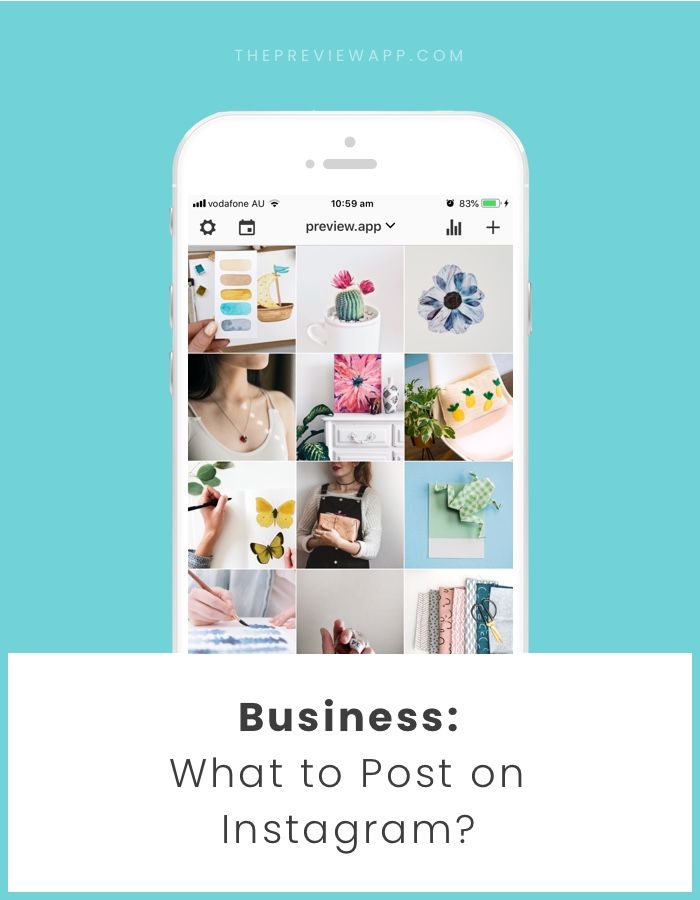
EXPERIENCED, BEGINNER, INTERMEDIATE · 1 MIN
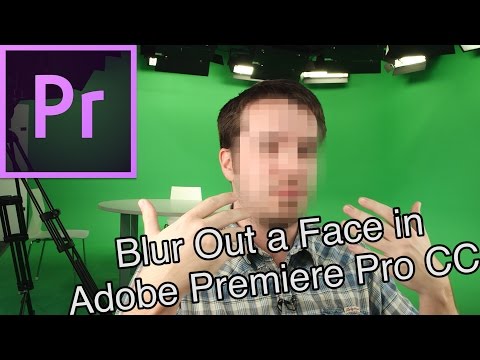
Moving photos, aka cinemagraphs, can be pretty hypnotic. So, if you’re looking to create super-engaging social content, you’ll want to know how to make these. Lucky for you, filmmaker Darren Rowlands (aka @mrdrowlands) has made a step-by-step tutorial using Adobe Premiere Pro – check it out below.
What you'll need
Get files
Tip: Shoot on a tripod to make the editing process easier. Record for at least 30 seconds so you have enough footage to choose from, and keep it simple.
Drag your files into the Project window and then drag this footage onto your blank Timeline to create a new sequence.
Resize it for Instagram by selecting Sequence > Sequence Settings. Update the frame size to ‘1080 x 1350’. Then, in the Effect Controls panel, play around with the Position and Scale values to get the right framing.
Next, you need to duplicate the clip. Go to the Timeline and select your clip. Hold down the Option/Alt key and drag the clip upwards onto a new video layer.
Use the Playhead to have a quick scan through the footage. When you spot the frame you want to work with, right-click and select Add Frame Hold. This will make everything after this point in time a still frame. Now trim the clip to remove the motion before this and extend your static clip by dragging its edge with your mouse.
Click on the top clip, head to the Effect Controls panel and click the Pen tool under Opacity. Use this to draw around the section of the clip where you want to have movement and then tick the Inverted box.
Look through the clip until you find a section that has minimal movement. Set In and Out points using I and O on your keyboard. Then press the Loop Playback icon to test out your selection. Zoom in and move around the loop to see if there’s anything that’s jerky. If you want to tweak these points, simply drag the handles that have appeared and move them as you see fit.
Finally, cut down the clips so they match up with the In and Out markers you’ve created. Premiere Pro should automatically help you out with this, so it should be a straight-forward drag and let go. Now you need to move it to the start of your Timeline – simply click in the gap and hit Delete. You’ll see your In and Out markers haven’t moved. So, drag these back over to your clip to make it loop again.
You’re nearly done. Now all you need to do is make sure it’ll work in Instagram, which means making it at least three seconds in length. So, select all your clips, press the Option/Alt key and drag the two layers to the right to duplicate them. Do this until you reach (or exceed) the three-second marker. Then press Command/Control and M to open up the Export window. Choose your output folder by clicking on the blue text alongside Output Name. Then hit Export and you’re ready to post your creation.
Download my practice assets
LET’S CONNECT
Facebook: http://facebook.com/adobecreativecloud
Twitter: http://twitter.com/creativecloud
Instagram: http://www.instagram.com/adobecreativecloud
YouTube: https://www. youtube.com/channel/UCL0iAkpqV5YaIVG7xkDtS4Q
Behance: https://www.behance.net/live Join our regular livestreams with real pros, real projects in real time and find inspiration.
Do you want to create interactive real-life experiences on your Instagram story? Well, why not make a moving picture and post it on your story? If you do not know how, then this guide can help you can learn how to make moving pictures on Instagram story. It is the need of the hour and can help you boost engagement, as well as showcase various aspects of your personal or professional product. So, what are you waiting for?
But before you get started with making moving pictures, you should know that Instagram itself does not have a direct feature that allows you to make these types of stories. Rather, you need to use a third-party video maker app to create GIFs, Boomerangs, videos, or moving pictures and then upload them to your Instagram story.
So, if you are hoping to gain additional engagement, bring in more views, or just showcase your personal or professional brand, follow this guide to learn how to make pictures move on Instagram story.
Can't Miss: Create a Slideshow for Instagram Story with Music Online for Free>>
FlexClip is the go-to video maker that allows you to make all kinds of videos online. You can let your creativity run wild by designing social media videos, marketing videos, animated videos, tutorials, wedding videos, family stories, trailers, and more. This web tool is an all-in-one kind that allows you to dynamically design your videos with a combination of voice recordings or text.
However, there are several key benefits of using FlexClip. It allows you to choose from a wide range of rich movements and transitions. Moreover, you can pick and choose from a rich, royalty-free photo, videos, and music resources and enjoy an easy editing experience.
If you want to learn how to make moving pictures on Instagram story, follow the steps below.
Create a Video View Templates
The first thing you need to do is become organized and set up the new project that you are going to be working on. Create a sequence of frames and then resize them in order to optimize for an Instagram story. If you do not pick the appropriate size, you may not be able to showcase the masterpiece you have created on your story!
Select the Right Video Aspect Ratio
Next, choose all the videos and pictures you want to include in your moving story. Selecting and then upload them to the storyboard on your screen. If you accidentally upload any extra pictures or not enough, do not worry! You can just add or remove them as you proceed with your moving picture.
Upload All Footage Media Resources
A majority of the web tools out there, such as FlexClip, offer you numerous transitions that can help you navigate from one frame to the other. Feel free to be as creative as possible and choose any transition or movement for your pictures that appears natural to you.
In addition, you have the opportunity to go as crazy as you like when making edits. After all, it is your Instagram story and is there to speak about your personal or professional brand. Add filters as you go, change the speed as per your liking, and maybe insert some groovy music in the background.
Remember, any reliable and reputable video-editing app will also allow you to trim your clips. This can be done to make sure that all the frames play in a perfect loop and are appropriately aligned with any music or filters you are adding.
Add a Transition to Video
Now that your masterpiece has finally been created, it is time to download and share it to Instagram. Let the compliments and views flow in!
The Bottom Line
If you have made it till here, then you know exactly how to make pictures move on Instagram story. All you have to do is follow a few simple steps and you can bring in engagement and interaction for your personal, as well as professional brand. All you need is a couple of gorgeous clips and snapshots to send you on your way.
However, since Instagram has not yet inserted the relevant feature, you will need a quality third-party app to help you develop your moving picture. Not to worry! FlexClip is at your service with its top-of-the-line edits, filters, and resources for you to pick and choose from. Always remember to give it a try!
Preview
Travel And Adventure
Use This Template
Preview
Photo Blog
Use This Template
Preview
Favorite Products
Use This Template
FlexClip Editor /
Professional in video editing and video marketing, we’d love to give some constructive tips and tricks to help our users make fantastic videos.
Reading time: 5 minutes
May 23, 2019
Animated photos can grab attention and stand out among the abyss of other posts. Let's consider two popular types of "live" photos: cinemagraphy and photo animation.
Our products help you optimize your social media experience
Learn more
and improve your accounts
with deep analytics
accounts using deep analytics
Cinemagraphs are those photos that you want to stick to. The looped combination of video and photo creates the impression of a “live” photo. Such a photo stands out against the background of static content and loads faster than a video.
Cinemagraphs are far from new, but for some reason they are rarely used in commercial accounts. Many have formed the erroneous opinion that you can’t do cinemagraphy on your own, and the pros take a lot of money.
This is not true. Here is a small list of applications that can create a cinemagraphic effect on a photo: make clouds float, ripples appear on the water, hair flow in the wind, etc.
These are not all applications that allow you to create cinemagraphy on Android and iOS. We have chosen those that are adequate in cost and those that we have used ourselves.
Preparing to create a cinemagraph from a photo
Many people try to create a motion photo from a photo archive on a smartphone. Such material is not suitable for cinemagraphy. Cinemagraphs can be created from both photos and videos, but in both cases, the workpiece must be thought out and filmed in advance.
A moving object in the video must be cyclic in order to get a beautiful "live" photo. For example, a running river, flowing smoke from a fire or flames.
When shooting, you will need a tripod or a homemade device that will prevent the camera from shaking during shooting. The video should focus on one subject, especially if the live photo is created for a commercial account.
Processing: creating cinemagraphs
Let's analyze the process of creating cinemagraphs using the PLOTAVERSE PRO application as an example.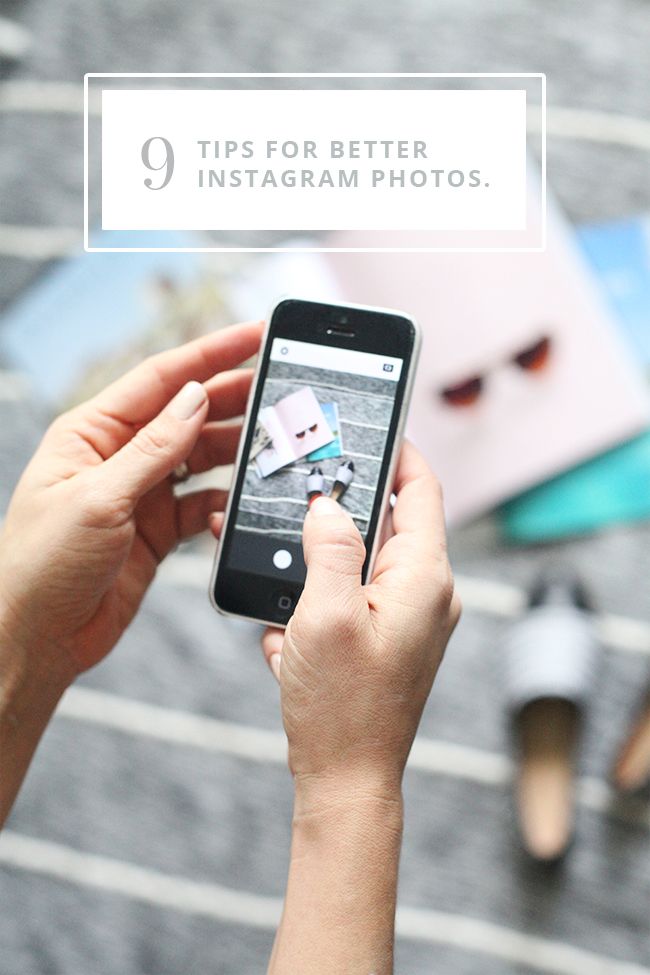 In other applications, the principle is relatively the same.
Load the photo you want to "animate" and select the "Mask" tool. Use a mask to blur areas of the photo that you want to remain static.
Go to the "Animate" section and select the direction of movement (we have Infinite - down). We put arrows on the waterfall in the direction of water movement.
On the preview (play button) you can look at the result and adjust the animation speed. By the way, the slower the animation, the more natural it looks.
Most likely, some static areas will float, to fix this go to the "Anchor" section and put anchors in those places where static areas float during animation. Once your cinemagraph is ready, save it as a video or gif. On Instagram, you can only post a video (at least 3 seconds), on Vkontakte, for example, you can also post a gif.
Try it for free
You can find out what content your followers like the most and whether there are posts with live photos among them in LiveDune
Animated applications differ from cinemagraphs in that they are not always cyclic and are created in other applications. Of the free photo animation apps, the most interesting in our opinion is Werble (iOS only). The very application in which you can add flowing steam from a hot mug of coffee or a burning sparkler.
Source: @tsaplina_olga
On the main page of the application there is a feed of animated photos, where you can find ideas for your animations. What's more, when you click on a post from the feed, Werble will show you what effects have been used.
Source: @werbleapp
For example, the following effects were used for this animation: smoke (169 ₽), 80s style (149 ₽) and rays (free).
Werble has a large selection of animation effects, but most of them are paid (up to 300 ₽). To open the entire list of animations, upload a photo to the application, then click on the "More Filters" button.
Animation is a simple but powerful way to grab the attention of your followers as they scroll through your social media feed. And for commercial accounts, also draw attention to the product. Experiment and surprise subscribers.
Only important news in the monthly newsletter
By clicking on the button, you agree to the processing of personal data.
What's new in SMM?
Subscribe now and get 9 ways to promote on Instagram for free
Popular articles
≈ 4 min to read 28.07.2020
How to make a countdown on Instagram and use it for business purposes?
The countdown sticker will help you announce an event, increase the motivation of your followers and increase your Instagram reach at the same time.
#instagram 04/15/2019
Masks on Instagram: how to find and make your own
How to create masks for Instagram stories yourself, where to find them and how to save masks of other authors to yourself.
#instagram 04/09/2019
11 video editing apps In order for the video to cause admiration and reactions from subscribers, you need to process and edit it beautifully.
#instagram 03/14/2019
Features of Instagram stories that you might not know about
To make your stories stand out among hundreds of others in the feed, you need to use all available features. We share secret tricks that will help make your stories original.
LiveDune marketing products - 7 days free
Our products help you optimize your social media experience and improve your accounts with the help of deep analytics
Analyze your own and other people's accounts by 50+ metrics in 6 social networks.
Account statistics
Message processing optimization: operators, statistics, tags, etc.
Direct Instagram
Automatic reports for 6 social networks. Upload to PDF, Excel, Google Slides.
Reports
Monitoring the progress of KPI for Instagram accounts.
Audit of Instagram accounts with clear conclusions and advice.
Express audit
We will help you to select "pure" bloggers for effective cooperation.
Checking bloggers
Hello friends! 🙋🏻
In this article, we will teach you how to make your photos stand out from the rest in the news feed and Instagram Stories. To do this, consider one of the most popular types of live moving photos - cinemagraph . Below we will tell and show in detail what motion photography is and how you can create your own cinemagraphs without any special skills. We will also explain the difference between cinemagraphs and video/animation, as well as the difference between a live photo and boomerangs and GIFs.
Cinemagraphs are not new on Instagram for a long time. However, for some reason, few people use it for commercial purposes, despite the fact that photos with a “moving” effect are more visible in the feed.
Perhaps this is due to the misconception that you need to be proficient in professional programs like Photoshop to create motion photos. Many users assume that this is too complicated, and they don’t want to allocate an extra budget for a designer. Although this is not true at all! In this article, we will tell you how to make cinemagraphs on your own, quickly, in some places for free or for a budget available to each user.
Cinemagraph is not a photo or video, as some people think. It doesn't even look like the familiar animation we're used to seeing. A live photo, as the name suggests, is a static photo in which only a certain part of the image is moving. For example, lights are flashing, hair is moving in the wind, and so on.
Live photo creates the impression of "multi-tiered" and this attracts the attention of the audience. The user views a live image much longer than a normal photo, as he tries to see all the moving objects. For this reason, cinemagraphs and live photography are a powerful tool for effective promotion. Global brands use the services of expensive photographers and operators who create not just animated images, but live advertising.
View this post on Instagram
Posted by Apple Music (@applemusic)
, galleries and so on. As you can see, their scope is quite extensive.
Cinemagraphs are the same photographs that you want to review several times. The looped combination of video and photo gives the impression of a “moving” photo. Such a photo stands out against the background of static content, but loads faster than a video.
There are two ways to take live photos : Photoshop and mobile applications for Android and iOS.
Below we describe in detail the process of creating cinemagraphs using these two methods.
To do this, of course, you need Photoshop. In fact, using Photoshop to create live photos is not as scary as it might seem at first glance. Moreover, if earlier this program cost a lot of money, now it can be purchased by subscription for a very reasonable price.
So, in the video below, an excellent specialist and master of his craft, Maxim Basmanov, will tell and show how to create a live photo in Photoshop. If you take the time to study this video tutorial and decide to install this wonderful program for yourself, you will acquire another great skill. By following all the steps from the instructions step by step, you can create your first cinemagraph in just a few minutes.
Well, we wish you patience and fast learning!
Make clouds float across the sky, circle the water, lift smoke into the sky, and more with special apps and effects. The choice of applications is huge. Basically, this is, of course, a paid pleasure, but some applications also have free effects.
The most cost-effective apps for iOS and Android:
Of the more expensive, but high-quality applications, with all sorts of "bells and whistles", I would like to highlight Cinemagraph. To install this program, you need to be a happy owner of a computer on Mac OS or iPhone.
This cinemagraph software was developed by Flixel, which won the 2014 Apple Design Award. Application features: user-friendly interface and unlimited opportunities for creating cinemagraphs. The cost of using it depends on the plan you choose.
One of the most popular, paid applications for creating cinemagraphs on the Android platform is Cinemagraph. It was developed by Factyle. The program has built-in training that will help the beginner. Following the instructions, you can easily create a cinemagraph in GIF format. To do this, the program can use a video clip up to 3 seconds.
You can't just create a cinemagraph from any photo in your archive. A number of rules must be followed. Cinemagraphs can be created from both photos and videos. But in both cases, the workpiece must be thought out and removed in advance. That is, you need scenario.
The framing must be decided in advance. Define a moving object and a frozen background, or vice versa. It is important that the moving object be cyclic. For example, a running river, flowing smoke from a fire or flames.
Watch for focus. Focus on one subject, especially if the live photo is being developed for marketing purposes. When shooting, you will need a tripod or a homemade device that will not allow the camera to shake during shooting.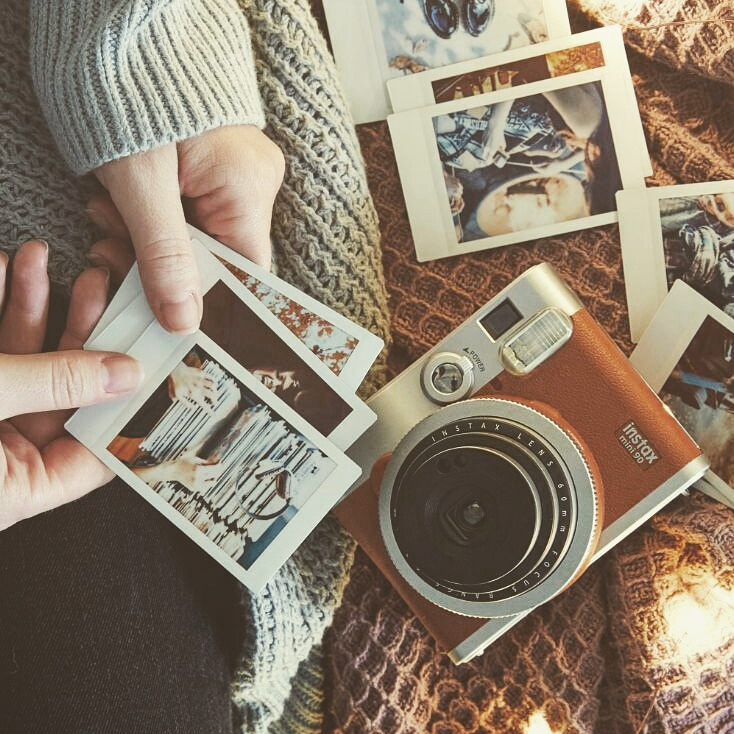
Let's analyze the process of creating cinemagraphs using the example of one application. In other applications, the principle is relatively the same.
 To fix this, go to the "Anchor" section. Place anchors where static areas float during animation. Or use the "Erase" eraser to erase unnecessary elements of the Mask.
 Cinemagraphs are in video or animation format. The type of content depends on the purpose and location of the content. For example, cinemagraphs on Instagram need to be posted in video format. In Vkontakte, for example, you can also publish a GIF. For uploading to the site, it is better to use the GIF format.
Animated photographs differ from live photographs in that the animation contains additional visual effects that were not present at the time of shooting. Thus, these are, let's say, "finished" photos. Whereas in live photos, the moving parts of the image are real - they are just looped for a more interesting effect.
For free image animation apps, you can try Werble (iOS only). Werble has a large selection of animation effects, but most of them, unfortunately, are paid. Animation is a simple yet powerful way to capture the attention of your followers as they scroll through your social media feed.
For a better understanding, watch the video about the possibilities of the Werble app for creating creative photo effects.
Live photos usually have only one or a few moving subjects in a loop. It can be dripping drops of melting ice cream, water moving in the wind, and so on. Flixel Cinemagraph® Pro (@flixelphotos) , which repeats over and over again until it is stopped.
View this post on Instagram
Posted by @mirrormememorables
everything is repeated in a circle.