There are lots of people who post their Instagram pictures on WordPress. And there are a lot of plugins that let you incorporate your feed into your blog. But what if you want to go the other way? Publishing content from WordPress to Instagram might be something you want to do, not only to increase your blog’s reach and get more life out of your content, but also to expand your social radius and the content you provide your followers on a totally different platform.
Subscribe To Our Youtube Channel
Yes, really. You might be thinking this is an odd move because WordPress is a blogging platform and Instagram is a photo sharing social network. However, over the past while, people have begun to post longer and longer content on Instagram. It has very much turned into a true microblogging platform in addition to the social network it began as.
And when they opened up the Instagram API to allow external services to post to user accounts, things really opened up.
And given that you are already creating content on your blog, you can absolutely have it perform double duty on Instagram. Best of all, it’s not hard to do. You just need a good plugin. We happen to know of some. How about that?
First off, Blog2Social (as you may be able to tell by its name) is not limited to Instagram. You can use the plugin to post from WordPress to Instagram or any of 16 social media platforms. For this, however, we’re going to focus on Instagram.
The plugin itself is free. You can 100% post to Instagram and the other networks from WordPress using the basic version. The Premium version, however, is where you get access to automation. For $79 USD, you can automatically post to Instagram from WordPress. With the ease of the plugin and the other premium features you get, we feel that it’s worth it. But if you don’t want to pay, you can manually share from the plugin, too.
If you’re iffy on whether you want the premium upgrade, you can get a free 30-day trial of Premium. That way you can check to see which one is the better fit for you.
First, you’re going to need to install and activate Blog2Social. It’s in the WordPress repository, so it’s easy to install. Once activated, you will have a new Blog2Social option in your WP dashboard near the bottom.
When you hover over the new item, you should see the Settings page in the menu. Select it and check out the few things you might want to set up first.
In general, free users won’t haves a lot to tinker with here. However, we do urge you to set your time zone correctly since it ties to your social networks, too, and to add a URL shortener service if you use one. Since you’re sharing to Instagram from WordPress rather than a hub like Buffer or HootSuite, you will need to track your own URL analytics. That said, Instagram doesn’t allow live links in the body of a post, so this is less important for you than if you take advantage of other networks, too.
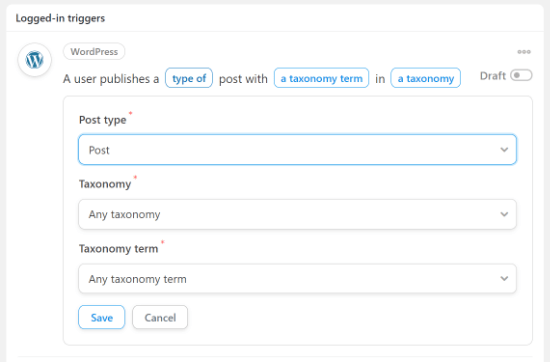
In the Auto-Post tab of the settings page, you can adjust the specifics of how the plugin handles pushing to Instagram on its own. Again, for free users, you won’t have access to this feature, but Premium users do. (And remember the free trial to give it a shot.)
Most sites will only want the Post option selected under New Posts, meaning that only newly published posts will get shared to Instagram. However, some might want to include Updated Posts, too, in order to get more eyes on a newly fixed or more relevant content. If you don’t update very often, this could be a nice way to re-share your content without much (or any) extra work.
Connecting your blog to Instagram is no trouble at all. The Networks page under Blog2Social in your WordPress admin panel gives you a full list of the 16 supported social networks. Instagram is near the top, and you will just need to sign in and verify your account credentials.
When you do sign in, you will be given a warning modal that looks like the image below. It warns that you may receive an email or message saying your account is being accessed from the Cologne area of Germany, and that it’s okay. Their server is located there, so you don’t have to worry about an account intrusion.
Also, Blog2Social will tell you they will contact you via your account for a verification code. This code will be sent to the account email by Instagram. You just need to enter the code into the box Blog2Social shows.
When you’re verified, it’s good to go, and you can start sharing from WordPress to Instagram immediately.
When you start a new post in WordPress now, you will see the Blog2Social Custom Sharing & Scheduling metabox in the right sidebar of the editor. It gives you overall sharing stats for the post (from re-sharing and so on, too), but also tells you whether auto-sharing is on. This will say either deactivated in red if you’re a free member or activated in green if you’re a subscriber.
Even though your posts will automatically be shared to your Instagram account, you may want to post something about them more than just that once.
Navigate to the Site & Blog Content menu item. You should see a list of all posts on your blog. You can filter and search by title, author, what’s already been shared, and so on.
Click on the Share on Social Media button to be taken to the setup page for a new social post.
The page here is straightforward. You can adjust the body and image of the post to be shared, both of which are pulled from the Featured Image and the post text. Decide when to post it, immediately or at a set time. You may also add other social profiles to cross-post with, too.
If you click the Show Calendar button in the lower-right of the pane. The content calendar appears, and you can schedule the post out for whenever it suits your marketing needs the best. Or save it as a draft for later.
Bear in mind that scheduling is also a Premium feature for Blog2Social. But if you’re using this as an automation tool for when you post, the automation of scheduling out Instagram posts from WordPress makes the upgrade doubly worth it.
We feel that the best option for WordPress users to get their content easily and quickly to Instagram is the Blog2Social plugin. It’s simple to use, quick and lightweight, and it offers both free and premium users a host of options. While it does take the Premium upgrade to get the automation, which is where a lot of the power comes, even free users can post from WordPress to Instagram in just a couple of clicks.
What uses do you see for posting content from WordPress to Instagram?
Article featured image by wild0wild / shutterstock.com
Sometimes you will need to automatically post from WordPress to Instagram. There are lots of people who post their Instagram pictures on WordPress. And there are a lot of plugins that let you incorporate Instagram feed into blog. But what if you want to go the other way?
Finding a plugin that will make possible to without issues publish your new post automatically to Instagram from your website is not easy to find.
When I started searching tool or plugin which will provide that, I was unpleasantly surprised finding that there are not many available tools to make that possible.
So I have a WordPress website in a particular niche. I have an Instagram account for that site. Lazy as I am, I don’t want to manually repost and publish a post to Instagram every time I publish new content or want to republish existing.
Naturally, I started searching for terms like WordPress auto post to Instagram, how to share WordPress posts on Instagram, etc. You get the point.
The first thing I did was to check if there is a recipe on IFTTT for my purpose. There were many Instagram to WordPress recipes, but no WordPress to Instagram at the time I checked.
Then I found out that official Instagram API is not accepting images from anything other than mobile devices. I understand that move from Instagram. They don’t want spammers publishing via bots.
Which means no automatic processes. Just good old manual posting. Luckily I managed to found plugins which promised auto post WordPress to Instagram feature.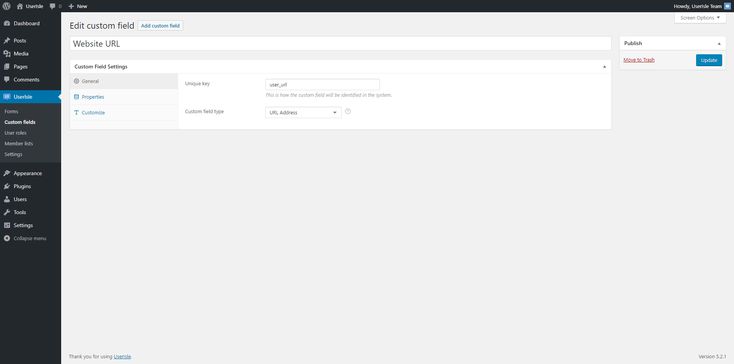 Those were Blog2Social and Social Network Auto Poster (SNAP).
I am already using the free version of this plugin, so didn’t know that in the PRO version, you have the option to post WordPress images to Instagram automatically when a new post is published.
In this case, the post featured image would be shared along with a few sentences of description and even hashtags. That was enough for me to buy the PRO version, which comes with tons of features and costs only $49.
I also found another plugin in Codecanyon repository. This plugin is called Instagram Auto Poster (it seems it is called different now). This plugin is relatively new and costs $19. Of course, it doesn’t have many features like SNAP does as it is oriented, especially to post WordPress images to Instagram.
Taking into consideration that social media plays a critical role in promoting content and engaging readers, it is essential to have your social media accounts set up. Preferably on autopilot. It makes it easier to reach out to new readers while allowing for greater engagement via comments and discussions.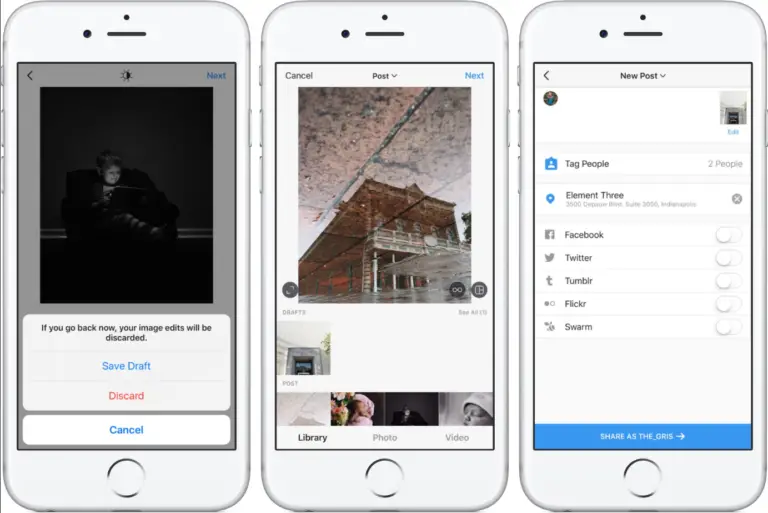
Manually sharing every post on all the different social media networks can get tiresome. If you don’t wish to share it manually every time, you can use one of many plugins or tools available. Your site or blog is already posting your content to Facebook and Twitter. So why not also on Instagram?
NOTE: If you are interested in how to manually or automatically share your existing or new pubslished posts, pages, products, custom post types, etc. to your Facebook profile, pages or groups, check my tutorial where I also use Blog2Social plugin and SNAP.
Table of Contents
No obstacle in WordPress can’t be solved using plugins. I will present you several methods on how to automatically share the WordPress blog on Instagram.
Instagram is huge. For brands for businesses and individuals. Just look at the booming interest in influencer marketing. The demographics of all the different social networks can be very different.
So how are you going to share images on Instagram from WordPress with as much hands-free automation as possible?
Below I will show you several methods and plugins which make possible sharing images from your WordPress posts and pages on your Instagram account.
This plugin automatically publishes posts from your blog to your Social Network accounts such as Facebook, Twitter, Google+(Google Plus), Blogger, Tumblr, Flickr, LiveJournal, Flipboard, Instagram, Telegram, etc. The whole process is entirely automated.
Just write the blog post and plugin will do the rest. Once you click “Publish” button, your post or announcement will go to all your configured Social Networks accounts.
What is the difference between “Free” and “Pro” version?” The free plugin is limited to one account per each type of connected networks.
In other words, you can add 1 Facebook, Twitter, LinkedIn, etc. accounts in the “Free” version. This is enough for about 95% of users.
Pro plugin is not limited in a number of accounts per each type of connected networks. You can add 10 (or 100) Facebook, Twitter, LinkedIn accounts in the “Pro” version.
Why are some networks not free? Networks without native API like Google+, Pinterest, Instagram, YouTube, Flipboard, LinkedIn Company pages and groups, Reddit, etc. don’t allow to make posts.
SNAP author had to create and maintain their own API libraries for such networks, and those libraries are available separately for some fee.
Some networks like Blogger and LinkedIn have free built-in APIs, but those APIs are limited in some ways. In such cases, the plugin can use free API to the full extent of the network imposed limitation.
I will not go in all features that SNAP has to offers as there is a lot of them and because I already wrote a Social Network Auto Poster review.
To be able to publish WordPress posts automatically on Instagram, you will need to buy the PRO version, which costs $49. This is an excellent price, considering the additional features you receive.
The first step is to connect Instagram to your WordPress site.
1. Login to your WordPress Admin Panel, Go to the Settings->Social Networks Auto Poster Options.
2. Click “Add new account” button, select “Instagram” from the list.
3. Fill your Instagram username and password.
You can set the image format to be extended, cropped, or untouched.
Extended – Image is extended by the longer side to make it square. The whole image will be seen in the stream and in the full view. In the stream, the image will appear smaller.
Cropped – Image is cropped to make it square. Some parts of the image will be permanently removed.
Untouched – Image is untouched. Instagram will crop the image for the stream. Could cause “Uploaded image isn’t in an allowed aspect ratio” Error.
To be able to share WordPress post images on Instagram, you will need to buy the PRO version. The paid version costs $49 yearly.
NOTE: My experience in using SNAP to post on Instagram was smooth in the past. But lately, it stopped publishing and working correctly, so I had to log in and share using alternative configuration.
That also worked for some time, but now even with that configuration, it doesn’t work for me. As plugin support doesn’t answer to support tickets I purchased and started using Blog2Social to publish WordPress posts automatically on Instagram.
Instagram has a SPAM filter. Instagram always watches new accounts. The older your account, the less likely it will be considered as “spamming account.” Instagram does not support links at all. You can put the URL to your description, but it won’t be clickable.
Instagram considers all posts with URLs as suspicious, but most of all, Instagram hates shortened URLs. Almost 100% of posts with shortened URLs will be regarded as spam and deleted.
Do not include the most popular tags. Instagram considers all posts with the most popular tags as suspicious. Do not post more than humanly possible. If you post five posts per minute 24/7, your account will be noticed.
If you already got hit by SPAM filter, try to make several posts from your phone without any links or hashtags. Instagram will unmark your account as “Spammer” after some time.
You can check here some other possible issues when using SNAP to post from WordPress to Instagram account.
I have recently started using Blog2Social after using SNAP for a long time. I highly recommend using this plugin for sharing your blog posts on social sharing sites.
Blog2Social is a social media auto-publishing, custom sharing, and social media scheduling plugin for WordPress blogs. You can cross-post and cross-promote to all social media networks.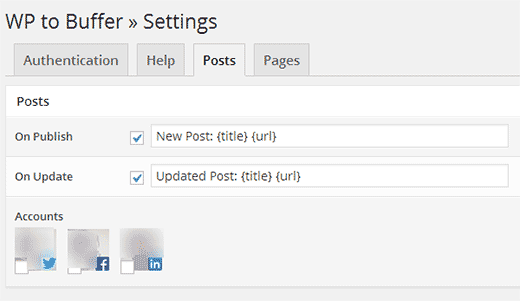 I have wrote extensive Blog2Social review so you can check that for more info about this plugin.
Blog2Social automatically turns your blog post into the right format, and you can auto-post at the best times for each network.
Instead of manually sharing your blog content on social media, Blog2Social saves you the time and pain of manually sharing your blog posts and images on social media. For sharing on Instagram, either manually or automatically, you will need to add your Instagram account.
With the Premium version of the plugin, you can change the custom post format photo post or link post for each social media post and channel (profile, page, group).
The plugin allows you to send posts automatically to your Instagram account. To use the plugin, you have to enter your Instagram username and password. There are not any settings except that. Simple and straightforward.
Choose if you want or not to automatically publish posts from WordPress to your Instagram account. Set message format and you are done. Price for this plugin is $19 and can be purchased on CodeCanyon.
NOTE: It seems this plugin is not available anymore.
Instamatic plugin can be used to automatically publish Instagram photos or videos to your Instagram profile every time you publish a new post to your blog.
You can even import posts from Instagram and post to Instagram automatically. To be able to share images from your post on Instagram, you will need to input your username and password.
Then go to “Post to Instagram” settings tab, and you will see options to set for publishing.
Price for the plugin at the time of writing this is $29. I have not personally tested the plugin, so can’t say how well it works in sharing image or video from your published blog posts.
Many people create posts and products on their WordPress websites, but they also upload them to Instagram. You don’t have to share your posts manually anymore! All of this is taken care of with the help from FS Poster, which will not only auto-post but also schedule them on social networks like Instagram so that they go live at just about any time or day in the future.
FS Poster is a WordPress Social Auto Poster & Scheduler that allows users to automatically post their WordPress blogs, custom posts, videos and even WooCommerce products to the most popular social networks.
The process of adding an account can be done in two ways. The cookie method is recommended, but there’s also the login and password approach which you should choose according to your needs or preferences.
Cookie method:
1. Click to the FS Poster > Accounts > Instagram menu.
2. Select the Cookie method;
3. Click the ADD AN ACCOUNT option.
4. Open an Incognito tab in a browser (Chrome is suggested, and you may open an Incognito tab in Chrome by using Ctrl+Shift+N).
5. Access your Instagram account;
6. In the newly created window, press the F12 key on your computer and select the Application tab.
7. Copy the sessionid cookie value and exit the incognito tab without logging out;
8. Copy and paste the sessionid into the designated box and press the ADD button.
9. Make your account active.
Login and Password method:
1. Navigate to the FS Poster > Accounts > Instagram page.
2. Select the ADD AN ACCOUNT option.
3. Choose the Login and Password method.
4. Enter your Instagram username and password, then click the ADD button.
5. Make your account active.
This is a simple plugin for your site to upload/post your WordPress posts, WooCommerce products, and all other custom post types to Instagram automatically. Your post/product must have a featured image to share on Instagram. Without the featured image, no post/product will be shared.
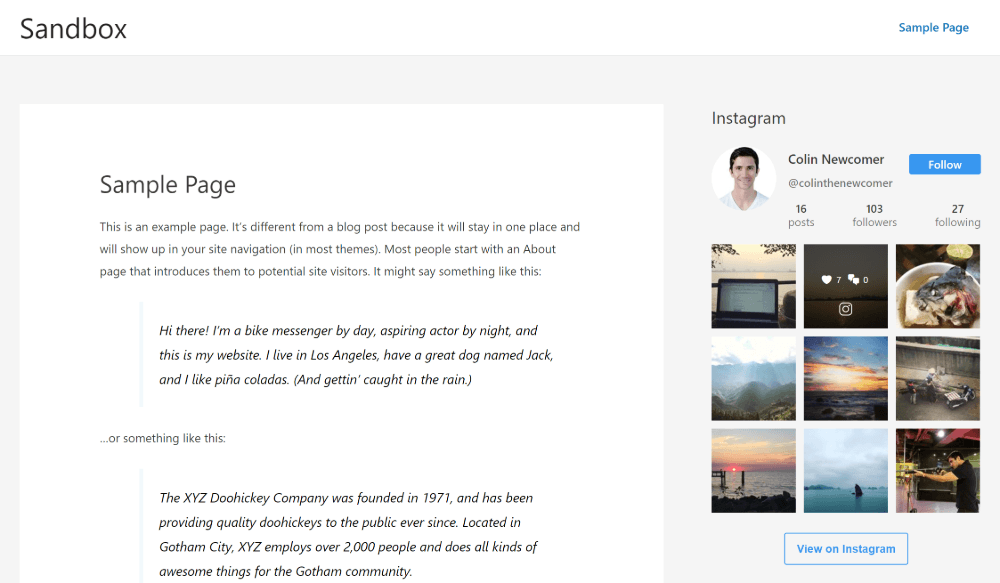
You can add a custom message and hashtags before publishing post/product. You can also add an Instagram widget for an Instagram feed at sidebars.
The plugin even has an option to share WordPress posts to Instagram story automatically.
The plugin has a free and paid version. In PRO version you also get the option to:
|
|
With Instagram Poster, you can publish your WordPress posts to Instagram feeds/stories with a clickable link. It can also post WooCommerce products and AliPlugin products.
Features:
With this plugin, you can automatically post WooCommerce products and custom post types to Instagram
The plugin posts images and stories automatically from WordPress to Instagram according to settings. It supports WooCommerce product, WordPress post.
To offer something different, I am including PHP script to the methods. So this is not a WordPress plugin but a PHP script which you install on your server.
Nextpost (now Instagram Media Planner) is an online marketing auto posting web application that allows you to auto post to Instagram, schedule and manage your Instagram accounts.
You don’t even need to log-in and out of various social media platforms as you can conveniently manage multiple Instagram accounts from a single place. Instagram Media Planner allows you to post to your Instagram accounts simultaneously.
As you add content to your Instagram, Nextpost automatically posts the same content to your other accounts. You can import images from your Dropbox and OneDrive accounts.
With built-in PayPal and Skrill integration, this script allows you to accept payments from your users for using your website. To enable PayPal integration, you need PayPal API Client ID and Client Secret.
After setting-up Stripe integration, your users will be available to make a payment with their bank cards without leaving your website.
Here is comparison between two most popular plugins for automatic sharing of published posts, pages, products, and custom post types with vast number of settings, features, and social networks.
Name
Price
Share to Facebook profile
Share to Facebook pages
Share to Facebook groups (public, private, closed)
Share to Instagram
Share to Instagram story
Share to Facebook story
Share to LinkedIn profile
Share to LinkedIn Pulse
Share to LinkedIn company pages
Share to LinkedIn groups
Share to ok. ru
ru
Share to Plurk
Share to Pinterest
Share to Twitter
Share to VK.Com
Share to Weibo
Share to XING profile, page and group
Share to Blogger
Share to Flipboard
Share to Google My Business
Share to Instapaper
Share to LiveJournal
Share to Medium profile
Share to Medium group
Share to Scoop.It
Share to SETT
Share to Tumblr
Share to WP Based Blog
Share to Diigo
Share to Reddit subredits
Share to MailChimp list
Share to Line
Share to Telegram
Share to Yo
Share to deviantART
Share to Flickr
Share to vBulletin
Share to YouTube channel
Share to Bloglovin
Share to Torial
Automatic repost of the existing posts
Autoposting Filters
You can setup general criteria for what posts should be autoposted
Integration with URL shortener services
Auto-Import comments from Social Networks
Plugin will automatically grab the comments posted on Social Networks and insert them as "Comments to your post"
Auto-HashTags settings
Open Graph settings
Auto-Scheduling
Auto-post imported RSS content
Content curation
Share content from any source on social media
Best time manager
Use pre-defined time settings to share your posts at the best times to post on each network
Individual scheduling
Define your own time settings for different dates and times to share your posts on each network
Select network post format
Put GIFs into your social media posts
SOCIAL NETWORK AUTO POSTER
Free and paid version
BLOG2SOCIAL
Free and paid version
Only Bitly
NOTE: Features of free and pro versions were taken into account in comparison table.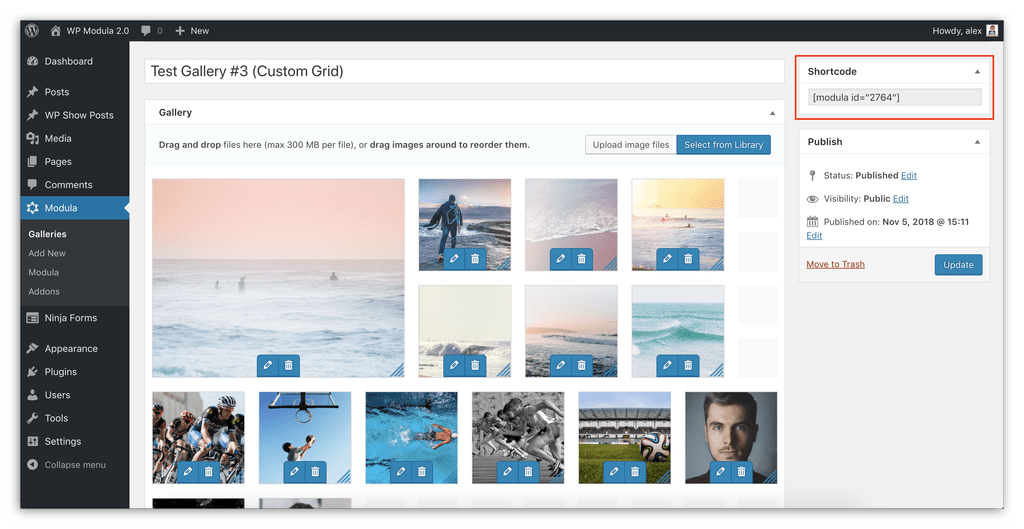 For information which features are available in free and for which you need to purchase pro version, please check official plugin sites.
Also, info stated in above comparison may be outdated as plugins get updates, new features are added and some are removed, pricing gets changes, etc.
Instagram is a massive social platform, but it is notoriously tricky to share images on Instagram from WordPress.
Insta’s emphasis is on “on the go” snapping and posting and designed to be mobile-only, and it doesn’t allow access from other apps for posting. It is conspicuously absent from social sharing tools and can be tricky to use from a PC, Mac, or laptop.
If you can post quality images regularly and create a follower base, Instagram can benefit your business. Using the plugins mentioned above, you can use the platform to help your online business and get some extra traffic to your site.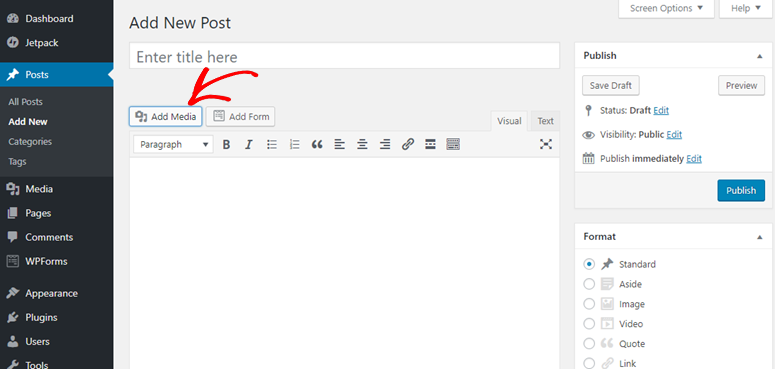
Stop manually posting every time you want to publish a new post from WordPress to Instagram. Let the plugin do the work so you can focus on more important things like writing content.
If you need to showcase your existing images from Instagram on your WordPress website, then I recommend InstaShow. Now over to you. Let me know in comments below what you think and if you know any other way or tool to post automatically from WordPress to Instagram.
Share buttons can be placed at the bottom of each post and page so readers can share your content on their social networks.
Table of Contents
Watch the video for a quick overview of how it works and read the information below for additional examples and settings.
To set up social media posting options for your site or blog:
You can add any or all the following services on the records and pages:
↑ Table of Contents ↑
You can select the types of pages where Like and Share buttons will be added. Check the boxes next to the types of posts and pages you want to place these buttons on and click Save Changes
If the option is enabled .
If you enter your Twitter username , when someone posts or pages on this social network, you will be mentioned in their tweets.
↑ Contents ↑
Adding social sharing buttons allows your visitors to share your page or post on their favorite social network, email or print the post/page.
To customize the services you use, click Edit Share Buttons :
To add Share Buttons, select the services you want to use in the area Edit Visible Buttons . When you do, you will see them added to the preview above.
To disable a button, select it again to disable it. You can also swap the positions of the buttons by pressing the Reorder button . After that, you will be able to drag the buttons in any order.
Alternatively, you can add a button More , inside which the list of Share buttons will be hidden. To do this, press + Add More Button .
They will appear on your site like this:
📌
Some services are not available when the blog is marked private.
↑ Table of Contents ↑
You can customize the actions, appearance, and layout of the buttons using the settings in the bottom half of the page:
Option Official Buttons allows you to extract buttons directly from services such as Twitter, Facebook, LinkedIn, Reddit and Pocket. According to this service, some services can even transmit the number of shares in real time to your blog.
Important information about each service:
To enable official buttons, go to menu Button style and select Official buttons .
Save your changes and open your blog to see the results.
You can also edit the caption displayed above the social media post buttons by clicking the Change text caption button at the top of the page.
After you change the text of this label, press Close , then Save changes .
↑ Contents ↑
You can disable the Share and/or Like buttons for each post or page using the checkboxes in Section Like and Share in Editor:
Via Jetpack Icon
Post/Page Editor → Jetpack OptionsFor more information on Like button , see this help material.
↑ Contents ↑
If you're having trouble displaying the social sharing buttons on your blog, check the following:
I can't see the buttons on the first page.
Verify that "Show buttons on..." is set to "Home page, archive pages, and search results".
The Twitter post button is using "via @wordpressdotcom" mode, but I want it to use my Twitter username.
You can add your Twitter username using the Twitter post button in the Share button section of the console.
Many of the available services are not listed on the social sharing settings page.
If you have a private blog, not all services will appear in the list.
All my social media counters are at zero! Can I return the old counters of publications in social networks? No. If the counters have changed due to a custom domain name change, such as from mysitehere.wordpress.com to mysitehere.com or from HTTP to HTTPS, then since these counters come directly from social networks and not from us, they do not transmit data over to a specific URL if it has changed since then.
What does the post counter on Facebook show? According to Facebook, if you use the official Facebook button, the count includes:
The Twitter share button does not show the number of social media posts.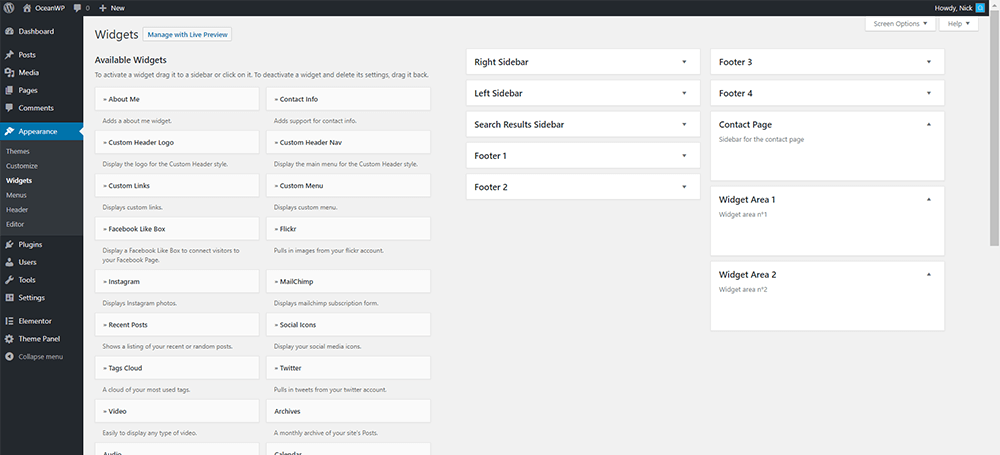
Twitter removed the post count from their official buttons. However, you can access this data and look at blog statistics to see what users share and what services they use to do so.
Ideal for students
The best option for presenting your hobby
Best option for freelancers
Ideal for small businesses
one Introducing the Blog2Social Plugin
2 How to Share WordPress Content on Social Media Using Blog2Social (2 Steps)
2.1 1. Attach your social media profiles
2. 2 2. Share your content on social networking sites
If you want to get the most out of your WordPress site content, social media is your top priority. You will want to share your work with most social networks in order to increase your audience and traffic to the site. However, this can be time consuming if you don't have an assistant. Introducing a free plugin that will greatly facilitate the process - this is Blog2Social.
This tool makes it easy to share WordPress content on the most popular social media platforms. It also gives you the ability to control how posts look when shared. And the icing on the cake is that you can automate this process.
In this article, we'll discuss why it's important to use social media and introduce the Blog2Social plugin. Let's show you step by step how it works.
If you're reading this article, it's unlikely that you need an introduction to social media. Over the past decade, social media platforms such as Facebook and Twitter have become part of everyday life.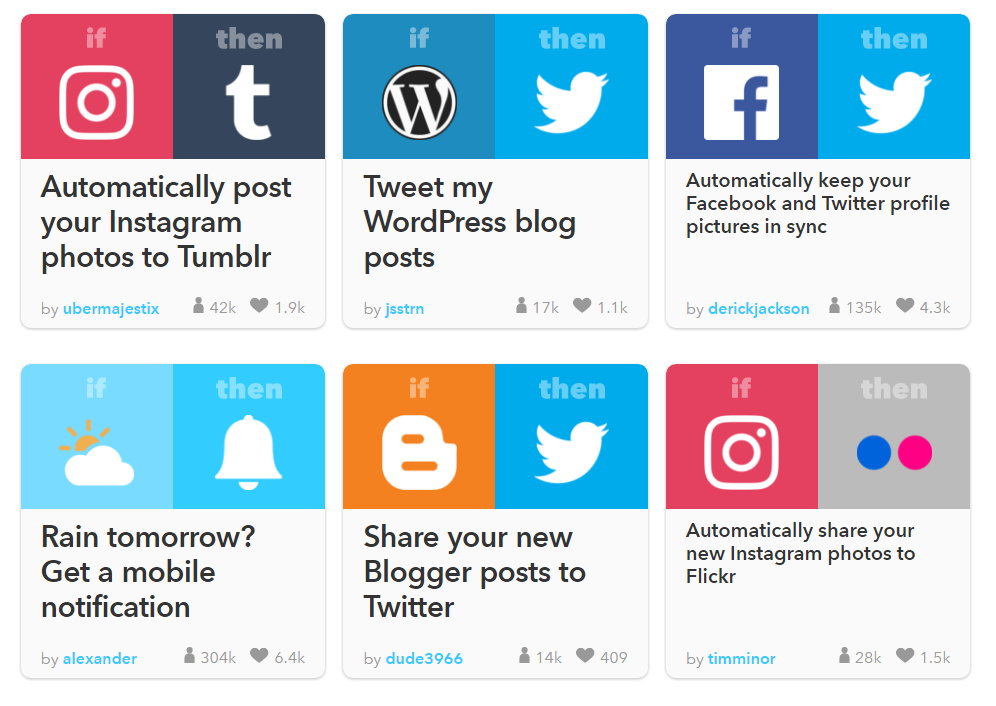 Most likely, you have profiles in these networks. When it comes to expanding the audience for your WordPress site, these platforms are the most important.
Most sites have already figured this out, and 78% of small businesses use social media to reach customers. This makes sense because social media allows users to interact more fully with your content—reading posts much more often than if they clicked on a site through a search engine. Plus, this, in turn, can help increase traffic to your website or store.
To ensure the success of your content, you must strive for an effective social media strategy. It has to do with understanding when to share your content, which platforms to target, and what schedule is optimal. Luckily, this becomes a lot easier to implement once you have the right tool.
Blog2Social makes social networking easy. With it, you can connect your site to Facebook, Twitter, Instagram, Reddit, Pinterest and many other platforms.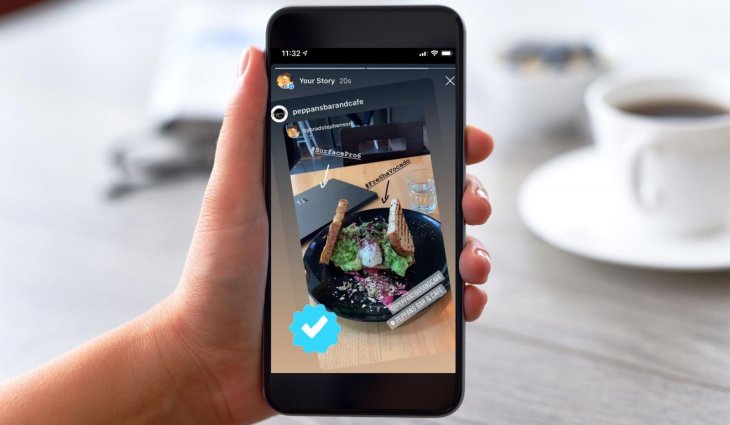 However, simply presenting your content is the bare minimum of what Blog2Social can do. Let's take a look at some of its useful features.
Blog2Social supports a large number of social media sites. They range from the biggest ones like Facebook, Twitter and Instagram to more niche networks like Medium and BlogLovin:
After installing the plugin, you need to make a few more settings. Blog2Social can automatically share posts with the networks you specify using the settings you want. All you need to do is create quality articles, and when they are published, all your subscribers will know about them.
Sharing content by posting it to social networks as soon as it's published is a common strategy and usually works well. However, this is not the only possible method. You may also want to schedule posts to different sites at specific times rather than instantly.
Blog2Social allows you to schedule social media posts at different times depending on the platform. This means you have complete control over your social media strategy.
See also:
Useful plugins in section WordPress plugins .
If you deal with a lot of content and platforms, it's hard to keep track of what posts you've shared and where. Blog2Social contains a dashboard where you can get an overview of all your activities on each network.
This calendar makes it easy to track your activities and filter them based on specific posts and networks. By tracking your content, you can ensure that your strategy is being followed correctly. Based on this information, you can optimize your publication algorithm at any time. You can also redistribute old posts that may not have been shared on social media before.
Social media is more than just text and links put together. The same post may look different on different platforms. Blog2Social allows you to specify the appearance of each post for publication on different platforms.
You can add meta tags to include images and define exactly what will be in the title and description. It's also the easiest way to add the Open Graph protocol and Twitter Cards as you don't have to mess with any code or additional plugins.
Finally, another important aspect of social media is the hashtag. For the uninitiated, this is a method of tagging posts based on their topic or potential audience. By including hashtags in your posts, you allow potential readers to see what topics will be covered in the content. This will make it easier for users to find similar posts if they are interested in the topic.
With Blog2Social, hashtags can be automatically generated using the WordPress tags specified in each post. You don't have to manually include relevant hashtags - this is another handy way to automate your social media strategy.
See also:
What plugins will help you integrate with social networks here .
Now that we've covered the main reasons why Blog2Social is such a powerful social media sharing tool, let's put it into practice.
Once you have downloaded and installed the Blog2Social plugin, you need to connect the social network profiles you want to use. These are the platforms on which your posts will be shared (from the word Share - to share), so it is important to add all the sites that interest you. You can add them later if you wish.
Go to Blog2Social -> Networks in your admin control panel to see the list of available platforms:
You will notice that some platforms allow you to select multiple options such as page or group. These options allow you to directly share content with Pages and Groups you manage, as well as your main profile.
When you click the button next to a specific platform, a new pop-up window will appear. You will be prompted to authorize your account in this service:
Depending on the platform, you may be asked to enter your account information and confirm that you want to grant access. Once you do this, the window will close and you will see that your profile is displayed below the network in the list:
Repeat this process for all accounts, pages and/or groups you want to connect. Once you've finished configuring the required platforms, you can start exchanging data right away.
The standard procedure for posting content using Blog2Social is very simple. To illustrate this process, let's share a blog post on Facebook. To do this, the post must already be published or scheduled for publication.
Open a post to share and you will notice a new window at the top of the editing interface (called Social Auto-Post):
Here, click Customize and Sign on Social Media to set up the post before sharing it.
 (Multiple posts/products at once)