When the Instagram business account launched in 2014, many brands, influencers, and content creators quickly switched from their personal accounts.
The appeal of detailed insights and analytics was too strong to ignore! Not to mention, access to a plethora of useful business tools to promote your content.
1 Types of Instagram Accounts
2 How to Change Instagram from Business to Personal (Step by Step!)
3 Should You Switch to a Personal Account on Instagram?
4 Conclusion: How to Go Back to a Personal Account on Instagram
But you may be contemplating whether to switch back to your personal Instagram account these days.
It’s understandable. Maybe you want to restrict your content to a tight-knit community of followers. Or you might be looking for ways to leverage Instagram’s algorithm and increase the organic reach of your posts.
In either case, chances are you’ve thought about making the switch to a personal account on Instagram at one point or another.
While switching from a professional account to a personal one on Instagram takes few simple steps, it’s a critical decision.
That’s why you should analyze the pros and cons before you decide to switch back to your personal account. We’ll delve deeper into these aspects below. We’ll also discuss how to switch back to a personal account on Instagram.
But let’s first take a quick look at the different types of accounts available on Instagram!
Instagram offers two main types of accounts to its users – personal, and professional!
A personal Instagram account lets you use all of the platform’s basic features. You can still upload posts, reels, IGTV videos, and stories. But you can’t monitor how your posts are performing or have access to in-depth analytics.
Professional Instagram accounts are further categorized into two types of professional accounts -business and Instagram creator accounts. These accounts give you access to a treasure trove of creator-friendly tools, including insights and promotions.
So, now that you know what kinds of Instagram accounts you have access to, let’s talk over how to switch between them!
First things first – switching your Instagram account from business to personal isn’t rocket science.
Switching to an Instagram business profile, or back to a personal account involves a few simple steps and takes less than five minutes! The difficult part comes when you’re thinking about whether you should make the switch in the first place. (More on that later!)
But if you’ve already made up your mind, here are the steps to switch back to your personal Instagram profile:
If you’ve ever tried changing your Instagram account from business to personal, you’ve likely come across a warning message.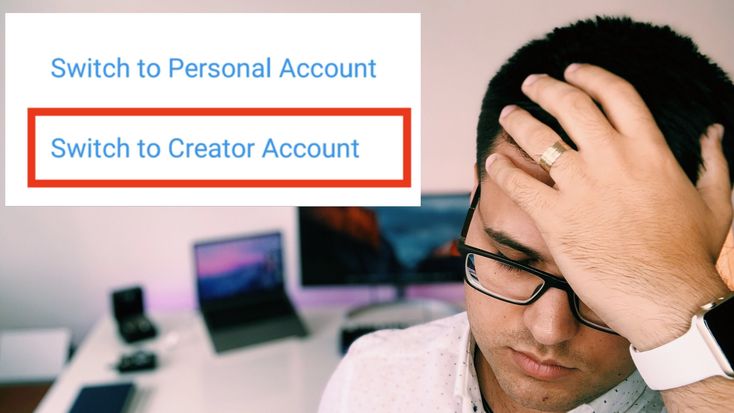 If you haven’t, you’ll see it here!
It explains how you can’t use some of the app’s features on your personal account.
To some people, the loss of insights might not be a big deal. But to professional brands and businesses that use Instagram as a main social media marketing platform, it can be disastrous.
The final choice between a personal and business account depends on your needs and preferences.
Let’s explore the pros and cons of turning off your Instagram business account:
This is likely the biggest advantage of having a personal Instagram profile. You can navigate to your “Privacy” settings and enable the “Private Account” option. It’ll ensure that your Instagram posts are only available to your followers.
Also, you can approve or dismiss follower requests to control whether new users can view your posts.
Some content creators and influencers have reported that the organic reach of their posts improved after changing their Instagram accounts to personal.![]() This isn’t surprising considering that the Instagram algorithm could suppress the organic reach of business accounts to compel them to run ads.
This isn’t surprising considering that the Instagram algorithm could suppress the organic reach of business accounts to compel them to run ads.
But there’s no concrete data to support this argument. So, it isn’t wise to switch to a personal Instagram account with the sole intent of boosting your organic reach.
The best part about having an Instagram business profile is that you get access to useful analytics on audience engagement. You can monitor the organic and paid reach of your posts, as well as gain a deeper understanding of your followers’ demographic.
Switching to a personal account means you can no longer use the “Insights” dashboard. Also, the analytics from your existing posts is erased. Even if you change back to a business account, you can never recover this data.
Unlike a business account, your personal Instagram profile doesn’t have a “Contact” button.
This means your followers can’t access your phone number, email address, Facebook page, or website.
Also, you lose other valuable buttons, such as “Insights” and “Promotions”.
If you manage an Instagram business profile, you’re likely using a social media tool to plan and publish your posts. Tailwind’s Instagram scheduling tool lets you draft and schedule Instagram posts for weeks in advance with SmartSchedule – and automatically publishes content at the right time on your behalf!
But the auto-posting feature is only available for business accounts. While you can still schedule posts from your personal account, Tailwind won’t automatically upload them. Instead, you’ll have to rely on push notifications from the app to remind you to upload the post.
Changing your Instagram account from business to personal is quite simple. You need to navigate to your account settings and select “Switch to Personal Account” from the available options. But if you’re a marketer or content creator, you shouldn’t be asking how to switch back to a personal account on Instagram.
Instead, you should evaluate the consequences of making the switch and whether it’s going to be the right decision. A personal account gives you more control over who gets to view your content. But you lose access to powerful audience insights and other tools.
Not sure about what type of Instagram account is the right choice for you? Pin this article and come back to it once you’ve made up your mind!
Sharing is caring!
29shares
Are you curious about how Instagram creator accounts differ from other profiles? Or whether or not an Instagram creator profile is right for you?
You’re not alone.
Instagram’s growth in 2021 made its popularity with creators skyrocket. Those impressive stats don’t lie!
In fact, “50 million independent content creators, curators, and community builders including social media influencers, bloggers, and videographers” make up the creator economy. Instagram created creator accounts with people like these 50 million in mind.
By the end of this article, you’ll understand what Instagram creator profiles are and whether or not they’re right for you. As a bonus, we’ve also included how to sign up for one if you decide it’s your vibe.
What is an Instagram creator account?
What special features do Instagram creator accounts include?
Instagram creator profile vs. business profile
How to switch to an Instagram creator account
How to turn off a creator account on Instagram
Can you have a private creator account on Instagram?
Bonus: Download a free checklist that reveals the exact steps a fitness influencer used to grow from 0 to 600,000+ followers on Instagram with no budget and no expensive gear.
What is an Instagram creator account?An Instagram creator account is a type of Instagram account created especially for content creators. It’s a lot like an Instagram business account but designed with individual creators instead of businesses in mind.
Creator accounts are meant for:
When you upgrade to an Instagram creator account, you get access to features that allow you to:
Instagram introduced creator accounts in 2018 to encourage influencers on the platform.
(Looking for the other Instagram feature for creators, Creator Studio? Creator Studio is more like a desktop dashboard for your creator account — check out our blog for more info)
What special features do Instagram creator accounts include?Detailed follower growth insightsUnderstanding your follower growth and activity is a priority for influencers and creators. Creator accounts give you access to an in-depth insights dashboard. Here, you can access data on your followers and how they engage with your account.
For example, influencers and creators can now map new content with net follower changes. This will help you see what’s resonating, so you can keep producing the right type of posts and grow your following.
One thing to note: You can only access the Instagram insights dashboard on mobile. If you’re looking for insights on your desktop, you’ll have to head to Creator Studio.
Streamlined messagingCreator accounts mean access to DM-filtering options! That’s right — say goodbye to the swamp of DMs in your inbox.
Creators can filter by three new tabs:
These filters allow you to split friends from fans (and trolls from, well, everyone). You can also flag important conversations, ensuring you never forget to reply.
Looking for message-related time-savers? Creators can generate saved replies so you can personalize keyboard shortcuts for standard messaging. These are a life-saver when you’re constantly answering the same questions via DM.
Here’s how to make your own:
Unfortunately, creator account users can’t connect to any third-party scheduling apps. If you’ve got one of these accounts, you’ll have to schedule your feed and IGTV posts using the Creator Studio dashboard.
In your Creator Studio dashboard, hit the green Create Post button in the top left corner.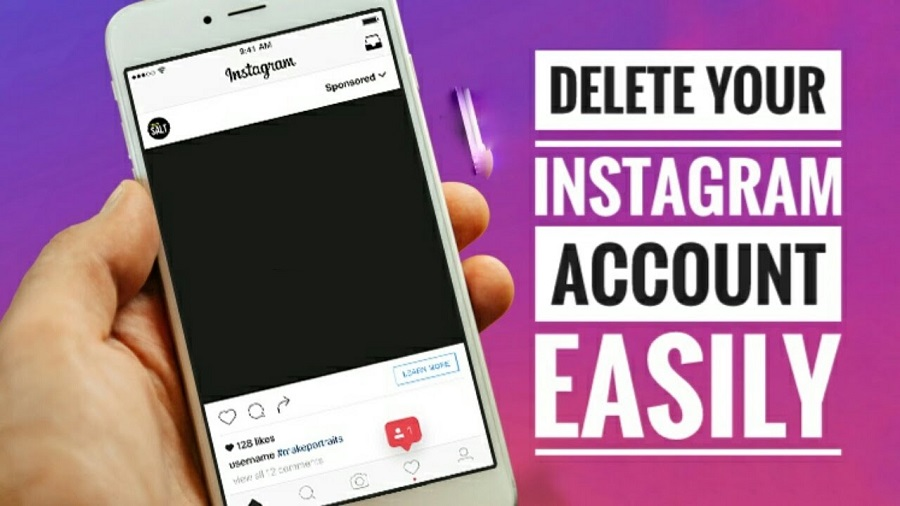 Then, upload your content, write your caption, and any other information you would like to include. Then, hit the drop-down arrow next to Publish in the bottom right corner.
Click the Schedule option and choose your date and time, and voila! You’re set.
Profile control & flexibilityYou decide what people see on your creator account. You can display or hide your contact information, CTA, and creator label.
And you can choose your preferred contact choice on your profile (including call, text, and email). This way, you can list a specific business contact and keep your private life private.
Shoppable postsIf you sell products or give recommendations, a creator account allows you to create shoppable posts and tag products. When someone clicks on your tag, they’re taken to a product description page where they can get more information or make a purchase.
This feature is great for influencers who work with or recommend multiple brands. If this sounds like you, a creator account may be right.
Note: You need the brand you’re featuring to give you approved access to their products to be able to tag them.
Try these 31 little-known Instagram features and hacks (for any type of account).
Instagram creator profile vs. business profileStill not sure whether you should have an Instagram creator profile or a business profile? Here are five notable differences between the two accounts.
LabelsNotably, creator accounts have more specific options to say what you do or who you are. These label options tend to be related to the individual — writer, chef, artist, etc.
On the other hand, business accounts offer professional industry-related labels for your account, like advertising agency, sports team, or business center. They’re great for company accounts or anyone who’s speaking for a larger group, not just themselves.
In short:
For creators, being specific with your category can allow you to niche down and find your community. For business accounts, understanding your industry category shows your audience what you can do for them.
But wait! A business profile might still make better sense even if you’re an individual creator. Keep reading for more differences.
ContactBoth business and creator accounts allow you to share your email address and phone number. This makes for an easy contact method for interested collaborators or customers.
Only business accounts, though, can add in a location. This can be useful for organizations with a head office, cafe location, or any official brick and mortar location.
You can hide your contact information on either account if you prefer DMs.
Call-to-actions (CTAs)Instagram CTAs sit under your bio on your profile. If you’ve enabled contact information on your account, your CTA will be next to that.
Business accounts use the Order food, Book now, or Reserve CTAs.
On the other hand, a creator account can only use the Book Now or Reserve CTAs.
If you’re in the food and beverage services, then a business account may be right for you.
Shoppable optionsBusiness and creator accounts on Instagram do have one main ecommerce difference: shoppable options.
As we mentioned above, you can tag shoppable products from brands that have approved access. Business accounts, however, can add a Shop to their profile, tag shoppable products in posts and Stories, and access Shop insights.
A business account may be right for you if you’re predominantly trying to sell products on Instagram. And, good news for you, Instagram Shopping is one of 12 Instagram trends for 2022 our experts have predicted.
Bonus: Download a free checklist that reveals the exact steps a fitness influencer used to grow from 0 to 600,000+ followers on Instagram with no budget and no expensive gear.
Get the free guide right now!
Third-party app accessThird-party apps — like Hootsuite, our favorite — can help you:
Unfortunately, the Instagram API doesn’t allow third-party app integration for creator accounts. But if you use a business account, you can.
If you manage multiple accounts, a business account may be right for you.
How to switch to an Instagram creator accountStep 1: Go into your settingsGo to your profile and click on the hamburger menu in the top right corner.
Then click on Settings, sitting at the top of the list. Then, select Account.
If you have a personal account, select Switch to Professional Account.![]()
If you have a business account, select Switch to Creator Account.
Note: You may also be prompted on your profile page by Instagram to switch to a professional account. This does the same as above.
Step 2. Create your accountChoose the label that best describes who you are or what you do from the list provided. Then, you can decide whether or not you want this displayed on your profile.
At this point, Instagram may ask whether you’re a creator or a business. Click Creator, then next. You’ll be prompted to set up your professional account.
Here, you can choose from the following list of steps to help you get acquainted with your creator profile:
You’ll be asked whether or not you’d like to share logins using the Accounts Center. If you skip this step by clicking Not now, you can always set it up later.
You’ll be brought to the Set Up Your Professional Account page. Here, you can browse your new features and tools.
Step 3: Check out your new features and toolsIf you’ve clicked off the Set Up Your Professional Account page, you can still access it by clicking on the “# of 5 STEPS COMPLETE” bar at the top of your profile.
You’ll have a bar graph icon in the top right corner of your profile page. Click this to access your Professional Dashboard.
Your Professional Dashboard is where you can find your account insights, access your tools and discover tips and resources.
Head here for more on Instagram analytics.
Head back to your profile page. From here, hit the hamburger menu in the top right corner. Hit Settings, then navigate to Creator. Under this tab, you can manage more features like:
Decided that creator life isn’t for you? Going back to a personal Instagram account is easy. But, you will lose the analytic data that you’ve collected so far. And, if you choose to go back to a creator account, you’ll need to re-sign up.
Simply head back to your Settings (in the hamburger menu on your profile). Navigate to Account. Scroll down to Switch account type at the bottom and click Switch to personal account.
Note: You can also switch to a business account here.
Can you have a private creator account on Instagram?You cannot have a private creator or business account on Instagram.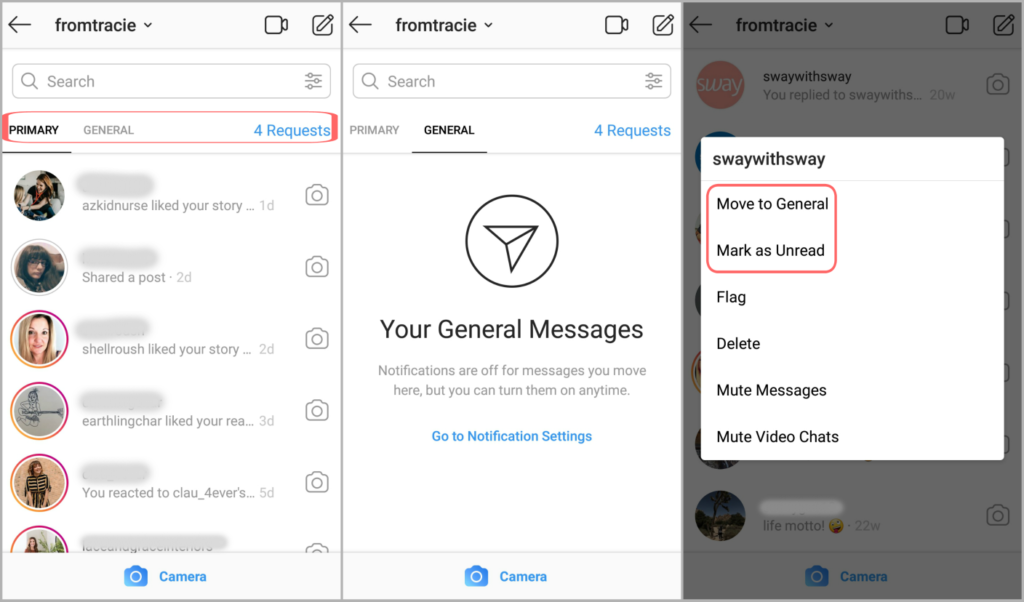 You’ll first have to switch back to a personal account to go private.
Sorry! We don’t make the rules.
Save time managing your Instagram presence using Hootsuite. Schedule and publish posts directly to Instagram, engage the audience, measure performance, and run all your other social media profiles — all from one simple dashboard. Try it free today.
Get Started
Social networks actively collect information about their users and are not at all eager to part with it - even if the account owner makes such a request. We figure out how to delete your data from Facebook, Twitter, VKontakte and Instagram.
Most social networks base their business on displaying advertisements.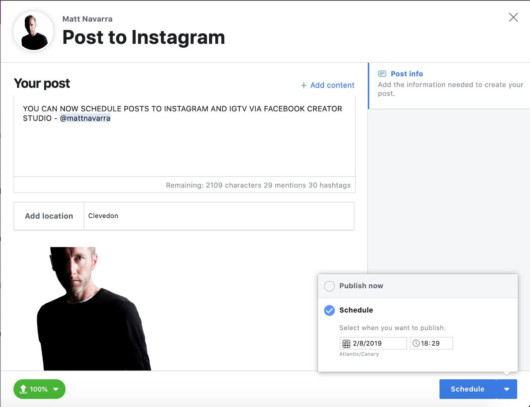 For their targeting (personalization of the display), a lot of data from the user profile is used, as well as information about actions in the social network, and sometimes beyond it. By creating a profile on Facebook, VKontakte or Twitter, the user accepts the confidentiality agreement, often without even reading it, and also leaves the privacy settings set by default. This leads to the fact that social services accumulate a huge array of data related to a particular person for years.
Of course, Russian legislation establishes certain rules for the processing of personal data of citizens and limits the possibility of their use, however, not all information about your actions in social networks is subject to Law No. 152-FZ and other regulations. In addition, by registering an account, we usually give the service consent to the processing of our data. However, the operator is under no obligation to provide us with tools for self-management of information about itself.
Interestingly, foreign Internet sites are often more client-oriented in terms of personal data management.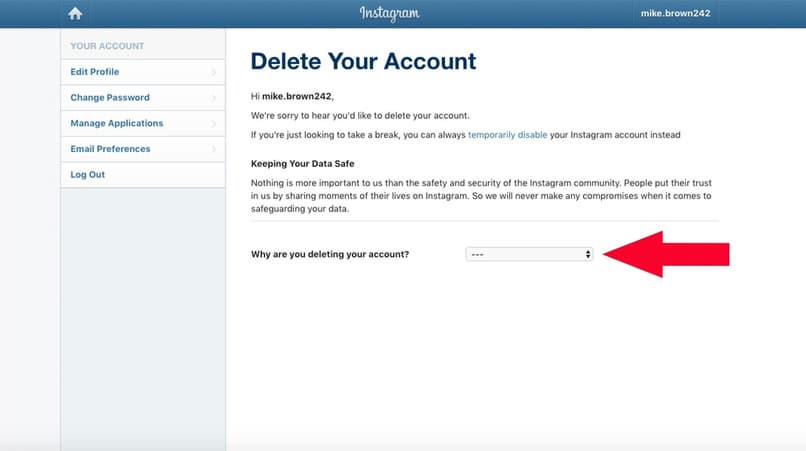 This is partly due to more stringent legislation (primarily European and American), partly due to more developed traditions regarding the secrecy of correspondence and personal life, a higher culture of handling such information. Nevertheless, for both Russian and foreign social services, the rule is true: it is much easier for them to become a user and a donor of information than to delete this information later.
In order to minimize the amount of data collected about you by the social network, we recommend that you pay attention to your profile privacy settings as soon as possible (ideally, immediately after registration). If you did not immediately limit the "appetites" of the site, try deleting some of the accumulated information. We have prepared short instructions on how to do this on Facebook, Instagram, VKontakte and Twitter.
Facebook collects a lot of data about the activities of its users. Information that allows you to more accurately target (and therefore sell more expensively) ad impressions is the basis of a social network business.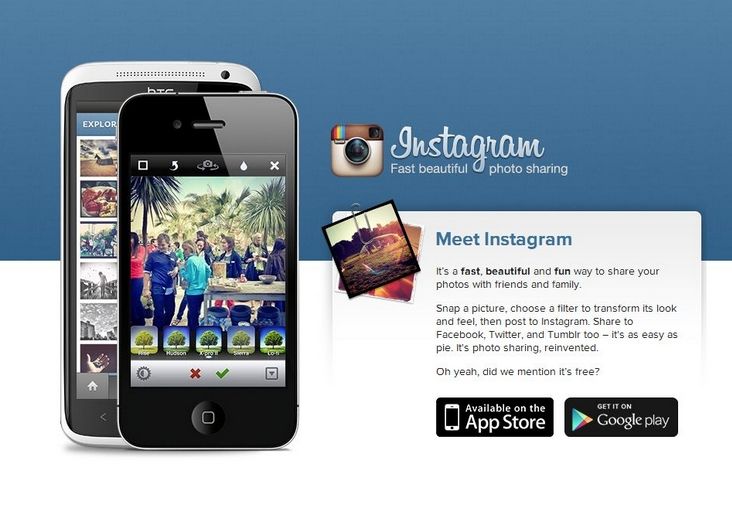 Therefore, she knows and remembers a lot about you: what and when you published, whose post was “liked” and what information they were looking for. Moreover, sometimes Facebook shares some of this data with other online resources - as part of partnership agreements and with your consent (remember the boxes that you checked when logging into a third-party service using your account). There is also a reverse scheme - online stores, banks, taxi services and other companies transmit data about your actions to Facebook in order to “catch up” with you with their advertising on the social network.
Nearly two-thirds of Americans don't trust Facebook to store their personal data, according to a study by NBC News and The Wall Street Journal. If you are also uncomfortable with being tracked by a social network, we recommend limiting its activity in relation to your personal data, as well as deleting information that you do not want to share. This is not to say that this is a very simple and convenient process, but there is an opportunity to clean up your personal data box.
First of all, we recommend downloading the archive of information collected by Facebook about you - in order to understand the scale of the problem and just in case. Here's how to do it:
By default, all types of data that Facebook collects about you are selected; if necessary, you can disable the download of individual sections. Select the file format - HTML or JSON - as well as the date range and quality level of downloaded photos and videos (the size of the archive depends on this), then click the "Create file" button. In an hour or two, a link to download the archive will be sent to the email associated with the account.
Let's start deleting information. Unfortunately, Facebook does not allow you to “wholesale” destroy all personal information or individual groups of data, but it is possible to get to each individual record. Open the same "Your information on Facebook" section (see above) and select "View my information".
Figure 1. User information collected by Facebook
This is a comprehensive library of Facebook data related to you: information about all posts, photos, search history and interactions with other users. We recommend that you carefully study each section and delete redundant data about yourself. Here is a list of 5 sections that you should take a closer look at:
 Take a look here, even if you have never used this feature.
 Finally, we recommend that you visit the Off-Facebook Activity page, which is also located under Your Facebook Information. Here you will find data about third-party sites and services that transmit information about you to Facebook, you can see what specific information they share (section "Manage information about actions outside of Facebook"), and delete it (section "Clear history").
Instagram is part of the Facebook media empire, so the conditions for storing, using and administering user data are largely similar. You can view, download and - in some cases - clear information about your activities within the service. Most of the features for managing your information on Instagram are located in the "Security" section of the "Settings" menu.
In the Data Access section, you can see what information the social network has collected about you. Not all data can be deleted, but the information from the "Account Activity" section can and should be cleared.
Figure 2. User data collected by Instagram
The Apps & Sites menu item contains information about Instagram-related third-party services. If you used your account details to log in to another site, then its owners may have access to some information from your profile. We recommend that you audit the connected services and remove those that you no longer use.
Instagram stores and uses your search history for personalization purposes. This information is involved in the formation of a "smart feed" and the display of targeted advertising. You can view the relevant data and clear it in the "Search History" section.
To download an archive of all the data collected about you by Instagram, you need to go to the "Download data" section, enter the email address where the link will be sent, and click the "Request file" button. Interestingly, you can specify any mailbox as a recipient, not just the one associated with your profile. To verify the request, Instagram will prompt you to enter a valid password for your account.
Just like Facebook, Twitter collects a lot of information about you to manage smart feed (show posts based on your preferences) and target ads. Removing or preventing the storage of some of such information may affect the operation of these services; This is something to keep in mind when changing your privacy settings on Twitter.
You can download data about you accumulated by the social network; this will allow you to understand what personal information Twitter holds, as well as to have an archive of published posts and photos. To request a download of information, follow these steps:
After the social network creates an archive with information about you, a link to download it will be sent to the e-mail specified in your account.
Unfortunately, you can remove all information about yourself from Twitter only by deleting your profile, and even then in this matter you will have to rely on the honesty of the service. However, you can adjust the privacy of your account to reduce the amount of information about your activity saved by the social network. To do this, in the "Settings and Privacy" section of the main menu, select the "Privacy and Security" item.
Figure 3. Off-Twitter Data Management Menu
Under the Sharing and Actions Off-Twitter section, there are four important privacy sections:
 Scroll through the "Interests" list - I'm sure you will find unexpected topics there.
 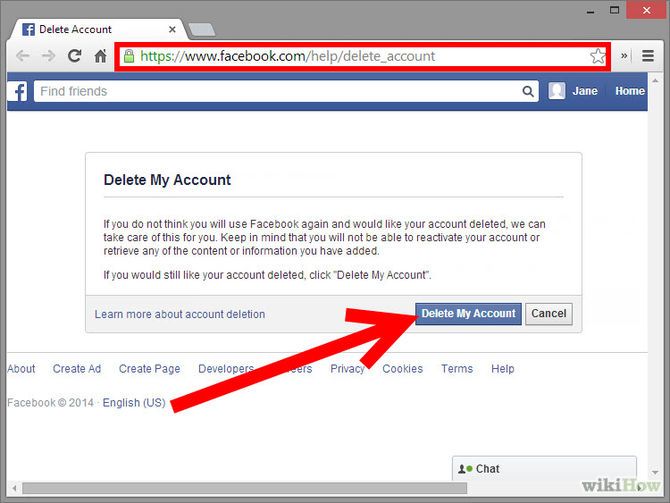 So information about your movements will be protected from possible leaks.
 To complete the process of removing redundant data about yourself on Twitter, take a look at the "Security and account access" section, which is also located in the "Settings and privacy" menu. Here you can edit the list of applications that are associated with your account - for example, they used its data for authorization.
Unfortunately, the leading Russian social network does not provide the user with advanced tools for managing personal data. Even the basic function of downloading an archive of personal information appeared in it only a couple of years ago. To ensure the necessary level of confidentiality of information, the creators of VKontakte offer to set the visibility of information about you for other people and services (this can be done in the "Privacy" section), but they do not allow you to regulate their storage and further use.
You can delete all information about yourself from VKontakte only when deleting your account. However, even in this case, your data will be stored on the servers of the social network for some more time, during which you will be given the opportunity to restore your profile.
Figure 4. Information about data management in VKontakte
select the "Data Management Order" section. From it you can find out what information the social network collects about you and how it uses it. The button for requesting the accumulated data archive is located at the bottom of the page. The download link will be sent to the email address associated with your account. The term for completing the application is from three hours to several days, depending on the composition of the requested information.
The most effective way to delete data from social networks is to completely delete your account. Theoretically, one month after you have deactivated your profile, all data associated with it should be deleted from the servers of the company that owns the service. In practice, this does not always happen. If, 30 days after deleting your account, you find that your information is still being used by a social network, you need to contact its technical support with a letter withdrawing consent to the processing of personal information, and if this does not help, write a complaint to Rospotrebnadzor.
However, deleting an account is a drastic measure. In the vast majority of cases, information about the user's actions in the social network is used to make his work with the service more convenient. Simple rules of information hygiene will help you find a balance between a comfortable level of privacy and using the opportunities of the site for communication and entertainment:
 Perhaps the rules of the service allow the use of a pseudonym instead of a real name and an abstract avatar instead of a photo.
 Sometimes it's good to take a break from social media, but self-discipline only allows a few. Then deleting the profile comes to the rescue. We explain how to delete from Instagram permanently or temporarily, saving data
Since March 21, 2022, the social networks Facebook and Instagram have been banned in Russia by a court decision, and the Meta Platforms holding company that owns them has been recognized as an extremist organization and is also banned.
Some users notice that they devote too much time to managing their Instagram account to the detriment of work and personal affairs. Even the owner of Instagram, Meta, admitted in internal documents that its social networks have a negative impact on sleep, work, parenting, work productivity and personal life of approximately 12.5% of users. And scientists from the University of British Columbia found that users' own lives begin to seem insufficiently bright and interesting compared to what they see on Instagram.
Meanwhile, until the spring of 2022, the social network was consistently in the top 10 in terms of downloads in Russia and in the world.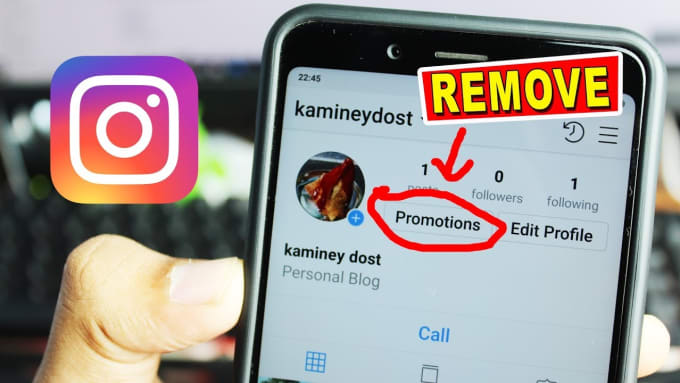 The international agency We Are Social estimated that in 2021 Instagram ranked fourth in our country in terms of the number of users (61.2% of Russian Internet users go there), and in total 67.8% of the Russian population (99 million people) use social networks. The average Russian spends 3 hours a day outside of work at the monitor or with a smartphone.
In November 2021, Instagram began testing the Take a Break feature. It will allow users to escape from the continuous viewing of the feed. In the settings, it will be possible to set reminders for breaks, for example, 10, 20 or 30 minutes. After that, the application will issue a warning about the need to rest. However, this feature has been opened to a limited number of users so far.
For now, everyone has the only alternative - to give up Instagram for a while or for good.
This option should be chosen when the profile is definitely no longer useful: for example, if we are talking about the account of a company that has closed.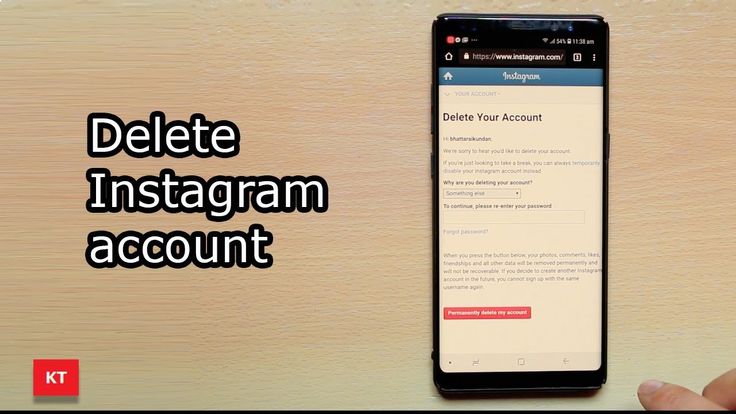
Before deleting a profile, Instagram will offer to save data from it. To do this, you need to send a download request. After that, an email will be sent to your email within 48 hours with a link where you can download photos and videos. You can also request a copy of your data through the Instagram app for Android and iPhone. To do this, open the menu in the profile, go to the "Settings" - "Security" section and select the "Download data" item. Next, you will need to enter your email address and account password.
Download request from Instagram
Even after deleting the profile, it will be visible on the social network for another 30 days. During this time, the user can change his mind and restore the account. If within a month the owner of the profile has never logged into the system, then the account is permanently deleted.
To delete a profile using a computer, you need to perform several steps:
To delete an Instagram profile using your phone, you need to take more steps:
The user can also stop using Instagram for any period and then restore the page. However, you can do this no more than once a week. A temporarily deleted profile is not visible to other users of the social network. To restore it, you just need to log into the application.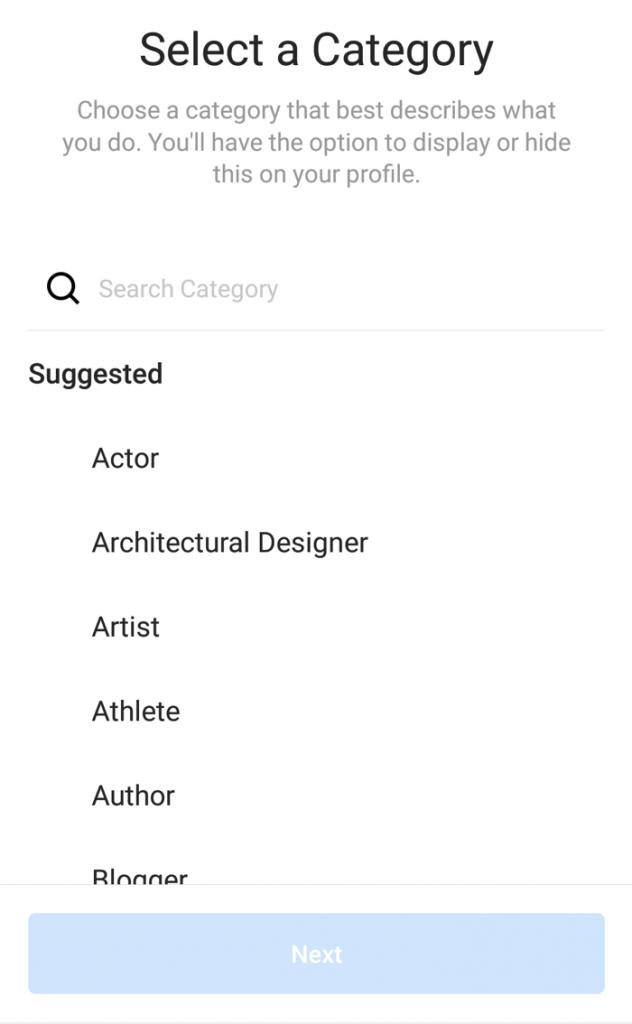
To temporarily deactivate your profile using a computer, you must perform the following steps:
As in the case of the "permanent" deletion, temporary blocking of Instagram will require more steps:
To delete your account, you need to know your username and password. A forgotten password can be reset using an email address, phone number, or Facebook account. If the user does not have access to the email address specified during registration, and his Instagram and Facebook accounts are not linked, then the support service will not be able to provide access to the account.
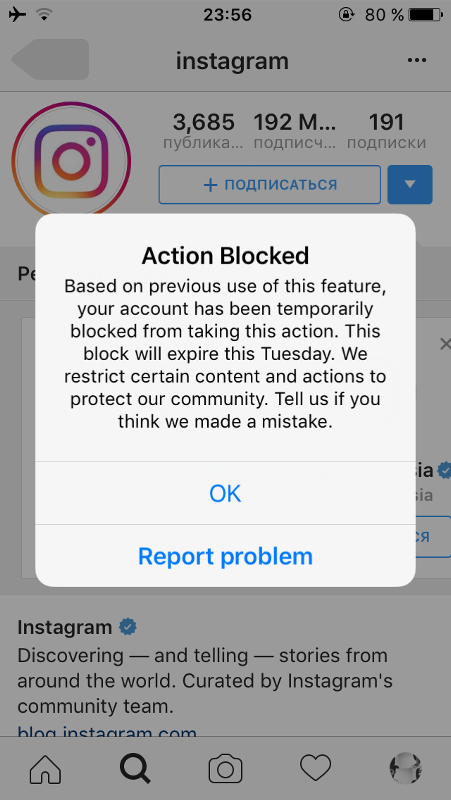
In the event that an Instagram account has been blocked by the social network itself, its owner will see a corresponding message when logging in. He can appeal this decision. To do this, you need to open the app, enter your username and password, and then follow the instructions on the screen.