That’s why we’re putting more effort into them than ever before. While apps like Over and Unfold allow us to curate our once candid Stories into more considered posts, Instagram’s ever-expanding sticker collection lets us connect with and entertain our followers.
What hasn’t changed however, is their expiration date. After twenty four hours on your feed, they disappear. Unless of course, you save them to your highlights reel. A permanent collection of your Stories, on your profile and visible to all your followers until you choose to delete them.
Why you should create highlights
As well as extending the life of your content, your Story highlights will allow new visitors to your profile a chance to see what your account is all about and easily navigate it.
Perhaps you are a travel influencer who could sort their highlights by destination, giving followers an easy way to discover your past adventures. Or maybe you share content about parenting and want to edit your Stories into helpful topics. How about if you’ve spent hours replying to your followers questions in the ‘ask me anything’ box? You could keep them safe in a Q&A highlight.
However you organise them, in choosing the very best of your past Stories, you’ll be ensuring new visitors see a highlights reel that will make hitting that follow button irresistible. For those already following you, there is a whole bank of content to rediscover.
Get highlighting
If we’ve persuaded you to save some highlights, here’s how you do it.
You can add more photos or videos to your highlights too. Simply go into the highlight reel you want to add to, select ‘more’ then, ‘edit highlight’. Select ‘archive’ and choose any additional Stories you want to add to that reel.
How to make them look extra
Sounds easy right? Almost a little too easy. Want to jazz them up a bit? We hear you.
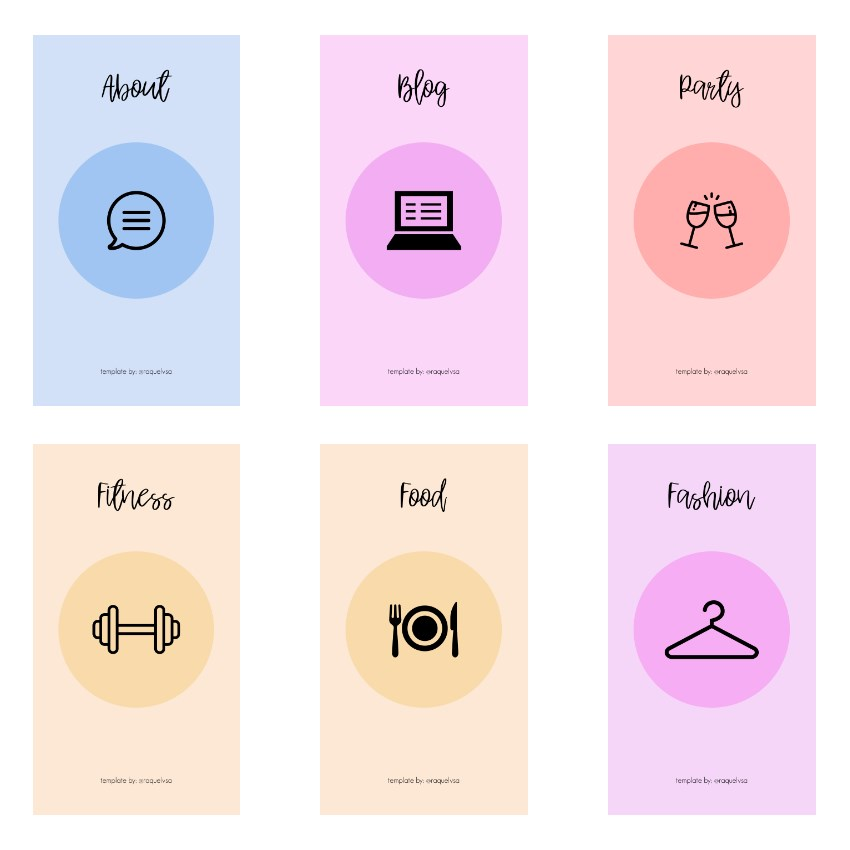
For a super polished look, why not design some of your very own on-brand icons as cover images for your highlights? You could do this easily using a website like Canva, using images and colours in-keeping with your Insta aesthetic. You’ll need to post these designs as Stories so you can add them to your highlights and make them covers.
Don’t forget, if emojis are your thing, you can add them to the names of your highlights.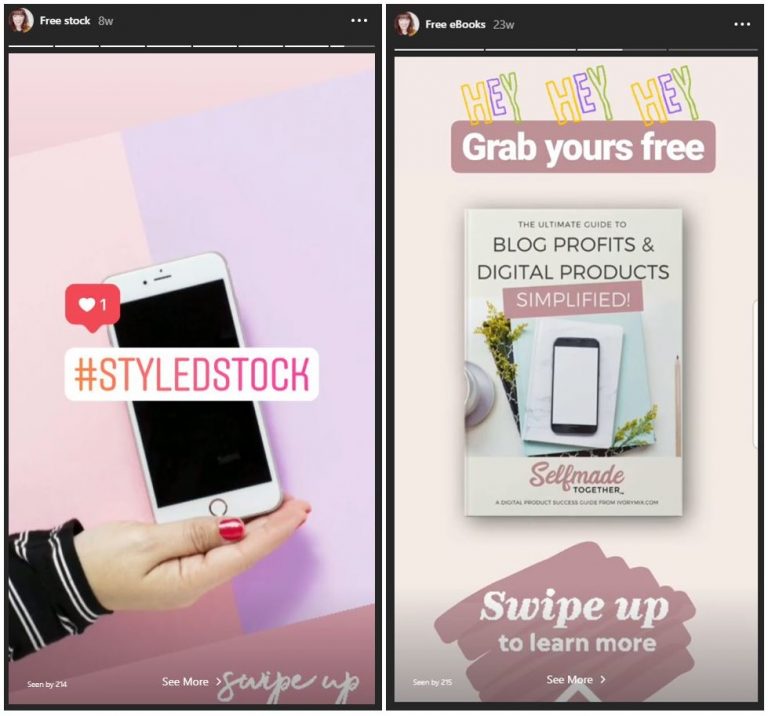 Or even use emojis alone to name your highlights. The Instagram Story highlight world is your oyster.
Want to join Vamp’s global community of creators? Download our app to apply.
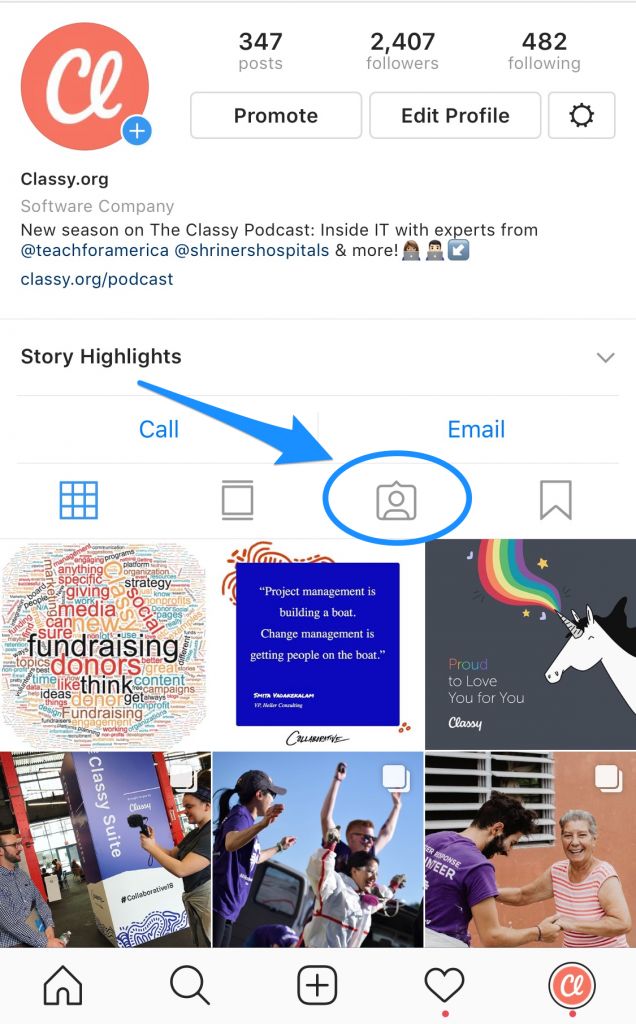
Do you use Instagram Highlights? They are the Stories you see right below the profile information. If you want to organize your content, and make sure what’s most important stands out. Then, Highlights is the best option for you!
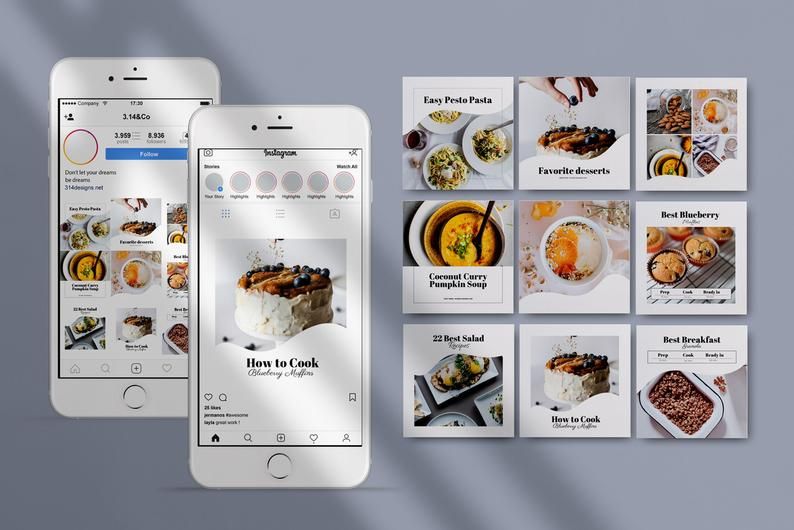
Take the example of this toy store in Spain:
Instagram Highlights work as a collection or a menu of the Stories you want to always be visible to your followers. You can add a name that describes its content, as well as a cover image. Do you think these highlighted stories are clean and attractive enough to catch your followers’ attention?
Customizing your Instagram Highlights cover photos might not seem like a priority, but it’s actually super important to build your brand with it own style and consistency.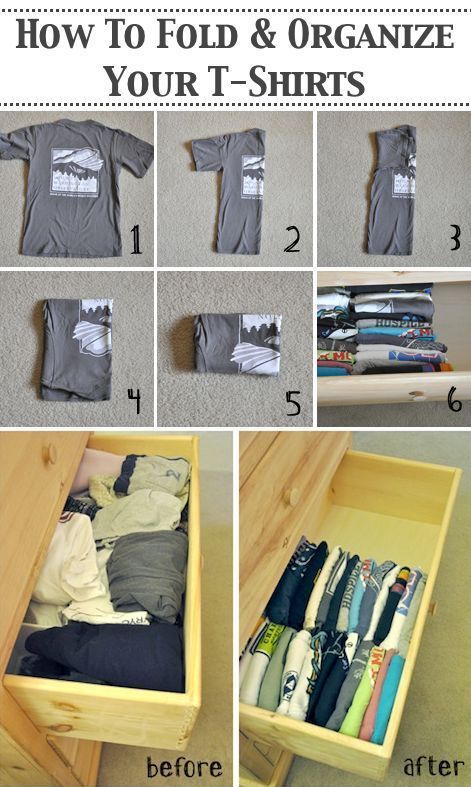 It’s also a good way to avoid confusion and to optimize the disposition of your content. So, in this article we will show you how to customize your covers, covering some strategies and tools. Let’s get started!
Before you customize them, you need to know what this feature has to offer. You probably already know that a story only lasts 24 hours. By highlighting a story, it will no longer be available for only 24 hours, but for as long as you want, and you can even label it.
But ATTENTION! The name or title can only be up to 15 characters long. It is important to note that if you want the title to be fully displayed, it is best that you make it approximately 10 characters long.
As we can see in the example above, the title of the highlight “Vintage S …” was cut in half as it exceeded the visible characters Instagram displays . It’s always recommended that you keep the title’s length under the10 characters limitations to make sure your followers don’t miss anything.
And what about the cover? In this case, Instagram automatically uses the image of the first Highlighted Story, which is not recommended by several factors: Are they really standing out? Do they match the brand style? Does it look more organized?
We took the example above from the blog Social Media Examiner, and just like they explain in the article, these highlighted images are lost in the profile, they do not attract attention or stand out. They don’t even build a brand identity.
On the other hand, in the following example, we can see a clear example of what we should achieve with Instagram Highlights. This is a profile of a professional photographer.
Short and simple names. The same color on each cover, and the same style which is according to the personal brand. This is what we should think about when we want to customize our Highlights.
Let’s look at another example:
Look closely at this profile. The covers match the style of the brand.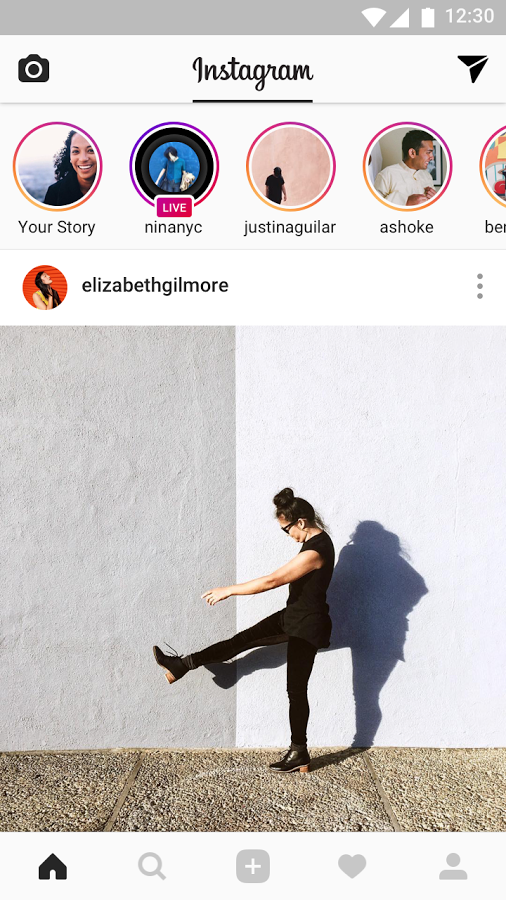 The reason? First of all, because it is an Argentine company that manufactures ceramic products with a singular aesthetic. This same aesthetic is represented in each story.
Some of the Highlights are related to the manufacturing process, and others with the product photos. Obviously, some adjustments could be made to make them even more organized, but the idea of using an icon as a name seems accurate for a brand like this.
Generally, it is necessary to name the highlight, but it will always depend on the brand and also the type of product. However, anything related to an artistic side has a greater creative gap.
Let’s see how to make your covers and customize your Highlights!
You can create similar covers, always respecting the same elements, like color, typography, image, icon, logo etc. Or you can also use different covers by adding some element in common.
In the following example, the covers are the same and match the color and logo of the profile.
In this other example, the covers use the same background color, changing only the image.
And what tools should you use to design your covers? The fastest and easiest way is to use online apps like Artstudio, you can access them through your mobile phone. Of course, if you are used to more resourceful tools such as Photoshop or Illustrator, you can definitely use them as well.
One crucial point: the size should be 1080 x 1920 pixels. In Artstudio you can take advantage of the Instagram Stories template, which can be quite useful!
However, these are not all the options! On Instagram itself, when creating a story, it is possible to design a cover image. All you have to do is use Instagram as a drawing tool, and imagine how you want your cover.
As we already know, Instagram has typography options, image filters, stickers etc. But this is not the most recommended option. It is best that you use Artstudio for a simple reason: you have a greater scope for action.
In this video of a Social Media expert, you’ll see the creation process from scratch.
RECOMMENDATIONS FOR CREATING THE LAYERS
Now you’ve made your cover. Already saved it on your phone or computer, it’s time to put it in your Highlight. It’s very simple!
Let’s look at the steps:
Repeat the process with all the covers that you created.
Creating custom covers for your Instagram Highlight Stories allows your most valuable content to always be available in your Instagram profile. And also, it makes it easier for your followers to navigate through your content and unifies the style of the brand.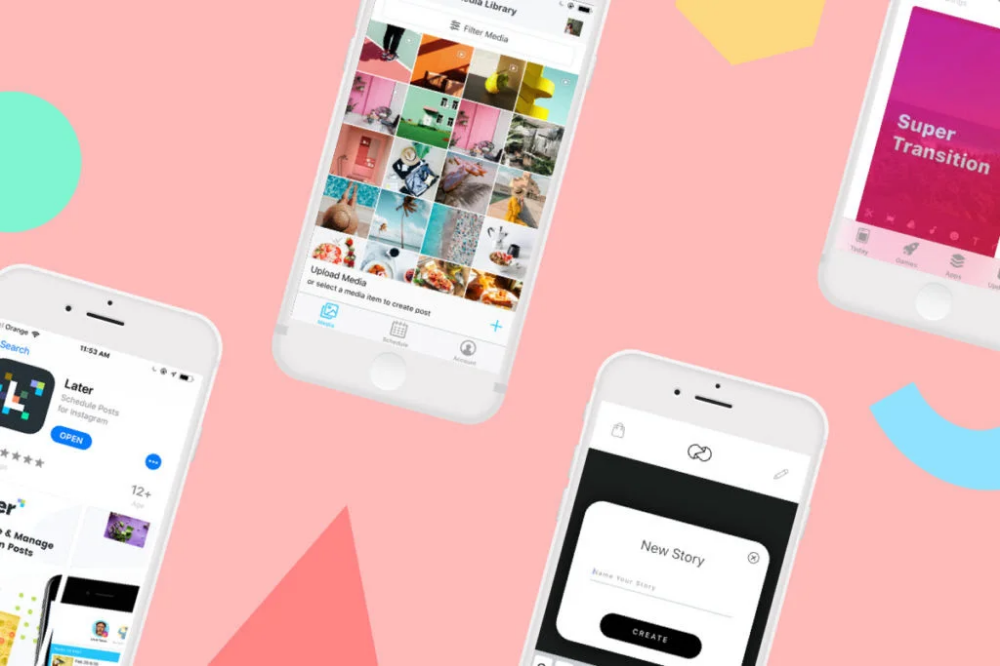
All this, at first glance, seems insignificant, but it becomes a powerful tool for any business or company. The user experience on Instagram becomes somewhat deeper, and it gives them a closer look at your brand’s proposal.
Tell us: Do you use Highlights? How has your experience been so far? Do you get better results? What tools do you use?
In this article I will tell you how to make an Instagram story and show you how to post a story from your phone or computer. Let's see all the features of the story editor - I'm sure you didn't know about some of them.
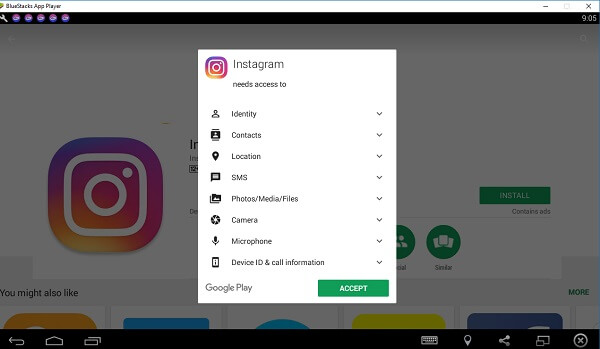
The easiest way is to post a story on Instagram through a mobile application. You will need the official Instagram app, download it from the Play Market or the App Store. We install, log in or register, draw up a profile if necessary.
Article on the topic: "Instagram design: how to make your profile attractive to the audience.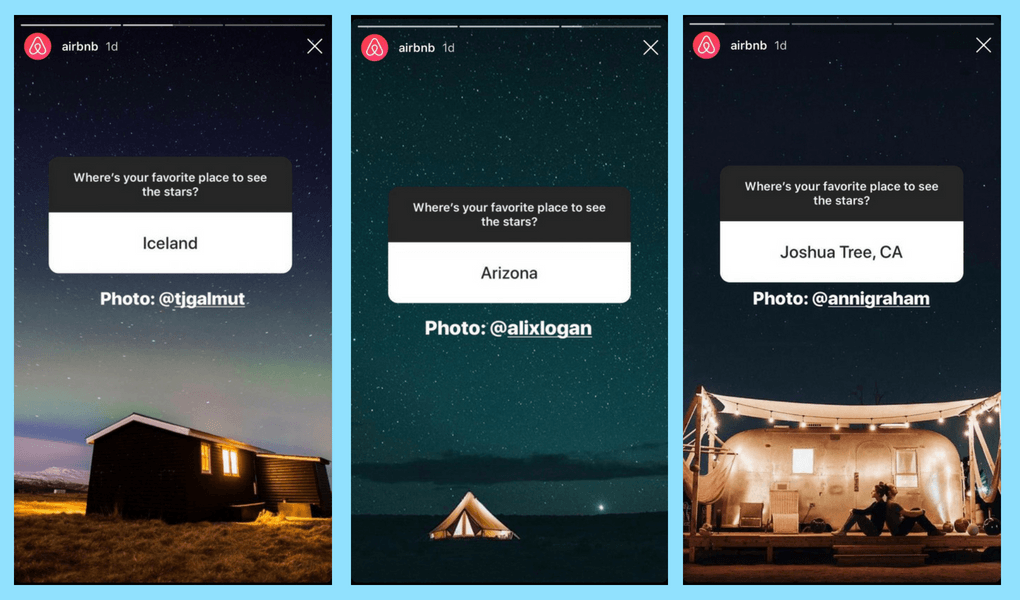 "
"
There are three ways to exit the Instagram story creation window. The first is to click on the plus icon in the bottom bar of the app. The second is to go to the main page (the section with the house icon) and click on the circle with your avatar.
Buttons that will take you to the story editorThe third way is to drag the main page to the right.
Dragging the screen to the right also opens the history creation windowIn all three ways, you go to a window from which you can create not only a story, but also a post, and also start a live broadcast:
From one editor, you can create a post, a story, or start a live broadcast video, or shoot them directly from this window. To select ready-made materials, click on the square gallery icon in the lower left corner. Through the icon in the lower left corner, you can go to the media gallery on your phone and select files from there You can select one file or several at once, to do this, click the "Select Multiple" button, it looks like two squares superimposed on each other.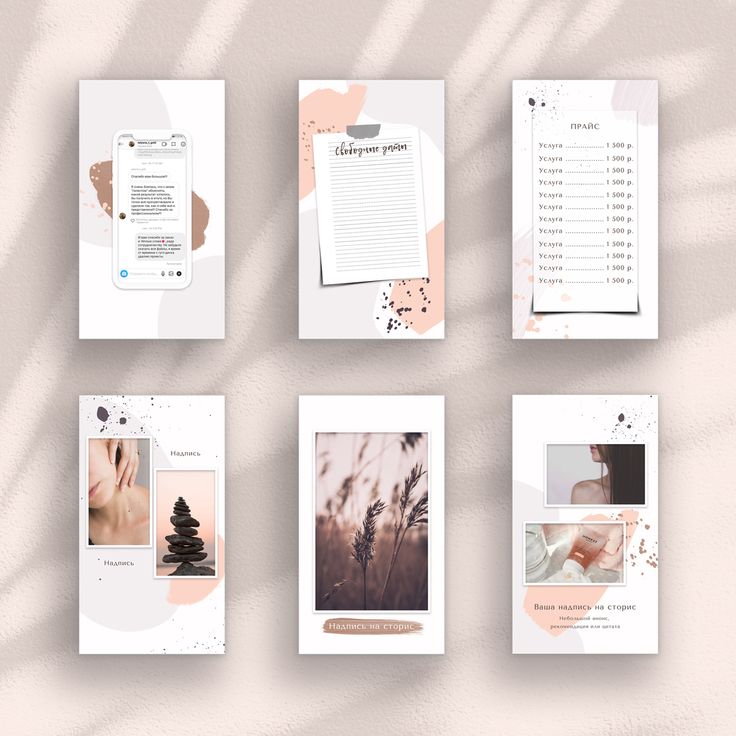
If you want to remove material, use the round button at the bottom center. To take a photo, click on it. To shoot a video, press and hold for as long as you need. A colored bar will run along the edge of the button: one full circle of it is equal to one full story duration. This will help you fit the video at the right time.
Hold down the button to take a video. Short press to take a photoBuild sales funnels and answer user questions using the chatbot on Facebook, VK and Telegram.
Instagram has more and more features for decorating stories: effects, shooting modes, elements that can be used to decorate a story. I'll tell you about all these functions in order.
Shooting effects - a row of circles at the bottom near the shoot button. To the right of it are pre-installed effects, to the left - added by you. How to add an effect, I'll tell you further.
Each of the circles will add a visual or sound effect to the photo or video you take through the application. Many of them are interactive: for example, masks that are applied to the user's face and change along with facial expressions.
Interactive masks react to your facial expressions and change with itLife hacks on effects:
Shooting modes - icons on the left. They can be used to create another fun video effect, such as a boomerang video loop or zoom video.
Shooting mode options. This is not the whole list - expand it by clicking on the arrow at the bottomHere is a list of available modes:
Some modes have additional settings. For example, in a collage, you can select several grid options, and in a photo booth, an imitation of different photographic film.
When you have taken a photo or selected it from the gallery, the final editing is in progress. You can add an effect, text, stickers and gifs to stories, draw something and add a link.
I'll show you how to edit stories on Instagram using different functions.
Color filter. It can be changed by moving your finger left or right. Just scroll to the right filter.
To apply a color filter, swipe left or right on the screen until you find the one you want Effects - button with a smiley face and two stars Here they are similar to shooting effects - here, too, there are masks, filters with snowflakes, with color changes, and so on.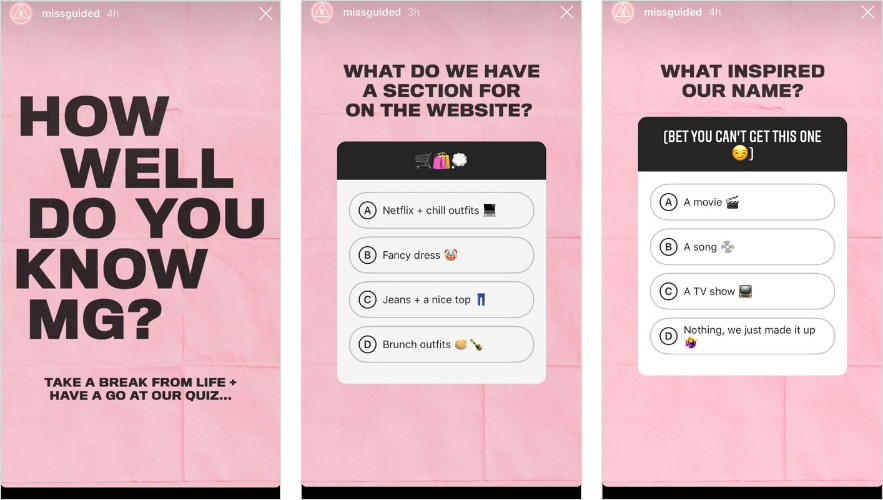
Please note that if you have already used the effect when shooting, you cannot add an additional effect to the video or photo while editing so that they do not conflict. You just won't have an add effect button.
In the example on the right, I used the hoarfrost effect when shooting, so there is no additional effect button.Link is a chain link button. On a personal account, you can only add a link to a video from your IGTV. You can add external links on the account of the author or business, but on condition that the audience is more than 10,000 subscribers.
Button for adding a linkDownload - button with an arrow . With its help, you can download the story that you have turned out to your phone.
If you want to save the result to your phone, click on the arrow Sticker or gif - icon of a rectangle with a curved corner . Through this button you can add a so-called sticker, also known as a sticker. With the help of a sticker, you can beautifully design a hashtag, mark a geolocation or another account, make a test, vote or poll. The element can be made larger or smaller and rotated, filled with your own text. If you want to delete an added item, drag it to the bottom of the screen, where the trash can icon will appear.
Here you can also find a gif, they are pulled from the Giphy service. Press the magnifying glass button labeled GIF, select a GIF from the list, or search by keyword.
Select GIFs from the list or search for the ones you need by keywordsYou can also take a photo and attach it as a sticker, to do this, press the button with the camera. Take a photo and just like with a sticker or GIF, adjust the size, tilt and place.
A sticker with a camera icon is needed to add another photo to the photo. Marker. Using a marker, you can draw something on the story. There are several types of lines and an eraser, you can choose the thickness and color of the marker.
Text. Write the desired text and edit. There are three options here. Left aligns text to the edge or center. The middle one is responsible for changing the font or its color. Right - adds effects to the font.
Write, arrange, move the textLife hack. To quickly add text, click anywhere in the editor. The Add Text window will open.
Please note: when you move elements on the story, the editor shows guides at the edges. It’s better not to step behind them, otherwise the element may be partially hidden - for example, in the upper left corner it will be covered by your avatar.
Guides are shown when moving an element to the edge of the screenSound. If you shot a video with sound, there will be an additional button to turn it off.
If you need to turn off the sound of the video, click the speaker icon That's all the settings.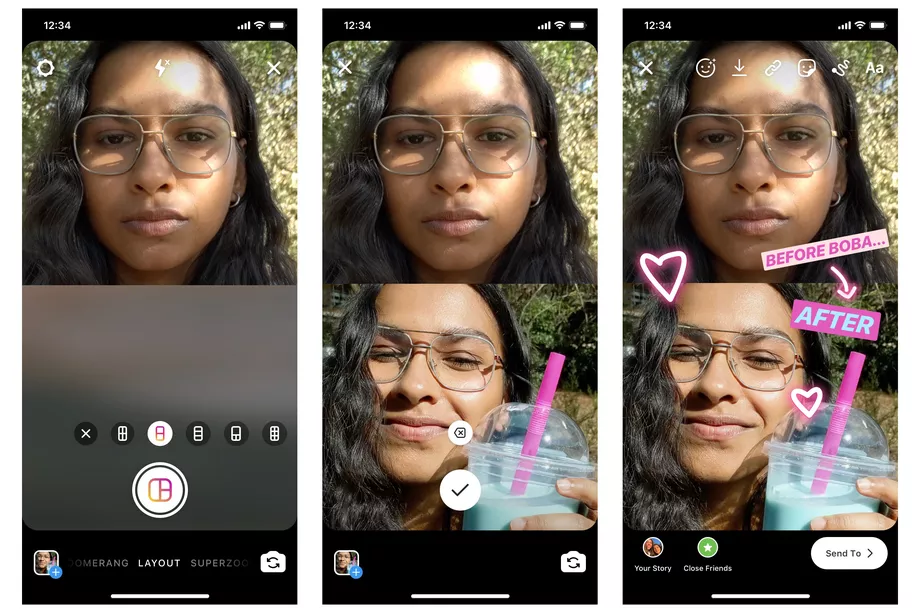 Now you can start publishing.
Important! Read our article about the features and interesting features of Instagram stories - we talked about invisible stickers, time-saving templates, delayed posting and other useful things.
Send chains of triggered welcome, abandoned cart, reactivation messages by combining email, SMS and web push within one chain.
Stories publishing settings are located under the gear in the upper left corner. Here you can choose:

There are three options for posting: post to everyone, post to your friends list, send a private message.
I will show two options - through the auto-posting service and directly through the Instagram website.
Some social media auto-posting services support posting stories to Instagram. Try:
However, in most services, the function of publishing stories is only to upload a photo or video. From the above list, only Parasite and SMMplanner support more or less advanced design: add text or gif, see how the story will look after publication.
Please note! In order not to screw up with the size of the picture, save yourself our cheat sheet on picture sizes for social networks.
If you want to post a story on Instagram without any frills, post directly through your browser. To do this, you need to go into the simulation of viewing from a mobile device, this is called the adaptive design mode, and it definitely exists in Chrome, Opera, Firefox. I'll show you how to do it in Firefox.
We go to the Instagram website and log in to the desired profile. Then we press the key combination Ctrl_Shift + I, it will open the developer panel. In this panel, you need to find the devices icon - it is at the top of the panel, it shows a phone and a tablet.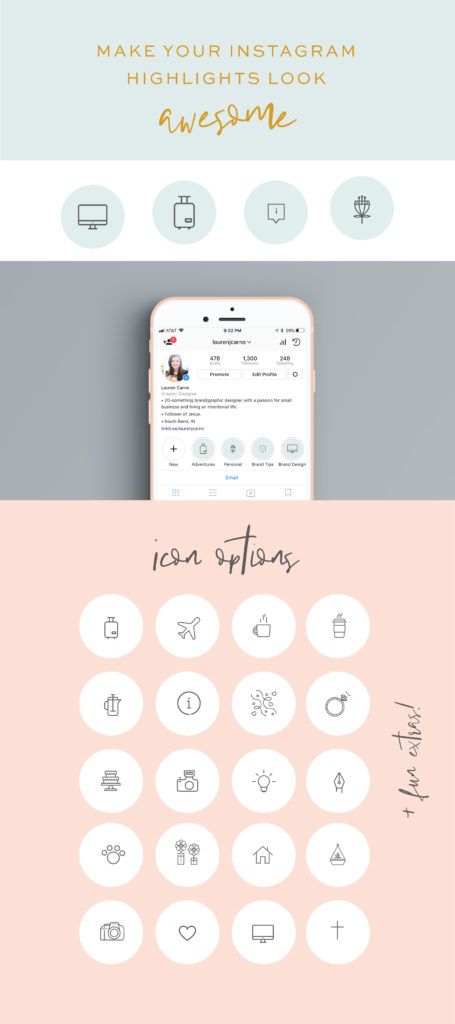
The site will look like you opened it on mobile, and the mode settings panel will appear on top. Here you need to select some kind of mobile device so that the buttons for creating posts appear, as in a mobile application.
Select any mobile device from the list providedI'll choose the first option, Galaxy. Now the site finally looks like a mobile application - there is a panel at the bottom, and my avatar appeared at the top, which you can click on to create a story.
Now the site looks like you are in a mobile application Click on your avatar at the top. The site will immediately prompt you to select a file from your computer, the file you selected will open in the story editor. Please note that the editing functionality here is severely curtailed: in my case, only four gifs were available in the stickers, and the elements added to the photo could not even be moved. At the end, click on the inscription "Complete the story" at the bottom of the screen, and it appears in the feed.
Now you know how to design your stories and upload them both from your phone and from a computer, which means you will always be in touch with subscribers. And do not forget about other channels of communication with customers: chat bots in messengers, automatic chains of email newsletters will work even when you are on vacation. Sign up with SendPulse and create them for free!
Life is always in full swing on the Internet, and especially on Instagram*. And the busiest place on Instagram* is stories. This is a separate feed of photos and videos that disappear after 24 hours from the moment they are uploaded.
One of the most popular storytelling formats - it helps to establish an online presence without overloading the main feed. In Stories, you can upload tons of vacation shots, broadcast live from festivals, report or conduct surveys. If you haven’t done anything like this yet, but would like to, our beginner’s guide will come in handy.
You can access the photo editor for stories by swiping your Instagram feed* to the right. There are two ways to upload a photo:
- use photos from the phone's gallery - click on the thumbnail of the last photo taken by the phone, it is located in the lower left corner of the screen;
- take a picture directly in the application - for this, the developers have come up with several modes.
Regular photo . This mode is enabled first by default. One press takes a photo, a long press switches to a 15-second video mode. You can apply a filter on a photo with some romantic name like Tokyo or Rio De Janeiro - swipe right or left on the photo to apply effects
To send a photo to the feed, click the "Your Story" button at the bottom center of the frame. The "Save" button at the bottom left uploads the photo from Instagram* to your phone along with all the changes you made in the editor: pictures, text and stickers - this photo can, for example, be placed in the main Instagram feed*, from where nothing disappears, or send to friends.![]() The "Recipients" button helps to organize the list of recipients of the frame, if you do not want to share it with everyone in a row - then the application will send the photo to Direct only to the selected ones.
The "Recipients" button helps to organize the list of recipients of the frame, if you do not want to share it with everyone in a row - then the application will send the photo to Direct only to the selected ones.
Tooltip : Stories privacy can also be adjusted in the settings (cog icon in the upper left corner of the screen).
If you have selected a photo from the gallery and it was taken more than a day ago, you will see a sticker with the date in large print on it. To remove it, hold the date with your finger - a trash can will appear where you can drag this sticker.
Screen text . Sometimes there is too much text in the story for a short note on the photo - all the letters can be put on separate screens. In this case, there is a "Text" mode. You can change the background color (the colored ball to the left of the main button) and the font. The font settings are hidden behind a button at the top center. The background for the text can also be a photograph — to do this, click on the camera icon in the lower right. To make a colored background appear under the text, click on the icon with the letter "A" and stars in the upper left corner of the screen.
Tip : You can select this mode to tell what's going on in the photo or video you upload next.
Live . In this mode, the video will be immediately broadcast to the Stories feed. You can invite people to watch your live broadcast, but even after it ends, the video will be available for another 24 hours if you click the corresponding button after the broadcast ends.
Hint : This mode is great for shooting at public events, but mobile internet in such places tends to be poor. Provide yourself with a backup link, such as stable Wi-Fi from a friendly cafe next door.
Boomerang . Boomerang is a two-second looped video that captures a single movement. Swings, fountains, flowing hair, printing presses - they will all be happy to play in your creative boomerangs.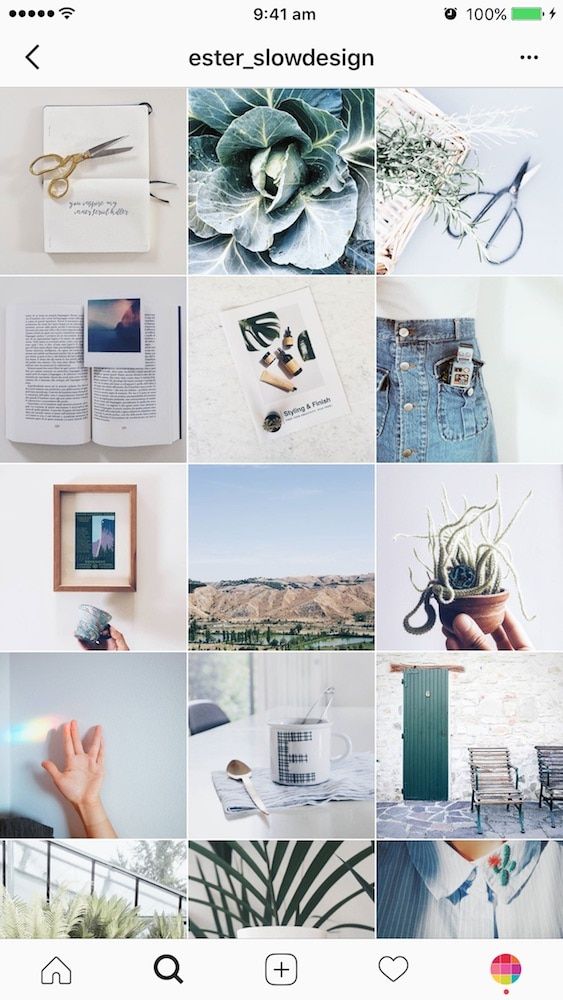
Superzoom . Allows you to shoot a three-second video with an increase in some part of the frame and accompanying music. There are several options for superzoom: drama, TV show, pendulum and disco beat. To select one of these options, you need to successively click on the icon with the treble clef.
Hint : to keep the music from disappearing from the video, you need to follow the sound speaker indicator in the upper left corner of the frame - there should not be a cross there.
Reverse shooting . You shoot the video as usual, and Instagram* shows it in reverse order.
Hint : It is especially cool with those movements that in the usual version you will not see in the reverse - squeezing paste out of a tube, blowing soap bubbles or jumping into the water from a cliff.
Hands free . In this mode, pressing will start a 15-second recording, and you do not have to hold the record button with your finger. It will come in handy, for example, if you need to record your incendiary full-length dance on video.
Instagram Stories* opens up new possibilities for selfie lovers: you can apply virtual make-up, fan coloring or bunny ears to your photo or video. To turn on the front camera, click on the icon of two arrows in a circle, and then the adjacent button with a smiley. A set of masks will appear below - have fun! A single press will take a photo, and a long press of the button will record a video.
You can easily add a geotag, local temperature and time, a hashtag, your companion's Instagram* account to your photo. To access these buttons, tap the square smiley icon at the top of the screen.
You can also choose stickers or gifs there.
The Poll button lets you ask a two-choice question, and the moving emoji button invites your readers to rate it.
To add text to the photo, click the "A" icon at the top of the screen. In this editor, you can change the font and background under the text - the buttons are located at the top, and the color palette is at the bottom.
By the way, you can write something in another editor designed for drawing. It is activated by the pencil icon at the top of the screen. The slider on the side will help you adjust the thickness of the brush, and you can choose the type of brush on the top line: a simple pencil, a marker, a neon brush, and something like graffiti spray. There is also an eraser and an "Undo" button with an arrow.
Drawing is a very useful tool to help mask parts of a photo that don't need to be disclosed.
The maximum video length for Stories is 15 seconds. If your story doesn't fit within these limits, use the CutStory app, which will cut your long video into the desired segments. To add music to a video, you can use the Storybeat app - you can select a song from your library and attach it to a video or photo slideshow.