When you go Live with badges, viewers can buy badges to support you and get extra recognition, while you earn money from content you’re already creating.
TURN ON BADGES
When viewers purchase badges, you’ll see heart(s) next to their usernames. You can also see the total number of badges purchased and your total earnings along with progress on any goals you set. To see more in-depth earnings, tap “View” during your Live. To see your total badge count, head to “Badges” in your Professional Dashboard anytime after your Live has ended.
Viewers can purchase multiple badges during your Live in $0.99, $1.99 and $4.99 increments -- remember to recognize badge purchasers!
Find more ways to earn.
Something Went Wrong
We're having trouble playing this video.To watch the video, please upgrade your web browser.
Learn more
Fitness creator Charlee Atkins turned an outpouring of support on her Live videos into another way for her viewers to give back with badges.
If you’ve mastered making Live videos, you can master badges. If you’re going to turn badges on and need a refresher, visit the Live page.
Ask your supporters what they want to see in Stories before you go live. During your Live, you can see who's purchased a badge so you can engage with your supporters.
Since viewers tune in at different times, remind them that badges are enabled at the beginning, middle and end of your Live video.
Remember to thank your supporters with shout outs during your Live, and afterwards, by using the Thank You sticker in Stories.
Sharing a goal for your Live and pinning it as a comment can help viewers feel more involved in your work and encourage them to purchase badges.
Instagram will send you a reminder every time supporters buy badges or you hit a milestone -- consider giving your supporters an individual shout-out if they’ve bought one or more badges, or a collective shout out when you hit a milestone.
They can buy as many badges as they like, for up to USD $250 per live video.
LEARN MORE
Once you’ve earned at least $100, you’ll get paid. Then depending on your bank, payments can take between 1-7 business days to arrive.
LEARN MORE
Google and Apple deduct 30% of all in-app purchases in fees. Currently Instagram receives no portion of the fees.
LEARN MORE
Instagram Live badges are the latest feature aimed at helping influencers and creators to make money on Instagram.
In a nutshell, badges are monetary tips that viewers can contribute during an Instagram Live broadcast.
This opens up a whole host of new opportunities for creators (from influencers to digital service providers, such as fitness instructors) to earn money.
We’re jumping into all the details, as well as how to get access, in this blog post.
What Are Instagram Live Badges?Never heard of badges? They're a new monetization concept on Instagram – and they're about to go mainstream!
Why? Because Instagram has just announced that Badges are being rolled out to all eligible creators in the US.
The concept of “badges” plays off a popular feature within Twitch and TikTok, which allows followers to “tip” a broadcaster during a live stream.
Creator Jon Youshaei recently hosted a live session to demo exactly how the new feature will work:
According to Instagram's press release: “Live has helped creators and businesses stay connected to their followers and bring people together [during the pandemic]. With badges, creators can generate income from the content they’re already creating.”
With the new feature, viewers can purchase a badge during a Live video that will stand out in the comments and unlock additional features, including placement on a creator’s list of badge holders and access to a special heart.
It’s a way for followers to show their support – while also becoming "VIP" community member.
PSA: Later is the world's favorite Instagram marketing platform. Join Later today (for free!) and plan, schedule, and automatically publish your posts from one easy-to-use dashboard, available on desktop and mobile.
Badges are available in 3 different levels, based on the number of hearts available to purchase.
Viewers can buy one heart for $0.99, two for $1.99, or 3 for $4.99.
Creators can see how many hearts a viewer has purchased thanks to a visual icon in the chat stream, making it easy to give them a shout out during the live broadcast.
This new revenue stream could make a real difference to how creators earn from their platform. In the future, every Instagram Live they host as the opportunity to make them money.
ICYMI: Instagram recently released a ton of new features to help influencers and creators make money on the platform – find out more here!
How to Get Instagram Live Badges for Your Profile:The good news is that badges are now coming to all eligible US-based creators. The bad news is that it’s still unconfirmed when the rest of the world will gain access – but Instagram's Creator's site states that it will be available in the UK, France, Spain, Italy, Germany, Japan, Australia, Turkey, Brazil and Mexico soon.
To be eligible for Instagram Live Badges, creators must:
Have a professional account (creator or business)
Be 18+ years old
Comply with Instagram's Partner Monetisation Policies and Community Guidelines.
Be in a region with access to the feature
Have 10K+ followers
Once your region has access, you can turn on badges and start earning from your live videos. Here's how:
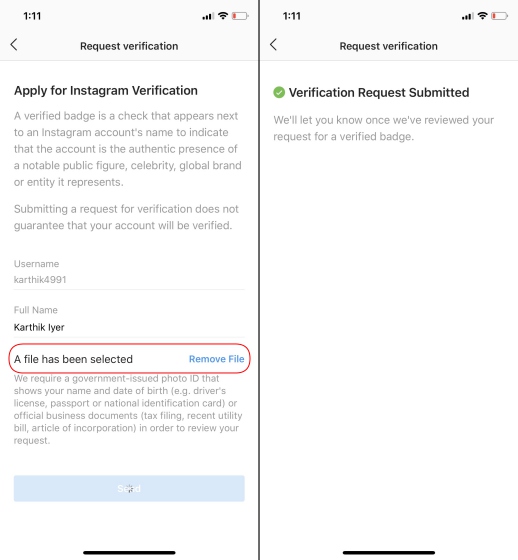
Step 1: Go to "Profile," then "Professional dashboard," tap "Grow your business," then select "Badges."
Step 2: Once you've been onboarded, head to the Live tab on stories. Tap the "badges" icon on the left side of your "Going live" screen. Confirm that you want badges turned on, add a title, and go live.
It's that simple!
Instagram Live badges are a huge new monetization opportunity for creators on the platform – and a great opportunity to get creative.
Will you be using this new feature? Let us know over on Later's Instagram account!
Want to stay up-to-date on all of Instagram’s new features and announcements? Sign up the Later newsletter and you’ll be the first to know!
When you think of name tags, you might think of those oversized and embarrassing things you wear to your high school reunion. Instagram name tags are much better since you can customize them.
Table of contents
What are Instagram tags?
How to use Instagram name tags
How to personalize your Instagram badge
Conclusion
Instagram name tags can be personalized, add your face to them, and make it easier for others to follow you. Keep reading to learn about the different ways to create and customize name tags on Instagram.
Instagram name tags are images you can create to make it easier for others to follow you. You won't need to enter anything to follow another account.
You don't need to create a name tag because you already have one. To find your name tag, tap the profile tab and tap the hamburger icon in the top right corner.
Select the Nametag option (it will be the first one in the list) and your nametag will automatically appear. Since this will be the first time you access your name tag, Instagram will walk you through the various tags you can use.
If you followed the steps above, you are currently viewing your Instagram badge. Now what? The label is what you are going to show your friends and future followers so they can follow your posts. Share your badge with everyone by clicking on the share icon in the top right corner.
What if you want to follow someone else? There are several ways to scan someone else's name tag. To get started, you can click on the "Scan badge" option right below your badge.
After selecting the option, simply use your camera phone to scan the name tag. You will see the option to view the profile. You can then decide if you want to subscribe to an account.
You can also scan a name tag saved in your device's gallery. Just click on the image icon in the top right corner.
Alternatively, you can scan a name tag by clicking on the Search tab and then selecting the name tag option in the top right corner.
Another way to scan a name tag is to swipe right to access the camera by pointing the camera at the name tag and then long press on the screen.
Now that you've found your Instagram badge and know how to use it, it's time to personalize it. You can change the color of your name tag, add emoji, or add a selfie. To change the color or emoji of your name tag, select the option you want to change by checking the radio button at the top when it changes from color to emoji to selfie. Tap anywhere on the screen to change any of these options.
As for the colors, it will keep changing until you stop pressing the screen. Similarly, touch the screen and swipe until you find the emoji you want to add.
For a selfie tag with a name, keep tapping until you get the design you want. For a design that will surround your selfie, you can choose between a unicorn, various glasses, hearts, and a mustache.
Obviously, Instagram copied this feature from Snapchat, but there are no complaints here. This is a great feature and hopefully it's the start of some great new features. Are you happy with Instagram tags? Let us know what you think in the comments below.
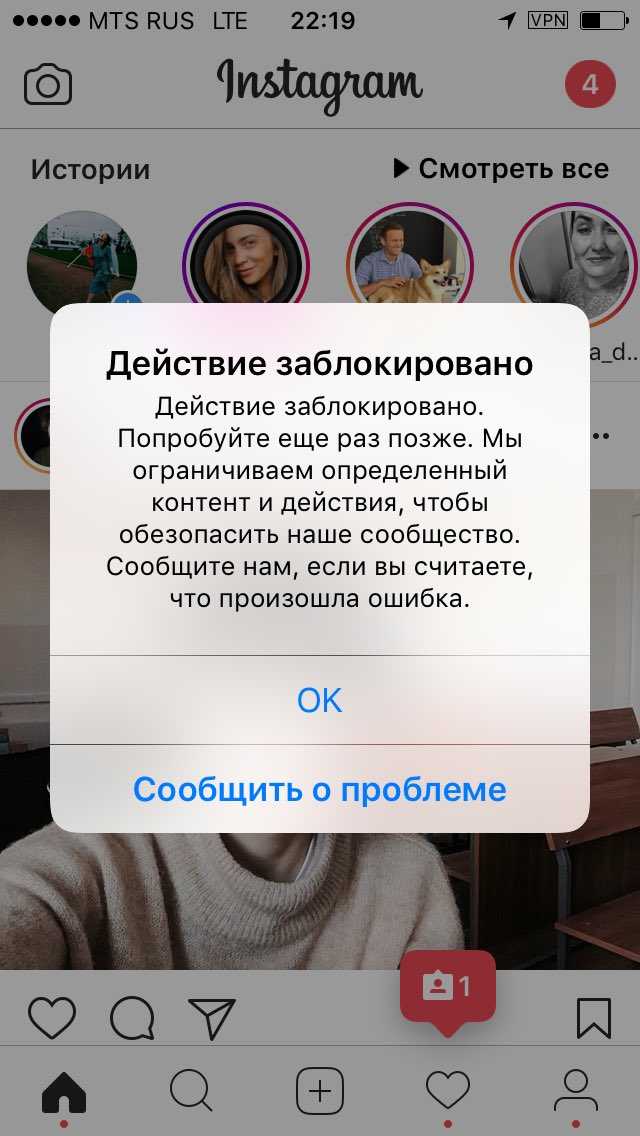
Mobile device owners are well aware of the so-called badges (stickers) - red circles with a notification counter displayed over application icons. They are very convenient when it comes to frequently used programs (social networks, e-mail, etc. ).
).
| Apple in Telegram and YouTube. Subscribe! |
♥ RELATED: 20 iPhone features that most users can turn off.
Just a glance at the screen will tell you if someone has sent you a message, commented on a Facebook post, or “liked” you on Instagram. However, there are a number of applications where notification badges are not needed (for example, a wallpaper application that notifies you when new images are available) and only clutters up the screen. The red icon on the icon with an ever-increasing number can be annoying and distracting, but luckily it can be turned off.
♥ RELATED: How to properly set up Do Not Disturb on iPhone, iPad, and Mac.

1. Open the application "Settings" and select the section "Notifications" . Here, under the name of each application, you will see which notifications are enabled for it. Inscription "Stickers" indicates an activated option that allows you to place notification badges on icons.
2. Touch the name of the application for which you want to disable notification badges.
3. Set switch Stickers to position Off .
Before and now:
Other options are available in section "Notifications" . You can completely turn off all notifications by moving the slider opposite "Allow notifications" . You can also disable "Sounds" and "Show banners" . For banners, you can select the display style "Temporary" (notifications will appear on the screen and then disappear) or "Permanent" (notifications will appear on the screen and remain there until you read them).
When notification badges are enabled for each application, there is a risk that the desired notification will get lost among the abundance of red icons. In order not to miss a really important notification, just turn off the badges where you don't need them.
♥ RELATED: How to change EXIF metadata for locations, dates, etc. photo in iPhone.
With the release of iOS 15, a new convenient feature has appeared - to turn off badges automatically at the right time so that they do not distract from work or study in the future. And at the right time, these notifications can be returned back to their original place. This feature will help to configure mode "Focus" . This method virtually eliminates the risk of missing something and not noticing.
1. Follow the path: Settings → Focus and create a new profile by clicking "+" in the upper right corner.
2. In the next window, select any suitable template from those offered or create your own from scratch (in our example, we chose the proposed template Awareness ).
3. In the From other people field of the Allowed notifications from people window, select Calls → From all and press Done .
Press Enable .
4. In the next window " Allowed notifications from application " select the programs whose notifications you want to receive. Click "+ Add" , select the desired icons and press Done .
5. Pressing the "Allow" button will create a profile that will not turn off notifications from other users or block messages from applications. But we need something else.
6. Go to your profile settings and open the section " Home screen ", where make the switch " Hide notification stickers " active.![]()
7. Now you will need to go to the " Auto-on " section and select the mode activation method that suits you. Here you have several options. You can set triggering based on a schedule, location, set your own schedule, or even automate.
8. To activate the created template Focus , open Control Center , press and hold your finger on the corresponding button (see screenshot).
9. Notification badges (red circles) will be removed from the previously mentioned application icons, and the active template icon Focus will appear in the upper left corner.
This is how you set the mode you want. It won't filter notifications, leaving out what you might need. This mode will simply hide those same red circles with numbers based on the conditions you set.
See also: