Millions of people scroll through beautiful photos on Instagram every day. They see dozens and dozens of products they want to buy, courses they are inspired to take, and services they need to invest in presented in an enticing way that makes it nearly impossible to resist. Instagram could be perfect for selling.
There’s only one problem…
You can’t add links to Instagram posts.
So how do you turn your loyal Instagram followers into paying customers? Believe it or not, there are several ways you can go about selling on Instagram with PayPal.
Not your usual platform for selling all things digitalInstagram isn’t usually the first social media platform that people would think to use to sell their digital products. Compared to platforms like Facebook and Twitter which allow hyperlinks in every post, Instagram seems like the last contender for gaining new customers, especially since you are only allowed one link in your account bio. But, as it turns out, selling on Instagram can actually be pretty profitable if you know how to use it properly.
To successfully sell things on Instagram, you’ll need a couple of things to get started. First, you’ll need to sign up for a business Instagram account. Signing up for a business account gives you access to a bunch of insights and analytics that help you see how well your account and posts perform and, ultimately, how to market to your followers most effectively.
1. Choose a product to sellOnce your business account is set up, you will need products and an online store to link to. You can sell anything you desire! Many people start their own online boutiques or sell goods they handmade themselves.
If you do not have the time or resources for either of these options, selling digital products is a great alternative!
2. Find a platform for selling your productsDigital products range from e-courses and ebooks to graphics and Lightroom presets.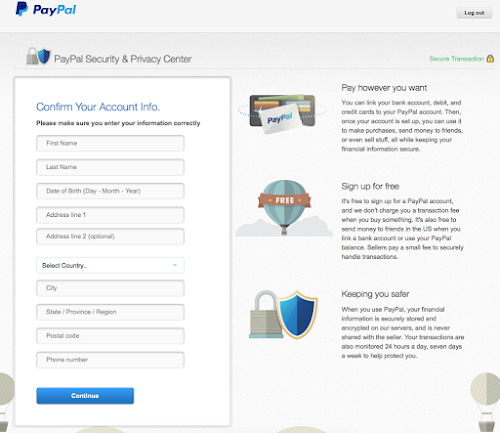 The benefits to selling digital products are not having to worry about shipping, offering instant access to your product, and the potential for residual income without having to make a brand new product. Having an online store like Sellfy to sell your digital products will help you out tremendously.
You can start a free 14 day trial on Sellfy.com.
Overview of the Sellfy dashboard.3. Connect your PayPal account
For starters, an online store gives you a safe and secure way of accepting payments. You could manually take orders via Instagram messages or comments, but it is easy to get mixed up.
Plus, it’s hard to make money transactions safe and secure when doing them in a dozen different ways. With Sellfy, you don’t have to worry about your security. You can also rest assured because we offer payouts directly to PayPal as soon as an order is placed.
Not to mention, a platform like Sellfy helps you automate the selling process. Once you set the store up, you let your customers take care of the rest.
To recap, to sell your products on Instagram with PayPal, you’ll need:
We’ve all heard it about a billion times, right? “Check out the link in my bio!” “You can find it at the link in my bio.” or just plain, old “link in bio.” No matter which way you say it, this tried and true call to action is exactly what you need to sell your products on Instagram.
Since Instagram only allows you one clickable link in your bio, this is where you will need to place your store or product link. But just placing the link here will not make the sales come in.
You need to actively ask people to click on the link and buy the product. Use some of the calls to action above, or some of your own, in every post that you make featuring your product.
You have to let your followers know that the link is there and the product is already waiting for them! You should also include a call to action in your biography.
Something short and sweet should do the trick, such as “Shop our store:” or “Check out our newest product:”. If you link to a specific product but change up the product you talk about, make sure to change your bio link accordingly!
Ron Jones does a great job of promoting his Sellfy store where he sells his training programs and frequently promotes them to his audience of 250+ thousand followers.
Sellfy creator Ron Jone’s official Instagram account.To add a link in your bio: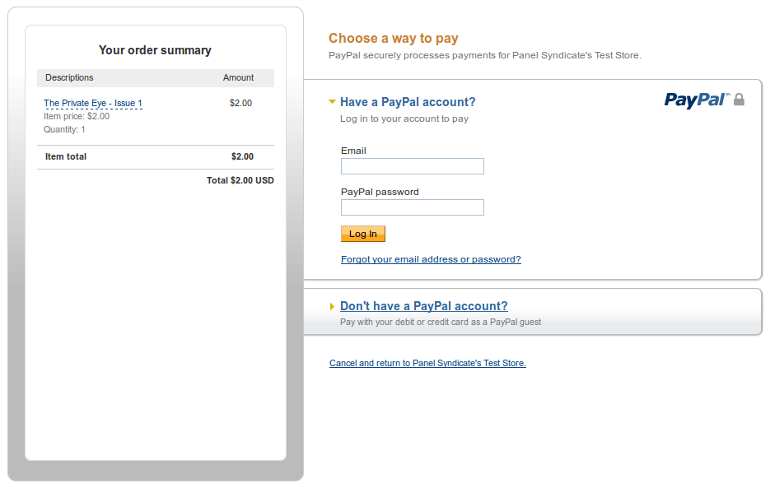 ”
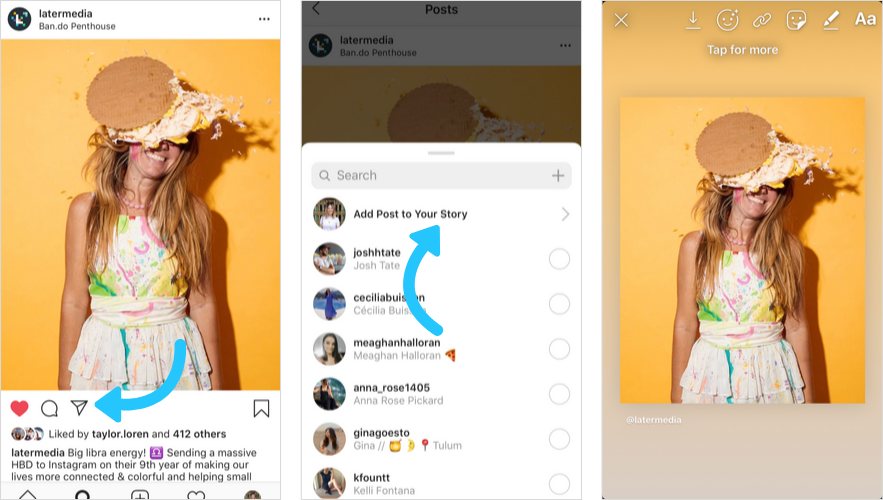
”With the addition of Stories in 2016, Instagram started allowing users with over 10,000 followers to add links directly in their stories. This new feature was a great addition for those looking to drive traffic to their online stores because instead of sending users to your bio link, you can now link a picture to its specific listing for users to click on right then and there.
Instagram Stories is a great place to show a different side of your products outside of your regular feed.
Stories only stay around for 24 hours, so it is a timely method for promoting products, sales, and specials. It is also a great place for giving users a behind-the-scenes glimpse into your brand, showing how a product is to be used, and featuring any user-generated content your customers have shared. Even though Stories fade in 24 hours, you have the option to add them to Highlights on your account page.
Sticking with Instagram
When it comes to selling on Instagram, practice makes perfect. There is no one way to sell more products through Instagram. What works for someone else may not work for you.
The best thing you can do is experiment with posts and call to action to see what kinds of things your followers want to see most. And, remember, great success doesn’t happen overnight. It takes time and patience to see all your hard work pay off!
Page Contents
Every day, millions of people all around the world use Instagram to browse beautiful images from different accounts. In addition, they see hundreds of items they want to purchase, courses they want to take, and programs they need to invest in. All they see is so appealing that makes it virtually difficult to say no. Instagram is undoubtedly an excellent platform for sale and here we’ll show you how to sell on Instagram with PayPal.
The only issue with Instagram is that you cannot add links to Instagram posts. You need to have an Instagram Shoppable account which needs some eligibility requirements. But, what if you are not eligible to have an Instagram account, for instance, due to an insufficient number of followers or living in an unsupported location? How do you convert your Instagram fans into paying customers? You can sell on Instagram using PayPal in a variety of ways. Let’s see how.
Instagram is not the first social media site that comes to mind when it comes to selling goods and services. Instagram appears to be the last contender for gaining new customers, particularly because you are only allowed one link in your account bio, compared to platforms like Facebook and Twitter, which allow hyperlinks in any post. However, if you know how to use Instagram properly, it can be very advantageous.
Here’s how you can set up an Instagram shop and sell products using it with PayPal:
To get started selling stuff on Instagram, you will need a couple of things. You will need to build a professional (business) Instagram account first. Signing up for a business account gives you access to the data and analytics that will help you understand how well your account and posts are doing and how to best market to your followers.
You need goods and an online store to connect to once your business account is set up. You are free to sell whatever you want! Many people open their own online boutiques or sell items that they have handcrafted. So, you are opening an online store on Instagram because you want to sell something. Make sure of the availability of your stock and then start your work.
PayPal is a safe and secure way of transferring money. You can get orders on your Instagram account and ask your customers to transfer the money for you via PayPal. Using PayPal, you no longer have transaction-related and fraud-related worries.
If you are not eligible for Instagram Shoppable or you do not even have a business account, you can use a great tool called MyURLs.Bio that allows you to add your PayPal widget to your Instagram bio.
We have all heard it a million times. “Check out the link in my bio!” says the Instagrammer. “It is available in the link in my bio. ” or simply put, “link in bio.” This tried and tested call to action (CTA) is just what you need to sell your goods and services on Instagram.
Since you can only have one clickable link in your Instagram profile, you cannot add your PayPal widget if you have already added the link to your online shop. So, what should you do?
The solution is using MyURLs.Bio. This Instagram tool allows you to add more than one link to your Instagram bio. As a result, you can have all of your links in a single space. You must actively encourage people to click the link and purchase the product that you offer. In any post that features your product, there has to be a call to action (CTA). Here you will learn how to add a link to your bio.
Add a link to your bio using these steps:
There are two ways you can connect your PayPal to Instagram stories:
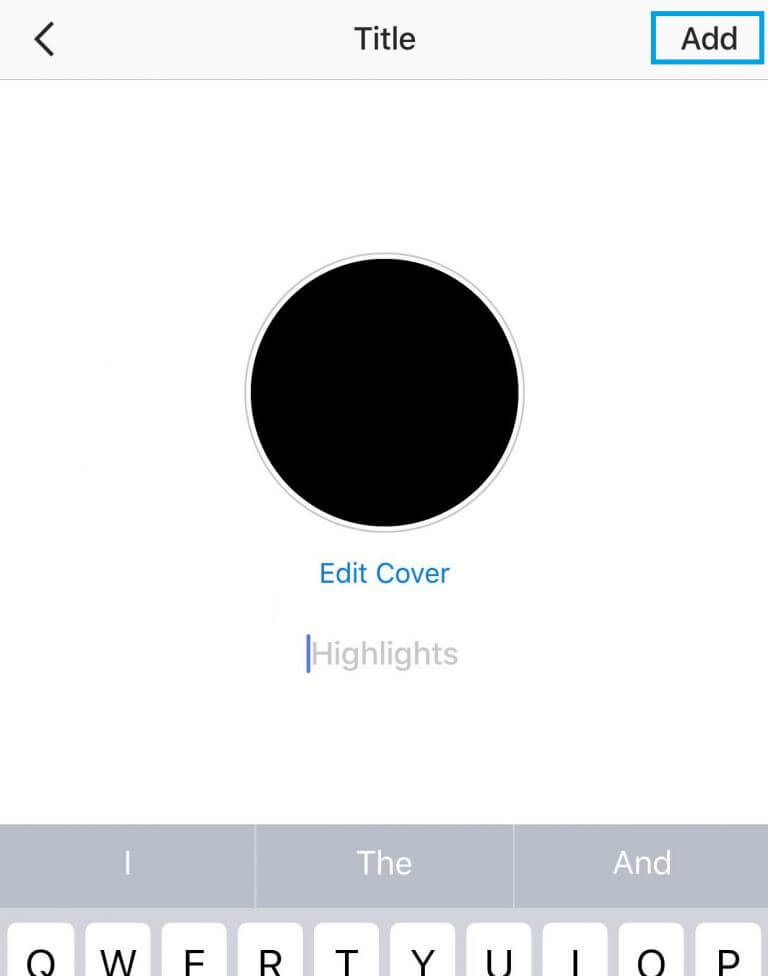
Since Instagram stories are only visible for 24 hours, they are an effective way to promote goods, promotions, and special offers.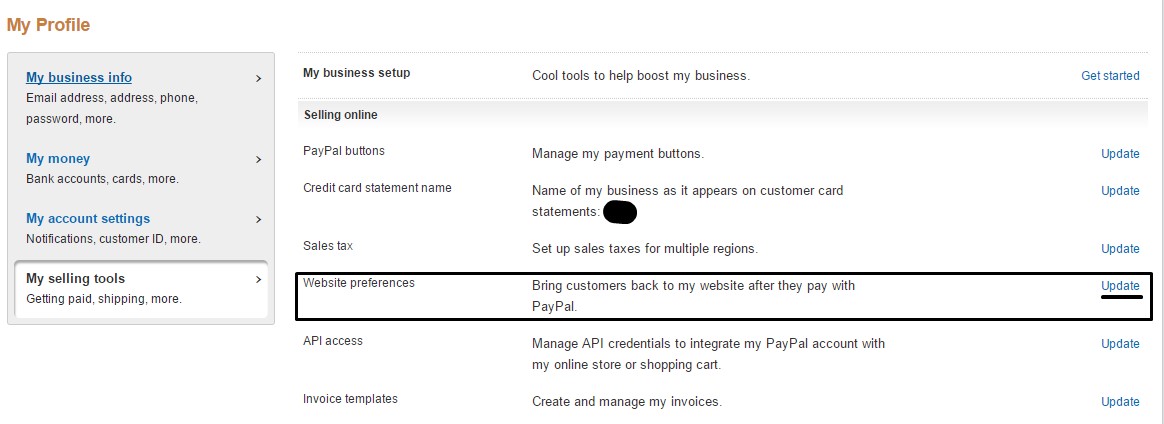 It is also a great way to give users a behind-the-scenes look at your business, demonstrate how to use a product, and highlight any user-generated content (UGC) your customers have shared. Even though stories expire after 24 hours, you can save them to story Highlights to keep them on your profile as long as you wish.
Add a link to your story using these steps:
Here is an example of using ‘Swipe Up’ feature by @tilburymakeup:
Sell on Instagram with PayPalWhen it comes to selling on Instagram, the more you practice the better the results will be. There is no one-size-fits-all approach to increasing product sales on Instagram. It is possible that what works for someone else does not work for you. The best thing you can do is play with different types of posts and calls to action to see what your followers are most interested in. Finally, remember that secure transactions are necessary for mutual trust between you and your customers. Therefore, adding your PayPal widget to your Instagram account is a must.
If you want to promote your Instagram account using official advertising, but don't know how to pay for it, then this article will be extremely useful for you. In it, I will tell you how to pay for advertising on Instagram in two ways (via Facebook and through the Instagram app itself).
Article content:
Today, there are 2 paid advertising options on Instagram:
I must say right away that in this article we will only analyze the payment for targeted advertising, because it is precisely on it that questions arise. With payment for advertising from bloggers or in public, everything is extremely simple, so we will not focus on this. In the second option, all you need is to agree with the blogger or the owner of the public about advertising, and they themselves will tell you how to pay for it.
Useful: Course "Promotion on Instagram from 0 to the first sales"
In the case of the first option, you will need to do everything yourself, and for this you must have at least a minimal idea of targeting.
Targeted advertising is set up and paid either through facebook or through the Instagram app itself. And let's first deal with payment through Facebook.
To pay for targeted advertising, you need to add a payment method in your facebook advertising account.
To do this, go to your Facebook profile and click on the triangle icon in the upper right corner. From the drop-down list, select "Create an advertisement"
You will be taken to your advertising account. Next, open the menu in the upper left corner of the screen.
Select "Billing" from the drop-down list.
Next, go to the payment settings by clicking on the appropriate button in the upper right corner of the screen.
Then click the "Add Payment Method" button.
Choose the payment method that suits you. Facebook suggests adding either a bank card or a PayPal account.
For those who don't know what PayPal is, PayPal is a payment system through which you can pay for your purchases on the Internet. It is quite common in the West, but it also finds its customers here. You can learn more about this system on their website
paypal.com
. You can also register your account there, if you want, of course. By the way, registration is quite simple and does not take much time.
Most often, bank cards are used to pay for advertising.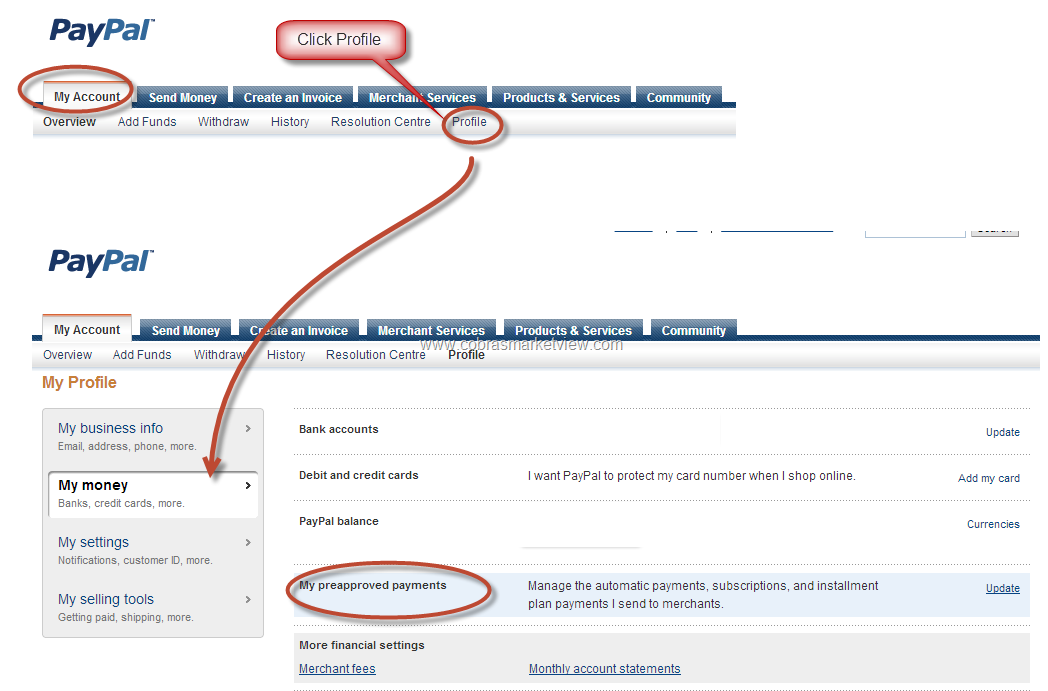 Everyone has them and everyone knows how to use them. By and large, in paypal you also link your card to this payment system. The only difference is that when paying directly with a bank card, the money is debited directly from it.
When paying via PayPal, you are first billed to this payment system, and then you confirm the payment in your account. After that, the money is also debited from your card linked to paypal.
After selecting the desired payment method, click the "Continue" button. Your details will be added to the Facebook advertising account and the amount spent on advertising will be deducted from them.
Important! Keep in mind that money is not debited immediately, but at the end of each month. That is, Instagram gives you the opportunity to run ads "in installments".
In other words, your advertisements are shown first and only then money is debited for them. Therefore, you should not be very happy when you see that your advertising works, and the money for it does not go away. They will leave, but only a little later 😊
And if you see that the money is still not leaving, then check the correctness of the details that you set as a payment method or bank card balance. Perhaps you simply do not have enough funds to write off. In this case, your ads will stop and Facebook won't let you run any more ads until you pay the previous bill.
To be on the safe side, you can set a spending limit for your facebook account. Upon reaching this threshold, your ads will be paused and you will not be charged more than the specified amount. If you want to resume showing, it will be enough just to increase the spending limit or remove it altogether.
It's worth noting that you don't have to add your payment details first and only then create advertisements. When setting up targeting for the first time, at the end facebook will ask you to select the desired payment method and automatically add it to your billing ad account. In the future, if necessary, you can change the payment method in the same Billing.
To pay for ads directly through the Instagram app itself, you first need to create a so-called "Promotion". In fact, this is the same targeted advertising, only it is called a little differently and is configured from your Instagram profile. But this option is only available for business accounts.
I described how to create a promotion in the article about targeting on Instagram, the link to which I gave at the very beginning of the article. Therefore, in order not to repeat myself here, I recommend that you familiarize yourself with it.
In a nutshell, during the promotion setup process, you will also be asked to add the desired payment method. Add it and your ad starts working. And at the end of the month, the spent amount will be deducted from you.
Learn more about advertising and promotions on Instagram in the course “Instagram promotion from scratch”. On the course, you will literally be led by the hand from scratch to the result.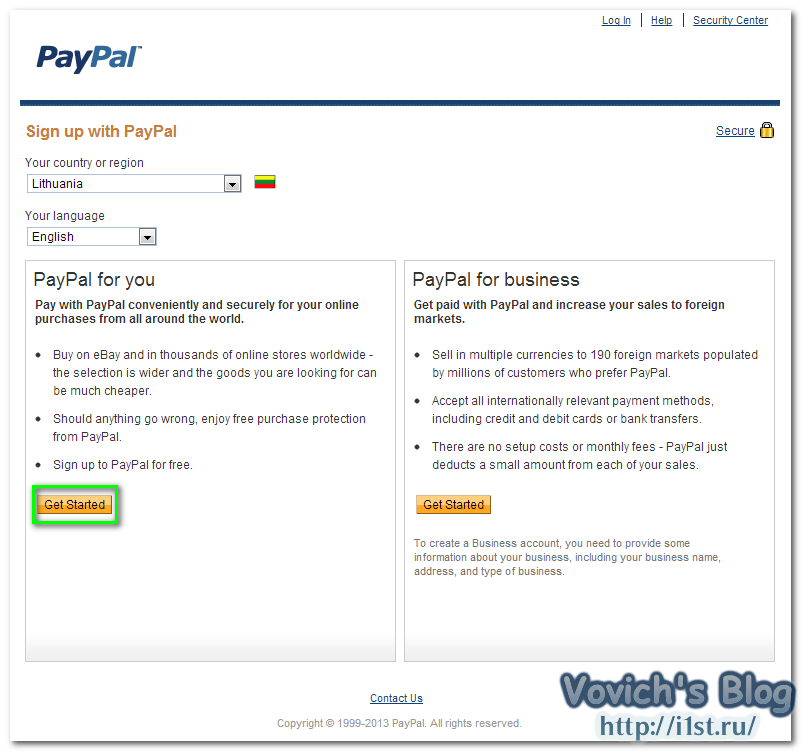
I hope I was able to explain to you how to pay for ads on Instagram. Basically, all you need to do is add a payment method to your ad and run it.
If you don't want to bother, then you can immediately set up targeted advertising without separately adding your details. As I said, if you didn't previously specify how you would pay for your advertisements, you will still be asked to do so at the end. Otherwise, facebook will simply not let you run ads on instagram.
And that's all for me. If the article was useful to you, then rate it and share it with your friends on social networks. networks (buttons below). Do you have any questions? - ask them in the comments.
Author: Georgy Timofeev
The article is relevant for the store version: 10.0 Other versions | 8.5-8.0 | 6. 0 | 5.0
In this article, we will look at how to connect and set up the PayPal payment method.
Registration and settings on the PayPal side
Attention!
To work with PayPal, you need to connect an SSL certificate to the domain.
Note
PayPal works only with legal entities and individual entrepreneurs.
Go to the PayPal site - https://www.paypal.com, then click the "Register" button (Fig. 1).
Figure 1.
Select a corporate account and click on the "Continue" button (Figure 2).
Figure 2.
Enter your email (Figure 3).
Figure 3.
Next, you need to fill out the registration form - enter all the details of the company (Fig. 4.1 and 4. 2). Then click "Agree and continue".
Figure 4.1.
Figure 4.2.
After you sign an agreement with PayPal, your personal account will be available to you. In it, you need to obtain the data necessary for setting up in the online store.
Hover over the gear icon and click on "Account Settings" (fig. 5).
Figure 5.
In the left menu, go to "Website Payments" (Fig. 6.1), and then click on the "Update" button next to the "API Access" parameter (Fig. 6.2).
Figure 6.1.
Figure 6.2.
On the page that opens, click on "API Credential Management" in the "NVP/SOAP API Integration (Classic)" section (Figure 7).
Figure 7.
Next, select the "Request API Signature" option and click the "Confirm Agree and Submit" button (Figure 8).
Figure 8.
After the steps taken, the data will be displayed (Fig. 9), which must be entered in the settings on the side of the online store.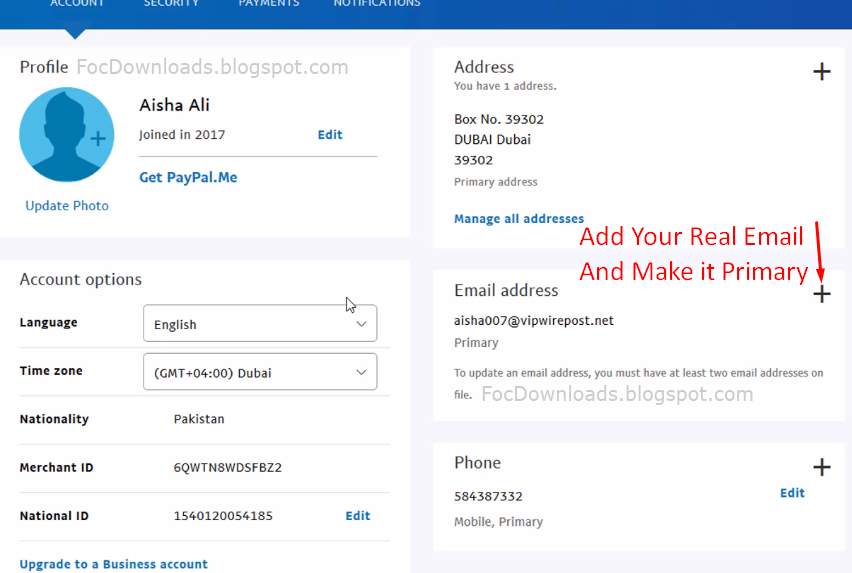 Click Finish.
Figure 9.
Settings on the merchant side
and select the module "PayPalExpressCheckout" (Fig. 11).
Figure 10.
Figure 11.
Next, you need to make the basic settings of the payment method (Fig. 12).
Figure 12.
Previously, this data was generated on the PayPal side (Figure 9).
Your PayPal API account name is the API username.
Password of your PayPal API account - API password.
Electronic signature PayPal API - signature.
To check the payment, check the "Test payment" field and test the payment method. If everything is set up correctly and the test payment has passed, uncheck the "Test payment" checkbox.
Done. We looked at how to connect and set up the PayPal payment method.
Was the article helpful?
Yes Not
Thank you for your feedback.