Can you record Facebook live? How to record Facebook live? Here’re the easiest ways to record Facebook live video on PC, Mac, iOS and Android.
Facebook Live has been around for some time now. It is a video streaming feature allowing people to broadcast from their devices and communicate with audiences in real time. On one hand, you can use it to live stream events, lectures, talks and performances. On the other hand, your viewers can comment, react and share their opinions during the live streaming. Compared to traditional video streams, Facebook Live greatly boosts engagement and helps build closer relationships with followers. With the rapid growth of the feature, people now seek ways to record Facebook live for reviewing offline.
So, can you record Facebook live? The answer is Yes. Here, we would like to show you how to record Facebook live video on PC, Mac, Android, iPhone/iPad easily.
You can record Facebook live on your computer with the help of a professional screen recorder. iTop Screen Recorder is a highly recommended free screen recorder for PC. It enables you to capture everything on the screen as a video on Windows 11, 10, 8 and 7. All streaming videos, both live videos and traditional online videos, can be well ripped from websites.
iTop Screen Recorder offers a free and flawless way to record Facebook live videos on PC. With the support of high quality recording, it is available to capture 1080p and 4K videos for getting vivid images when playback. It is also able to record internal and external sounds so that you can record Facebook live video calls with audio with ease. After finish recording, you can export the recorded Facebook live video to MP4, AVI, MOV and other formats. In addition, an inbuilt video editor can be accessed to enhance your recording. For example, you can cut off unwanted parts, merge several live clips into one, add special effects into the video.
iTop Screen Recorder delivers great performance. Thanks to hardware acceleration and low-CPU usage, it record Facebook live video with no lagging and other troubles. It is pretty easy-to-use as well. Now, let's get how to record a Facebook Live video with it.
Step 1: Download and install iTop Screen Recorder on your computer.
Free Download Buy Now
Step 2: Launch the program. Then, choose recording area. You can record full screen, part of screen or any window.
Step 3: Hit the big REC button or use the F9 hotkey once you are done.
Step 4: After recording, click on the stop button and proceed to My Creations to view the video. Here, you can play the recording immediately or make editing.
You can use the free screen recorder illustrated above to record Facebook live on your Mac PC. More options from this operating system include the Quick Time player. Most people use it to play videos, but it can do more than that. You can use it to capture screen recordings, including how to record Facebook live streams, and how to record Zoom meeting without permission. If you want to use it for Facebook live, follow the following steps:
Step 1: Open the Quick Time player and click on File and then New Screen Recording. Next, join the Facebook live video you would like to record.
Step 2: Use the triangle button to toggle the settings as you wish.
Step 3: Click the red button to start recording Facebook live. You can choose to record the whole screen or a part of it.
Step 4: After recording, use the Stop button to quit. The recorded video will be in MOV format.
Also Read: How to Record Your Screen on Mac >>
If you are not viewing the Facebook live video on your Windows or Mac PC, you can use your Android device to record Facebook live video using the inbuilt screen recorder or a third-party application. For the latter, there are numerous apps on Google Play for that. However, most Android phones and tablets come with an inbuilt recorder to ease the recording task. Here is how to use it to get the recording from Facebook.
Step 1: Access your inbuilt screen recorder from your Android. If there is no shortcut, search the app via the settings.
Step 2: Tap on the recording button to start recording. After that, proceed to the Facebook live video you would like to record.
Step 3: Once you finish recording, hit the stop button.
Step 4: Proceed to access the video via the Gallery or the saved thumbnail in the screen recorder application.
You can also record Facebook Live on your iPhone/iPad using the inbuilt applications. So, just like the Mac, you don’t need to download third-party software. If you have an iPad or iPhone with iOS 11 or later, you can record Facebook live from the device.
Here are the steps you need to get it done:
Step 1: Tap on Settings and then Control Center. Proceed to Customize Controls and find the Screen Recording option. Click on the + button to add it as a shortcut.
Step 2: Swipe the screen downwards on the right to access the control center. The screen recording feature will be there.
Tap on it and then use Start Recording to kick start. Proceed to the Facebook video to continue recording. You can also capture the audio via the microphone option.
Step 3:Tap the red bar and confirm you want to stop recording once done. Go to Photos to access the recorded video.
Facebook live recording helps viewers to grab everything important in a live event, enjoy favorite live performances at any time. iTop Screen Recorder makes it a reality to record Facebook live effortlessly. It is not only powerful for capturing live video and video calls on Facebook, but can deliver video and audio recording with high quality. If you need a solution of how to record Facebook live video on PC, iTop Screen Recorder is a good choice.
Facebook Live is a popular feature of Facebook that allows users to share a live broadcasting video with any content. This feature is used by bloggers, influencers, gamers, online sellers, online teachers, musicians, and more. Furthermore, Facebook Live also became an outlet for business companies to promote their services. But, downloading Facebook Live is not permitted on Facebook. That is why some Facebook users tend to look for an excellent screen recorder to capture their preferred Facebook Live videos. On that note, we will write down all the tools that you can use to record Facebook Live video.
Navigation of Contents
Installation Packaged Size: 61.53MB
Best For: Professional screen recording.
In recording Facebook live videos, we must not compromise the quality. In that case, we present AceThinker Screen Grabber Premium. It boasts a powerful recording feature that lets you capture your Facebook live recording for up to 4K UHD quality. Additionally, it gives you the option to capture your entire screen or just a specific part. Meanwhile, you can insert annotations in real-time if you want to emphasize something on the Facebook live video. Let's follow the steps to learn how to record a Facebook live video with Screen Grabber Premium.
Free Download Secure Download
Free Download Secure Download
To instigate the process of how to record FB live let us start by installing the software on your computer. Hit the "Download" button provided to start. Follow the set-up guide properly until it is successfully installed. After that, open Screen Grabber Premium and also your Facebook account so we can begin.
Next, hit the "3 lines" and choose "Preferences" from the list to open its window. Let us configure some elements like the output format, folder, and more. Set the recording quality to the highest to ensure we'll capture a clear recording. Then, hit the "OK" button to apply these changes.
Next, click "Video Recorder" and activate "System sound" as the audio source. Then, choose whether you'll record it on full screen or just a part of it. After that, click the REC button to initiate the 3-second countdown. Using that allowance, go to the Facebook live video you want to record. Using the same method, you can also record Facebook video chat.
Wait until the live video ends. If that happens, quickly click the "Stop" button also to complete the recording. Then, the playback window will appear. You can quickly preview it here. Lastly, hit the "Save" button to keep the copy from the output folder.
Aside from Facebook, you can also record video from Amazon Prime, Netflix, YouTube, Vimeo, and more. Screen Grabber Premium has a Task Schedule feature that you can use to set a date and time to record your screen automatically. Perfect for recording scheduled Facebook live-stream videos.
Installation Packaged Size: 13MB
Best For: Instant recording with essential features.
AZ Screen Recorder is one of the best apps on Android that can record Facebook live-stream with ease. This app is easy to use and has an overlay button appearing on your screen, and it does not interfere with the recording. Aside from Facebook, this application can also record YouTube live and other videos available online. In fact, this tool has a built-in video editor that allows you to trim, crop, resize, zoom in and out, and cut the video. You can also include your front camera while recording Facebook Live in real-time. It can record your Android screen without any time limit and watermarks in it. On the other hand, we are going to show you how to record a live stream on Facebook with this tool below.
User guide
Installation Packaged Size: 28.5MB
Best For: Beginner who are looking for straightforward screen recorder.
AirShou is a screen recorder for Facebook Live that works on iOS 9 and higher.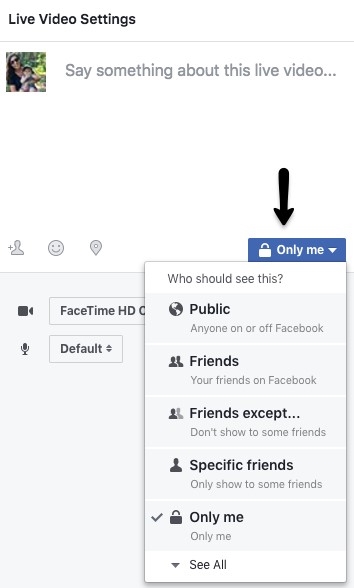 This app can provide you with a clear recorded video while running with minimal processing power. This tool's recorded videos are saved directly on your camera roll. It is being used by professionals that need to record a review about an iOS app. Also, it allows you to include mic recording for narrations. Moreover, to understand how to record live video on Facebook with this tool, see the steps below.
User guide
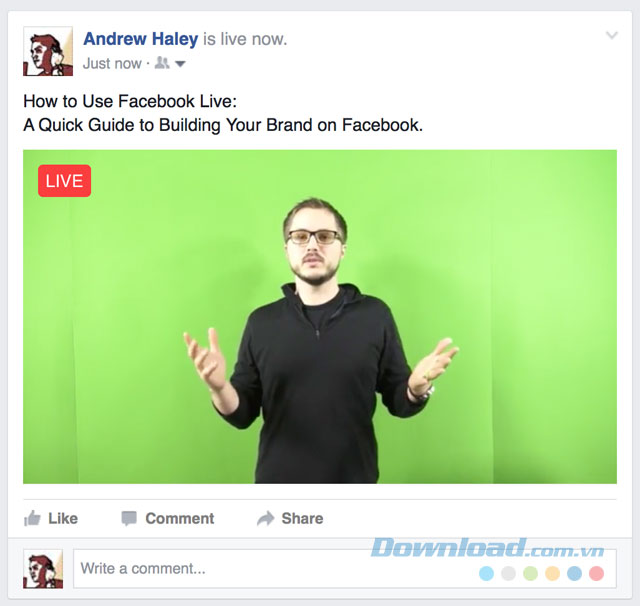
First, launch the Facebook app on your mobile device. Then, go to the Page, Group, Profile, or Event form where you wish to share your live broadcast. At the bottom of the post composer, press the "Live" button. Next, fill up the blanks with s description of your video. You can also add an activity or feeling, tag friends, check in to a specific location to your post. Once done, tap the "Start Live Video" button to start live streaming. Tap on the "Finish" button when you want to end your live streaming.
First of all, log in using your personal Facebook account. Then, click "What's on your mind, [Your Name]?" at the top of your News Feed. Next, click the three-dots symbol, then "Live Video," and you will be sent to the "Live Producer. " To go live, write a description of your live video and click "Go Live" in the bottom left corner.
Live With is a Facebook Live built-in co-broadcasting feature. It allows you to invite another person into your live broadcast and stream to an audience. You can utilize this tool to bring in a guest speaker, interview an expert, or collaborate with a fellow artist, among other things. As the host, you can invite several guests to go live with you during a mobile broadcast from your Page or profile. Take note that Live With is not available on desktop or in Live Producer at this time.
On Facebook, live broadcasts are live broadcasts that users can start through a personal profile, group or public page.
Table of Table of Contents
The social network has recommendations for users who plan to launch a live broadcast. To run from the computer version, you need to connect one of the streaming applications capable of playing sound.
Therefore, it is easier to connect to broadcasting functions through the mobile application.
Two ways to run:
OBS STUDIO is a free program for launching streams on social networks. The disadvantage is that setting up individual components can be difficult: add camera data, select a stream for broadcasting
From the mobile version, you can create a separate room for chatting with friends or move on to adding a shared broadcast.
How to create from a personal page:
The user can specify which of the page visitors can view and connect.
A shared room on Facebook is a group chat where the profile owner can invite up to 50 people. It is possible to create through the publication of an open page and through a personal one. By logging into your account, the user will see the inscription: "Common room" and friends who are currently online. nine0003
How to connect:
If the users to whom the applications were sent answered in the affirmative, the broadcast will start for the specified people. The creator can edit the list of invitees: delete or add new ones. In such a chat they exchange messages, photos. nine0003
It's just as easy to use Facebook Live from a public profile as it is from a personal one. The owner needs to go to their account and select: "Create a post".
How to add a stream:
In contrast to the personal profile method, the public broadcast will be started on behalf of the community. The same features are available in and in groups, where subscribers can connect to the live broadcast of the administration. nine0003
The feature of broadcasting with two hosts has been removed by the social network. In 2017, a separate option appeared on iOS devices that allows you to stream from two devices at the same time. At the moment, it has been moved to Instagram, and only rooms remain on Facebook.
Solve the double broadcast problem:
The account owner can create posts through a public profile or set up an event: "Event".
Invite presenters to the page:
If the author enters certain people as hosts, they can edit the information and also go live. But this is a separate mode: it will not work at the same time.
During live broadcasts, you can not use obscene language, show private parts of the body or prohibited products.
Basic rules and requirements:

Possibilities of the broadcaster:
At the same time, the host must also comply with the requirements of the social network and not send offensive comments. If the rules are violated more than three times, the profile owner will be denied the opportunity to create live broadcasts in the future.
The social network can block broadcasts as a separate option (during maintenance) or for an individual user. nine0003
Other reasons why the feature is not available:
If the Internet speed is low or there is no stable connection - by turning on “Live” a notification will appear: “Unable to start. Try later". nine0003
Also, the ability to work with broadcasts is affected by the amount of internal memory and RAM. If the owner of the smartphone has turned on two applications where the camera is running, Facebook will notify you that you need to switch to start live broadcasting. Or completely close the utility that interferes with the work with the broadcast. Before starting, it is better to clear the list of active processes, leaving only Facebook.
Until recently, live streaming on Facebook was only possible using the mobile app. But now this function is also available from a computer, which is very convenient for conducting online webinars. Live broadcast can be started:
Consider the process of launching a broadcast from different devices.
First you need to download the social network we need. In our case, this is Facebook. After you install the required application, launch it. To do this, click on the Facebook icon on the phone screen. We immediately get to our page. We click on the white field "What are you thinking about", several lines appear. Click on the red "Play" button. nine0003
The broadcast field opens, the camera on your smartphone turns on. At the bottom of the screen we see the line "Describe your live broadcast ...". There you can enter the name of the broadcast and any other important information about your live broadcast. When everything is ready, click the "On air" button in the lower right corner of the screen. A countdown appears, after 3 seconds your live broadcast will start.
It's important to know that your video will still be available on your Facebook page after you stop streaming. When the broadcast starts, the inscription “You are on the air! We are gathering an audience for you.", "Go on. We invite your friends to join the broadcast. Soon subscribers will connect to your broadcast. In order to end the broadcast, click on the "Finish" button in the lower left corner of the screen. nine0003
Important: live broadcast cannot be shorter than 4 seconds.
Starting a live broadcast on iPhone is no more difficult than on Android. Install the desired social network through the AppStore application. Once the app has downloaded, click on its icon. Let's log in. At the top we see a white field “What's new with you?”, And at the bottom left of this inscription there is a red “Live broadcast” button. We click on it.
A screen appears with the camera already on. Click on the inscription "Tap to add a description ...". Here you can enter the name of your broadcast. Next, to start broadcasting, click on the "Start Live Broadcast" button. After a three second countdown, the broadcast will start. nine0003
To end the broadcast, click the End Broadcast button at the bottom of the screen. Facebook will prompt you to save or delete the video. If you save the broadcast, this video will appear on your page and will be available to all users (if you have access to the page).
In order to conduct a live broadcast through the computer, go to Live Producer (we type in the name in the browser). You will see a page with selection windows where to broadcast live. Select the desired window and click the "Set up broadcast" button. Here you need to choose whether you will broadcast now or want to schedule the broadcast for a specific date and time. nine0003
In the "Broadcast settings" section, select the video source. You can use the camera of your PC or laptop. When configured, click "Next". In the "Create publication" section, you can write the name of the broadcast, set up audience selection. Also here you can mark friends or places, choose your mood or action. When set up, click "Finish". If all the settings are ready, click the "Go Live" button in the lower left corner of the screen.
In order to save the live broadcast on your Facebook, after the broadcast is over, click on the "Save broadcast" button that appears. Next, you can edit your video. If you want to change the preview of your video, click "Edit Post" in the top right corner. Next, you can choose a thumbnail from the proposed frames, or upload your own image.
When the saved broadcast settings are ready, click "Save" in the lower right corner. The video will appear on your Facebook page. nine0003
You need to open the application to start live streaming from your personal Facebook profile. Once open, click on the white area "What are you thinking about?". Select the red "Play" button. In the line on the screen, enter a description of your broadcast. Add a title. Click on the "Available to all" button, select the audience. Next - "Done".
Click on the "Publish and Story" button, enable or disable the creation of a publication after the broadcast ends. If you disable the option, then after the end of the broadcast, it will be unavailable. nine0003
Press the "On air" button. Within three seconds, your broadcast will be active. After the start of the broadcast, click on the little man icon to invite friends directly to your broadcast. When you want to end the broadcast, click the "End broadcast" button in the lower right corner of the screen.
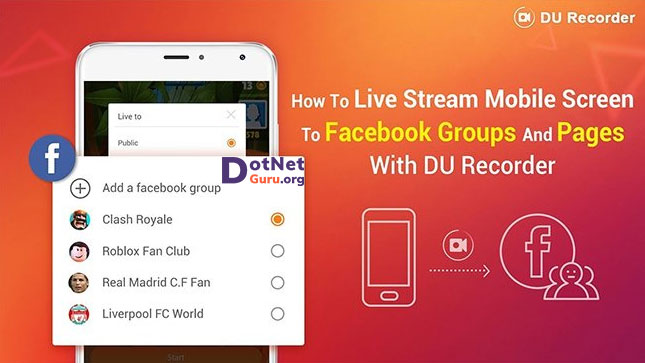
Open your Facebook app and click the Menu button in the top right corner. There you can select the business page/group/event you need. Open it, scroll down to the "Publications" section. Click on the red 'Play' button. nine0003
Important: If your business account is linked to Business Manager, you need to install the Facebook Page Manager app.
Without it, you will not be able to conduct online broadcasts.
Next, you need to enter the name of the broadcast and its description. This is done on the screen itself. The line will be centered, just touch it once. Next, you will be able to enter what you need. If your business is local, you can add the address of your business page to the description. To do this, click on the geolocation icon in the lower left corner of the screen. nine0003
Target your future live broadcast by clicking on the Location Restriction button. Next, you can specify the gender, age, and location of your future audience. After the settings, access to the application will be given to those users who will fit the parameters you specified.
When the settings are complete, click the blue "Start Broadcast" button at the bottom right. In three seconds, your broadcast will be available to users. The main difference between broadcasting from a business account and broadcasting from a personal account is that the former can include all Facebook users in general. Whereas the live broadcast from the personal page will be available to your subscribers and friends of subscribers (this moment is regulated in the broadcast settings from any device). nine0003
First you need to download OBS (Open Broadcaster Software) Studio. Choose a button for Windows or for Mac. In order to download this program, click the green Download Installer button in the lower right corner. Download it to your computer and install it like a regular program that you have on your computer. When the program has downloaded, double-click on it with the left mouse button. Then the download starts. nine0003
Done, click Finish. We get acquainted with the license agreement, click "OK". After that, you need to configure the program. Click on the + (plus) at the bottom under the word "Sources", then - "Video capture device" - "Create new" - "OK".
After configuring the program, we can see ourselves on the screen (do not forget to check that your webcam is working and active), but in a small size, in the upper left corner. In order to be able to broadcast, you must apply the standard version of the screen settings. To do this, click on the gear at the bottom of the screen. nine0003
In the "Resolution/Frame Rate" column, select "Custom" instead of "Device Defaults". Further, in the column "Resolution" we compare 640x480. Click "OK". After that, with the cursor, expand the screen to the required one.
Next, go to Facebook. We can arrange a live broadcast both from our personal FB page, and from the group page, business page.
Click on the "Publishing Tools" button. On the left, you will see the "Video Gallery" button. Here we see that the button "On Air" has appeared. Click it, and now we can create a live broadcast directly from your professional video equipment. To do this, you need to copy the “Stream Key”, return to the previously installed OBS Studio program. nine0003
In the upper left corner, click on the button "File" - "Settings" - "Broadcast". In the "Broadcasting" section, paste the stream key. In the "Service" column, select the line Facebook live. Next - "Apply" - "OK". In the lower right corner, look for the button "Start broadcasting", click.
Now for the second way to broadcast live on Facebook. To get started, you need to go to this page.
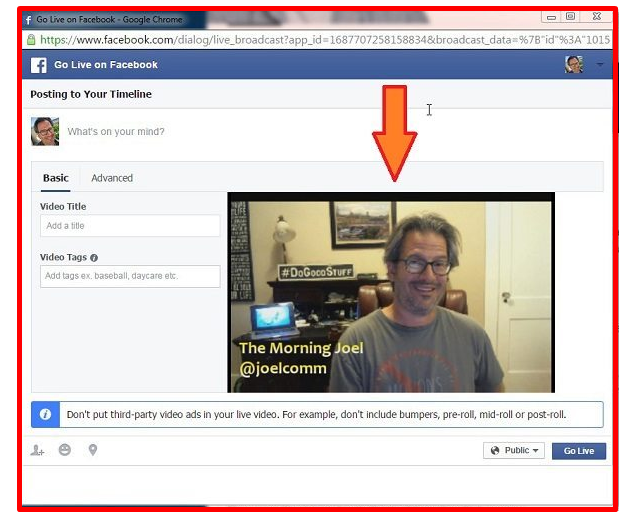
Scroll down the page and find the blue "Broadcast on Facebook Live" button. We press it, the window “Live on Facebook” drops out to us. nine0003
In the "Share to your timeline" section, you can choose one of four options. Choose, for example, "Share in your timeline" - "Next". We will open the Facebook settings page, we will have to copy the “Stream Key”.
Next, open "File" - "Settings" - "Broadcasts" in OBS Studio and change the stream key. "Apply" - "OK".
Then, on the main screen of OBS Studio, click the "Start broadcast" button in the lower right corner. Now we see that our broadcast has begun. In the window with the ether, it is worth removing the sound so that there is no bifurcation of the sound. At the top of the broadcast there is a yellow inscription "Preview". This means that for now we only see ourselves in preview mode. nine0003
Scrolling down a little, we see the "Available to all" button (by clicking on it, you can choose who will watch your broadcast). Having decided on the audience, press the button "On air".
Then, go to the main (main) page of your Facebook and see that the broadcast has begun. The number of viewers will be displayed next. Under the video, you can see all the comments that users watching your broadcast will leave. When the broadcast ends, your video will be available for viewing on the Facebook page. nine0257 To stop broadcasting, in OBS Studio you need to click the "Stop Broadcasting" button in the lower right corner.
We go to the Facebook page where we want to create a live broadcast. Click the Publishing Tools button at the top of the page. Next, on the left, click the "Video Gallery" button and click the "On Air" button. On the page that appears, find the line "Stream key" and copy it. This key will need to be inserted into the appropriate window in the OBS Studio program. nine0003
Further on the right in the line "Tell us about this live broadcast" we can leave a description of the broadcast. In the line "Name" we write the name of the broadcast (if you wish, you can write tags in the column "Tags"). Now we go down below and click the "Schedule" button. The “Schedule the broadcast” window appears, click on the calendar. We set the date and time we need. Upload an image for the announcement if you wish. To save the selected image, click "Save Changes" - "Schedule".
You can schedule a live broadcast no earlier than 10 minutes after the start of scheduling. On the main page in the "Publications" section, the scheduled broadcast will be displayed. If suddenly you decide to change something in the scheduled broadcast, then you can click on the button "Administrator only: edit your data.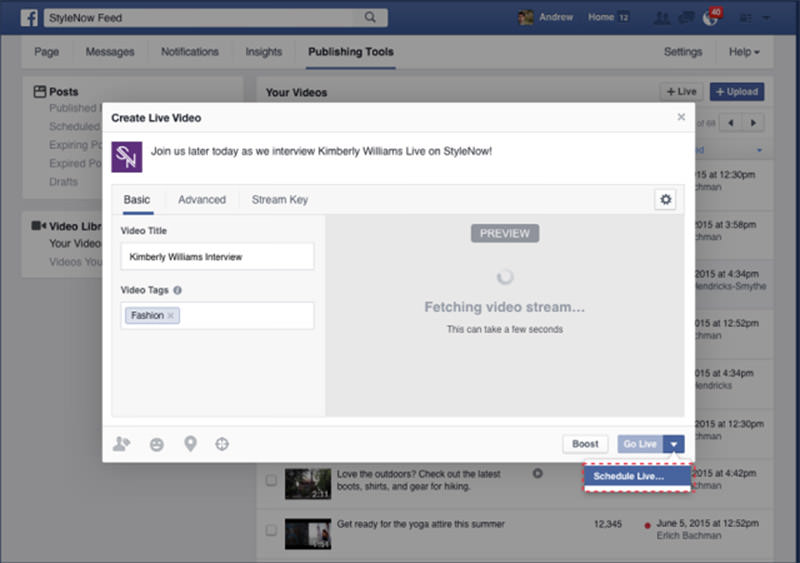 " You will see a window where you can change everything you need. After making changes, click the "Save" button. nine0003
3 minutes before the start of your broadcast, all your readers and subscribers will be notified of the scheduled broadcast. You will have a countdown to the start of the broadcast. Your viewers/subscribers will be able to watch your live stream from any device they have Facebook installed on.
If you suddenly miss your broadcast, that is, did not have time to connect to it for some reason, the link and stream key will be valid for 7 minutes. Then the broadcast will not be considered valid. Then you will have to repeat all the steps that are described above. nine0003
During a live broadcast, there is constant interaction with the viewers of the broadcast. Viewers write comments and ask questions. You need to read and respond to them in order to retain your audience. If you are not interested in comments and reactions, you can hide them from your stream. In order to hide comments and reactions, you need to swipe right on the screen during the broadcast. Swipe left to bring back comments and reactions. nine0003
You also have the option to enable silent mode. To do this, click on the video and select the icon in the form of a crossed out circle in the dialog in the upper right corner of the screen. To return comments and reactions, click on this icon again. This instruction is the same for both iPhone users and Android users.
If you also want to write something in the comments to your broadcast, to do this, open the "Comments" line and write the desired text. Then click the "Submit" button. nine0003
To edit a live broadcast on Facebook, you need to go to Facebook.com/lookback. Then click on the "Edit" button in the upper right corner of the screen. You can then use the checkmarks on your photos and other stories to show them in your video. Select those photos that you want to add/remove to/from your movie. The video will update automatically.
When you're done editing, click Refresh or Share Your Movie above the video player. Your changes will be saved. nine0003
Facebook has a number of requirements for users to live stream from their Facebook pages:
You can analyze Facebook live performance in the same way as in simple videos, but there are some nuances. This feature is especially important for business accounts. In order to view the statistics of the broadcast, click on the "Statistics" button. Next, select the video you want and click on it.
What exactly can you learn by analyzing the performance of a Facebook broadcast? nine0003