You can customize your Instagram Story in a number of ways, including changing the background color.
Specifically, there's two major ways to change your Story's background color. Which one you use will depend on whether you want to include a photo or video with your Story, or just text and stickers.
Here's how to change your Instagram Story background color in both ways.
How to change your Instagram Story background color if it has an image or videoMost Instagram Stories include a picture. But unless that picture fills up the entire screen, there's going to be some blank spaces in the background.
You can change this background color using the Draw tool. This method is a bit imprecise, but it does work, and lets you pick pretty much any color you want.
1. Open Instagram and tap the Your story icon in the top-left, then select the photo or video that you want to upload.
2. Tap the three dot icon in the top-right corner, then select Draw.
You'll find "Draw" on the page that lets you choose who can see your Story. Meta; William Antonelli/Insider3. Toolbars will appear at the top and bottom of the screen. Tap the left-most option in the top toolbar (it looks like a pencil tip), and pick the color that you want from the bottom toolbar.
Quick tip: You can also choose the highlighter option in the middle of the top toolbar if you want your background to be transparent. And if the color you want isn't in the bottom toolbar, you can use the dropper tool on the left to choose a color directly from your photo or video.
4. Tap and hold your finger anywhere on the screen. After a second, the entire screen will fill with the color you chose.
5. Now tap the right-most option in the top toolbar to turn on the eraser. Drag your finger across the screen to wipe away the color covering your photo or video.
This can be a messy process, so go slow and remember to use the Undo button in the top-left. You can also use the slider on the left to make your brush bigger or smaller.
Once you're done, go ahead and add any stickers or captions that you want, then post it.
Quick tip: Alternatively, you can save a picture to your phone that has the background color that you want, and then upload that to your Story. You'll still be able to add text and other stickers to it.
How to change your Instagram Story background color with the Create toolThe other way that most people make Instagram Stories is using the Create tool. This feature gives you templates that you can use to quickly post a poll, timer, GIF, and more. The big difference is that it doesn't let you include photos or videos.
And unlike the method above, the Create tool has a feature that lets you change background colors built right into it. Here's how to use it.
1. Open Instagram and swipe to the right to turn on the camera, and then select the Aa Create option on the left.
"Create" should be the first option. Meta; William Antonelli/Insider2. A page will appear where you can pick your Story's template. You'll also notice a small bubble appear in the bottom-right corner — tap this bubble to cycle through background colors.
3. When you find one that you like, choose your Story's template and fill it all out. Once you're ready, post it.
You can also use the Draw tool method here too. Once you've finished making your Story and get to the page that lets you choose who can see it, tap the three dot icon in the top-right and select Draw. All the same steps work.
William Antonelli
Tech Reporter for Insider Reviews
William Antonelli (he/she/they) is a writer, editor, and organizer based in New York City. As a founding member of the Reference team, he helped grow Tech Reference (now part of Insider Reviews) from humble beginnings into a juggernaut that attracts over 20 million visits a month. Outside of Insider, his writing has appeared in publications like Polygon, The Outline, Kotaku, and more. He's also a go-to source for tech analysis on channels like Newsy, Cheddar, and NewsNation. You can find him on Twitter @DubsRewatcher, or reach him by email at [email protected].
Read moreRead less
Alexandra | Apr 22, 2021
Want to add a background photo when sharing a feed post in your Instagram Story?
There are 3 ways to do it:
Let’s have a look at each trick.
Click here to use it
The first way to add a background picture on Instagram Story when sharing a post is to use the Screenshot Trick.
It’s super fast to do, and the final result looks like this:
Click here to see the video tutorial.
Here’s how to do it:
Done!
And yes, the post is clickable / tappable. You can tap on it and people will be able to check the post in your feed.
Want an easier way to change the background picture without covering the photo?
Use the 2 Finger Trick.
Here’s how to do it:
And you’re done!
Click here to watch the video tutorial.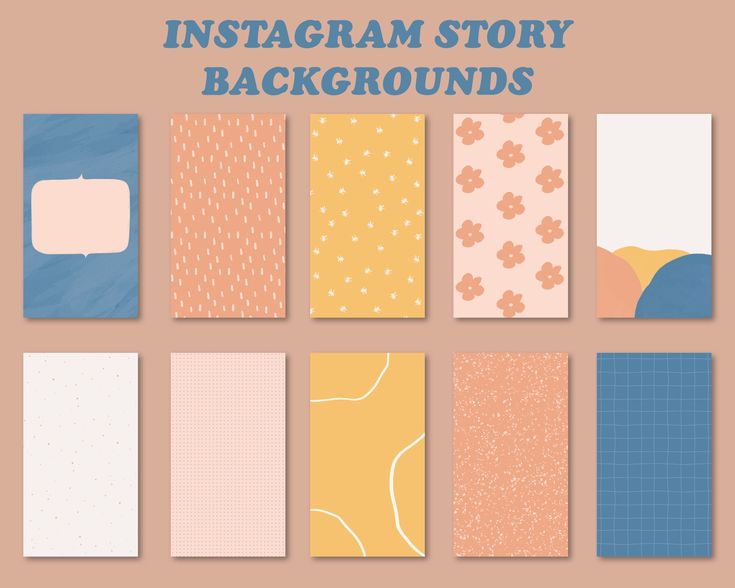
How to change the background photo in your Insta Stories with an Android phone?
Not all Android phones have the “Photo Sticker” feature or the “Copy image” feature on Instagram yet.
So if you don’t have it, here is how to add a background picture in your Stories when you share a post from your feed.
It might look long, but trust me, it’s super fast and it only takes a few seconds, and you’ll get addicted to this trick.
Click here to watch the video tutorial.
Here are the steps:
And you’re done!
If you want to change the background color without covering the photo, click here.
Was it helpful?
Let me know in the comments if you have any questions!
More tips:
Click here to use it
Users of Instagram have the ability to share the usual story , a memory or a story shared with another person.
If there is someone who doesn't know how to change the background, or if you want to customize your Instagram stories with a background that catches the attention of followers, Infobae will tell you how to do it easily with colors or backgrounds from gallery.
It's a lot easier than you might think because all you have to do is start publishing and then set it up.
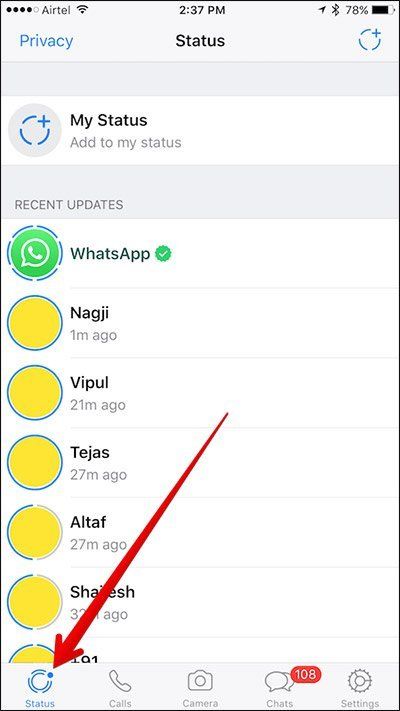
If you have "Memories" turned on, you can access and share them at any time. Just go to profile to see clock, file or archive icons.
In this section you can see all past stories. If the app warns that there's something special for the day, or if you want to share a memory just for the sake of it, you can easily do so from there.
Personalizar fondos en Instagram. (foto: Instagram/Jose Arana)When posting a memory post, the color is set to auto, and all you have to do is open the story with the post to download, tap three dots, tap "Draw" and go to selection tool .
Personalizar fondos en Instagram. (foto: Instagram/Jose Arana) If you want to add an image to your memories, you can do so by sharing the post with of the Stickers tool. So you can add one image next to another, and if you enlarge the image enough, anything that allows you to enlarge it will appear in the background.
The image touched at the end will be the overlay image . In this case, it will take a little skill to place the image on the background. It is best to put colored background.
If you want to change the background of your shared story, the first thing to do is go to Instagram and select a post to post.
Now click on three dots at the top of the screen. A selection of the appropriate instrument and multicolor will appear.
In this step, select the instrument you want to place in the background by holding the screen for a few seconds anywhere. If this is done, the background will be changed. You can then share the post as a story to account and turn on the background.
Personalizar fondos en Instagram. (photo: Instagram/Jose Arana)This can also be done by adding a background image from the photo library from post.
The steps are simple. Just click Add post to your story and when you're ready, you need to move it around a bit.
Click on the " Stickers " icon and click on the option shown in the photo of to access the gallery of the phone or camera.
Personalizar fondos en Instagram. (photo: Instagram/Jose Arana)You just need to select the image you want to use as the background and now enlarge it so that it covers almost the whole screen so you can see the post you want to share.
While still pressing , tap the post you want to share with another finger. And yes, as mentioned above, the skill is necessary to get the expected results.
Personalizar fondos en Instagram. (foto: Instagram/Jose Arana)If you want to customize the background of any Instagram story, you must first create a story and select the image you want to use in the background from the smartphone roll .
The image you want to include in the main post will be added using the " Stickers " tool in the section mentioned above (image with "+").
Once you do this, you will find that the main story image will be in the center. You can resize it, move it, or do whatever you want to customize the story to your liking.
Personalizar fondos en Instagram. (foto: Instagram/Jose Arana)KEEP READING
Man goes viral on social media after carrying cross with crates of beer
New scam: Instagram photos stolen to link to XXX platforms similar to OnlyFans
How to find out the last location of an Android phone or iPhone if it was stolen, even if it is turned off
Stories may soon become the main type of content on Instagram, but with the number of stories, competition is growing. You need to come up with new ideas for stories and ways to design content to stand out.
We have already given 16 examples of text design in posts, and in this article we will offer some ideas for creating an unusual background using the standard story editor.
Reduce the budget of targeted and contextual advertising with click.ru
Click.ru will return up to 15% of advertising costs.
Cut the budget >> Advertising
Read also : Who is a story maker and how to become one
By default, in the story editor, you can shoot a video or make static stories with a background. The background can be a picture from your phone or a gradient.
To add your picture, click on the square in the lower left corner and select a photo from the gallery.
To use a gradient fill, click Create at the bottom. We will talk more about the gradient in more detail.
Sometimes a picture or a built-in gradient may not be enough for a spectacular story. How else can you transform the background using the editor?
Sometimes a simple plain background may be needed, for example to emphasize text. First you need to add a picture from the gallery as a background (it is written above how). Then go to the drawing tool - the wavy line icon.
Select the leftmost marker icon, and at the bottom select the desired color, for example, green. Or you can use the eyedropper tool.
Then pinch any place on the photo with your finger and hold until the background becomes solid. In the same way, you can change the color if you change your mind - select another one from the palette and again pinch the screen with your finger until the color changes.
Now you can add the desired text, photo or GIF. You can use this method for the background of current stories.
P.S. If the proposed palette is not enough, then you can hold down any color and a more diverse one will appear.
This trick can be used to add design elements. We take a photo from the gallery or make a solid background. Click on the Add Text icon. We put a point (you can use another sign, most importantly, a small one), then 10-15 spaces and one more point. Add a background to the text - icon A.
It turns out a colored rectangle.
Now stretch and move the rectangle to the corner.
You can do this several times, making rectangles of different colors, experimenting with shapes. It turns out a frame.
P.S. The more spaces, the less you need to stretch the rectangle, and the stripe is already obtained.
We already wrote above that the gradient is a standard editor feature. When we click "Create", a gradient opens, to change it, you need to click on the gradient icon in the lower right corner.
There are 5 types of gradient in the editor.
If you want to make your own gradient, you can use the trick. Click on the sticker icon. Scroll to the emoji and select the one that suits us in color.
Stretch the emoji to make a color.
Do the same with the other emoji and then combine them.
Of course, the transition here is not as smooth as in standard gradients, but you can experiment. It is better to choose solid-color emoji so that dead pixels are not very conspicuous. Alternatively, you can arrange activities or games in stories like this.
You can use not only emojis, but also gifs or any PNG image from the Internet.
Another way is to use text boxes (previous point). We make a solid background - choose the main color. Then we make a rectangle from the text of a different color. It is better to choose a color from an expanded palette.
Now enlarge the rectangle and tilt it to the desired angle. It remains to add text. This method is better than the GIF gradient, as it has a smoother color transition.
Semi-transparent background is useful if you do not want to use just a picture or a solid background. Adding a neutral picture from the gallery. Go to the drawing tool (wavy line icon) and find the highlight marker there.
Select it, select the desired color in the palette at the bottom (you can use the pipette) and pinch the screen with your finger until a translucent fill appears. The principle is the same as for a transparent background, only there we used a regular marker. Then you can add an inscription and other elements.
P.S. Unfortunately, the percentage of transparency cannot be adjusted, and sometimes the translucent fill flies off and changes to a solid color.
It's interesting : How to set up ads in Instagram stories
For this life hack, we need coolsymbol.com. Here you can find interesting symbols and fonts and insert them into your story as text. Yes, new beautiful fonts have recently appeared in the story editor, but they still do not suit many. So let's go to the site.
Scroll down and select the desired character. Click on the symbol, it is saved to the clipboard.
Now we need to add text to the story (we add all the characters from this site like this). Click on the Text tool (the icon with the letters Aa), pinch the screen with your finger so that the “Paste” button appears, click on it and paste the copied character.
The pattern can be enlarged, duplicated and moved to the right place.
You can change the color of the pattern because it is recognized as text in the editor. Click on it and select the desired text from the palette.
Depending on the type of text, the symbol may change. True, in this case, the pattern again becomes small, it must again be enlarged and moved to the right place. And the size is limited - if with the classic style you can increase the pattern to the maximum, then in the rest the increase is negligible.
Symbols can be used as frames and patterns for photos, and can also be used to make a pattern.
You can make an interesting pattern with an eraser — first select a photo and apply a solid background over it (the very first life hack). Then we go to coolsymbol.com and select the desired pattern for the frame, for example, a square (described in the previous paragraph). We impose a square in the place where it will be necessary to develop part of the photo, for example, where the face is.
Now take the eraser tool (for this we go back to the drawing panel) and click on the eraser icon. Erase part of the photo. It turns out such a sticker effect. Can be used to arrange a swipe in stories.
Here we go back to coolsymbol.com. First, we make a solid background, then go to coolsymbol and select the appropriate pattern for the pattern. Copy, paste as text, select the desired color.
Now zoom in and do it a few times until the whole background is filled with squares. Elements cannot be copied into stories, so each square must be inserted as a separate text and then enlarged / moved. You can make smaller squares so that the lines are not as thick, but then you need more squares. Change the color of the background and squares until you get what you need.
Usage example : This is how you can make a background for a story where you want to share a post.
You can make a doodle effect using markers. Add a photo from the gallery to the background, then go into drawing mode and select a marker. You can use plain or neon.
Select the thickness of the brush (slider on the left). You need subtle touches. And we start drawing.
Open a photo in the gallery and draw any pattern. For example, coils. You can choose from a regular marker, a neon marker, or a highlighter marker. Neon looks better. The main thing is that the brush should be smaller.
Then very carefully erase what comes in the photo (it may not work the first time). As a result, you need to achieve this effect:
You can experiment, everything is limited by your imagination and ability to draw. The drawing tool in stories takes some getting used to.
Secret story function
You can apply animated and static effects on top of photos or videos in stories, for example, glitch effect, mosaic, multiple faces, duotone, bokeh, golden dust.