By Alice Kotlyarenko
Updated
Stickers are a great way to have more fun with your friends. Learn how to make your own Telegram stickers!
Telegram stickers are a universe of their own, with people having entire conversations in cool graphics, trashy memes, or movie quotes. And it's largely possible because Telegram allows you to make your own stickers.
The best thing about making Telegram stickers is that you don't have to have a developer account or pass a long and painful review. You just send images to a bot to create a Telegram sticker.
So, if you've been meaning to do something with all the inside jokes that you and your friends have accumulated, follow this guide explaining how to make Telegram stickers.
You don't have to be a professional graphic designer to create Telegram stickers. If you are, that's great—now you've got another free way for you to promote your art. But if you're not, don't let that stop you.
Some of the best Telegram stickers are hilarious meme-like creations, thrown together out of quotes and photos. Even basic design skills will suffice for those.
The stickers you create have to follow unified design requirements. Don't worry, though, because these are super simple:
It's important to understand that using things like movie quotes to create your stickers is a copyright infringement. Yes, that's exactly how memes are made, but unlike a meme, your sticker pack will likely be taken off Telegram if the copyright owner complains.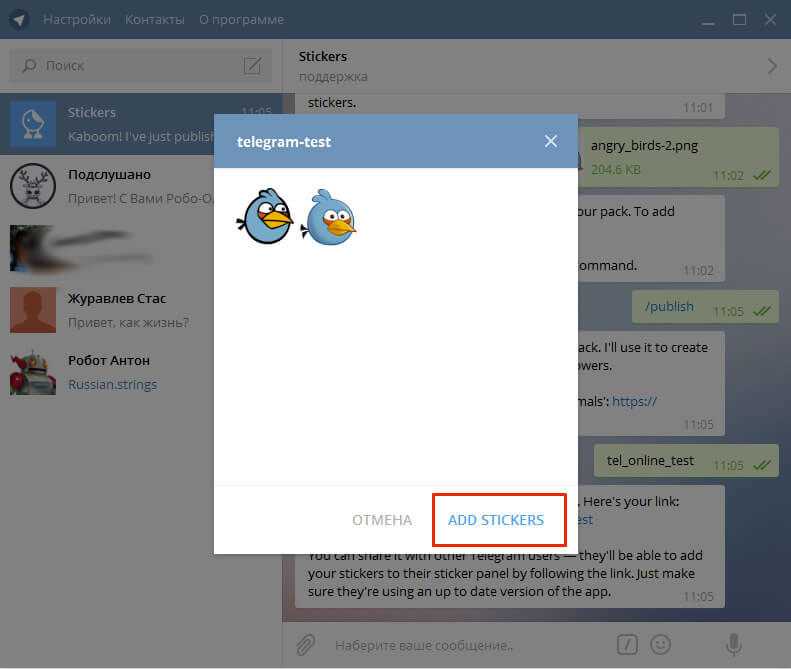 That said, there seems to be no copyright check when you upload your designs.
The average Telegram sticker pack includes between 10 and 20 stickers, but you're not limited in how many you want to upload. Some packs have over 100 stickers, and you can keep coming back and adding new ones even after you publish.
Related: The Best Telegram Channels and How to Use Them
As you've probably already noticed, you don't need a Photoshop subscription to create Telegram stickers. You can design yours using a mobile sticker maker app or any of these free alternatives to Adobe software. We designed ours using the SVG-Edit web app.
Once your very own Telegram stickers are ready to roll, find the Telegram sticker bot. You can do that either by following the link above or by opening Telegram and typing "stickers" into the search field. You'll see the following list of commands you can use in the chat area:

Click Start to start setting up your sticker pack if this is your first time creating stickers, otherwise, use the /newpack command.
The Telegram sticker bot makes it easy to upload and publish your designs. Here's what you need to do:
 If you don't have an icon, just send the /skip command, and your first sticker will become an icon for this pack.
 Done! Click on the link to your Telegram sticker pack to see how everything looks. If you have more than 10 stickers, you can scroll through them.
Telegram doesn't have a sticker store or any other way for people to browse all existing stickers. This means your pack will be gathering dust until you and your friends start sending the stickers you made.
Related: How to Use Telegram's Voice Chats 2.0
When you click on your pack's URL, you'll see two ways to start sharing your Telegram stickers.

Stickers alone would be enough to ditch other messaging apps in favor of Telegram, but there are more reasons why Telegram is the only messenger you need. From secret chats to the ability to fix typos in the messages you've already sent, Telegram has tons of features you're likely to use.
Take Telegram bots, for example. These simple assistants can help you with just about anything—there's even a bot that reminds you to straighten your back every 30 minutes. Check out some of the useful Telegram bots, and you'll be amazed at all the tricks this underrated app has.
Many messaging apps allow you to include stickers in conversations with your friends and family. Telegram, a popular secure messaging app, is unique in that it actually lets you upload and use your own stickers in conversations.
You can create sticker packs and show them off as much as you want. Here's how to make stickers and use them in your Telegram conversations.
How to make Telegram stickersBefore you can create Telegram stickers, you'll need image editing software that lets you create PNG files with transparent backgrounds. Adobe Photoshop is the most popular image editing software out there, but if you're looking for something less expensive, you can poke around the internet for a free alternative — we used GIMP in this instance, and there are plenty of other options available as well.
There are a few rules you need to keep in mind when designing Telegram stickers:
The process of creating a transparent background for your sticker varies depending on the software you're using, but in general, you'll need to add an "alpha channel" to the background in order to create transparency.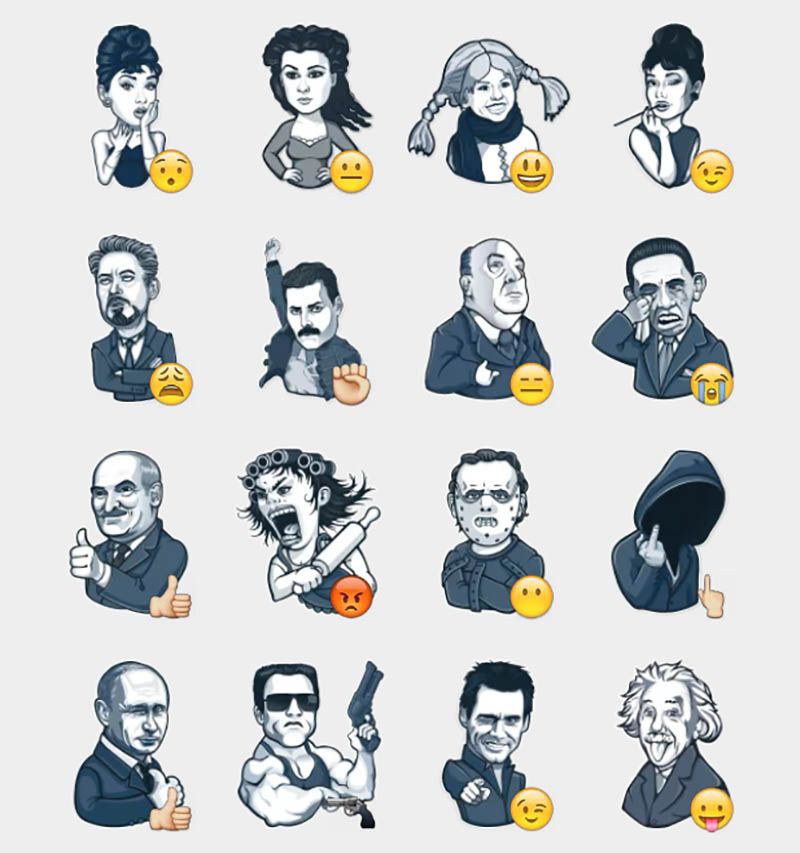 Once you've added an alpha channel, anything you erase or delete in that layer will become transparent, represented by a white and gray checkerboard pattern. With this, you can edit the image to your liking and save it as a PNG file once you're done.
Just remember that once you've made and published a pack of stickers (as we show how to do below), the stickers are public for everyone on Telegram. So if there's anything in your stickers that you're not alright with strangers seeing, leave them out.
How to add and use your sticker pack in TelegramAfter you've created your sticker pack, you'll need to upload them to Telegram before you can start using them in a chat. To do this, you'll have to contact the Telegram sticker bot.
1. Open the Telegram app and log in if prompted.
2. Tap on the search bar and type "stickers," then tap on the Telegram sticker bot once it appears. This will create a new conversation with the sticker bot; tap "Start" to begin.![]()
3. Type "/newpack" (without quotation marks) into the message bar and tap the blue arrow to send the message.
4. Type a name for your sticker pack in the message bar and tap the blue arrow.
After you name your sticker pack, Telegram will direct you to upload the file. Chrissy Montelli/Insider5. Now it's time to upload your first sticker. Tap on the paperclip icon in the message bar, then tap "File," and then select the sticker you want to upload.
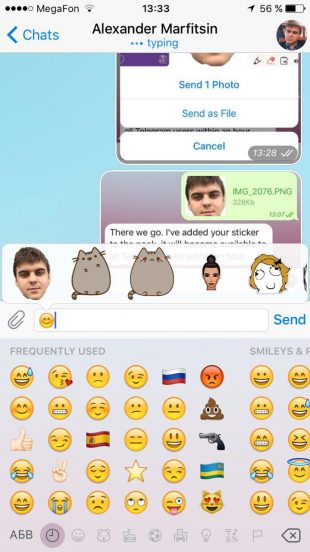
6. Use the emoji keyboard to type and send an emoji that applies to the sticker you just uploaded. This helps the sticker bot categorize the stickers.
7. Repeat steps five and six for each sticker you want to include in the sticker pack. Once you've finished adding stickers, type "/publish" (without quotation marks) into the message bar and tap the blue arrow.
8. Telegram will give you the option to upload an icon for your sticker pack. If you choose to do so, the icon must be 100 x 100 pixels. This isn't required, though, so if you want to skip this step, just type "/skip" (without quotation marks) into the message bar and tap the blue arrow.
The short name you choose will be incorporated in Telegram's unique link for your sticker pack, so you might have to try a few before finding one that isn't taken. Chrissy Montelli/Insider
 9. Type a short name for your sticker pack and tap the blue arrow. This will be included in the URL that Telegram creates so that you can share the sticker pack. If a short name has already been taken or isn't usable, Telegram will ask you to choose a different one.
10. Telegram will send you a link for your sticker pack. Tap on the link, then tap "Add Stickers" to download the sticker pack. You can also share the link with your friends so that they can use your stickers as well.
Telegram creates a unique link that you can share with others, allowing them to use your stickers, too. Chrissy Montelli/Insider
 11. Now that you've created and downloaded your sticker pack, you'll be able to include them in messages like any other sticker. Start a conversation with a friend and give it a try.
Once you've added them, your stickers will appear in your sticker keyboard and you can use them like any other sticker. Chrissy Montelli/InsiderChrissy Montelli
Chrissy Montelli is a writer and content creator originally from Long Island, NY.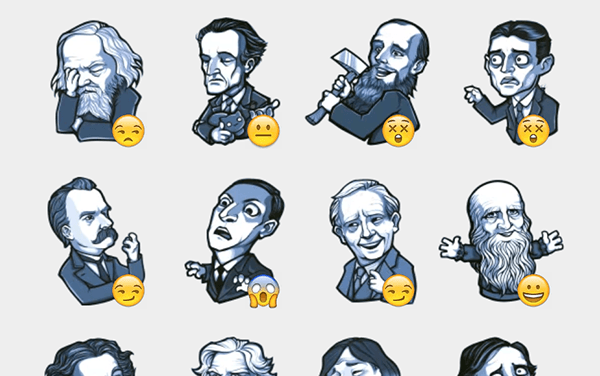 She is the author of two poetry chapbooks, Heart Float (Bottlecap Press) and Going to Ithaca (Ghost City Press), as well as various online publications. Read more from her at chrissymontelli.wordpress.com.
Read moreRead less
Telegram stickers are now a kind of communication style: there are cool stickers from memes, stickers with popular actors, funny animals, politicians and patriotic stickers for every taste. Creators express themselves through stickers, and some even sell sticker packs for a lot of money. Therefore, it's time to learn how to create your stickers in Telegram, and we will tell you how to do it using just a few tools.
First of all, there was an idea. You need to understand what kind of sticker pack you want to create, come up with a Big Idea for it and prepare the source code. By the way, you can even draw stickers on an iPhone, so don't bother if you don't own Photoshop or Figma. A simple photo editing app like PicsArt is enough.
iOS 16 helps a lot with this. The system already knows how to cut out individual objects and you can pre-make them png, so that after that you can simply fit them to the size in the desired program + add a stroke or text. A cool feature of iOS 16, which I can’t get enough of.
By the way, if you go to the bot for creating stickers, you will be given a psd file that you can add to Photoshop and work like the official tips. This is for those who design stickers on PC or Mac.
Personally, it’s more convenient for me to create in Photoshop, because there are more opportunities and it’s more convenient to transfer all this to the bot after, but you can choose the option and application that is convenient for you, there is nothing critical in this.
After we have 5 or more stickers ready (more is possible, but 5 is the standard). We have to add them to Telegram. For this, there is a special bot that will help us quickly organize our creativity.
We can add the required number of our stickers until we fill everything. It is very convenient that the system itself tells you what to do next and at any time you can finish editing, add a sticker pack background image and start using it.
Please note: you won't be able to change the name of the sticker pack. Therefore, be prudent when naming your stickers. It is better to choose simple names by which they can be found, so you will win in the distribution of stickers “to the masses”.
Also, take note, Telegram does not like it when copyright is violated . If you take other people's drawings and then the author complains about your stickers, they can be deleted altogether, and you will be blocked from accessing the bot. So let's respect each other and make our own cool stickers.
Publication and distribution. After you have added all the stickers, give the bot the /publish command. Here you will be prompted to add a 100x100px background image. I advise you to do it separately and, of course, add it. But you can send /skip and then by default the first sticker will take the place of the cover.
Then we add the dialing address: it is also desirable to choose not an abstruse name from numbers and random letters, but something with associations. I have stickers with Craig Federighi, so logically I called the address creig (crage seems to be busy).
After the stickers are published, you can manage them: add new ones to the pack, delete bad ones, view usage statistics and view statistics for all your sticker packs. To make the stickers scatter, you just need to use them, let your friends add them to themselves, use them in group chats and distribute them in this way.
Important: when adding a new sticker to an existing pack, it may not immediately appear for those users who added it. It takes about 2 hours for the pack to update. But don't worry, stickers will appear.
We hope that our instructions will help you make a cool sticker pack.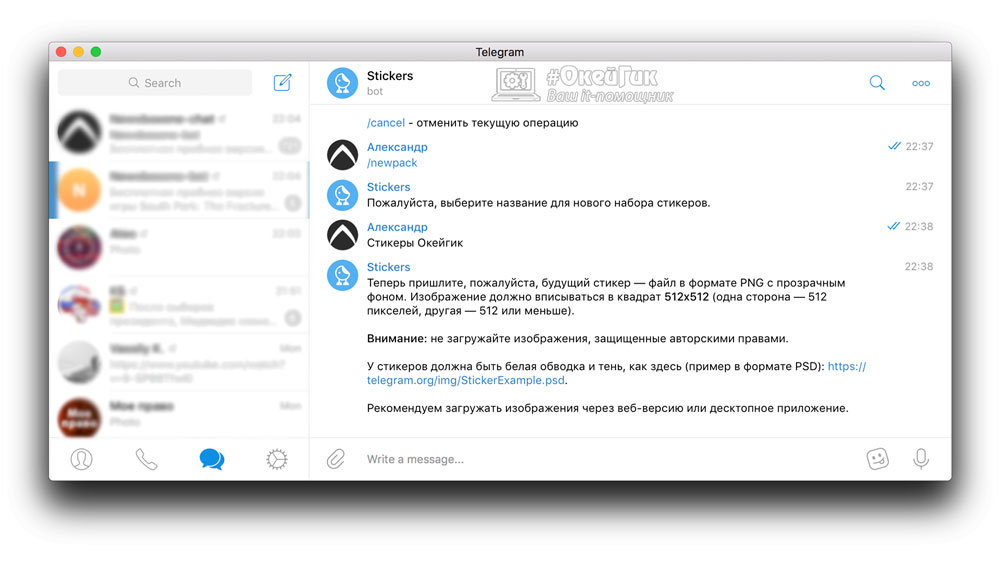 Be sure to send it to us in the Telegram chat, we will be pleased to know that we helped you to do something creative on your own.
Meme stickers are one of our weapons against the enemy in this difficult time. The more Ukrainian stickers, the better! So do it for your health!
Telegram Chips iPhone
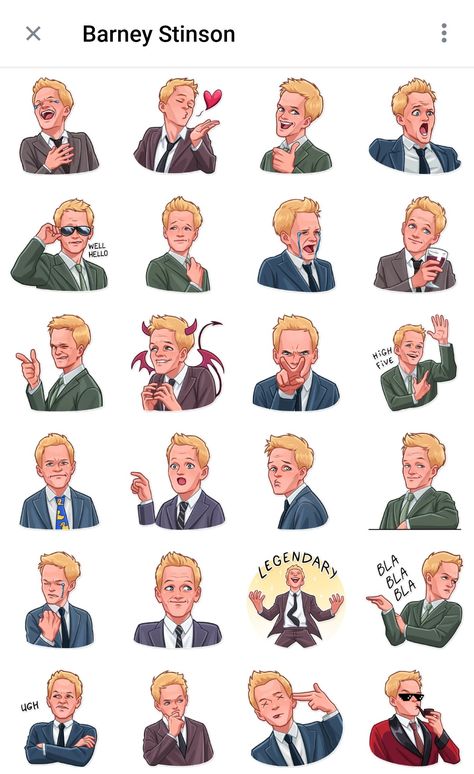
Stickers (from English can be translated as "stickers") generally play the same role as emoticons and emoji, expressing actions or feelings. Stickers often depict movie and cartoon characters, as well as historical figures, public figures and Internet memes with a variety of characters in the title role.
Another good thing about stickers is that not only designers and illustrators, but also ordinary users can contribute to their creation. The ability to create and share homemade stickers is provided by the Telegram messenger, created by the team of the founder of VKontakte, Pavel Durov.
So, if an idea for a set of "stickers" has long been born in your head, then with the help of the instructions below, you can bring it to life.
If you already have templates for pictures and Telegram is installed (not mobile, but desktop version), you need to write any message to a special bot - @Stickers. In response, he will offer the following set of commands:
/newpack - create a new set of stickers / addsticker - add a sticker to a set / delsticker - remove a sticker from a set / ordersticker - rearrange / cancel - cancel the previous action
Select the first command and send it to the bot. Next, he will offer to choose a name for the new sticker pack (just enter the name in the chat line and press enter), and then send an emoji that will match the first sticker.
It is worth noting that the bot sets limits on the resolution of uploaded images: their width must be exactly 512 pixels, and their height must not exceed the same value. The maximum image size can be no more than 350 kilobytes. The image for the future sticker must be attached through the File menu, which appears when you click on the paperclip image.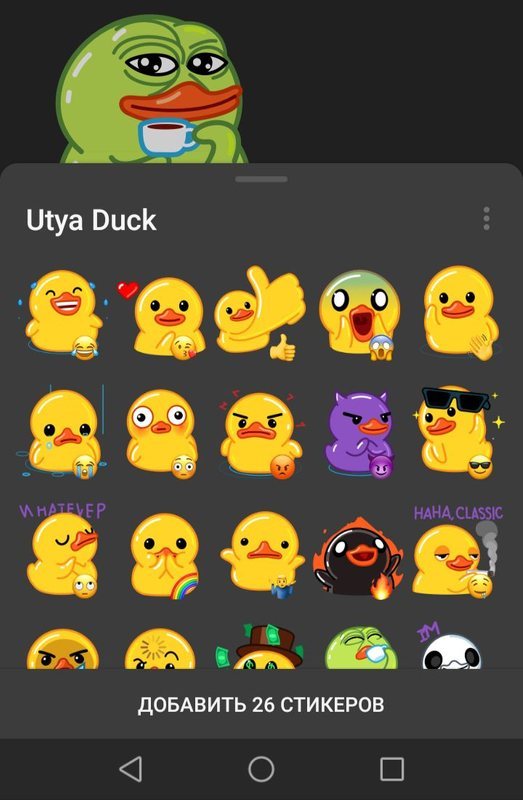
Don't worry if it doesn't work right away - at each stage of creating a sticker, the bot will tell you how to proceed.
When the first sticker is ready, you need to select an emoji for the second sticker and upload the desired picture again. You will have to repeat these steps until all the "stickers" are ready.
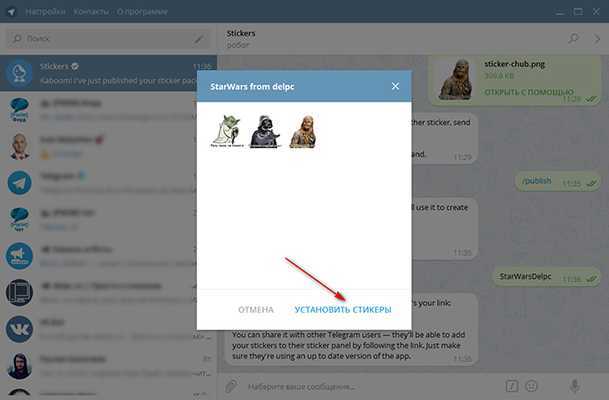
To publish a new set, send the /publish command. In response, the bot will offer to come up with a short name (with it there may be problems) of the link, which in the future can be sent to friends or published on social networks. Of course, it will lead to the author's pack of stickers.
Creating a sticker pack is not that difficult, but novice users may have difficulty processing the images themselves in a photo editor. For simple actions, you can use Paint. True, skill is required, since arbitrary selection is done "by hand" - it will not work to set a value of 512 pixels horizontally (and vertically too).
If it was possible to cut the image evenly, then it should be copied to a new document (copy the selected image - Ctrl + C - "Create" - paste the copied image - Ctrl + V). Do not forget that the final image size should be 512 pixels wide. The height may be less.
If you have access to the Photoshop editor, then it is better to use it to cut stickers. The algorithm is only slightly more complicated, but the output will be a neat picture with the desired parameters.
So, open the picture and take the tool "Pen" or Pen Tool (screenshot No. 1, highlighted in red). We begin to select images by setting points along the contour. At the end, we connect the last point with the first. By the way, the more points are set along the path, the smoother the clipping will look.
Next, on the options bar, find the "Paths" or Paths tab (screenshot #2, highlighted in red), right-click on "Work Path" and select "Generate Selection" from the pop-up menu.
Next you need to select the feather radius.