With Inssist Chrome plugin it has never been easier to post Videos to Instagram from Desktop. Instagram has some video posting quirks you should be aware of though. This article explains how to post videos, stories and IGTVs to Instagram, typical problems you might encounter, and how to solve them.
Videos can be posted to Instagram in 5 different ways: as Video Posts, Video Stories, IGTVs, LIVEs or Reels. Inssist supports 4 of those types: Video Posts, Stories, IGTVs and Reels.
LIVEs support was not available on the Instagram Web API at the time of writing this article but it may well come in the future and will be introduced to Inssist as soon as Instagram starts supporting them on the Web API.
Instagram platform is known to be picky when it comes to accepting videos from PC and may fail if video size, format or aspect ratio is unsupported. To avoid problems with video uploads and quality loss due to compression (blurriness), please make sure your video file size and format is one of the recommended:
 55).
55).Instagram may compress a video server-side after it is uploaded. Compression may result in videos being blurry or pixelated if the size of the video file does not adhere to one of the optimal requirements listed above.
Photos and videos uploaded from Android devices have a worse quality and higher compression rate compared to uploading from iPhone or Desktop. Inssist forces an iOS compression from Instagram so that your photos and videos look crisp.
To avoid blurry videos make sure to prepare your video before uploading.
Instagram may serve a down-sized version of your video to the Web Client for a few minutes after it is uploaded so it may appear a bit blurry. To verify if your video is indeed blurry or not, open your Profile on Instagram Mobile App or wait for a few minutes and refresh the post page on Inssist.
To avoid video compression (blurriness) and “Video failed to upload” issues, make sure your video aspect ratio, size and format is one of those listed above. You can use a number of tools to resize, cut or format your videos. Probably the fastest one to use is OnlineConvert.com
Instagram is known to reject video uploads if the video file size is too large. Not only can OnlineConvert resize, cut or reformat your video to MP4-h364 but it also reduces video size in megabytes resulting in a faster upload.
Other free online tools that can help you resize and reformat your videos are:
Once your video size and format has been optimized for Instagram, upload it from the PC / Mac with Inssist with a few clicks.
First you need to get a free Inssist Chrome Extension. Once installed it can upload your video to Instagram in two ways:
With direct video posting you can upload video posts, video stories and IGTVs to Instagram from PC. Locate a [+] icon at the bottom of the Instagram Frame and select the type of file you’d like to upload to Instagram:
For a video post you can set caption, location, hashtags, mentions and other parameters.
Video stories do not support @mentions, music, GIFs and text yet due to limitations in the Instagram Web API. These features may be added to the product in the future once they are supported by Instagram Web API.
Direct posting is available on Inssist Free version. If you’re on PRO version you can also upload a video cover (thumbnail) for your video post to make sure your Instagram grid looks perfect and consistent.
Scheduled posting to Instagram works through Facebook API and can post videos AND video carousels (multi-media posts). Navigate to Post Assistant on the left, connect your Instagram account to a Facebook Page to setup scheduling then click on “SELECT FILES” to upload your video and create a new post:
You can set caption, location, hashtags, mentions, cover (thumbnail), turn off comments or tag accounts on your video. Post Assistant can also clone your post to the connected Facebook Page for you.
Once the video is uploaded and parameters are set you can then either draft, schedule or post the video immediately to Instagram.
Feeling short on content for your stories? Check out Canva. It has a ton of free templates for you to pick from and also supports adding and formatting text on photos and videos. Inssist is not affiliated with Canva in any way.
There are a few things that could happen when you upload a video to Instagram from PC / Mac:
Feel free to share a link to this article on your blog to help others with posting to Instagram on PC! 🤗

It’s no secret that Instagram is one of, if not the most, wildly used social media platforms in the world. It’s not hard to understand why either—there are several different ways to share and create content all through this one app.
With Reels basically rivaling TikTok in popularity, it’s safe to assume Instagram is going nowhere. So, let’s talk about how you can use the platform to post images and videos all from your desktop or mobile device.
Right away, let’s just make it clear that the supported file formats are mp4 and QuickTime. So, if you’re not sure whether your video is mp4 or QuickTime, check out our breakdowns for exporting in the most popular editing programs.
Let’s look at the specific upload requirements for your videos on Instagram.
 91:1, and 9:16.
Upon updating this article, Instagram has recently announced that IGTV is no longer a thing. Instead, the longer form content that was meant to be hosted on IGTV can now live directly on your feed.
The max length for videos is now sixty minutes. So . . . that kind of changes everything about user experience on Instagram’s feed.
You can also upload in a variety of different aspect ratios, such as:
Many content creators prefer the 4:5 Portrait aspect ratio (864 pixel width by 1080 pixel height) because it takes up the most onscreen real estate on the Instagram feed. The larger view also helps the perceived quality of the video.
If you’re wondering about cover images, or thumbnails, Instagram has listed their recommended sizes as 420px by 654px (or 1:1.55 ratio). Right now, you won’t be able to edit your cover photo once you’ve uploaded it.
In addition, the video codec required (if you need this information) is as follows:
Thanks to a recent update, you can now post photos and videos right to your feed . . . drum-roll please . . . natively, right from your desktop! I’d like to tell you that there’s a difference between uploading on a PC vs. Mac, but the truth is, they’re exactly the same! Wait, that’s a good thing. Well, alrighty then.
So, if you’re wondering how to upload a video from your desktop, it pretty much works in the exact same way as uploading a photo. You just pick the video that’s already located somewhere on your desktop or hard drive. Once you select the video and hit “Upload” this is what you can expect to see, once you’ve uploaded the video to Instagram.
Video uploaded to Instagram.You have options to choose a “Cover photo” based on the images throughout your video. Be mindful of this when editing this social-friendly video to make sure you have an image somewhere that could work as a good cover photo.
However, you still have the option to choose a cover image from your desktop or hard drive. You also have the ability to trim down the video if it’s too long, or you need to start or stop in a different place.
There’s also the option to turn the video’s sound off. This is in case the video features audio, or a song you might not want or hasn’t been approved by the third party who created the video or music.
Instagram Reels is the app’s latest and most popular feature. Think of it as their own version of TikTok. You can record, edit, and add effects to your video right within the app. It’s a fantastic inclusion to the already growing platform. At the moment, you can’t upload a “reel” from your PC, so you’ll be limited to using this feature on your phone.
The idea is simple, though. Record bite-size clips within the app, then add music, stickers, overlays, and titles to make whatever you want in up to sixty seconds.
Going live on Instagram is a simple, straightforward process. By going to the “plus” sign at the bottom of your screen, just like normal uploading practices, you’ll find the option to go “Live.”
One of Instagram’s most popular features allows other users—or “friends”—to join in on the live stream with you. You can use this for interviews or conversations for your followers to watch. You can also title the live stream so your audience knows what they’re getting into before they tune in.
So, can you go live on your computer? Yes! But, first you’ll need to download two apps.
The first is called Yellow Duck. Once you download this free software, it essentially produces a RTMP URL that you can enter into your encoding software—in this case, OBS.
Now, download OBS if you haven’t already.
So really, this process is as simple as entering your Instagram account into Yellow Duck, then taking that RTMP URL and copy and pasting into OBS. This allows you to use your laptop or webcam to stream from your computer directly to Instagram!
A couple of quick side notes if you’re uploading edited videos to Instagram Stories . . .
The Instagram Stories aspect ratio is 9:16 (1080 px width by 1920 px height). Videos uploaded to Instagram Stories will automatically break into fifteen second sections when played back by viewers, and there will be a slight pause between each section.
If you’re looking to upload stories from your PC, as of right now, you’re only able to do so through third-party apps. These apps are both paid and free, and they’re primarily for scheduling and managing your account.
Be sure to look through their features to make sure they have everything you need before you give them your money.
Third-party upload & scheduling apps:
In order to upload an edited video through the Instagram app, you’ll first need to transfer the video onto your mobile device. The Dropbox app is the easiest, free method available for both PC and Mac users.
Alternatively, Mac users can also use the AirDrop feature to transfer files between iOS devices.
Image via Dropbox.First, create a free Dropbox account (if you don’t already have one), then upload your edited video to your online Dropbox folder. You can do this by uploading the file directly to the website or by installing the Dropbox desktop app on your computer.
The desktop app is simply a file folder that automatically uploads all content added to the Dropbox platform. Simply drag-and-drop the video file to start transferring. Dropbox will notify you when your file has uploaded (synced), and you should see a small green check mark on the file.
Next, you’ll need to install the Dropbox app on your mobile device. Open the Dropbox app and navigate to the edited video file. Click the three vertical dots to the right of the file name. This will open up the options menu.
Scroll down the options and select Export.
<
You’ll then be asked where to export the file. Select Save to device. Afterwards, you might have the option to rename the file. From there, the video file should save to the camera gallery or camera roll on your mobile device.
You can now post the video to Instagram, just as you would any other photo or video from your phone. Launch Instagram, and select the add photo icon.
You should see your video in the gallery. If you don’t see your video in the gallery, check one of the other folders, such as: Video, Instagram, Camera, or Downloaded.
Depending on the aspect ratio of your video, select the crop button to ensure your video displays correctly before posting.
Top image via Faenkova Elena.
Filmmaking Marketing Social Video Tips & Tutorials Video Video Production
June 12, 2020LikbezTekhnologii
The desktop site of the social network does not allow posting. But there are workarounds.
Share
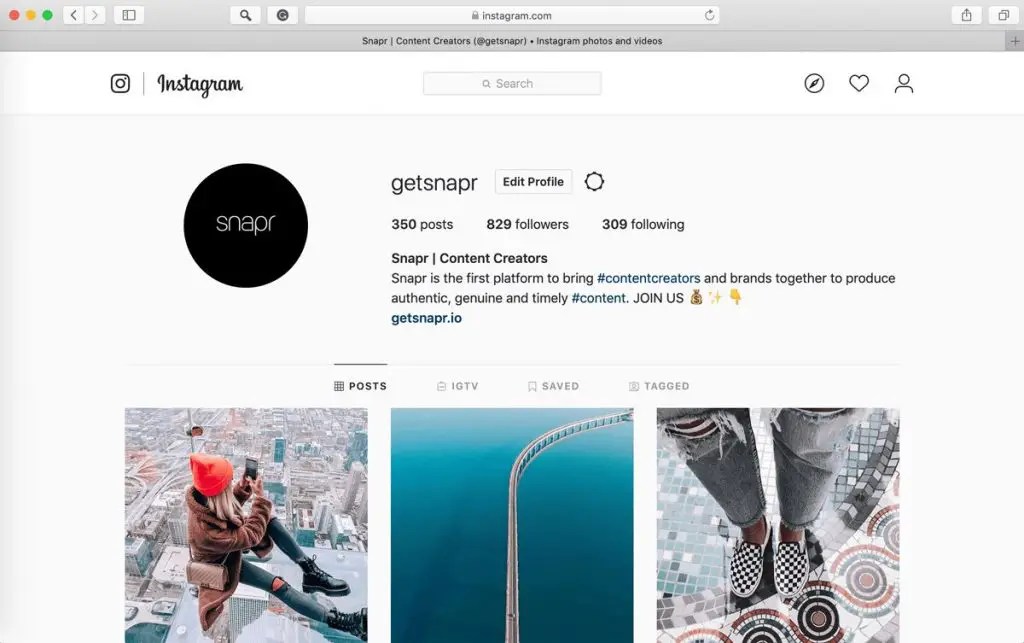
0 You can open the mobile version of the Instagram* website on your computer and create stories and posts there, much like the official app. How to do this - we show on the example of Chrome, but in most other browsers the steps will be similar.
Go to the Instagram* website and log in to your account.
Open developer tools. To do this, press Shift + Ctrl + I or right-click on the page and select View Code (or a line with a similar name).
On the toolbar that opens, find the icon with a schematic representation of multiple monitors or mobile devices and click on it. If you can't find it, press Shift + Ctrl + M. One way or another, the browser should launch the site in mobile mode.
Customize the size of the Instagram* interface that is convenient for you using the buttons above the site window.
Refresh the page. After that, a publish button will appear and you can use the social network on a PC in the same way as on a smartphone.
Last year, Facebook* launched a dedicated Creator Studio section. It allows you to publish and even schedule posts on Instagram*. You can't create stories yet.
To work with Creator Studio, you need to switch your Instagram* account to a professional one (creator profile or business account). To do this, go to the settings of the Instagram* mobile app, select "Account" → "Switch to a professional account" and follow the prompts. The procedure will take you a couple of minutes. If you don’t like something, you can return to the usual account type at any time.
In addition, you must link your profile to a Facebook page*. To do this, click the Edit (iOS) or Edit Profile (Android) button on your account page in the Instagram* app. Select "Page" and connect your new Facebook* page using system prompts.
Now open Creator Studio on your computer browser, select the Instagram* icon at the top and log in with your account.
To make a post, on the left panel, click the Create a post button and select Instagram* Feed. Add a photo or video using the Add Content button.
Click the arrow next to Publish and select the appropriate option: Publish Now (publish now) or Plan (schedule). In the second case, you can specify the time at which the service will publish the post automatically.
Emulators are special programs that allow you to run any Android application directly on your computer. By launching the official Instagram* mobile client this way, you can easily publish Stories and posts. You don't need an Android device for this.
Install any free emulator from Lifehacker's selection for Windows, Linux and macOS. In the screenshot example, you can see a window with the NoxPlayer interface.
Launch the emulator and enter the Google Play app store through it by clicking on the corresponding icon. Connect your old or create a new Google account to be able to download Android apps.
Download Instagram* from Google Play directly in the emulator and log into your profile. After that, you can publish videos and pictures from your computer as if you were using the social network on your smartphone.
See also
*Meta Platforms Inc. activity. and its social networks Facebook and Instagram are prohibited in the territory of the Russian Federation.
Menu
Contents
Instagram is becoming more and more a video platform. The popularity of IGTV, short videos and stories is gaining momentum. To be trending on Instagram, switch to the video format. And we will show you how to upload the finished material from your computer to your Instagram profile.
Instagram wants to conquer all possible directions in the Internet space. Videos are becoming one of the most active and developing areas.
To take advantage of the possibilities of using videos on your page, consider the following nuances:
 Be prepared to meet this limit. With carousel function, user can upload 10 media files. Those. the blogger has the right to share 10 minutes of content.
 Video format can be shared on Instagram if it is captured and saved as MP4.
The following methods will help to publish content in video format:
With Inssist, you can share videos or photos, send messages to Direct, schedule posts, and view profile analytics.
 Log into Inssist through a browser.
 Your content is now available to subscribers. For fans of video instructions, we recommend visiting our YouTube channel. We have filmed step-by-step instructions for all Instagram features for you.
The web version of the social network is a bit more modest and slower. But you should not be upset if you prefer to work on a laptop. Install an emulator program on your computer. It adapts your operating system to Android.
You will be interested: an overview of emulators for Instagram.
The user receives the rights to download and use any applications, even those developed only for smartphones.

There are also free options, but they are rather limited in functionality. Through planning programs, you can conduct a full-fledged set of measures, working with one or more profiles.
Planners are preferred by professional bloggers, SMM-specialists, businessmen, celebrities. It is worth using services carefully, because. Instagram opposes delayed posting.
We told you about ways to download video content in the previous section. Now let's discuss the benefits of videos for your account: