Create Instagram Carousel posts that get users to stop scrolling through their feed! Check out these tips for a successful Instagram carousel strategy.
Do you create Instagram carousel posts? Are you looking for ways that you can use them more effectively?
I’m going to show you some creative ways you can use Instagram carousels in your feed.
You want to be remembered, so people will buy services or products from you. But the moment when someone scrolls past your post in the feed is so fleeting. Even if they stop to give it a like.
That hard-won moment of attention can extend if you use Instagram carousel posts. Instead of a quick like, your audience can swipe through your images. They’re spending more time with you … and that means you’ll be more memorable.
Plus, you get an extra chance to grab their attention. Once Instagram has shown someone your carousel post, it’ll show it to them again. But this time, with the next slide in the sequence showing.
That means extra impressions from the same post, extra opportunities to get noticed, extra space in the feed.
Instagram carousel posts are episodic. When someone scrolls onto the next image, they will get the next installment—whether it’s a completed picture, a new product or another tip. It’s your chance to keep people interested in what you do and the knowledge you share.
I’ll show you some examples of how you can tap into these benefits shortly.
You still have to grab attention.
There’s no benefit in Instagram carousel posts unless you can get your audience’s attention in the first place. Any of your carousel images could appear in the feed, so every slide in your carousel is important.
Each one must work on its own.
Because Instagram users are swiping through your images, not just scrolling by, they are immersed in your content—until they move on.
The problem with carousels is that it’s hard to stop people scrolling long enough to get them to swipe.
Plus, it’s also not always obvious that a post is swipeable. The only indication in the feed is the line of dots below the post.
Instagram does give you a helping hand. Once someone sees the first slide of your carousel in the feed, Instagram will resurface the post later with the second slide displaying.
So even if your viewers scroll past the first time, you get a second chance to engage them with slide two. Every slide in your Instagram Carousel post is as important as the first one.
Are you a newbie in creating Instagram Carousels? If so, I’m going to show you three ways to create them.
Although most people think of Instagram images and videos as being square, you can post both horizontal and portrait creative in the feed, both for regular posts and for carousels.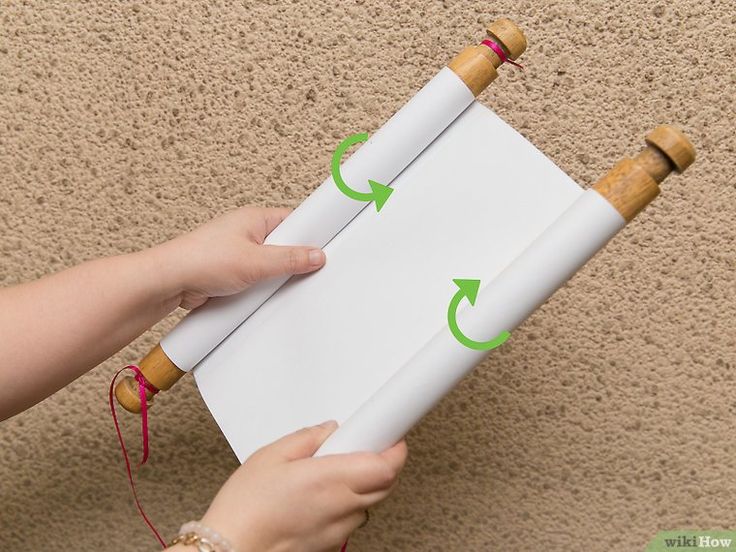
If you’re creating a carousel post just make sure that all the images or videos you are including are the same size.
Here’s a guide to the sizes:
Although all three sizes work, square and vertical will take up more space in the feed meaning you’re more noticeable and more memorable.
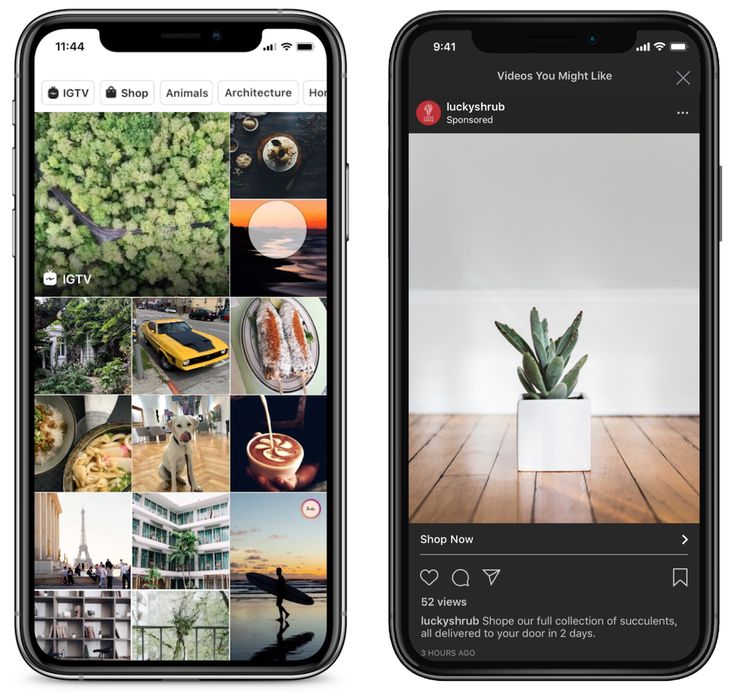
Open your Instagram app, and click the plus button to create a post.
Click on the square stacked icon at the bottom right-hand side of the selected photo.
Tap to select up to 10 photos and videos to add to your carousel.
You can filter each slide individually by clicking on it, or you can select a filter for the whole post by clicking an option at the bottom of the screen.
Click next and post to Instagram the same way you post standard posts.
Tap to select up to 10 photos and videos to add to your carousel.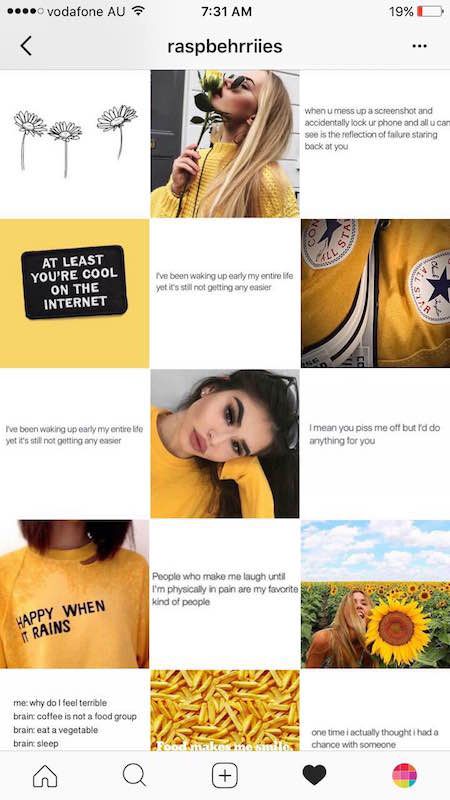
Click next.
Choose a filter to add to all the images and videos in your carousel.
Filter your whole post or choose a filter for each slide in the carousel.
Click next.
Now you can add your caption, hashtags, and location just like you would on an Instagram post.
Under “Advanced,” you can add alt text to each individual slide.
If you have a business Instagram account, you can post Instagram Carousel’s using Creator Studio.
Click the Instagram icon at the top of the screen to post to Instagram.
Click “Create Post” and select Instagram Feed
Select the Instagram account you want to post to.
Write your caption, and add hashtags and location as usual.
Click “Add content” and “From file upload” from the drop-down menu.
Select up to 10 images or videos you want to use from your computer.
For each image you can change the position in the carousel by changing the number in the box below it.
Crop it to square, landscape or vertical.
Under Advanced settings you can add alt text. When you have finished you can choose to publish immediately, schedule or save as a draft.
Creator Studio is great for posting and scheduling content to Instagram.
But if you manage a lot of social accounts it can be easier to post to and monitor them all in the same place. It’s a huge time saver to use a tool like Agorapulse. And we support image carousels.
From your Agorapulse dashboard, select the Instagram account you want to post your Instagram Carousel Post to.
Click the paper plane icon to create a post.
Write your caption and add hashtags as usual.
Click the camera icon to add your images.
Now you can either choose images from your computer or design them in Canva.
If you click “edit image” underneath each one to crop, resize, flip, or rotate.
You can also add alt text underneath each one.
When you have finished editing, click Publish, Add to Queue, or Schedule for later.
Carousels are the perfect place to showcase a group or products or a set of product features in an engaging way.
Consider this: You’ve just launched a new product line. You’re itching to share every new product on Instagram—but if you post them all on the same day you’re audience won’t see them all.
But if you post a carousel, your audience can browse them all.
Glamping Under The Stars share images that set the scene of the holiday you could have when you book with them.
Is your grid a carefully curated thing of beauty? Do you cringe when you have to post something that might destroy your style, even when it’s user-generated content that you know will help you promote your business?
Shoe company APL has an exquisitely stylized feed. They’ve come up with a clever way of keeping their grid looking beautiful and on-brand while sharing user-generated content. It involves carousels.
Each week, they pick an image from one of their customers and award them “Photo of the Week” on Instagram. To showcase this and keep their feed looking beautiful, they hide the user-generated post behind their on-brand photo in a carousel post.
Speaking of user generated content. Passion Planner curate themed UGC into carousels. Like this one from customers sharing their planner with their pets.
The nice thing about Instagram carousels is that there is no frame or break between the slides. This makes them a perfect way to share a horizontal or panorama shot.
You could create a shot of a local attraction or just something that is way too wide to get into a single Instagram post.
Or you could create something with a carousel specifically in mind. Like this post from Innocent
Creating panorama shots like this doesn’t require hours of cropping or photoshop. You can use an app, such as the following.
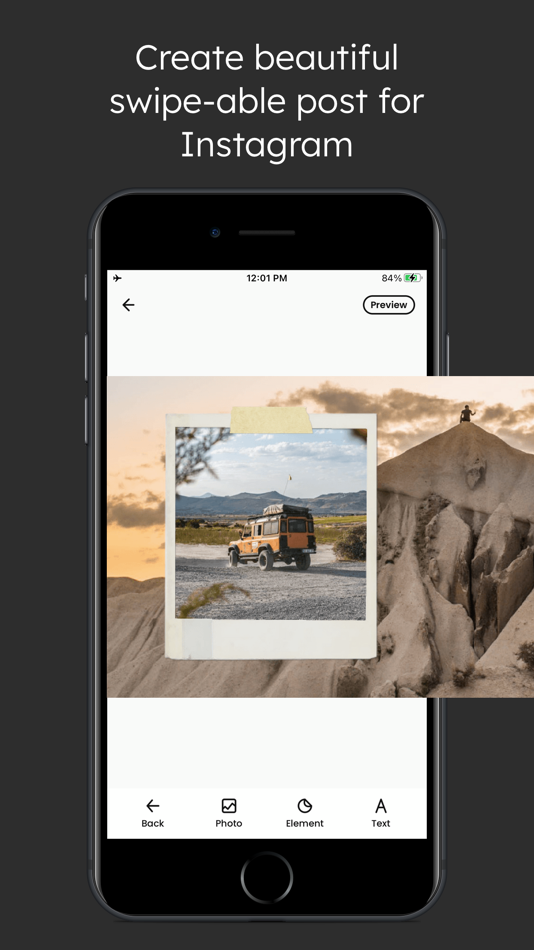
Swipeable panorama
This is my favorite iOS app for creating panorama carousel posts. As well as splitting your image into squares for posting on Instagram, it makes the first square a video that nudges people to swipe for more.
Insta Panorama
Swipeable isn’t available for Android, but Insta Panorama is a good alternative. It doesn’t have the video at the start, but you can create a panorama carousel in seconds.
Carousel posts on Instagram are a great way to engage your audience and get extra impressions in the feed. Hopefully I’ve given you some inspiration with the examples I’ve shared, so now it’s time to get creating.
Get started on creating Instagram content that rocks! Check out our free trial of Agorapulse to help you schedule, track, and measure all your social media efforts.
Prev. postBack to homeNext post
Skip to main content
The VergeThe Verge logo.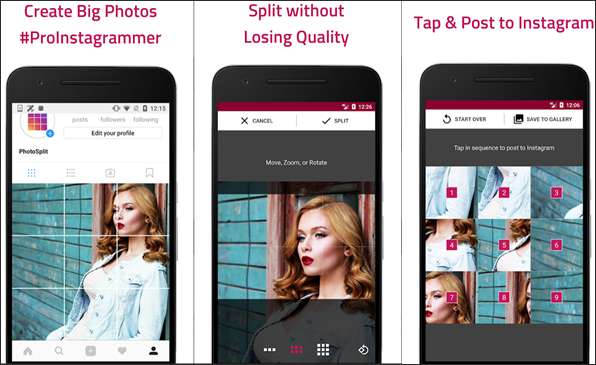
The Verge homepage
The VergeThe Verge logo./
By Vjeran Pavic
|
Photo by Brennan King, animation by Vjeran Pavic / The Verge
Part of /
The Verge Guide to Instagram
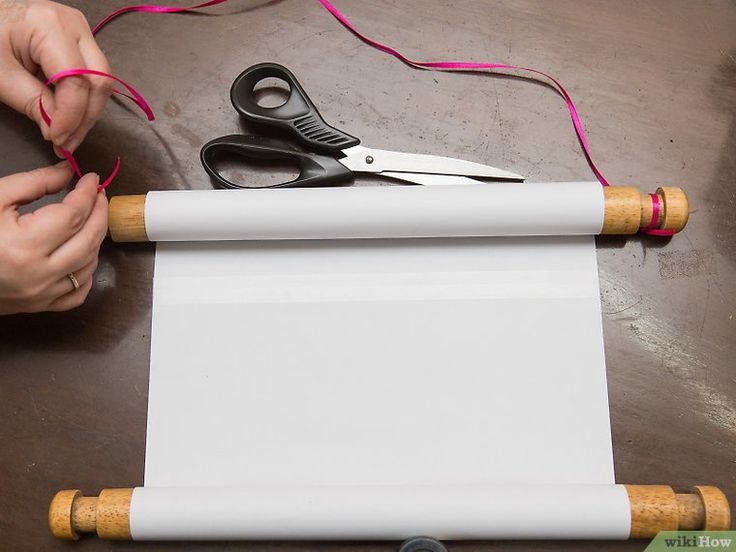
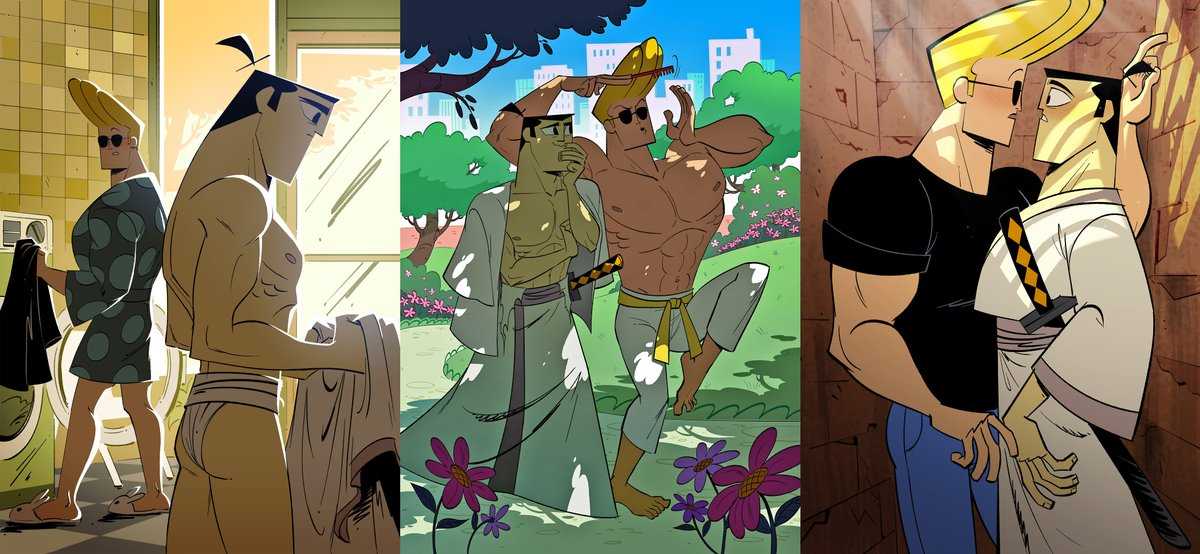
It’s already been a few years since Instagram allowed you to post multiple photos simultaneously in a single post. This small change enabled a lot of creative options. One of my favorites is creating seamless panoramas by simply slicing your photo in two — like this one.
If you want to take advantage of this neat little hack, here’s a quick, simple tutorial on how you can pull it off.
Before you start, you’ll need two things: Adobe Photoshop (or another pixel-based photo editor that lets you work with layers) and an elementary understanding of Instagram’s requirements for sizing photos.
First, about the sizing: no matter which photo you upload, Instagram will automatically resize and compress your images. For example, square photos will always end up being 1080 x 1080 and vertical ones will always be 1080 (w) x 1350 (h). So if you want to create a panorama made out of two vertical photos, you’ll need to duplicate the pixels lengthwise, while the height stays the same: 1080 x 1350 becomes 2160 x 1350. Or if you want to create a panorama made out of three images, you’ll use 3240 x 1350. The same applies if you’re starting off with square images, which will fit into a panoramic space with twice the width (2160 x 1080).
Okay, let’s boot up Photoshop and open up two documents.
In Photoshop, you can save document sizes as presets for future edits.
 We can name this one “Slices.”
 Guides will help you split images in equal parts.
Now you’re ready for exporting. You can either export each layer at once using Photoshop’s “Layers to Files” option (under “File” > “Export”) or you can export each layer individually. I tend to add a few more layers to the same document, so I batch export those. In case you want to double-check your final export settings, you can use “Save for Web.”
Here are all the layers I’ll batch export.
If you’re using a PC, it might be easiest to save your files to a cloud service, where you can easily access them with your phone. Or if you’re in the macOS / iOS ecosystem, simply Airdrop your exports.
Getting the photos to properly show up on Instagram should be easy enough, but let’s go through that quickly just in case, because there are some things you can easily skip by accident. On your mobile device:
Don’t forget to enable vertical photos first. Also, you can tap and hold one photo to enable multiple selections.
Vox Media has affiliate partnerships. These do not influence editorial content, though Vox Media may earn commissions for products purchased via affiliate links. For more information, see our ethics policy.
Most Popular
November 12, 2017 Web services
A little trick will allow you to bypass the Instagram* limitation on photo width.
Uploading a panoramic photo to Instagram* is easy. You can create an Instagram post* with multiple photos blending into one another. It will look something like this.
Panoramic photos on Instagram* are no different from regular posts with multiple shots. They can be made manually or using mobile applications. Here's how it's done. nine0003
 For a six-part panorama, the aspect ratio should be 6:1, and so on. Please note that you cannot insert more than ten squares into one Instagram* panorama.
 Take a panoramic photo for Instagram* with apps like Swipeable for iOS and InSwipe for Android. They are free, and with them you do not have to bother fussing in graphic editors.
The iOS app lets you create panoramic and even 360° loop photos for Instagram*. Just select a panoramic photo, and the application will divide it into square segments and apply the necessary filters.
appbox fallback https://apps.apple.com/ru/app/id12096
Powered by Android and has similar functionality - creates seamless panoramas for Instagram*. Photos can be scaled or resized. A grid that adapts to the size of the panorama will allow you to cut images in exactly the right places.
Download
Price: Free
Panoramic shots on Instagram* look pretty impressive. In addition, in mobile applications, sliding from shot to shot in one post is quite smooth, so that several photos seem to be a single whole. nine0053 *Activities of Meta Platforms Inc. and its social networks Facebook and Instagram are prohibited in the territory of the Russian Federation.
Photo hosting Instagram develops vertical scrolling of the "stories" feed - exactly the same function has one of the most popular applications in the world of TikTok, with which Zuckerberg's corporation is unsuccessfully trying to compete. Regardless of the fact that Instagram is no stranger to appropriating the "chips" of competitors, experts warn that the service can "overplay" in the pursuit of TikTok and, as a result, completely lose its identity. nine0003
Instagram may soon introduce vertical scrolling in the Stories feed, according to TechCrunch. While stories can now be viewed with a horizontal swipe, which Instagram borrowed from Snapchat, in the future, users will be able to scroll through them like a standard news feed from bottom to top. This is how it works in the social network TikTok, which Instagram, owned by the Facebook corporation, considers its main competitor.
The first “vertical stories” on Instagram were discovered by mobile developer Alessandro Paluzzi, who shared a screenshot of his discovery on his Twitter account. nine0003
#Instagram is working on Vertical Stories
— Alessandro Paluzzi (@alex193a) February 2, 2021
Swipe up and down to browse stories. Twitter
Subsequently, the social network confirmed that this feature is indeed in development.
"This is an early prototype," a company spokesperson told TechCrunch.
Vertical scrolling is familiar to mobile users as it is found in most modern applications.
However, given the history of Instagram, which is not shy about "peeping" ideas from other companies, it can be assumed that the new feature is another step towards turning the service into a "second TikTok".
For example, the former head and co-founder of Instagram, Kevin Systrom, openly admitted that the “stories” format itself was completely copied from Snapchat, which first introduced it to the world.
“For a long time, people's Instagram accounts were filled with links to their Snapchat profiles. It was obvious that users would like to combine the two products. And we gave them what they wanted,” said Systrom at the SXSW festival in 2019year.
In addition, in August last year, the Reels format appeared on Instagram, which exactly repeats the functionality of TikTok, so the interest of Facebook management in repeating the success of the social network from the Chinese company ByteDance is obvious.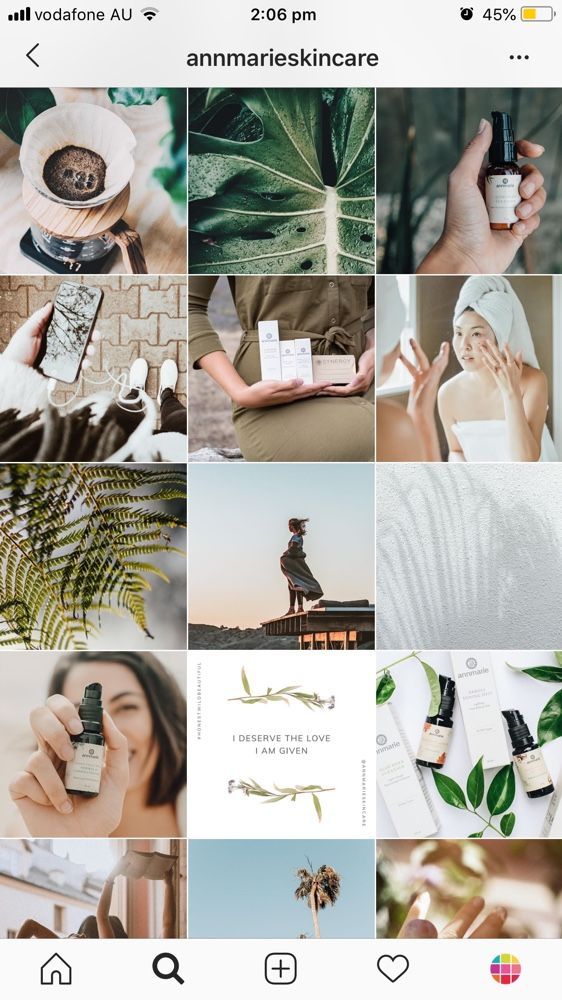 Moreover, in January of this year, the head of Instagram, Adam Mosseri, openly stated that TikTok is still “ahead” of Reels in terms of user engagement, so the company still has a lot of work to do.
Why is Instagram trying so hard to be like TikTok? Photo hosting wants to migrate to a younger age audience, so it introduces vertical scrolling and is trying to figure out how to integrate videos even more into its platform, since it hasn’t had a revolution here yet, says Mark Sherman from B&C Agency
According to him, the social platform is trying to become less conservative and make "stories" more spectacular, giving them more opportunities.
“But here you need to understand that the advantage is usually with the one who does something first, so Instagram is better to focus on new developments, not borrowing.
There is one subtlety here - being part of Facebook, a public company whose quotes are going up, what motivation do Instagram top managers have if everything is fine with financial performance? nine0003
The same Snapchat is a public company, and its popularity is immediately displayed in quotes. If you watch the same WhatsApp, which is also an integral part of Facebook, then they are also not chasing monetization and are in a rather conservative state, while competitors have been offering more progressive features for a long time,” Sherman added.
The new features of each social network are primarily aimed at simplifying and creating convenience for users. However, there comes a point when innovation disappears, and we can only wait for small updates. Perhaps now such times have come for Instagram, Ekaterina Vronskaya, press secretary of the iMARS communication group, public relations director of the Sputnik marketplace, tells Gazeta.Ru. nine0003
“Today, few people scroll through the main feed, but everyone regularly watches constantly updated stories - due to this, users and brands get additional coverage and do not lose them in general. The app is now looking for ways to increase engagement and retention with its new TikTok competitor.
Moving to vertically scrolling stories will be an important step for Instagram, which in turn could make stories the predominant format on the social network.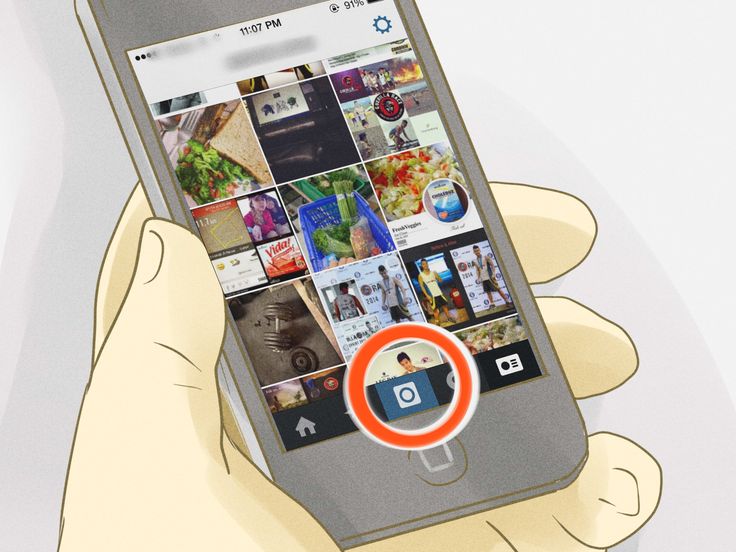
On the one hand, the vertical scrolling of “stories”, which the platform wants to adopt today, seems more natural and familiar to the web space, since the scrolling of the feed of the platform itself, as well as most other mobile applications and sites, is carried out in this way. Do not forget that most platforms are trying to adapt to mobile gadgets, since in modern realities it is more convenient for people to consume and create content on their own with their help, ”says Vronskaya. nine0003
On the other hand, the expert notes, a TikTok-style vertical interface can make the Stories format more video-centric than static content, and thus cause a lot of controversy.
“It's hard to say right now how this will affect the overall reach, engagement and identity of Instagram, because the innovation is still in the development stage. It is not even known if this feature will become mandatory or if the company will leave the choice of vertical or horizontal viewing of stories for users as an additional option.