Home » Misc » How to make an event on facebook ipad
How to make an event on facebook ipad
How to Create a Facebook Event on iPhone and iPad
When you’re organizing an event, Facebook can make it easier to invite others and communicate all the details. Whether it’s a private affair such as a birthday party or open to the public, you can create a custom event page with information such as date, time, location, etc. Further, you can also keep track of who’s attending and edit details if needed. So let’s learn more about how to create a Facebook event on your iPhone and iPad.
Create an Event on Facebook App for iPhone
Edit an Existing Event in Facebook App on iPhone
How to Cancel or Delete Facebook Event on iPhone and iPad
Add Facebook Events to Your iOS’s Calendar App
Create an Event on Facebook App for iPhone
Launch the Facebook app and tap on the Hamburger icon.
Choose Events and tap on Create.
Event to be hosted can be created either in Online or In-person. Here I’m selecting Online.
Now, add the Event name, Start Date, and time and then choose Privacy can be changed as per requirement.
Private: It would only allow the participants who have been invited prior to the event.
Public: Can be viewed by anyone on or off the Facebook app.
Friends: Will be visible to all of your Facebook friends.
Group: You can send the event invite to the groups you are in on Facebook.
After you tap on Next. You will be asked to choose a way for invitees to join your event (Applicable only if you are hosting an online event).
Messenger Rooms: It would allow you to stay together in a video chat. People will be able to join the room directly from the event page.
Facebook Live: A Facebook Live will be scheduled for your event so that people can watch.
External link: Adding a link will help people to know where to go when your event starts.
Other: It allows you to add instructions in your event details on how to participate.
You will next be able to review the details of the event. A description or guidelines for the event can be added.
From the screen where all of your event details are mentioned, you will send invites or edit the event details.
Edit an Existing Event in Facebook App on iPhone
Open the Facebook app and tap on the Hamburger icon.
Now, tap on Events.
Tap on the calendar, and you will see a list of events you are hosting.
Tap on the event you wish to edit.
Now. tap on Edit.
You will change the event name, time, location, add co-hosts, and add more info about the event. In addition, you will be able to view the changes you’ve done in the event details.
How to Cancel or Delete Facebook Event on iPhone and iPad
Go to the Facebook event you’ve created.
Tap on the More icon and tap Cancel Event.
Select Cancel Event or Delete Event.
Click on Confirm.
Note: Once you’ve deleted an event, you won’t be able to restore the event. When you cancel an event, you’ll no longer be able to make changes to it, but people will still be able to post. When you delete an event, everything will be deleted and no one will post.
Apart from these events, editing them, and deleting the same. You can add your Facebook events to your iOS device’s Calendar app as well.
How to Add Facebook Events to Your iOS’s Calendar App
Open the event from your Facebook app.
Tap on More, and in that, tap on Add to Calendar.
You will see a pop-up mentioning the event will be added to your iPhone’s calendar. You can add it to your Gmail id, Family, Home, or Work.
That’s It!
I hope all your queries were resolved in this article.
If you still have some questions! Do write to us in the comment section below! Till then, keep reading and stay upgraded.
You may also like to read:
How to Post Live Photos on Instagram and Facebook from iPhone
How to Group Video Chat in Facebook Messenger on iPhone and iPad
Facebook Not Working on iPhone and iPad? Here’s The Real Fix!
How to hide a comment on Facebook and other alternatives
Facebook
Social Media
iGeeksBlog has affiliate and sponsored partnerships. We may earn commissions on purchases made using our links. However, this doesn’t affect the recommendations our writers make. You can read more about our review and editorial process here.
Author
Suraj is a digital marketing expert on the iGB's team. He contributes to the social media section along with tips and tricks for iPhone, Apple Watch. Apart from blogging, he likes to work out as much as he can in his gym and love to listening to retro music.
How To Create An Event On Facebook In 2022
David Woutersen
This post may contain affiliate links, which means I may earn a commission, at no cost to you, if you make a purchase through a link.
Creating an event on Facebook is a great way to let people know about an upcoming gathering, party, or other special occasion.
You can create events on both the desktop version of Facebook and the Facebook app, and there are a number of different ways to go about it.
In this article, we’ll show you how to create an event on Facebook from start to finish.
Let’s get started.
Table of Contents
How to create an event on Facebook on desktop
How to create an event on the Facebook App
How to create a group event on Facebook
How to edit a Facebook event
How to invite people to an event on Facebook
How to share a Facebook event
How to delete an event on Facebook
Final thoughts on Facebook events
How to create an event on Facebook on desktop
Facebook events are a great way to organize and gather friends together for a birthday, family reunion, or just a fun night out.
It provides an easy-to-use platform to keep track of invites, RSVPs, and declined invitations. You can also plan events that are in person or online.
If you would like to create your own event on Facebook here is how to do it on a desktop computer:
Log into your Facebook account.
Click the “Events” button in the left-hand side menu.
Click the blue “Create new event” button in the left-hand side menu.
Choose whether you want your event to be online or in person.
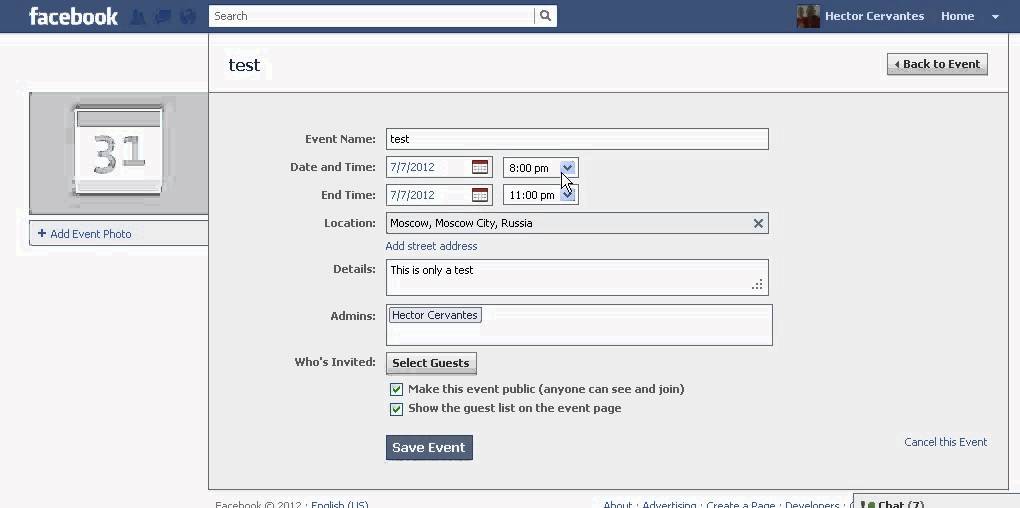
Fill in your event information and click next.
When you have filled in all the information, click the blue “Create Event” button.
How to create an event on the Facebook App
Creating an event can be done on the mobile Facebook app as well, and the process is quite similar to creating an event via desktop.
If you would like to create a Facebook event from the mobile app here is how to do it:
Open the Facebook app and log in.
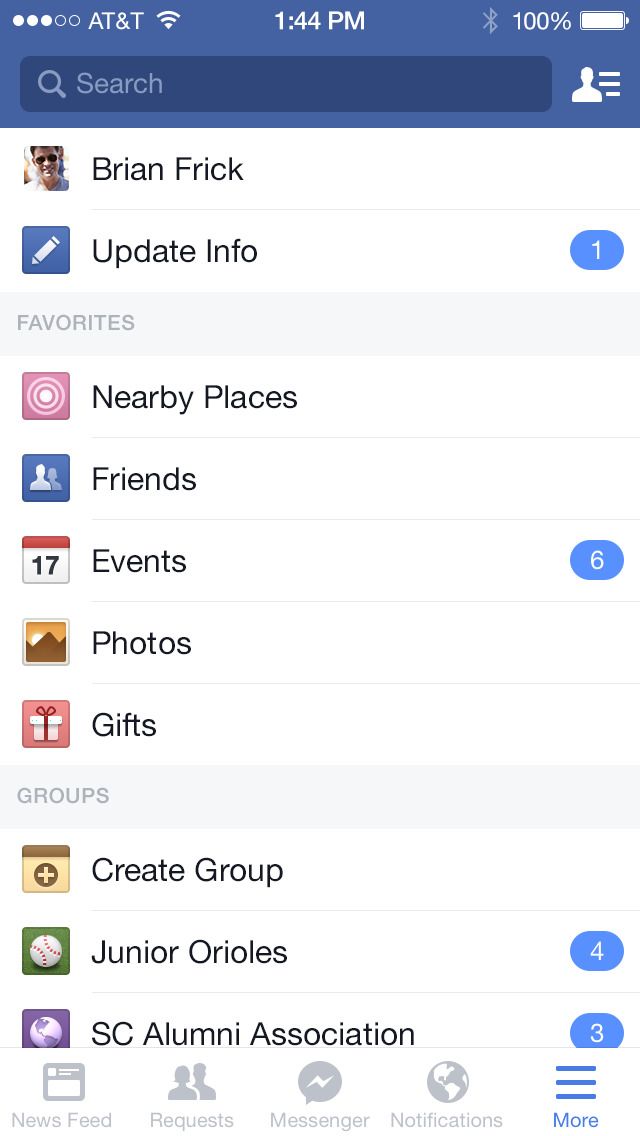
Tap the three stacked lines in the bottom right-hand corner.
Tap on the Events button.
Click the blue “Create” button in the top left-hand corner.
Choose whether you want your event to be online or in person.
Fill in your event information and click next.
When you have filled in all the information, click the blue “Create Event” button.
How to create a group event on Facebook
Creating a group event allows you to create an event that is for specific members of any given Facebook group.
This allows members to attend events that pertain to one particular group.
Dog lovers can easily meet in a nearby park, or you can hold a clothing swap or book club, the possibilities are endless.
If you would like to create a group event on Facebook here is how to do it:
Log into your Facebook account.
Click “Groups” in the left-hand menu.
In the left-hand menu, navigate to the group that you would like to create an event in.
Unter the name of the group, click “Events”.
Click “Create event”.
Fill in your event information and click next.
When you have filled in all the information, click the blue “Create Event” button.
How to edit a Facebook event
It is quite easy to change the details of an event you have already created.
If you need to correct a spelling error, change the time or place of your event, etc. this is how to do it:
Log into your Facebook account.
Click the “Events” button in the left-hand side menu.
In the left-hand menu click “Your events”.
Find the event you would like to edit and click on it.
Click “Edit”.
Make the necessary changes.
Click “Update”.
How to invite people to an event on Facebook
Once you have created your event on Facebook you’ll need to invite some friends to attend, otherwise, it isn’t really much of an event.
If you have already invited people to your event they will receive notifications about the event, regardless of whether the event was made on a desktop or mobile device.
You can also see who hasn’t responded to your invitation yet and send them reminder invites.
Here is how you invite friends to an event:
Log into your Facebook account.
Click the “Events” button in the left-hand side menu.
In the left-hand menu click “Your events”.
Find the event you would like to invite friends to and click on it.
Click the “Invite” button.
Select all the friends you would like to send an invitation to. You aren’t limited to only inviting your Facebook friends, you can select people who have attended the same past events or people from groups that you are in as well.
Click “Send invites”.
How to share a Facebook event
Sharing events is a great way to get your friends and family involved in an event or share an event with people who might not be on Facebook.
If you would like to share your upcoming event among your social circles away from Facebook here is how to do so:
Log into your Facebook account.
Click the “Events” button in the left-hand side menu.
Select the event you would like to share.
In the top right-hand corner click the arrow button.
Select where you would like to share the event.
How to delete an event on Facebook
If you have created a Facebook event and it has since been canceled, or you simply don’t wish to host anymore, the only way to remove it from Facebook is to delete the event.
This is how to delete a Facebook event:
Log into your Facebook account.
Click the “Events” button in the left-hand side menu.
Select the event you would like to delete.
Click the three dots on the right-hand side.
Click “Cancel event”
A pop-up will prompt you to choose to cancel the event or delete the event.
Click “Delete event”.
Final thoughts on Facebook events
Facebook events are a great way to connect with friends and family, promote your business, or celebrate a special occasion.
They’re easy to create and can be customized in many ways. You can invite people to join your event, share it on your profile or page, or even embed it on your website.
And if you need to cancel or delete an event, Facebook makes that easy too.
We hope this article has helped you learn how to create and use Facebook events for all kinds of occasions.
How to create an online event on Facebook?
Create an online event
In the Facebook app, click the icon and select Events.
Click New and then Online.
Select the type of online event:
Facebook Live. Suitable for events with more than 50 guests.
Messenger rooms. Suitable for interactive events where additional video chat settings may be required. Messenger rooms can accommodate up to 50 people, including hosts and co-hosts.
External link. Suitable for events outside of Facebook. In the description, include all the information that guests may need.
Other. For this type of event, provide clear instructions on how to participate.
Then click Next.
Add information to the Event name and Start date and time fields.
Click Privacy and select one of the following options:
Private. The event is hidden and you need an invitation to join it.
After creating an event, you cannot change the position of the switch Guests can invite friends.
Open. The event is open to everyone and anyone can join.
Friends. Only your Facebook friends can see and join the event.
Group. The event can only be seen and joined by members of the Facebook group you select.
Click Finish and then Next.
Add a description for the event and click Next.
If you want to add a photo, click Add cover photo.
If you need to add a co-host, select Event Settings.
Click Create event.
Privacy
Once you create an event, you cannot change its privacy setting.
There are 4 privacy settings in total:
Private. The event is visible only to invited people. You can allow guests to invite their friends. People who receive invitations can view the description of the event, its photos, publications and videos.
Open. The event is visible to all people on and off Facebook. They can view the description, photo, video and discussion of the event.
Friends. The event is only visible to your Facebook friends. They can view the description of the event, its photos, publications and videos.
Group. The availability of the event depends on the group's privacy settings.
Public group. The event is visible to all people on and off Facebook. They can view the description, photo, video and discussion of the event.
Closed group. The event is only visible to members of the group. They can view the description of the event, its photos, publications and videos.
Allow guests to invite friends
If you are creating a private event and want guests to be able to invite others, you can activate the Guests can invite friends toggle. This will allow guests to invite their friends to the online event, including people you may know or who don't use Facebook or Messenger.
Note. Once you create an event, you cannot change this setting.
Online event formats
Facebook Live
The maximum number of guests is 500 people.
Facebook Live allows you to broadcast events, speeches and meetings on Facebook. Viewers can watch broadcasts on phones, computers or Smart TVs.
Shortly before the start of the event, we will send you a reminder. When you go live, people will be able to watch it on the event page or News Feed. Co-hosts can send a request to participate in the broadcast, but only you can start the live broadcast.
Messenger Rooms
Messenger Rooms can accommodate up to 50 people including host and co-hosts.
You must be the first to join the room and may do so before the scheduled start time.
External link
The maximum number of invited Facebook users is 500 people.
You can add a link to a third-party website or app that allows guests to join the event. Because the event is hosted outside of Facebook, include any information guests might need in the event description.
Other
The maximum number of invited Facebook users is 500 people.
This event format does not have a live link or "Join" button. Include information about how guests can participate in the event description. For example, honor an event with a minute of silence or set aside time to visit a book club.
Event Settings
The Event Settings option can be seen in the last step of creating an event. The options available there depend on the privacy setting you've chosen for the event.
Settings Private and Friends
Co-hosts.
Display the guest list.
Setting Open
Co-organizers.
Display the guest list.
Only organizers can post publications.
Publications must be approved by the organizer.
Setting Group
Co-hosts.
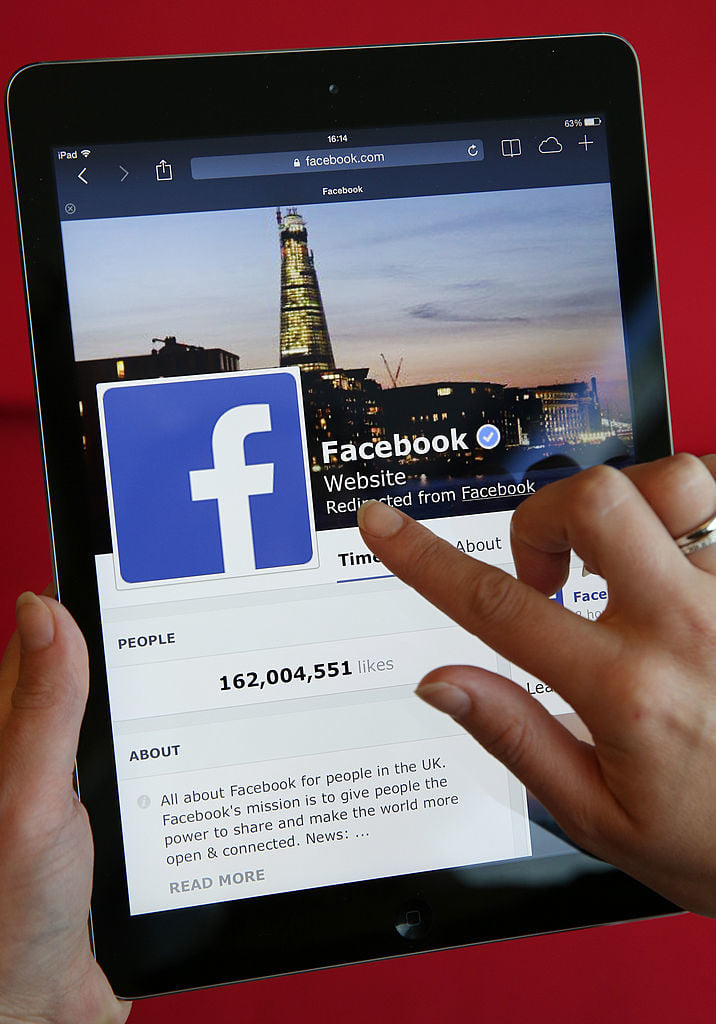
Official Facebook* app for iPad released
Early this morning Facebook* released the official app for iPad. This event has been long awaited. The iPhone version of the program has become the most popular application in the App Store. Therefore, many expected that with the release of the iPad, the social network would release an application adapted to the tablet computer.
Facebook* for iPad began to take shape in the spring. At that time, some tech blogs not only published screenshots of the application, but also told how owners of jailbroken devices could test the program. Then there were rumors that FB* was announcing a new application on one of Apple's keynotes, but in the end the release happened without being tied to any events.
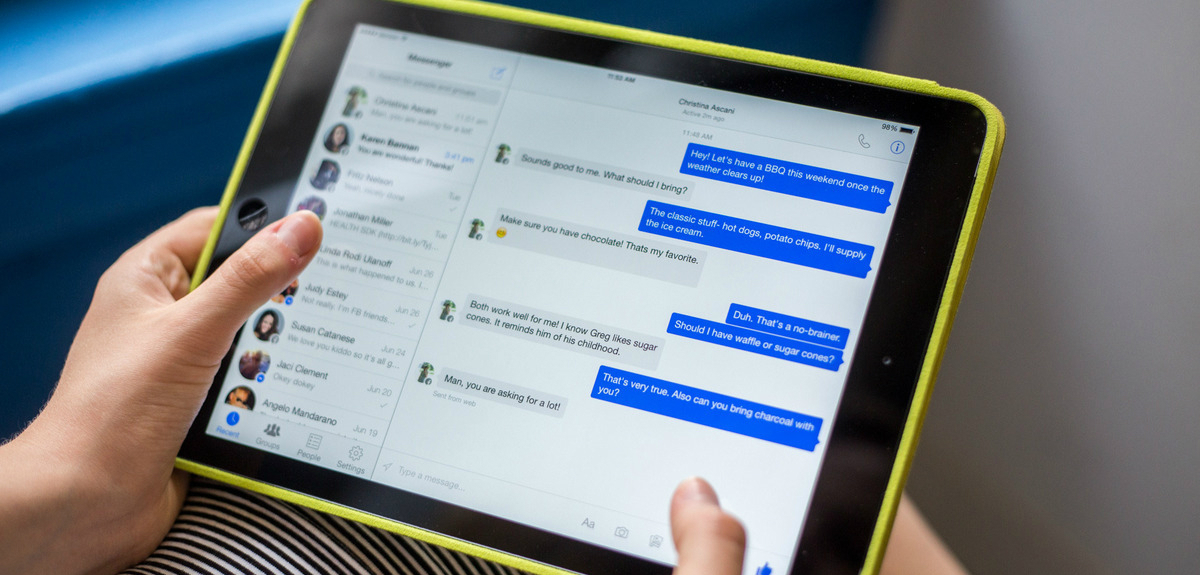
Facebook* for iPad offers all the functionality you would expect from an official client. You can update statuses, upload photos, check in, follow your friends' news.
The application is actively using gestures. Swiping from left to right in landscape opens the sidebar, where you can access the news feed, messages, calendar (Events), friends list, your pages and apps. Swiping from right to left brings up a list of friends you can chat with right now. Photos can be scaled by pinching.
Facebook* for iPad will become the most used application for many. The thing is, there is no need to leave it. Even the links in the message feed open in the built-in browser. I am sure many users will spend their time only in this program.
The program is also interesting from a technical point of view. The application supports Airplay technology, which allows you to broadcast video from your iPad to other devices - for example, to a TV via AppleTV.
As you know, Facebook* itself opened up an API many years ago, allowing third-party developers to create applications. How are they accessed from Facebook* for iPad? A rather curious solution was found. If an app written by programmers for Facebook* has an iOS version, Facebook* for iPad will run that one. If such an application is not installed on your iPad, but is available in the App Store, Facebook* for iPad will open the corresponding page in the Apple Store. For example, a very long time ago I had Yelp installed on the social network Facebook*. When I tried to launch it from the iPad app, the App Store page opened up and I was able to install the native app from there. What happens if the developer of the Facebook app* doesn't release an app for iOS? In this case, Facebook* for iPad will try, if possible, to open the HTML5 version of this application.
The launch of Facebook* for iPad isn't the only news. The popular social network has also updated the iPhone app and seriously improved the mobile version of the site.
Download from the App Store : Facebook* Price : Free System Requirements : Requires iOS 3.0 and above Developer : Facebook*
 You can add it to your Gmail id, Family, Home, or Work.
 He contributes to the social media section along with tips and tricks for iPhone, Apple Watch. Apart from blogging, he likes to work out as much as he can in his gym and love to listening to retro music.


 This will allow guests to invite their friends to the online event, including people you may know or who don't use Facebook or Messenger.
 Swiping from left to right in landscape opens the sidebar, where you can access the news feed, messages, calendar (Events), friends list, your pages and apps. Swiping from right to left brings up a list of friends you can chat with right now. Photos can be scaled by pinching.