Device Links
We rarely notice how fast time flies, so to some, it may seem like Facebook was only introduced less than 10 years ago. Surprise, surprise – Facebook marked its 17th birthday this year, and your personal account may be older than you think. If you’d like to find out when your Facebook account was created, we’re here to help.
In this guide, we’ll explain how to access your or someone else’s Facebook account creation date. We’ll also share instructions on finding out when you became friends with someone on the platform. In the end, we’ll explain how to find another user’s birthday on Facebook.
You can view the date your account was created by accessing your Facebook information. To do this, follow the steps below:
Another option to find out the account creation date and your first actions on the platform is through the Activity Log. To access the activity log, follow the instructions below:
 ”
”Alternatively, you can find a welcome email from Facebook if you still have access to the email address you used when registering. If you’ve set a profile picture right after creating the account, you can also view the date of your first profile image.
Finding out when someone else joined Facebook isn’t as simple as it is when viewing your own account creation date. That’s because the account creation date isn’t indicated in the user’s profile information. However, there’s a way of accessing this information by scrolling until the end of the user’s timeline. Here’s how to do that:

Checking when you befriended someone on Facebook is interesting and often surprising. To view this information, follow the steps below:
 Alternatively, type in their name into the search box.
Alternatively, you can find out the exact date – rather than just the year – when you became friends with someone on Facebook. To do this, you’ll need to scroll through the Activity Log. Follow the steps below:

Now that you’ve hopefully found your Facebook account creation date, you may have experienced a nostalgic feeling or found some nice old pictures. Sometimes, viewing your old posts may be awkward, but at the end of the day, where else could you access such a detailed story of your early days if not on Facebook?
How old is your Facebook account? Let’s see who has been on the platform the longest – share your account creation year in the comments section below.
Disclaimer: Some pages on this site may include an affiliate link. This does not effect our editorial in any way.
By Mahesh Makvana
Updated
Share Tweet Share Share Share Email
Curious to find out the exact date you created your Facebook account? Here are several methods to try.
Do you want to find out exactly when you created your Facebook account or how old your Facebook account is? There are various ways to do that.
Facebook provides its own way to help you find your join date, but there are some other methods that you can use as well.
Each method has varying accuracy, and which one you should choose depends on the access you have (whether you can or cannot access your Facebook account). Read on to find out how to check your Facebook account creation date.
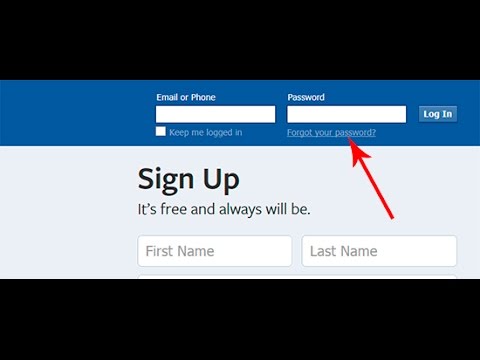
If you can log in to your Facebook account, there’s a section on the site that tells you when you made your account. This is the best way to find the Facebook join date as this provides the most accurate answer.
Free Checklist: Download The Ultimate Facebook Security Checklist
Here’s how you use this method:

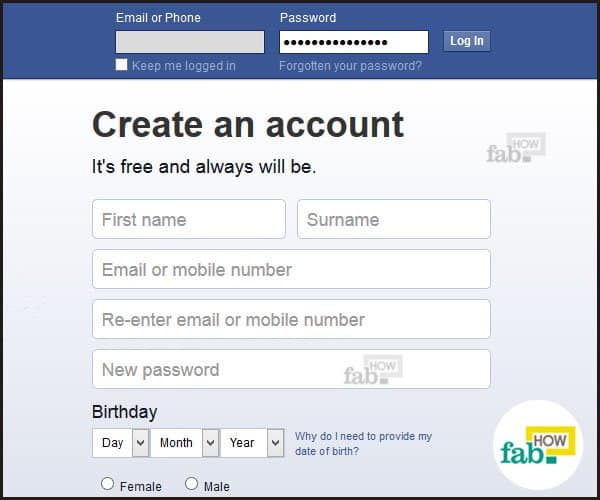
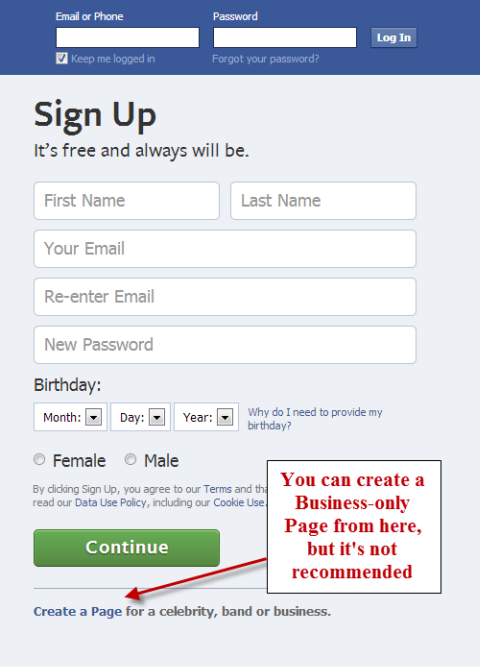
 To use this method, open your email account’s inbox. Put your cursor in the search box and search for keywords like Welcome to Facebook, Facebook Registration Confirmation, and so on. When you find the Facebook email that either asks you to confirm your email address or offers instructions on getting started with Facebook, that email’s date should be your Facebook account creation date. This is the best method if you no longer have access to your Facebook account, or you recently created your account and so the welcome email is easily accessible.
How to Recover Your Facebook Account When You Can't Log In
Read Next
Share Tweet Share Share Share Email
Related Topics
About The Author
Mahesh Makvana (304 Articles Published)
Mahesh is a tech writer and editor at MUO. He's been writing about the tech for the past decade, and he loves to explain technology in simple words. You can find his work on some of the popular tech sites out there, including but not limited to How-To Geek, MakeTechEasier, and Online Tech Tips.
More From Mahesh Makvana
Join our newsletter for tech tips, reviews, free ebooks, and exclusive deals!
Click here to subscribe
Do you urgently need to write someone a message on Facebook, but you do not know if this user is online or not? Thousands of social network users face this situation. Determining the time of visiting the site, it turns out, is not so simple. In any case, unlike other social networks popular in Russia, you will not be able to find this information on the main page of users. What to do if it becomes necessary to see when a person came to Facebook? We will talk about this in this article.
In fact, within the framework of the American social network, there really is no way to clearly determine the time of the last visit of all users. The main assistant in solving this problem is Facebook Chat. As you know, in the list of contacts displayed in the Chat window, next to the names there are icons indicating the status of people in the social network.
If you see a green circle , then this user is currently online and using the built-in messenger.
If a person was active some time ago, then next to his name it will be written how long ago he used the Facebook messenger.
Alas, this method cannot be called 100% successful. Firstly, a person can simply turn off Chat, and even if he is currently on the site, you will not see a green circle next to his name. Secondly, information about the time of the visit in the messenger does not always coincide with reality.
Another way to determine the time of a person's visit to Facebook is to look at his activity on the social network. Scroll through the News Feed. If a user likes, reposts, or adds new material, you will see it.
Unfortunately, there are no other ways to see the time of visiting Facebook users on the site. The leadership of the social network takes the privacy of its users so seriously that it stops any opportunity to track their activity.
Such a policy, of course, does not suit many account holders, but it has a rational grain. This is how the creators of the most popular social network in the world protect the privacy of millions of users. For the same reason, you cannot find out who visited your page, or see information hidden by the account owner.
Do you remember how long you have been on Facebook, VKontakte, Odnoklassniki, Instagram, Twitter? We will help you remember. Also, these methods will help you find out the date of registration of any other users of social networks.
Facebook
Go to Activity log , then select the earliest year in the right column. After scrolling through the tape to the very first action. You may have to scroll for a long time if you were actively posting that year.
VKontakte
Enter the command vk.com/foaf.php?id=NAME in the browser. The username can only be a numeric number. It can be found here: Settings > General > Page URL > Edit .
The received code contains information about the username, field, date of registration, date of birth, etc.
But it is easier to use online services that will immediately show you the date of registration in this social network. For example: http://regvk.com/. When using such services, never enter any personal data (especially the password).
Odnoklassniki
We go to the mobile version of the site (if you go from a computer, use https://m.ok.ru/). Then click on your avatar in the upper left corner, then on the arrow and select item About me . This will indicate when the profile was created. If the year is not specified, then the registration took place in the current year.
In the same way, you can find out the date the profile was created from friends (the item is called About a friend ).
Instagram
We use a third-party Internet service: https://getip.social/tools/creation_date. Enter the username and get the date of registration.
If there are few posts, you can scroll through all the entries to the very first. But remember that not everyone leaves the first entry on the day of registration. Also, the first posts can be deleted.
Twitter
The easiest way to find out the date of registration in this social network. We go to the profile and see the desired date.
Many Facebook users are interested in how to see the guests on their page and find out when the person was last online. Let's take a look at these questions.
The question of Facebook users about who was on their page comes up very often. If, for example, in Odnoklassniki this function is built in by developers, then in Facebook she's gone.
Facebook guests
But there are various tricks and applications for viewing guests on your page. They give accurate and guaranteed results. You just need to install the extension and allow it to receive information from your profile. But is it really so?
This question was asked directly to the professionals who work at Facebook .
They gave an unequivocal and categorical answer that in this social network it is impossible to find out who viewed your page, since this functionality was intentionally limited. All programs that claim otherwise are either viruses or they are designed to get your personal data. They will never be able to display information about who viewed your profile.
There is one popular browser trick Google Chrome . The user is prompted to look at the source code of the page and get a supposed list of guests. But the specialists of Facebook stated that they had nothing to do with the people visiting your page.
In addition, the administration does not plan to do such a function.
This is another equally common question. In this case, it is worth noting that this information is also very easy to find out.
If you visit any page of Facebook user , the header will not exactly display the time and date of the last visit. In addition, you will not even see the status of the account. Therefore, you will not even be able to see if a person is online or not.
But you can still find out this information. To do this, look at the tape of the right person and look through his personal page.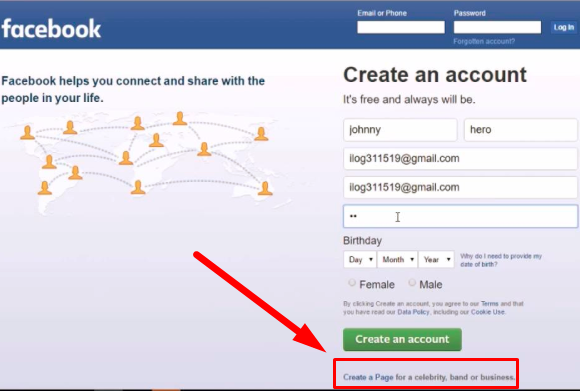
Go to the user's page. You will see his wall, where at the top of each entry is shown the date of its publication. You can also enable alerts so that you receive notifications when a person visits the site. For this :
In addition , you can set the priority of showing the news of specific people in your feed .
Settings in the show
. when you view the feed, you will see your friends' news in the first place and you will know when they were last online.
In order to find out the date of birth of a Facebook user, you need to go to the required page of the user. Then go to the Information tab, in the General information column you will see a line with the date of birth. Or on your page, go to the Events tab. On the left in the list of holidays, select the item Birthdays. You will see a list of the nearest birthdays of your friends and colleagues, as well as other users who are on your friends list.
Like all other social networks, Facebook also contains tons of fake accounts.
Another thing is that here they are actively fighting against them, sometimes punishing completely innocent people (read what they can block on facebook for).
Here are some tips that I try to follow when another stranger asks me to be friends or leaves a comment on my pages.
Adding it right away is foolhardy.
Always be suspicious of profiles whose main photo is of model-looking people. Moreover, the photos were clearly taken in studio conditions.
Yes, it's clear that this is not a reason to ignore a person, but most often, such accounts turn out to be fake, the main purpose of which is to gain the maximum large number of friends to use them in their own interests.
See when a person joined Facebook (connect the timeline, everything is in full view), or when he started to be active.
It's very strange if in a short period of time on Facebook, he "gathered" an incredible number of friends.
Very often, accounts are created to promote software products (Facebook applications). By adding such a person as a friend, get ready to receive tons of invitations to various games, messages of a dubious nature (“give me this and that in such and such a game”), etc.
Most fake profiles open their photo albums to everyone. As a rule, these are photos with tags pointing to other profiles. Photo comments containing tons of dubious links. Be careful.
If your profile is as full as possible, then with a high degree of probability it can be argued that this is a real person. Fake profiles are usually limited to basic information (sex photo, full name, age, interests), they don't have time for everything else.
If a person is real and conducts at least some, even if not very active, activity on Facebook, then he will definitely have an impressive number of pages in his interests.