Facebook is a treasure trove of memories of you and your friends, so you may want to download Facebook photos and videos to your computer or phone.
We'll show you the official methods as well as third-party Facebook photo downloader apps, allowing you to download your photos, your friends' photos, and videos.
If you want to save a single photo on Facebook, don't bother with third-party apps or websites. Facebook itself offers an easy downloader tool.
You can use this method to download Facebook photos. It's as simple as that.
However, to download your friends' Facebook photos, their Facebook photo privacy settings should allow for it.
If you want to download a Facebook album from your own profile, Facebook has a simple method to do that. Again, you don't need any third-party downloader apps for this. However, you'll need to use Facebook on the web since the mobile apps don't let you download albums.
Follow these steps to download your Facebook album:
Facebook will get to work creating a zipped folder. Depending on the size of the album, this can take some time. Once it's done, you will get a notification telling you that the album is ready to download. Click the notification, enter your Facebook password, and select Continue. Your album will immediately start downloading.
The downloaded album comes as a ZIP file. You'll need to extract this ZIP file to access the pictures.
There is also a simple method to download all photos from Facebook that you have ever uploaded. You will even get them in the right sub-folders organized by album. But the names of the files can be a little strange.
Here's how to use the easy built-in Facebook photo downloader:
Facebook will take some time to get the ZIP file ready, depending on how many photos and videos you have on Facebook. Once it's done, you will get a notification to download it from Available Files.
Download and unzip the file to see all of your posts and images, with albums as sub-folders.
3 Images
Multi Downloader for Facebook is one of the best Facebook picture downloader apps out there. It's free, it's super easy to use, and it works for videos, too.
With this app, you can download your own Facebook photos and albums, and your friends' Facebook photo albums, too. You can also search for users or Pages, and download photos and videos from there.
The app menu has quick links for Photos, Videos, Friends, Search, and a quick link to your downloaded images and videos.
Tap Photos for your own pictures, Friends to browse for someone in your friends' list, or Search to browse users and pages on Facebook.
The filter icon next to the search box at the top helps you find a user or a Page. Then browse to the album you want. Here, you can download all photos in the album or select a few to save. The method also works for videos. The major caveat is, the app is only available on Android.
Although Multi Downloader isn't as versatile as our previous favorite (VNHero Studio's Download Videos and Photos: Facebook and Instagram) that's no longer available, it does offer enough to stand among the rest.
Download: Multi Downloader for Facebook for Android (Free, In-app purchases available)
Pictures on Facebook have a simple Download button. But videos don't have any such easy way to download them. FDown.net is one of the easiest web apps you can use to save Facebook videos. The site lets you download private Facebook videos and works on desktop computers and smartphones.
Here's how to use it:
It should work like a charm. The downloaded file will be in MP4 format, which should be fine for most people. The method works on mobile browsers as well. We've tested the website on Chrome, Firefox, and Safari on Android and iOS, so pick any of the three.
FDown also has a handy extension for Google Chrome on desktop dubbed Video Downloader Plus. When you are playing a Facebook video, click the extension icon to download it to your computer.
Download: Video Downloader Plus for Chrome (Free)
There are lots of other sites that work the same as FDown. Now that you can save Facebook videos, you might want to go back and search for old videos you liked. To help you do that, here's a guide on how to find videos on Facebook.
Apart from photos and videos, Facebook has a ton of other information about you. The company is also notorious for its data collection.
The above methods let you download photos and videos easily, but you might want to consider backing up your Facebook history and learning about other download and data management tools.
You know, it’s easy to save a single photo on Facebook. Just hover over the image, right-click or tap on the image and select “Save Image As…”, pretty simple, huh?
What if you have a thousand pictures to download? I bet you don’t want to save them one by one.
That’s why I decided to write this post – sharing a number of methods to download ALL Facebook photos, videos, and albums the quicker way.
Imagine, with only a few clicks, you get a copy of all your favorite pictures. Even better, you’ll get the exact albums/photos you want without sacrificing image quality.
You could then keep those digital memories in a safe place, or share them with family members offline. For those who want to close their Facebook account, you can do so without worrying about data loss.
Quick Note: Thanks for all your feedback! It’s a bit tiring to update this post because many apps and Chrome extensions that used to work now don’t, due to frequent Facebook API changes. Therefore, I’d rather not take the time to actively monitor each of those tools.
After you download all your photos or albums, I highly recommend you make at least one backup to an external hard drive. Also, make sure to back up your PC and Mac just in case.
Table of Contents
If you’re looking for a quick way to back up all your Facebook data, including those precious photos, then look no further. Just log into your account, go to Settings, click Download a copy at the bottom, then follow the instructions. Facebook will provide you with a copy of your archives.
Here’s a helpful video by TechStorenut that shows you how to do this step-by-step:
What I like about this method is that the process is quick, it took me only a few minutes to back up all the data which is perfect if you decide to close your Facebook account for good. Besides media files, you can also export your friends’ list and chat logs.
However, the quality of exported photos is kind of poor, they are not the same size compared to what you originally uploaded. Another con of this method is you can’t really specify which album or photos to include. If you have thousands of photos, it’s a pain to find the ones you want to extract.
Disclaimer: I don’t have an Android device to test this free app but lots of people gave it a good rating on the Google Play store. I’m thus featuring it here. If you are using an Android phone (e.g. Google Pixel, Samsung Galaxy, Huawei, etc.), please help me test it out and see how it works.
Download this free app from Google Play here.
IFTTT, short for “If This Then That”, is a web-based service that connects many apps you use with methods called “recipes.” There are two types of recipes, DO and IF, for you to choose from.
To download your Facebook photos, choose the “IF Recipe” to get started. Next, select “Facebook” channel under the “This” option, and in the “That” option, highlight another app — like Dropbox, Google Drive, etc. — where you want to store your new FB pictures. Click “Create Recipe” and you’re all set.
Now you can check back on your Dropbox or Google Drive and see your new Facebook Photos. Above is a screenshot I took showing the last step.
ClearingtheCloud has shared a nice video on how to create that kind of recipe step-by-step. Check it out:
IFTTT is very intuitive with a clean user interface and simple instructions, it also supports dozens of other apps and services – you’ll find gazillion ways to use IFTTT completely free, with no ads. Personally, I love the name. It reminds me of the if…else statement in C programming 🙂
The downside is also obvious, it won’t work with photos you’ve already been tagged in. Plus, it’s a bit time-consuming to create multiple recipes for different purposes.
Simply speaking, odrive is like an all-in-one folder that syncs everything (photos, documents, and more) you use online. It also downloads your Facebook photos.
To do this, sign up for odrive via Facebook. Almost instantly, you’ll see a folder has been built for you. That’s where you’ll find all your Facebook photos.
Unfortunately, there’s no one-click option to download files in a batch. Though odrive does allow you to view each photo one by one and click download, that’s going to take ages if you have thousands of photos.
However, that does not mean there isn’t a solution. All you need to do is to install the odrive application on your computer or mobile device, then sync up those photos in a single click.
I really like odrive. The app is well designed with friendly user interfaces. You can use it to sync with many other apps besides Facebook. And it also allows you to backup, view, and organize Facebook photos on computers and mobile devices.
If you want an application to organize all your photos whether you’re online or offline, then Fotobounce is an awesome choice. As a comprehensive photo management service, it enables you to easily download all your pictures — as well as specific albums — shared or uploaded by you or your friends on social networks.
To download your Facebook photos and albums, launch the app and log into Facebook through the panel on the left. In just a few seconds, you’ll see all of your stuff. Simply click “Download” and save to your desired destination (see image below).
You can also watch this YouTube video for detailed instructions:
The app is very powerful and it has lots of useful features. It’s available for both Windows and macOS, and it supports Twitter and Flickr integration as well.
However, it takes time to download and install the software as the Mac version takes up 71.3 MB. Also, I think the UI/UX has room for improvement.
If you use Google Chrome like me, then getting your Facebook albums is easy. All you need is this extension, called Download FB Album mod (now renamed as DownAlbum). The name says it all.
Simply search and install the extension in the Google Chrome Store. Once that’s done, you’ll see a small icon located in the right bar (see below). Open a Facebook album or page, click the icon, and hit “Normal”. It’ll start collecting all the images. Press “Command + S” (for Windows, it’s “Control + S”) to save your pictures.
Here is a video tutorial made by Ivan Lagaillarde.
The plugin is very easy and quick to set up. It’s able to download photos from both albums and Facebook pages. Also, I found the quality of exported photos pretty good. However, the user interface is really confusing. At first, I didn’t know where to click, honestly.
IDrive is a cloud storage and online backup service that allows users to create data backups or sync important files across PC, Macs, iPhones, Android, and other mobile devices. It’s like a secure hub for all your digital data. One of the features is Social Data Backup, which allows you to backup Facebook data within a few clicks. Here’s a step-by-step guide:
Step 1: Sign up IDrive here to create an account. Then log into your IDrive, you’ll see its main dashboard like this. On the bottom left, select “Facebook Backup” and click the green button to continue.
Step 2: You’ll be prompted to log in with Facebook, input your Facebook username and password, and hit the blue “Continue as [your name]” button.
Step 3: Wait a minute or so until the importing process is complete. Then click on your Facebook profile and go to next step.
Step 4: Now’s the magic part. You can select the Photos and Videos folders, then click the “Download” icon to save the files.
Or you can open specific albums to browse your uploaded photos. In my case, IDrive displays the photos I shared on FB during a trip to Stanford University, Palo Alto, California.
Please note that IDrive only offers 5 GB of space for free, if you decide to expand the volume you need to pay for a subscription. Here’s the pricing info.
Pick&Zip is a free online tool that allows you to quickly download and back up photos–videos–from Facebook in a Zip file or a PDF, which can then be used for backup or sharing purposes.
The beauty of this solution is that you can build customized lists based on your albums and tagged photos. To do this, simply click the “Facebook Download” option as shown in the image below. You’ll then be asked to authorize PicknZip to extract your data.
What I like about this web tool is that you can build and select your own photos or albums. Besides photos, it also downloads videos you’re tagged in. And it works with Instagram and Vine photos. But the flash ads on the site are a bit annoying.
fbDLD is another online tool that works. Similar to PicknZip, all you need to do is log into your account and you’ll see several download options:
To get started, select one option and click “Backup”. In a few seconds, depending on how many pictures you have, it’ll be finished. Just click the “Download Zip File” button, and you’re done!
I like web-based tools like fbDLD as no installation is required, and it offers several different backup options for you to choose from. Best of all, it doesn’t reduce file size thus photo quality is very good. During my research, I found several users had reported the album download links not working issue, though that didn’t happen to me.
I’ve tested dozens of tools, and these are the ones that still work by the time this post was last updated. Due to the nature of web-based products, it’s sometimes inevitable for existing tools to become outdated. I’ll try my best to keep this article up-to-date.
That said, I’d appreciate it if you can give me a heads-up if you find a problem, or have a new suggestion. Just leave a comment below.
Skip to content
Svetlana Simagina
Do you need to save all the photos from your Facebook profile? Luckily, this is a lot easier than you might think. What's more, you can do it right on your iPhone, iPad, Mac, or Windows PC.
Following a data breach in early 2018, the company changed its privacy policy to allow users to download all their data from Facebook. This includes your photos, videos, messages, posts and more. With the new feature, you can easily download all your photos and videos in one go.
Below we'll show you how to do this on a computer or mobile device.
6. You will see a message that your copy is being created. Will have to wait a while. Then press Download .
That's all, after downloading you will receive a file with all your photos and videos.
If you don't need all the photos from your profile, you can save only the ones you need one by one.
That's it, saving photos one at a time is even easier.
All photos are saved as a ZIP archive that you will need to unzip to view your photos. In this tutorial, we focused on the method for the iPhone and iPad, but it will be almost the same on the computer. Note that the downloaded photos also include those in which you were tagged by other users.
Facebook allows you to download not only all photos and videos, but also other information. For example, payment history, your places, messages and other data about your activity. This is done in the same way.
Rate this post
[total: 4 rating: 4.3]
The ability to share your photos with family and friends is one of the best features of Facebook. However, it's important to present your Facebook photo albums in the best possible way. Your photos just won't look as good if they're displayed in impersonal, cluttered albums.
To add personality and order to your Facebook photo albums, here's how to customize, delete, and organize your Facebook photos.
You've already uploaded all your photos to Facebook in bulk, but what if you forgot a few? If you need to go back and add more photos to an album, Facebook gives you the option to add any photos and videos you missed.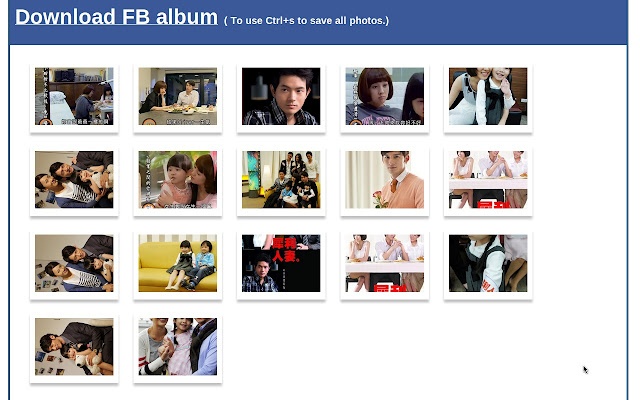 You can upload more photos with a few simple clicks:
Programs for Windows, mobile applications, games - EVERYTHING is FREE, in our closed telegram channel - Subscribe :)
Now that you've uploaded these extra photos, you can share even more memories with your friends and family.
After creating an album, Facebook automatically selects one of the photos as the album's thumbnail. This picture serves as the front end of your scrapbook, so it should sum up the trip, experience, or occasion you are documenting. If you want to change your album art, follow these steps:
When you view your album on Facebook, you now see this image as your cover image.
If you don't want to deactivate your Facebook account but want to get rid of some photos for privacy reasons, you can remove multiple photos from your Facebook album. Facebook doesn't have a handy bulk delete option, so you'll have to delete each image one at a time using this method:0003
This is a laborious process, but it is the only way to get rid of unwanted images.
Maybe you want to place photos in a Facebook album so that your favorite photos are at the top of the album. Or maybe you want to organize your photos by location, subject, or date. In any case, you have the freedom to rearrange the photos in your Facebook album by doing the following:
As you move your photos, you will notice that the other photos in your album will automatically move to match the new photo position.
To give your Facebook friends some context for your album, you'll want to write captions for your photos and album. Thankfully, Facebook makes the process of creating captions easy and all you have to do is follow these steps:
In addition to adding captions to your photos, you can also tag people in this menu by clicking on someone's face and searching for their name. You can also add a date or location by selecting the clock icon and the GPS pointer icon below each image's label box.
Downloading Facebook photo albums allows you to save an entire album to your computer. These simple steps will start the download process:
Depending on the size of your album, the download may take a few minutes. Keep in mind that there are quite a few ways to download photos and videos from Facebook, using both third-party apps and official methods.
When you have uploaded all your photos to an album, you may have accidentally uploaded some photos from another album. To solve this problem, Facebook makes it easy to move images between existing albums with the following steps:
You cannot move multiple pictures at once, so get ready to do some repetitive work if you have multiple pictures to move.
After attending an event with family or friends, you can create a new Facebook album with photos of your favorite memories. To add even more photos to your collection, consider creating a shared album. This gives your Facebook friends permission to upload photos to your album, making it a great way to see more photos from different angles. Here's how to set up a shared album: