From Saturday Night Live and the Super Bowl to celebrity slaps at the Oscars, there’s no denying the thrill of watching events unfold in real time. You just never know what could happen. That’s why social media live streaming is so appealing to viewers and why content creators should be getting in on the action.
Since YouTube’s very first live event in 2008, internet users have grown from lukewarm to fully obsessed with social media streaming. These days, nearly a third of all internet users report watching at least one video live stream each week.
And can you blame them? Live streaming is authentic, engaging, and—we won’t deny it—a little bit thrilling.
What is social media live streaming?
How to go live on social media
8 tips for successful social media live streaming
Bonus: Download a free checklist that reveals the exact steps a fitness influencer used to grow from 0 to 600,000+ followers on Instagram with no budget and no expensive gear.
Social media live streaming refers to real-time videos shared on social media platforms (as opposed to videos filmed in advance and then posted to social media). It is sometimes referred to as “going live” and is most often used by creators and influencers, who can tap into features like live chats, polls, and question prompts to invite viewers to participate in real-time conversations with them.
Because most platforms also allow users to give streamers gifts that can be redeemed for cash, creators can also earn a fair amount of money with social media live streaming.
Source: Facebook
How to go live on social mediaAt some point, you’re going to get that burning urge to go live on social media.
But the smorgasbord of social media live streaming platforms can be downright overwhelming. Instagram or TikTok? Facebook or YouTube? Is Twitch just for gamers? (Side note: no, it’s not. )
)
The answer, though, is simple: you should be streaming wherever your audience (or future audience) is hanging out.
Here’s some helpful demographic information on each of the major social media networks to help you address your target audience and figure out where to go live.
Then, read on for details on how to master live streaming on each one.
How to go live on FacebookDepending on your user profile and your device, there are a few different ways to go live on Facebook.
If you’re creating a mobile Live video for a business page:
If you’re creating a mobile live video for a personal profile:
If you’re creating a Facebook Live video on your computer:
Once you’re live, you’ll be able to see the names and number of live viewers and a stream of real-time comments.
When the show is over, the post saves to your profile or page (unless you’ve shared it to your story only).
Source: Facebook
Learn more about how to live stream from Facebook here.
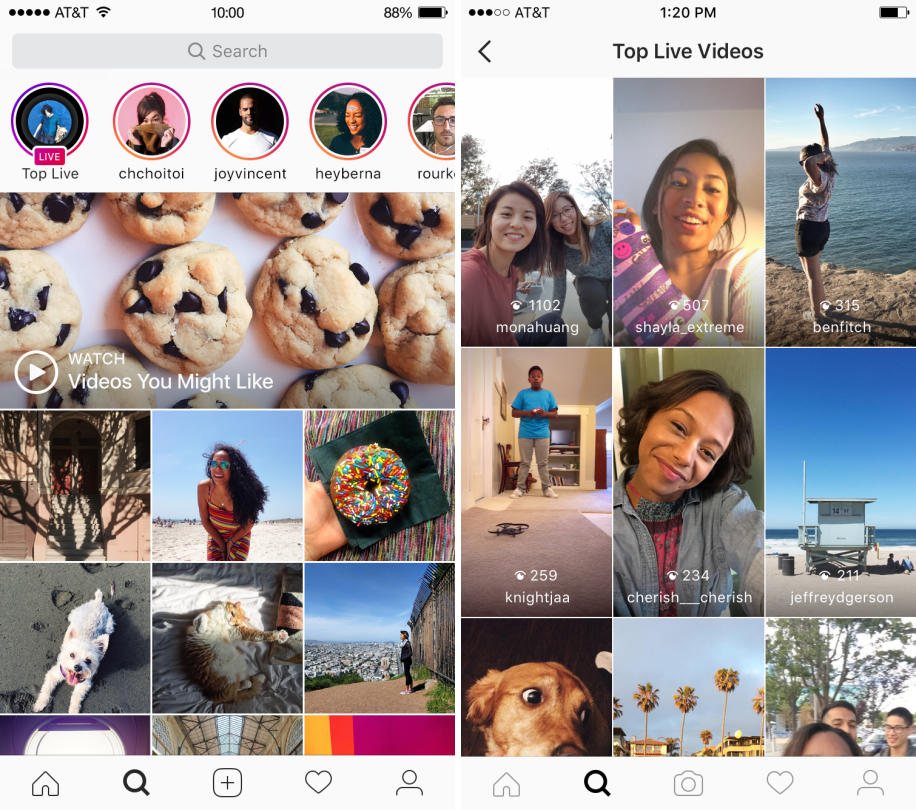
How to go live on InstagramOn Instagram Live (available on the mobile app only for now), you can collaborate with guests, ask followers questions, or use filters. When your session’s over, you’ll be prompted to share your stream to your Story if you’d like.
Here’s how to go live on Instagram:
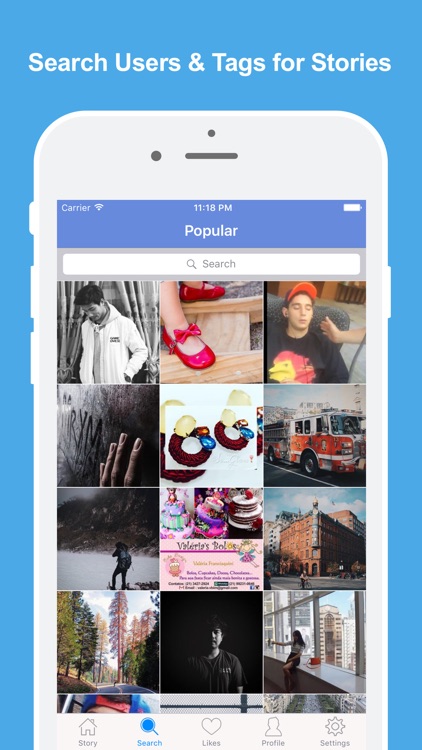
Source: Instagram
Find more tips for how to use Instagram Live here.
How to go live on Instagram and Facebook at the same timeWhile there’s no official way to live stream the exact same content on Facebook and Instagram simultaneously, there are some third-party that can help.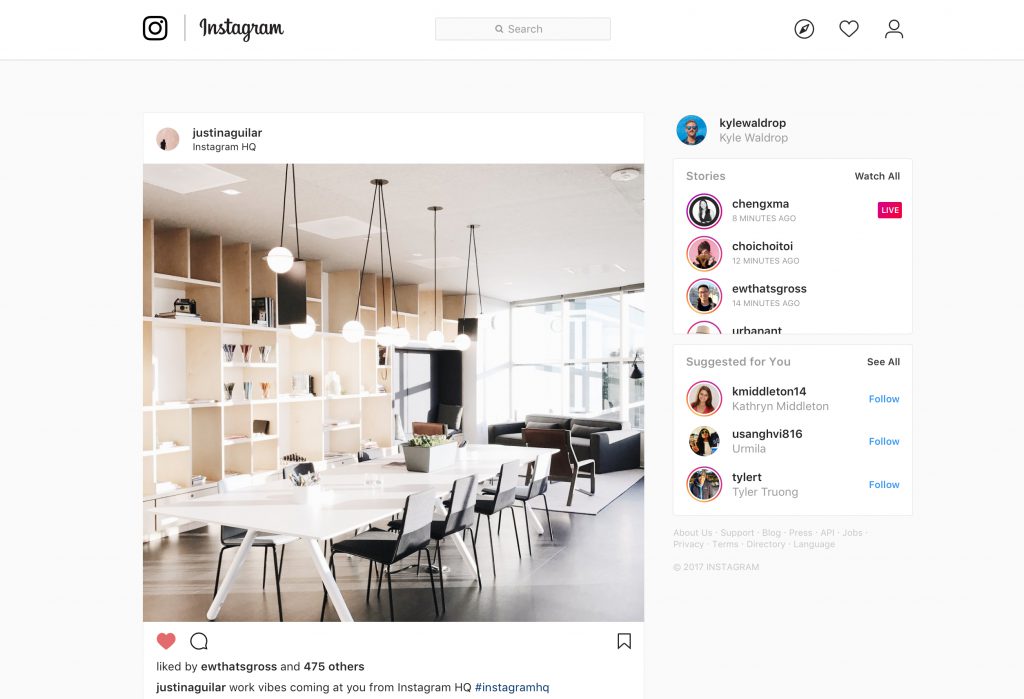
StreamYard, OneStream are a few of the multi-stream platforms that can be customized (unofficially) to broadcast to multiple platforms at the same time.
Though be warned that Instagram does not officially support streaming outside of its own app.
If you want to keep the solution lowtech (and legal), you could also use two devices to record simultaneously: one for streaming to Instagram, and second to stream to Facebook from another angle.
Keep in mind that double the broadcasts also means double the comment streams to keep track of. You may want to enlist an engagement specialist to help you.
Ugh, we get it, you’re popular!
How to go live on LinkedInAs of September 2022, LinkedIn Live is only available to users who meet certain criteria based on follower count, geographical location, and adherence to LinkedIn’s Professional Community Policies.
To check if you are eligible, tap Event from your home page. If you see LinkedIn Live in the event format dropdown, you are allowed to go live on the platform.
Source: LinkedIn
Unfortunately, LinkedIn doesn’t have the same native live streaming capabilities as other social media platforms. Instead, you’ll need to use a third-party tool to broadcast live to LinkedIn.
Note: When your broadcast is over, it will live on your LinkedIn feed to attract even more engagement on the rewatch.
Get the complete guide to going live on LinkedIn here.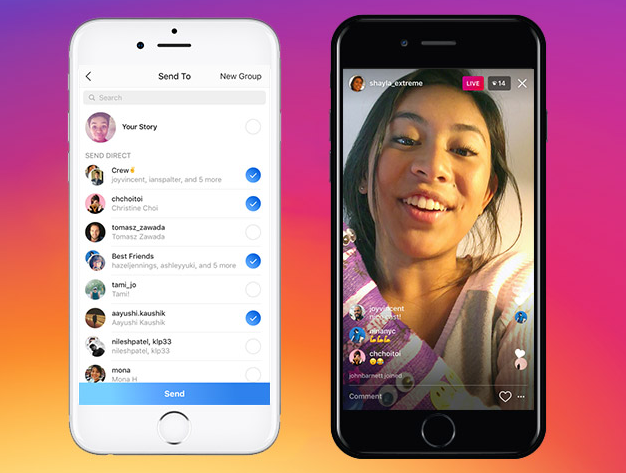
A video is the perfect way to stand out from the crowd in the non-stop stream of tweets. When you’re all done, you can share from the beginning to tweet the video in full.
How to go live on Twitter:
Source: Twitter
Here’s the full breakdown for how to go live on Twitter.
How to go live on YouTubeYouTube was the first major social network to offer live streaming. Today, it is the most popular place to consume live content.
A webcam or smartphone (if you have at least 50 subscribers) will get you rolling right away.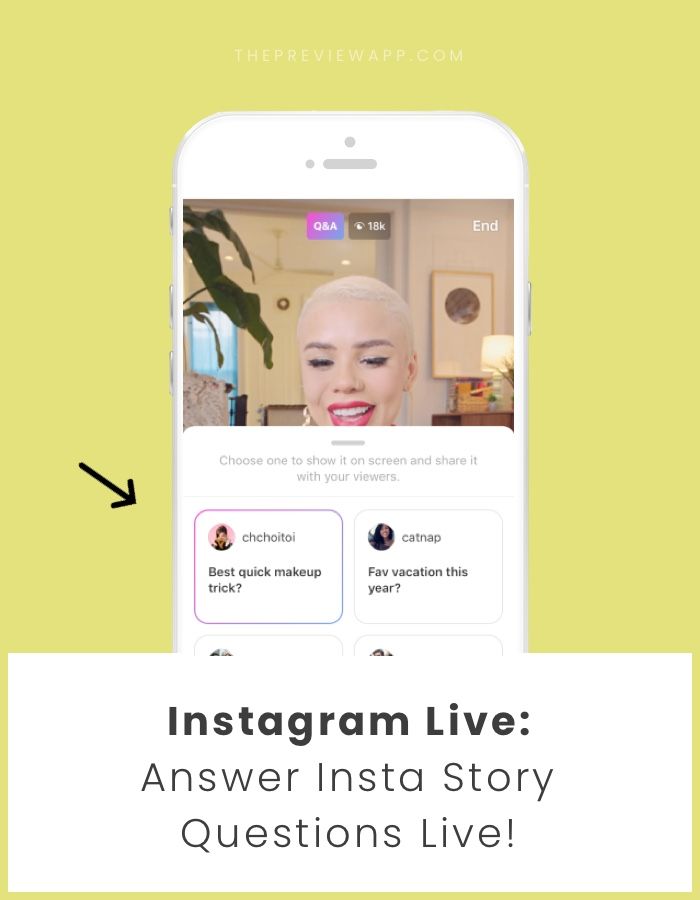 More advanced streamers can use encoders to broadcast from external devices, or screen share that awesome Mario 2 speedrun.
Any stream under 12 hours will be automatically posted to your Youtube channel for future generations to enjoy.
How to go live on YouTube with a webcam on desktop:
Note: you will have to verify your phone number with YouTube before you can go live from your desktop.
How to go live on YouTube on mobile:
Note: Only users who meet certain requirements can go live via mobile on YouTube. You’ll need at least 50 subscribers, have no live streaming restrictions, and be a verified channel.
How to go live on YouTube from an encoder:
Source: YouTube
Find more detailed instructions on how to live stream on Youtube here.
How to go live on TikTokAs of 2022, TikTok’s live feature is only available to users who have at least 1,000 followers and are at least 16 years of age.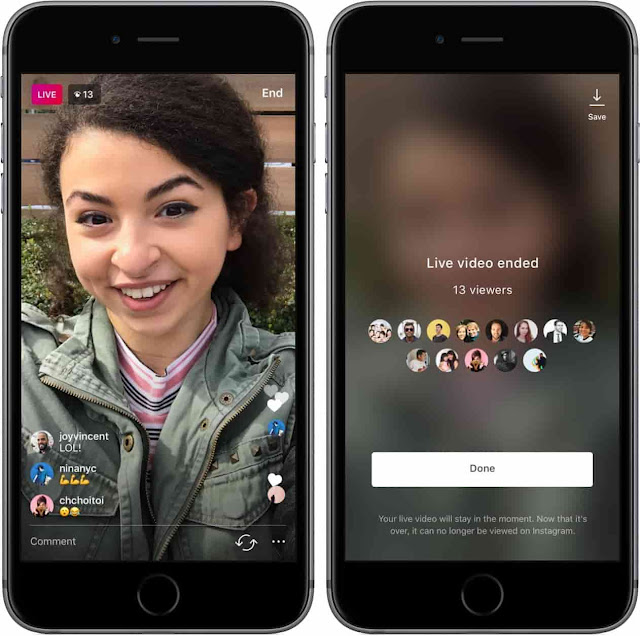
Haven’t reached the threshold yet? Here’s a potential trick for how to go live on TikTok without 1,000 followers.
If you’ve got access to TikTok Live, here’s how to use it:
Source: TikTok
How to go live on TwitchTwitch is unlike other social platforms in that it was built specifically for streaming, which means it’s a must for creators who want to break into live content.
This also means that going live on the platform is relatively straightforward.
If you want to stream videos of yourself or your surroundings, follow the instructions for how to go live IRL. If you want to stream yourself playing a video game, follow the instructions for how to stream games.
How to stream on Twitch in IRL:
How to stream games on Twitch:
How to stream on Twitch from desktop

Source: Twitch
8 tips for successful social media live streaming1. Leverage live analyticsAs with any other kind of social media post, you’ll want to pay close attention to your analytics after you’ve done a few lives. Instagram’s Live analytics, for example, can help you benchmark performance and hone your live strategy.
Make sure you’re posting at the right time to maximize views and engagement. Shameless plug: Hootsuite will tell you the best time to post based on when your followers are the most active.
Make note of views, watch time, average view duration, engagement rate, and reach.
2. Promote your big momentPeople might happen to catch your video as you press that “go live” button. Letting your audience know it’s coming up is only going to boost those numbers. When you schedule your social media posts, be sure to include information about upcoming lives.
Start a countdown on your various social platforms to hype up the moment: your Twitter crew might need a nudge to migrate over to YouTube when it’s your time to shine.
3. Make it timelyYour live video is competing for attention with the millions of other videos already out there. Having a timely “why now” hook will give your video an urgency more evergreen content will lack—like a one-night-only event (a holiday concert!), a seasonal special (an interview with Santa!) or an exclusive scoop (Santa’s dropping an album!).
Bonus: Read the step-by-step social media strategy guide with pro tips on how to grow your social media presence.
Get the free guide right now!
4. Create a dream teamSharing a live broadcast with another influencer or expert in your field is one way to attract attention.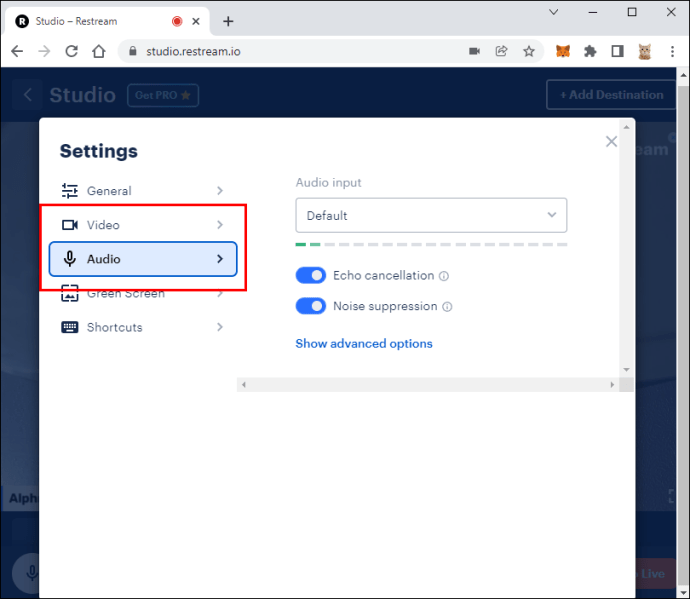
Whether it’s an interview with someone you admire or a more collaborative production, it’s a great way to leverage your guest’s audience into your own new followers. Sharing is caring, right?
5. Keep the context clearThe hope is that viewers will be watching from the very beginning, but the reality (or maybe magic?) of live streaming is that your audience will come and go throughout the broadcast.
Make sure it’s clear what they’re tuning into by occasionally reiterating the topic. A watermark, text or logo that clarifies who is on screen and what’s going on can be helpful, too.
6. Engage with your audience in the momentThe whole reason you’re doing your video live is to connect with your viewers, right? So make sure they know they’re a part of the show.
Say hello to commenters, welcome new viewers who are just joining the stream and answer questions on the fly if you can.
7. Have a roadmapThe beauty of a live stream is that anything can happen. But that isn’t to say that you shouldn’t have a goal of what you want to happen.
Financial expert Josh Brown may have been responding to viewers live on Twitter, but the Q&A format gave the off-the-cuff show some structure.
Jot down your key points or segments before you go live to keep yourself on topic. Think of it as less of a script, more of a road map.
8. Optimize your setupWhile on-the-fly filming definitely has its charm, videos that are inaudible or poorly lit can be a struggle to stick with.
Set yourself up for success by doing a sound check before you go live. Seeking out bright, natural light whenever possible, and using a tripod if a shaky arm is too distracting. (Why do they make those phones so heavy?)
Promote your live videos in advance with Hootsuite, an easy-to-use dashboard that lets you schedule posts to all the major social networks from one place. Then, engage with new followers and track your success.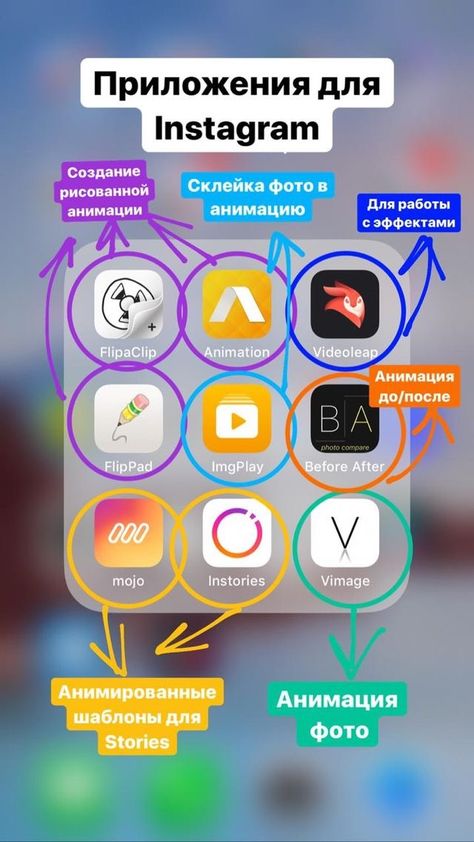 Try it for free.
Get Started
Do it better with Hootsuite, the all-in-one social media tool. Stay on top of things, grow, and beat the competition.
Free 30-Day Trial
Facebook owns Instagram, and they both have methods to livestream. With Facebook, you end up doing a Facebook Livestream. With Instagram, it’s a Live Video, either as a normal post or as a Story.
It stands to reason that a user of one platform might be a user of another, and it’s entirely possible that you might want to stream to both platforms simultaneously. After all, you want to reach the largest possible audience with each broadcast, and you can only do that if you reach both platforms.
So how can you broadcast to both platforms at the same time? Let’s discuss your options.
Phone Solutions
Hybrid Solutions
Instagram on PC
PC-Only Solutions
If you’re broadcasting via a phone, you may be out of luck. It depends on the resources you have and the effort you want to put into it.
There is no way to broadcast a live stream feed to two different platforms at once from your phone. It’s simply not possible, for one technical reason: one app can’t be accessed by more than one other app at the same time.
What this means, specifically, is that you can’t use your phone’s camera from two different apps at the same time. Since you would need to be using both Facebook and Instagram in app form to broadcast, they would both need access to your camera (and microphone), and your phone will not allow that.
Even if your phone did allow simultaneous access, encoding and broadcasting video is very hardware intensive. Some full-size computers have issues with it, so a phone with much lower specifications will have a correspondingly harder time. Granted, a computer is likely doing more processing, adding more effects, and broadcasting at a higher quality level, but the fact remains.
If you’re not able to use a desktop computer of any sort to do your broadcasting, and are limited to just your phone, you have two options. Option 1 is to pick one platform and broadcast to it, then save and upload the video to the other platform once it’s done. This is less than ideal, because it loses all of the real-time engagement from the secondary platform.
The other option is to simply use two phones. Set one phone up to broadcast to Facebook, and the other phone to broadcast to Instagram. Set the two devices side by side in front of you so you can see the chat feeds from both, and so that the cameras are roughly in the same place, so you don’t look or sound dramatically different from one to the other.
This isn’t necessarily an ideal solution either, since needing two phones means needing two expensive technological devices. There are plenty of other uses you can find for a second phone, even one that doesn’t have a cell data plan and relies entirely on your wifi, but it’s still an expense you don’t really need. Plus, if you have two different phones rather than two copies of the same phone, you might run into differences with configuration, video or audio quality, memory, or another issue that can hinder one stream while the other works fine.
As is, I consider this more of a workaround than an actual solution. If you want to broadcast to both platforms, I highly recommend using a computer.
Another option is to go with a hybrid solution. One phone cannot broadcast to both platforms, but you can use a phone to broadcast to one and a computer to broadcast to the other. This has the advantage of only using devices you probably have on hand, though you may need to purchase a webcam and a microphone or headset to broadcast via your computer.
The primary downside of using this option is that one stream is going to look and sound somewhat worse than the other, depending on the devices you’re using. If you’re using a powerful desktop computer with a good camera and a good microphone, your phone stream is probably going to look and sound significantly worse. If you’re using a good modern phone, but an old webcam and a headset mic, your computer-based stream might look and sound worse.
The primary advantage, as I mentioned, is that you likely already have everything you need to set this up. If you don’t have a webcam or a microphone, a cheap headset and webcam – or even just a webcam with a serviceable microphone built in – will only run you a small fee, likely under $100. The software necessary to broadcast to either platform is free, though I’ll discuss that more in the next section.
Instagram has historically always been a mobile-only platform, and that includes limitations on their streaming. As of right now, as near as I can tell, there are only two ways to broadcast to Instagram via a PC. One is to use their official cross-compatible app that only works in Windows 10. The other is to emulate the app using a phone emulator like Bluestacks.
In either case, to broadcast to Instagram with anything more than a basic camera feed – for example, if you want to use overlays, alerts, or a picture-in-picture feed – you need a streaming software to output to a single feed you can pick up as a virtual camera. You can configure this with any of the software listed below, but it’s a bit too advanced for me to go into right here.
If you don’t want to broadcast from a phone for one reason or another, that’s perfectly fine. I personally have found that phone streams are only really worthwhile when you’re doing a stream on the go. Tourist streams, streams of life as you experience the town or a party, those kinds of events. For a premeditated stream in the comfort of your own home or place of business, a PC setup is much better.
When using a PC, you essentially have two options. You can use two instances of the same software, or you can use two different pieces of software. In addition, there are a few goofy workarounds you might need to use, depending on what you’re streaming.
If you’re streaming a piece of software, a game, or anything that doesn’t require a peripheral like a webcam, you can often just configure two pieces of software to capture the window or application, and broadcast just fine. Your microphone audio will be picked up by the operating system and be broadcast from there, so you don’t need to add your microphone as a source directly.
Using a webcam or peripheral camera for your broadcast makes things more difficult, because you run into the same issue as with a phone camera. The camera can only broadcast to one destination at a time. The main workaround to this is to broadcast your stream to a server you control, and then capture that stream to broadcast to your other locations, though that requires even more tricky setup. The other alternative is to use a camera specifically designed to have multiple outputs, though these tend to have one high quality stream for security purposes and one for monitoring. As you might suppose, this too is less than ideal.
Personally, I prefer Open Broadcaster, or OBS. OBS Studio is a great, free, open source piece of software that has a ton of control options for streaming. Plus, it’s easy to get more than one instance of it working.
Actually, let’s talk about that before digging too deep into software. With any application that typically only has one instance available, you can force it to open multiple instances. Right-click on the application .exe file and click properties. You will see a file path, something like C:\Program Files\OBS\OBS.exe. You will want to edit this line to add -multi to the end of it, so the final line looks like “C:\Program Files\OBS\OBS.exe -multi”. This allows you to open more than one instance of the program.
This option works, but will encounter difficulties using the same devices or the same captures. Just because you’re opening more than one instance of the software doesn’t mean you’re using different versions of the dlls or other file associated with the program. To do that, you will need more than one installation of the software.
You can also install more than one piece of software. For example, you might install OBS Studio and OBS Classic. OBS Classic is an older version of the program with fewer features, but it includes all of the basics. You’re free to use both at the same time, though again, you’ll run into conflicts trying to use the same camera feed for both.
Here are your software options:

 It can support as many sources as your computer can handle, includes conferencing features, can add in widgets like scoreboards and timers, and has a lot of additional filtering and control options. It’s also not a free option, though. The studio version, with unlimited inputs and destinations, two remote guests, and standard support is $700. The pro version includes more inputs, more outputs, expanded capability in every zone, and higher caps on conferencing, but costs you $1,000.
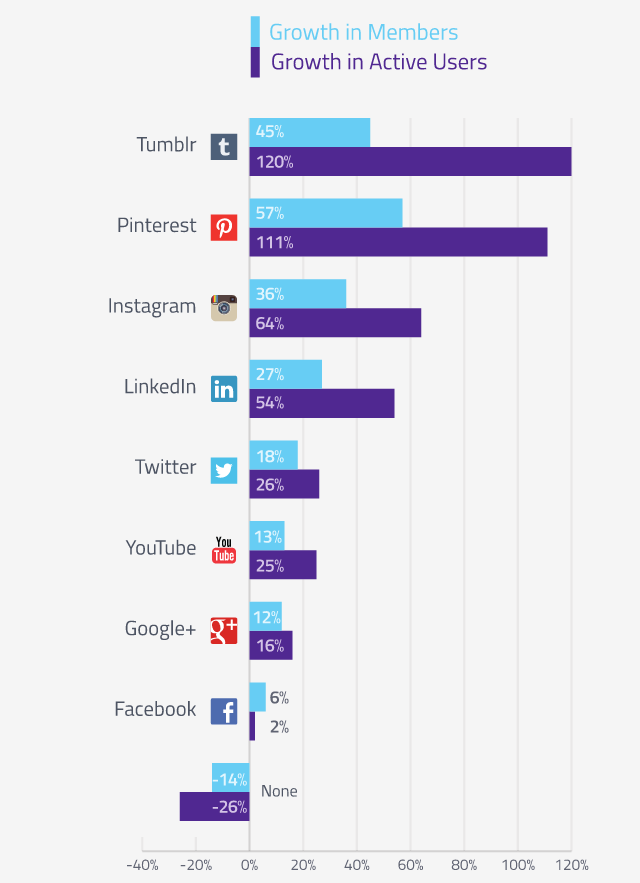
Picking two free options, a free and a paid option, or a single option that supports multiple outputs can all get you the same result: broadcasting to both Facebook and Instagram at the same time.
Help Center
Instagram features
Broadcasts
You can invite up to three guests to your room live or send a request to have someone else live. There are two ways to start a live broadcast and invite guests on Instagram.
Note. The author of the broadcast can only invite guests who follow him on Instagram.
To invite a guest to live on Instagram:
Tap the icon at the bottom of the screen or swipe right anywhere on the ribbon.
Scroll to Live TV at the bottom of the screen.
Press .
Press . Here you will see requests to join your room. You can also click next to the username you want or search for the username at the top of the screen.
Click to invite subscribers to live.
Select Submit Request. If the guest accepts the invitation, they will appear live in the room. If the invitation is declined, a notification will appear.
To delete a user who has joined live in a room, click the x icon in the upper right corner of the frame in which it is displayed.
To request to participate in the live stream you are watching:
Click the icon at the bottom of the screen.
Press .
Click Request to Join and then Submit Request.
If your request is accepted, you will be notified that you are ready to join the room live.
Note. In the comments section, you may receive an automatic notification asking you to submit a request to participate live in the room.
Was the article helpful?
How to start live on Instagram?
Instagram Music
Instagram Video Upload Requirements
Viewing Other Users' Live Videos on Instagram
How do I complain about Instagram Live?
© 2023 Meta
Jobs
Terms of Use
Privacy
9 min. reading
According to Hubspot, 78% of people watch online video every week and 55% every day. By 2020, online video will account for over 80% of all consumer internet traffic (85% in the US).
With so many videos popping up left and right, how do you, as a live broadcaster, stand out from the crowd? Here are some tips to help you with this.
Wear something comfortable and don't obsess over your background.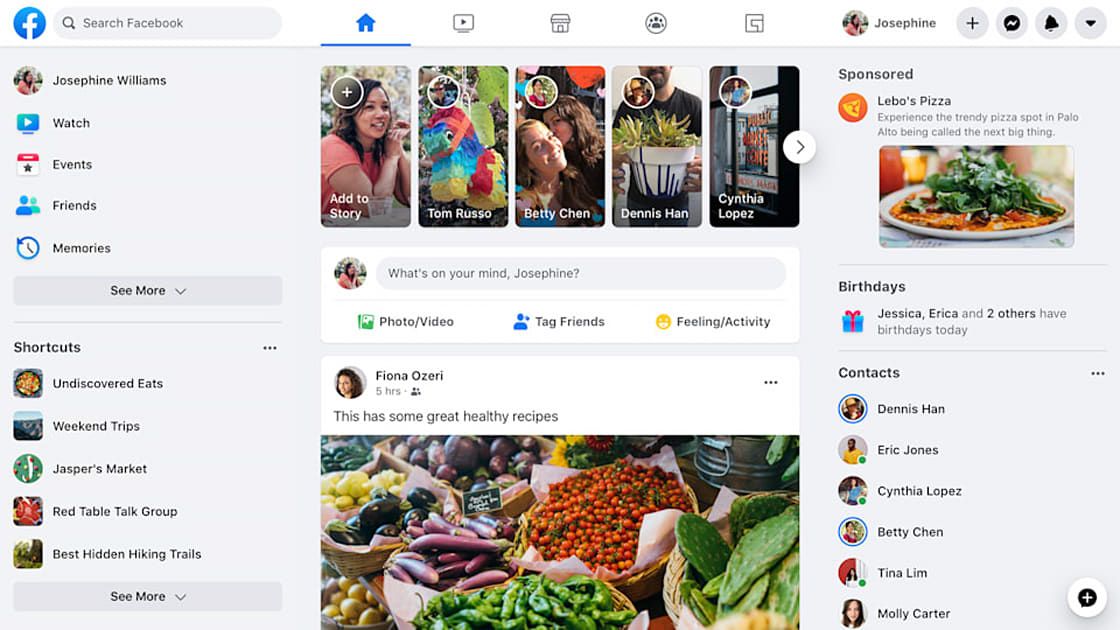 If you wear something comfortable, you won't have to worry about your outfit. If you wear something nice but ill-fitting or uncomfortable, it will show on the screen, and no one wants to look at a person who is constantly fiddling with their clothes.
Real-life examples of what you can wear for your live shows
For the background, keep it clean, but remember that there is no need to buy new things to decorate the place. People will watch you for your content, not for the decor that can be seen in the frame.
It sounds trite, but why try to copy someone else's style when you have your own unique way of doing things. Netizens can recognize a fake person from a mile away, and they can be quite ruthless when they see one. It is best to remain yourself, because in this case the right audience will find its way to you.
advice
Don't try to copy someone else. Netizens can spot a fake person from a mile away.
It's true that you may not have the numbers you want at the beginning, but you will definitely rise to the top if you are true to yourself and your content.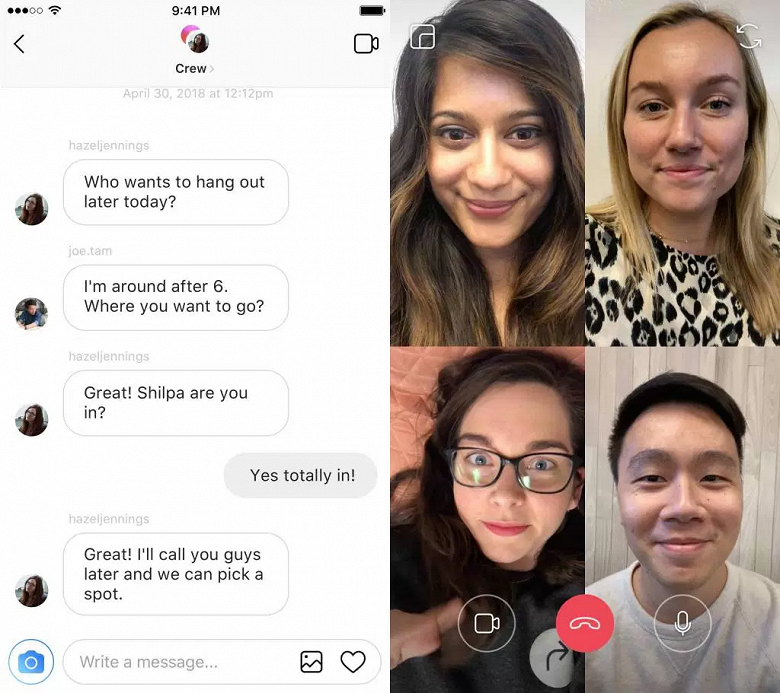
There will be days when you don't want to live stream or record. Press the live button anyway. If you only have 10 or 20 minutes left, sit down, press the button and go live. Practice makes perfect, and the more times you go live, the better you get at it.
The more times you participate in concerts, the better you will get.
You also need to stick to the schedule and stick to it, because people will expect you to come when you say. If you don't keep your word, the chances of the person returning for another show are minimal. So make sure that even if you're having a lousy day, you should push the button and just go live.
Use a green screen or choose a branded item to serve as part of your background so that when people look at your feed and see that item or background, they will immediately identify it with you.
Notice how Facebook expert Marie Smith has a recognizable style in all of her live videos
Think of the biggest brands and how you can easily identify them even if you only see part of them their logo.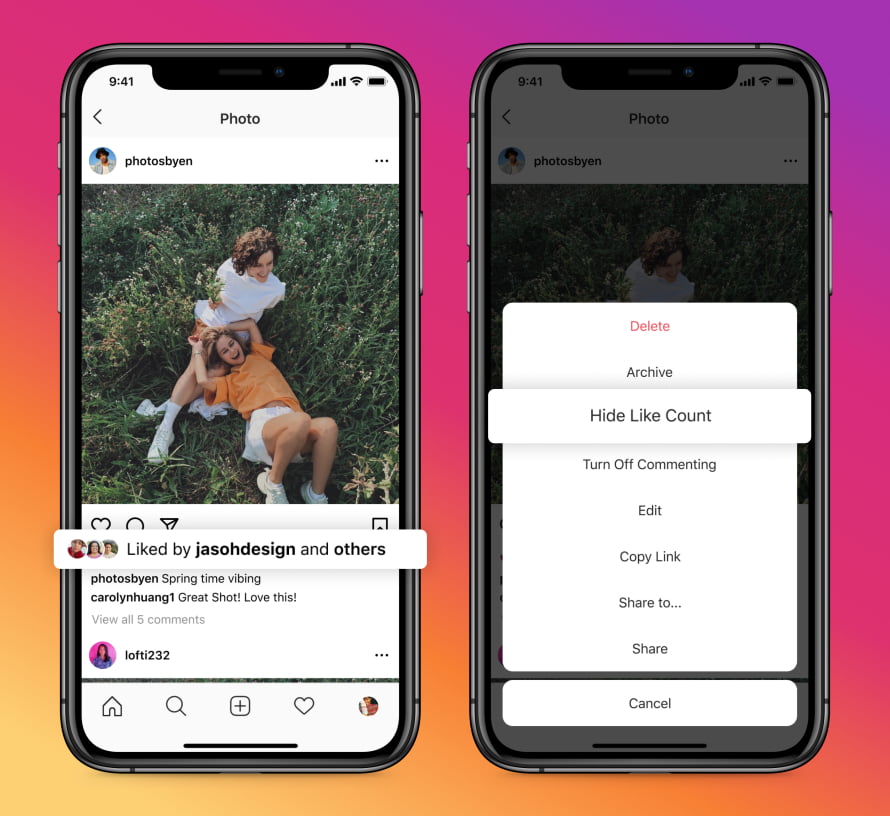 That's what's called with the correct branding of . As a streamer, you need to create a brand for yourself, your space, and your show. Everything needs to be consistent and have a consistent look and feel that people can identify with your show. It's never too early to start branding.
You can also start with a statement at the beginning of a broadcast and repeat it at the beginning of each broadcast. Jeffree Star, the famous YouTuber, starts every video with "What's up folks? Welcome to my channel! Hey, how are you?" and people have learned to associate that saying with him.
You can then end the show with a question or a quote so that when people hear it they learn to associate it with you and know that this is the end of the video they are watching. Saying associations are also a great way to brand both your show and yourself.
Engagement is key to live streaming, and in most cases, this is where many streamers fail. They focus on what they will say and look good in front of the camera and forget
respond to what their audience is saying.
When you become like an emoji, you react to what your viewers tell you. You can laugh with them, show love, empathize when needed, and be grateful for all the support they
give. This takes interaction to a whole new level and helps viewers feel connected to you.
advice
When you become like an emoji, you react to what your viewers tell you.
You can also ask the audience questions that you think might elicit a response. It could be as easy a question as Coke or Pepsi ? What matters is that you increase engagement. If there is some permanent viral thing, as it used to be with the blue and gold dress, that too could be a question you ask.
By asking easy questions, you can also gauge your audience's mood and tickle them so you know how to move on to more serious things. Some viewers like easy questions, while others prefer to get to the bottom of things. Feel the pulse of your audience and you can easily increase the engagement of your shows.
When you go live, you want people to remember you. You want them to share your video, react to it, comment on it, and tell other people about it. You want people to be willing to share it without you forcing or, worse, begging them to do so.
You want people to want to share your video live without forcing or begging them to do so.
If you can use the right tools to make you look more professional and an expert in your niche, people will be drawn to it and more likely to do the magic 3 things: react, comment and share.
One such tool is BeLive.tv. This is a platform that does not need to be downloaded. You just need to sign up with either Facebook or Twitch and you're good to go. You can use the lower thirds to let people know what segment they're in, so even if they're watching your stream in the middle of a live stream, they know what to expect and what's going on.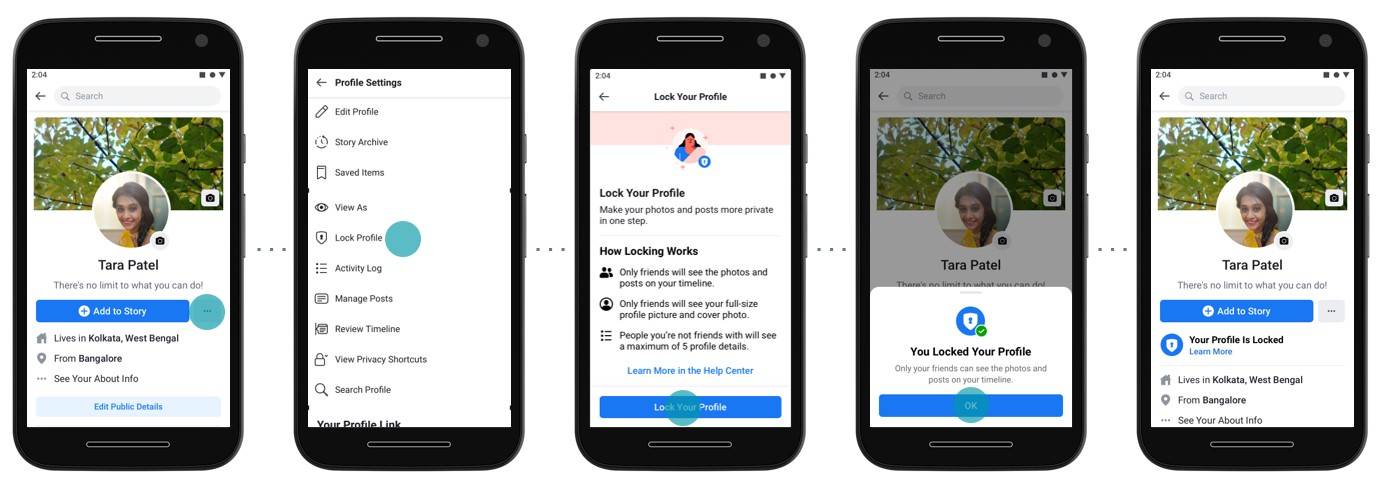 You can even invite 3 more guests during the show.
Using the lower thirds, the agenda feature, and the ability to schedule live broadcasts are some of the best ways to prevent venality from appearing in your live broadcasts. The lower thirds can constantly show a call to action without having to say it.
The agenda feature helps you not get lost during a live broadcast, and broadcast planning gives you more than enough time to promote the show, let people know what it's about, and prepare them for what to expect from the show.
You don't have to worry about getting lost in the discussion because with the Agenda feature you can always be reminded of what to say next or follow a plan to stay in control. BeLive.tv turns your live streaming experience from simple to professional.
This is how you really stand out.
About the author: Cathy Ngo is a writer and content editor at BeLive.