Facebook events can help you bring together a group of friends for a birthday or raise awareness about an event your company is hosting.
Facebook users can discover these events through invites from their friends, engagement from friends, or suggestions made by the website itself. Events make it easier to share information about both one-time programs and recurring ones.
Here's how to create an event on Facebook for your brand page or personal profile from a desktop computer.
1. While on your business or brand page, click the "Events" tab under the name of your page.
Go to the "Events" tab. Grace Eliza Goodwin/Insider2. In the "Upcoming Events" section, click "Create New Event" in the upper-right.
Click "Create New Event." Grace Eliza Goodwin/Insider3. On the next screen, choose whether your event will be "Online" or "In person."
4. On the left side of the next screen, enter an event name, start date and start time, and end date and end time, if any. The privacy level will be automatically set to public for business and brand pages. Add a description and select a category from the drop-down list of options. The right side of the screen displays a preview of what the event page will look like — click the icons in the top right corner to preview the page on a desktop or mobile app. Click "Next" on the left side of the screen once you've entered the necessary info.
Fill in all necessary details on the left, and preview your event page on the right. Grace Eliza Goodwin/InsiderQuick tip: If you're creating an in-person event, you can click "Recurring Event" and choose the frequency of your recurring event.
5. If you're creating an in-person event, type in a physical location for the event. If you're creating an online event, choose one of the location options listed: "Facebook Live," "External link," or "Other." Click "Next."
6. On the "Additional details" page, click "Upload Cover Photo" to add your event page's cover photo. Click "Event settings" to add co-hosts, make your guest list viewable to all invitees, and choose admin and posting restrictions.
Upload a cover photo and edit your event settings. Grace Eliza Goodwin/Insider7. When you're done, click "Create Event."
8. Before taking you to your newly created event page, a pop-up will ask you if you want to "Boost your event." When you boost your event, you can pay for targeted event ads to specific audiences.
9. On the right side of your event page, click "Share event" or "Link a group" to notify people of your public event. Unlike with personal events, business or brand events don't have the option to invite specific friends from your friends list.
Select "Share event" or "Link a group" to spread the word about your event. Grace Eliza Goodwin/InsiderYou can change any of your event settings at any time by clicking "Edit" in the top-right corner of your event page.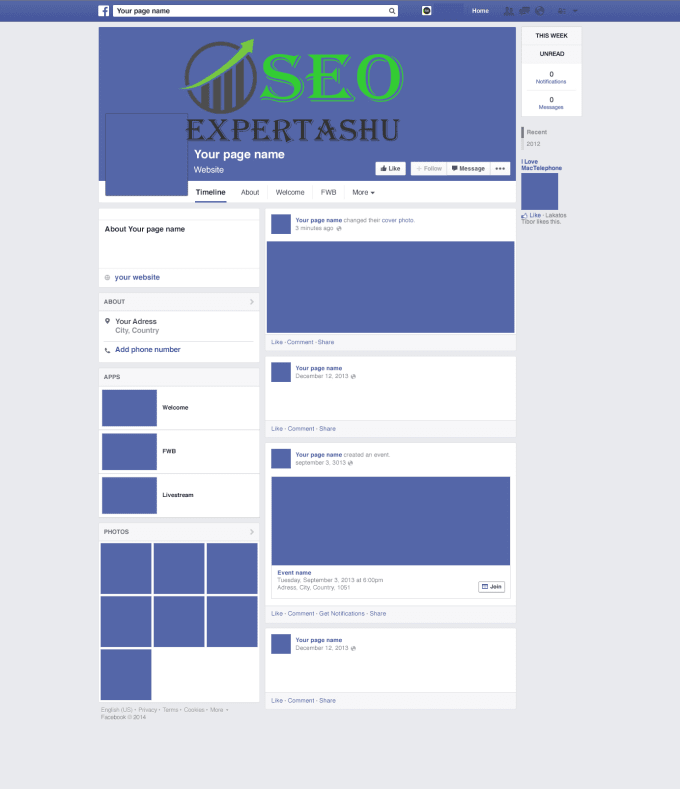
1. Go to Facebook website on a web browser and log into your account if necessary. From the homepage, click "Events" in the sidebar menu on the left.
Go to the "Events" page. Grace Eliza Goodwin/Insider2. Click "Create New Event" on the left side of the Events page.
Select "Create New Event" to begin. Grace Eliza Goodwin/Insider3..jpg) On the next screen, choose whether your event will be "Online" or "In person."
On the next screen, choose whether your event will be "Online" or "In person."
4. On the left side of the next screen, enter an event name, date and time, and privacy level. The right side of the screen displays a preview of what the event page will look like — click the icons in the top right corner to preview the page on a desktop or mobile app. Click "Next" on the left side of the screen once you've entered the necessary info.
Enter the necessary info on the left and click "Next." Grace Eliza Goodwin/Insider5. If you're creating an in-person event, type in a physical location for the event. If you're creating an online event, choose one of the location options listed: "Messenger Rooms," "Facebook Live," "External link," or "Other." Click "Next."
6. On the next screen, enter a description for the event, and click "Next" when you're done.
7. On the "Additional details" page, you can click "Upload Cover Photo" or "Choose Illustration" for your event page's cover photo. Click "Event settings" to add co-hosts and make your guest list viewable to all invitees.
Here you can add a cover photo or edit some of the event settings. Grace Eliza Goodwin/Insider
 8. When you're done, click "Create Event."
9. Now that the basics of your event are created, you can begin inviting guests. On the event page, click "Invite" in the upper-right corner. In the pop-up, select the friends you want to invite, and click "Send Invitations."
Click "Invite Guests" to begin inviting your Facebook friends. Grace Eliza Goodwin/InsiderYou can now see your guest list on the right side of the event page, including who's "going," who's still a "maybe," and who all has been "invited. "
"
After you create your event, you can always edit these fields. You can also invite new guests or post more information by updating the description or posting on the event wall.
If you have an event to promote, you should be making the most of your social currency to spread the word and help you sell tickets. Facebook allows you to set up your own event fan page for free so you can reach out to the site’s two billion-plus members. You can also set up private event pages that will help you to invite a select group of guests. Facebook Live allows you to share your event with those who might not be able to attend.
In this guide, we’ll teach you how to create an event on Facebook, share it, and make it private or public, depending on your event’s needs. We’ll also walk you through how to use Facebook Live and the best practices on sharing live content.
A public event is visible to anyone on or off Facebook who will be able to see things like the event description, photos, event discussion, and videos. The event may also be discoverable in search.
Once you’ve chosen the event type you’d like to create, you can add all of the details in the left sidebar. This includes information such as:
If you’d like to hide the guest list from the public, or from other people attending the event, you can uncheck the box that says “Display guest list” under “Event Settings” which is found in the sidebar when you get to the “Additional details” prompt.
With public Facebook events, you can also add SEO information to help your event become more discoverable. This includes a category, description, and keywords.
For example, if you’re running an online marketing workshop, you may want to add keywords such as “marketing,” “social media,” and “online workshop.” The next time someone searches “online social media workshop,” they could find your event, helping to increase registrations. And if your event is taking place in person, make sure to include the location in your keywords, like “New York” or “Los Angeles.”
Once you’re happy, you can click “Create” to make your event, or save it as a draft to return to later.
You can also see under “Event Host” that you can choose whether to host the event from your personal profile or from a Facebook business page.
The only people who can see private events on Facebook are those who have been invited. Guests can invite all their friends to an event on Facebook if the admin allows it and, if invited, these people can view the event description, photos, posts, and videos. Note that you can’t share a private Facebook event — you can only invite people to view it.
Good to know: Private Facebook events can only be created from a personal profile. If you’re creating an event from your Facebook business page, there is no way to make the event private.
Create a personal event by selecting “Private” in the left sidebar and following the same steps described in the public event instructions above.
If you want to host the event through your business, select the dropdown and choose the business account. You can also set up an event directly from within your Facebook business page using the guide below.
Follow these instructions to create a new public event on Facebook with a business page as the host:

You can also create a recurring Facebook event. Once you’ve filled in the required details, click “Schedule Multiple Events.” Under “Frequency,” click the dropdown menu and choose whether you want your event to take place daily or weekly. You can also create a custom frequency by clicking “Custom” on the calendar and choosing your own dates. This feature works well with Eventbrite’s Multi-Event Ads campaign tool, which is a great way to bolster your marketing opportunities without increasing your budget.
Changing circumstances happen all the time, and they might mean you’ll need to edit your event listing details. To edit your event, go to the business or personal profile hosting your event and you’ll see “Events” listed on the left-hand side. This is your events manager on Facebook, where you can see a list of all of your upcoming dates. Use the dropdown next to each event to edit, share, or duplicate your event.
To add another host:

If you need to add another host to your Facebook business event:
Alternatively, share from the event page itself by selecting the Share button at the top of the event page.
Remember: private events are invite-only and the general public won’t be able to see them.
Integrating your Facebook event with EventbriteIf you’re using Eventbrite to promote your event, you can easily integrate it with Facebook — with the added benefit that attendees can buy tickets without ever having to leave Facebook. Here’s how to do it:
Eventbrite has a range of helpful marketing tools, such as Eventbrite Boost, to help promote your Facebook event and get more out of your Facebook ads.
Eventbrite Boost is the all-in-one marketing platform designed for event creators. This tool makes it easy to reach new people, engage fans and followers, and grow your attendance – directly from your Eventbrite account. With Boost’s latest update, it’s never been easier to do just that. The new Eventbrite Boost features marketing plan recommendations that are personalized for you and your events, more effective campaigns and audience targeting powered by Eventbrite intel, and clearer visuals of audience insights.
Powered by Eventbrite’s exclusive data, Boost’s Smart Audiences feature allows you to find new attendees, connect with them through your social advertising, and sell out your events. Do this by adding Smart Audiences to any ad you run through Boost.
Multi-Event Ads let you market your entire events calendar quickly and effectively. Publicize your entire event calendar, spend less time and money on marketing, and rest assured that your campaigns are up-to-date and running smoothly.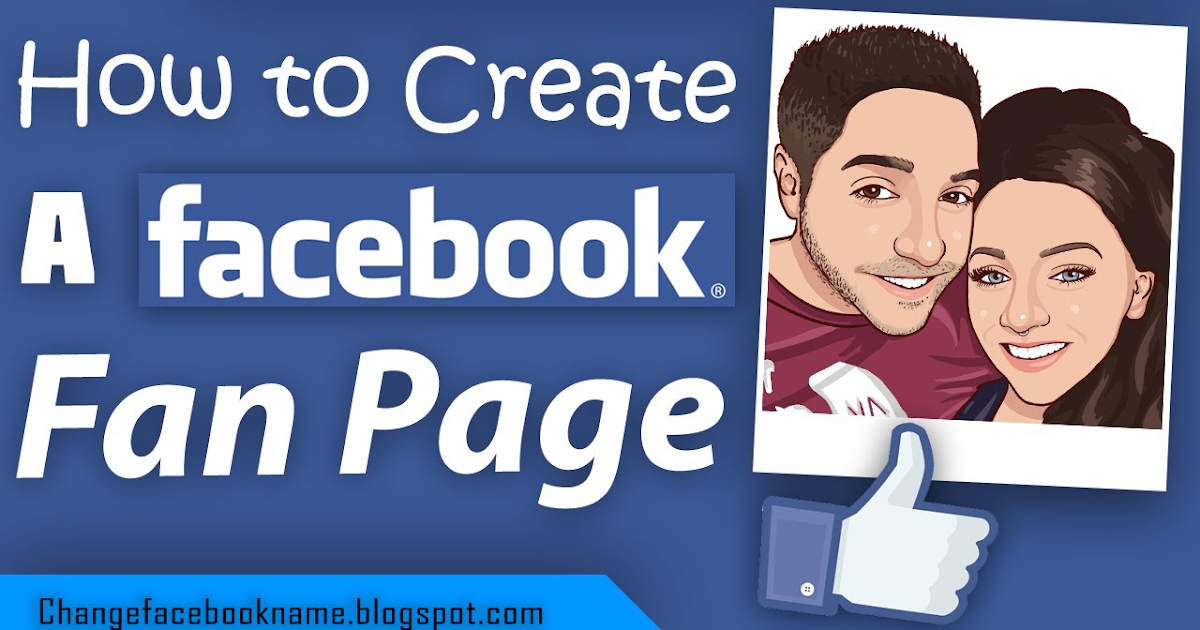
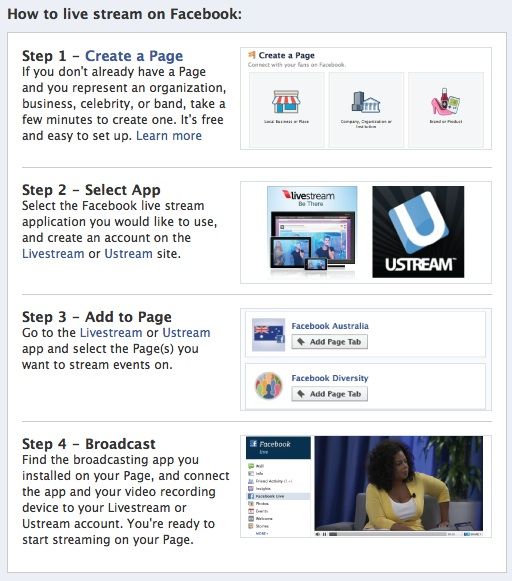
Facebook Live is a video stream in real time, and anyone who’s on the Facebook app at that moment can tune in. As you broadcast, people watch and engage with you through comments and likes. It’s an easily accessible way to broadcast any event and can even cause a bump to your attendee base — 30% of people who watch an event livestream will attend the same event the following year.
How to use Facebook Live
Now you know how to make a Facebook event page and how to use it to go live. Here are four examples of events that are making the most of Facebook’s event marketing opportunities:
As soon as you arrive on the Leeds Festival Facebook event page, you’ll see the eye-catching video heading and the Book Now call to action. A clear call to action is pivotal. You’ve managed to get someone to your Facebook event page, and you’ve got them excited enough to want to purchase a ticket. Now, direct them to the ticket sales page before they can change their mind.
Egg London, a nightclub in a Victorian warehouse with multi-room DJ sets, hosts multiple events each week and expertly utilizes Facebook to promote them. Its team also uses Eventbrite Boost to update the busy events calendar, save time, and sell out shows. Egg London can manage all its social media ads on Eventbrite Boost, with the same low budget.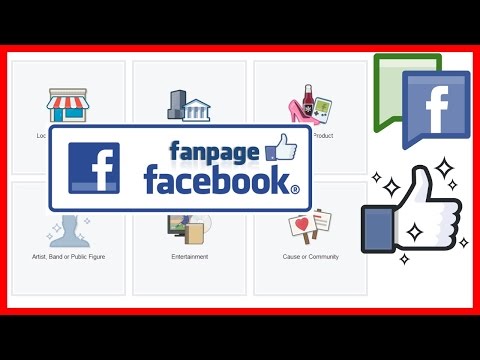 As a result, its event marketing is more effective and more efficient: the club generated six times more revenue than when using single platforms alone and had 2,500 more clicks.
Paradise Wildlife Park has been using Facebook Live to invite its followers, wherever they are in the world, to take a look around the park. Whether it’s a lion pride or a family of otters, the team regularly livestreams the animals and interviews with keepers to keep potential customers engaged during off-peak times. The hashtag #liveatthezoo is used so that followers can easily keep track of event information. And during the livestreams, the park promotes merchandise as a way to increase revenue.
This year, The London Coffee Festival is holding a free virtual event ahead of its in-person one. With highlights including talks by influential coffee entrepreneurs and a latte art throw-down, the virtual program offers attendees a taste of what to expect at the festival.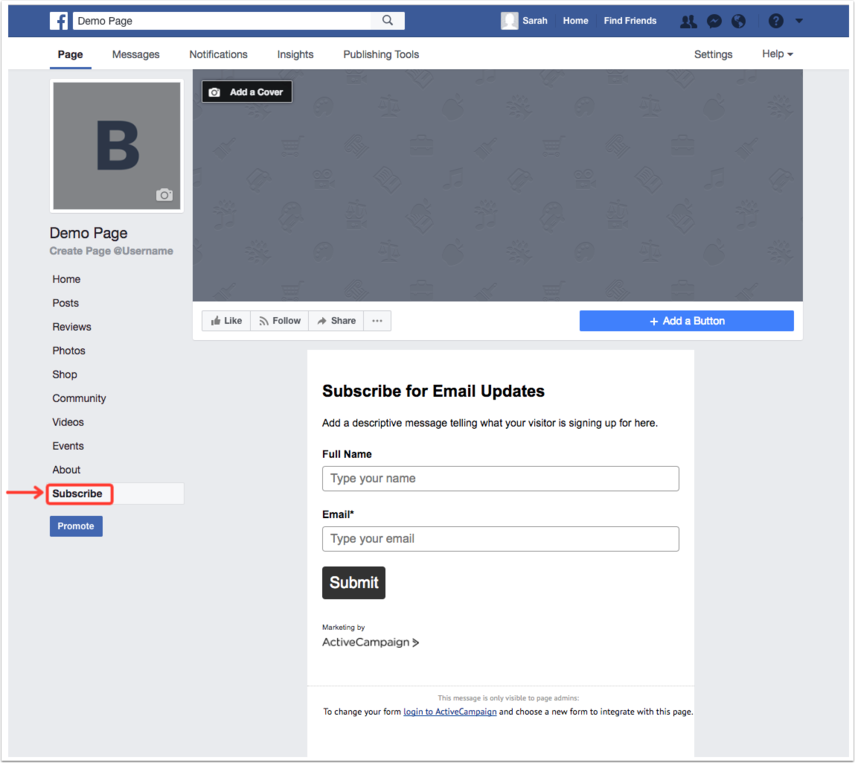 The organizers have been using Facebook to share fun coffee-themed videos and keep followers engaged. They’ve also promoted event sponsors and partners on the page, providing them with added value.
By creating a Facebook event page, you’ll be able to reach a much larger audience. But to really engage the potential attendees that visit your page and increase ticket sales, you’ll need to make use of calls-to-action, hashtags, live videos, and more. Drive even more attendees to your event page with Facebook ads.
Whether you’re connecting people in-person or virtually for poetry readings, cook-alongs, or concerts, you’ve got a lot on your plate. Lighten the load and reach new audiences directly from your Eventbrite account with Eventbrite Boost.
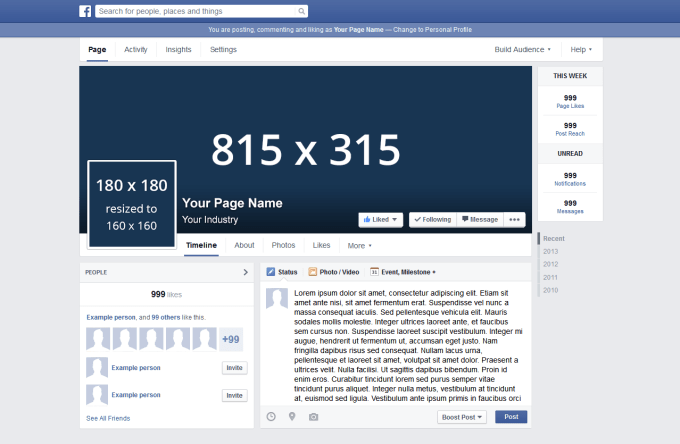
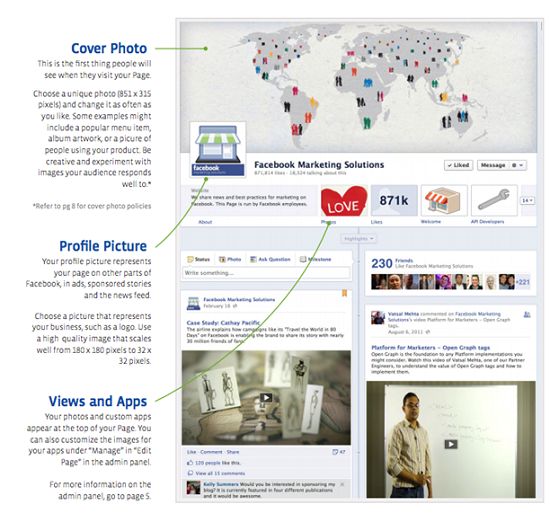
Facebook Brand Pages make it easier for companies, organizations, brands and community organizations to share news and connect with people.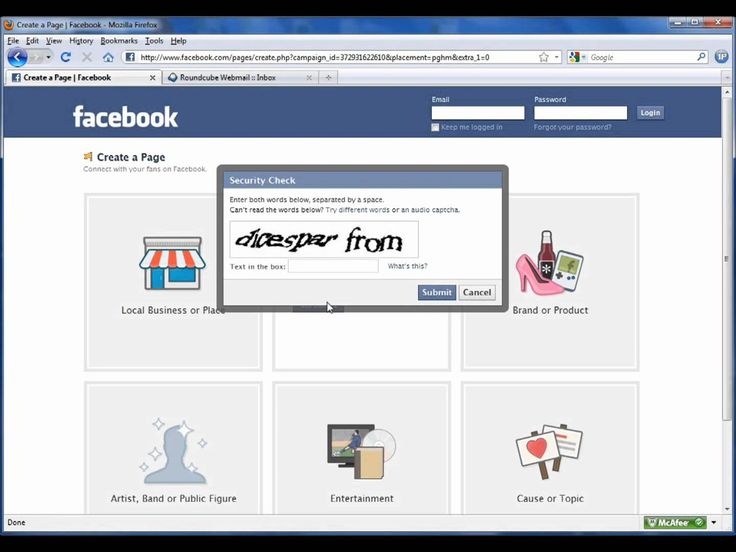 Like profiles, pages can be updated by posting news, hosting events, and more. People who subscribe to your page updates will receive notifications of new events in their news feed.
To create a Facebook page :
Note . Anyone can create a page, but only authorized representatives can create pages for brands owned by an official organization, company, or public figure.
If you want to introduce a company, brand or product on Facebook, create page . It allows you to attract the attention of other people on Facebook and offers tools for managing and analyzing audience activity.
If you want to share events from your schedule with a wider audience, you can let others follow you . If you allow others to follow you, all Facebook users will be able to follow you and see your public events in their feeds, even if you are not a Facebook friend. The number of people who follow you is unlimited, you can follow a maximum of 5000 users. You personal account can have up to 5000 friends
How to claim an unmanaged page
A page about your company can exist even if it was not created by one of your employees. For example, when someone registers for a job that doesn't have a page, Facebook creates an unmanaged page whose job it is to represent the location. The page can also be created from a Wikipedia article.
If the page is not managed, the inscription unofficial page is displayed under the photo in the background. You can claim a page, become its administrator, and connect it to your existing page that you manage on behalf of the company.
To get rights to an unmanaged page:

Be aware that Facebook may ask you to provide information to verify your ties to the company, such as your company's phone number, email address, or documents. If you know who the current admin is (for example, a former employee), you can contact that person and ask them to add you as an admin.
You can use more tools when creating a page. The page can be shared with a large number of recipients. Turning a profile into a page will create a new Facebook page based on your profile. You can only turn your profile into a page once.
After converting the profile to a page:
To turn your profile into a Facebook page:
What happens to the invite friends, followers, and pending friends sections when you convert your profile to a page?
After publishing a new page:
Using a profile to represent anything other than yourself (e.g. company products) is inappropriate Facebook Terms of Use . You may permanently lose access to your account unless you convert your account to a page.
If you use your profile to represent your company, turning it into a page will give you many benefits:
If you have two Facebook pages about the same thing, you can merge them, provided that:
Before submitting a page merge request, ensure that the campaigns that are running do not have a page listed that will be removed.
To merge pages:
If you don't see the option to link your pages, it means they can't be linked. If you see an option to link your pages, your application will be considered.
The page merge feature merges all your likes and registrations, but all other content such as posts, photos, ratings, reviews, and username is permanently removed from the linked page.
The page you want to save will remain unchanged; only likes and registrations from the second attached page will be added to it. A page that is not saved will be removed from Facebook, and page deletion cannot be undone .
Note . If your pages are in the business manager, go to business.facebook.com/pages/merge to merge them.
To invite friends to your like page:
To view the invitations on the likes page, go to the Invitations tab.
If your site has less than 100,000 likes, you can invite people who reply to your page posts.
To invite people to reply to posts on your Page:
Remember that if the site has more than 100,000 likes, you will see the option to add people as friends instead of inviting them to the likes page.
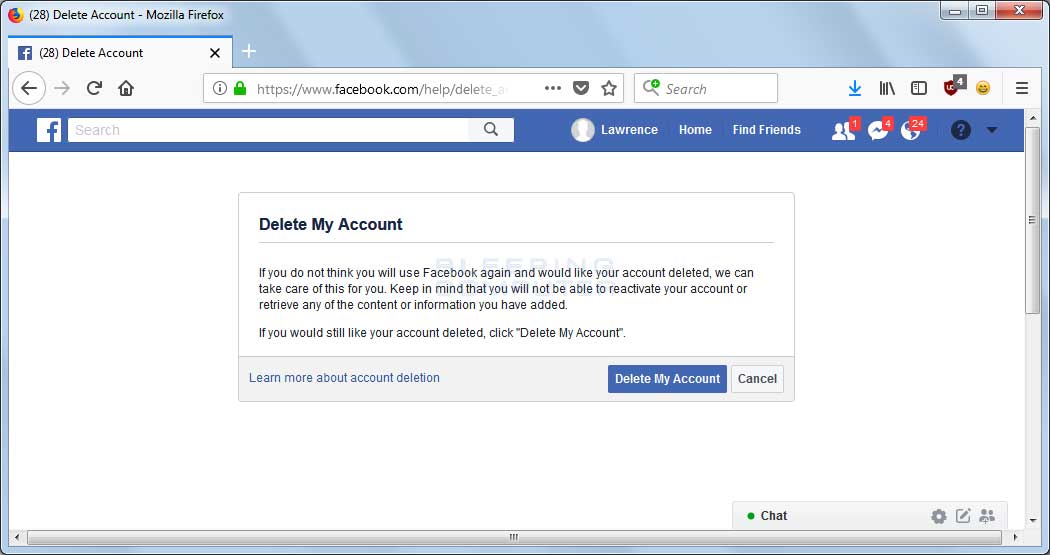
To delete a page you must be an administrator of the page. If you are an administrator:
Your page will be permanently deleted after 14 days, but you can unpublish it at any time.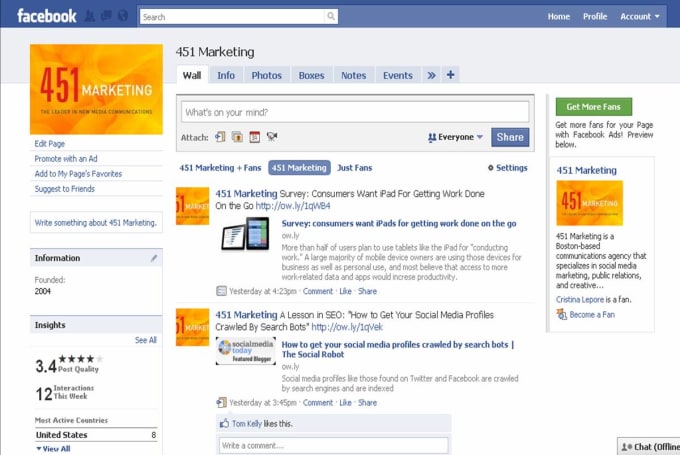
To cancel deleting a page:
You can also delete your personal account.
Note . If you don't see the delete page option, it may mean that you are not an administrator.
Published pages are visible to the public. Unpublished pages are only visible to those who manage them. Unpublishing a page will hide it from users, including those who liked it. The page will remain invisible until it is published.
As an administrator, you can cancel a post at any time. To unpublish a page:
Be aware that newly created pages may be unpublished due to inactivity.
A fan page, also called a fan site, fan site or fan page, is a page dedicated to something special from a book to a music band or a video game. This is not the same as a personal site, so its administration is also different. And the fact that they usually post the latest news or photos on a particular topic, upload multimedia content, chat with other users, or through forums where fans gather on a topic under discussion often makes them take shape.
It is a fact, and it has also been studied that This type of page often serves as a vehicle for more aggressive commercial purposes. from other official fan sites. In fact, most of them are not. And if used properly, one can benefit for one's own products by taking advantage of the power that social networks like Facebook can have. Currently one of the most used and works best.
Index
The main difference between a fan page and a regular Facebook profile is that many people, even millions, can follow you. To complete this process, you must follow the following points and order:
 If this is a page related to our company, product or brand that we want to sponsor, you will select the first field. If you want to create events, share things, or post a public face page, you check the box. But given that it could be promoting your company, product or your own brand, you will choose the first option.
Your fan site will provide you with many opportunities almost immediately. As with a personal profile, you can write and post content with videos, photos, events, and anything that is related to and relevant to the purpose for which you created the page.
The most interesting option is that you can choose your audience or promote your page to attract subscribers. I also invite my friends. Every time you post something, all the people who follow you will see it on Facebook, and vice versa.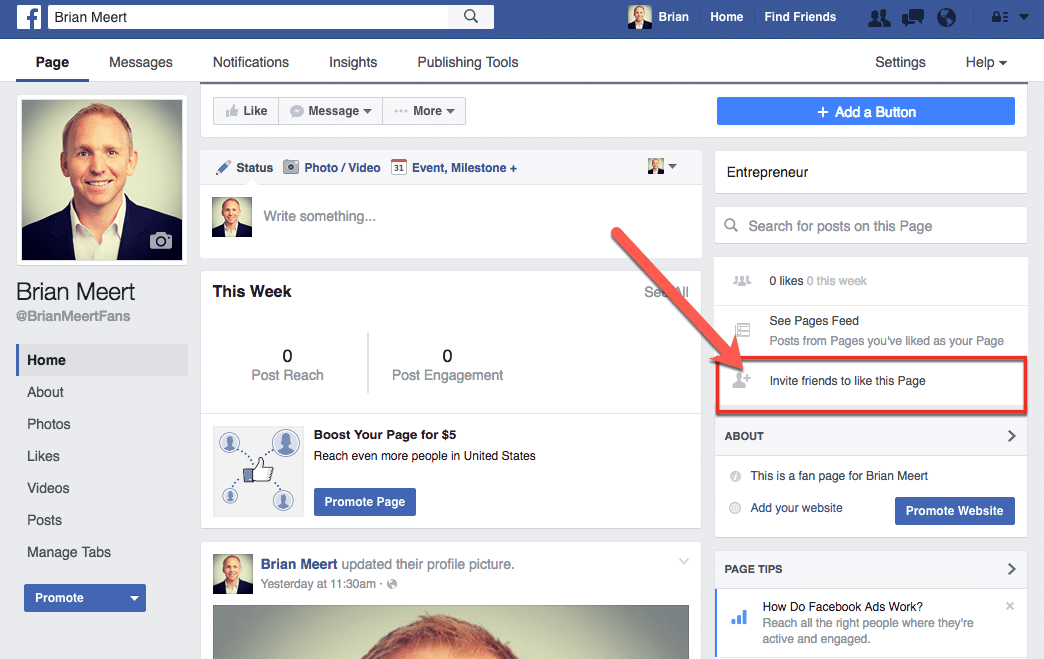 You can insert a like box o Widget on your WordPress or website to get likes on Facebook, with which you can keep up to date with all those who are interested in your site.
 By attracting more visits, SEO will improve, so search engines will also improve rankings.
 Article subject:
Mistakes that damage your brand image on social media