Viber is the instant messaging app which is popular all over the world. You can send Viber messages, photos, videos and calls to other Viber users for free over the air. Just like what WhatsApp and Skype do. However, Viber does not record messages and call history. There is no direct way to recover deleted call history on Viber app without extra tools.
If you want to get your important Viber call history and messages back, you need to use a Viber recovery tool to make the lost or deleted Viber calls visible again. Here you can get super-easy steps to recover iPhone Viber call history quickly. Just read and check.
Recover Viber Call History
So why your Viber call history lost or disappeared? Here are many reasons that may lead into iPhone Viber call history loss. You should also be careful when you encounter similar scenarios.
If you have no backup that contains the deleted Viber calls, you can turn to FoneLab iPhone Data Recovery for help. Actually, the moment you delete call history on Viber app, the deleted files still exist in the original place. Though the related storage space will be marked as available.
Thus, when you cannot see your Viber call history, you need to stop saving new data to your phone to prevent data overwritten. Well, you can get the high success rate for Viber call history recovery here.
Step 1Launch iPhone Data Recovery
Free download, install and launch the Viber data recovery software. Plug your iPhone into the computer with a lightning USB cable. Once your iOS device is detected, you need to tap “Trust” in the “Trust This computer” dialog on your iPhone.
Step 2Scan for all Viber call history
You will be in the default “Recover from iOS Device” section. Click “Start Scan” to scan all your previous Viber calls. After the data scanning process, you can see all recoverable Viber data in the left pane. You can choose “Viber Call History” to get the deleted and existing calls on Viber app.
Step 3Recover deleted Viber calls
You can double-click on the Viber call to preview details. In addition, you can choose “Viber” and “Viber Attachments” to recover Viber chat history too. If you cannot find the certain file, you can use its built-in search engine. At last, select Viber calls and click “Recover” to recover Viber call history on iPhone.
iPhone Data Recovery has simplified the call history recovery with iTunes or iCloud backup. You do not need to recover from an entire backup with previously-stored files replaced. Fortunately, you can download the latest backup file to scan and preview freely. As a result, you can save much time on Viber call history recovery.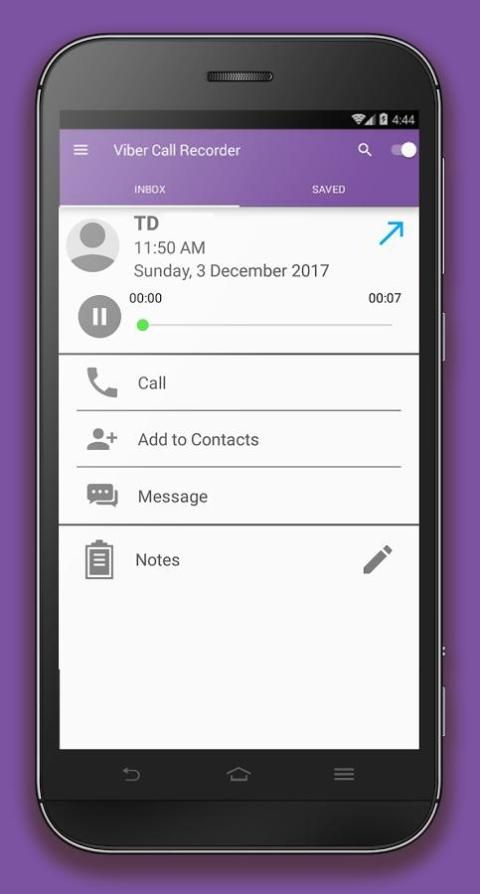
Even though your iPhone is lost or stolen, you can still recover Viber calls, messages and files due to these or those reasons. Just go ahead to the “Recover from iTunes Backup File” or “Recover from iCloud Backup File” section to get powerful iPhone Viber recovery tools.
Tip
As for Android users, you can use Android Data Recovery to recover Viber call history on Android. The program can help you find, extract and recover deleted Viber calls from the Android internal memory, SD card or even SIM card.
iPhone Data Recovery is more than the tool that you can recover Viber call history. If you want to make a copy of some really important Viber calls, you can extract and transfer iPhone Viber data to your computer for backup too. Furthermore, you can complete free Viber calls and messages recovery with this program. Whenever you want to access Viber call history, you can free download iPhone Data Recovery to have a try.
What do you think of this post?
Excellent
Rating: 4. 6 / 5 (based on 47 votes)
May 08, 2019 17:11 / Posted by Nicole Jones to iOS Recovery
Leave your comment and join our discussion
As most of us know, unexpected data loss always happens to the Viber app in various cases, like iOS update failure, app deletion, device stuck, app crash, mistaken call records removal, etc. All this makes data recovery a matter of urgency. Even though Viber doesn't have the power to help find the missing data directly, you can learn from this post to professionally recover deleted Viber call history on iPhone.
 Apple's Ways to Recover Deleted Viber Call History on iPhone
A tool with perfect capabilities to restore deleted SNS data is Joyoshare iPhone Data Recovery. With it, you can retrieve disappeared Viber call history not only from the device itself but also from backups, including iCloud and iTunes. Also, there are many options it offers to conveniently view data before recovery and select items quickly based on specific requirements.
Key Features of Joyoshare iPad Data Recovery:
Recover Viber deleted photos, call history, videos,
Support popular SNS apps, like WhatsApp, Kik, Viber, Line, etc.
Come with real-time preview to selectively restoration
Function well for all iDevice models and iOS versions, even iPhone 13 and iOS 15
Try It FreeTry It Free
Here Joyoshare iPhone Data Recovery guides you on how to recover deleted Viber call history.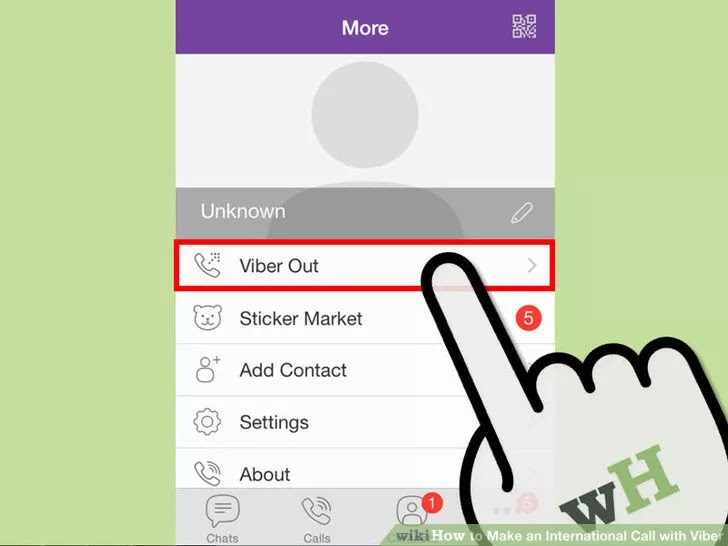 Just make sure the device works before doing as below.
The first mode is specially developed for those who have no iPhone backup. If you can't be absolutely sure that your lost call history is still there, you can use the trial version first. Handily, the options to scan and preview are free.
Get Joyoshare iPhone Data Recovery, free downloaded and installed on your PC or Mac. Launch it quickly and plug your iPhone under its default "Recover from iDevice" mode. You'll have to "Trust" this computer to end up device connection and recognition.
The program can detect info from this connected iPhone for your reference. Next, you need to select data type in your way. It's suggested to uncheck all and only mark "Viber & Attachments". Then simply press on the "Scan" button at the bottom right to search data.
The scan time depends on how much data you actually selected. After that, go to the SNS Data section in the left column to preview recoverable files in the "Viber Call History" category. You're allowed to read the name, phone number, data, call type, and duration. Just choose desired call logs to "Recover" and save them on your computer.
Try It FreeTry It Free
The second mode is just fine for users who have backup files in iTunes. It requires no iPhone device and you can directly operate in a trusted computer that you previously synchronized the data to.
Run your ready program of Joyoshare iPhone Data Recovery on the desktop. Go for the top toolbar to set the mode as "Recover from iTunes". Soon after, all locally detected iTunes backup files are listed there.
Choose the most relevant iTunes backup according to the suggestive details, like system version, backup date, device name, etc. Then, tap on the gear Setting icon to confirm related Viber data types and begin "Scan".
Wait for the Joyoshare program to finish scanning iTunes backup. You'll see the Viber Call History category on the results page. Now take your time to browse these available items and choose the one you need to "Recover".
Try It FreeTry It Free
The third mode is appropriate for those who create backup files to the iCloud account. It will perform to fetch backups and does no damage to your current data on iPhone. Make sure you use the right Apple ID and password.
Double click the program on your desktop to run Joyoshare iPhone Data Recovery and log in to your account using the third "Recover from iCloud" mode. No privacy will be recorded.
Likewise, you are enabled to pick up one iCloud backup to "Download". Afterward, click on the Setting option to choose "Viber & Attachments" or more data types you want. You can then start to "Scan" and extract data.
Your Viber data from the iCloud backup file will be fetched and classified into designated categories. Carefully preview the social app data, especially Viber call history, in real-time. You can choose the important items and click on the "Recover" option to get them back.
Try It FreeTry It Free
 Apple's Ways to Recover Deleted Viber Call History on iPhone
Syncing data with iTunes is a convenient activity for Apple users, as they can sync data either automatically or manually. Apple has also developed iTunes with the feature of "Restoring Backup" for its users. Despite that, this solution is not perfect. On the one hand, you'll have to replace your iPhone's current data with the restored iTunes backup file. On the other hand, you have no option to preview notes or selectively recover items that you desire. Following that, we will outline how you can utilize this feature at each step.
Step 1. Launch iTunes on your PC or Mac. Connect iPhone with the computer with an original USB cable. If asked, click on "Trust" on your iPhone.
Step 2. After the iPhone is detected, you should see the device symbol in the upper left corner. Click on the "Summary" → "Backup" → "Manually Back Up and Restore" and click on "Restore Backup".
Step 3. Click on "Restore Backup" once again to confirm your request in iTunes. Afterwards, this program retrieves a chosen backup file for you.
An iCloud backup of your iPhone can be used to restore Viber messages and even restore deleted Viber messages if you have previously made one. A major downside is that you can't choose Viber alone. You'll be able to restore all of your old data to your new iPhone. All the current data on your iPhone will be overwritten, so any new files created or changes to settings since your last backup will be lost. Here's how it's done:
Step 1. Turn on your device. You should see a Hello screen. If you already set up your device, you need to erase all of its content before you can use these steps to restore from your backup.
Step 2. Tap Restore from iCloud Backup when you reach the Apps & Data screen. Follow the on-screen setup steps to complete the process.
Step 3. Sign in to iCloud with your Apple ID.
Step 4. Choose the most relevant backup based on the date and size of each backup. Once the selection is made, the recovery process begins. The on-screen instructions will tell you how to update the software if you receive a message indicating you need a newer version.
Step 5. When you're prompted, log in with your Apple ID to recover your apps and purchases. Wait until the progress bar appears and shows completion.
Step 6. You can now enjoy your device after completing the setup. Content like your apps, photos, and also your deleted Viber call history will continue to restore.
This post has discussed how to recover deleted Viber call history on iPhone with/without backup. If you have read this article carefully from beginning to end, you already know the power of Joyoshare iPhone Data Recovery. This is your best option for reverting almost all data from your device without leaving a single byte of the missing files behind. Why not get started now? Joyoshare is an efficient and reliable tool that you can use for your benefit.
Try It FreeTry It Free
(Click to rate this post)
Updated on Mar 28, 2022 5:13 PM
Viber is an instant messaging app that is popular all over the world. You can send Viber messages, photos, videos and calls to other Viber users wirelessly for free. Just like whatsapp and skype do. However, Viber does not record messages and call history. There is no direct way to recover deleted call history on Viber app without additional tools.
If you want to get your important Viber call history and messages back, you need to use the Viber recovery tool to make newly lost or deleted Viber calls visible again. Here you can recover iPhone Viber call history easily and quickly. Just read and check.
Recover Viber Call History
So why is your Viber call history lost or disappeared? Here are many reasons that can cause iPhone Viber call history to be lost. You also need to be careful when you encounter such scenarios.
If you don't have a backup containing deleted Viber calls, you can turn to FoneLab iPhone Data Recovery for help. In fact, the moment you delete the call history in the Viber app, the deleted files still exist in the original location. Although the corresponding storage space will be marked as available.
So when you can't see your Viber call history, you need to stop saving new data to your phone to prevent it from being overwritten. Well, you can get a high success rate of Viber call history recovery here.
Step 1Launch iPhone Data Recovery
Free download, install and run Viber data recovery software, Connect your iPhone to your computer with a lightning USB cable. Once your iOS device is detected, you need to click "Trust" in the "Trust This Computer" dialog box on your iPhone.
Step 2Scan all Viber Call History
You will be in "iOS Device Recovery" by default. Click "Start Scan" to scan all your previous Viber calls. After scanning the data, you can see all recoverable Viber data on the left pane. You can select "Viber Call Log" to retrieve deleted and existing calls in the Viber app.
Step 3Recover deleted Viber calls
You can double click on a Viber call to view the details. Also, you can select "Viber" and "Viber Attachments" to restore your Viber chat history. If you can't find a specific file, you can use its built-in search engine. Finally, select Viber calls and click "Recover" to restore Viber call history on iPhone.
iPhone Data Recovery made it easy to restore call history with iTunes or iCloud backup. You do not need to restore the entire backup and replace previously saved files.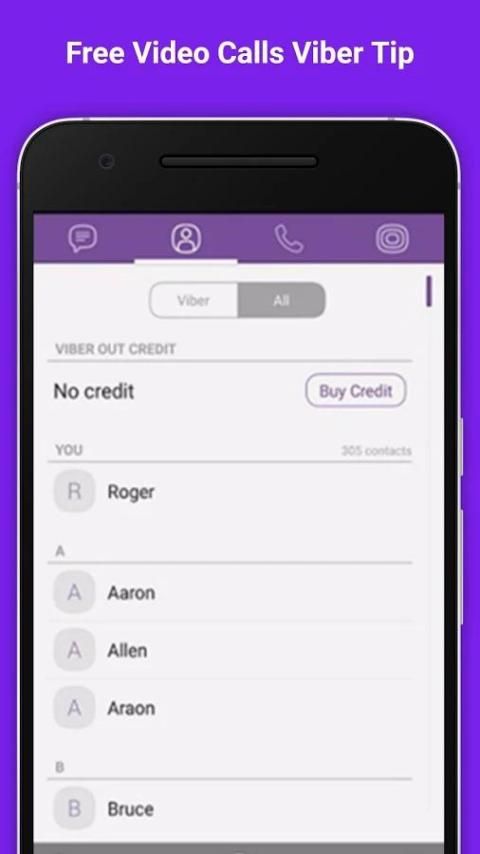 Luckily, you can download the latest backup file to scan and preview for free. As a result, you can save a lot of time on Viber call history recovery.
Even if your iPhone is lost or stolen, you can still restore calls, messages, and Viber files for one reason or another. Just go to "Recover from iTunes Backup File" or "Recover from iCloud Backup File" to get powerful iPhone Viber recovery tools.
Functions
As for Android users, you can use Android Data Recovery to recover Viber call history on Android. The program can help you find, retrieve and recover deleted Viber calls from Android internal memory, SD card or even SIM card.
iPhone Data Recovery is more than a Viber call history recovery tool. If you want to backup some really important Viber calls, you can extract and transfer iPhone Viber data to your computer for backup too. Moreover, you can complete free Viber call and message recovery with this program. Whenever you want to access your Viber call history, you can free download iPhone Data Recovery and have a try.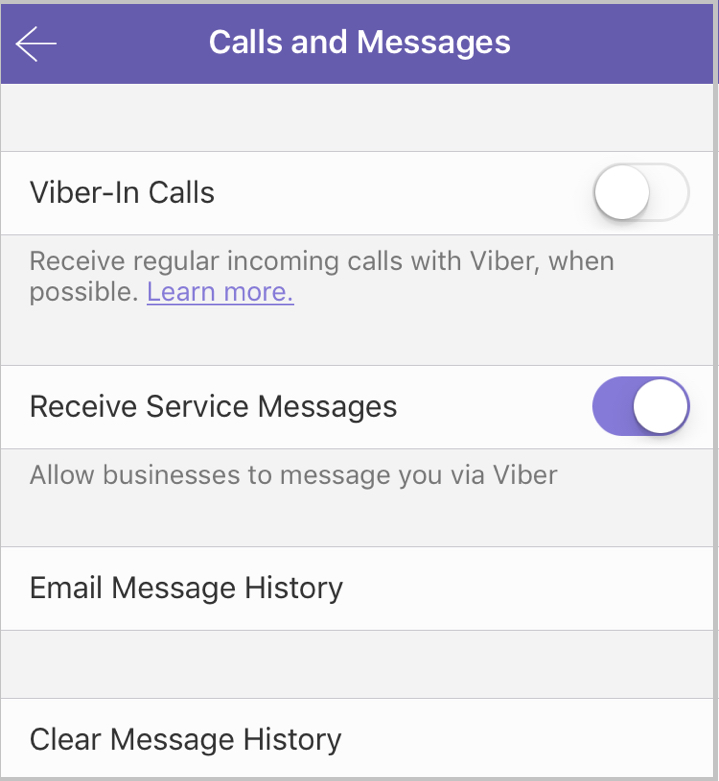
What do you think of this post.
Great
Rating: 4.6 / 5 (based on 47 votes)
May 08, 2019 17:11 / Posted by Nicole Jones in iOS Recovery
Leave your comment and join our discussion
Navigation:
Detailing of calls in Viber is one of the topics discussed among users of this messenger. Many people are not satisfied with the fact that it is impossible to get a structured list of made calls in the application, but for others this fact is a plus, because if you lose your account, you don’t have to worry about the safety of your data. However, some loopholes still exist.
However, some loopholes still exist.
It's no secret that there are two types of calls in the system: free, that is, via the Internet, and for money, through the Viber Out system. The first type is the most common, as it does not require investments and allows you to call any other user of the application, if he has access to the Internet. The second one allows you to make calls directly to a SIM card or to landline numbers, but you will have to pay for this.
At the moment the application does not provide a structured list of incoming and outgoing calls made via the Internet. It will not be possible to receive data either through the application, or through contacting the Viber company, or through the SIM card of the operator that provides you with communication services.
The only way to find out who called the user is to look at the history of the particular conversation. Placed and received calls will be displayed interspersed with normal messages. Only users between whom the conversation was carried out can see this information. However, if you clear the history, the conversation data will also be deleted, after which it will no longer be possible to view them.
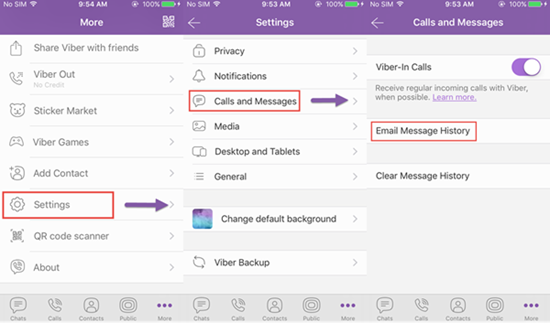
Now account holders can receive information about calls made only through the Viber Out system. The answer to the question of how to order detailing is very simple. To do this, you need to launch the application and find the Viber Out item in the main menu, and then open the call history on the tariff page. The system also allows you to save the data in a PDF file so that it can be printed later and studied in more detail if any questions remain.
It is important to remember that this is the only way to legally obtain Viber call history. On the Internet, you can meet many people offering hacking services, after which the user will have access not only to conversations and correspondence from his account, but also to any other person.