Follow these steps to connect your bot to Telegram:
To distribute you bot to other users, you can use a link in this format:
https://telegram.me/{username} Where {username} is your bot's username. This will allow any Telegram user to start talking to your bot. Of course, the person clicking the link must to be signed up and ready to use Telegram on their device.
If you'd like to give people a link to allow them to add your bot to their group, you can use this link format:
https://telegram.me/{username}?startgroup=1 Again, replace {username} with your bot's username.
There are a lot of optional settings that you can update with @BotFather that will improve how your bot appears and give your users more idea about what it does.
You can read about all the bot settings over at Telegram.
When the user connects to the bot for the first time (they click the 'START' button in Telegram), the message '/start' will be sent to the bot. You can look for the presence of this to know that the user clicked 'START' and welcome the user for the first time. The start message may also have optional arguments in the case of a deep linking (a way to drive traffic to specific flows using URLS). Please see how to work with commands here and how to set them up in Telegram with auto-complete for your users here.
Telegram has a lot of powerful features that are unique. Because Flow XO supports many channels, not just Telegram, our standard flow building tools cannot take advantage of many of these features. However, if you are building Telegram specific flows you can take advantage of these from within Flow XO by using our Telegram Actions integration, which provides easy access to most Telegram bot functionality.
Let us know how we can improve Flow XO on our feedback site.
Still need help? Contact Us Contact Us
Part 3 of our chatbot series comes with a step-by-step guide on how to make a Telegram bot in Python.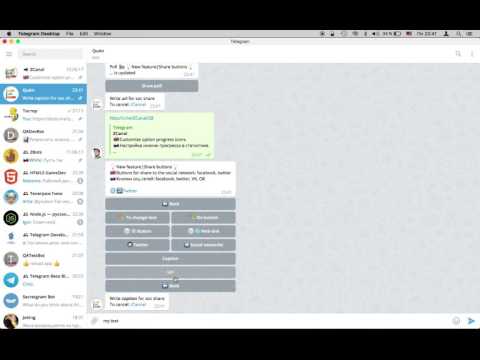 The bot should be able to show the exchange rates, show the difference between the past and the current exchange rates, as well as use modern inline keyboards.
Now let’s cut to the chase and discover how to make a Python Telegram bot.
Read more: 8 questions you should ask yourself before building a chatbot.
Table of contents:
Here’s a a simple question to start our guide: how do you develop Telegram chatbots?
The answer is very easy: you use HTTP API both for reading the messages sent by users and for messaging back. This calls for using URL which looks like:
https://api.telegram.org/bot/METHOD_NAME
A token is a unique string of characters required to authenticate a bot in the system. It is generated during the bot’s creation and looks like this:
123456:ABC-DEF1234ghIkl-zyx57W2v1u123ew11
METHOD_NAME (and this is obvious from its name) is a method, for example, getUpdates, sendMessage, getChat, etc.
To executie requests, you can use both GET and POST requests. A lot of methods require additional parameters (while using the sendMessage method, for example, it’s necessary to state chat_id and text). The parameters can be passed as a URL query string, application/x-www-form-urlencoded, and application-json (except for uploading of files).
Another requirement is UTF-8 encoding.
After sending an API request you will receive a JSON response. For example, if we fetch data with “getMe” method, we’ll receive something like this:
GET https://api.telegram.org/bot<token>/getMe
{ ok: true, result: { id: 231757398, first_name: "Exchange Rate Bot", username: "exchangetestbot" } }If ‘ok’ is true, the request was successful and the result will be displayed in the ‘result’ field. If ‘ok’ is false, you will see an error message in the ‘description’ field.
You can find a list of all Telegram Bot API data types and methods here.
The next question: how to receive the users’ messages?
There are two ways to do this.
You can manually make requests via the getUpdates method. In the response, you will get an array of Update objects. This method acts as long polling technology (you make a request, process the data and then start over again). To avoid reprocessing the same data, it’s recommended to use the offset parameter.
The second way is to use webhooks. You have to use the setWebhook method only once. After that, Telegram will send all the updates on the specified URL as soon as they arrive.
The only limitation is that you need HTTPS (however, self-signed certificates are also permitted).
But how do you choose an optimal method for receiving messages?
The getUpdates method is best suited if:
The webhook method is the best choice if:
In this guide, I will use the getUpdates method.
Now, how to make a bot program?
@BotFather is used to create Telegram bots.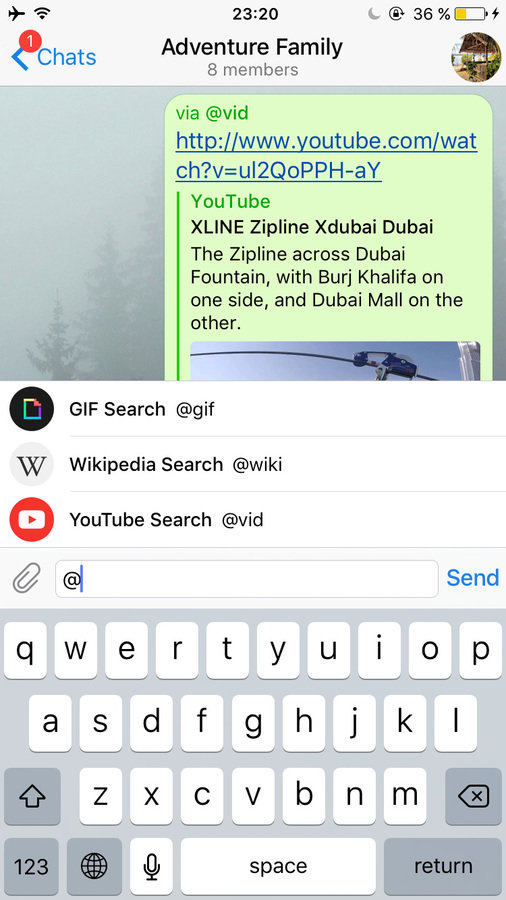 It also allows a basic configuration (description, profile photo, inline support, etc.).
There are plenty of libraries that can simplify working with Telegram Bot API. To name a few:
At their core, all these libraries are HTTP requests wrappers. A great deal of them is written using OOP and reflects all the Telegram Bot API data types in classes.
In this Telegram bot tutorial, I’m going to create a Python chatbot with the help of pyTelegramBotApi library.
Let’s write a Python script which is going to implement the logic for specific currency exchange rates requests.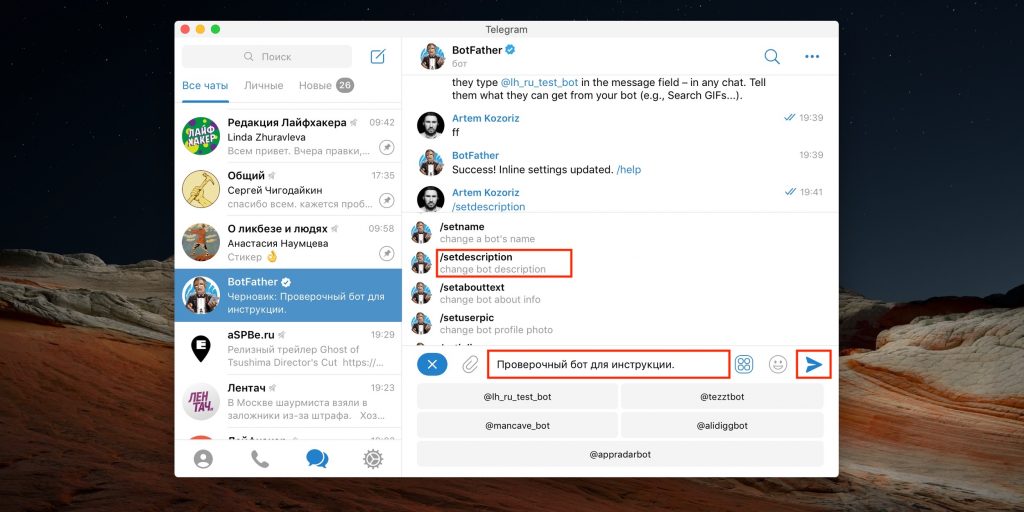 We’re going to use PrivatBank API.
An example of a response:
[ { ccy: "EUR", base_ccy: "UAH", buy: "28.70000", sale: "29.10000" }, { ccy: "RUR", base_ccy: "UAH", buy: "0.39300", sale: "0.40300" }, { ccy: "USD", base_ccy: "UAH", buy: "25.40000", sale: "25.70000" } ] Let’s create a pb.ру file and write the following code:
# -*- coding: utf-8 -*- import re import requests import json<br> URL = 'https://api.privatbank.ua/p24api/pubinfo?json&exchange&coursid=5' <br>def load_exchange(): return json.loads(requests.get(URL).text) def get_exchange(ccy_key): for exc in load_exchange(): if ccy_key == exc['ccy']: return exc return False def get_exchanges(ccy_pattern): result = [] ccy_pattern = re.escape(ccy_pattern) + '.*' for exc in load_exchange(): if re.match(ccy_pattern, exc['ccy'], re.IGNORECASE) is not None: result.append(exc) return result
We have implemented three methods:
Contact the @BotFather bot to receive a list of Telegram chat commands.
Now use the /newbot command and wait for instructions to select a name and username. Upon successfully creating your bot, you’ll receive the following message:
Done! Congratulations on your new bot. You will find it at telegram.me/<username>. You can now add a description, about section and profile picture for your bot, see /help for a list of commands.By the way, when you've finished creating your cool bot, ping our Bot Support if you want a better username for it. Just make sure the bot is fully operational before you do this. Use this token to access the HTTP API: <token> (here goes the bot’s token) For a description of the Bot API, see this page: https://core.telegram.org/bots/api
Let’s configure the bot’s settings. Specify description and about text (/setdescription and /setabouttext commands), profile photo (/setuserpic), turn on inline mode (/setinline), add commands prompts (/setcommands).
You will need to use two commands: /help and /exchange. Let’s describe them in /setcommands.
Now when the setup is over, you can proceed to writing the code. Before moving on, I would highly recommend reading about the API and looking into the library documentation to better understand the information below.
Let’s begin with creating a config. py file for configuration purposes:
# -*- coding: utf-8 -*- TOKEN = '<bot token>’' TIMEZONE = 'Europe/Kiev' TIMEZONE_COMMON_NAME = 'Kiev'
Here we have: the bot’s token and the time zone it will operate in (you’ll need this in the future to specify the time for message updating. Telegram API doesn’t allow you to find out a user’s time zone, therefore the update time should be displayed with a time zone prompt).
Let’s create a bot.py file, import all the necessary libraries, config files and the previously created pb.py. If some of the libraries are absent, install them via pip.
# -*- coding: utf-8 -*- import telebot import config import pb import datetime import pytz import json import traceback P_TIMEZONE = pytz.timezone(config.TIMEZONE) TIMEZONE_COMMON_NAME = config.TIMEZONE_COMMON_NAME
Let’s create the bot using the pyTelegramBotAPI library. For this purpose, you should pass the token into a constructor:
bot = telebot.TeleBot(config.TOKEN) bot.polling(none_stop=True)
Now your Python chat bot is initialized and constantly requests the getUpdates method. The none_stop parameter is responsible for polling to continue even if the API returns an error while executing the method.
Then it’s possible to call any Telegram Bot API methods from a bot variable.
Let’s start with writing a /start command handler and add it before the bot.polling(none_stop=True) line:
@bot.message_handler(commands=['start']) def start_command(message): bot.send_message( message.chat.id, 'Greetings! I can show you PrivatBank exchange rates.\n' + 'To get the exchange rates press /exchange.\n' + 'To get help press /help.' )
As you can see, pyTelegramBotApi uses Python decorators to initialize handlers for various Telegram commands. You can also catch messages using regexp, their content-type and with lambda functions.
In our case, if commands=[‘start’] condition is true, the start_command function will be called. A message object (deserialized Message type) will be passed into this function. Afterward, you simply execute send_message into the same chat with the specified message.
Whew, that was easy, wasn’t it?
Let’s spice up our /help command handler with an inline button linking to your Telegram account. Let’s name the button “Message the developer”.
@bot.message_handler(commands=['help']) def help_command(message): keyboard = telebot.types.InlineKeyboardMarkup() keyboard.add( telebot.types.InlineKeyboardButton( ‘Message the developer’, url='telegram.me/artiomtb' ) ) bot.send_message( message.chat.id, '1) To receive a list of available currencies press /exchange.\n' + '2) Click on the currency you are interested in.\n' + '3) You will receive a message containing information regarding the source and the target currencies, ' + 'buying rates and selling rates.\n' + '4) Click “Update” to receive the current information regarding the request. ' + 'The bot will also show the difference between the previous and the current exchange rates.\n' + '5) The bot supports inline. Type @<botusername> in any chat and the first letters of a currency.', reply_markup=keyboard )
As you can see in the example above, I’ve used an additional parameter (reply_markup) for the send_message method. The method received InlineKeyboardMarkup consisting of a single InlineKeyboardButton with the text: “Message the developer” and url=’telegram. me/artiomtb’.
The above looks like this:
The /exchange command handler displays a currency choice menu and inline bot keyboard consisting of 3 buttons: USD, EUR, and RUR (these are the currencies supported by the banking API).
@bot.message_handler(commands=['exchange']) def exchange_command(message):<br> keyboard = telebot.types.InlineKeyboardMarkup() keyboard.row( telebot.types.InlineKeyboardButton('USD', callback_data='get-USD') ) keyboard.row( telebot.types.InlineKeyboardButton('EUR', callback_data='get-EUR'), telebot.types.InlineKeyboardButton('RUR', callback_data='get-RUR') ) bot.send_message(message.chat.id, ‘Click on the currency of choice:', reply_markup=keyboard) Let me explain what callback-data in InlineKeyboardButton is. When a user clicks this button you’ll receive CallbackQuery (its data parameter will contain callback-data) in getUpdates. In such a way, you will know exactly which button a user has pressed and handle it as appropriate.
BTW, this is how the /exchange response looks like:
pyTelegramBotAPI offers using the @bot.callback_query_handler decorator which will pass the CallbackQuery object into a nested function.
@bot.callback_query_handler(func=lambda call: True) def iq_callback(query): data = query.data if data.startswith('get-'): get_ex_callback(query)Let’s implement the get_ex_callback method:
def get_ex_callback(query): bot.answer_callback_query(query.id) send_exchange_result(query.message, query.data[4:])
The answer_callback_query method is required to remove the loading state, which appears upon clicking the button. Let’s send a message into send_exchange_query. You’ll have to pass it the Message and the currency code (you can get it from query.data. If it was, for example, get-USD, then pass USD).
Let’s implement send_exchange_result:
def send_exchange_result(message, ex_code): bot.send_chat_action(message.chat.id, 'typing') ex = pb.get_exchange(ex_code) bot.send_message( message.chat.id, serialize_ex(ex), reply_markup=get_update_keyboard(ex), parse_mode='HTML' )
This is also pretty straightforward.
Let’s first send the typing state into the chat, so that the bot will display the “typing” indicator while the banking API receives a request. Now let’s call the get_exchange method from a pb.py file, which will receive the currency code (e.g. USD). You’ll also have to call two new methods into send_message: serialize_ex, a currency serializer, and get_update_keyboard (which returns the keyboard to “Update” and “Share” buttons).
def get_update_keyboard(ex): keyboard = telebot.types.InlineKeyboardMarkup() keyboard.row( telebot.types.InlineKeyboardButton( 'Update', callback_data=json.dumps({ 't': 'u', 'e': { 'b': ex['buy'], 's': ex['sale'], 'c': ex['ccy'] } }).replace(' ', '') ), telebot.types.InlineKeyboardButton('Share', switch_inline_query=ex['ccy']) ) return keyboardLet’s write in get_update_keyboard the current exchange rates in callback_data using JSON format. JSON is intentionally compressed because the maximum allowed file size is 64 bytes.
t key means type and e key means exchange. The rest is done using the same principle.
The “Share” button will have the switch_inline_query parameter. Pressing the button will prompt the user to select one of their chats, open that chat and insert the bot‘s username and the specified inline query in the input field.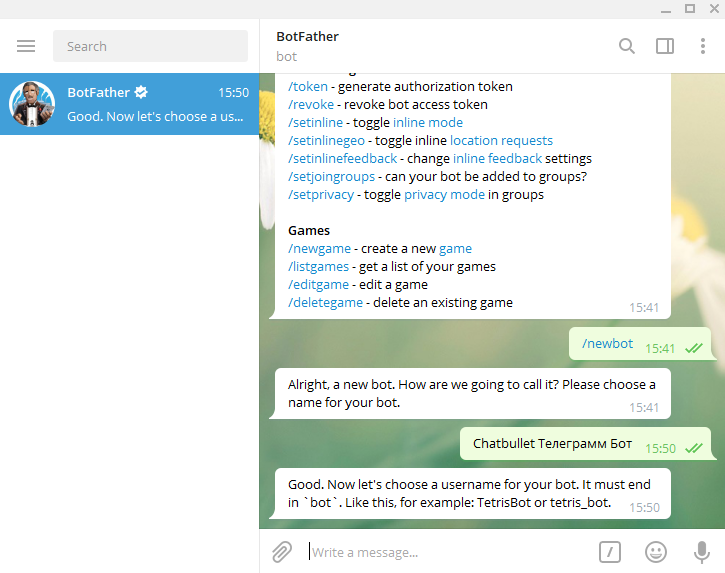
Next, let’s present the serialize_ex method and auxiliary serialize_exchange_diff required to show the difference between the current and the old exchange rates upon clicking the “Update” button.
def serialize_ex(ex_json, diff=None): result = '<b>' + ex_json['base_ccy'] + ' -> ' + ex_json['ccy'] + ':</b>\n\n' + \ 'Buy: ' + ex_json['buy'] if diff: result += ' ' + serialize_exchange_diff(diff['buy_diff']) + '\n' + \ 'Sell: ' + ex_json['sale'] + \ ' ' + serialize_exchange_diff(diff['sale_diff']) + '\n' else: result += '\nSell: ' + ex_json['sale'] + '\n' return result def serialize_exchange_diff(diff): result = '' if diff > 0: result = '(' + str(diff) + ' <img draggable="false" data-mce-resize="false" data-mce-placeholder="1" data-wp-emoji="1" alt="<img draggable="false" data-mce-resize="false" data-mce-placeholder="1" data-wp-emoji="1" alt="<img draggable="false" data-mce-resize="false" data-mce-placeholder="1" data-wp-emoji="1" alt="<img draggable="false" data-mce-resize="false" data-mce-placeholder="1" data-wp-emoji="1" alt="<img draggable="false" data-mce-resize="false" data-mce-placeholder="1" data-wp-emoji="1" alt="↗️" src="https://s. w.org/images/core/emoji/2.3/svg/2197.svg">" src="https://s.w.org/images/core/emoji/2.3/svg/2197.svg">" src="https://s.w.org/images/core/emoji/2.3/svg/2197.svg">" src="https://s.w.org/images/core/emoji/72x72/2197.png">" src="https://s.w.org/images/core/emoji/72x72/2197.png">)' elif diff < 0: result = '(' + str(diff)[1:] + ' <img draggable="false" data-mce-resize="false" data-mce-placeholder="1" data-wp-emoji="1" alt="<img draggable="false" data-mce-resize="false" data-mce-placeholder="1" data-wp-emoji="1" alt="<img draggable="false" data-mce-resize="false" data-mce-placeholder="1" data-wp-emoji="1" alt="<img draggable="false" data-mce-resize="false" data-mce-placeholder="1" data-wp-emoji="1" alt="<img draggable="false" data-mce-resize="false" data-mce-placeholder="1" data-wp-emoji="1" alt="↘️" src="https://s.w.org/images/core/emoji/2.3/svg/2198.svg">" src="https://s.w.org/images/core/emoji/2.3/svg/2198.svg">" src="https://s.w.org/images/core/emoji/2.
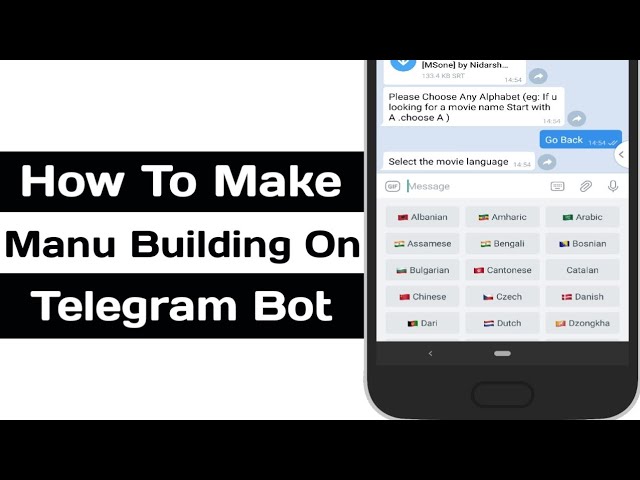 3/svg/2198.svg">" src="https://s.w.org/images/core/emoji/72x72/2198.png">" src="https://s.w.org/images/core/emoji/72x72/2198.png">)' return result
As you can see, the serialize_ex method receives an optional parameter diff. It’s there that you’ll pass the difference between the exchange rates in {‘buy_diff’: <float>, ‘sale_diff’: <float>} format. This will happen during the serialization when you click the “Update” button. We won’t need it the first time the exchange rates are displayed on the screen.
This is how the bot’s answer looks like upon clicking USD button:
Now you’re ready to implement the “Update” button handler. After complementing the iq_callback method it will look as follows:
@bot.callback_query_handler(func=lambda call: True) def iq_callback(query): data = query.data if data.startswith('get-'): get_ex_callback(query) else: try: if json.loads(data)['t'] == 'u': edit_message_callback(query) except ValueError: pass
If callback-data begins with get-’ (get-USD, get-EUR and so on) then let’s call get_ex_callback as we did before. Otherwise let’s try to parse JSON and receive its t key. If it equals ‘u’ then call the edit_message_callback method. Let’s implement it:
def edit_message_callback(query): data = json.loads(query.data)['e'] exchange_now = pb.get_exchange(data['c']) text = serialize_ex( exchange_now, get_exchange_diff( get_ex_from_iq_data(data), exchange_now ) ) + '\n' + get_edited_signature() if query.message: bot.edit_message_text( text, query.message.chat.id, query.message.message_id, reply_markup=get_update_keyboard(exchange_now), parse_mode='HTML' ) elif query.inline_message_id: bot.edit_message_text( text, inline_message_id=query.inline_message_id, reply_markup=get_update_keyboard(exchange_now), parse_mode='HTML' )
How does it work?
The get_ex_from_iq_data method parses JSON from callback_data:
def get_ex_from_iq_data(exc_json): return { 'buy': exc_json['b'], 'sale': exc_json['s'] }The get_exchange_diff method receives the old and the current exchange rates and returns the difference in {‘buy_diff’: <float>, ‘sale_diff’: <float>} format:
def get_exchange_diff(last, now): return { 'sale_diff': float("%. 6f" % (float(now['sale']) - float(last['sale']))), 'buy_diff': float("%.6f" % (float(now['buy']) - float(last['buy']))) }
 get_edited_signature generates “updated …” text:
def get_edited_signature(): return '<i>Updated ' + \ str(datetime.datetime.now(P_TIMEZONE).strftime('%H:%M:%S')) + \ ' (' + TIMEZONE_COMMON_NAME + ')</i>'This is how the message looks like upon updating if the exchange rates haven’t changed:
And this is how it looks when the exchange rates have changed:
Implementing inline means that writing @ + bot’s name in any chat will activate the search for the entered text and offer the results. By clicking one of them the bot will send the result on your behalf (marked “via bot”).
@bot.inline_handler(func=lambda query: True) def query_text(inline_query): bot.answer_inline_query( inline_query.id, get_iq_articles(pb.get_exchanges(inline_query.query)) )
Voila, you have implemented the inline query handler.
The library will pass the InlineQuery object into the query_text function. Inside you use the answer_inline_query function which should receive inline_query_id and an array of objects (the search results).
Let’s use get_exchanges from pb.py to search for several currencies that suit the search query. Let’s pass this array into the get_iq_articles method which will return the array from InlineQueryResultArticle:
def get_iq_articles(exchanges): result = [] for exc in exchanges: result.append( telebot.types.InlineQueryResultArticle( id=exc['ccy'], title=exc['ccy'], input_message_content=telebot.types.InputTextMessageContent( serialize_ex(exc), parse_mode='HTML' ), reply_markup=get_update_keyboard(exc), description='Convert ' + exc['base_ccy'] + ' -> ' + exc['ccy'], thumb_height=1 ) ) return result
Now when you enter @exchnagetestbot + space in any chat you’ll see the following:
Let’s type usd and the result will be instantly filtered:
Let’s click the offered result:
The “Update” button is also operational:
Good job! You’ve successfully implemented the inline mode!
Congratulations! Now you know how to make a Python chatbot for Telegram, implement inline keyboard, messages updating, and the inline mode. You can pat yourself on your awesome back and raise a toast to the new Botfather.
Hit the subscribe button below to get more tech news or message us directly if you need some help with your business bot.
References:
More on chatbots:
Among inexperienced users, there is an opinion that to create a bot in Telegram, you need to be an experienced coder and know programming languages. In some cases, this is indeed the case. But only when the bot must have complex functionality that cannot be endowed with a constructor. In other cases, you can get by with special services for creating Telegram bots. We will talk about these tools today.
Create a site on UMI for free
Before creating a bot, you need to register it in BotFather. This is done so that your bot can work in Telegram. BotFather is also a bot, it is easy to find it, just click on this link and the messenger will open a dialogue with it. Click the "Launch" button below.
The chat window will display all available commands. We are interested in /newbot. You can enter this manually or click on the corresponding entry directly in the command list.
BotFather will prompt you to choose a name for your future bot. Enter arbitrary.
Then you need to come up with a username for the bot. It must be unique, otherwise the bot registration will be rejected. At the end of the name, you must specify the prefix _bot.
After successful registration, BotFather will send you a message with a token that you need to write down and save somewhere. In the future, we will need it.
Now let's move on to creating the bot itself.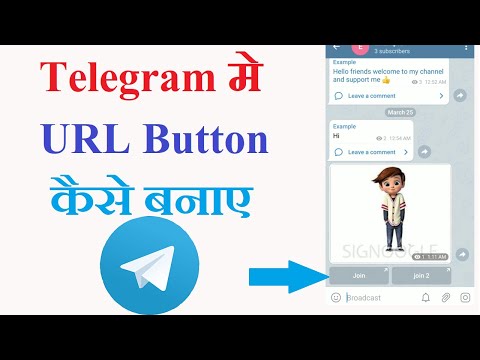
ManyBot is a unique development in Telegram that allows users without knowledge of programming languages to create their own simple bots.
Run ManyBot from the link above and click on the "Add new bot" button.
Then we copy the token we received earlier into BotFather and paste it into the chat with ManyBot. Click on the send message arrow on the right or Enter.
Now we need to write a small text about what our bot will do. In case you don't want to write anything, you can use the "Skip" button.
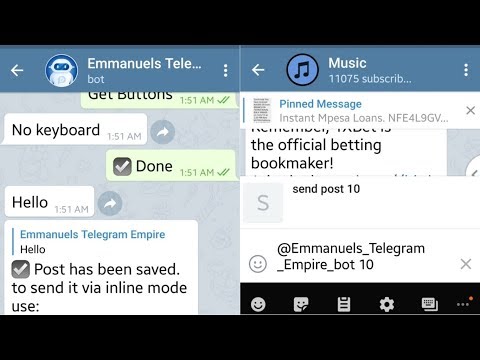
We receive a message from ManyBot that the bot has been created and configured.
Click on the link with our bot and click on the "Start" button.
A window immediately opens where a list of commands is displayed, and at the bottom there is a convenient menu for adding functions to the bot.
Click on the "Custom Commands" button and then "Create Command".
The name of the command is arbitrary, but so that later it will be clear what it is responsible for. Before the command, be sure to specify slash in the form /.
After writing the command, press Enter or the blue arrow on the right.
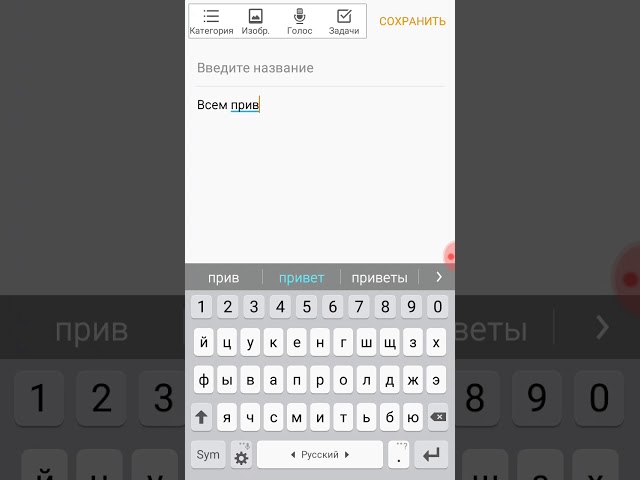
Now you need to add what you want the bot to send to the user in response to the command entered. For example, some text or picture, document or audio file.
We write the text in the field for this or copy it from somewhere, and use the Paperclip icon to attach files.
The image is sent separately from the text.
Once you've added all the information you need for this command, use the Save button.
In this way, you can create many commands, and each of them will be responsible for displaying specific information in the form of text, photos, documents or files.
To test the command's performance, click the "Back" button in the menu, then manually enter the command we created and press Enter. The response is a message with the content that we specified when adding the command.
However, manually entering commands each time is somehow inconvenient, so you can use the function to create a graphical menu in ManyBot. To do this, go back to the "Custom Commands" section and click on the "Configure Ch. menu".
Then click on the "Add menu item" button.
Select the command we created in the menu.
Enter the name of the menu item. For example, "About the company". You can use emoji.
Press Enter or use the arrow on the right. We see a message that the command was successfully added to the menu. We go back using the corresponding button (2 clicks).
The menu now has a button we added, to which the created command is assigned. Let's try to click on it and see what happens.
When the button is pressed, the information that was previously sent only when manually entering the command is sent. Agree that it is so much more convenient!
With the help of ManyBot, you can also create polls, send out newsletters to subscribers, set up auto-posting to a Telegram channel, view statistics, etc. You can learn more about all the functions of the constructor in the bot itself by scrolling the menu to the "Help" and "Instructions" items. Click on them and explore all the features of the tool.
Create a website on UMI online
This is a full-fledged web constructor that allows you to create your own Telegram bots through a clear interface in the system. First you need to register here. Then we find ourselves in the personal account, where you need to click on the "Add" icon.
Then click on the "Empty Bot" icon in the window that opens.
To connect the bot we registered earlier in BotFather, you must first remove it from ManyBot. This is done through the /deletebot command (entering the command, selecting the desired bot, confirming the deletion). Or you can register a second bot and use a token from it, leaving the first one untouched.
We took the first path and removed our bot from ManyBot. Now his token can be used for BotMother. To connect the bot to the system, go to the settings.
Here we move the Telegram slider to the right so that it turns green, in the "Token" field enter the token received earlier in BotFather and click on the "Diskette" icon below to save the settings.
Now back to our bot in the constructor.
First, you can add a welcome text for all users who will run your bot. On the right is a block with functional blocks. Click on the topmost one with the name "Text" and drag it to the start screen.
Now write our greeting in the text box. You can use emoticons.
To address each user personally by name, add the {{this_user.firstname}} construction to the message text.
To create a menu, let's drag the "Group of buttons with hints" block to the same start screen, but with the location below the previously entered greeting.
In the "Message text" field, enter a hint for the user. For example, "Select the menu item you want." And in the "Enter button text" field, specify a short text that will become the name of the button.
To add another button, click on the plus sign.
Now we need to add two more start screens, on which we will place information corresponding to the buttons we created earlier.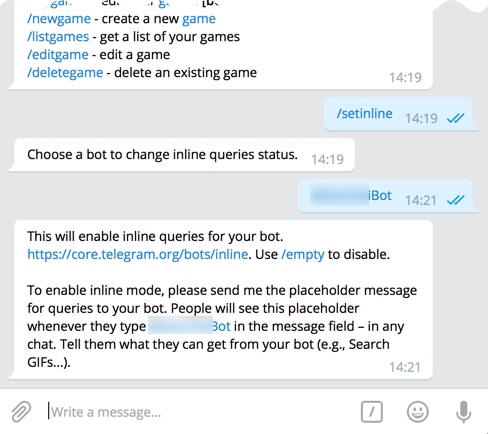 We find a button with a plus sign in a blue circle at the bottom of the site page and click on it.
A new start screen appears, enter a name like a button.
Now we drag the components that should be on this screen onto this screen. For example, the same text as before, but with the addition of a photo or other files.
Do not forget to periodically click on the save button, which is located at the bottom of the page in the form of a floppy disk icon in a green circle.
Create the second start screen in the same way. We call it as the second button.
Drag the required components here again. Text, photo, location, document, or any other element that allows you to use the free designer plan.
We used a screenshot of our rates on the 1C UMI website.
Now we need to link the second and third start screens to the action buttons in the first one. To do this, drag the "Fork" component to the 1st screen to the very bottom.
In the "Select screen" item, select "Start screen", then click on the + button.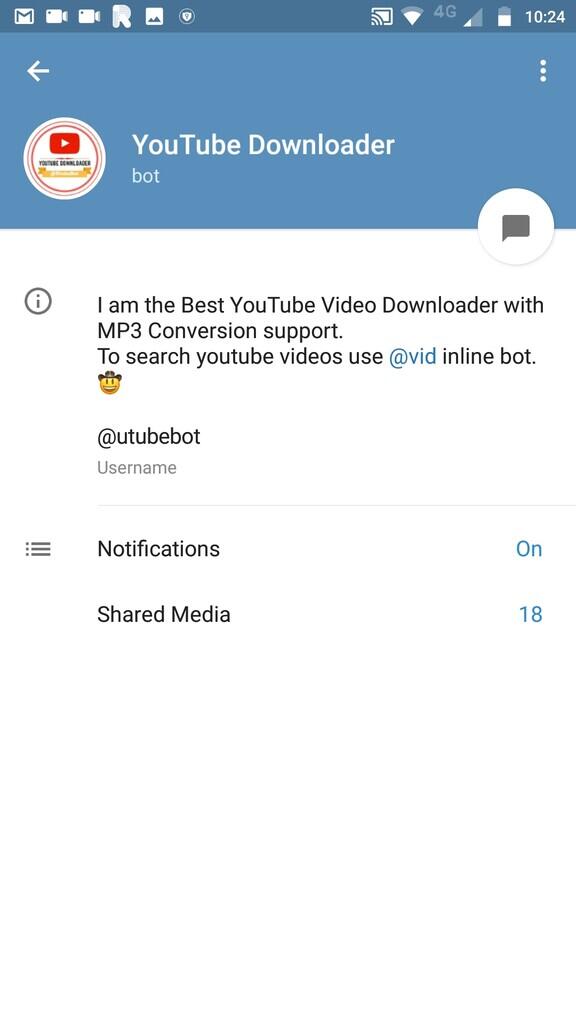 In the upper field, you need to select the second start screen. We leave the "text" field untouched, and in the "Enter a value" field, specify the exact name of the button.
Click the plus button again to add the next item. We do everything the same as for the first item, but select the 2nd screen and specify the name for the second button.
Click the "Save" button. We launch the bot in Telegram and check what happened.
Click on the "About" button and receive a message in response.
But how to go back after that? And for this you need to create an appropriate button. This is done simply. First, the "Group of buttons with tips" component is transferred to the second start screen, and just below the "Fork".
In the first block, we write a hint for the user what he needs to do to go back, and the name of the button itself.
In the second "Fork" block, we do everything the same as in the previous similar components, but select "Start screen" among the screens, and indicate "Back" in the button name.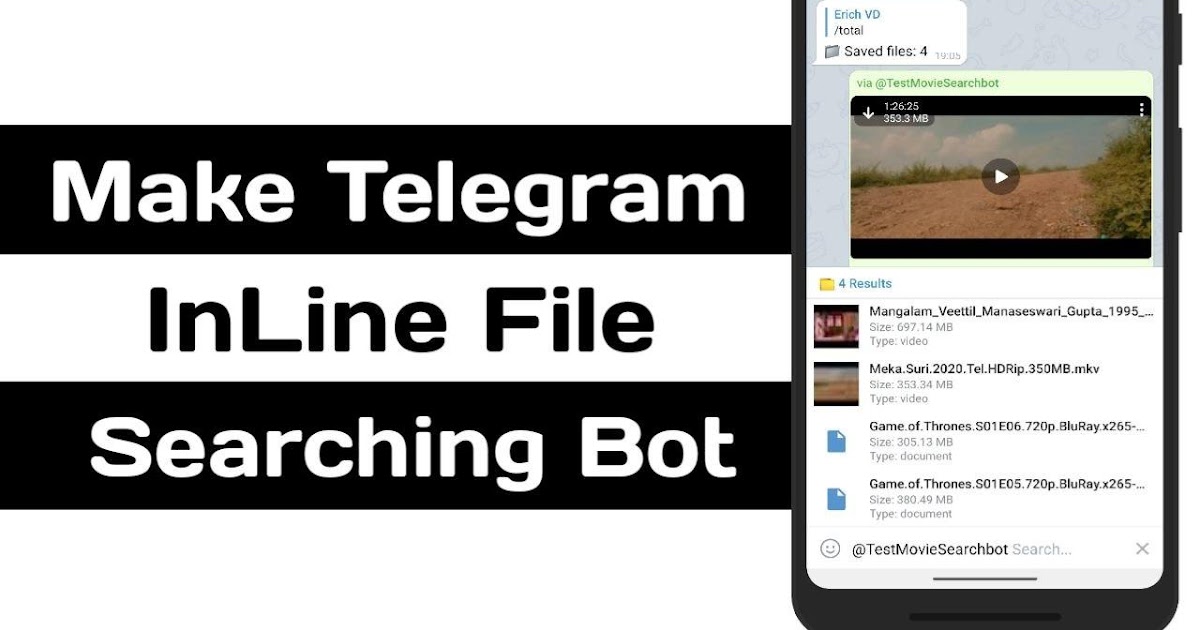
Save changes using the floppy disk icon at the bottom right of the page.
We clear the history of correspondence with the bot in Telegram, start it again. We click on the first menu item and after it sends information, we see that the "Back" button has appeared, by clicking on which you are redirected to the main menu.
This back button can be made for all menu items.
A simple bot created in BotMother will look like the image below in your personal account.
ManyBot sometimes "slows down" and does not respond to commands entered into the bot. Also, when you launch a bot created on this constructor, text ads from developers are sent.
As for the pluses, here we can highlight the presence of a mailing function, a more or less understandable interface, absolute free of charge and the ability to track statistics.
BotMother has almost no drawbacks, except for the inability to use paid components within a free account and the creation of only one free bot.
Other than that the service is excellent. Many different functions, clear chains of actions, no ads and a detailed guide in text and video formats.
Create a website now!
SMM
1614240000
179162
84
7
Irina VolitskayaHow to regularly maintain a Telegram channel and not spend half a day on publications? I have prepared tips that will be useful to both SMM specialists and authors of personal channels. It all starts with ControllerBot. This is one of the most useful tools for channel administrators in Telegram. Install a bot because it's convenient:
Go to the chat with the ControllerBot, press /start . Then issue the command /addchannel and follow the simple step-by-step instructions to connect the bot.
Go to the dialogue with the BotFather bot.
Press /start and select the command /newbot .
Give your bot a name (it will be displayed in the dialog list) and a username (a unique name that ends with "bot" and is written with @).
You will receive a token. Now copy it, send it to the chat with ControllerBot and fulfill one of the conditions for adding a channel (for example, you can just send your channel nickname to the bot).
Done, you have created a bot. Add him to the channel admins. And be sure to specify your city so that the bot sets up the time zone and can manage pending posts.
Click on the command / create a post .
Then select a channel (in my case it is Netpeak).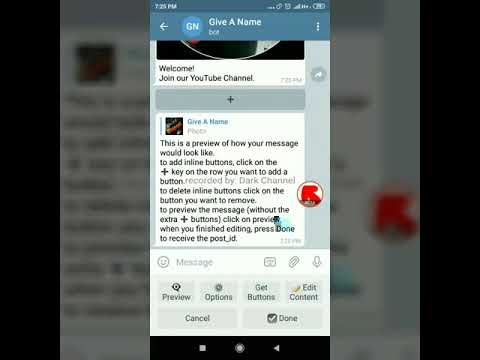
After sending the message, the bot will offer you several functions.
Use the usual hotkeys to format text directly in the dialog box:
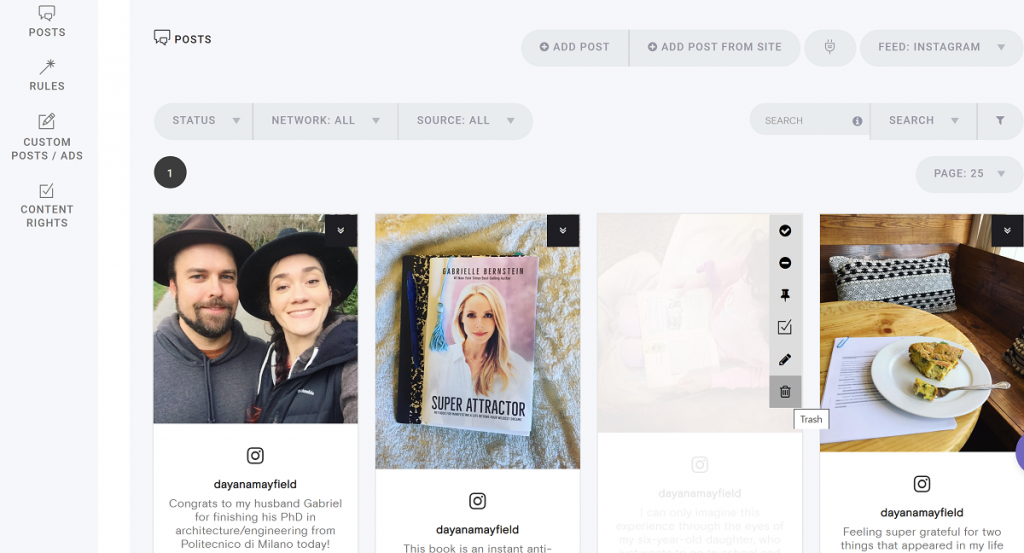
Click on the command /attach media file and send a photo or gif to the bot (it is not necessary to save the image, you can copy and paste it).
If suddenly you don't like how a post with a particular image looks, you can always change it. Click on command /detach media file and do it all over again.
Artem Borodatyuk about business and how it changes the world
Andrey Chumachenko about marketing, managing himself and the agency
Read
Read
Click on command /add reactions and select emoji (no more than six per post, separating each with a /). See how visually improved the design of the post.
After publication, you will see voting emojis next to each post and the number of clicks on them from users.
Select command /add URL buttons and send a text message to the bot with links separated by a dash "-". This is how it will look like.
After clicking on the button, the subscriber will be taken to the specified site.
After preparing the post, click Next.
You will see a menu with several publishing options: