There are a lot of good reasons to delete photos from Facebook, so knowing how to do it as efficiently as possible is a useful skill if you want to make best use of the giant social media platform.
You might simply have uploaded an image in error, or you might simply come to dislike a given picture. And cleaning up your social media persona is important to do before you apply for a new job or to a new school, both of which require putting your best foot forward.
First, log into your Facebook account and find the photo in question, whether it's in an album or just in "Your Photos," and don't click on the picture to open it.
1. Hover over the image to be deleted; a gray box with a pencil icon will appear in the top right corner of the thumbnail image.
2. Click the pencil icon, which will display a popup message "Edit or Remove."
Hover over a picture to reveal the edit icon. Steven John/Business Insider3. At the bottom of the menu that appears, click "Delete This Photo. "
"
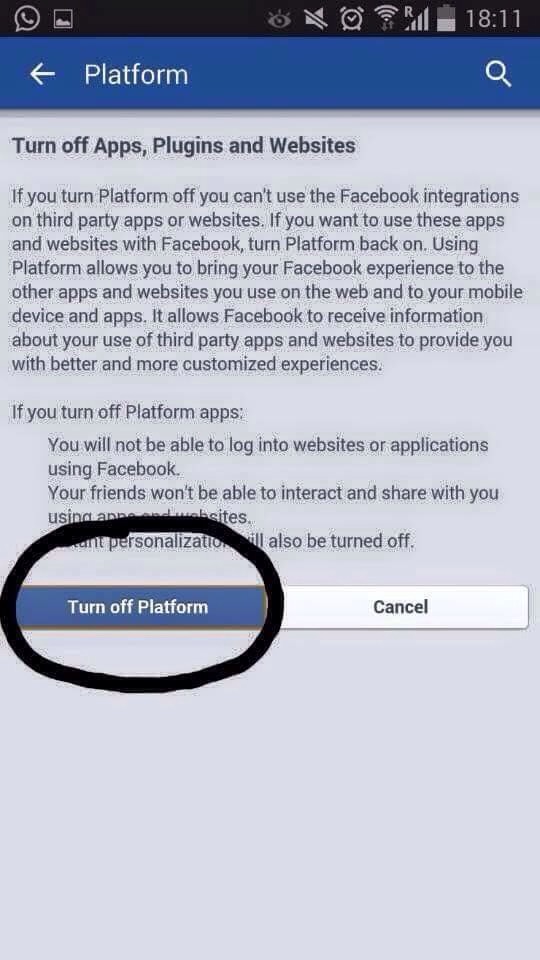
4. On the next popup window, click the blue box that reads "Delete."
Click "Delete" to finish the process. Steven John/Business InsiderAnd like that, it's gone from Facebook.
How to delete your Facebook photos from a mobile browserGo to the Facebook website on mobile and make sure you're logged in.
1. Locate the photo to be removed (remembering you can only delete images you uploaded) and tap on the photo to select it.
2. Under the image, tap the words "More Options."
Open the image to find the "More Options" button. Steven John/Business Insider3. Tap "Edit Photo."
4. Tap "Delete."
Tap "Delete." Steven John/Business Insider5. Under "Are you sure you want to delete this photo?" tap "Delete" to do so permanently.
And with that your picture is gone, deleted from Facebook on mobile, desktop, and everywhere else.
How to delete your Facebook photos from the mobile appThe process of deleting a photo from Facebook's mobile app differs slightly from a mobile browser deletion.
1. Open the Facebook app.
2. Go to your photos and tap the photo you'd like to delete.
3. Tap the three-dot menu in the top right corner of the photo's page.
4. Tap "Delete Photo" from the menu that pops up.
Tap "Delete Photo." Facebook; Business Insider5. Confirm your deletion on the next screen.
Tap "Delete" to confirm. Facebook; Business Insider
 Steven John
Freelance Writer
Steven John is a freelance writer living near New York City by way of 12 years in Los Angeles, four in Boston, and the first 18 near DC.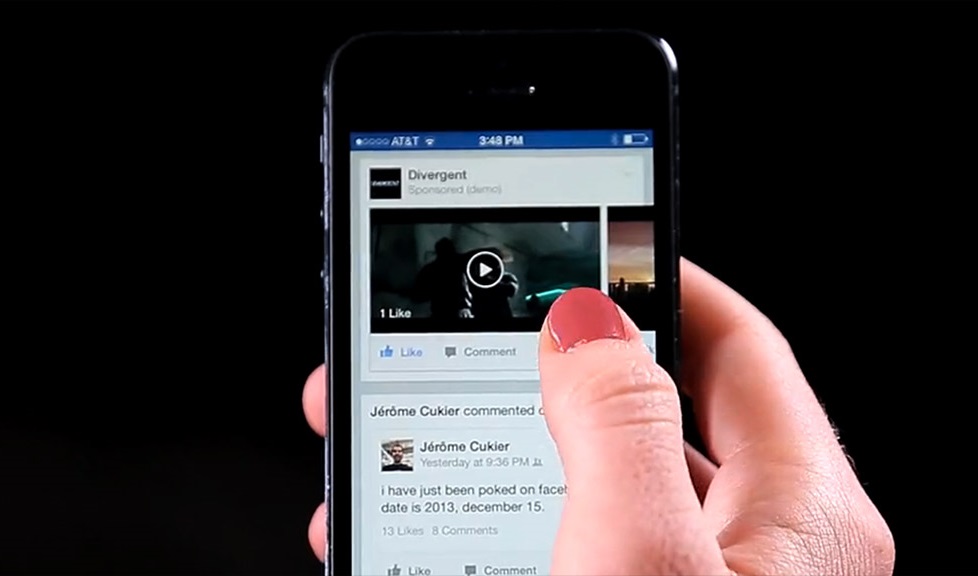 When not writing or spending time with his wife and kids, he can occasionally be found climbing mountains. His writing is spread across the web, and his books can be found at www.stevenjohnbooks.com.
Read moreRead less
Facebook is the world’s largest social media website. It houses millions of photographs, videos, and posts on its network. So, it’s not surprising that an individual may consider deleting a few of them. Learning how to delete photos on Facebook is very beneficial to users because they can erase them from their timeline and other people’s feeds.
People may discard their pictures on this website for reasons like applying for a new job and moving on from a relationship. Whatever the purpose is, this article provides information on how to delete photographs on the website in 2021.
There are several reasons a person may want to know how to delete photos from Facebook. All they need is a mobile device with an internet connection. In just a few steps, one can quickly mass-delete their photographs with the app.
Removing a single picture from the website is very straightforward. People can complete the process in just a few steps and in no time.
Here’s how to quickly delete a photo:
Sadly, Facebook doesn’t have a mechanism for wiping out many images at a time. That doesn’t mean it is impossible to mass-delete pics. With a few tricks, a person can remove several photographs easily.
Here’s how to discard an album:
Here’s how to mass-delete photos:
A person can erase any self-made album. However, the ones created by Facebook, like “Videos” and “Cover Photos,” cannot be deleted using this method. One has to remove the pictures in these locations individually.
Learning how to delete pictures on Facebook by using the website is quite similar to operating the mobile web. A person can quickly delete the single snaps that were uploaded on the platform. However, the process of removing photographs on computers isn’t the same as the mobile versions.
Navigating through the web browser on how to delete photos on Facebook is easy. It is simpler than using a mobile device because it saves people from opening several pages to access a single picture.
Here are the best ways a user can do this:
A shorter way to discard single photographs:
 Several controls will appear at the bottom.
Even with the website, people can’t mass-erase their photographs. These photos can either be discarded one at a time or together in an album. Just like on Android and iOS, a new collection will have to be created for this.
How to delete an album:
How to mass-delete photos:
That will immediately wipe out all the pics at once. On the website, only the albums created by a user can be accessed with this method.
This technique is for individuals who do not have the application on their devices. It is not different from using the app, but it’s trickier when deleting pictures with it. Hence, this tutorial will show users how to remove Facebook photos with a mobile web browser.
The mobile web is slower and more disorganized than the mobile app and desktop website. Most times, the widgets on it are tightly packed and smaller than on other platforms. It’s no surprise that a person may have difficulty navigating it.
Here is the best way to delete single photographs with the mobile web:

A user can only remove the photographs and albums that were created and posted individually. The social network doesn’t provide an option to pick multiple pictures and delete them in one go. Moreover, it is more confusing to navigate through the site using the mobile web.
Below are the steps to follow:

A profile picture is one thing a user must always have to enable their friends and family to find them on the app. It serves as the first impression to contacts who search for their account. Now, in a situation where a person feels the image is old, Facebook provides the individual with an alternative to remove the pic immediately.
Here’s how to discard the profile photograph:

The cover image serves as a backdrop for the profile photo. It is a large banner graphic that introduces an individual’s business to other contacts. For multiple reasons, a user may wish to trash it.
The process is similar to that of removing profile images.
The steps are available below.

If a person deactivates an account, all the picture posts will be deleted.
Many people worry about their safety online. Various cyber-attacks may even advance in 2021. Hence, it’s no news that some users may prefer to keep their timeline images hidden. Facebook has a feature that allows people to protect their pictures without hassle.
If people are tagged to a picture they don’t like, they can efficiently use the untag option to exclude themselves from it. Removing tags from an image doesn’t delete photos from Facebook. However, it won’t show in a user’s newsfeed.
Steps on how to hide photographs on the timeline:
 It is located at the bottom of the screen on an iPhone and the top for Android.
A shorter method to hide snapshots from the timeline:
A person may be tired of getting unsolicited tags from friends and colleagues on the website. With time, too many tags can become annoying and offensive. Thus, many people wonder if there’s a way to stop it. Of course, this activity can be controlled.
Here are ways people can untag themselves from photos:
This social network doesn’t have a “Trash” album that stores deleted snaps for privacy. By removing photos from Facebook, the media will be lost on it. Besides, a user may want to operate a new account and not to lose the media on the present one.
Every deleted image can easily be accessed with these steps:
 Then tap “Create File”
Just like photographs, albums have to be deleted individually. There’s no button to remove all of them at once.
Here is a fast way to get rid of them quickly:
There are situations where a person may want to purge its account of all its pics. No doubt, this function will remain relevant in 2021. However, the site and other social networks like Twitter don’t provide their users with a single option to delete them all. Here are the best steps to follow on how to remove photos from Facebook.
How to erase every picture on a person’s account:
How to discard every photograph by using albums:
If a user follows these provided steps, knowing how to delete Facebook photos will be straightforward. There are several ways to erase these images, depending on the device a person operates. Thankfully, none of these methods is complicated.
As mentioned earlier, an individual can’t erase images and albums created by the site. Now, if people post an undesired photograph, they can easily delete it. Individuals can also decide to report unwanted images to the website rather than discarding them on their own.
How helpful did you find this article? Please let us know in the comments below.
Published: April 07, 2021Updated: April 19, 2021
Matt Robinson
Matt is an experienced technical writer and translator skilled in writing targeted texts for a variety of audiences. He has a diversified background, including social media management of various products. He is a data-driven strategist and a passionate story-teller. He posts about all social innovations and delivers high-quality research and content to our readers.
By posting regular photos online, you are unlikely to surprise anyone. Facebook allows you to make your page unique and memorable. This can be achieved by creating bright and unusual photos. One of the last options is the 3D snapshot, which makes the image come alive.
Contents:
There are two main ways to create a 3D image: This is available on iPhone 7+, Samsung Galaxy (Note 8 and S9+ models) and Google Pixel. Share a photo through the mobile app. To create a three-dimensional photo, use the "Portrait", "Blur", "Live Focus" modes;
Examples. To evaluate a 3D photo, just move your mouse over the photo.
The official Facebook help page currently lists only three manufacturers of smartphones capable of supporting 3D imaging. But the functions of other gadgets are constantly being improved. It is impossible to exclude the possibility that other smartphones will be able to take 3D photos.
If you have a gadget that has two cameras and supports the desired shooting mode, then you should try to create your first 3D image. To do this, you need:
Attention : If there is no suitable image in the device memory, then take a picture on your smartphone using the Portrait mode.
No special equipment is needed to complete a new publication of a 3D photo on a computer. To create a three-dimensional image on Facebook, you only need to download and install special software.
Programs suitable for 3D photography:
Optimal formats are png and jpg. A three-dimensional image must necessarily contain the depth parameter. For example, newimage_depth/png.
When you have both of these files, you can start:
If you're having trouble adding a 3D photo to your post, there are several ways to fix the problem:
 Following the advice of Facebook, it is better to use Chrome, Firefox, Safari;
 If some difficulties may arise when creating a 3D image, requiring certain skills and abilities, then viewing volumetric images is available to anyone.
To appreciate the beauty of 3D photos, do the following:
Facebook developers are constantly expanding the list of devices that support this format and increase the speed of loading large images.
To take high-quality three-dimensional photographs, follow the advice of the designers of Pocket Lint:

Click on the icon in the lower right corner. Scroll down and tap Settings & Privacy > Settings. Scroll down to the Media & Contacts section and select Videos & Photos. In the VIDEO SETTINGS section, click the icon next to Upload in HD (for example, ) to enable this setting.
Open the Facebook Android app and find any photo you want to download. Now click on the Options menu and click on the Set as button. (Tap More if this setting is not visible on the screen) Then select Gallery Photo, which should appear in the dialog after installing Androidify.
How Facebook ruins your images
Therefore, uploaded images are compressed to reduce their size. As a result, the picture quality may noticeably suffer. And after your image has passed through the entire Internet, has been downloaded, then repeatedly uploaded to different services, it can become absolutely terrible.
To add a photo or video to an existing album:
Possible reasons why Chrome won't play Facebook videos include: Corrupted cache. Browsing data and launch configurations are cached by the browser to reduce loading times. However, over time, outdated cache content can prevent the content from displaying correctly.
Log in to your Facebook account online.
Facebook Help Center | Facebook.
…
To save the photo to your phone or tablet:
How to save a post from Facebook for later reading
To save the photo to your phone or tablet:
If you don't want to crop your photo, click Skip Cropping at the bottom left, and then click Save.
…
You can:
To create a new album:

How to add photos to an existing album
Add photos to your post.
Click on the Photo/Video link and a window will open on the screen with a local folder on your computer. Select photos to upload. You can select multiple photos at once. Click the "Open" button in the lower right corner of the window to start uploading the selected photos to the publication.