Tired of posting on Instagram from your phone? Wondering how to post on Instagram from your PC or Mac instead?
You’ve come to the right place. Posting on Instagram from your desktop can save you time and offer more flexibility in what you can upload (such as edited videos and images).
And you can do it without having to upload them onto your phone first.
Below we’ve outlined three different ways to post on Instagram from your computer.
How to post on Instagram from your computer
Method 1: How to post on Instagram from your computer using Hootsuite
Method 2: How to post on Instagram from a PC or Mac
Method 3: How to post on Instagram from your computer using Creator Studio
How to post an Instagram Story from desktop
How to post an Instagram carousel post from desktop
How to edit an Instagram post from desktop
Bonus: Download a free checklist that reveals the exact steps a fitness influencer used to grow from 0 to 600,000+ followers on Instagram with no budget and no expensive gear.
Below, you’ll find ways to post on Instagram from your PC or Mac. We’ll also show you how to post via Hootsuite which works on either operating system.
If you’re more of a visual learner, watch this video from our pals at Hootsuite Labs to see how easy it can be:
You can schedule feed posts, Stories, carousel posts, and Instagram ads with Hootsuite.
The instructions below will walk you through the process of posting to your Instagram feed. We cover Instagram Stories and carousels a little further down in this article.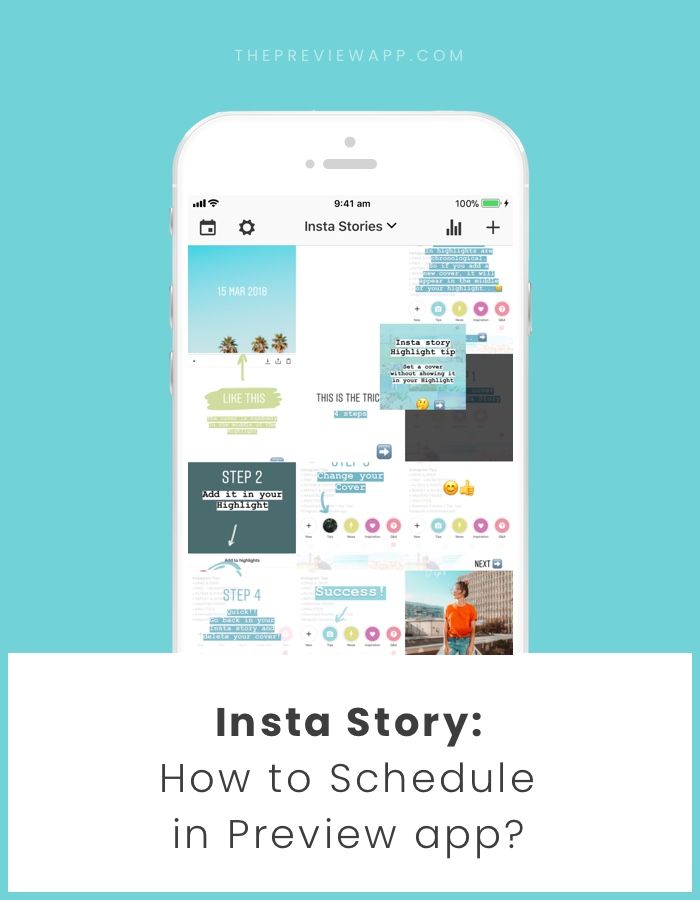
To post on Instagram from a PC or Mac using Hootsuite, follow these steps:
 Alternatively, you can also Schedule for later if you want it to post at a different time.
 For a quick summary of how to post on Instagram from Hootsuite, watch this video:
Voila! Posting photos and videos to Instagram from PC or Mac is that easy.
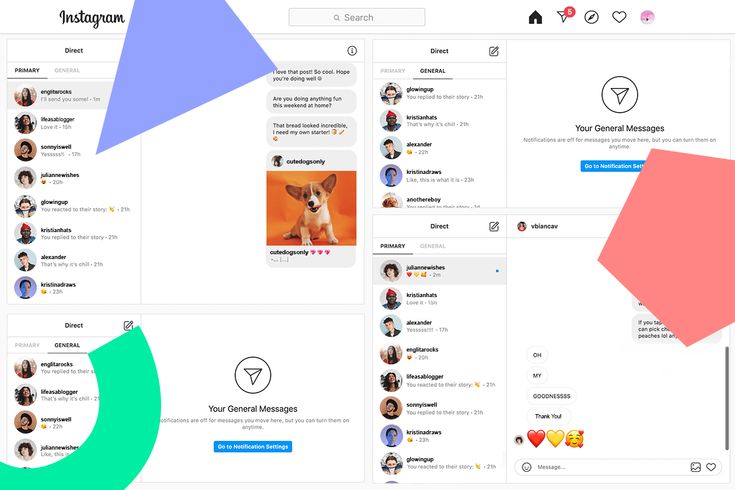
Method 2: How to post on Instagram from a PC or MacAs of October 2021, all Instagram users can create and publish feed posts from the browser version of the app.
To post on Instagram from your desktop computer (PC or Mac), follow these simple steps:
 A Create new post window will pop up.
And that’s it!
At the moment, only feed posts can be created and published directly from Instagram on desktop. Keep reading to find out how to post Instagram Stories from a PC or Mac computer.
If Instagram is your social network of choice and you don’t mind not having all your social networks in one dashboard, Creator Studio could be a good option for you.
Note that when using Creator Studio, you can post and schedule all types of posts other than Instagram Stories.
How to post on Instagram using Creator Studio:

You can post an Instagram Story from your computer using a third-party social media management tool like Hootsuite. Just follow the steps outlined in this short video:
Or, read our step-by-step article on how to post an Instagram Story from your computer.
If you don’t have Hootsuite, you can post an Instagram Story from your PC or Mac through the following steps:
You’re done! It’s practically the same steps as if you were using the Instagram app on a mobile device.
#1 Social Media Tool
Create. Schedule. Publish. Engage. Measure. Win.
Free 30-Day Trial
With Hootsuite, you can also create and easily publish carousel posts (with up to 10 images or videos) directly to Instagram. Here’s how.
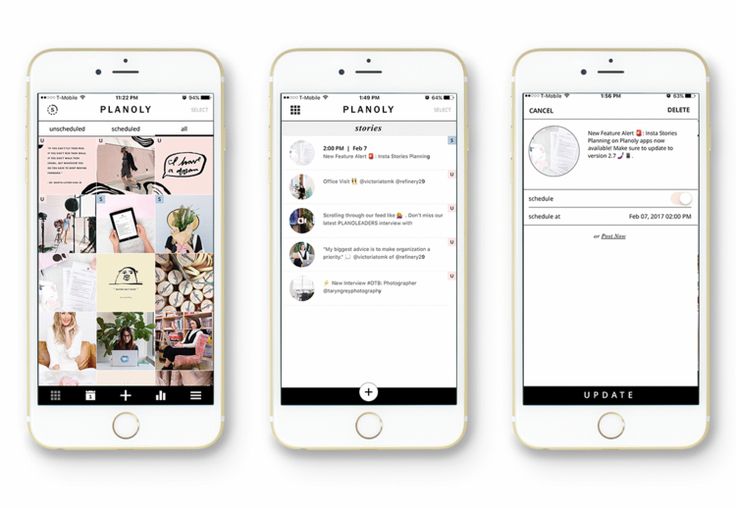
1. Go to Planner and tap New post to launch Compose.
2. Select the Instagram account you want to publish to.
3. Include your caption in the Text box.
4. Go to Media and tap Select files to upload. Select all the images you want to include in your carousel. All selected images should appear under Media.
5. Use the yellow Schedule button to select a date and time to publish your post.
6. Tap Schedule. The post will show up in your Planner at the time you have scheduled it for.
That’s it! Your post will go live on the date and time you selected.
Hootsuite Compose allows you to edit any image directly on your dashboard before you post it. Unfortunately, you won’t be able to edit the image once it’s posted.
Follow these steps to edit:
 This brings up Hootsuite Composer’s edit tool. It allows you to customize the aspect ratio of your image to fit practically any social media platform’s image metrics. From the sidebar, you also have the ability to add filters, adjust lighting and focus, add text and stickers, and use the brush too.
Voila! You just edited your image from your desktop.
Post to Instagram from your PC or Mac using Hootsuite. Save time, grow your audience, and measure your performance alongside all your other social channels. Try it free today.
Get Started
Easily publish and schedule Instagram posts from your computer with Hootsuite. Save time and get results.
Try it for Free
Instagram stories are wildly popular. From celebrities to small businesses, everybody seems to utilize stories to get a message out. At least, for a brief window until the imagery goes into digital oblivion.
Since Instagram is a mobile-centric social network, a lot of functions, including computer uploads, are not available outside the mobile ecosystem. As Instagram doesn’t give you the option within the website’s interface to post a story, there are a few simple workarounds available.
You need to employ some browser tricks, use third-party apps or scheduling tools to successfully post an Instagram story from your Mac or PC. Either way, the process becomes straightforward once you get the hang of it.
Once you read the subtitle, this hack might sound like more than you’ve bargained for. But it’s probably the easiest way to post an Instagram story or any other media from your computer.
This workaround doesn’t require additional software or extra payment to work, but you are limited to Google Chrome. With a few simple steps, you can post stories to Instagram from your Mac or PC.
If your computer doesn’t already have Google Chrome, you can get it here. This browser has several benefits with the Web Store. For installing Chrome extensions, there are endless possibilities for your Instagram account.
Launch Chrome and access the Developer tools from the View menu at the top. You can also use keyboard commands to quickly open the developer tools:
For Mac – Command + Options + J
For PC – Control + Shift + J
Note: The screenshots are taken on a Mac. So the layout might be a bit different on Windows, but the same steps still apply.

This method assumes you have images and videos ready on your computer. If not, you should upload them first.
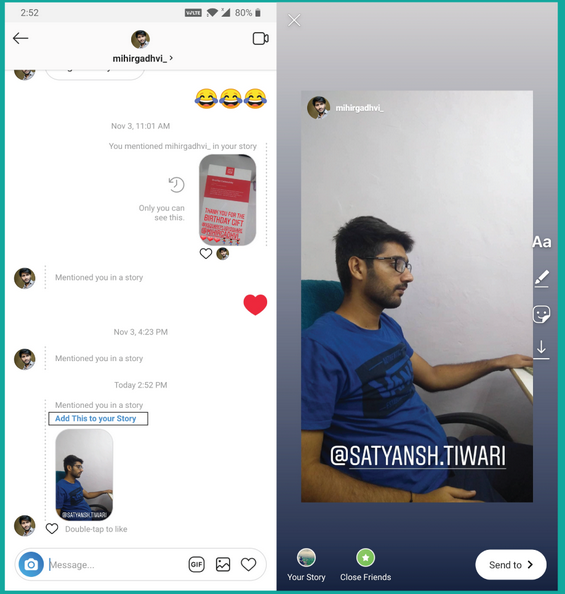
Write custom captions, add doodles, and embellish your story using the same tools as you would on a mobile device. Hit “Add to your story” once you are happy with the looks. That’s it.
In theory, it is possible to post an Instagram story from Safari but your computer needs to allow Portrait orientation. You should be able to change your display settings and post a story.
If not, you can always use Safari to post pictures or videos. Here is how to do it:
 3 – iphone(Safari iOS – 11,3 – iPod touch works as well)
You can now log into your Instagram account and click on the “plus” icon to add photos and videos. As already mentioned, if you want to add a story, switch to portrait mode first.
Compared to Chrome, it might be easier to use Instagram on Safari because you get a full-window view. Then again, things become a bit tricky with posting stories via the portrait mode.
Third-party apps offer different posting/search features, and some of them are available with paid versions only. However, these apps can be useful if you are using Instagram for business or want to upload in bulk.
Hootsuite is a popular service for influencers and many entrepreneurs. Fortunately, it can do a lot more than schedule posts. Hootsuite gives you the option to set up Instagram posts from your computer.
Although it is a paid service, it is well worth the money if you’re managing multiple social media accounts, posts, and schedules.
An Android emulator, Bluestacks is also available on both Mac and PC. You need a Google account to use it and the entire process resembles the browser hacks described above.
The best thing about this app is that it’s free of charge and you can easily post stories, pictures, and videos. However, it doesn’t support bulk uploads and management of multiple accounts.
Hopper HQ is a scheduling tool designed for power users. It offers bulk uploads, full automation, analytics, and more. Plus, it features a Grid Planner which allows you to get a preview of your Instagram profile.
This tool is best for social media managers and influencers as the subscription price is a bit steep.
Dropbox doesn’t exactly let you post stories to Instagram using your computer but it is worth mentioning. Assuming you have some great photo editing software on your computer, or, it’s easier to work with your Instagram content on a larger screen, the Dropbox service makes it easier to move that content to a mobile device and upload it.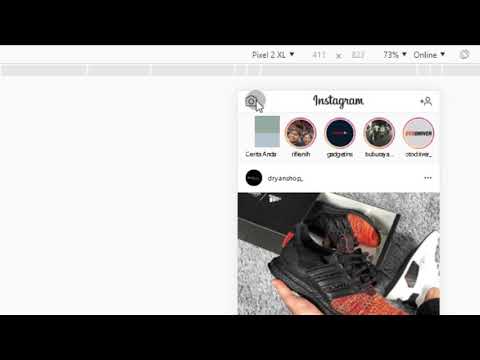
If you’re having issues with any of the above-listed options, Dropbox paves the road your edited content will travel from computer to smartphone. Combining simple upload options and immediate data uploads within the application, this is yet another way to post content on Instagram using your computer.
Posting an Instagram story from your computer is easy. And if you are an average user, there is no need to resort to third-party apps. Just make sure to upload photos or videos to your computer before you share them.
In this article I will tell you how to make an Instagram story and show you how to post a story from your phone or computer. Let's see all the features of the story editor - I'm sure you didn't know about some of them.
The easiest way is to post a story on Instagram through a mobile application. You will need the official Instagram app, download it from the Play Market or the App Store. We install, log in or register, draw up a profile if necessary.
Article on the topic: "Instagram design: how to make your profile attractive to the audience."
There are three ways to exit the Instagram story creation window. The first is to click on the plus icon in the bottom bar of the app. The second is to go to the main page (the section with the house icon) and click on the circle with your avatar.
Buttons that will take you to the story editorThe third way is to drag the main page to the right.
Dragging the screen to the right also opens the history creation windowIn all three ways, you go to a window from which you can create not only a story, but also a post, and also start a live broadcast:
From one editor, you can create a post, a story, or start a live broadcast video, or shoot them directly from this window. To select ready-made materials, click on the square gallery icon in the lower left corner. Through the icon in the lower left corner, you can go to the media gallery on your phone and select files from there
 You can select one file or several at once, to do this, click the "Select Multiple" button, it looks like two squares superimposed on each other.
This is what the "Select Multiple" button looks like.If you want to remove material, use the round button at the bottom center. To take a photo, click on it. To shoot a video, press and hold for as long as you need. A colored bar will run along the edge of the button: one full circle of it is equal to one full story duration. This will help you fit the video at the right time.
Hold down the button to take a video. Short press to take a photoBuild sales funnels and answer user questions using the chatbot on Facebook, VK and Telegram.
Instagram has more and more features for decorating stories: effects, shooting modes, elements that can be used to decorate a story. I'll tell you about all these functions in order.
Shooting effects - a row of circles at the bottom near the shoot button. To the right of it are pre-installed effects, to the left - added by you. How to add an effect, I'll tell you further.
Effects create a background, add snow or hearts to videos and photos, and change the color of the frame or face in the frameEach of the circles will add a visual or sound effect to the photo or video you take through the application. Many of them are interactive: for example, masks that are applied to the user's face and change along with facial expressions.
Interactive masks react to your facial expressions and change with itLife hacks on effects:
 You can also add a filter from someone else's story, just click on its name. The added filters will be displayed to the left of the capture button.
 Shooting modes - icons on the left. They can be used to create another fun video effect, such as a boomerang video loop or zoom video.
Shooting mode options. This is not the whole list - expand it by clicking on the arrow at the bottomHere is a list of available modes:
Some modes have additional settings. For example, in a collage, you can select several grid options, and in a photo booth, an imitation of different photographic film.
When you have taken a photo or selected it from the gallery, the final editing is in progress. You can add an effect, text, stickers and gifs to stories, draw something and add a link.
I'll show you how to edit stories on Instagram using different functions.
Color filter. It can be changed by moving your finger left or right. Just scroll to the right filter.
To apply a color filter, swipe left or right on the screen until you find the one you want Effects - button with a smiley face and two stars Here they are similar to shooting effects - here, too, there are masks, filters with snowflakes, with color changes, and so on.
Please note that if you have already used the effect when shooting, you cannot add an additional effect to the video or photo when editing so that they do not conflict. You just won't have an add effect button.
In the version on the right, I used the hoarfrost effect when shooting, so there is no additional effect button.Link is a button with a chain link. On a personal account, you can only add a link to a video from your IGTV. On the account of the author or business, you can add external links, but on condition that the audience is more than 10,000 subscribers.
Button for adding a linkDownload - button with an arrow . With its help, you can download the story that you have turned out to your phone.
If you want to save the result to your phone, click on the arrow Sticker or gif - icon of a rectangle with a curved corner . Through this button you can add a so-called sticker, also known as a sticker. With the help of a sticker, you can beautifully design a hashtag, mark a geolocation or another account, make a test, vote or poll. The element can be made larger or smaller and rotated, filled with your own text. If you want to delete an added item, drag it to the bottom of the screen, where the trash can icon will appear.
Here you can also find a gif, they are pulled from the Giphy service. Press the magnifying glass button labeled GIF, select a GIF from the list, or search by keyword.
Select GIFs from the list or search for the ones you need by keywordsYou can also take a photo and attach it as a sticker, to do this, press the button with the camera. Take a photo and just like with a sticker or GIF, adjust the size, tilt and place.
A sticker with a camera icon is needed to add another photo to the photo. Marker. Using a marker, you can draw something on the story. There are several types of lines and an eraser, you can choose the thickness and color of the marker.
Text. Write the desired text and edit. There are three options here. Left aligns text to the edge or center. The middle one is responsible for changing the font or its color. Right - adds effects to the font.
Write, arrange, move the textLife hack. To quickly add text, click anywhere in the editor. The Add Text window will open.
Please note: when you move elements on the story, the editor shows guides at the edges. It’s better not to step behind them, otherwise the element may be partially hidden - for example, in the upper left corner it will be covered by your avatar.
Guides are shown when moving an element to the edge of the screenSound. If you shot a video with sound, there will be an additional button to turn it off.
If you need to turn off the sound of the video, click the speaker icon That's all the settings.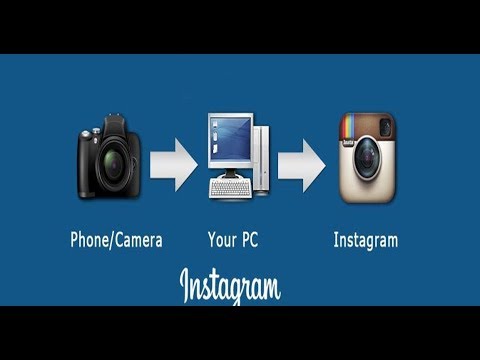 Now you can start publishing.
Important! Read our article about the features and interesting features of Instagram stories - we talked about invisible stickers, time-saving templates, delayed posting and other useful things.
Send chains of triggered welcome, abandoned cart, reactivation messages by combining email, SMS and web push within one chain.
Stories publishing settings are located under the gear in the upper left corner. Here you can choose:

There are three options for posting: post to everyone, post to your friends list, send a private message.
I will show two options - through the auto-posting service and directly through the Instagram website.
Some social media auto-posting services support posting stories to Instagram. Try Onlypult.
However, in most services, the function of publishing stories is only to upload a photo or video.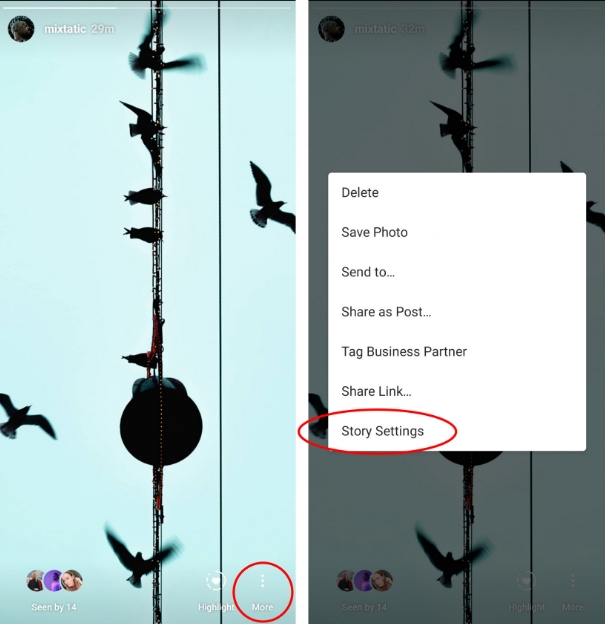 From the above list, only Parasite and SMMplanner support more or less advanced design: add text or gif, see how the story will look after publication.
Please note! In order not to screw up with the size of the picture, save yourself our cheat sheet on picture sizes for social networks.
If you want to post a story on Instagram without any frills, post directly through your browser. To do this, you need to go into the simulation of viewing from a mobile device, this is called the adaptive design mode, and it definitely exists in Chrome, Opera, Firefox. I'll show you how to do it in Firefox.
We go to the Instagram website and log in to the desired profile. Then we press the key combination Ctrl_Shift + I, it will open the developer panel. In this panel, you need to find the devices icon - it is at the top of the panel, it shows a phone and a tablet.
Turn on the mode with the button with the image of the phone and tablet in the developer panel The site will look like you opened it on mobile, and the mode settings panel will appear on top. Here you need to select some kind of mobile device so that the buttons for creating posts appear, as in a mobile application.
I'll choose the first option, Galaxy. Now the site finally looks like a mobile application - there is a panel at the bottom, and my avatar appeared at the top, which you can click on to create a story.
Now the site looks like you are in a mobile applicationClick on your avatar at the top. The site will immediately prompt you to select a file from your computer, the file you selected will open in the story editor. Please note that the editing functionality here is severely curtailed: in my case, only four gifs were available in the stickers, and the elements added to the photo could not even be moved. At the end, click on the inscription "Complete the story" at the bottom of the screen, and it appears in the feed.
We upload a media file from a computer and publish a story Now you know how to design your stories and upload them both from your phone and from a computer, which means you will always be in touch with subscribers. And do not forget about other channels of communication with customers: chat bots in messengers, automatic chains of email newsletters will work even when you are on vacation. Sign up with SendPulse and create them for free!
We make your page interesting and encourage subscribers to visit your page or website more often for shopping
Fresh publications regularly
Get our book “Social Media Content Marketing: How to get into the head of subscribers and make them fall in love with your brand” .
Subscribe to the newsletter and get a book as a gift!
In this article we will tell you how to post stories on Instagram and upload them yourself from a computer where stories are added and whether it is possible to create stories on a computer for publications on Instagram. Stories is a handy tool for promoting a commercial blog on Instagram. With its help, audience surveys are conducted, announcements of events, new products, advertising is served, products are sold. All this increases the engagement of subscribers, the number of orders, the position of the page in the search results.
But if you're an active business account, you may need to work with a PC that won't be able to post new content. Fortunately, there are several ways out of this situation. Let's start with a simpler option.
Viewing Stories from a PC is carried out from the application website.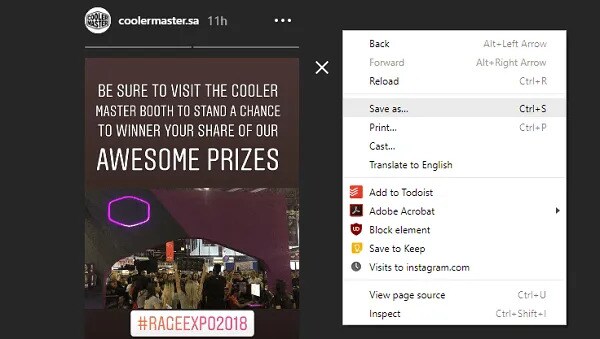 But there is limited functionality. It comes down to editing your profile (data, password, deleting notes) and viewing other people's pages. To expand the field of activity, try to do the following:
Let's take a closer look at the second method. It's free. Go to Google Chrome settings - More tools - Extensions. Then click on the list icon in the upper left corner and click "Open Online Store". In the search bar, enter the name as in the screenshot.
On the right side of the browser, you will have an icon to activate the mode on Instagram. Open it and select the appropriate emulator - a program that will allow you to use your account effectively. For example, Android is KitKat. Log in to your profile through the official website https://www.instagram.com. You will see that the blog has taken on a different, mobile-like form.
At this stage, you can already share photos in the feed with your followers. To do this, click on the camera icon and select a picture. At the bottom of the screen, you'll find editing features and filter options. To download Stories, you must have the content made and edited on your computer. Recommended format: 9*16. Click on the house in the lower left corner, and then on the icon in the upper. The extension will ask you to rotate your device. Narrow the window, or use Ctrl-Alt-Left Arrow to do so. Then publish by clicking Add.
There are several more ways, one of them is also through Google Chrome. Go to your browser settings again, select More tools - Online store and search for Web or Desktop for Instagram. The principle of operation is the same. The third version also asks to rotate the device, but after downloading the file. One big downside to all of these options is that you can only post images. Also inconvenient is that in some cases they need to be pre-cropped in order for them to look good in Stories. There is no built-in editor.
In addition to all of the above, there are BlueStacks and Nox emulators. They are a screen smartphone, they work on Windows and Mac. With their help, you can upload not only photos, but also videos, change your profile, reply to messages in Direct, delete your account.
You can add your Stories to the archive on your phone. This means that it will always be available to you. There is no such function for other people's Stories. You will have to be content with a screenshot or use the StorySaver or InstaStory programs. In the case of a PC, various applications and extensions will again come to the rescue. One of them can be installed in the way you already know - through Google Chrome. In the search in the browser's online store, enter the name Chrome IG Story or immediately follow the link. Click "Install" and then on the icon in the upper right corner. She looks like this. You will see your account listed. By clicking on the arrow next to the user or hashtag you are interested in, you will download the entire Stories archive!
If you need one specific Story, use Web for Instagram. In the search, find the user or hashtag leading to the publication you need, open the video and click on the blue arrow as in the screenshot.
Another way to download is the SMMplanner service. This is a paid site, but it has a trial period and upon registration you get the opportunity to publish 50 notes. They will be charged every month. A single photo or video posted in Stories is considered a post. Here are the actions that will be available to you.
After authorization, you need to attach your account. Scroll down the page you are on a little and select a social network. There is one caveat! You must remember which mail was specified when creating the blog, or add the current address in the profile settings. On it (in case of resetting the password) instructions for recovery will be sent.
The system does not save the access combination and all personal data remains only with you. For this reason, the service will not be able to help you if you forget them. Also, no one will intercept your information and steal access. The next step is working with Stories.
Go to the Posts tab and select Schedule. Find the content you want to share on your PC. The recommended size for a photo is 9*16, video is 15 seconds. The free package only includes images. The site has the ability to edit. To enter this mode, click on the pencil icon.
All basic image editing functions are available.
Don't forget to click "Save" before exiting edit mode. The possibilities of the service do not end there. You can tag people or other commercial blogs in the photo. To do this, find the icon in the image in the lower left corner. Click on it and enter the user account. Type in the name, click on search, confirm (ok).
There is a link field above the picture. If you need to publish Stories with a URL, just enter the data in this line.
Hashtags are indicated in the text of the post.
Add a geotag. This is a useful element for promoting the page. To do this, in the "Search in Facebook places" as in the screenshot below, enter the name of the country, city or institution. Then go to edit mode (pencil) and select stickers. So you make a label with a sticker. You will see their options first in the list.
PC surveys are another great feature from SMMplannera. Write your question and include answers. To style all this with buttons, proceed as in the case of the location mark.
These are all the basic functions that are available. Don't forget to check the "Submit as Stories" box before posting. Set the date you plan to add videos or images. In this way, you can create a stock of posts that will be published automatically at the configured time.
Now you know how to post a Story on Instagram from a computer. The methods we have listed will make maintaining a business account easier and more efficient.