Blogger has no inbuilt option to share all blog posts on social media. I’ll explain how you can share Blogger blog posts automatically to social media in 2022.
Page Contents
In this world of digital era, everyone is on social media. You understand its potential and can’t ignore this platform to attract more users to your website. You can create your account or dedicated pages related to your business on Twitter, Facebook, etc. And share that page with groups similar to your business or audience that may like your product.
After creating a page and getting followers, it is essential to serve some content to them from time to time. And it is also vital that you share all the blog posts and banner links to social media. So the page followers don’t miss any updates from your website.
There is no straightforward solution to sharing Blogger blog posts on Facebook. Initially, we can connect the blog feed with Twitter and connect to Facebook. But in 2019, Google shut down this feature too.
Now, we can take the help of a third-party application Zapier. This service is free for 100 monthly blog posts. You can use this feature on other blogging platforms as well.
You’ve to create an account on Zapier and log in to the account. You can also choose Facebook, Microsoft, or Google to create an account.
create a ZapNow you can start creating zap, and this zap will help you connect your blog post and social media platform.
Enter the name of the Zap for future reference. And Now select the Trigger, after which our event should initiate. You have to search RSS by Zapier.
This RSS by Zapier is an RSS feed also available with the Blogger blog. We’ll use it to share our blog content on social media platforms automatically.
A new window will open where you can provide the RSS feed URL of the Blogger blog. The RSS feed is under /feeds/posts/default in the Blogger blog.
After clicking on continue, you’ll be on the trigger setup window. In this window, you’ve to provide the RSS feed URL of your blog. After providing an RSS feed, click on the continue button as shown above.
Find RSS Feed URL: If your blog URL is example.blogspot.com, the feed URL will be example.blogspot.com/feeds/posts/default. And in the case of Blogger custom domain name example.com, the feed URL will be example.com/feeds/posts/default.
Now you can connect as much as your social media account by clicking on the plus(+) symbol provided.
After setting up a trigger event for the Blogger blog post, you can select action on Trigger. Click on the plus(+) sign to set the action of the Trigger.
A Zapier action window will open where we can set action event. We’ve to share our post on the Facebook page; then, we’ll select the “Facebook Pages” option.
After selecting Facebook Pages, you must choose the event for the Facebook Page. We want to publish our blog post on the Facebook page; then, we’ll create an action event page.
You have to select your Facebook account, and the particular page to publish the Blogger blog post content.
In the setup section, you’ve to provide content that you want to share on social media. These settings are crucial; select carefully.
You can press continue and test the trigger event. Now, whenever you publish new content, Zappier will share that on social media.
In a similar manner to the above, you can share your Blogger blog post on Twitter, LinkedIn, or other social media platforms listed on Zapier.
After creating a Zap Trigger event of the RSS feed, you’ve to select Twitter. In the above case, we selected Facebook, and now we’ll choose Twitter.
The critical part of Zapier setup, in this section, is that you’ve to provide all values correctly. The above values will automatically appear in the bar. You’ve to find the correct value and select it.
You’ve successfully created the Zap for Twitter and Facebook. Don’t forget to turn on these Zaps.
This article discussed how to automatically share our Blogger blog post on social media platforms like Facebook, Twitter, LinkedIn, etc. As there is no direct option to share social media content, we used the Zapier tool.
I hope you like this article; in case of any doubt, or feedback, feel free to ask in the comment section provided below.
How to share Blogger blog posts automatically to Facebook?
Blogger blog posts can automatically be shared on Facebook and other social media using Zapier.
Where can I share my Blogger posts?
To attract more users to your blog, you can share your Blogger blog post on social media platforms like Facebook, Twitter, Telegram, and others social media platforms.
Promoting your newly published blog posts on social networking sites like Facebook and Twitter can bring a lot of traffic to your website. However, with so many social media platforms out there, it can be a time-consuming task to share every blog post manually.
Is there a way to automate the process of sharing content to different social platforms? Yes, you can do that with the help of the Uncanny Automator plugin.
In this article, we’ll share the step-by-step process of automatically sharing new WordPress blog posts to Facebook, Twitter, and Instagram.
Note: Uncanny Automator can share posts to your Facebook page (or group) only and not to your individual Facebook account. Also, you need an Instagram Business account to automatically share images on Instagram.
Before we proceed with the actual tutorial, let’s talk about the Uncanny Automator plugin.
Uncanny Automator is a no-code automation plugin for WordPress. With it, you can automate different tasks by connecting 80+ WordPress plugins and popular web apps. And you’ll have to create a recipe (with at least one trigger and one action) to automate any task using this powerful plugin.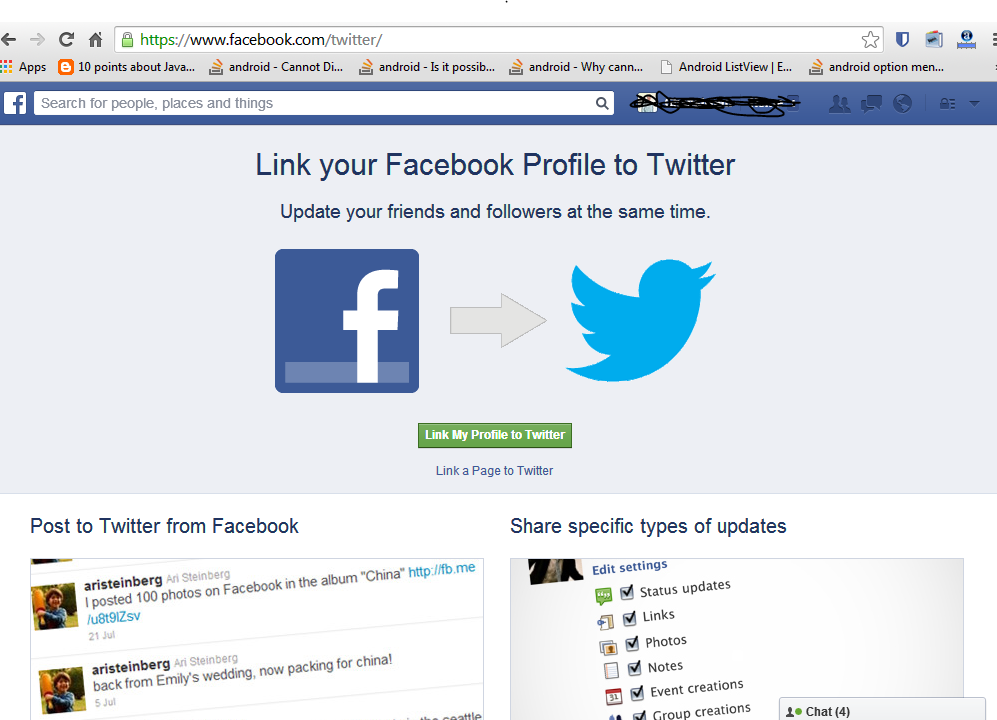
Uncanny Automator comes with two versions – free and paid. You can use the free version of the plugin to follow this tutorial. However, the free version offers 1,000 credits only to use premium integrations like Facebook, Twitter, Instagram, Slack, and more. Once you use up the free credits, you’ll have to upgrade to Uncanny Automator Pro for unlimited usage.
Now, we’ll be creating an Uncanny Automator recipe to automatically share new WordPress blog posts to Facebook, Twitter, and Instagram. So, the trigger for the recipe will be “a blog post is published”. And we’ll be adding the following 3 actions to the recipe:
With that said, let’s get started with the step-by-step tutorial.
The first step is to create a new recipe in Uncanny Automator. To do that, you need to head over to Automator -> Add new from the left sidebar of your WordPress admin panel.
Next, you’ll be asked to select a recipe type. Here you need to select Logged-in users as blog posts can only be published by a user with a WordPress account. Then, you need to click on Confirm to proceed.
After that, you can add a recipe name in the Add title box. This is just for future reference and can be anything you like.
Let’s set up the trigger now.
The standard WordPress functions (like blog posts) are a part of the WordPress integration in Uncanny Automator. So go ahead to select WordPress under Select an integration.
Next, you need to search and select this trigger option – “A user publishes a type of post with a taxonomy term in a taxonomy”:
Selecting that option will open up some new fields like post type, taxonomy, and taxonomy term. Since you want to share your newly published blog posts, you should select Post from the Post type dropdown.
Do you want to share posts from a specific category only? In that case, you can select Category under Taxonomy and the category name from the Taxonomy term dropdown.
You don’t need to change the Taxonomy and the Taxonomy term fields if you’re planning to share every newly published blog post.
Finally, you need to click on the Save button to make the trigger live.
After configuring the trigger, let’s set up the action part of our recipe.
Uncanny Automator allows you to add multiple triggers and actions to a single recipe. That means you don’t have to create 3 separate recipes for sharing your posts on Facebook, Twitter, and Instagram – simply add 3 actions to a single recipe and you’re good to go.
Let’s add the first action to our recipe by clicking on the Add action button. You’ll now see a list of integrations to choose from. Here you should click on the Facebook Pages integration:
If you’re using this integration for the first time, you’ll see a Not connected label on top of the Facebook icon. Go ahead and click on the integration to connect your Facebook account to Uncanny Automator. This will open up a popup asking you to complete the following 2 steps:
Next, you’ll see 3 options to choose from. Since we want to share our blog posts on Facebook, let’s select the option “Share a link with a message to a Facebook page”:
Uncanny Automator will now ask you to choose your Facebook page from the Select a Facebook page dropdown.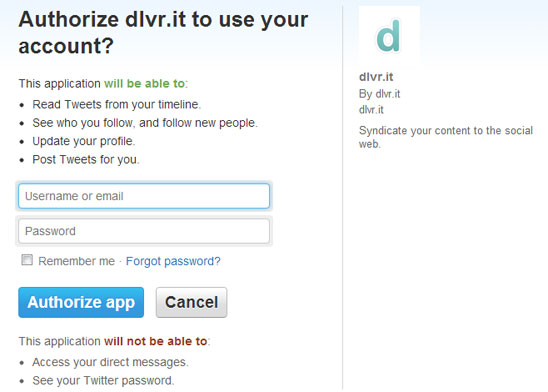
The External link URL field should have the URL of the newly published blog post. So click on the Asterisk icon and add the Post URL dynamic token to that field.
In the Message field, you can add static text as well as dynamic tokens. For example, you can add static text like New Blog Post or Just published a new post. Then, you can click on the Asterisk icon and add tokens like Post title or Post excerpt to the Message field.
Finally, you should click on the Save button to make this action live.
As mentioned before, Uncanny Automator allows you to add multiple triggers and actions to a single recipe. So click on the Add another action button to add the Twitter action to this recipe.
Next, you need to click on Twitter under Select an Integration:
Again, if you’re using the Twitter integration for the first time, a popup will open up and will ask you to connect your Twitter account to Uncanny Automator.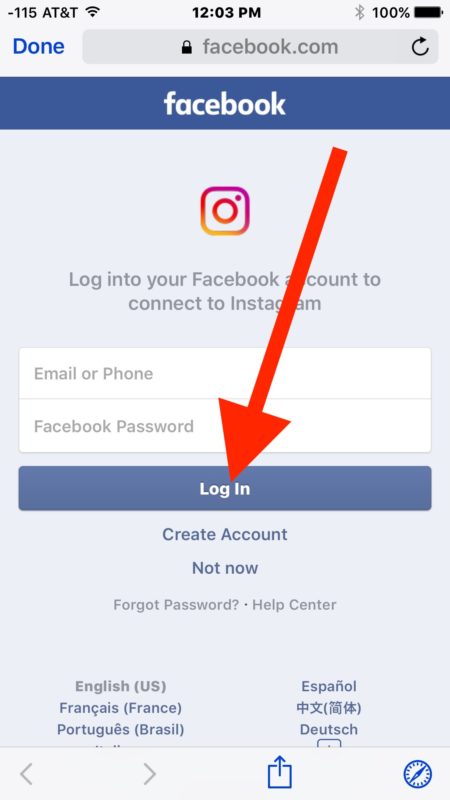
After authorizing Uncanny Automator to post to your Twitter account, you need to close the popup window. This will reload the recipe page. Now, you’ll see the Twitter option that says – “Post a tweet to Twitter”:
Clicking on that option will open up two new fields – Status and Image URL. You can add a combination of static text and dynamic tokens (click on the Asterisk icon to see the tokens) to the Status field.
Note: Twitter has a 280-character limit.
The Image URL field is optional. However, you can add the Post featured image URL token to that field. That means the featured image of your post will be tweeted along with the text in the Status field.
Lastly, you need to click on Save to make this action live.
Before we proceed, you need to understand that Instagram doesn’t allow you to add clickable links to individual posts. However, you can always share the featured image of the post along with some caption (like the post title or the post excerpt). Also, you need an Instagram Business account to automatically share images on Instagram.
Let’s click on the Add another action button to add the Instagram action. Then, you should click on Instagram from the list of available integrations.
If your Instagram Business account is not connected to Uncanny Automator, a popup window will open up and will ask you to connect them. You can follow our knowledge base article if you need any help.
After connecting your Instagram business account to Uncanny Automator, you’ll have to select the option – “Publish a photo to an Instagram Business account”:
Next, you’ll have to select the Instagram Business account where you want to share the featured image of your post.
After that, you need to add the Post featured image URL token to the Image URL field by clicking on the Asterisk icon. Make sure the featured image of your post has an aspect ratio between 1.91:1 and 4:5 – otherwise, your image will not be posted on Instagram.
You can also add a combination of static text, tags (like #NewArticle), and dynamic tokens to the Caption field.
Finally, you need to click on the Save button to make this action live.
It’s time to make our recipe live. To publish the recipe, all you need to do is change the toggle option, in the Recipe box from Draft to Live.
That’s it! Your recipe is live now. From now on, whenever a new blog post is published on your WordPress site, Uncanny Automator will automatically share the post on Facebook, Twitter, and Instagram.
Here’s the final recipe for automatically sharing your blog posts to 3 different social platforms:
Uncanny Automator can easily automate the process of sharing your new WordPress posts to Facebook, Twitter, and Instagram. Just follow the steps mentioned in this tutorial and you’re good to go.
Note that Uncanny Automator supports 80+ WordPress plugins and 3rd-party web apps. So you can also add other triggers and actions to the above recipe and create a complex workflow.
For example, you can share the post on LinkedIn, Reddit, or Pinterest with the help of Zapier, Integromat, IFTTT, or Integrately integrations, as well as our webhook support. Also, you can share the post with your MailChimp list or ActiveCampaign list. You can even get notifications on Slack every time your editorial team publishes a new post.
If you have any questions on how to share newly published posts on Facebook, Twitter, and Instagram, please feel free to comment below!
Help Center
Using Facebook
Home Page
We are updating the mobile version of Facebook.com. More
Depending on the privacy settings of a post (for example, if it's shared with friends), the Share feature may not be available to you.
To share a post from Feed:
Mobile Classic
Click the icon below the post.
Select where you want to post your post. Depending on your publishing privacy settings, you might see the following options:
Share now
Publication
Send in the message
Share in the group
to share on page
If you clicked to share people who will be visible to the people who will be visible. publication, use the audience selector tool.
Optionally enter a message, tag friends, add your location, action or feeling.
Click Publish.
New version for mobile browser
Click the icon below the post.
Select where you want to post your post. Depending on your publishing privacy settings, you might see the following options:
Share on Facebook
Share on a friend's timeline
Share to a group
Share to a Page
Send in a message
If you clicked Share on Facebook and want to choose the people who see your post, use the Audience Picker.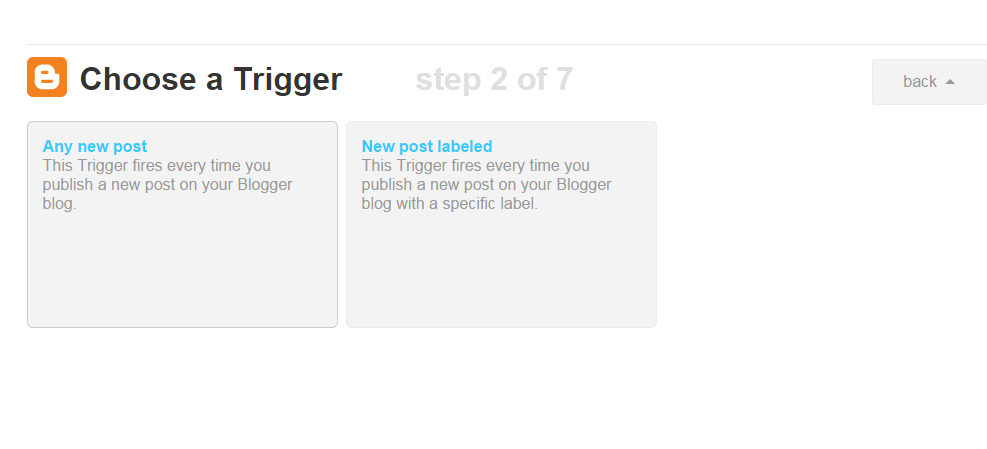
Optionally enter a message, tag friends, add your location, action or feeling.
Click Publish.
Note. You can't share a post with people who weren't originally part of its audience (for example, a post set to "Friends" can't be made "Public").
Information
Confidentiality
Conditions and rules
Advertising preferences
Vacancies
COOKIE
Creation
Create page
Why automatically share WordPress posts on Facebook?
How to automatically post to Facebook from WordPress
Plugins to automatically post to Facebook from WordPress
1 FAuto poster
2 WP2Social Automatic Publishing
3 Restore old messages
Social media opens up the possibility of sharing blog posts with new audiences. An interesting Facebook post can increase traffic to your WordPress website.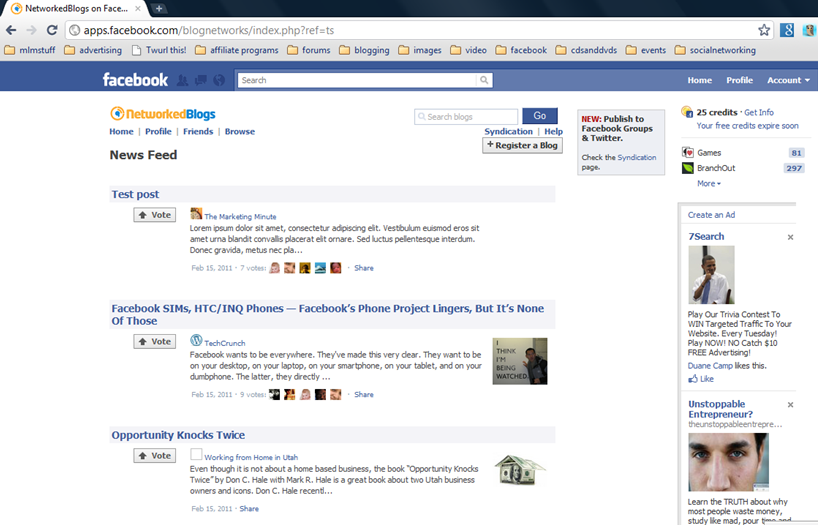
However, posting each blog post manually to Facebook can be a tedious task, especially if you post an article every day. Also, if you have multiple responsibilities in your business, you may forget to post multiple posts.
But don't worry. You can solve this problem by automatically posting to Facebook from WordPress. With a 10-minute setup process, you'll reclaim several hours of your work week so you can focus on more important tasks.
Facebook advertises over one billion daily active users. This social media channel with a huge user base offers a great opportunity for your business to distribute content. This is an effective way to increase traffic to your website.
Facebook works best when you post regularly. This way you will be able to attract loyal subscribers who are looking forward to your messages. By automatically publishing WordPress posts to Facebook, your social media profile stays active and you can attract followers with fresh content from your site.
IFTTT (If This Then That) is a free online tool to automate interactions between your favorite apps and devices. Using IFTTT, you can automatically share the latest WordPress blog post to your Facebook account. Follow the instructions below to set it up.
1. Create an IFTTT account.
2. On the IFTTT Facebook page, click Connect to add your Facebook account.
Source: IFTTT
3. On the IFTTT WordPress page, click Connect to add your WordPress account.
4. Now go back to the IFTTT WordPress page and click on Automatically Post New Posts to Facebook Page.
5. Click Connect .
Source: IFTTT
6. Now when you publish a new WordPress post, IFTTT automatically shares it on the desired Facebook page.
IFTTT is not the only option to automatically share WordPress content to Facebook. Here are some plugins that can help too.
FAuto Poster is a popular plugin for posting your website posts on your Facebook profile and fan pages. You can set up content types to post, such as custom pages or posts tagged in a specific category. The tool also keeps track of all your automated messages so you can analyze them later.
Next is WP2Social Auto Publish. This plugin allows you to post blog posts to Facebook with just one click. It offers many ways to share your content, including plain text format, text with an image, or a link. You can even enable (or disable) the publication of specific WordPress pages.
Revive Old Post automatically shares your old and new WordPress posts with your Facebook fans. You can choose the number of posts to post and the time each post is posted. There is also the option to add targeted hashtags to your posts. To help you track posts, the plugin is compatible with URL shorteners and integrates with Google Analytics.