Instagram Reels are short vertical videos similar to TikTok videos and Youtube Shorts. Reels offer a different, unique way to showcase your photos and videos. According to Instagram, “Reels are short, entertaining videos on Instagram where you can express your creativity and bring your brand to life.”
While the best, most effective reels are usually personalized clips that show the photographer’s face, some photographers are not as comfortable doing that. For the more introverted photographers, recording videos of themselves talking into the camera or showcasing a BTS clip can be a daunting task. With practice and a little extra courage, you can iron out your presentation skills and improve your process. But in the meantime, you can still get exposure within the Instagram Reels algorithm with a video slideshow of your work, along with adding music to the video. In this article, we’ll review how to make reels on Instagram with photos in a slideshow format.
We’ll review the following:
Let’s get started with an example of Instagram Reels with Photos from an actual recent wedding photoshoot. If it’s not showing up, you can click here to view it on Instagram. With the following process in this article, you should be able to create a similar video in 20-30 minutes from start to finish.
View this post on Instagram
A post shared by Lin & Jirsa Photography (@linandjirsa)
One way to make reels on Instagram with photos is to use the native app exclusively. However, we do not recommend this process since it takes longer and lacks features. However, if you prefer to keep things within Instagram, follow these steps:
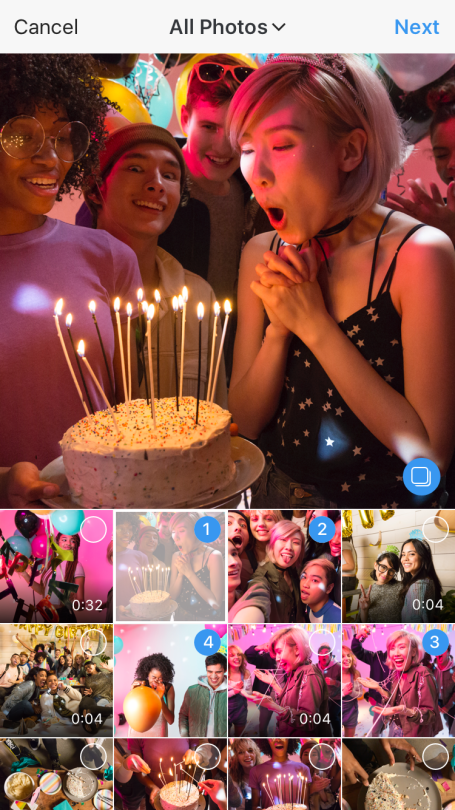
screenshot of adding multiple photos
While the native Instagram app works for creating an image slideshow Reel, the process can be time consuming and the features are not as robust as using a 3rd party app. Instead, our preferred method is Canva, which we’ll detail below.
Our preferred method is to use Canva for your Instagram Reel image slideshows. While there are other options out there, we find that Canva gives you intuitive, versatile features without overwhelming you with too many options. This is why we prefer Canva over software like Adobe Premier or iMovie for creating Instagram Reel slideshows.
Here are a few reasons we prefer Canva:
 You can then use the app to download the final video on your mobile device.
Let’s walk through a complete workflow for creating IG reels on Canva. As mentioned, you should be able to get this process down to 20 minutes or so with some experience.
Create an account on Canva or Login to an existing account. Then, search for “instagram reels” and browse the existing templates.
Find the template that matches the overall feel of your brand. Don’t worry about the music, as we’ll be selecting the audio track within the Instagram app.
Number of Images – Select around 20-30 images to use in the slideshow. Since the Reel is limited to 60 seconds, and you want to give each image at least 1.5 seconds, your absolute maximum should be 40 images.
Type of Images – To speed up your process, limit the images you select to certain types of images. The last thing you want to do is spend hours sifting through thousands of images. If you’re a wedding photographer, feel free to follow these general guidelines:
Optionally, you can order and rename your images prior to uploading if that speeds up your process. We use Adobe Bridge for this, but if you don’t have it, then it’s not absolutely necessary. You can just upload all of your selected images in Canva and go from there.
Use the fonts and animations within Canva to create your lead photo. For weddings, we typically use the strongest couples session photo from the day and overlay the couples’ names.
Add the photos with the following tips in mind:
From here, you can either export and download your video to your desktop or you can log into your Canva app on your smartphone and download the video from there. We use the latter so that we don’t have to transfer the video from our desktop to our smartphone (to upload to Instagram). So creating the slideshow in Canva on desktop and downloading with the app is the fastest way to make reels on Instagram with photos.
Use the same process as we outlined above in the first section get to the Instagram Reels section. Then add the video clip that you created in Canva.
Find the right audio track based on your branding and your style. We prefer chill instrumental music for our brand such as lofi or acoustic remixes of popular songs. We typically avoid pop songs and songs with too many lyrics because we want these picture slideshows to be timeless and not too “dated.”
Tip: As you browse for songs, be sure to swipe left and save the good ones for future use. This will save you a ton of time in the future as you make more reels on Instagram with photos.
After that, select your share settings and press the “share” button. If your audience doesn’t respond the way you’d hoped, make a few tweaks and try again with the next one. There is a chance that your audience is not used to the new format, and it might take a few tries for your Reels to start getting the engagement you’re looking for. If you would like, you can also reuse the video you created for your Youtube Shorts or Tiktok.
For more information on web marketing, we invite you to check out the Photography Business Training System in SLR Lounge Premium.
Instagram Reels are better known for short, engaging video clips but if you have a tough time making videos or simply want to show off your pictures, you can also create epic slideshows from your favorite photos. These work especially well for travel, behind-the-scenes and mini vlog videos.
In this blog, we’ll show you two simple ways to create slideshows for your Reels in under 5 minutes - using the Instagram app itself or if you want to create professional-looking slideshows then using InVideo’s online editor.
Make sure you check out the reels section on the InVideo Instagram channel for ideas & examples.
Here’s what we will be covering:
1. How to make a Reel on Instagram with photos?
2. How to make a Reel on Instagram with photos using InVideo’s online editor?
Let’s dive right in!
Create a trending Reel out of your photos in minutes
With 1000+ ready-to-use Reels templates
Try InVideo today
 How to make a Reel on Instagram with photos
Here’s a step-by-step guide to show you how to create Instagram Reels with photos using the app:
Step 1: Open the Instagram app and click on the plus (+) button on the top right corner on the home screen and select the Reels option.
Alternatively, you can also open the Instagram stories camera and choose the Reels tab to create Reels.
Step 2: Next, click the Audio button on the left-hand side panel to choose audio from Instagram’s library. The top trending audios will be displayed at the very beginning and you can also search for specific audio using the search bar.
You can also drag the slider to choose the section of the track you want for your video.
If you’re using the original audio from your video, Instagram will attribute it to you when you post the Reel. Alternatively, you can also add audio from another reel by tapping the Use Audio option.
Step 3: Next, you can set the duration of your video. Tap the Length button on the left side panel and depending on your account, you can create 15, 30 and 60 second Reels.
If you want a video shorter than 15 seconds, tap the Clock icon and use the slider to set the duration.
Step 4: You can also choose from a variety of effects and record your video with various filters. To choose an effect, click the Effects button (Stars symbol) on the left side panel, and choose an effect that best suits your video. For example, we're using the Golden Glitter effect in the GIF below.
Step 5: If you want to record your videos hands-free, you can set a timer by clicking on the Timer button and you can choose between 3 and 10 seconds.
Step 6: Now it’s time to add your photos. You can tap the plus (+) button on the bottom left and select a picture. Next, drag the slider to increase or decrease the photo’s duration.
Then, tap the Add option to add more pictures to your slideshow. Instagram allows you to add up to 10 pictures to your slideshow.
Once you’ve added all the pictures, tap the Preview button to check your slideshow video.
Step 7: You can now add text, stickers and other effects to your video. You’ll find all these options on the top panel of Instagram’s editor. You can also change the text style and colour to match your brand’s style.
If you want to change the duration of the text, tap it and drag the slider on the bottom to where you want it to be visible.
To add a GIF to your slideshow video, tap the Sticker icon, search for a relevant one using the search bar, and tap to add it to your video.
Step 8: Once you’re satisfied with your Reel, click Next to share the Reel. Don’t forget to add a cover image, caption, and hashtags before you hit Share.
Now, while the Instagram app allows you to create and post Reels, it has a number of glitches and limitations that prevent you from making cool edits to your video.
Instagram’s editor lags and crashes quite often and it doesn't have options for motion graphics or complicated layouts for specific trends, such as the Vogue challenge and the 3D picture trend. Moreover, you can’t add transitions between your images or control the duration of the animated text.
Turn your favorite photos into trending Instagram Reels
With the world’s easiest Instagram video editor
Get started today
InVideo’s online editor is a great tool for making Instagram Reels using just pictures. Here’s a step-by-step guide that you can follow:
Step 1: Log in or sign up for a free account on InVideo.
Next, find a suitable template from the 5000+ templates available on InVideo, which also includes many trending Instagram Reel templates. Simply click on the Pre-made templates option, select the 9:16 aspect ratio and then search for templates using keywords like ‘BTS’, ‘real estate’ or ‘testimonials’.
Once you’ve found the perfect template, click the Use This Template button to open the video editor.
Alternatively, if you want to create your own Reel from scratch, choose the Blank Canvas option, select 9:16 as the aspect ratio and click the Make a Video button.
For the purpose of this guide, we’ll use the Blank Canvas option to create an Instagram Reel with photos.
Step 2: You’ll be redirected to the editor. Here, click the Uploads tab on the left-hand side panel and select the images you’d like to add to your slideshow from your desktop.
If you don’t have images of your own, you can find high-resolution images from InVideo’s stock library. Click the Images tab on the left panel and use the search bar to find relevant images.
Step 3: Then, drag and drop the images into your video from the Uploads and Images tab to add them to the scene. You can also adjust the duration of the scene by clicking the Advanced timeline button and using the slider.
To add more images to your Reel, click on the +Scene button on the timeline and repeat the above step.
Step 4: Next, you can add, edit or delete the text in the video by clicking the text box.
Step 5: Most templates come with a default music track but if you don’t like it, you can choose another track from the music library to change it. Start by deleting the existing music track by clicking on delete.
To add a new music track go to the Music tab on the left menu panel and choose a song based on mood or genre. Once you find the song of your choosing, simply click on the plus sign next to it to add it to the timeline.
Pro-tip: As for music and audio, it’s better to add trending audio using Instagram's music as the algorithm will recognize the song and give your video better traction and reach.
Step 6: Once you’re done with your edits, click on the Download & Share button on the top right of your screen and then click the Export button after you have chosen the resolution of your video.
The runaway success of Instagram Reels has proved that short-form video content is here to stay. Right from independent creators to the world’s biggest brands, the popularity of this new Instagram feature has transcended across boundaries. In fact, we at InVideo have seen a five-fold increase in reach with Reels on our own Instagram channel.
We’ve already seen in this article how how easy it is to create epic Reels with just pictures in less than five minutes. While Instagram’s editor does the job, InVideo helps you create professional-looking Reels in a shorter time, even if you’ve never edited a video before!
If you want to leverage Instagram Reels for your business, check out these 40+ Instagram Reel ideas (with ready-to-use templates) for your business. You will also be interested to read this blog in which we talk about how to go viral with Instagram Reels with a process that worked for our very own business.
Lastly, if you prefer learning via videos, you should definitely check out our YouTube channel where we share video editing tips, the latest video trends and ideas, and help you make more money as a video creator.
Written by Mrignayni and edited by Sarika Nerurkar
Article author:
Maria, Instagram setup expert
Reading time:
7 minutes
9265
up to 10 shots. It is not necessary to post only video format to a social network: you need to select audio and pictures.
Content
Rils has three types of clip durations and four recording formats:
The last option is suitable for recording clips without third-party applications, but with a photo selection.
In order to place an entry in Reels, the extension must be MP4 or AVI. If you create through a third-party application, then this fact should be taken into account. When uploading a photo or creating a clip on Instagram itself, the format is set automatically.
The user can make video Reels from photos if he goes to the clip recording and selects the photo in the Gallery instead of the video format. Pictures must be prepared in advance, because the mode does not involve taking a photo.
How to make a selection:
User can select up to ten pictures in total. Submissions may include short videos, but the total length must not exceed one minute (60 seconds).
To work with photo collections, you can use the CapCut application, which is actively used for processing Reels. It supports not only the processing of ready-made video materials, but also the creation of new ones, based on pictures and with the addition of an audio track.
Create a slideshow using the application:
The advantage of the application is that you can connect to your TikTok account and get songs from there. Or simply use the list of popular melodies.
In Reels, photos with music can be created using the Clideo service, which supports uploading photos and sounds.
Make a slideshow:
Expert opinion
Maria
An expert on customization and new features on Instagram.
Ask a question
To select several photos at once on the PC, you need to hold down the CTRL button and select the required number with the mouse. Some formats may not be supported: a notification will appear at the top stating an error.
At the first stage, the user can select only photographs and, already proceeding to editing, select an audio file.
After a user has made a video in Reels from several photos, he can publish it on a social network.
When adding such a video, you must comply with the following requirements:
For added tracks, you can use the additional menu and rename to the original name. So the author will avoid violations and removal of the clip due to copyright.
How to add to a social network:
To use the same photos that are in the profile, the author needs to download them first or use the originals that are left in the Smartphone Gallery.
There are 4 ways to add music to photos in Reels:
 Record a track in the background;
 For example, if you create slideshows in Canva, there is a selection of free music without copyright.
To record voiceovers in Reels:
This can be a speech by the author or a piece of music played on another device. But with the latter, a copyright problem may arise: the clip can be blocked for using music without specifying the AP.
Did the article help? Rate
Have you ever wondered what you use Instagram* for? Everyone has their own goal: someone boasts about what a great shot with protruding lips turned out in the mirror of the toilet, someone - a photo of food from a restaurant, but someone just shares interesting photos taken during the trip with friends. With the advent of the ability to add videos, as in Vine, short videos of various quality and performance began to appear on the popular social network, however, the photo-oriented service still prevails over video content. The InstaVideo application is designed to correct this situation, which allows you to create a video from a set of your photos.
How the app works is very simple: you select a few photos, add music, text and effects, and then save the video to add to Instagram*. Sounds promising, right? Let's also try to make our own little video.
After opening the application, we are given a choice of several options for preparing a video: creating a slide show, video collage and a new recording from the camera. Editing and splitting videos - for processing ready-made videos.
To create an effective slide show, select the appropriate menu item. From the iOS gallery, add several photos (up to 15 pieces) that will be displayed in it. After that, a preview of your video will be available to you.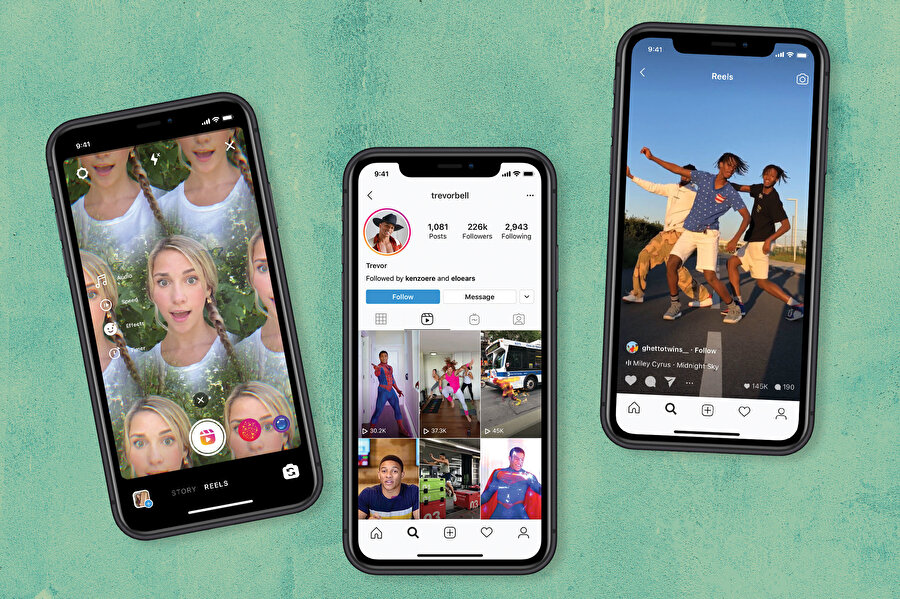 Now we need to add music to our video. To do this, there are three buttons with which you can select a musical composition from your library, set the playback start time, or ask InstaVideo to select a random track.
In the advanced settings, you can specify what video you want to make for Instagram*, then it will be optimized to 15 seconds. In addition, you can set "Photo Zoom" so that each photo in the slideshow has a slight zoom effect - this will make your video more "alive" than a simple series of photos following one another. It is also possible to adjust the effects, the transition from one photo to another. There are 10 different transitions available, including a random transition from frame to frame. The set itself does not stand out with anything special, but leaving the default "random" - the end result will be more interesting in any case.
After all the preparations and settings, the final touch remains: adding text to your video. You can choose not to write anything or choose one of eleven text templates that will be displayed at the beginning of the video.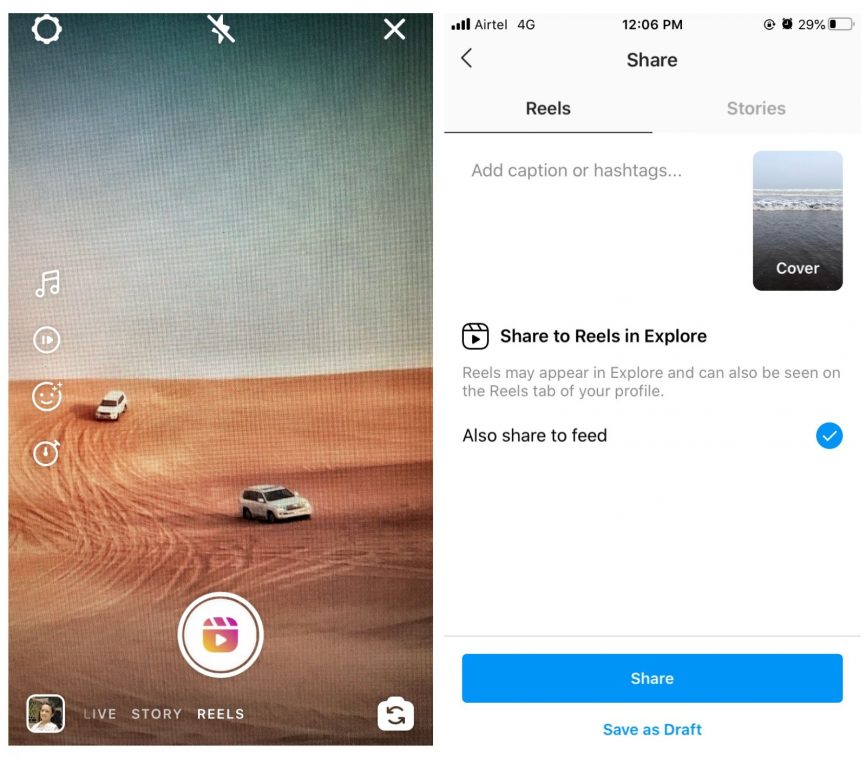 The templates themselves are quite common, but overall not bad.
That's it, the video is ready and now we can either save it on our device for later adding to Instagram* or share it via iMessage, AirDrop or email.
Creating a video collage works in the same way: select photos or videos (up to 8 pieces), adjust their location on the screen, add music if desired and save. Everything is extremely simple and fast.
Given that the application is absolutely free, it will definitely find its fans. Together with ease of use and fairly fast video processing, it can become a kind of simplified analogue of iMove for iOS for those who do not want to get into the intricacies of video processing, but simply share with friends a nice video made in a few minutes right on their smartphone.
Here's what I came up with from a few photos, a music track, and InstaVideo:
Do you think that in the future, video processing software for mobile devices will be able to replace full-fledged products used on desktop operating systems? Share your opinion in the comments!
appbox fallback https://apps.