Facebook is all too keen to remind you of the past. Remember that concert you went to three years ago? That person you friended nine years ago? That photo you snapped on vacation last decade? No worries; Facebook will make sure you never forget.
But now more than ever, it's important to curate what pops up on your social media feeds, lest a potential employer or date stumble upon an ill-advised photo, comment, or like.
If you're sick of cringing every time you log into Facebook, it might be time to rid your account of aging memes and reminders of your 2008-era frosted tips phase. You don't have to nuke your entire account, though. Here's a more civilized solution for social media cleanup.
First, it may be informative to see what your profile looks like to people who aren't on your friends list. Go to your Facebook profile, open the three-dot menu next to the Edit Profile button (Add to Story on mobile), and click the View As "eye" icon. This will display your profile as it looks to the general public, by displaying everything on your profile that is set to Public.
Facebook makes it easy to delete your old posts with the Activity Log. Go to your profile, click the three-dot menu, and select Activity Log. This will show you every action you, or another user, has taken on your Timeline, including reactions, shares, comments, tags, and posts. The results can be filtered by date or a specific person.
On desktop, you can scroll through all your past actions on Facebook, or choose a category under the Activity Types header to view your posts, tags, or interactions. Click the Timeline, Photo and Tag Review drop-down to filter specific tags. Mobile users must select nested categories to view posts, tags, interactions, and more specific actions.
When you come across something you want to remove, select the three-dot menu to delete, hide, or archive; unlike a comment; or remove tag.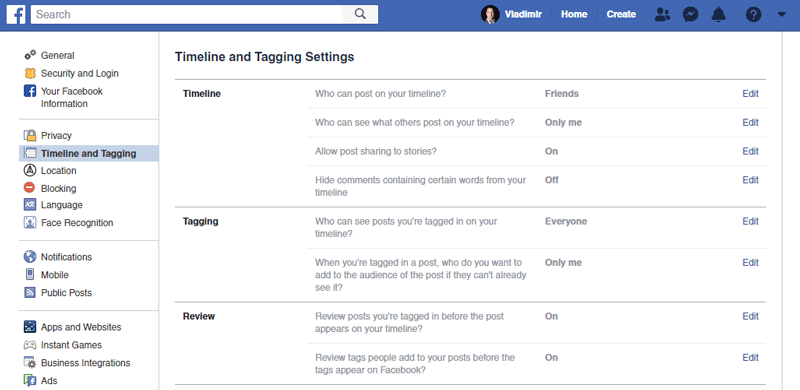 If you wish to remove multiple posts at a time, tick the box next to the actions, then select Archive or Trash on the top right.
It's possible to limit the visibility of old photos and posts by making them private instead of deleting them entirely. From your Timeline, click the ellipsis next to the post you want to hide, select Edit Audience (Edit Privacy on mobile), then select who should have permission to view the post. Choose Only me to hide it from everyone else. To only hide the post from certain people, select Friends except... or Specific friends... to include or exclude certain friends.
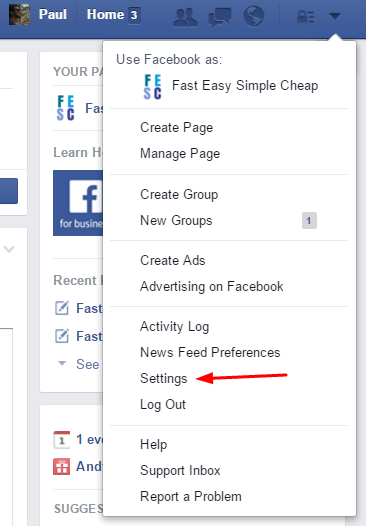
Facebook also has a tool to hide public Timeline posts en masse. To do this, click the arrow in the top-right corner of your profile and navigate to Settings & Privacy > Settings > Privacy. Click the Limit Past Posts link to open a warning advising that all your public posts will be converted to Friends only.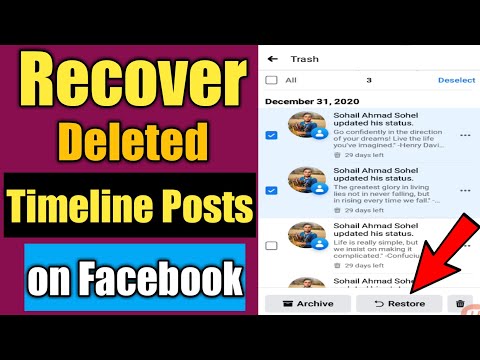 If that's okay, click the Limit Past Posts button and your public posts will only be visible to those on your friends list.
On mobile, tap the hamburger icon and select Settings & Privacy > Settings > Privacy Settings > Limit who can see past posts. Here, you can also edit how future posts will appear.
Don't want to lose your Facebook information forever? You can download a copy of your entire Facebook Timeline by navigating to Settings & Privacy > Settings > Your Facebook Information. Select the View link next to Download Your Information.
Choose what should and should not be included in the download, then click Create Files to download your Facebook information to your computer. Once a file is created, it can always be redownloaded from the Available Copies tab.
Sign up for Tips & Tricks newsletter for expert advice to get the most out of your technology.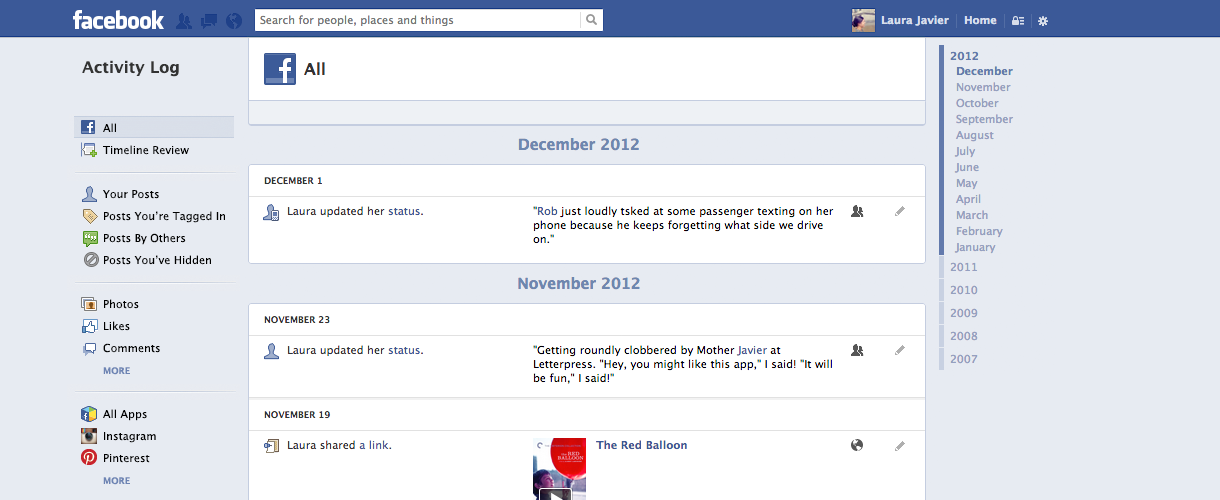
This newsletter may contain advertising, deals, or affiliate links. Subscribing to a newsletter indicates your consent to our Terms of Use and Privacy Policy. You may unsubscribe from the newsletters at any time.
Thanks for signing up!
Your subscription has been confirmed. Keep an eye on your inbox!
Sign up for other newsletters
Ivan covers Big Tech, India, policy, AI, security, platforms, and apps for TNW. That's one heck of a mixed bag. He likes to say "Bleh." Ivan covers Big Tech, India, policy, AI, security, platforms, and apps for TNW. That's one heck of a mixed bag. He likes to say "Bleh."
Welcome to TNW Basics, a collection of tips, guides, and advice on how to easily get the most out of your gadgets, apps, and other stuff.
We were all stupid once. So, there’s no shame in admitting that we might have a ton of silly Facebook posts from when we started using the social network. We might not want everyone to see them, so Facebook lets you archive or delete them in bulk.
Before we get started, the bulk delete/archive functionality is currently only available on Facebook’s mobile apps (Android, iOS, and Lite). So, make sure you have one of the versions before you start.
The heart of tech is coming to the heart of the Mediterranean
Read more
The procedure for deleting old posts is similar for all three apps. So that’s a bonus. Here’s how you can do it:
Deleting or archiving old Facebook postsAll archived or deleted posts will show up as labels in Your Posts sections. You can tap those labels to see your archived or deleted posts.
Facebook will retain your posts in the recycle bin for 30 days in case you deleted a post by mistake, and want to restore it. It’s a bummer that there’s no option to bulk delete posts on Facebook’s desktop site. Hopefully, the company will roll out this feature soon. Till then, you can hide all of your sins under the carpet through mobile apps.
Stories
Stories
Alexey Zenkov
History Direction Editor
Alexei Zenkov
Facebook has a terrible habit of reminding you of everything you've ever posted. Most likely, in the dark corners of your Chronicle there are many records that you no longer remember. It's time to remove them once and for all.
Alexey Zenkov
First of all, make sure you know how your Timeline is seen by regular users (those who are not your Facebook friends). To do this, go to your Timeline, click on the lock icon, in the "Who can see my materials?" select "View As" and you will see the following:
Have a good look at everything, and if you don't like something, click on the date under your name, then on the globe icon, and change the item "Available to everyone" to "Friends", "Only me" or "User settings" . In addition, you can completely delete the entry by selecting the appropriate item after clicking on the arrow in the upper right corner.
If you want to hide many public posts at once, you'd be surprised that Facebook has a dedicated tool for this.
Click on the privacy settings padlock in the upper right corner of the page, select "See other settings" and click "Restrict access to previous posts". Read the message that appears and click "Apply these restrictions to past posts" if you want only friends to see all your old posts.
Next, let's make sure that the Chronicle settings match your preferences. Click again on the privacy settings padlock in the upper right corner, select "See other settings" and click on the "Timeline and Tags" tab in the left panel.
Make sure the first, fourth, fifth and seventh steps are set to "Friends" or whatever you choose:
If these tips are not enough for you, you can use one of the browser extensions Chrome like Facebook Post Manager. However, such programs can be overly aggressive, so be careful when using them.
Done! You have cleared your Timeline of old forgotten posts. Now you can live in peace and not worry that someone will stumble upon a compromising image or status that you posted in 2009year.
Source
Cover photo: Pixabay
Related content:
How to turn off annoying Facebook live notifications
10 tricks for Facebook marketers and Instant Articles to know: Facebook Instant Articles
Facebook explained the changes in the news feed algorithm
Found a typo? Select the text and press Ctrl + Enter
November 13, 2022
SberStudent
November 13, 2022
FranchCamp Aspiring Entrepreneur Competition
November 13, 2022
Sovcombank Team Challenge 2022
All possibilities
Stories
News
News
News
News
The section "Publication management" will immediately help you delete all posts on Facebook./cdn.vox-cdn.com/uploads/chorus_asset/file/10580071/Screen_Shot_2018_04_03_at_12.54.16_PM.png) The user will be able to hide or permanently get rid of unnecessary posts.
The user will be able to hide or permanently get rid of unnecessary posts.
Table of Table
on Feibuke for a long time there was no function: “Delete post”, instead there was “Hide from the general chronicle”. Recordings were stored in the Archive, from where the user could re-publish them. In one of the updates, the option appeared in the browser and mobile versions.
How to remove one post:
In order not to lose a previously created entry, the user can hide it. A completely deleted publication cannot be restored, as well as returned added photos or videos.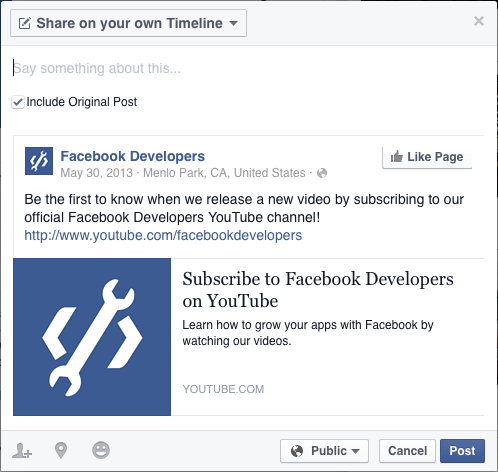
The browser version has a section: "Manage publications", so it's easier to delete a post from a computer than in a mobile one. The user can select which entries to remove or hide from the Timeline. Separate options: change the posting date, edit the audience and the post itself.
How to delete multiple entries:
Publications are placed by date and grouped by months and weeks.
To delete everything at once, the user needs to go to the button: "Filters":
There are also other options for filters: "Privacy" and "Tagged Publication".
From the mobile version, in order to delete a post on Facebook, you must also go to management.
In contrast to the browser view, the function is hidden in the application and is located in the "Personal profile" category:
There are also filters with the same settings. The profile owner can delete individual posts one by one by going to them using the "Feed".
Another way to get away from others is to set your privacy settings. Change access to records:
The profile owner can restrict access to basic information about the page. For example, city of residence, date of birth and place of work.