As one of the most popular social media apps, Instagram constantly keeps coming up with new ways to share snippets of your life with others. One of the major breakthroughs over the years has been the release of Stories, adopted from Snapchat.
The core of Instagram Stories is the ability to share photos or videos that can only be viewed for 24 hours, after which they disappear forever. This eases the burden of having to create permanent content of the highest quality and incentivizes people to share more.
Furthermore, instead of forcing users to choose the best photo for their Story or regular feed post, Instagram has also allowed them to share a post with multiple photos, so they can tell their story in the best way possible.
Let’s review how you can share multiple photos in one Instagram post or Story as well as how to add images or video to an existing Instagram Story and a few other tips and tricks.
When you upload multiple images to Instagram, you not only tell a better story but also save time, increase engagement, and maintain clear theme separation in your overall narrative.
There are a few ways to add multiple photos or upload multiple videos to Instagram. You can do so from your phone or Mac, both using the official Instagram app or leveraging the extra functionality of third-party alternatives.
When you want to add multiple photos in one Instagram Story, your instructions might differ based on what version of Instagram you’re using and whether you’re trying to do that on iPhone or Mac.
Historically, the way to upload multiple images to Instagram Stories has been the following:
Instagram has recently removed the Select Multiple option on the iPhone (still there on Android). However, the functionality still exists — you just need to tap and hold any of your images for it to appear.
There also are a variety of situations where posting Stories from your Mac would be much more preferable, especially if you tend to edit your photos with macOS software. As you might know, there’s no official Instagram client for Mac. But there’s Grids, and it’s just as good.
Grids is a fully-functional Instagram experience for Mac that lets you like, comment, follow, search, explore and, most importantly, post just like you would do with your phone. You can post single or multiple photos or videos to your regular feed and even post Stories. Besides, Grids features a beautiful customizable design, which lets you send direct messages and use separate accounts at once.
Using a carousel in your Instagram feed opens a ton of possibilities for a new kind of storytelling. But posting multiple photos to your Stories can bring your creativity to a whole new level.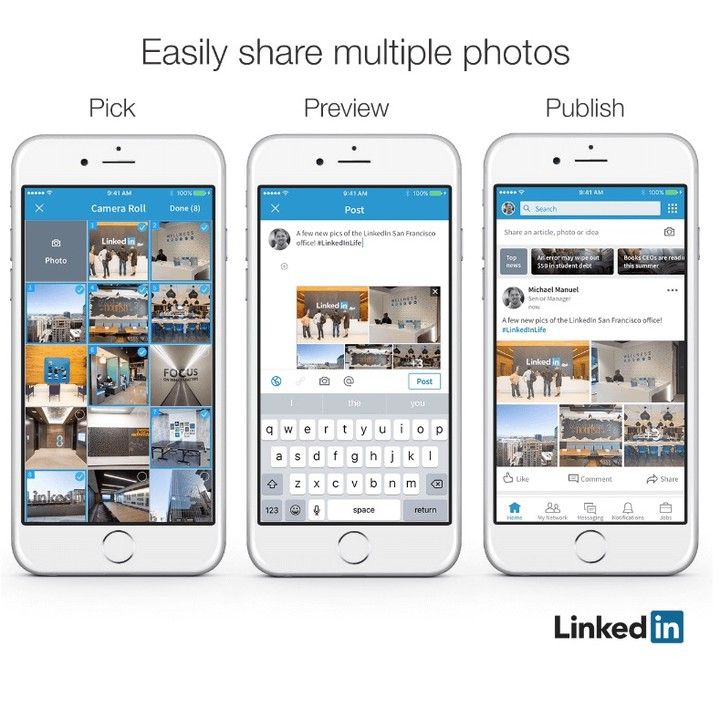
Luckily, it’s very easy to learn how to add images or video to an existing Instagram Story:
Instagram is changing the functionality of its app so frequently that it’s sometimes difficult to catch up. One of the newer Instagram features that you might not have tried yet is called Instagram Layout.
Basically, you can use the Instagram Layout tool to create custom collages of your favorite photos and post them as Stories.
Here’s how to use it:
Alternatively, you can use the sticker functionality instead:
 g. text or music)
Sometimes, instead of adding multiple photographs to Stories, you want to create a carousel in your feed instead. How do you do that? It turns out, it’s even easier to do:
This process works in the official Instagram iPhone app, but what if you want to share on Mac instead? Here, once again, the Instagram Mac client, Grids, will help you.
Grids integrates the whole posting process, from choosing high-quality photos and videos to editing how they look and adding captions. You can post multiple photos and videos too, as well as add emojis and hashtags. What’s more, Grids is the only app that allows you to post Stories from Mac.
Long time ago, when Instagram used to be all squares, every photo was automatically cropped to fit the default ratio. Today, there are no longer ratio restrictions. However, if you try to upload multiple images to Instagram, all the photos in the batch will be cropped to the ratio of the first one, which might not necessarily be what you want.
Luckily, it’s easy to change:
In addition to all the information shared above, there are a few questions that tend to come up over and over again, and which we should clarify.
A: The current limit for an Instagram carousel is 10 photos.
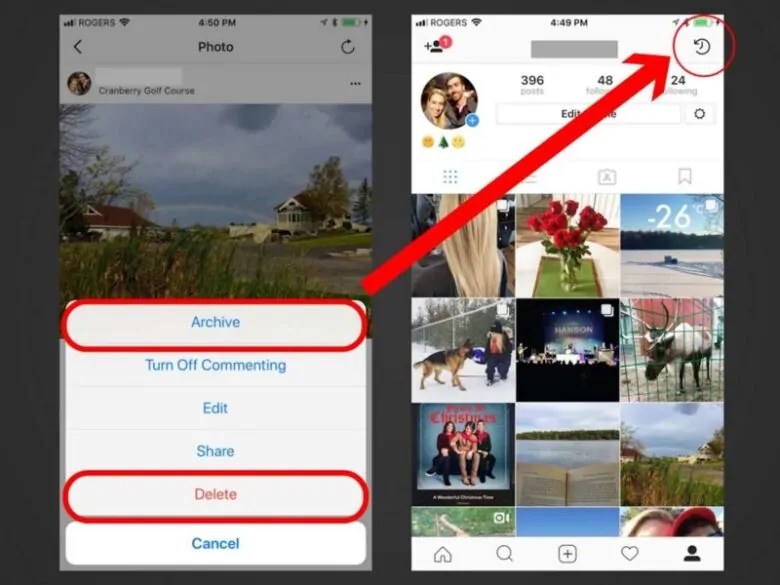
A: Although you can add extra photos to an Instagram Story, you can’t do so with posts, since they are meant to be more permanent. Your only way out here is to delete the post and resubmit it again with the correct number of images.
A: The multiple photo workflow described above might not yet be available everywhere in the world. So, depending on where you live, you might get it at a later date. Try keeping your Instagram app updated to the latest version and watch out for it.
As you can see, there are indeed many ways to post multiple pictures on Instagram, both from your iPhone, in the official Instagram app, and from your Mac using a full-featured app like Grids.
Best of all, Grids is available to you absolutely free for seven days through the trial of Setapp, a platform with more than 220 outstanding Mac and iPhone apps for everything from creating beautiful color palettes (Aquarelo) to turning images into icons (Image2icon). Try every Setapp app at no cost today and expand your collection of favorites!
There are several different ways to add multiple photos to an Instagram Story at once.
The first method allows you to select up to 10 photos and videos from your camera roll, which get uploaded to your Story as 10 separate slides.
The second method is layering several photos on the same slide as stickers, and the last method is creating a collage using Instagram's built in feature called Layout.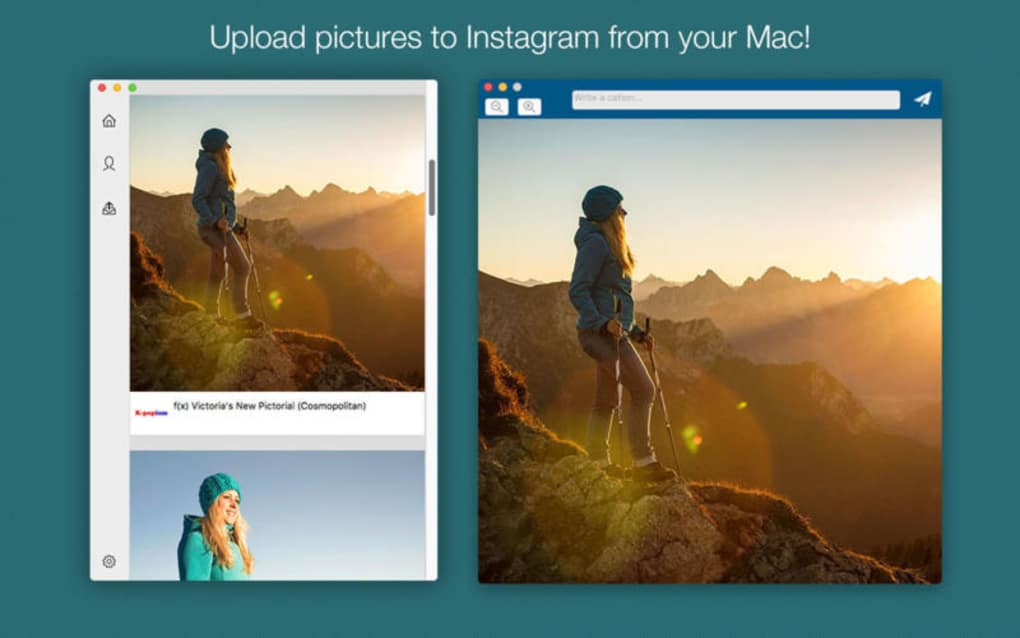
Here's how to do it all.
1. Open the Instagram app. Tap the plus (+) button over Your Story or swipe right on the home screen to open Stories.
If you don't currently have any live posts in your Instagram Story, the plus button will appear at the top of the screen. Abigail Abesamis Demarest/Insider2. Tap the photo icon on the bottom-left of the screen to open your Camera Roll.
A preview of the last photo you took will appear at the bottom-left. Abigail Abesamis Demarest/Insider
 3. Tap Select, then select up to 10 photos and videos. Then, tap the arrow at the bottom-right of the screen to continue.
Tap "Select" to upload more than one photo at a time. Abigail Abesamis Demarest/InsiderQuick tip: Like an Instagram post, the order that you select the photos will be the order that they appear in your Story.
4. On this screen, customize each photo or video with text, stickers, or drawn lines. When you're finished, tap the arrow at the bottom-right of the screen.
5. Tap the circle next to your intended audience (Your Story or Close Friends), then tap Share.
Close Friends will share your Stories with a smaller audience of your choosing. Abigail Abesamis Demarest/InsiderQuick tip: Adding multiple photos to the same Story at once isn't available everywhere in the world just yet, so if you don't see this option you'll have to upload photos to your Story one at a time.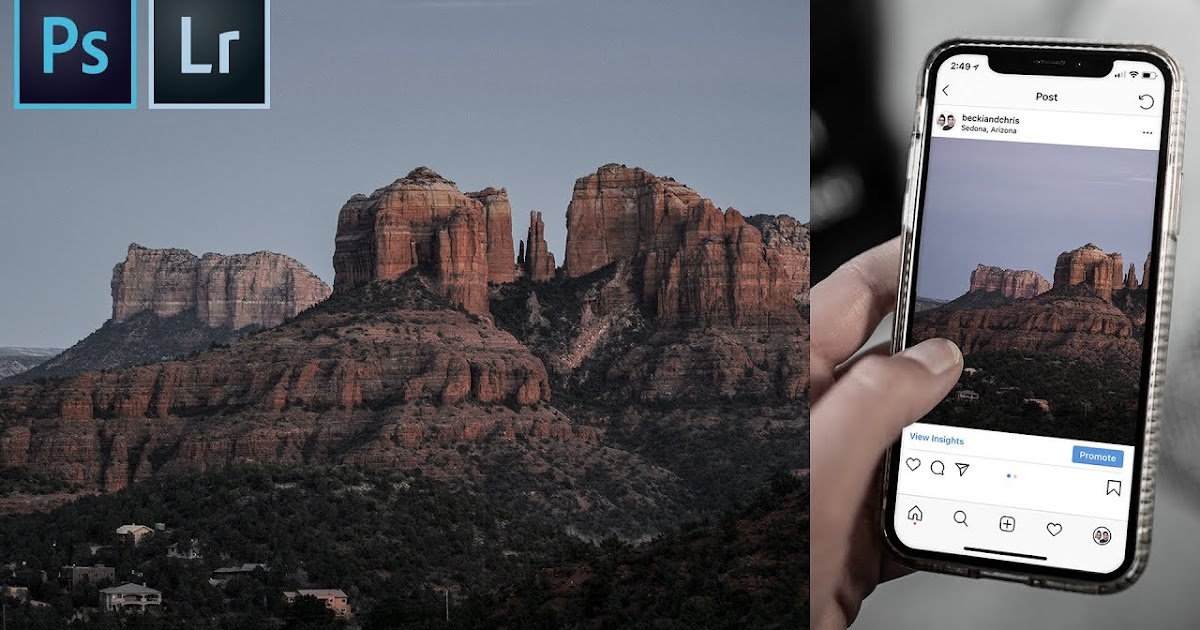
1. Open the Instagram app. Tap the plus (+) button over Your Story or swipe right on the home screen to open Stories.
2. Tap the photo icon on the bottom-left of the screen to open your Camera Roll. Select a photo.
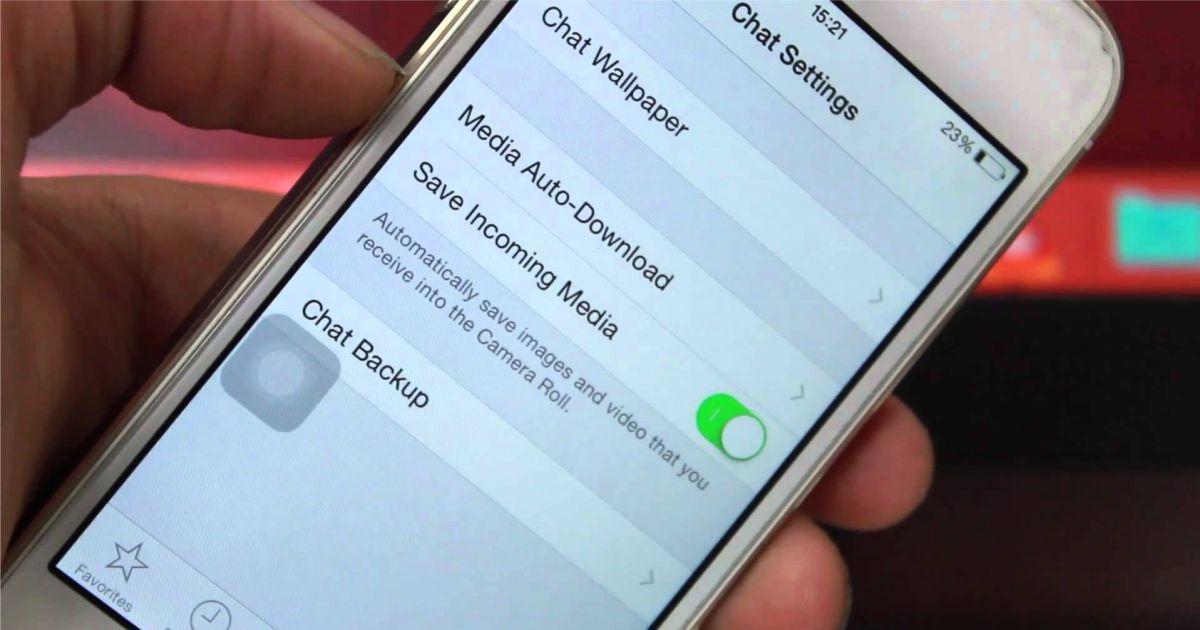
3. Tap the sticker icon at the top of the screen. Scroll down and tap the photo sticker.
Instagram sticker icon highlighted in a hot pink box with an arrow pointing at it. Abigail Abesamis Demarest/Insider4. Select the photo you want to insert. Repeat this process until you have all the photos you want to include.
5. Tap each photo to change the shape, drag them to change the position, or pinch them to change the size.
6. Once you're finished, tap Your Story or Close Friends to share the post.
Share your post once you're finished editing. Abigail Abesamis Demarest/Insider1. Open the Instagram app. Tap the plus (+) button over Your Story or swipe right on the home screen to open Stories.
2. Tap the Layout icon on the left side of the screen. Tap the Change Grid icon to select the option you want.
Layout is a collage creator built into Instagram. Abigail Abesamis Demarest/Insider3. Tap the photo icon on the bottom-left of the screen to open your Camera Roll. Select a photo to add it to your collage.
4. Once you're finished creating your collage, tap the check button at the bottom of the screen.
5. Add any additional elements as desired (text, stickers, etc. ), then tap Your Story or Close Friends to share the post.
In addition to posting multiple photos on your Instagram Story, you can also do it on a regular post. Here's how:
1. Tap the New post icon.
2. Tap on the photos icon, which is located in the middle right of the screen.
3. Tap the multi-photo select icon and select the photos that you want to have appear in the post.
Quick tip: The order that you tap on and select the photos is the order that they will show in your finished story. You can tell the order based on the number in the corner of the photo's icon. You can include up to 10 photos.
4. Tap the Next icon and, if desired, add any filters you wish to apply and tap Next again.
5. Write a post caption and fill in the optional settings if desired.
6. Tap Share.
Write a caption and share your Instagram post.Abigail Abesamis Demarest
Abigail Abesamis Demarest is a contributing writer for Insider based in New York. She loves a good glazed donut and nerdy deep dives into the science of food and how it's made.
Read moreRead less
Kyle Wilson
Kyle Wilson is an editor for the Reference team, based in British Columbia, Canada.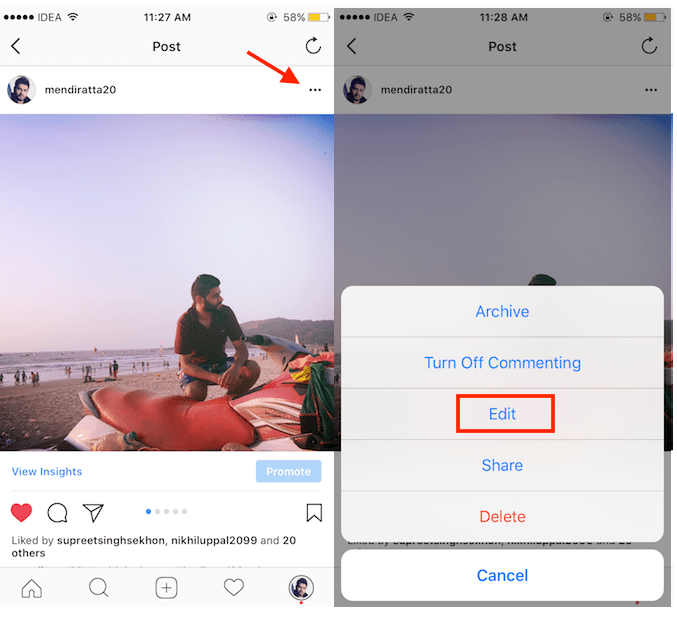 Outside of Insider, his work has also appeared in publications like The Verge, VICE, Kotaku, and more. He periodically guest co-hosts the Saturday tech show "Tech Talk" on the iHeartRadio station C-FAX 1070. Feel free to reach out to him on Twitter, where he can be found most of the time, @KWilsonMG.
Read moreRead less
Make your page interesting and encourage subscribers to look at your page or website more often for shopping
Fresh publications regularly
Get our book "Content marketing in social networks: How to get into the head of subscribers and fall in love with your brand.
Subscribe to the newsletter and get a book as a gift!
Instagram is an actively developing social network that never ceases to please with new functionality and user-friendly interface.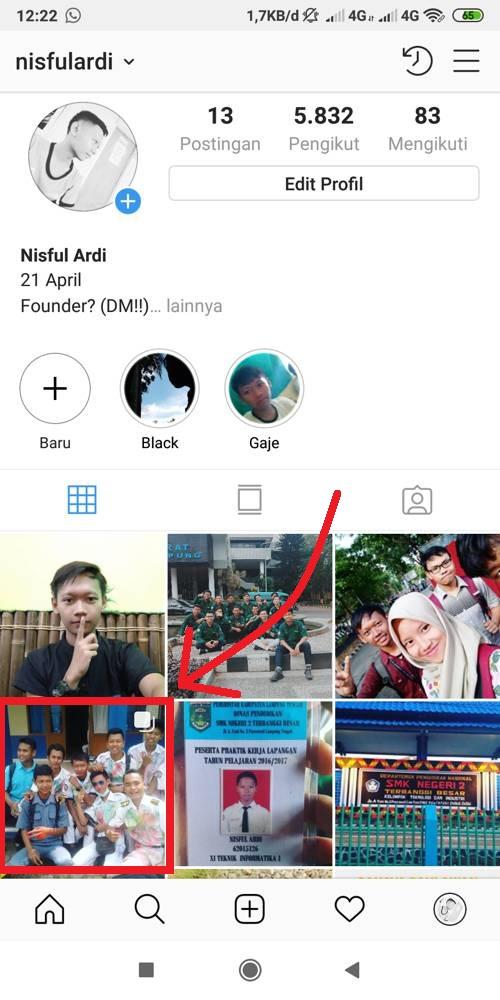 Relatively recently, the function of adding more than 1 image has become available to users. This has greatly simplified the lives of many people, as the rather boring collages have faded into the background. The advantages over them are obvious: posts are larger, which allows you to take a good look at everything, and full-fledged pictures look much more attractive than their small copies or parts. To understand all the benefits, let's look at how to put, make and add a lot and upload several photos at once to Instagram, how to send and upload them to Instagram, post, insert, publish, merge, expose, launch, and publish 2 (second) photo in one Instagram post.
Surely you have already noticed that some people have dots displayed. If you swipe the entry, other images will become available to you.
The main steps for adding more than two or three pictures:
 After completing the procedure, select "Next".
 The instruction is detailed, so there should be no problems with further use of the innovation. In any case, Instagram developers help their users adapt to the new conditions for maintaining their pages.
If the function is not available on your device, just go to the Play Market or Apple Store (depending on which platform you are using) and click the "update" button.
If even after this manipulation nothing happened, restart the phone or close the application, and after 15 minutes go back to it.
Throws you out? This is a version 10.13 issue. In this case, you will just have to wait for the update on your device.
Many users are already familiar with the concept of "story". The function provides for posting a photo or video lasting 24 hours. After the time expires, the publication will no longer be available to subscribers.
They are gaining popularity as the main advantage is the ability to view users who have clicked on the glowing halo around the profile picture.
Now the question is: “How to upload more than one photo to a story?” Unfortunately, this is not possible, as the story is designed to publish only one moment at a time. You can post a new photo or video in the next. Timing - 15 seconds.
If you add 2+ pictures within a day, they will automatically merge into one photo stream. Your subscribers will be able to block view stories.
Experienced users know that to insert a photo from Explorer, you just need to swipe up from the bottom of the screen. In this case, the storage will open in a reduced version. The main rule: you can upload a frame that was taken in the last 24 hours.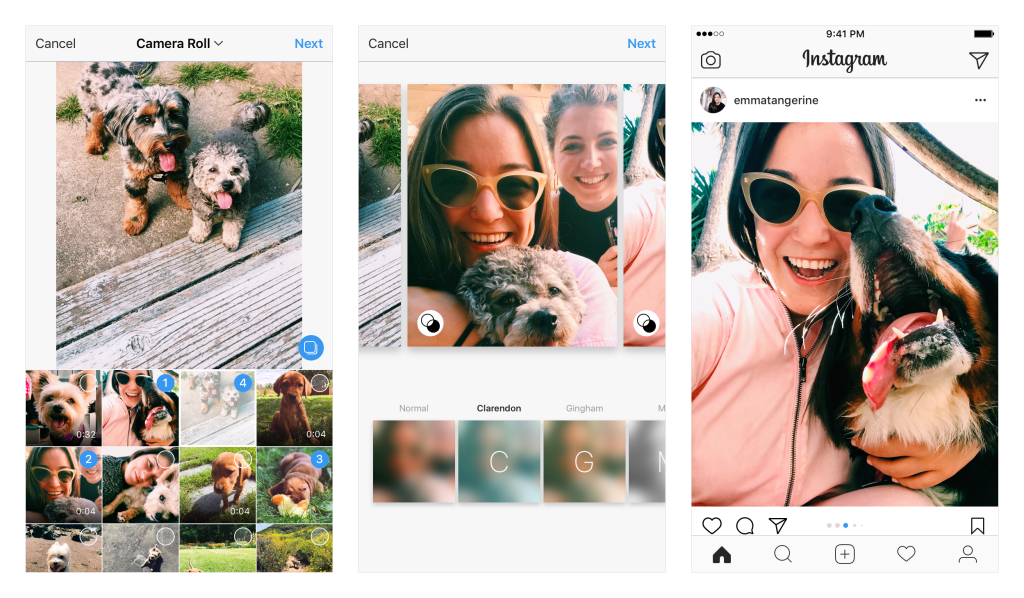
But there is a little secret: if you want to show an old photo, just screen the screen.
Unfortunately, Instagram does not allow you to delete more than two or three pictures at a time. You won't be able to do this even if you download the mobile app on your computer. You can get rid of several images at once only if they are all within the same post.
Now there are many services that provide such an opportunity.
Instagram is an ideal platform for creative endeavors, so knowing the main tools and innovations is a top priority for those who want to develop their profile based on the rules of the service. Simultaneous posting of more than two photos contributes to pleasant and comfortable work.
Worked on the material by:
Pavel Bavykin
Project Manager
Many people ask themselves: “Is it possible to post a photo to Instagram from a computer?”. We have collected in this article methods that give a 100% guarantee that your publication will appear in the feed if you add it from a PC. Let's move on to detailed instructions.
To post an image to Instagram from a computer, use your browser. For Google Chrome and Opera, right-click on the "View Code" option, and in "Yandex Browser" - "Explore Element". Now let's see how it looks in practice.
Go to the browser, go to the Instagram page and connect your account.
Application main pageRight-click and select View Code. We used the Google Chrome browser.
An example of how to enable "View code" in the browserIn the window that opens, select the display of the page in mobile phone format.
Selecting the page format in the browser Refreshing the page and using all the functionality of the application from Facebook.
And now we can send a picture.
An overview of working with a pictureNext, let's look at several options for loading images using browser extensions.
This application helps you quickly upload a photo without any extra effort.
Installing the extension.
To access Google Chrome extensions, click on the three dots at the top of the screen, select "More tools" and then find the "Extensions" line.
An example of how to enter the extensionsAfter installation, an icon will appear in the extension bar:
Web Instagram icon in the extension barClick on it, a separate tab will open in front of you in a vertical size. Now you can work with the service, as in a mobile phone.
A separate tab with an application The screencast shows the mechanism of the application - click "+", select a photo and send the picture to the feed.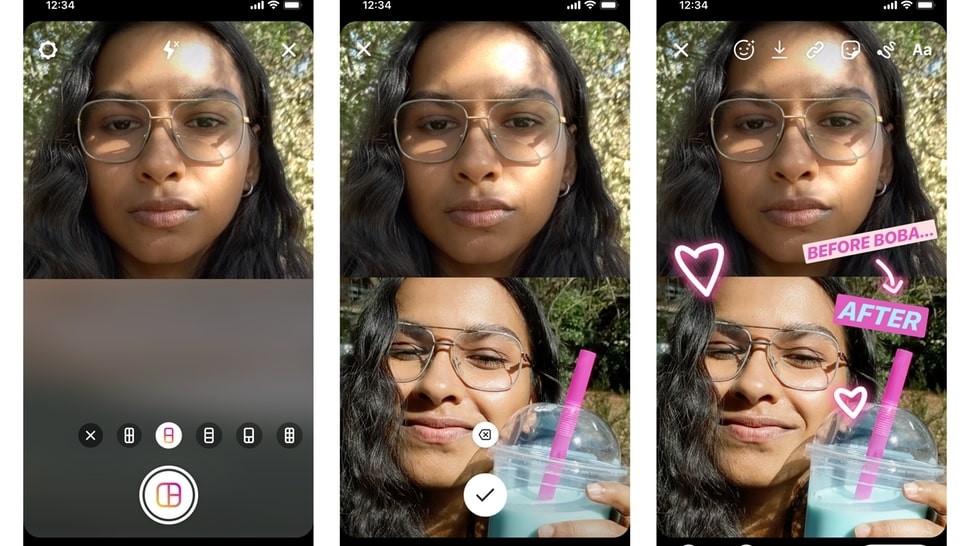 The only downside is that you will not be able to edit the image with the built-in Instagram functionality.
The second extension we are looking at allows you to add images and work with stories.
Installing the extension.
Open an Instagram account in a browser. After connecting, several icons will appear on the page: a camera - uploading images, a smartphone - opening a separate tab in the mobile phone format, a bright circle with an arrow - stories. And the last symbol allows you to download all publications.
Extension operationClick on the "camera" and select "Add to Profile" - this function allows you to publish an entry in the feed.
Selecting a button to publish to the feed The overview below shows how the extension works. You are only allowed to resize the image, tag people and make a note.
The third extension is a separate application through which you can add photos, videos and stories.
Install and run the extension.
In the browser, click on the application icon at the top right.
Application iconWhen clicked, a separate tab will open. Here you need to connect your account and work with the profile, as from a smartphone.
The checkbox for uploading photos is checked by default, as is access to the full image format. Additionally, through the Desktopify extension, you can upload videos to IGTV.
Tab with extension The overview below shows an example of how the application works when the Desktopify extension is connected. You can apply a filter to adjust a photo, but you can't edit—to change the brightness, contrast, or saturation of an image.
And now let's move on to the emulator service that displays the smartphone screen on a PC - use mobile applications or run games.
Of all the emulators on the market, BlueStacks is the most convenient. The application automatically adjusts to the screen, optimizes games and works without delay.
Download and install the emulator. In the program window that opens, connect your account to Google Play. We install the application.
Installing the application in BlueStacksGo to the main page - this is a tab located next to Google Play at the top of the screen. Open the "System Applications" folder and turn on "Media Manager".
We will need this step to upload photos that we will publish in the feed.
Important! Emulators do not have a function to open computer system folders.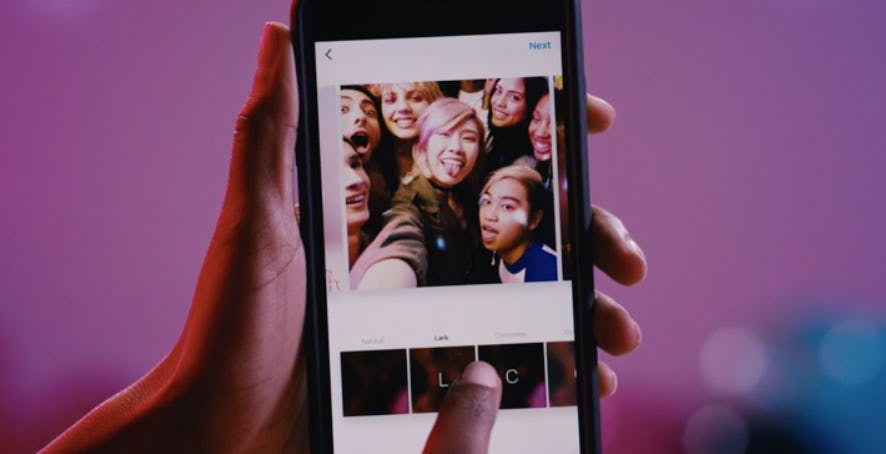 All images must be uploaded to the server in advance.
In the file manager, click on "Import from Windows" and select the images that we want to place in our Instagram account.
Importing photos from WindowsWe return to the application page and load the picture.
An example of how the emulator worksA feature from Facebook that allows you to work with two social networks at the same time. Let's see how to link accounts and add images.
Go to the Facebook Creator Studio page. At the top of the screen, switch to the Instagram icon.
Important! Make sure your Facebook and Instagram accounts are linked.
A page where you can link the accounts of two services After clicking on the button, a window will appear - agree to the terms and add profile data.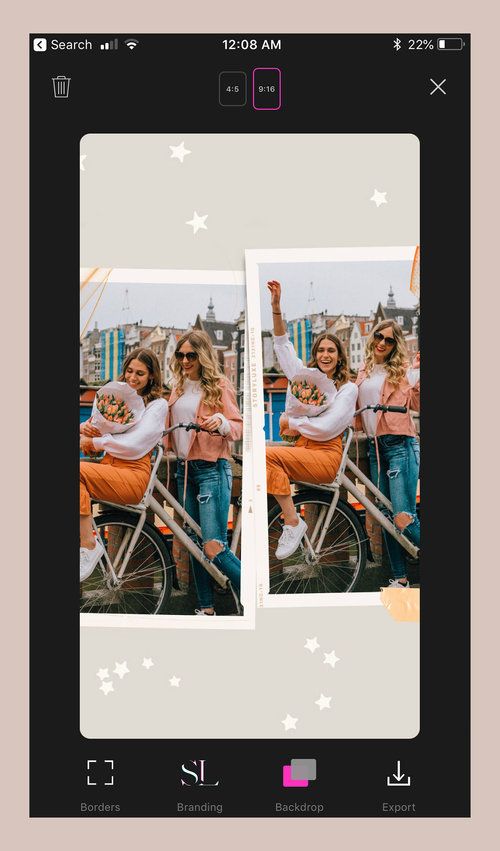
Now you can add entries: click "Create publication" and start registration.
Create Post button on FacebookThe example below shows how the service works. The only thing is that you can’t edit a photo here, but you can prepare it in advance in image editors: for example, in Canva, Photoshop or Figma.
An example of how the service worksIn the following sections, we'll look at how to set up a delayed write in the scheduling services. They are used in their work by SMM specialists, marketers and bloggers.
Important! Please note that all planning services provide free access for a limited period of 7 to 14 days. If it is more convenient for you to send photos via PC, we recommend purchasing a paid subscription.
In this section, we will look at a simple and convenient program for scheduling posts.
Go to the SMM Planner website and register.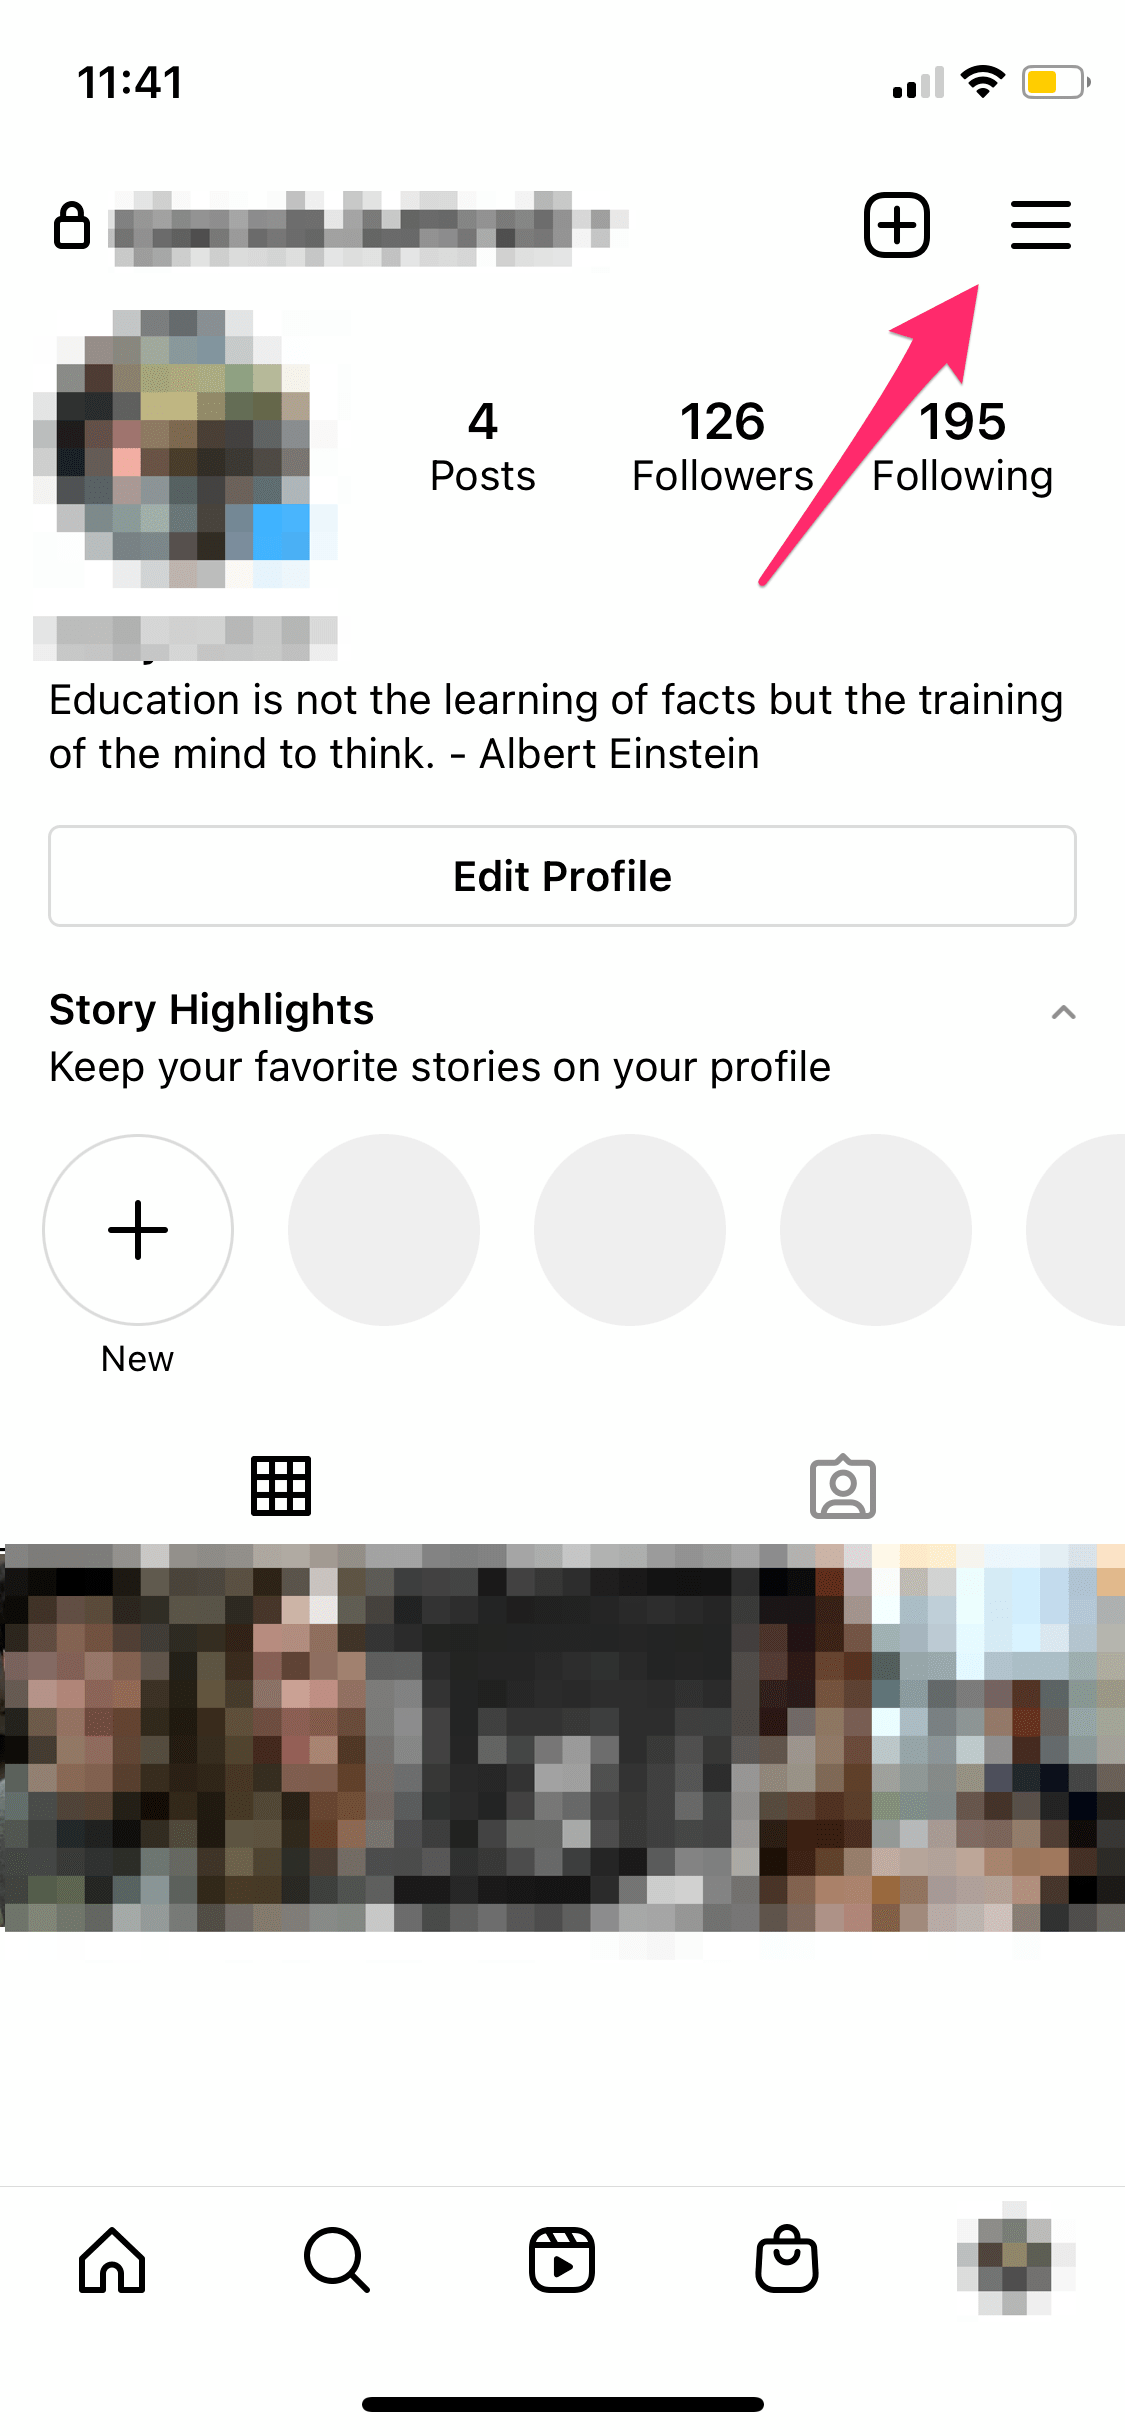
Go to the dashboard. Select the "Accounts" tab and connect your profile to Instagram.
Steps for connecting an account in the plannerThe added profile should look like the screenshot below:
Connected account in SMM PlannerNext, go to the "Posts" tab. Here we form publications and plan the time of sending.
Desktop for working with recordsClick on the "Schedule a post" button. It will be posted on the feed. In the window that opens, add a photo and text, and check the boxes where necessary: disable or add comments, send a picture to stories or IGTV.
A window where you can arrange and schedule a publicationAfter publication, the entry will appear in the dashboard, and the post in your account.
Example of displaying scheduled posts And here we looked at a program through which you can not only publish images, but also track analytical data for each post.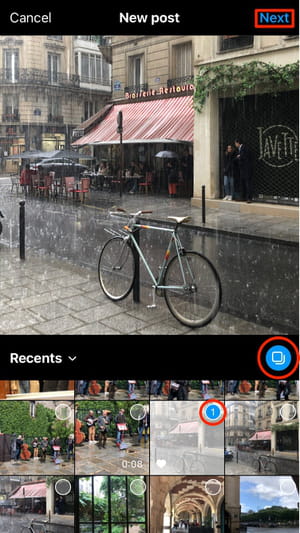
Register on the Parasite website.
Parasite website home pageAdd an Instagram account.
An example of what the dashboard looks like after adding an accountClick on the green button that says "Add post" and make an entry.
Edit publicationAt the appointed time, the entry will be published.
Successful test - post publishedAnd here we show you how to post with a promotion program.
Create an account on the Tooligram website.
Service main pageAdd an Instagram profile. Go to the "Features" tab and find the "Delayed Posting" item.
Delayed posting in the Tooligram serviceWait until the service connects your account. Then click on "Auto Posting". You will see a window with an authorization request, agree and proceed to the registration of the record.
Dashboard with a connected account The review below shows how to work with the functionality of the service - selecting and editing an image, adding text and setting the date and time of the publication.


/i.s3.glbimg.com/v1/AUTH_08fbf48bc0524877943fe86e43087e7a/internal_photos/bs/2017/G/P/cJapYbRs6W5mTwVaoHbg/status-no-whats.png)