When Instagram was launched, it only allowed users to upload square photos. This meant that a substantial portion of your photos had to be cropped.
Instagram’s square photo dimensions became a major drawback to photographers and Instagram users as the image quality, content, and resolution of images were often be sacrificed.
Fortunately, Instagram has seen the need to resolve this major issue. Instagram has given its users more freedom to be creative with their images. Now, pictures can be uploaded in landscape or portrait orientation.
So how can you post portrait photos on Instagram without cropping?
The vast majority of Instagram images are squared off. That’s fine for the most part, but it does tend to impact the composition of a photo — especially if it’s a portrait or landscape subject.
When you upload an image or load it into Instagram, the image is automatically cropped to 4:5. No one wants to put a lot of time and effort into capturing the perfect photo only for Instagram to ruin it by cropping the image.
Instagram did add different orientations not long ago, but images still take a little tweaking to get right. Now, you can post images at a maximum size of 600 x 600 for square images, 1080 × 607 for landscapes, and 480 × 600 for portraits. The actual stored size differs slightly, but when you measure images within Instagram, these are what typically come up.
So, if you’re one of the many Instagram users that’s tired of having their photos cropped, let’s take a look at how you can post portrait or vertical photos on Instagram without cropping.
Depending on the size of your image, you may now be able to post a portrait image on Instagram without having to crop it.
Here’s how you can check:
Open Instagram and create a new post.
Select the image you want to upload from your photo gallery.
Select the small crop icon in the bottom left of the main image screen.
Adjust the image within the grid until it’s to your liking.
Using the crop icon shifts the shape from the usual square to its vertical or portrait orientation. This way, you won’t need to shave off the edges of your photos.
What if you want to post a landscape picture without cropping?
Well, fortunately, the same process above works in landscape orientation too. Since the two sizes were added to Instagram, it will pick up the shape and size of the image and let you post the most suitable size.
The same instructions apply for portrait and landscape photos, so you can simply refer to the above steps and select a landscape image that you want to upload.
Sometimes, the image just doesn’t look right with the new setup on Instagram and you need to do a little bit of manual editing first.
The new orientation feature is good but also has a few glitches, and if it won’t show your image off at its best. It may be better to manually edit the image and upload it as a square — even if it means sacrificing the composition.
There are a lot of photo editing apps that can help you edit your images first before uploading them to Instagram.
Just follow these simple steps to get started:
If that doesn’t quite work or leaves the image subject hanging out to dry, you can add a white border to either side of the image to create the 5:4 ratio.
This can often make the image look better. It has the advantage of leaving your image in its original form, but it will be slightly smaller than usual.
This method works great if you aren’t happy with the way your image looks when you upload it straight to Instagram without editing.
There are a number of third-party apps that can help prepare images for Instagram and help you resize an image with or without cropping. Even though you can now post portrait and landscape, these apps still make life a little easier when preparing something for publishing.
Two of the photo editing apps we can recommend are No Crop & Square for Instagram for Android and Whitagram for iPhone. Although, there are a lot more photo editing apps for you to explore.
Both of the apps mentioned above achieve the same goal as the manual editing method and will resize your images for Instagram. If you want to keep everything on your phone and not download it to your computer, these and other apps like it are well worth a try.
Most photographers find squaring off an image takes something away from the effect. Instagram users have been stuck on using the square dimension for years, but thanks to the app’s recent updates, there is now more flexibility in uploading photos.
Adding portrait and landscape orientation gives the professional photographers and those enthusiastic amateurs more options when composing their shots.
Want to find more apps to help you create eye-catching Instagram posts?
Check out our article on the Most Popular Instagram Apps.
3 min
Instagram crops all vertical posts to a 4:5, which means part of a vertical video or photo is cut off. But, if you add a white background before publishing to Instagram, you can post the full 9:16 portrait without cropping.
Instagram crops all vertical posts to a 4:5. Unless your video is under 30 seconds, it won't work on Reels. That means that it’s impossible to fit a full 9:16 video into a normal Instagram video post. If you take a screenshot, film a video clip on your phone, TikTok, or Snap, or if you want to post a Story to your feed, Instagram makes you crop part of it out unless you resize it first.
To post a full vertical video or image on Instagram without cropping to 4:5, add a white background to make it into a square. Then, you can post the photo or video without cropping out or changing the size. This technique works for pictures, GIFs, and videos. Here’s a step-by-step tutorial:
Open Kapwing’s resizer and upload the vertical or portrait photo you want to post.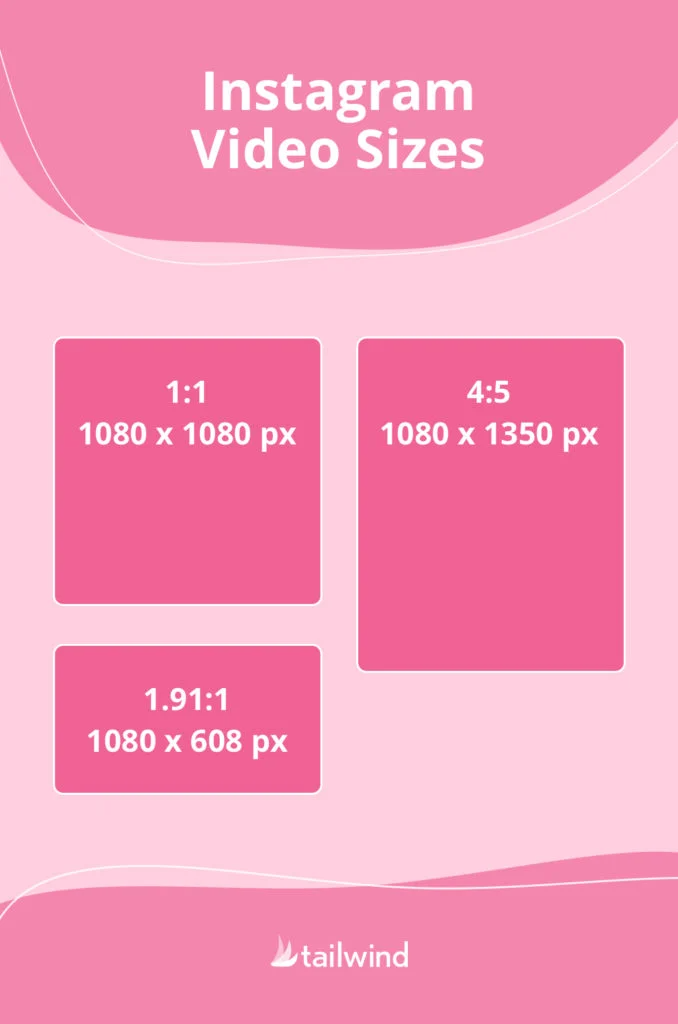 Kapwing’s resizer is free to use and online, so you don’t need to download an app. It supports images, GIFs and videos.
Note: If you want to edit or add filters to your photos, make sure to do this before resizing. That way, the white background won’t be affected by the color changes and adjustments.
Choose the 1:1 option for Instagram (Kapwing also supports 16:9 sizing for YouTube and other formats). You can change the background color and use Kapwing’s zoom and positioning tools to zoom in, crop, or add a border. Click “Export Image” once the preview matches what you want your post to look like!
Choose a new size on the right panelTo take up more vertical space in the Instagram feed, you can also choose to resize your post to 4:5 (the “FB/Twitter Portrait” option on Kapwing).
After a few moments, your image or video will be ready for download – you can remove the Kapwing watermark for free by signing into your account.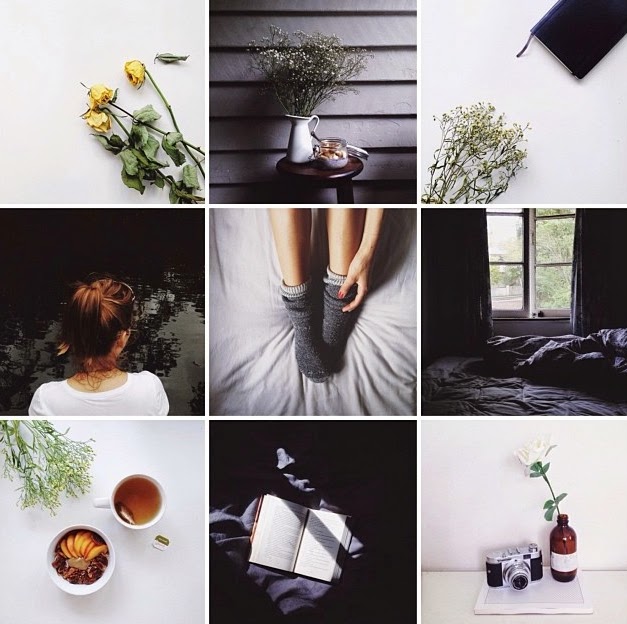 Since your photo/video now has a 1:1 aspect ratio, you can now download and publish it without cropping on Instagram.
If you're not signed into a Kapwing account, sign in or sign up using your Google or Facebook account – once you've signed into a Kapwing account, the watermark in the lower right corner will be removed from your final image.
Steps for saving the image on iPhonesI hope this article helps you share your un-cropped vertical videos and portrait photos with the world! Kapwing’s one-click editor was designed for people with no previous editing expertise, so don’t be afraid to try it out.
For more information on how to resize a video for Instagram, check out this video tutorial:
For more ideas, tutorials, and features, check back in at the Kapwing Resources page or our YouTube channel! And remember to tag us @KapwingApp whenever you share your content on social media– we love to see what our creators are passionate about!
Related Articles:
Recently, Instagram announced support for both landscape and portrait formats, but only when you post multiple images and videos in one post. It soon became allowed for individual downloads as well. While welcomed, this move is still limiting as I can't post vertical photos to Instagram unless they have a specific aspect ratio.
I've put together a few methods for adjusting your photos to the correct aspect ratio. These are multi-platform applications and tools that will allow you to upload Instagram vertical images in a few clicks. Let's start.
Read: Make a photo square without cropping - online tool
Windows programs, mobile applications, games - EVERYTHING is FREE, in our closed telegram channel - Subscribe :)
There are two options for cropping images for Instagram:
While Instagram isn't perfect, there are ways to fix this problem. Some tools and applications allow you to post vertical photos with a few clicks. Let's see how.
A strange and curious name, but a very popular app for those who want to upload vertical images to Instagram without cropping them. No Crop and Square won't let you post vertical photos like the one you see below.
The process is quite simple. You open the app and select the image you want to share on Instagram. There are a number of filters and effects to choose from. You can apply whatever you like. There are also emoji, stickers, emoji, and 3D emoji if that's what you're looking for.
You can create a collage in no time. Just add all the images you want to add with the collage tile button. The ability to add text with different fonts, patterns, resize and rotate images makes No Crop and Square a complete Instagram app.
The app is free to use, but with ads that can be removed with a $0.99 upgrade. In my experience, the ads were unobtrusive, with the exception of full-screen pop-ups.
Download No Crop and Square (Freemium)
Whitegram does for iOS devices what No Crop does for Android. It allows you to post full size images and photos to Instagram without having to crop or resize them. Simply select the image you want to upload in vertical mode and the app will automatically crop it to perfection against a white background.
You see the beauty of this. By adding a white background, it misleads Instagram into thinking the image is square. There are other apps in the App Store that will give you the results you want.
Tip: Always choose the highest resolution when working with a vertical image.
Download Whiteagram (Free)
Here is the easiest trick from the book. Instagram has a hidden option that will let you upload vertical images if you know how to crop images to the right size. You can do this on any platform because it is an online tool. Pixlr is a free and powerful image editor.
You start by selecting an image and cropping it to a 4:5 aspect ratio. Pretty easy, right? Now, in order to upload an image to Instagram using your PC's browser, you will have to fake it. Follow this guide. It will tell you how to make Instagram think that you are posting from your mobile phone, when in fact you are using your computer.
This is what your screen should like when you faked your browser. You should see the familiar "+" icon at the bottom to add a new image.
Read: 8 (+1 new) ways to post to Instagram from your computer
When you click the plus icon and add an image, you should see an expand button that looks like an arrow from either end.
Clicking this button will place your image in its original portrait mode with a 4:5 aspect ratio. You will also notice that there are no borders on a white or black background. No more square images that can be annoying as hell when they're crisp, portrait should be the obvious choice.
Note that the developer mode trick mentioned in the tutorial above will also work on Mac OS using the Safari browser. In fact, it works in all browsers on all platforms.
Visit Pixlr (Free)
I can't stress enough how annoying Instagram rules are. I agree that this gives a uniform look to the whole platform, but the tools that do this are not in the application. Instapadder is a web service that completely solves this problem. You can use it on your computer and Android devices to quickly adjust images to match Instagram without cropping content. iOS users cannot get a piece of this particular cake due to their own rules, but they can try the iOS specific method above.
To add padding around images, simply go to the website in your web browser, click the download button and select all files. It uploads images to a server and converts the images to an Instagram compatible format. The best part about this method is that you can upload and process images right away.
It accepts most image formats and outputs converted images fairly quickly. The only limitation I found with this service is the lack of a preview option before uploading augmented images, so you can't choose which images to upload. Otherwise, Instapadder is pretty good.
Visit Entrance Staircase
Polarr Photo Editor is available from the MacOS App Store and can be used as an integration with the iPhoto editor or as a standalone editing tool.
Once you have downloaded the Polarr Photo Editor (link below), just open it and import the photo you want to edit for Instagram.
Once you enter the editor application, click the settings tab on the right side of the screen. Scroll down and click "Border" '. Now select the aspect ratio and border color from the available custom menu. When you click on the Save button, the changes to the photo will be saved and the iPhoto library will be updated immediately. If you're using an iPhone, it's probably also in your iPhone Photo Library.
Download Polarr Photo Editor (Free, $24 per year)
If you're using a Windows tablet with touchscreen support, Instagram has announced an app just for you. The app is available on the Windows Store, but what about other users? This is where Gramblr comes into play.
Gramblr didn't support vertical images before, but I think they made some changes to their API since the current version supports it. Here is a screenshot.
As you can see, Gramblr does its job. The application is free and works on all Windows computers, including 32-bit versions. You will need to create a free account, but there is no need to verify your email address. Just select, crop, add filters, add a caption and post it to your Instagram.
Download Grambler (Free)
Instagram was originally designed to be used on mobile devices such as Android and iOS. But that doesn't mean you can't use it on your PC or Macbook. Whether you need an online tool or offline software, we take care of your Instagram needs.
Also read: How to turn off the last activity feature on Instagram
Programs for Windows, mobile applications, games - EVERYTHING is FREE, in our closed telegram channel - Subscribe :)
Everyone needs to know how to post photos on Instagram. After all, it is one of the most popular social networks in the world. Such success of Instagram can be explained by the desire of people to share significant shots and the opportunity to observe the life of loved ones and famous personalities.
High-quality pictures will help make your account bright and memorable. Images with high definition, excellent color reproduction and a reasonable number of filters will inevitably please subscribers and bring well-deserved likes.
You can upload an image to the page from your smartphone or tablet. Instagram is a program designed for mobile devices. The PC version has significantly fewer features.
You can add a new publication in the following way:
It's no secret that Insta has long allowed users to post only square pictures. At the same time, the aesthetics of the images suffered, because the original backgrounds and beautiful landscapes simply did not fit into the frame completely.
The latest version of the application allows you to post a long photo.
To fully enjoy the ability to upload vertical frames, you need to:
 When publishing a video, the same principle will apply.
 If you have a desire to share the surrounding landscape with subscribers, then a horizontal shot will be a great way to show it.
Posting a panoramic photo so that it is not cropped can be guided by the same principles as when posting a vertical photo.
Click on the “ ” sign in the lower left corner of the selected image. After adjusting the size, click "Next" and continue editing.
The days when Instagram only allowed users to post square photos are long gone. Now the desire to publish a picture of a non-standard size arises very often.
Additional applications will help to decorate the page with a similar photo:
Some of the listed programs have editing capabilities, others will only add a frame, but all of these applications will allow you to achieve insta-format.
If you have any questions, let us know Ask a question
Static photos on social networks can be very beautiful and high-quality, but they cannot convey movement.
Previously, this problem was solved by publishing video files. Now iPhone7 and subsequent models of phones allow you to take life-photos. They convey dynamics, but weigh less than video recordings. You can also apply filters to them and edit them to your taste.
Insta allows you to post a live photo, but after posting the image will stop moving. To convey all the charm of a life-frame, applications that convert detailed pictures to gif-format allow:
All these programs work on the same principle - they change the image format in gif or video.
Now you can upload a live photo to a social network according to the standard scheme.
We found out that you can post images of different sizes on Instagram. It is easy to add a publication if the picture was taken recently, but what to do if the footage has been in the smartphone archive for a long time, we will find out now.
After pressing “+”, the application automatically offers to publish the latest photo from the phone's memory. If the plans were to share another snapshot from the story, then you can swipe up from the bottom of the screen, open the Gallery and select the desired image.
There is a way to find a frame faster. After clicking “+”, pay attention to the upper left corner. It can be seen that by default the application opens the largest folder "Gallery". By clicking on it, you can view all the folders on the device and select the one you need.
Social networks are created to share moments of your life here and now. Insta allows you to take pictures directly in the application, edit pictures there and show them to subscribers in a matter of minutes.
To take a picture online in the application:
Hashtags allow to show the photo to as many people as possible. This tag will allow you to attribute your picture to any topic and make it possible for interested users to find it.
You can correctly put the hashtag as follows:
Millions of photos have been published on Instagram, which, after uploading, are sent to the server. To make the process as efficient as possible, the system compresses the frame. Photos with a small number of pixels are transmitted faster.
For a social network, a small image weight is an absolute plus, but for users this is not always the case. Often frames lose quality significantly, pixels become visible, colors are distorted.
To publish photos correctly and without loss of quality, the following tips will help:
 To do this, go to "Advanced settings" and select the option "Use high-quality processing".
It is possible to post a full-size photo on Instagram through third-party applications or using the function: "Carousel".
When posting a photo on a social network, the size decreases, the quality decreases. This posting format is applicable to any content on Instagram in order to increase download speed and reduce server load.
Other problems when posting on a social network:
Compression occurs if the user uploads a high quality image. Rectangular images are also cropped.
If the screen displays: “Unable to download. Please try again later”, then the problem is in the speed of the Internet or there was a failure in Instagram. You need to switch to a more stable connection and upload the snapshot again.
To upload photos to Instagram without losing quality, you need to use third-party applications.
Tips on how to post photos in full size without losing quality:
In Inshot, the user can improve the quality using the button: "Save". You will be offered a choice of quality: from 240 to 1080. Maximum - increases the size of the photo, but reduces noise and removes pixels.
The Image Converter application is designed to change the format of pictures and videos. It is recommended to change the photo type from JPG to PNG. This format is applicable for raster images, but requires less resources to load and retains the initial quality.
If Instagram ruins the photo quality, then it is worth checking the compliance with the technical parameters.
The social network has requirements for posting materials:
Uploading a file that exceeds the size or resolution - the social network will show an error. For placing Stories: rectangular orientation, weight - no more than 300 MB. To avoid upload problems, the user should compress the photo themselves. In this case, the quality of the image is lost: pixels appear and the number of colors decreases. Find out all the reasons why Stories are of poor quality.
You can upload two to ten photos to the Carousel.
When adding to the collection, the user must reduce the size or Instagram will automatically crop the pictures to a square type.
If your photo doesn't fit on Instagram, you can crop it or share it through third party apps. For example, No Crop Instagram will help you post a full-size photo. In the settings there is cropping photos and editing the size, with the addition of frames.
The second way is to make a panorama from one picture. That is, placing a photo in the Carousel.
Other ways to place a photo and leave it in its original quality:
Filters and color changes are not recommended.
Additional effects can spoil the quality: make the image soapy, cut off important details.
To post a photo without cropping, you can use the NoCrop application. It creates a picture frame that reduces the size of an image without losing quality. As a result, the user will receive a square image with the frame selected earlier.
How to keep the original quality:
By clicking on the button: "Share", the user will be prompted: to leave a photo on the device or send it to the Instagram Feed.
Uploading a photo to Instagram without losing quality is possible if the photo was taken in a panorama format or in a horizontal position.
How to share a photo:
In order for the image to look like a single image when turning over, you need to place the images in the order in which they were divided. That is, one part complements the next.
In this way, you can save the quality of the photo when uploading to Instagram and make interesting content. But it is worth cutting only high-quality images, with a resolution of more than 1980 horizontally.
Successful blogging on Instagram looks boring without photos. Even worse, when the author simply reposts a low-quality photo. By low quality, one should understand not the absence of filters, but their search. In order for the content to be useful and increase the rating, it is necessary to take into account several subtleties of Instagram, which will be discussed further.
Uploading photos to Instagram is possible only from mobile phones and tablets. The laptop version does not have this feature. The maximum resolution for images is 1080x1080. If you wish your blog good in the form of many likes and new subscriptions, then always choose a photo with about this resolution.
Another point concerns the format and editing of images. A typical storage format for a mobile camera is JPEG. Such photos have one drawback: the quality deteriorates when they are repeatedly modified and saved on different devices. Every time you save a photo, it is re-archived. Therefore, to preserve the quality, it is advisable to edit the photo and upload it in one go.
Everyone is familiar with the situation when a photo with a perfect background after uploading looks not so perfect. All due to the fact that Instagram crops photos.
The frame for uploading photos in the Insta interface has a size of 1080x1080, and earlier it was 612x612. A typical cell phone camera produces images of 1100 and up. The excess part is mercilessly removed when downloading. What to do?
For those who are tormented by the question of how to post photos in full size on Instagram, there are special applications. They are easy to download to your mobile phone and transfer photos through them. Here is a quick overview:

The reasons for the deterioration in the quality of photographs are due to technical reasons. To quickly send the uploaded photo to the server, the system automatically compresses the photo. Smaller pixels are better transmitted. The format is also of great importance. PNG is preferred over JPEG.
But all is not lost. For example, for Android devices. Once you set the necessary settings, you can forever forget about distorted photos and muddy pixels. How to do it? The algorithm is as follows:
There is also an opinion that photos taken on IOs are better displayed on Instagram than photos from Android. About the reasons for the deterioration in the quality of photos during publication, read the article at the link.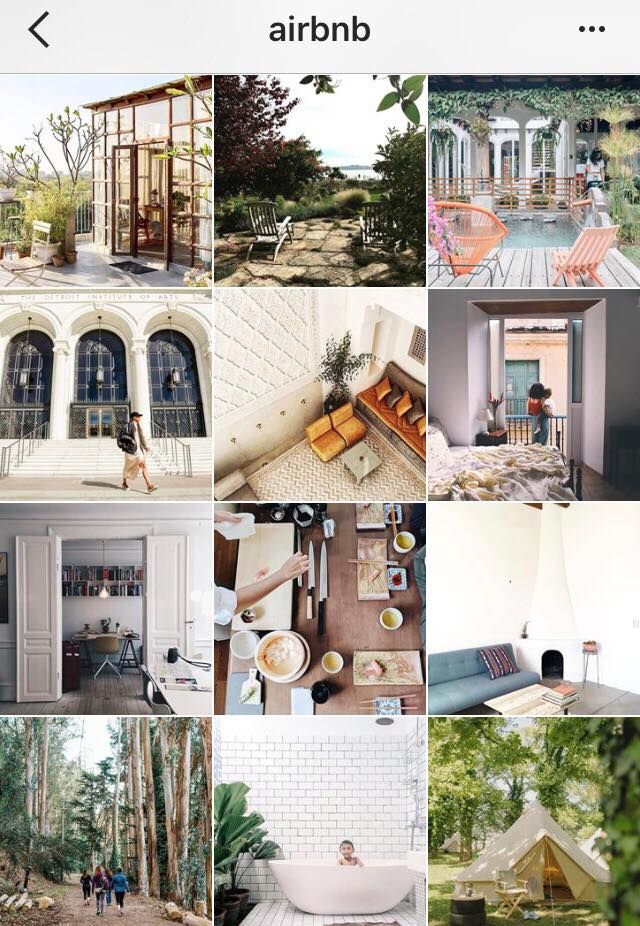
The introduction of the possibility of posting pictures in a non-standard format is dictated by the behavioral factors of users. So, the system "noted" that some users cancel publications when they see that the photo does not look the same as in its original form. Thanks to the new feature, the blogger sets the proportionality of the photo at his discretion.
The function is very easy to use - just download the latest version of the application. Now, when uploading photos, an icon with two arrows appears in the lower left corner of the upload frame. You should click on them and set the photo parameters. The same rules apply to video files.
Disappearing photos and videos is one of the latest additions to Instagram functionality. The essence is simple: the user takes a picture that he cannot see beforehand and sends it to other users. You can only one or several at once.
All actions of the recipient will be displayed in private messages. For example: watched, replayed, took a screenshot, etc. After a while, such a photo or video disappears on its own. The author himself can see it, if only the recipient shares the screenshot.
Instructions how to do it:
The history of sent files and information about the actions of the recipient will be in the list of private messages. Such photos are sent in their “natural” form, without filters and without cropping.
Manufacturers of modern devices have succeeded in introducing the most impressive features. For example, the iPhone 7 is able to capture not only static frames, but also movement in a photo. In this case, the file will be saved not as a video or gif, but as a photo. Such files weigh much less than other graphic files. You can edit and apply filters.
However, once uploaded to the feed, the Live Photo will look like a regular static photo. To convey the whole effect, you have to use third-party applications and turn the file into a gif. One of the following applications comes to the rescue:
Despite the difference in the interface and names, all applications work on the same principle - they help you convert a file in gif format or as a video in good quality. The result is uploaded to Instagram in the usual way.
You can add a full photo using one of the above methods, since the content of the photo does not matter: you can take a full-length photo or capture the tip of the nose. In any case, it is enough to master the technical principles of downloading content.
Do you want to keep an eye on your competitors? Instagram has all the tools for this.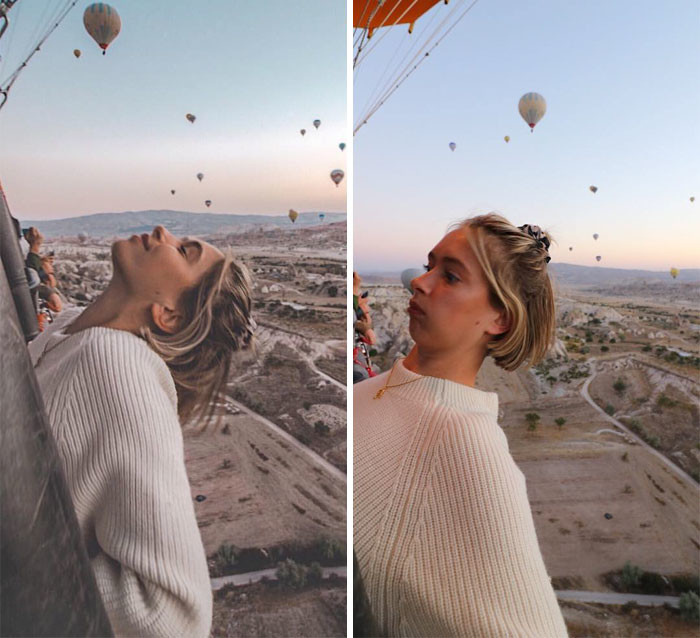 Study their content, look at the reaction of the public to a particular post. We do not recommend copying successful chips, since you should create them yourself. But learning from their mistakes is acceptable.
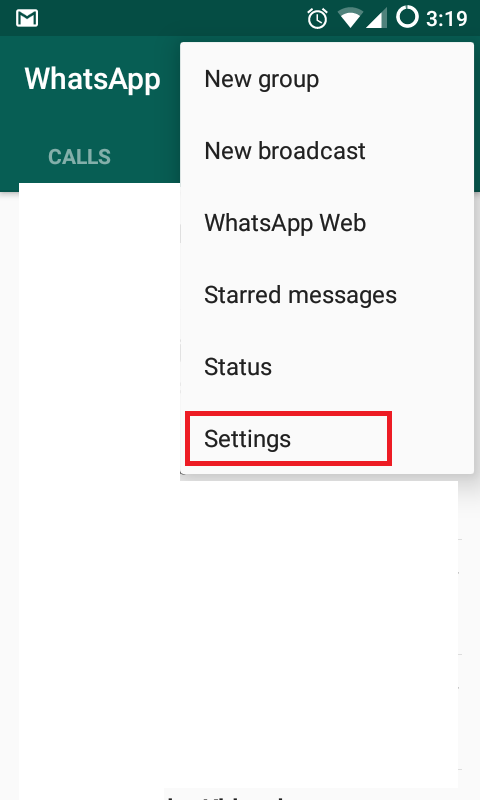
So, go to the competitor's profile, open his page and click on the three vertical dots on the right. There we find the item "Turn on post notifications" and go back. Now the system will first of all inform you about the actions of competitors in cyberspace.
If this is a photograph, then you have the opportunity to quickly determine its quality. A new Instagram feature will help with this: simply by spreading the photo with two fingers, you can look at each pixel. By the way, you are also not immune from such detailed viewing. Therefore, it is necessary to master all the tricks for uploading photos.
All the fuss about photo quality, filters and applications have one goal - to impress the audience. But for the full effect of technical solutions will not be enough.