If your brand uses Instagram for business, you’re probably already aware that Instagram Stories is an effective way to engage with young users. In 2019, 500 million accounts used Instagram Stories every day and 67% of all Instagram users are ages 18 to 29. Stories’s interactive features—like polling, questions, and Instagram AR filters—are fun ways for brands to engage those users. (Not sure how Instagram Stories can build your brand? We’ve got tips to help you use it like a pro.)
Augmented reality (AR) sounds futuristic, but Instagram Stories has used augmented reality filters since 2017 when it launched its face filters. And recently, Instagram Stories took augmented reality to a new level. The Facebook-owned platform Spark AR Studio lets users create their own interactive AR filters. In August 2019, that platform was opened to the public.
Now, anyone can create custom AR filters for Instagram Stories.
Here, learn what Instagram AR filters are, why creating unique filters might be right for your brand, and how to get started with Spark AR Studios.
Download your free pack of 72 customizable Instagram Stories templates now. Save time and look professional while promoting your brand in style.
Augmented reality (AR) filters are computer-generated effects layered over the real-life image your camera displays. In Instagram Stories, an AR filter alters the image your front or back camera displays.
Think of Instagram’s face filters. For example, the puppy filter superimposes a dog’s ears and nose over top of your image. Those digital effects move with you as you move.
Or its “Hello 2020” filter: 2020 glasses are superimposed onto your face and digital balloons fall down the screen.
Keep in mind that Instagram AR filters are different from its preset filters. Instagram’s preset filters elevate the quality of photos in one click, so you don’t need to spend lots of time editing photos for Instagram. In contrast, Instagram AR filters are an interactive element only for Instagram Stories.
At its F8 Conference in May 2019, Facebook announced that anyone can build custom AR filters using its Spark AR Studio platform. This new platform allows users to create original augmented reality effects for Instagram Stories, Facebook Stories, Messenger and Portal.
Before this platform became public in August 2019, Instagram users had to be invited to use Spark AR. That meant only select Instagram users could design and publish custom AR filters. Now, anyone who downloads Spark AR Studio can get creative with filters.
It’s easy for Instagram users to find these filters. Anyone visiting your brand’s Instagram profile can click the new face icon. All the AR filters you create are compiled here.
Click on the new face icon (third icon from left) while visiting a user’s profile to see all the filters they’ve made.
Plus, Instagram users can discover original filters in the new Effect Gallery. However, branded or promotional posts will not show here.
Original AR filters are categorized in the Effect Gallery. There are categories like “selfies” and “color and light.”
While this tool might not be right for all businesses, it’s a great option for brands trying to reach younger individuals on Instagram. Remember: 67% of all Instagram users are ages 18 to 29. Additionally, one-third of the most viewed Instagram Stories are from businesses.
Here are a few examples of how custom AR filters could leverage your brand:
Show off your brand’s personality
Connect with your audience

Be ahead of the curve
Increase brand awareness
When viewing an AR filter for Instagram Stories, there’s a “try it” button on the bottom left-hand side of the screen.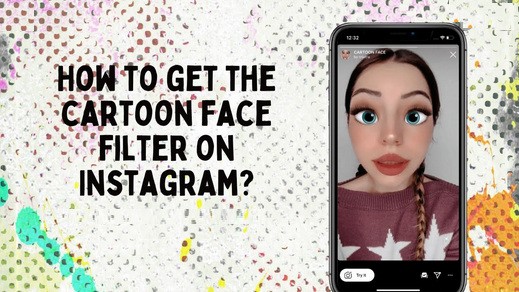 Users can save the filter to use later by pressing the “upload” button. That’s the first button on the bottom right-hand side of the screen.
Here are five examples that show how different brands are getting creative with AR filters.
AritziaAritzia created the SuperGlow filter. This custom filter increases brand awareness and recognition.
Coca-Cola PolandCoca-Cola Poland uses an AR filter to digitally superimpose the brand’s polar bear on top of the real world.
This Paris-based artist publishes artistic AR filters and shows just how creative brands can get with custom filters. She also uses this tool to show her support for social causes.
Ray-Ban’s custom Reindeerized filter is a playful way to interact with the brand. It’s also a way to virtually try on a Ray Bans product, which is super helpful for customers looking to purchase Ray Bans online.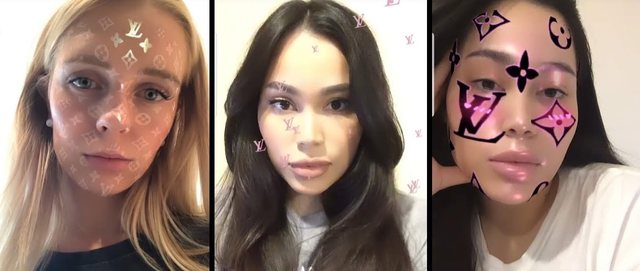
Tiffany and Co.’s custom filters incorporate the business’s branding.
HootsuiteThat’s right! We made our own AR filter for Instagram. It’s called Emoji Roulette and you can try it for yourself by going to our Instagram profile and tapping the smiley face icon.
This step-by-step guide shows you how to start creating custom filters for Instagram Stories.
Step 1: Download Spark AR StudioSpark AR Studio is the easy-to-use platform you need to create custom filters and effects. Currently, it’s available for Mac and Windows.
Step 2: Decide on your effectNext, walk through the tutorials in the Learning Center to get a feel for the program’s interface. Once you’re ready to get started, decide whether you’ll create a filter from scratch or choose from one of the eight templates.
We’re going to walk through the World Object template.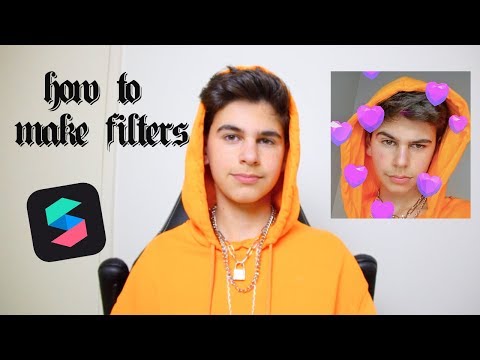 This involves putting a 3D object into the real world, just like Coca-Cola Poland did with its polar bear.
Download your free pack of 72 customizable Instagram Stories templates now. Save time and look professional while promoting your brand in style.
Download the templates now!
Step 3: Getting startedYou’ll see a placeholder object in the central panel when you open the template. That central panel is called the Viewport. This is where you’ll build your filter.
The iPhone 8 in the corner is the Simulator. This is where you’ll preview your work. Using the dropdown, you can change the Simulator from an iPhone 8 to another device.
To the left is the Scene panel. You’ll use the options here to edit your Instagram Stories AR filters.
Step 4: Upload a 3D assetChoose a 3D asset for your filter from the AR Library or import your own. For this guide, we are importing a free asset from the AR Library.
The AR Library also allows you to choose from free audio files, animations and more.
Step 5: Edit the behavior of the uploaded graphicNow, you’ll see your uploaded asset—in our case, a rotating pizza—in the Viewport. Using the Scene panel, edit how it looks, moves and interacts with the real-world. The edits will result in your custom AR filter.
For example, you can change the colour and intensity of ambient light. The below images show the 3D asset without ambient lighting (top) and with ambient lighting (below).
As you explore the Scene panel on the left, you’ll see that you can also:
You can send your test file to Instagram or Facebook to see how it works in Instagram Stories or Facebook Stories.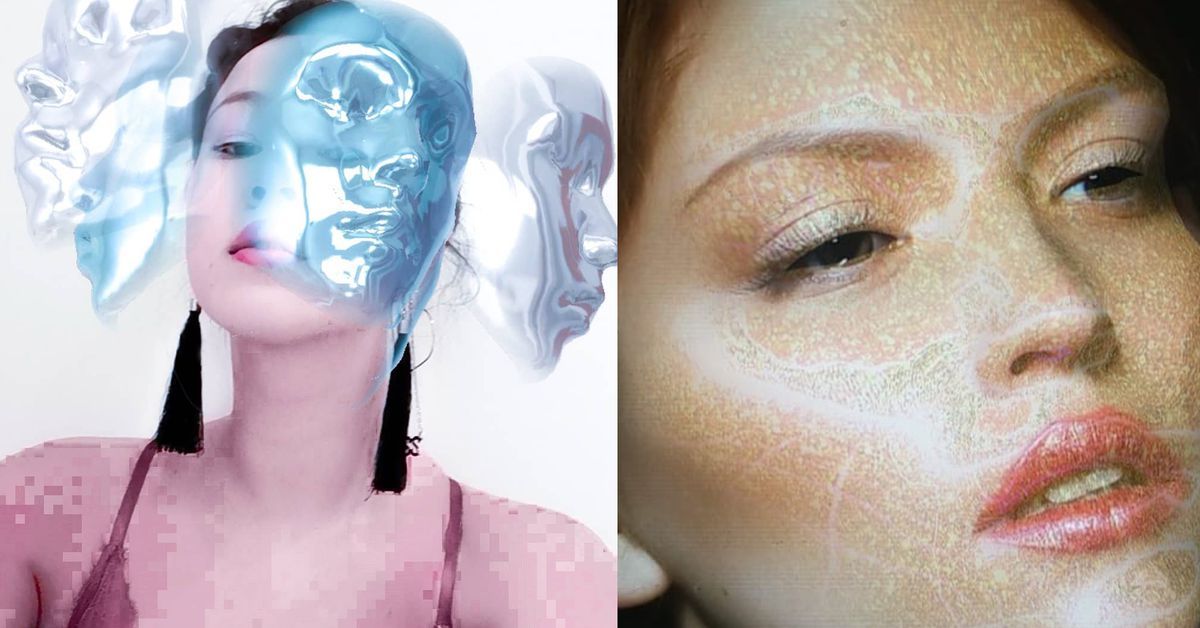 Or you can download the Spark AR Player app.
Now, press the “upload” button in the bottom left-hand corner. You’ll find it right below the “test on device” button.
Keep in mind that your new effect won’t be published immediately. First, your creation will be reviewed to make sure it meets Spark AR’s policies and guidelines. This review process might only take a few days, or it could take up to one week.
Spark AR also has more details in its Learning Center on submitting newly created effects for approval.
Step 8: Keep learningAs you familiarize yourself with this platform, you’ll quickly learn how to work with its other templates—or how to create an AR filter on a blank canvas.
Need more guidance? Curious about face filters, lighting filters or other AR effects? Spark AR has tons of useful guides in its Learning Center:
Now, it’s your turn. If you think creating your own AR filter for Instagram Stories is right for your brand, it’s time to get creative. Good luck!
Save time managing your Instagram presence—and all your other social media accounts—by using Hootsuite. Create and schedule posts, respond to comments, track competitors, and measure performance. Try it free today.
Get Started
Easily create, analyze, and schedule Instagram posts, Stories, and Reels with Hootsuite. Save time and get results.
Free 30-Day Trial
Ah, Instagram—my life, my love, my doom. Lusting over other people’s brunch outings is an official hobby of mine, but as much as I love scrolling endlessly through the seemingly beautiful lives of people I mostly don’t know, I love Stories more. They’re quick, they’re easy, and their limited lifespan allows me to be as silly as I want without ruining my whole grid aesthetic.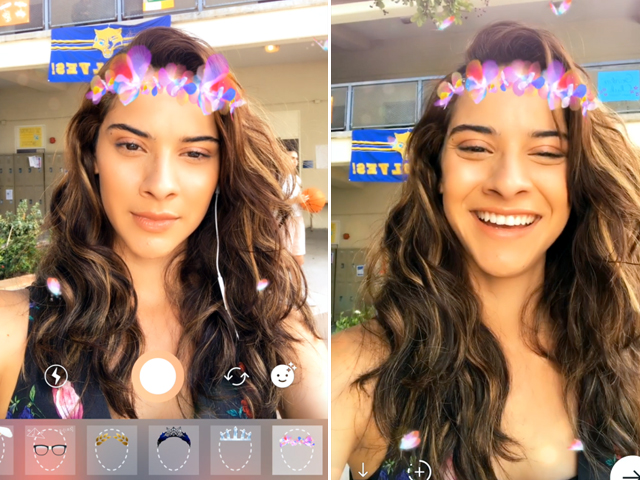
Plus, Stories allow you to add a filter to your photos and videos—one of the most versatile features on social media nowadays. Want to horse around looking like a cute rodent? There’s a filter for that. Want to have silky smooth skin and try on lipsticks you can’t afford? There’s a filter for that. Want to look like the cover of a Pink Floyd album? Well, you get the gist.
For years, Instagram face filters were only made by the platform itself or by a handful of studios and creators with access to Spark AR Studio, a tool Facebook designed specifically to create custom AR filters for their platforms. But that changed in 2019, when Spark AR’s closed beta version ended and the software became available to anyone dreaming of making their own filters.
So, as the Instagram addict I am, I volunteered as tribute and set about to learn how to make a filter—and then write about it so you can do it, too.
But before we start, there are some things you need to know:
Building a filter can be complicated, but the difficulty depends on how elaborate your idea is.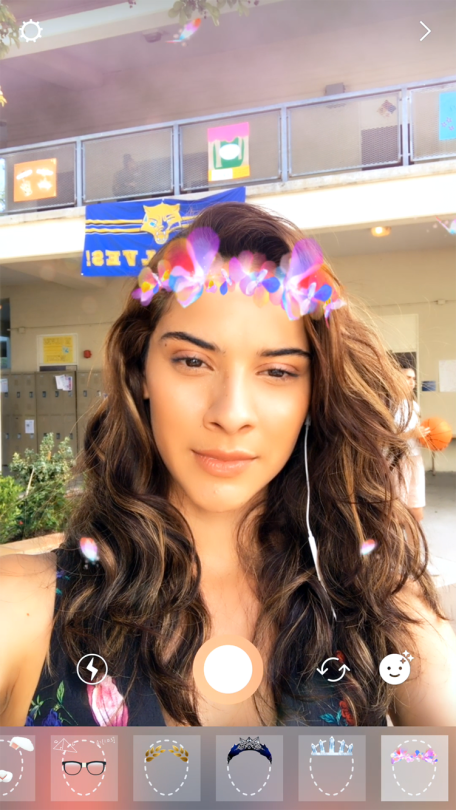 If you want to stick to something easy, you can create a lot of 2D effects in Spark AR that won’t require you to animate anything or spend hours on end trying to figure things out.
If you’re already familiar with graphic editing programs such as Cinema 3D or even Adobe Photoshop, you may find it easier to navigate Spark AR. If this is your first encounter with such a tool, make sure to explore and experiment with the platform first. It’ll help you get to know it a little bit better.
When Facebook opened Spark AR to the public, it created a community of creators to help, inform, and inspire its members on the new art of filter-making. There’s also a rich platform of content, materials, and tutorials to educate people on all things filter. In fact, when you download Spark AR, the first thing you’ll see is a menu with preset projects such as an animated bunny face mask, a light streak, and floating particles.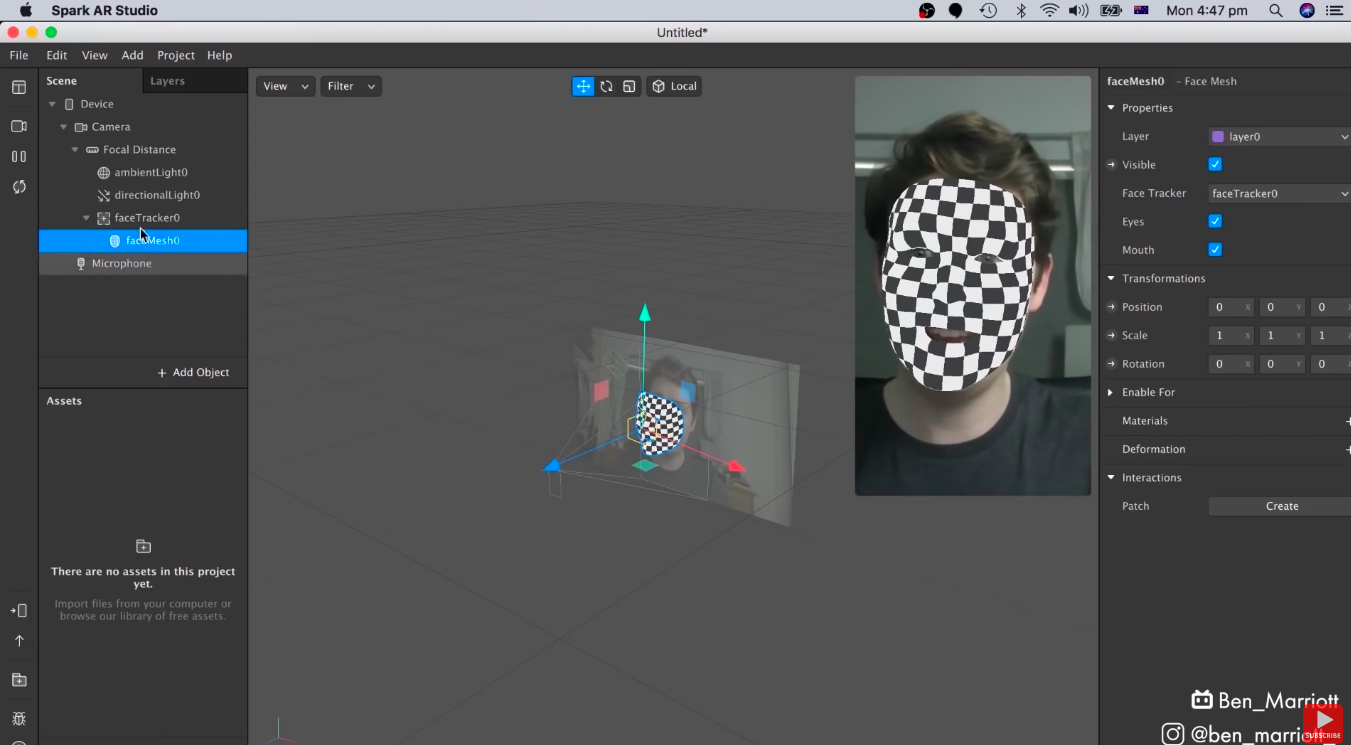 These will give you a pretty good idea of how the main types of filters work behind the scenes, but you’ll also be able to play around with them until you’ve achieved something completely new and yours.
If you’re more adventurous and want to try animating 3D objects, there’s an entire library of preset elements for you to put in your filters, including all sorts of skulls, Pokeballs, anime characters, and even a realistic dancing crab, for whatever reason.
Since I have absolutely no animation experience and prefer minimalist effects anyway, I’ll build a simple 2D filter. Doing so is easy enough and a perfect initiation to making filters. You can combine 2D elements, use them separately, or even multiply them within a single project to create a richer effect.
Start by downloading Spark AR Studio. It’s free, easy to install, and available for Windows 10 (64 bit) and macOS Mojave 10.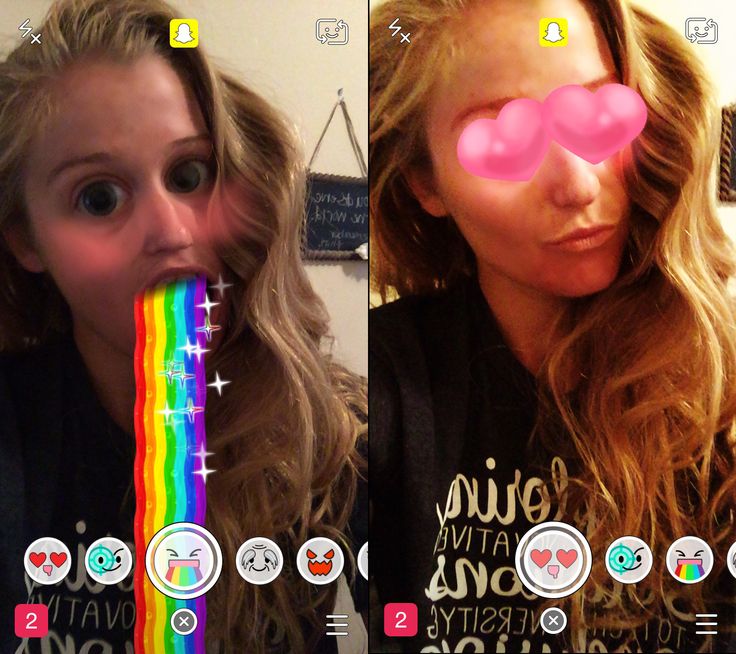 14 and higher. Once it’s installed, you can choose to work with various presets or start your own filter from scratch by clicking on the Create Project button in the bottom right.
Spark AR will open to the default workspace, which is divided into four areas. In the top left, there’s the Scene panel, which will show the basic structure of the objects in your filter. By default, you’ll see “ambientLight0” and “directionalLight0,” which are lighting elements.
Below the Scene panel is the Assets panel, which will contain all the materials that describe the objects in the Scene panel. For example, if you add a red rectangle to the Scene panel, the color element will show up in the Assets panel.
The space in the middle is the viewport. This will be your main workspace, offering two perspectives of your project. The bigger one in the center shows all the objects in your filter within the range of your device’s camera. This will help you create effects in camera space—which move with the camera—or world space—which stay put regardless of where the camera moves.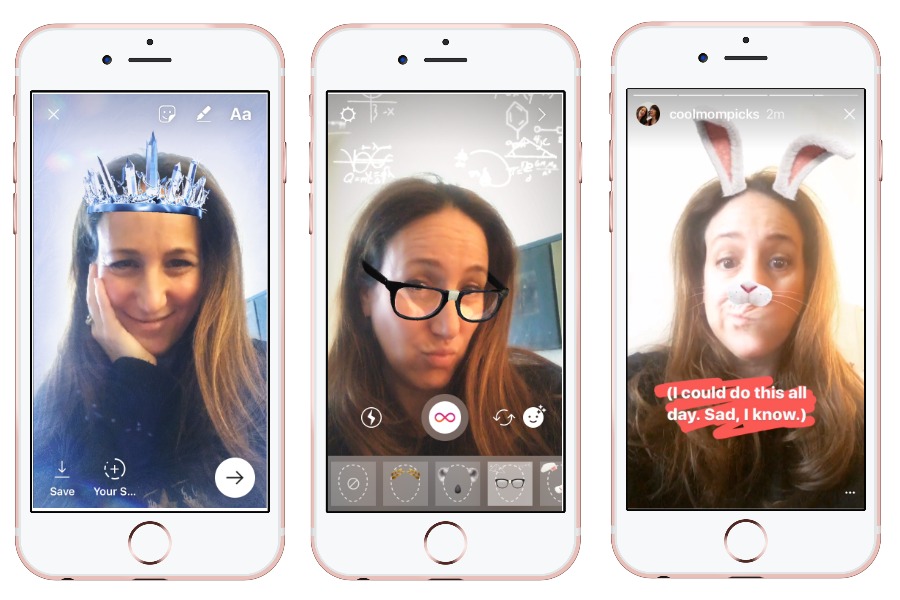
In the top right of the viewport, there’s another viewer called the simulator that shows how your filter will look as a final product. By default, you’ll see your work as it would appear on an iPhone 8, but if you hover over the viewer and click on the name of the device, you can change it. Options span a number of iOS devices (including the iPad) and Android smartphones (including some versions of the Samsung Galaxy, the Google Pixel, and the Google Nexus).
You can choose the specific device you want to build your filter for, or test how it looks on different screens. Sandra Gutierrez G.Finally, on the far right of your workspace, there’s the Inspector panel, which will show the properties of the elements in your scene and allow you to edit color, texture, position, rotation, and other details.
Spark AR includes several test faces for you to try your filters on. You’ll be able to see how they look on people of different genders and ethnicities, a blank canvas, and even yourself. You can play with your options by clicking on the camera icon to the left of the Scene panel and choosing the face you want to use from the pop-up menu. If you want to try it on yourself, choose your local camera (Facetime HD Camera, on Mac) and you’ll be able to build a filter on your own face.
At any point in the process, you can test your work on the Instagram app. Just click on the Send to Device button (second to the left of the Assets panel) and choose Send to App. You can test it on both Facebook and Instagram by clicking the Send button next to each one.
If you’ve never ventured beyond Microsoft Office, you may find this a little nerve-wracking, but don’t worry—it’ll all start making sense once you’re actually working. If you’d like a little extra help, check out Spark AR’s interface walk through.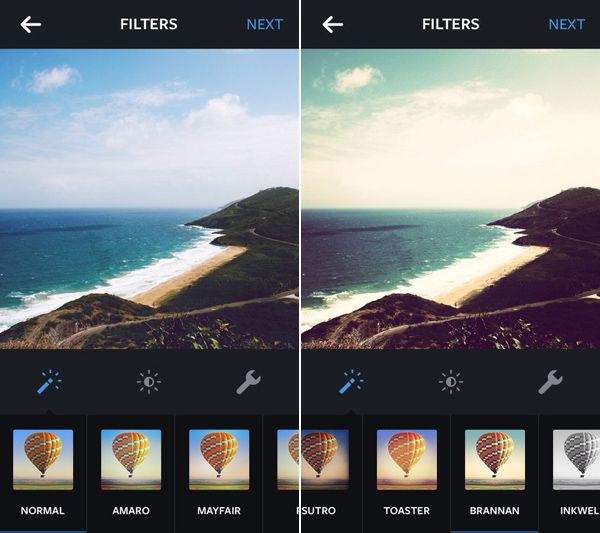
Let’s start with something simple. Swapping your background is technically called “segmentation” and is a basic, but fun effect that offers tons of possibilities.
1. Choose an image to use as your background. You can select a proper photograph or create something new by playing with colors and effects in Photoshop or any other image-editing software. I chose one of the Hubble Space Telescope’s pictures of the Bubble Nebula in the constellation Cassiopeia. Of course you’d want to teleport there—even the name is rad.
2. Add two rectangles. One will be the background (like a green screen) and the other one will display your face while erasing your real-world background. Head to the bottom right of the Scene panel, click on Add Object, scroll down the pop-up menu, and choose Rectangle. Do this twice. By default, your rectangles will appear as “Rectangle0” and “Rectangle1”, but it’s a good idea to change the names so you don’t get lost. I changed “Rectangle0” to “Background” and “Rectangle1” to “Foreground”, for example. To do so, double-click the name and a field will appear. Make sure both rectangles are nested under canvas0. This means both will be “children” of that element and will be subjected to any changes you make to their “parent.”
3. Set the rectangles’ sizes. Click on the Background rectangle (formerly known as “Rectangle0”) and you’ll see its properties in the Inspector panel on the right. Click on the Size fields and then the Fill Width and Fill Height drop-downs that appear. This will make the rectangle change size no matter which device a person uses it with. Do this for the second rectangle as well. Your viewport will be completely covered by the rectangles, which will be displayed as a checkered pattern called “alpha.” This means they’re transparent, but they’re still there.
In this step, we aim to expand both rectangles to cover the entire filter. Sandra Gutierrez G.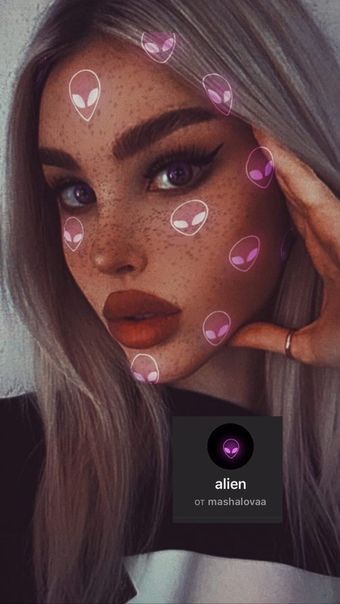
4. Separate the layers. By default, any object you add will join the layer you last worked in. If you don’t want it there, you’ll have to move it to a different layer. For the segmentation effect to work, you’ll need the rectangles in different layers so the background renders after the foreground. To do this, click on the Background rectangle in the Scene panel. On the Inspector panel to the right, click on the Layer field and choose Create New Layer. If you want to, you can rename the layers by clicking the Layers tab in the top right of the Scene panel, and double-clicking the name each layer in turn.
5. Create new materials. Time to give those transparent rectangles a solid form. That’s what “Materials” are for. You’ll assign each rectangle its own material by selecting each one in the Scene panel and then, in the Inspector panel on the right, clicking the plus sign next to Materials. When you do it for the second time, you’ll see a drop-down menu offering existing materials or the option to create a new one.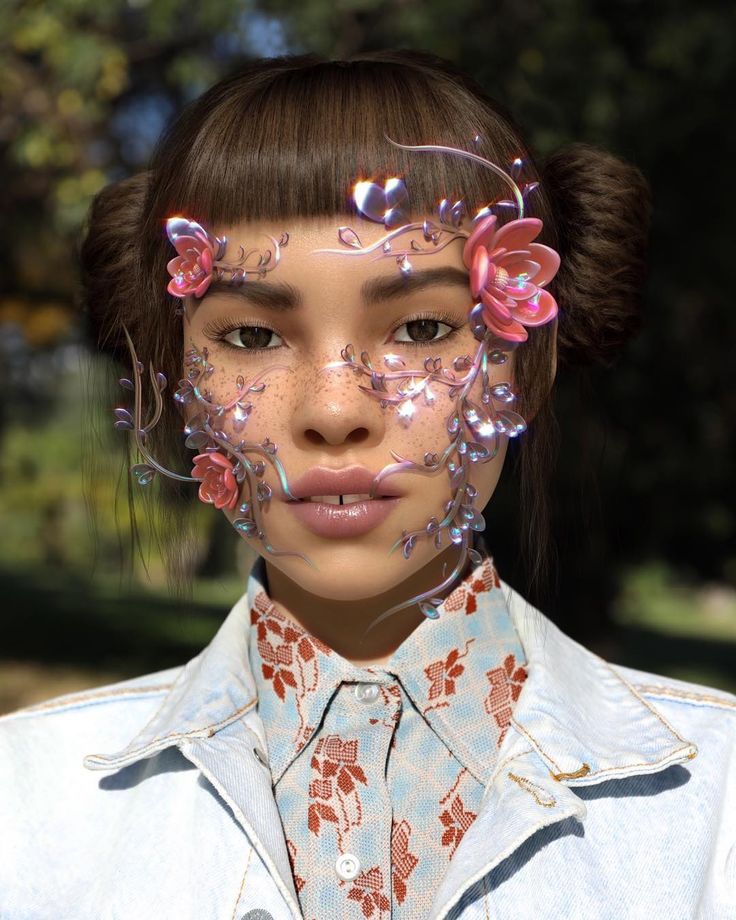 Choose the latter.
Once you’ve chosen your materials, they’ll show up in the Assets panel and it’s also a good idea to rename them to keep track. When you select your materials in the Assets panel, you’ll see a bunch of new options in the Inspector panel. You can change color, texture, opacity, blend, etc. If you want to experiment with your filters, play around with these options and see what you can come up with.
Materials are one of the main elements in Spark AR—they can be a picture or a block of color. Sandra Gutierrez G.6. Create a segmentation texture. This will turn any video captured by your camera into a texture, which means it’ll separate you (or whoever you’re pointing your camera at) from the background. In the Scene panel, click on Camera, and in the Inspector panel, click the plus sign next to Segmentation. A new asset will appear in the Assets panel called, by default, “personSegmentationMaskTexture0”.
7. Add “texture extraction” to the foreground material. First, click on Camera in the Scene panel, and in the Inspector panel, click the plus sign next to Texture Extraction. Another asset will appear in the Assets panel, named “cameraTexture0.”
To use it as a new texture, click on the foreground material in the Assets panel. In the Inspector panel, change the Shader Type (first item on top) to Flat, which will give this material the properties of a flat, 2D element. If you want to give it a volume effect (ideal for 3D), the Physically-Based option is a good choice. You can also play around with these to see what types of effects you can come up with on your own.
Under Diffuse (the second item in the Inspector panel), find Texture and choose cameraTexture0 from the drop-down menu. Lower, check the box next to Alpha (it will look like it’s “off” but clicking the box to the right will make it appear) and in the Texture field, open the drop-down menu and choose personSegmentationMaskTexture0.
8. Change the background. It might look like nothing happened, but you’re almost there. You’ve set the foundation for your filter and now all you have to do is change the background. Click on the Background_Material and on the Inspector panel, under Diffuse, change the color to something that contrasts with the subject in the camera. This will help you adjust the edges of the segmentation by changing the Mask Size and the Edge Softness. You’ll find these options in the Inspector panel when you click personSegmentationMaskTexture0.
If you like blocks of colors, you can stop there and play around with different background colors. But why do that when you can get a constellation? Let’s change that background.
Select your Background_material, and under Diffuse, reset the color to white. Lower, under Texture, click on Choose file from computer and upload the picture you want to use as a background. Keep in mind that large photo files may be too big for Instagram or Facebook to process seamlessly, so keep it as light as you can. I used a 720-by-734-pixel image weighing around 86KB, and the program was a little sluggish.
9. Add a little sparkle. As cool as teleporting yourself to Cassiopeia may seem, it’s not cool enough. Not unless you have some shiny bits of flair floating around you. This is known as the floating particle effect, and it’s a common feature in Instagram filters. Applying one to your filter will be quite easy and highly customizable.
Having the emitter as an independent object allows you to create a “world” effect. Sandra Gutierrez G.First, in the Scene panel, click on Add Object and scroll all the way down to the end of the list to choose a Particle System. You’ll notice a new element in the viewport emitting alpha squares in the middle of your viewer. This is your emitter, and the alpha squares are the particles.
When you create your emitter, it will appear in the Scene panel under your foreground rectangle, which means it will be subjected to the Focal Distance element (second under Camera) by default. If you want to create a “world” effect, click on the name of the emitter (“emitter0,” by default), drag it down and drop it below Microphone. This will make the emitter an independent object.
You’ll notice three arrows coming out of the emitter. They represent the X (red), Y (green) and Z (blue) axis, and you can drag them around to change the emitter’s position. Also, when you click on the name of the emitter, you’ll find a list of every possible customizable option. We’ll go through a few of them.
The checkered pattern is called “alpha.” it means something’s there, but it’s transparent. Sandra Gutierrez G.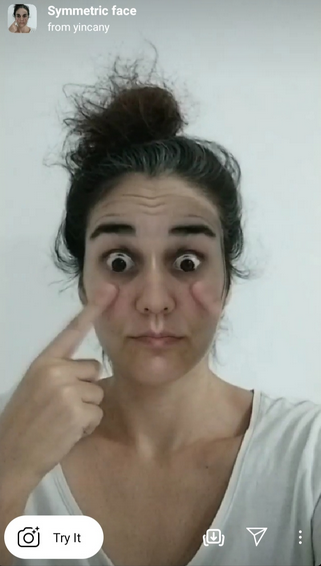 Since I have a fixed background—it will not move if we move the camera—I’ll use the Ring emitter, which will spray particles in a spherical radius. This will create a “world” effect that will make some particles appear closer and others further from the camera.
10. Add a material. Until now, you’ve only have the idea of particles; simple alpha squares floating around your filter.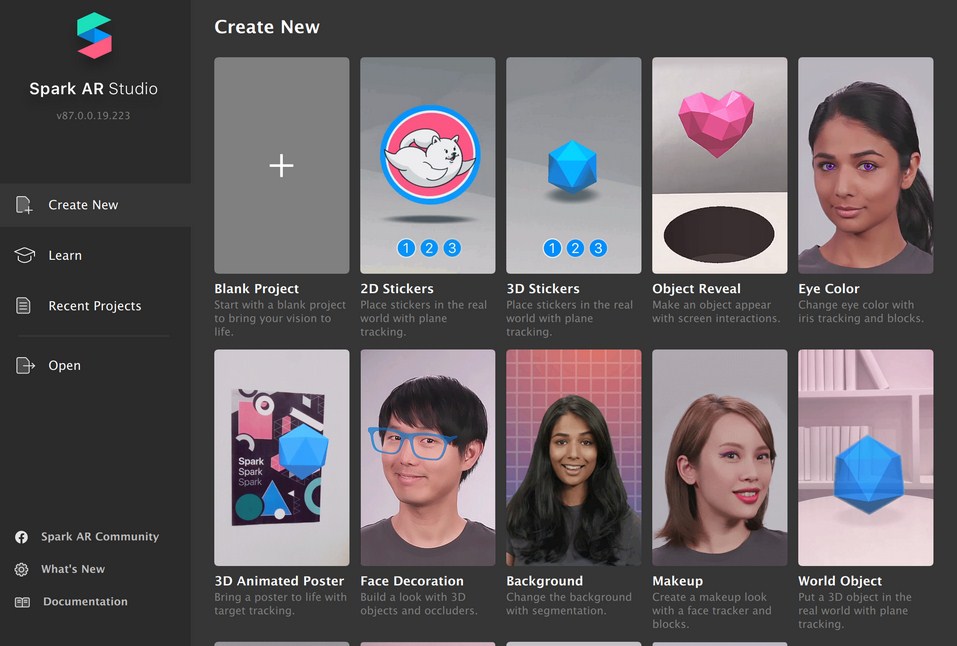 Now, it’s time to add a material. With the emitter selected in the Scene panel, go to the Inspection panel, scroll down, and click on the plus sign next to Materials and choose Create New. A new element will appear on the Assets panel. Double-click on it and rename it “Particle_material.”
You’ll notice your particles will have changed. Mine turned yellow, but yours might’ve turned some other color (if that is the case, don’t worry). Select Particle_material in the Assets panel, and then in the Inspector panel, click on the Shader Type drop-down and choose Flat. All this works if you’re using a 2D particle effect, but if you’re using something with a 3D effect, you can use Physically-Based, instead. Further down, under Shader properties, next to Texture, click on the Choose file from computer option. An explorer window will open and you’ll be able to select any file you like.
No, Spark AR guy, those are not fireflies.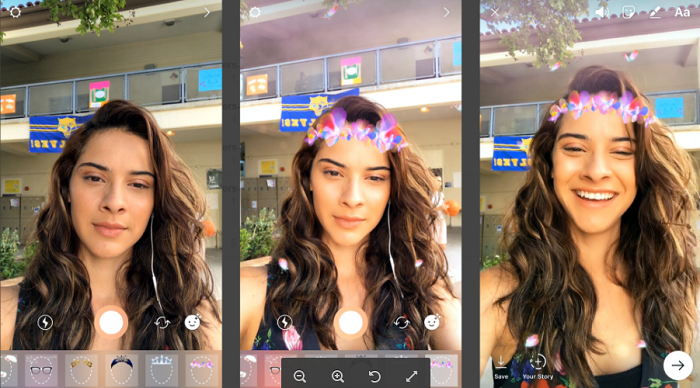 Sandra Gutierrez G.
Whatever image you end up using for your particles will have to have a transparent background. Most of the time, you’ll find these types of files in PNG format with a simple Google Image search. I looked for “spark, filetype:.png” on Google Images and chose the one I liked the most. Once you have a particle with its own texture, you might want to readjust your emitter. I went back and made the particles bigger (from 0.01 to 0.05).
Congratulations! You made your first Instagram filter. Now what?
11. Share your new filter. To do so, you’ll have to upload it to the Spark AR hub, where you can also set up an icon and a sample video for users to see. Once there, your face filter will be reviewed by Instagram’s support team, who will take up to 10 days to check it out. If they determine your filter complies with the platform’s community guidelines, it’ll be available in the Instagram gallery, on your profile, within Stories, and through a sharing link.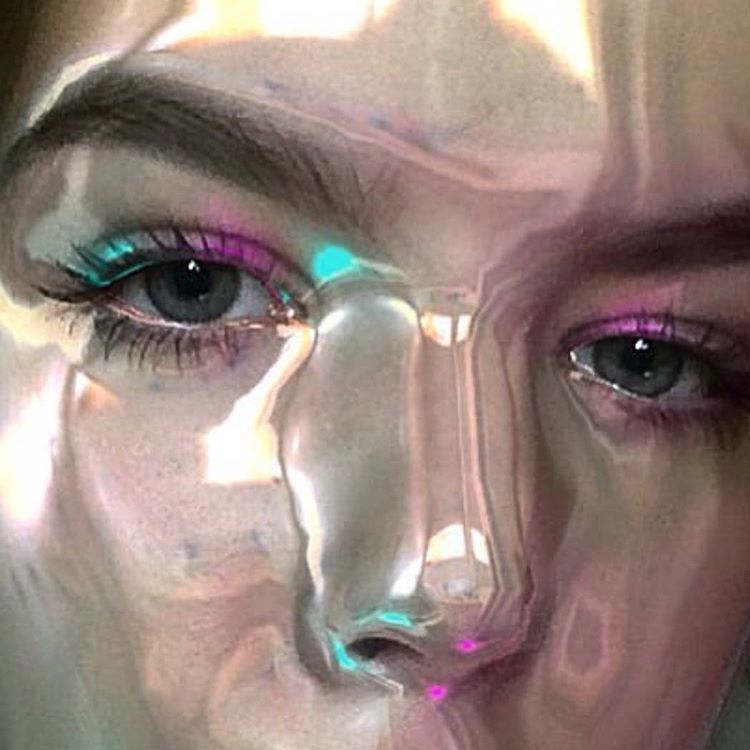
Start by clicking the Export button to the left of the Assets panel (it’s an upward arrow). Once there, save your project in an arexport file, which you will have to upload to the Spark AR hub. The program will automatically direct you there once the export is done.
Spark AR is a versatile tool that’s not that user-friendly, but stands out because of the vast possibilities it offers those who want to create Instagram filters. With a little imagination and tweaking, the segmentation and particle emitter effects alone can launch a myriad of experiences. There’s a lot of content out there for you to learn and experiment with, so it’s just a matter of investing the time and playing with it.
Now, if you excuse me, I have some stories to post.
I can see the view count going through the roof. Sandra Gutierrez G. In this step, we are aiming to expand both rectangles to cover the entire filter.
4. Set the size of the rectangles. Select the background rectangle (previously known as "Rectangle0") and you'll see its properties in the panel on the right. Click on the boxes next to "Size" to change the width ("Fill width") and height ("Fill height") of the fill and stretch the rectangles to fill the screen of the device. Do the same for the second rectangle. Your viewport will be completely covered by rectangles, which will be displayed as a checkered pattern called "Alpha". This means they are transparent, but they are still there.
5. Separate the layers. By default, any object you add is attached to the layer you last worked on. If you don't need it, move it to another layer. For the segmentation effect to work, you need rectangles on different layers. So the background is "drawn" after the foreground. That's what the background rectangle in the Scene panel is for. In the Inspector panel on the right, click the "Layer" field and select "Create New Layer". You can rename layers if you wish by selecting the Layers tab in the upper right corner of the Scene panel and double-clicking on each layer name in turn.
6. Create new materials. Time to give these transparent rectangles a solid, visible shape. This is what the "Materials" function is for. You can assign each rectangle its own material: select them one by one in the Scene panel, and then in the Inspector panel on the right, click the plus sign next to Materials and click Create New Material. As a result, two materials should appear in the Assets panel (under each rectangle)
Materials can also be renamed. Once you've selected your materials, you'll see a host of new options in the Inspector panel. You can change the color, texture, transparency, blending, and so on. If you want to experiment with your filters, change these settings and see what happens.
7. Create a segmentation texture. This will turn any video taken with your camera into a texture, which means it will separate you (or whoever you're pointing at) from the background. In the Scene panel, click Camera, and in the Inspector panel, click the plus sign next to Segmentation. A new resource will appear in the Assets panel, named personSegmentationMaskTexture0 by default.
8. Add texture extraction to the front of the material. First, click Camera in the Scene panel, and in the Inspector panel, click the plus sign next to Texture Extraction. Another resource named "cameraTexture0" will appear in the Assets panel.
To use it as a new texture, click on the foreground material in the Assets panel. In the Inspector panel, change the Shader Type to Flat, which will give this material the properties of a flat 2D element.
In "Diffuse" (the second item in the "Inspector" panel), find "Texture" and select cameraTexture0 from the drop-down menu. At the bottom, check the box next to "Alpha", in the "Texture" field, open the drop-down menu and select personSegmentationMaskTexture0.
9. Change the background. It may seem like nothing happened, but you're almost there, as you've set the base for your filter. Click on the background material and in the Inspector panel, under Diffuse, change the color to something that contrasts with the object in the camera. This will help you adjust the segmentation edges by changing the mask size and edge softness. You'll find these options in the Inspector panel when you double-click personSegmentationMaskTexture0.
Select a material for the background, and in the Diffuse section, reset the color to white. Below, next to "Texture", click "Choose File From Computer" and upload the image you want to use as the background. Keep in mind that photo files can be too heavy for Instagram or Facebook, so keep them as "light" as possible.
Watch this video tutorial for example, you will learn how to use camera segmentation and texture to create an effect that separates someone from the background. Change backgrounds however you want.
Content
 9004 9004 Instagram filters for stories
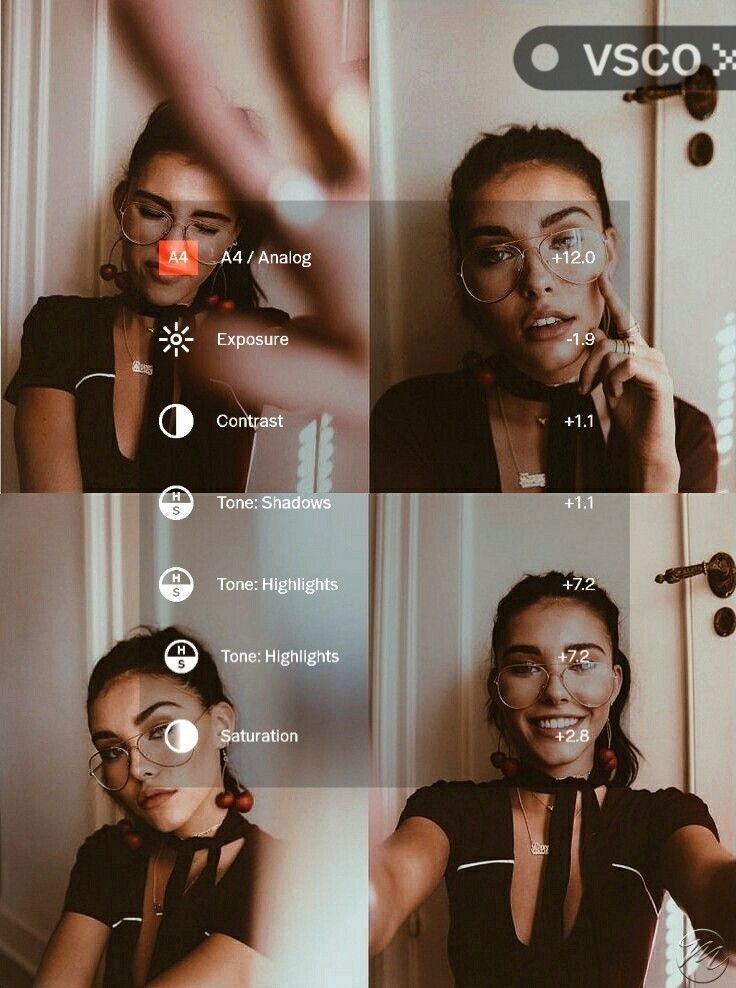
Although it may seem somewhat trivial, Instagram filters can make or break your post. Choose the perfect one and the photo will blow up Instagram. Pick the wrong one and your once beautiful picture with so much potential will be a flop.
Everyone edit photos and apply face filters for instagram. If someone says they don't, they are lying. When famous bloggers edit their photos, they put one filter on top of another and then spice up the image with another overlay, here's how it works:
Few bloggers are photography experts, but using filters, they can turn their photos into candy, making a beautiful ribbon in the same style.
Instagram has over 40 built-in filters. We take a look at the most popular photo filters based on 79 data0 000 users.
But before we get started, let's take a look at a brief history of built-in options.
In a 2018 marketing study, marketers found that native Instagram filters are used 10. 5% of the time. The fact is that Instagram was created as a photo sharing app, not a photo editing app. Filters came much later.
You may not have heard the name Cole Rise before, but he played a huge role in what Instagram is now. He was the 75th user on the platform, helped design the app icon, and most importantly, he also created some of the first built-in filters, including Sierra, Mayfair, Sutro, Amaro, and Willow, for example.
Instagram photo filters have become popular very quickly. But there was a problem - there were few of them, and the pictures began to look the same.
At the time, you couldn't swipe down on the screen to reduce effects. This explains the emergence of VSCO, Snapseed, A Color Story and other editing programs. Applications differed from IG's built-in options.
These applications gave more creative freedom and advantages to those who wanted to stand out from the crowd. So it's not that the filters were bad, but that people used them excessively.
The built-in options are located in the effects gallery. If you don’t know how to find a filter on Instagram, here’s the instruction just in case:
So now that you've had a quick look at the nature of effects, let's take a look at the top 10 Instagram filters.
That's right, the most popular Instagram filter is the "Normal" filter, in which no effect is applied to the image. It is clear that this is not a filter. "Normal" was popular last year when it was overdubbed in 89.5% of cases.
This doesn't mean that bloggers post their #NoFilter natural photos. In most cases, they still pre-process their photos in other apps where they add aesthetic Instagram filters. And the finished photos are uploaded to Instagram. That's why they don't need IG's built-in options, they just choose "Normal".
Second place goes to Clarendon.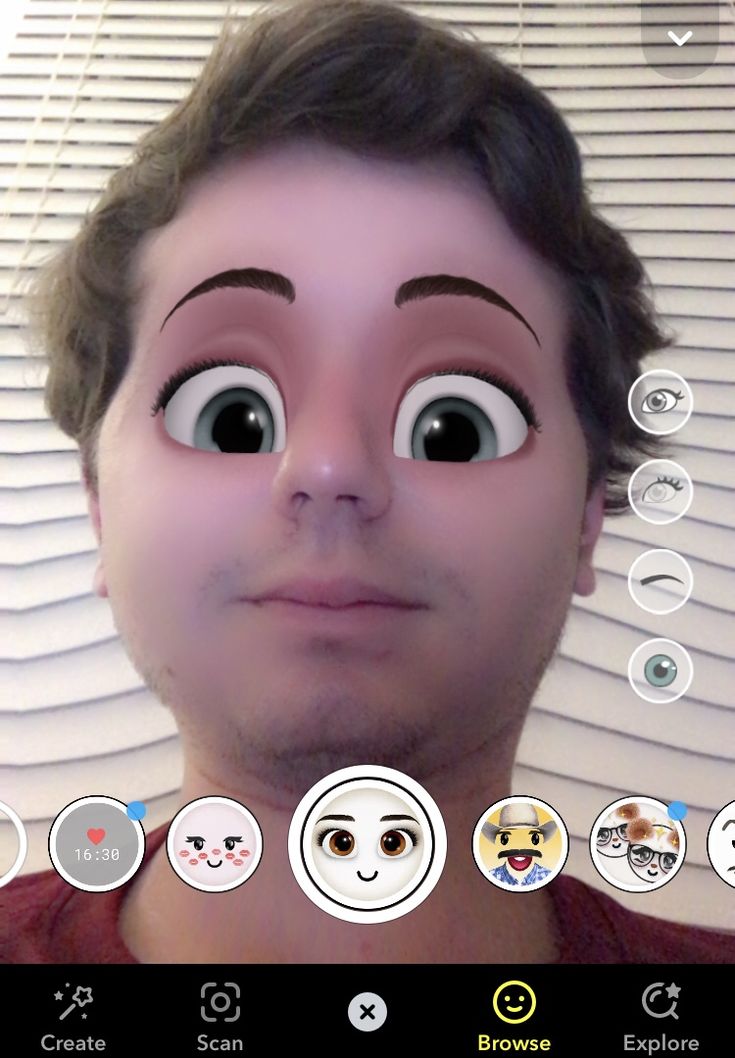 An Instagram filter that adds light to lighter areas and darkness to darker areas.
What Clarendon does is “cool down” photography. Because the image increases saturation and contrast, but then adds a blue tint to clean highlight areas and cools shadows and highlights.
Its midtones, however, are relatively warm, allowing the skin in portrait photos to look natural despite being chilled. Good for: selfies.
The Juno Effect is not only a great movie, but also a very good filter. It's simple and doesn't do anything special other than slightly manipulating the contrast and brightness of the photo.
Enhances reds and yellows, making them slightly more visible than blues.
Guess the riddle: if Beethoven was on Instagram, what filter would he use? You answered correctly: Ludwig.
Joking aside, this effect is named after the very long-named architect Ludwig Mies van der Rohe, who coined the famous minimalist mantra “less is more”.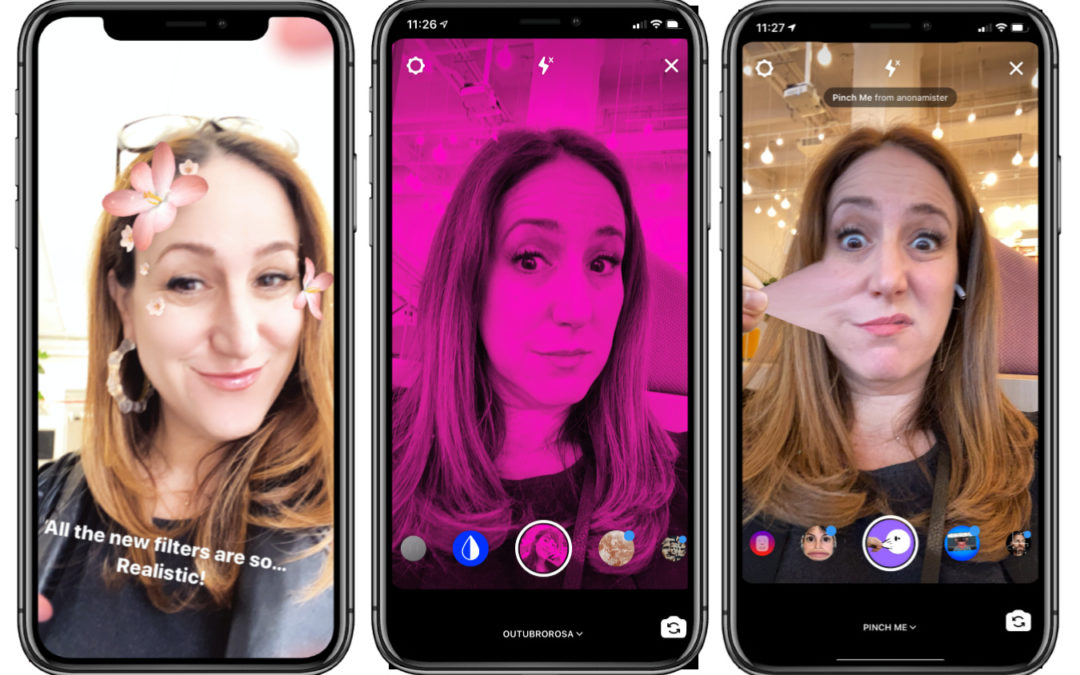
Ludwig reduces saturation and lightness for yellows, greens, cyan, blues, and magenta, except for reds, which become more saturated. With very little contrast reduction, Ludwig brings out the vibrancy of the red color. Good for portraits, geometric shapes, architecture.
When you need to lighten up a photo, keep a cool feel and make it a bit washed out, Lark is your best friend. It increases the exposure, which makes the picture brighter.
Slightly reduces vibration, making it more "quiet". Reduces the saturation of reds and magenta tones, and increases the saturation of blues and greens. Bloggers put Lark on nature shots.
Gingham gives images a vintage effect as it mutes the color of the photo. Gingham reduces highlights (by about 48%), reduces saturation (by about 31%), and applies a white vignette to the image.
This creates a slight haze and gives the painting a subtle warm atmosphere.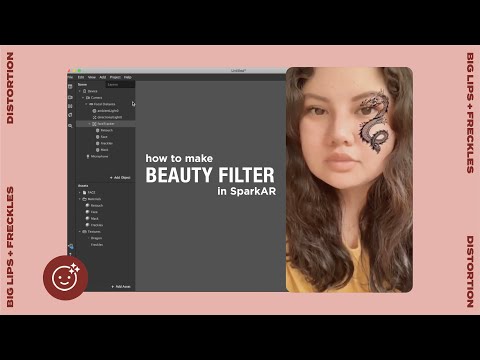
Lo-fi has been a strong player for many years and has been one of the top filters on instagram. When the author turns on the option, the image becomes more intense.
The option adds shadows and increases saturation for that super dramatic look that any mascara model would be proud of. It creates the atmosphere of the 90s.
Option Aden is retro with pastel shades. The style works great if the author needs to soften harsh light.
It dims bright photos a little, making them more delicate and a little dreamy. Photographers add Aden for autumn shots.
Also on the list is good old Valencia. This filter will add a yellow tint to your image, instantly warming up the entire photo, as if it were being lit by a nightlight.
Use for photographs with light pinks and pastels.
Last but not least, the X-Pro II. It rounds out the top best photo filters and is the highest contrast and probably the least reserved on the list.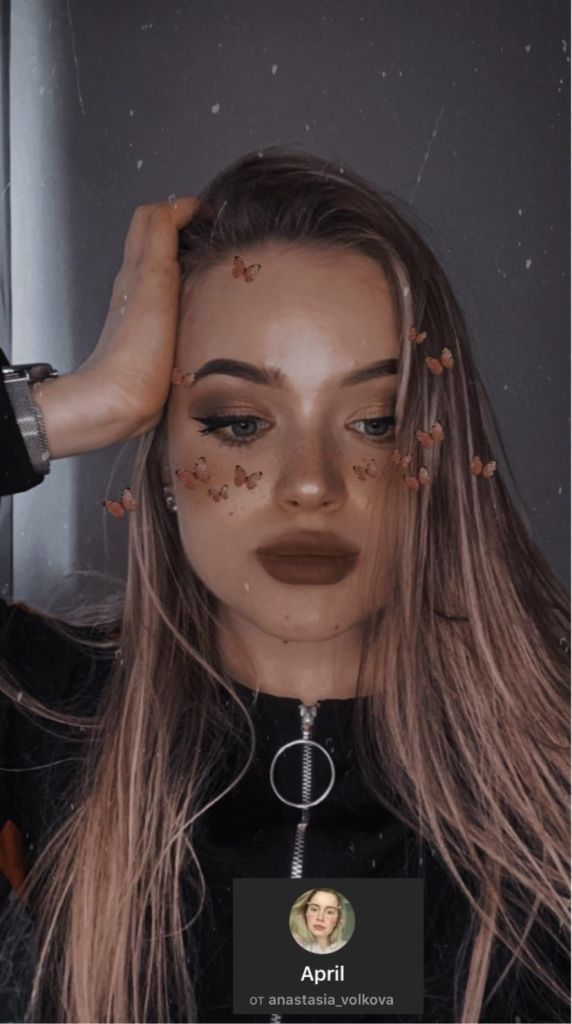
XPro adds a lot of shadows and a vignette that darkens the edges of the photo. X-PRO II is based on a "cross-processing" photo development method, where photographs are processed in a chemical solution for different film types.
In instagram, this is one of the centenarians. It was designed for below-average camera phones in 2010, when the social network had just launched. Surprisingly, this is still one of the most popular filters on the platform.
Superimpose to turn ordinary photos into very intense ones.
And here's the thing about applying effects: what's popular now may be outdated in a year or two. Therefore, follow the trends.
Beautiful Instagram filters can be great if you know how to apply them. Apply them sparingly and mix them together. And don't forget to compare the result with the original photo.
Instagram filters should be used like makeup: it should enhance your features, not change your entire face.
First, upload a photo to Instagram with the + button on the main screen. Then select the desired image from your phone's gallery and click the "Next" button. Use Instagram's built-in camera to take a photo, but it's usually easier to use your phone's camera.
Instagram makes photos square by default. Use the <> button in the lower right corner to resize the photo to its original size.
If you keep the square format, put your fingertip on the photo to move it and get exactly the frame you want.
The grid lines that appear will help you adjust your visual composition. This is no accident a 3x3 grid; it helps to follow the classic “rule of thirds”.
Once you click "Next", the application will take you to the filter screen. When you click on any of the filter thumbnails at the bottom - Clarendon, for example - the app immediately applies that effect to the image. (This works exactly the same if you're posting a video. )
)
If you click on the same filter thumbnail a second time, Instagram will reduce the intensity of the filter to achieve a more subdued look.
If you're taking a photo with an iPhone, click on the small square icon to add a simple frame.
Before selecting "Next", click "Edit" at the bottom of the screen. And adjust the alignment of the photo: contrast and brightness, warmth, saturation and color, and a few other categories. The setting is changed by linear sliders or buttons.
Once everything is as you want, click "Finish" and then "Next" to go to the publishing page where you can fill in the text for the post.
As you get more experience with effects, you'll start developing favorites that you'll come back to over and over again.
Scrolling the list of effects all the way to the right, you will see the option “Control” to go to a new menu that changes the order of the filters with a button with three bars on the left.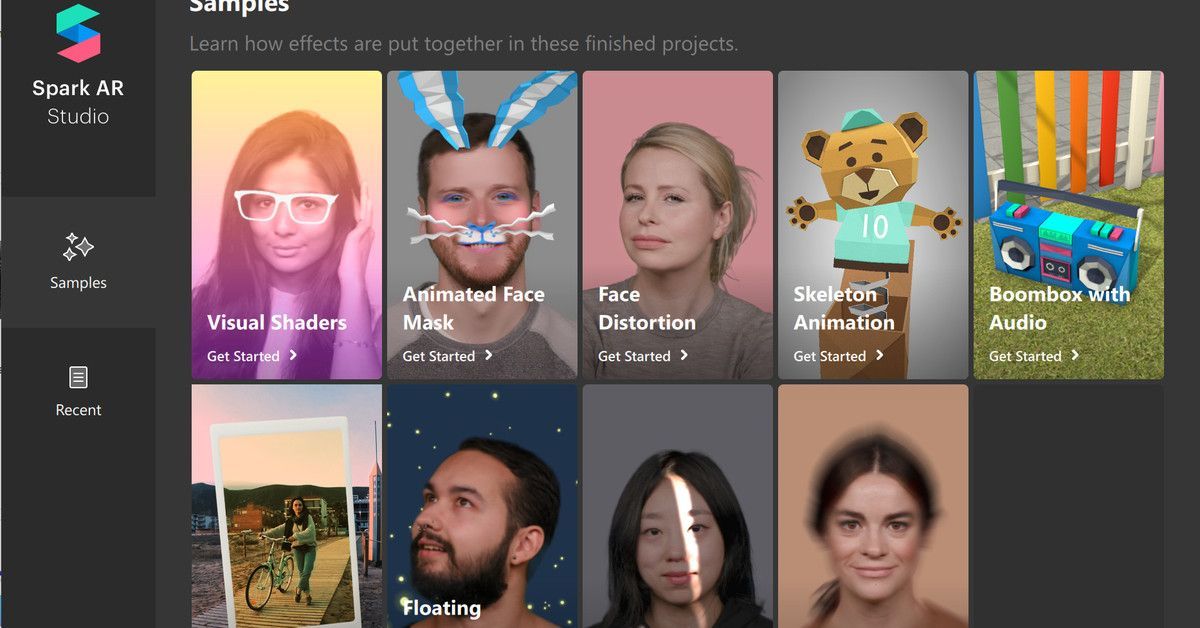
You can hide filters by clicking on the checkmark. This way, your favorite filters will appear first and you won't have to wade through the ones you never use.
Unnecessary options can also be hidden without a menu. On the filter page, press and hold any thumbnail for a few seconds. The thumbnail will become slightly larger and ready to be moved.
You can then drag the thumbnail left or right to change its position in the ruler. Or drag up to the drag to hide area that temporarily appears in place of the photo you are editing.
AR - short for Augmented reality (translated from English - augmented reality). Sounds futuristic, but Instagram has been using them since 2017.
In Facebook's Spark AR Studio platform, photographers and designers create interactive AR filters. In August 2019, this platform was opened to the public to make AR effects for stories.
Augmented Reality (AR) are computer-generated effects superimposed on a real image displayed by your camera. In AR stories, the filter changes the image displayed by the front or rear camera.
For example, the Instagram dog filter (Puppy) overlays the ears and nose of a dog over the face. When you move, these digital effects move with you.
Or else, for example, the "Hello 2020" filter is superimposed on the face of glasses 2020, and digital balloons fall down the screen.
Be aware that AR filters are different from instagram preset options. The pre-installed Instagram filters that we talked about above improve the quality of photos in one click. Unlike them, AR is an interactive element only for Instagram stories.
At their F8 conference in May 2019, Facebook announced that SparkAR Studio is designed to create augmented reality effects for Instagram, Facebook, Messenger and Portal stories.
Before this platform went public in August 2019, Instagram users were required to receive invitations to SparkAR. This meant that only a select few could develop and publish AR filters.