When Instagram Stories first appeared, everyone made fun of Instagram for appropriating Snapchat’s entire business model.
No one thought Stories would catch on – much less morph into a permanent feature with regular improvements! (Some people didn’t think Snapchat would even survive either.)
Well, here we are. Stories are a mainstay on not only Instagram, but also Facebook, LinkedIn, and other social media platforms.
Instagram Stories, however, remains in a league of their own. Instagram adds new capabilities, holiday-themed filters, and more stickers all the time.
Case in point: layering photos onto a single Instagram Story.
See kids, back in the old days we had to install a shady third-party app if we wanted to layer photos in our stories or adjust the layout with multiple photos.
But now, Instagram lets us add multiple photos and layer them directly within the Story creator.
You kids have it so easy today.
Let’s go over how to layer pictures on an Instagram Story, the benefits of using Stories regularly, and some other hints for maximising their potential.
Stories ooze engagement: Their short lives demand urgency and action.
We’ve all been victims of organic social media algorithms at some point.
Stories always appear at the top of newsfeeds. If someone follows me and clicks on a Story bubble, they’ll get to mine eventually.
Stories are meant to be more in-the-moment or behind-the-scenes than typical Instagram posts. In fact, using professional shots and editing can backfire with Stories.
I use Stories to relate to my audience and connect with them on a deeper level.
Instagram lets us track reach and engagement from our posts, but it won’t tell us who saw our posts. Stories, however, tells us exactly who viewed them. We can use Stories to find our biggest fans.
Sometimes, we aren’t ready to commit to a permanent professional photo on our Instagram timeline – or anywhere else.
Stories let us test the engagement waters with low-risk content. If something performs well in a Story, we can run with the idea on Instagram, our blog, YouTube, and beyond.
“Why should I waste my time with Stories? They just disappear into the internet black hole after 24 hours.”
Not true! You can save Stories now. On the back end, Instagram saves every Story you publish. You can then create different categories for your hottest topics and display your Stories forever.
They’ll hang out at the top of your profile feed, just below your bio and link:
Previously, we could only share one full-screen image or photo at a time via our Story.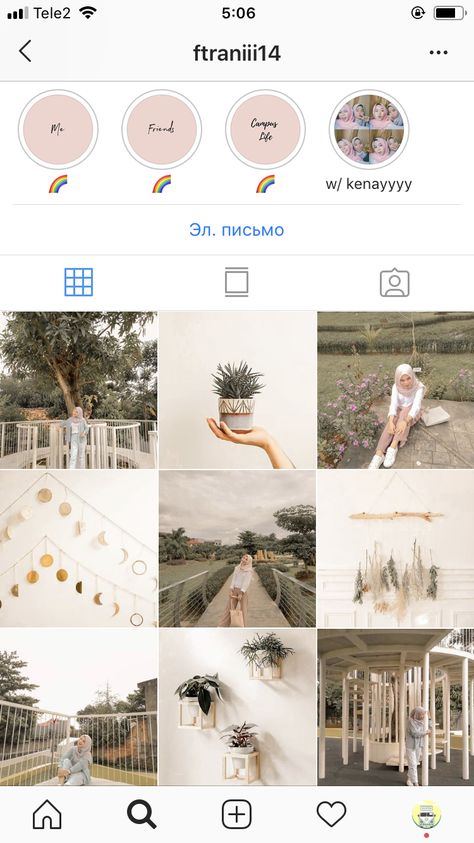 Instagram now lets us take multiple photos or choose multiple images from our gallery to place inside the same Story screen.
Like so:
We can still add all the cool Instagram features like stickers, text, links, and tags. But this layout format lets us take Stories to a new level.
Instead of publishing multiple Stories because we have several images to share, we can merge them all together into a collage using different layouts.
Some practical applications might include:
Whenever you want to include more than one photo, just go ahead and layer them as a group.
Layering multiple pictures on one Instagram Story is easy.
We just tap the + sign on our profile picture to open our Story creator.
Once we’re in the Story creator, we look along the left-hand side of the screen for the grid and arrow:
Just tap on the grid to open the layout selector.
We can add two, four, or six photos to a single Story in total.
Once we pick the layout, we can start snapping some shots to fill it. (No pun/Snapchat reference intended.)
The Instagram camera will fill your shots from top-left to bottom-right. To capture a picture, just tap on the big circle at the bottom of the screen.
Instagram also lets us pick different static and dynamic filters for our shots. We can apply a different filter to each photo OR throw a single filter over the whole Story.
Swap filters in and out with the bubbles along the bottom of the screen:
Four filters look like three too many in that Story.
All done!
Once we fill up our Story with layers of photos, we can incorporate the rest of Instagram’s cool features like stickers, text, links, and more. Like so:
Maybe we’ll even add some interactive stickers like music. Millennials who were all about the Myspace songs will love this one:
Leonard Cohen anyone?
Finally, you can also layer photos by tapping on the camera icon in the sticker selection screen:
Once it opens, you can take a photo through the Instagram camera and add it to your Story:
Kind of strange, but it works!
The fun doesn’t end with real-time photos. We can also layer photos from our gallery in our Instagram Story.
Go back to the initial Story creator screen and pick your layout again.
After you have your layout, instead of capturing new photos, tap on the little gallery icon with the tiny blue + sign in the bottom left corner of the screen:
That will open your gallery.
We’ll just sift through the memes, screenshots, and photos to find what we need and keep adding them to our Story layout.
Once we pick our gallery photos, we can add the rest of our stickers, text, or other items to the post:
Now we have an awesome series of gallery shots for our Instagram Story!
Don’t just throw Stories together willy nilly (like we did here to show you how layering works).
Carefully plan and think about how you’ll use layered photos in Instagram Stories to connect with your audience.
Highly edited professional photos just don’t work with Stories.
People spend most of their time online these days. They want authentic and real content from brands and the people they follow. They don’t want to feel even more isolated and not good enough.
Keep Instagram Stories raw and real. Show the real moments from behind the scenes at your company: the daily grind, the mistakes, and little wins.
People respond much better to real content than contrived every time.
Stories is a beautiful place to repurpose content from other platforms like Twitter, Facebook, or your blog.
In terms of layering photos in Stories, you might grab some of your best Tweets from the week along with some top replies. Get a conversation started in your Instagram Story.
You could also take a picture and create a quick infographic with a link to your related blog post.
Instagram makes it super easy to work branding into your Stories.
In the Story editor, just incorporate your brand colours every time you create a new story.
Glowing text, filters, stickers, fonts – create a style guide for Instagram Stories and stick with it to keep everything consistent.
It’s easy to go overboard with the stickers, tags, and features. Instagram offers so many cool features, you just want to use them all.
Please don’t.
Remember, each Story only displays on the screen for a few seconds. Walls of text, music playing, tons of stickers, and GIFs can become visually and audibly offensive – fast.
Think about what stickers and tactics you’ll use before you jump into the creator, so you’re not tempted to use as many as possible just because they’re there.
Strategise!
Just because your Story photos should feel raw and real, that doesn’t mean you can’t leverage a strategy and purpose behind them.
Before you even open the editor, ask yourself “why am I sending this and who is it for?”
Consider how it fits into your overall Instagram strategy, your marketing strategy.
Then again, sometimes fun Stories just for the hell of it are great too. Life’s about balance and we’re all human.
Creating Stories is an easy way to share updates and build a connection with your audience. Frankly, Stories isn’t exactly simple. Instagram offers a ton of features and integrations for Stories, so it takes some time and experimenting to get them straight and work them to your advantage.
But once you do, you’ll have better access to tracking and unlimited engagement potential.
When it comes to sharing a moment on your Instagram Story, sometimes a single photo just won’t cut it. Suddenly you need to know how to add multiple photos to an Instagram Story.
And that’s where photo collages for Instagram Stories come in to save the day.
The 3 main ways to add multiple photos to an Instagram Story (a.k.a make a collage)
How to make a collage on an Instagram Story: easy way
How to make a collage on an Instagram Story: layering method
How to make a collage on an Instagram Story: most customizable way
How to post your collage on your Instagram Story
Bonus: Download a free checklist that reveals the exact steps a fitness influencer used to grow from 0 to 600,000+ followers on Instagram with no budget and no expensive gear.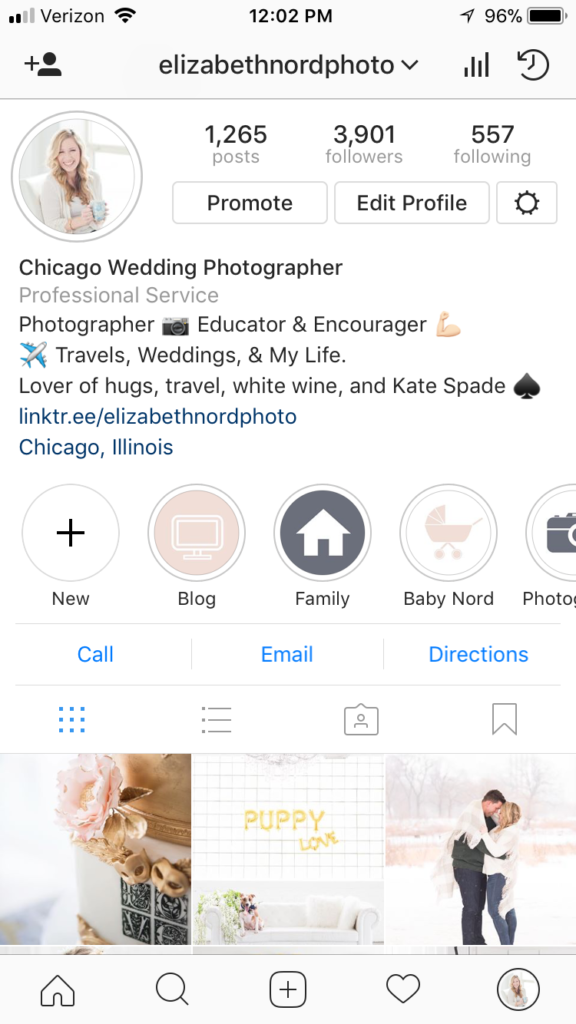
Compiling multiple photos allows you to deliver maximum visual information in one powerful Instagram Story moment.
This is as true for fashion brands and it is for the owner/manager of a dog influencer who wants to share the best memories from Mr. Chonk’s bark mitzvah.
No matter what your business or industry, you should be using Instagram Story photo collages. There are actually three different ways to make it happen:
We’ll walk you through all three because we’re nice like that. (Maybe keep that in mind when you’re making the guest list for Mr. Chonk’s next major event?)
You can also watch our video on how to add multiple photos in one Instagram Story, right here:
How to make a collage on an Instagram Story: easy waySince you’re here looking for the answer to “how to make a collage on Instagram Stories,” we’re going to assume that you didn’t know Instagram offers an in-platform way to do just that.
But we don’t blame you for not noticing this feature: it’s weirdly hidden away.
Here’s how to find it and use it to share multiple pics in one sweet full-screen Story design.
1. Open the Instagram app and tap the + icon at the top of the screen. Select Story.
2. This will open your camera roll. But don’t be distracted by all your beautiful photos! We need to activate create mode first. Tap on the camera icon to do this.
3. On the left-hand side of the screen, you’ll see a list of icons. Tap the third from the top: a square with lines in it. This is the Layout icon.
4. Tapping the Layout icon will open up a quadrant of layout on your screen. From here, you can fill each segment either with a fresh photo or something from your camera roll.
Option 1: Take a photo! To capture a photo, just tap the photo-capture button: the white circle in the center of the btoom of the screen.
Once you take a photo, your pic will fill that top left corner shot. Continue shooting three more photos.
To delete something and take a new pic, tap the photo and then tap the delete icon.
Option 2: Select from your camera roll. Tap the square camera-roll-preview icon on the bottom left corner of your screen to access your camera roll.
Tap the photo you wish to be in the top left corner of the quadrant. Repeat until the screen has four photos.
To delete something and take a new pic, tap the photo and then tap the delete icon.
5. Happy with your collage? Hit the checkmark to confirm and move on to add stickers, text, or effects. Or, if you want to try a different layout, check out step 6.
6. To select a different layout, enter Layout mode and tap the rectangular grid icon directly below the Layout mode icon. This will open up a selection menu where you can choose an alternative style of grid. Tap your preferred style, and then fill each segment either with a photo capture or an image from your camera roll, as outlined above.
7. Tap the check mark to approve your design. Next, you can add stickers, text, or effects. Tap the arrow in the bottom right corner when you’re ready to publish.
8. Choose your preferred audience for your masterpiece and tap Share!
How to make a collage on an Instagram Story: layering methodFeeling restricted by Instagram’s layout grids? This alternative method gives you the opportunity to go rogue.
Images can be enlarged, shrunk, tilted, or placed in an overlapping formation. Time to freestyle!
1. Open the Instagram app and tap the + icon at the top of the screen. Select Story.
2. This will open your camera roll. But don’t be distracted by all your beautiful photos! We need to activate create mode first. Tap on the camera icon to do this.
3. Tap the sticker icon at the top of the screen (the square with the smiling face). Scroll through the stickers to find the Camera Roll sticker: it’ll be a circle previewing your latest photo, with a logo of a mountain and sun overlaid on top. (We know that sounds confusing but we honestly don’t know how to describe this in a clearer way? Hopefully, this photo below will help clarify.)
4. Pick a photo and it will be added to your story. Drag it anywhere on the screen, or use your fingers to manipulate the size and tilt of the image. Then, tap the sticker icon again to add another photo.
Repeat until all your photos are on the screen. Move them around and tweak them as you’d like.
5. To change the background color, tap the colored circle at the top of the screen. (You’ll also find tools to add text or further stickers if you’d like!)
You can also change the shape of your images by tapping them — for instance, maybe circles tickle your fancy.
6. Ready to post? Tap the arrow icon to move on to your sharing settings. Select your audience and then tap Share.
How to make a collage on an Instagram Story: most customizable wayIf building your collage in the Instagram Story create mode isn’t getting you the results you want, there’s good news: dozens of apps exist out there to help you customize the multi-image graphic of your dreams.
1. Download the Instagram collage app of your choosing and design a graphic using your photos, cool templates, and other design details.(Alternatively: download one of our 72 free Instagram Story templates, open it in Photoshop and make it your own.)
For this example, we’ll use Unfold.
2. Export the image to your camera roll if you’re using an app. (Using the Photoshop method? Send the final file to your phone… make use to save it as a .jpg or .png!)
3. Create a new Instagram Story and select the collage image from your camera roll and post. See below for more explicit instructions if you need ‘em!
How to post your collage on your Instagram StoryOkay, you’ve got a collage saved to your phone that you’re ready to share with the world. All you’ve gotta do is post it to your Instagram Story like you would any other single photo.
Need a refresher? No sweat. Here’s how to use the Instagram Story create mode to post an image from your camera roll.
1. Open the Instagram app and tap the + icon at the top of the screen. Select Story. This will open your camera roll. Tap your collage to upload it.
2. Add any more text, stickers, or effects that you’d like. When you’re done, hit the arrow in the bottom right corner.
3. Choose where to share your Instagram story (to your public story, to your Close Friends List, or send it as a private message). Tap Share when you’re ready to publish.
Now that you’re an expert in creating beautiful collages for your Instagram Story, looks like you’ve got some time on your hands. Maybe a good opportunity to brush up on other hot tips for using your Instagram Stories for business?
Use Hootsuite to schedule Instagram posts and Stories at the best time, respond to comments, track competitors, and measure performance—all from the same dashboard you use to manage your other social networks. Start your free trial today!
Get Started
Grow on Instagram
Easily create, analyze, and schedule Instagram posts, Stories, and Reels with Hootsuite. Save time and get results.
Free 30-Day Trial
Menu
Content
Methods for making a collage of multiple photos in the application for iPhones and for other phones differ. It’s easy to add several photos to stories on iPhone, you don’t need to download additional applications.
 Ready!
 But in order to do the same steps on other phones, you will need to tinker, download a third-party application.
Step by step how to use this feature on your Android smartphone.
 In the lower right corner there is a carnation or pin icon. We poke;
 You can add several photos, reduce or enlarge them, write on them, use gifs, stickers, emoticons. When you have done all the necessary actions, share with your subscribers.
On different devices, the appearance and functionality of the keyboard may vary, but the essence remains the same, and if you search in the settings and widgets, you will find a “pin” to upload pictures.
Here are some ideas for adding variety to your Stories:

There are many ideas on how to use this feature on Instagram. As long as there is enough imagination and resourcefulness, the profile will be so unique.
What to do if you do not want to leave Instagram, and you are not going to download something additionally? For such cases, there is a function Instagram collage. Let's figure out how to put several photos in the story.
Keep in mind that the sizes are determined not by you, but by Instagram. It gives the same standard for everyone, except that there are several collage formats. Choose the one that suits you best.
And now you know how to insert several photos into one story.
Another way to attach multiple photos to Instagram Stories is to use the Stories editing app.
If the phone's memory permits, several applications can be downloaded. There are more editing options, application tools will make Instagram stories brighter and more creative.
 Frames are distributed over them. Paid content is not noticed, but advertising is often evident.
 So anyone who makes a minimal effort can make a story from several photos for Instagram. There are many applications in the Play Market that make stories more aesthetic, templates are selected according to the mood, seasons of the year, and even holidays.
From this article we conclude that there are many ways to make an Instagram account different from everyone else, they cannot be counted. Plus, they are easy to use.
If the tips from our article help to make your Instagram account more attractive to you and your readers, then we are not in vain. Experiment with content and have fun with it, and our blog with instructions will help you with this!
Share with friends:
Tweet
Share
Share
Send
Classify
Adblock
detector
A bunch of tips to instagram like a pro and post stories like a travel blogger.
There is a difficult way: choose a brush and paint over the entire screen with it for a long time. And there is a way five times easier.
How to Add a picture to your story, select any color for the brush, press and hold your finger - now there is a solid color background.
Photos with a color translucent filter are obtained in almost the same way.
How to Add a picture to the story, choose any color for the brush, but then switch to the marker. Press and hold your finger on the screen - there is a photo with a color filter.
In addition to a solid background, there is another beautiful option - a background with a gradient, like in a story with text.
How to Go to the text story, select a background and write one word. Click next and delete the text - you have an empty gradient on which you can add pictures in the same way as in the previous paragraph.![]()
Are there only 27 standard colors in stories? In fact, there is a whole palette to find any color at all.
How to make Hold your finger on the color bar and choose something you like.
The main question of all Instagrammers is how to make a story collage. You can download an application with a bunch of templates, or you can do the following.
How to Open a story, add a picture, for example, a colored background. Then go to the photo gallery, select a photo, click the "Share" button, and then "Copy". Return to Instagram - a pop-up window will appear with the copied photo, click on it - it lies on top of the first picture. Repeat to infinity.
Several small videos are added to stories in almost the same way. The sequence of actions in this case is different.
How to Add a picture to the story, for example, a colored background, click on the sticker icon, and then on the round icon with the photo icon. Only in the gallery, select not a photo, but a video.
To record a story in the My Reaction to Anything genre, you need to quickly switch from the main camera to the front camera. That's how the genre works. There is a special button for this, but it is located in such a place that it is easier to break your index finger. Here is an alternative way.
How to Tap the screen twice quickly while recording, the camera will switch. Repeat to infinity.
Owners of older iPhones and Androids can't be happier with the beautiful blurring of the background when taking a selfie with the front camera. But the disadvantage can be compensated in the Instagram camera.
How to Go to the "Focus" tab in the camera and see if the selfie looks better if the background is blurred.
Live Photos on iPhones is an underrated feature. Instead of one photo, she makes a short video, from which they then choose the right moment. And another underestimated feature is boomerangs, because they are simply constantly forgotten about. It's not scary, because boomerangs can be obtained from Live Photos.
How to Add a Live Photo to your story, hold your finger on the screen or hard press it, the photo will turn into a short looped video.
Perhaps your stories are secret and you don't want your followers to send them to anyone. Of course, you can't make it so that random people don't see them at all, because you can always take a screenshot. But at least complicate this operation to the maximum.
How to Go to the camera, click on the gear and turn off the "Allow sharing" option
You may think that comments are a thing of the past decade and have no place in today's social media. There are many ways to remove them from your profile.
How to do First, go to Settings - "Privacy & Security" - "Manage Comments" and choose who can leave comments under posts. Second, disable comments before publishing a new post. To do this, go to the advanced settings at the very bottom of the publishing screen. Thirdly, turn off replies to stories: on the camera screen, click on the gear and turn off replies.
Luckily, Instagram doesn't tell all your friends that you've been tagged in a bad party photo. Unfortunately, friends can still see the photos you're tagged in on their profile. This is a solvable problem.
How to Go to settings - "Privacy and security" - "Photos and videos with you" and hide all the photos that you do not like in the last menu. But be careful: this will remove the marks on the photos forever!
Shops, beauty salons and people who are subscribed to 2500 people, you do not need, because they do not interact with your content and thereby reduce reach. There are two ways to unsubscribe them from yourself: a difficult one - go to the profile and block it - and simpler.
How to Go to the subscribers screen, click on the three dots next to the nickname and on "Unfriend". Save two taps!
Profile description supports a bunch of weird fonts not found in standard keyboard layouts. What if you always wanted a nice description like "𝖒𝖔𝖘𝖈𝖔𝖜 𝖌𝖔𝖑𝖉𝖊𝖓 𝖌𝖗𝖗𝖗𝖑" but didn't know how to write it. And very simple.
How to make Go to igfonts.io, come up with a cool description in English and choose the best font.
In 2008, we asked friends how to hide your online on VKontakte. In 2019-m this is more relevant on Instagram.
How to do Go to Settings - "Privacy and Security" - "Online Status" and turn it off. But after that you will not see your friends online either.
There are a lot of saved posts to make moodboards for a long time. The problem is that not all likes are added to saves. And it's good that there is also a list of likes.
How to do Go to settings - "Account" - "Posts you liked".
Instagram has a good photo editor, but there is one drawback: it does not save photos to memory. But the disadvantage is easy to get around.
How to Turn on airplane mode, process the photo, upload it and wait for the message that the post cannot be loaded. During this time, Instagram will save the processed picture to memory.
Maybe Instagram is your life and it would be nice to keep it in a safe place. Or maybe you just decided to leave? Then download the entire Instagram with photos and messages to your laptop memory.