If your business uses Facebook, you should be using Facebook Business Manager. It’s an important tool that keeps your Facebook business assets centralized, safe, and organized.
If you’ve been putting off setting up Facebook Business Manager because you weren’t quite sure how it works, we’ve got good news. In just 10 simple steps, this tutorial will teach you how to do everything from setting up your account to placing your first ad.
But, first, let’s answer an important question: Exactly what is Facebook Manager, anyway?
Bonus: Download a free guide that teaches you how to turn Facebook traffic into sales in four simple steps using Hootsuite.
As Facebook itself explains, “Business Manager serves as a one-stop shop to manage business tools, business assets and employee access to these assets.”
Basically, it’s the place to manage all of your Facebook marketing and advertising activities. It’s also where you can control multiple users’ access to additional resources like your Instagram account and product catalogs. Here are some of its key functions:
Now that you know why you might want to use Facebook Business Manager, let’s get you set up.
The first stage of setting up Business Manager is to create an account. You’ll need to use a personal Facebook profile to confirm your identity but, as mentioned above, your coworkers and partners won’t have access to the personal information in that account.
In this step, you have a couple of different choices. You can add an existing Facebook business page or create a new one. If you manage Facebook pages for clients or other businesses, you can also request access to someone else’s page.
That last distinction is important. While you can use Business Manager to manage clients’ Facebook pages and ad accounts, it’s important to use the Request Access option rather than the Add Page option. If you add your client’s pages and ad accounts to your Business Manager, they’ll have limited access to their own business assets. That’s a sure way to cause tension in your business relationship.
For the purposes of this post, we’ll assume you’re managing your own assets, rather than acting as an agency, so we won’t get into the Request Access process. But be sure to keep this difference in mind.
We have a guide that shows you how to set up a Facebook business page, so we’ll assume you already have one to add to Business Manager. If you haven’t created your page yet, hop on over to that post and come back here to add your page to Facebook Business Manager when you’re done.
To add your Facebook page to Facebook Business Manager:
Note that once you add your ad account to Facebook Business Manager, you can’t remove it, so it’s especially important only to add accounts you own. To access a client account, click Request Access instead.
If you’re already using Facebook ads, you can link your existing ad account as follows:
If you don’t already have a Facebook ads account, here’s how to set one up.
Each business can create one ad account right from the start. Once you are actively spending money in your first ad account, you will be able to add more based on your advertising spend.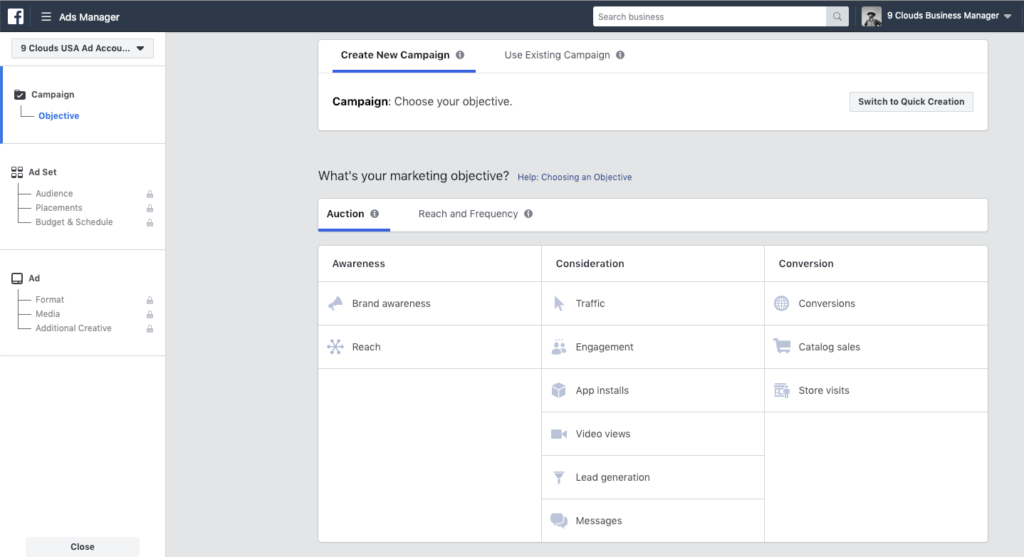 There is no option to request more ad accounts.
Keeping on top of your Facebook marketing can be a big job, and you may not want to do it alone. Facebook Business Manager allows you to add team members so you can have a whole group of people working on your Facebook business page and ad campaigns. Here’s how to set up your team.
You can decide whether to give these individuals limited account access (choose Employee access) or full access (choose Admin access). You can get more specific in the next stage. Make sure to add people using their work email addresses.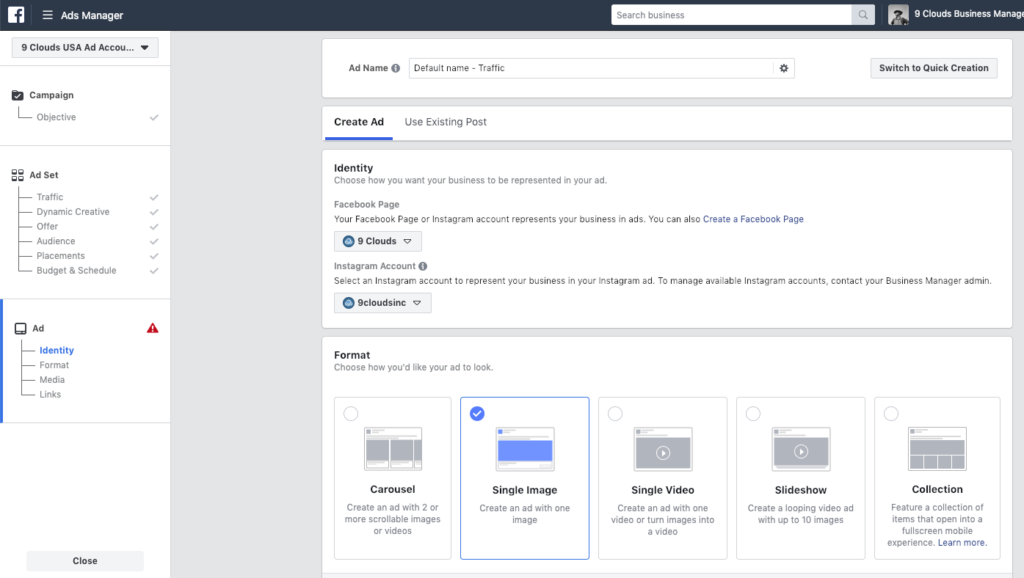 Then click Next.
In the left menu, you’ll also see options to add people to catalogs and apps, but you can skip these for now.
They will each receive an email with information about the access you’ve given them and a link to get started, but it would be a good idea for you to send them a personal note or let them know directly that you’re giving them this access and they should expect the automated email with the link.
You can see all of your pending requests from your dashboard, and withdraw them at any time for people who have not responded.
Bonus: Download a free guide that teaches you how to turn Facebook traffic into sales in four simple steps using Hootsuite.
Get the free guide right now!
If someone with access leaves your company or switches to a different role, you can revoke their permissions. Here’s how:
This might not apply to you if you’re just getting started with Facebook advertising, but you can always come back to this step later.
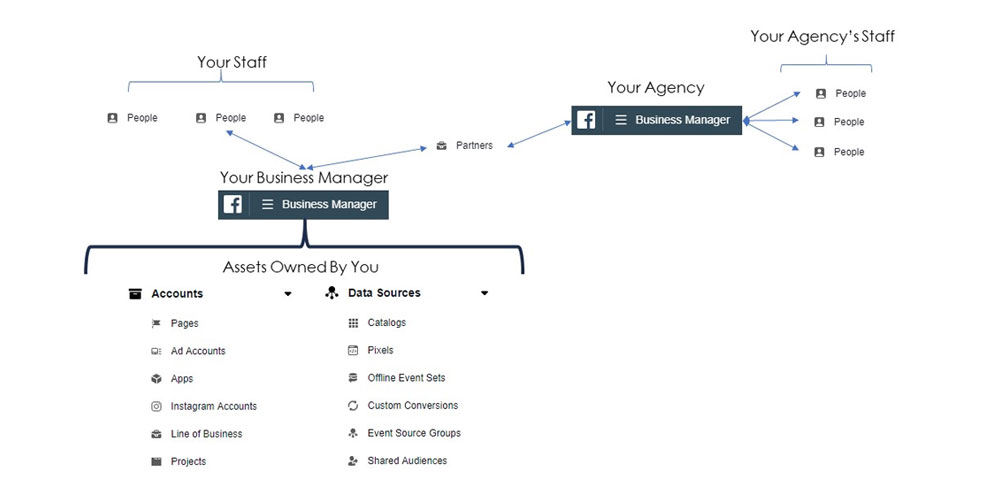
The business you’ve just added can manage permissions for the individuals on their own teams from their own Facebook Business Manager account. That means you don’t need to worry about assigning and managing permissions for all the individual people who service your account at your agency or partner company, just the partner company itself.
Now that you’ve got your Facebook assets set up, you can connect your Instagram account to Facebook Business Manager as well.
What’s a Facebook Pixel? Put simply, it’s a small bit of code that Facebook generates for you. When you place this code on your website, it gives you access to information that will allow you to track conversions, optimize Facebook ads, build targeted audiences for your ads, and remarket to leads.
We recommend setting up your Facebook pixel right away, even if you’re not ready to start your first ad campaign yet, because the information it provides now will be valuable when you are ready to start advertising.
Our complete guide to using Facebook pixels is a great resource that walks you through everything you need to know about making the best use of the information a Facebook pixel can provide. For now, let’s get your pixel set up from within Facebook Business Manager.
You can create up to 10 pixels with your Business Manager.
One of the advantages of using Facebook Business Manager is that it offers extra security for your business assets.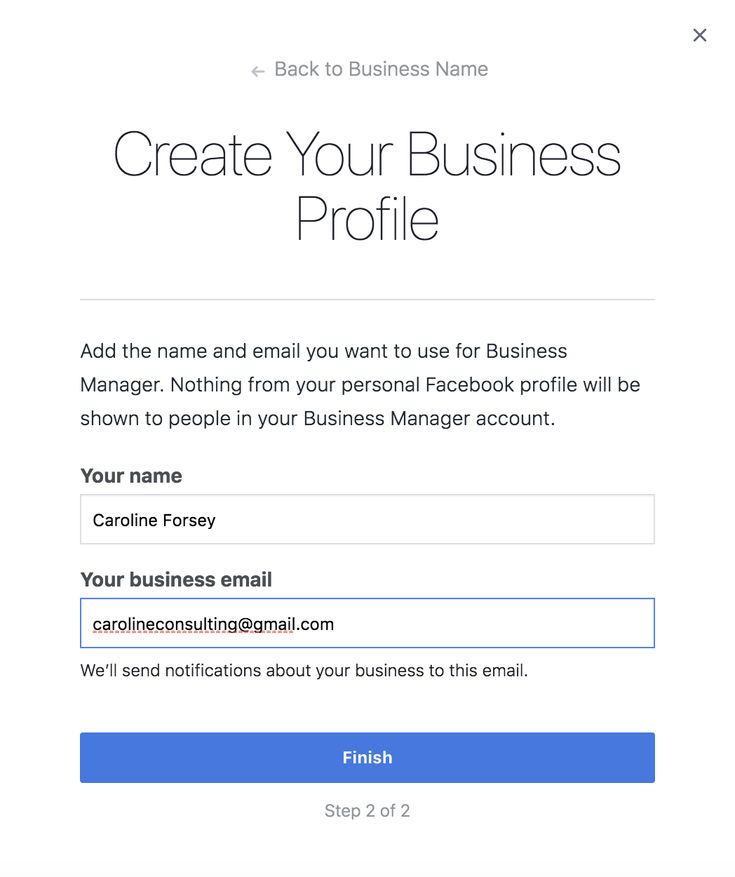
Now that your account is set up and your pixels are in place, it’s time to launch your first Facebook ad.
We’ve got a full guide that explains all the strategy and specific details you need to know to create compelling and effective Facebook ads. So here, we’ll just walk you through the steps you need to take to get an ad up and running in Business Manager.
As the number of assets in your Facebook Business Manager grows, it can become difficult to keep track of everything. Business asset groups help keep your pages, ad accounts, and team members organized and clear.
And that’s it! With the small amount of effort invested today, you’ve got everything centralized in one spot, and you’re ready to use Facebook Business Manager to make the most of your Facebook ads and marketing efforts.
Get the most out of your Facebook ad budget and save time with Hootsuite. From a single dashboard you can manage ad campaigns and organic content across multiple networks. Try it free today!
Get Started
Grow your Facebook presence faster with Hootsuite. Schedule all your social posts and track their performance in one dashboard.
Free 30-Day Trial
Are you looking to jump into Facebook Ads? Before you get started, let’s set up a Facebook Business Manager account!
In this guide, I’ll show you how to set up Facebook Business Manager account so that you can use Facebook Ads to improve your marketing game.
This tutorial will explain:
Let’s dive in!
First, let’s outline the main differences between Facebook Business Manager and Facebook Ads Manager since these two tools are often confused for each other.
Let’s start with Ads Manager. As a marketer, you’re pretty familiar with it, right? Ads Manager is where you create campaigns, audiences, and ads. Pretty simple.
Business Manager is a little bit different. It is where you manage your overall business and connect it to your ad campaigns. It also includes a Facebook page and Instagram account that represents your business—a place where clients can interact with you online.
Your Business Manager is the central hub for all of your Facebook tools. You can add and connect your Ads Manager, your pixels, and even your payments.
All businesses should have a Business Manager account configured (with their Ads Manager attached). And it’s quite simple to set up—let me show you how.
First, head to business.facebook.com and click on the button that says Create Account. (You’ll need to log into your Facebook account if your browser isn’t logged in already. )
)
Click on the blue Create Business button to get this Create Your Business Manager Account popup.
For example, I’ll call mine Demo FB. Then, just add your name and email address and click Submit.
Once you click Submit, Facebook will need to verify your email address. In your email inbox, find the verification email and click Confirm Now.
Congrats! You just set up a Facebook Business Manager account—but we’re not done here.
There are some other things that you need to do to make sure that you’ve set up for success. Our next step is to connect any existing pages and accounts to this Business Manager.
One of the chief benefits of a Business Manager account is that you can centralize your control and analysis over multiple Facebook-related business accounts. You can attach your Facebook Page, your Instagram business account, WhatsApp accounts, and even apps.
Adding a Facebook page and Instagram account is really simple in this case. First, click on the dot menu at the top of your sidebar and go to Business Settings.
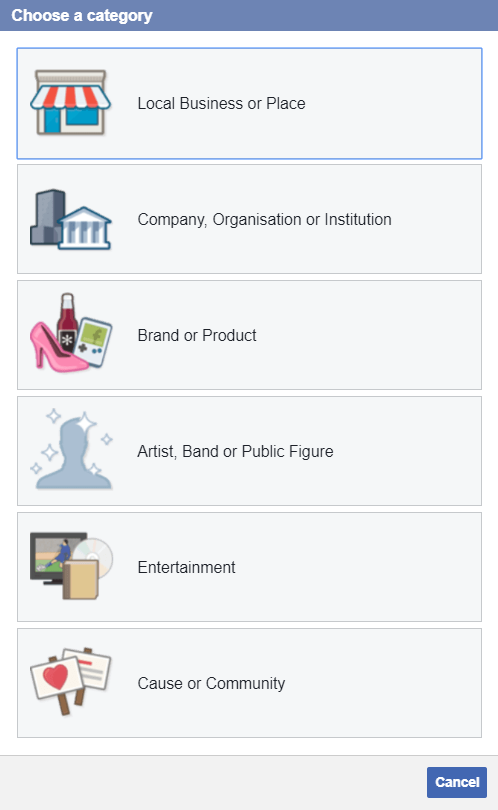
To add a Facebook page, click Pages, then click Add. You have three options here: Add as Page, Request Access to a Page, and Create a New Page. all you have to do is click Add and here are the three options.
If you own the page you want to add to this account, simply click Add a Page. (Note that this only works if no other Business Manager accounts have claimed this page in the past.)
Request Access to a Page is for an agency or freelancer who is using Business Manager on behalf of a client who owns the page.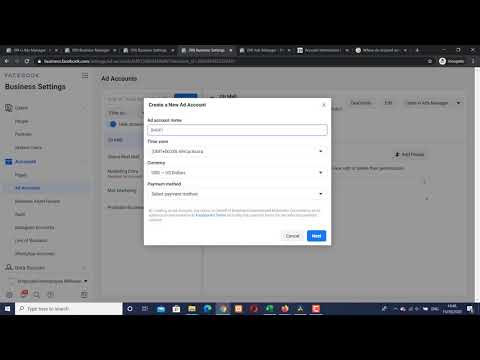 In this case, you should usually request access to their Facebook page, Ads Manager account, and Instagram account altogether.
The last option, Create a New Page, is if your business doesn’t have a Facebook page at all yet. Since you need a page to advertise on Facebook, you should make this a priority if your business doesn’t have a Facebook page.
Easy, right? Connecting your Ads Manager account is almost exactly the same.
Click on Ad Accounts in the sidebar menu, then click Add to get similar options: Add an Ad Account, Request Access to an Ad Account, and Create a New Ad Account.
For simplicity’s sake, I’m going to go ahead and assume you already have an Ads Manager account (although it’s pretty easy to make one if you don’t). Click Add an Ad Account.
The next step is to enter your Ad account ID (this is the same if you’re requesting account access from someone else).
Where do you find this? The quick and easy way is to go to your Ads Manager account and check out the string of numbers after campaigns?act= in the URL. You can also find it in parentheses after your account name in the top bar dropdown.
Then, simply copy and paste the Ad account ID in your Business Manager account and click Add Ad Account. Easy!
Here’s an important thing to note: when you create a Business Manager account, you still need to add yourself as a user for any pages or accounts you’ve connected.
This may not seem very intuitive, but it’s because your business owns the accounts—not “you“. The Business Manager account is a separate entity from your personal account. So you wouldn’t be able to make changes on your business profiles, but your business can (even though it’s still you).
Make sense? Here’s an example.
Let’s go to our Facebook Business Manager, go to Ad Accounts in the sidebar menu, and click our Facebook Ads account.
Here, we can set permissions and add users—including ourselves. The first time you connect an account to a Business Manager, you need to make sure to add yourself!
Select your profile from the left side, then turn on the Manage Ad Account switch on the right. This gives you full permission and control for everything to do with this account.
Remember, you’ll need to add yourself (and any other clients or teammates who need access) to each account, even if you’re the owner.
That said, the ability to easily add users and set permissions is great. You can set a variety of permission levels to give certain access to teammates, clients, or freelancers. You can even set view-only access if you’re getting an audit from a consultant.
Keep in mind that your Business Manager and your personal profile are two different entities.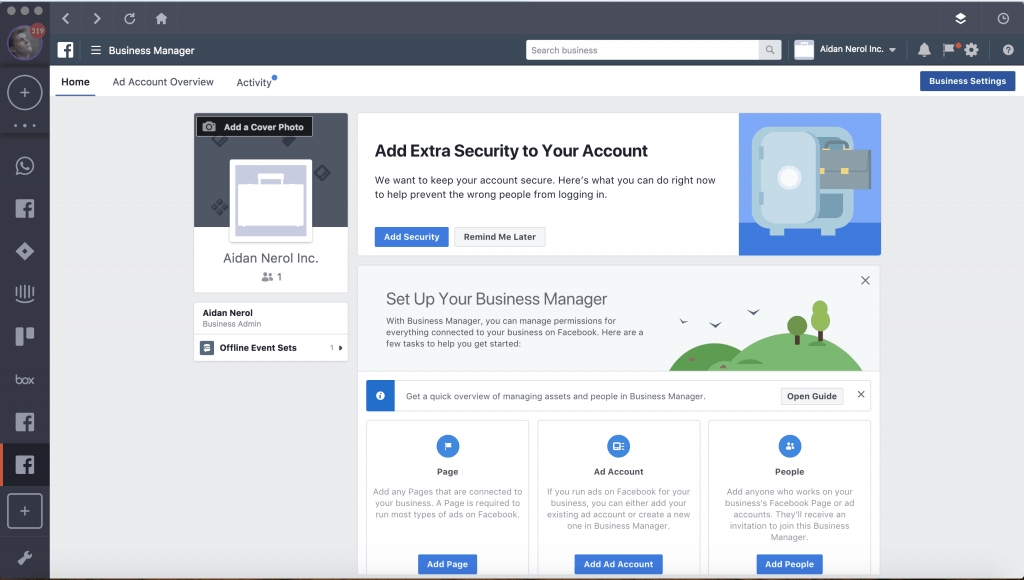
When you add a user in your Ad account to your Business Manager, you also need to give access to the ad account where you create campaigns, publish ad sets, and create ads.
As I mentioned, one of the best parts about Business Manager is that it centralizes all your Facebook business functions in one place. This includes any billing info or accounts that you use.
To add your billing info to Business Manager, start by going to Business Info in the sidebar menu. Here, fill in your Business Details such as the Legal Name of the Business, Address, Business Phone, Website, and Tax ID.
Once you have completed the Business Information, head to the menu item called Payment Method and click Add Payment Method.
This is where you can add a credit card or debit card to charge for all your Facebook Business transactions. By adding your billing info here, you can streamline any future purchases of ads or other Facebook products.
The final step to configuring your Facebook Business Manager account is to verify your domain.
To do this, click on Brand Safety in your sidebar menu, then go to Domains and click Add.
Enter your website domain and click Add. Then, just refresh the page to see your domain added.
The next step is to verify that domain. There are three different ways of verifying your domain: Meta-tag Verification, HTML File Upload, and DNS Verification.
I recommend DNS Verification because it’s pretty easy. Go ahead and click on that tab.
All you have to do is log into your domain registrar and go to the DNS records section. Then, copy and add the TXT record given in Step 2 into your DNS configuration. (Some registrars will also ask you to add a Host field—you can just use the symbol @ for this.)
This step will look a little different for everyone depending on which domain registrar they’re using, but I’ve found a useful article on how to do all of this on GoDaddy.
But even if you’re using another host, it doesn’t matter—they’re all similar in process, and you can probably find an article somewhere specifically for your domain provider.
The DNS change typically takes effect around 48 hours, but Facebook warns that it may take as long as 72 hours. When the change is completed, this little circle next to your domain name is going to turn green to let you know that it has been verified.
And that’s it—this is how to set up a Facebook Business Manager account.
Business Manager helps manage several Facebook ads, accounts, and pages more productively, which can help make you a better marketer. It’s also ideal for agencies that manage clients’ social media accounts or ad accounts.
Now that we’ve learned to set up a Facebook Business Manager account, we should start advertising! To make the most out of your ads and data, make sure to set up conversion tracking so that you can replicate strategies from your best campaigns.
Have you encountered any challenges in setting up your Facebook Business Manager account? What else do you think is important to do in Business Manager? Let us know in the comments!
Facebook Business Manager is the most useful tool for both clients and agencies or professionals who are engaged in targeted advertising in social networks.
Why a Facebook Business Manager is needed for a client/customer
 ).
).
Why an agency or professional needs a Facebook Business Manager
This is a very useful and convenient tool for both business owners and those who set up ads for them. It not only simplifies the management of advertising and the transfer of projects between specialists or agencies, but also provides more opportunities for advertisers.
Next, let's take a step-by-step look at creating and configuring a Facebook business manager.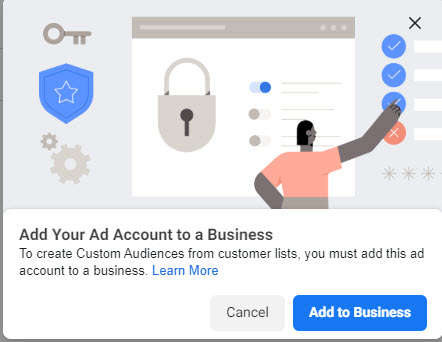
Create a Facebook Business Manager
Add your company page on Facebook.
Add your company's business account on Instagram
Create a Facebook ad account
Create a Pixel
Create a product catalog
Add employees or contractors
Assign a role and management objects to each employee in Business Manager
An important clarification before you start: A business manager is created from a personal Facebook profile. If you need to create a Facebook Business Manager, first register a personal Facebook profile. If you already have it, feel free to proceed to the instructions.
3. Fill in all the fields in the opened popup and click the Send button.
It is important to provide real data in case you need to confirm your identity or company.
4. Confirm email address. To do this, find the email from Facebook in the mail and click the Confirm button.
5. After that, you will be redirected to Facebook Business Manager.
Important! To add a Facebook business page to Business Manager, you must be an administrator of the page.
3. In the drop-down menu, select the Add page item.
4. Enter the copied URL and click the Add page button.
5. If everything is done correctly, the page will appear in the list.
1. Go to the Instagram Accounts tab and click the Add button.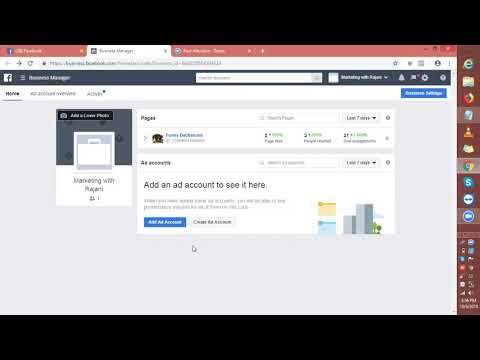
2. In the pop-up window, click the Connect Instagram account button and then enter the login and password for your business account.
If done correctly, the account will appear in the list.
Note: if your Instagram account is linked to a Facebook business page, then when you add it to Business Manager, it will automatically be pulled up.
1. Switch to the Advertising accounts tab and click the Add button.
2. In the drop-down menu, select Create an advertising account.
3. In the next popup, select the appropriate item and click the Create button.
4. In the next popup, select the appropriate item and click the Create button.
5. The next step is to add payment information.
6. Select the type of payment and click Next.
7. Enter the details of the card with which you plan to pay for advertising and click the Save button.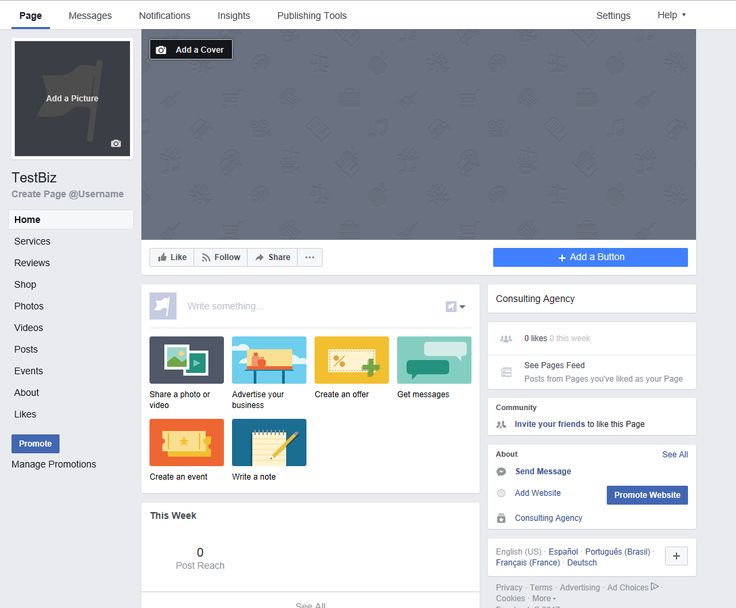
Facebook Pixel
video instructions
3. Name the Pixel and paste the URL of your site.
4. Click the Continue button.
If done correctly, the new Pixel will appear in the list.
1. On the Data Sources tab, switch to the Catalogs section and click the Add button.
2. In the drop-down menu, select Create catalog.
3. Give a name to your catalog and click the Create catalog button.
4. Select the Pixel that will be associated with the directory and click the Save button.
1. Switch to the People tab and click the Add button.
2. Enter the email of the employee / contractor you want to add to Business Manager
3. Select the access level and click the Next button.
Important! In the email field, you need to enter the address from which the employee is registered on Facebook. If an employee has an account, but only a phone number is added to it, you need to add an email as well.
4. Assign which resources the new employee will have access to and click the Invite button.
If everything is done correctly, you will see the employee's email in the list with the status "pending".
After the employee accepts the access, the "pending" status will disappear.
Administrator has the ability to edit, assign / remove access to other employees, edit accounts and tools. Has access to all resources in Business Manager.
Employee can only work with the resources and tools that are assigned to him.
3. In the pop-up menu, select objects (according to the list) and assign roles.
4. Click the Save changes button.
After that, in the general list you will be able to see the assigned objects for each of your Business Manager's employees.
Income from the Facebook channel for 3 months
How to get 1140% ROAS, 772 orders from social networks for products / audience 35+
429 sales at $2.28 | case on catalog advertising on Facebook and Instagram
Product catalog advertising on Facebook and Instagram for a children's clothing manufacturer
Facebook and Instagram audience statistics Ukraine
research for January 2021
Elena
Sergeeva, Targeted advertising specialistFacebook Business Manager is a convenient tool for managing a business or project within Facebook and Instagram social networks.
It often scares beginners with its scale and the number of settings. In this article, marketer Elena Sergeeva will share step-by-step recommendations on how to create and set up a business manager.
Manage Facebook pages and Instagram accounts in one place. Give access to the team and invited specialists without transferring passwords.
Share data from your resources (for example, the database of site visitors) with partners and contractors, while maintaining control and privacy of the audience.
Use dynamic retargeting in an advertising campaign for an online store.
Go to the tool page and click "Create an account" in the upper right corner of the page.
Then fill in the basic information about the company.
A new business manager account has been created, now you can go to basic settings. Only four steps - and the tool will be minimally ready for work.
First, let's connect a Facebook business page and an Instagram account. Staying in the "Company Settings" section of the business manager, select the "Accounts" tab, and in the drop-down list - "Pages".
You can select an existing Facebook Business Page and add it to Business Manager or create a new one. If you need to work with a partner's or client's business page, click Request Access.
To connect to Instagram, select "Instagram account" from the drop-down list on the left and add the required account.
To run targeted ads on Facebook or Instagram, you need to create an ad account.
Up to 5 advertising accounts can be created within one Facebook business manager (the limit of created accounts is available in the "Company Information" section).
For security purposes, the owner of the accounts must be the head of the company.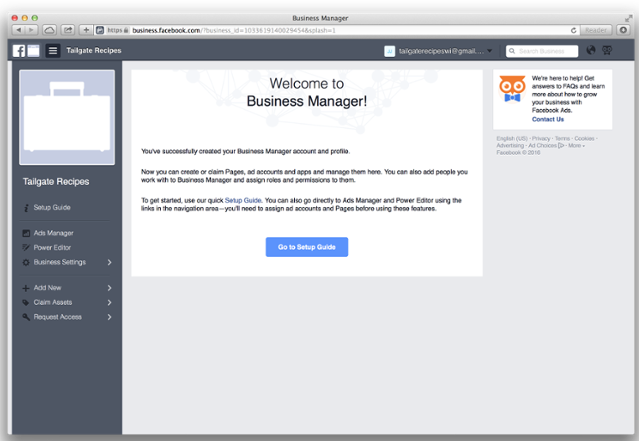
During an advertising campaign, the audience of users will be collected into a database using a pixel.
In which cases it is worth creating separate advertising accounts - let's look at examples:
If a business has two independent directions with different sites, for example, for companies and individuals.
If branches or lines of business are registered in different countries (in Russia, VAT (20%) is charged for all campaigns within one advertising account).
If the business wants to separate the financial flows of advertising campaigns or ways of paying for advertising (for example, it works with different contractors or pays from different cards).
If the project has several interconnected sites united by a common audience, it is recommended to create one advertising account with one pixel.
When setting up each ad account, pay attention to the time zone in the settings (Los Angeles by default) and currency.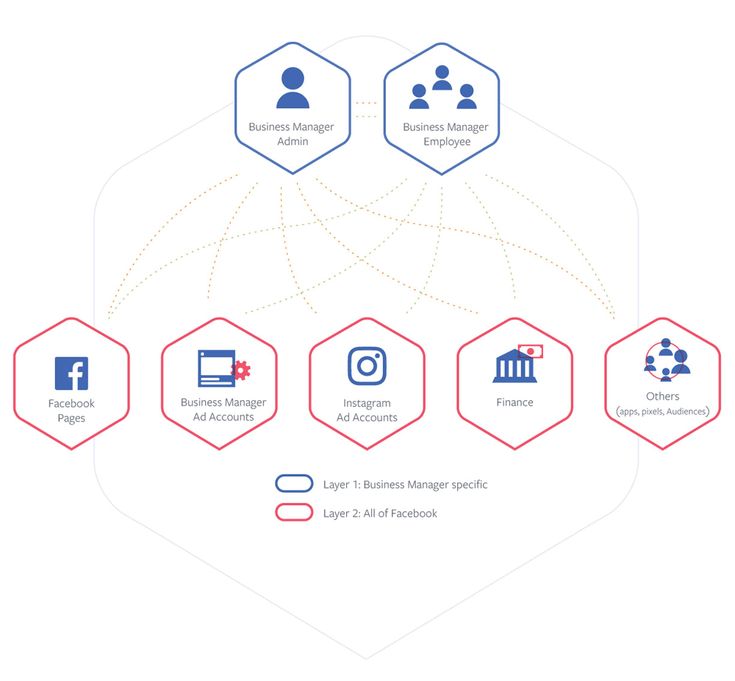
According to the specified time zone, the schedule for launching advertisements is configured and statistics are collected. You cannot change the time zone later.
A pixel is a special code that is installed on your site to track visitor activity. To connect, in "Company Settings", select the "Data Sources" section, and in the drop-down menu - "Pixels".
In the window that opens, enter a name and link to the site.
After the basic setup of the Facebook Business Manager, you can go back to the detailed pixel setup within your ad account. How to do it, we told in the video tutorial.
Two different access levels can be configured in Business Manager:
1. Specialists are added to Business Manager and assigned the role of Employee or Administrator. Advanced features regulate access to financial information.
2. Or, in accordance with the assigned role (employee/administrator), the employee is given access to a specific object: a business page, an advertising account, or a pixel.