By Thomas Houston on 63Comments
Whether you're ready or not, Facebook has begun the Timeline rollout, and your lowly, simple profile page will soon be transformed into a glorious two-column scrapbook documenting every facet of your digital life. It's the most radical change in the history of the site, so unless you opt to shut down your account, we recommend going into this with the knowledge of what to expect and how to deal with it, whether or not you agree with Zuckerberg that a life-spanning scrapbook best represents humans in the digital age.
Wired reports that the project initially grew out of the "Memories" hack, an idea developed at one of Facebook's spring 2011 hackathons. Timeline represents a desire to give you a "rapid-fire summary of all the best things that happened to" you in the course of a year. Designer Nicholas Felton, known for his own delightfully thorough infographics and personal reports tracking everything from friends and relationships to workouts and coffee consumption, joined Facebook and helped to spearhead this new design that brings a bit of that attention to detail to your daily life. Remember the uproar that happened when Facebook flipped on News Feed in 2006 for the first time, revealing all of your friends' updates in one, easily-consumable feed? This is even bigger.
A big change
You're going to have to deal with it sooner or later — Timeline will be a mandatory change in the coming months — so get a jump start on the inevitable by heading to facebook.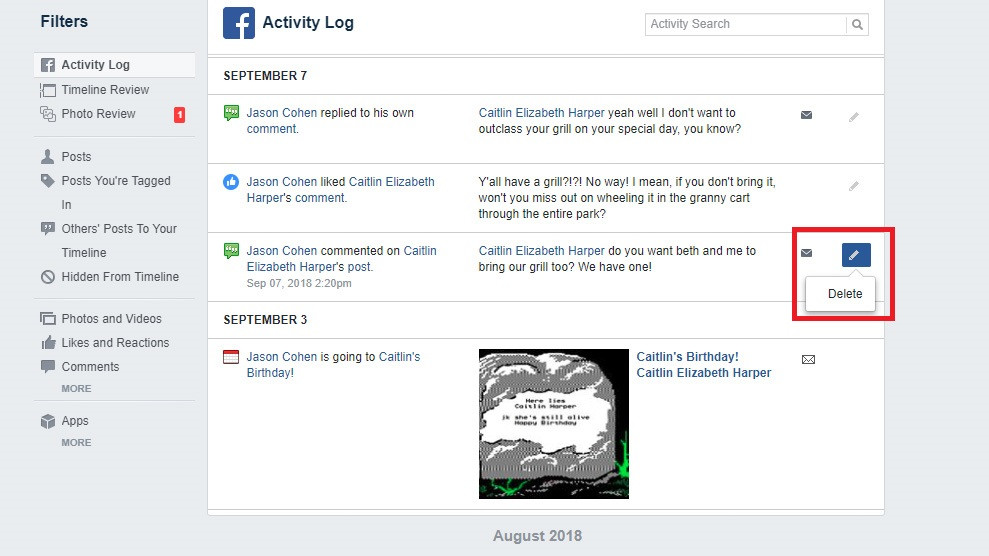 com/timeline. The point here is to help you manage the shock of a new design that makes your history more visible and easily accessible than ever before. Once you begin the process, you've only got seven days before your newly redesigned personal identity is published live, so enable when you've got some free time to tinker with your profile. It won't be visible by others until you hit publish or hit your seven day limit, and once it's published, there's no way to revert to the old profile. If you're like most of us, you — and your friends — have logged hundreds or thousands of status updates, photos, videos, events, and check-ins over the years, and Timeline throws it all onto a single page.
It's both exciting and terrifying. Facebook's built a browsable, visual history of your life without much effort on your part — aside from providing the content — and it's got much more of an immediate impact than any previous version of Facebook. Our friends, jobs, break-ups, late nights, hard times, great meals, and everything else we've documented will soon be laid out in reverse chronological order on what will be the world's biggest digital scrapbook — 800 million users strong — that we've been posting to and tweaking all along. It might feed late-night narcissistic binges where you spend hours highlighting your favorite photos and hiding questionable status updates from 2006 in order to present the best "you," or, as Zuckberg said at f8, "It's a new way to express who you are." Regardless, you'll probably need to consider how you want the new digital you displayed. Where in the past photos buried in galleries may have been shared with your friends, your data has never been this accessible. Let's dive in.
Using Timeline
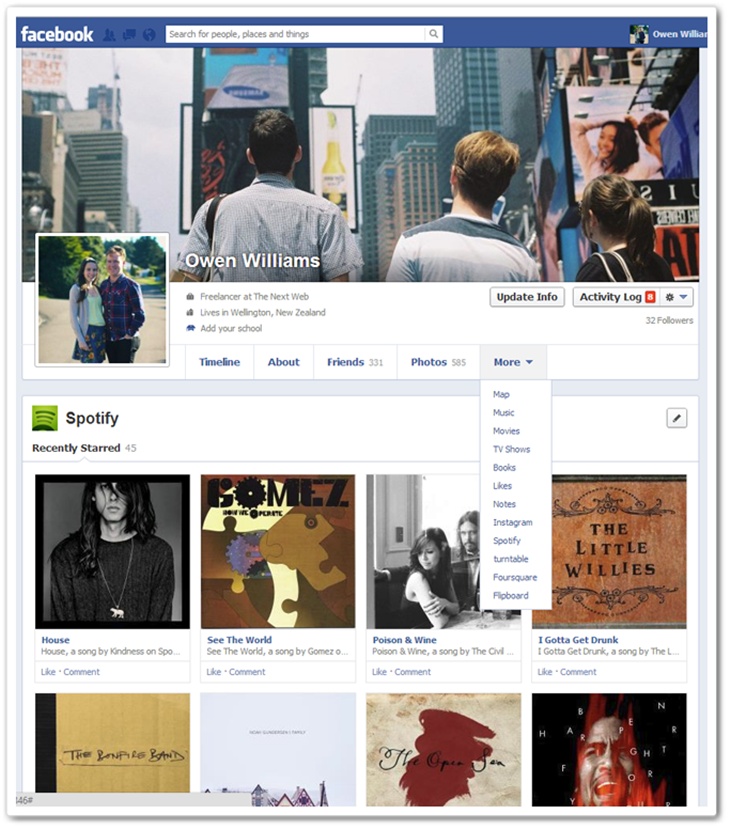
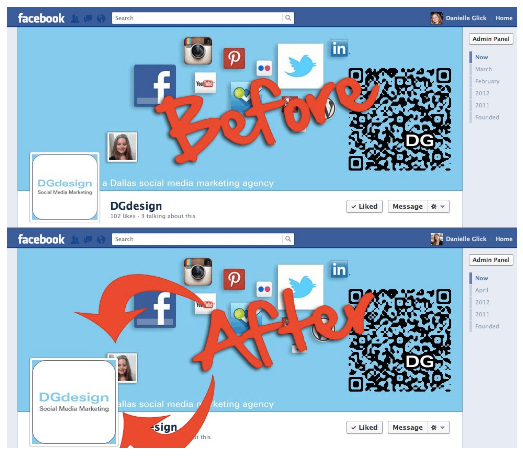
After clicking 'Get it Now,' you'll be asked to add a new Cover image. We've found uncluttered, full-screen shots work best, and you can choose from your pictures on the site or upload a photo from your hard drive. The Timeline redesign shuffles around your friends, photos, and other activity, placing it all directly beneath your Cover Photo. Clicking through each section reveals your photos, friends, likes, and other activity chronologically.
At the top left of your Timeline, you can add more events, status updates, and photos. A click on the blue line running down the middle of the page invites you to share more photos, "Life events," status updates, and locations, especially among the the pre-Facebook days. Yes, Life Events, which give you the option of adding everything from home improvements and new roommates to first kisses and new hobbies. Navigating Timeline is pretty simple, if a bit click heavy: scroll down to move back in time, and persistent calendar at the top right slides down the page with you so you can hone in specific years and months. Additionally, once you scroll down far enough where your Cover image can't be seen, a new navigation bar appears with dropdowns to jump to different years and more options for quickly posting status updates.
Things might get messy hereTake note of the gear in the set of menu buttons on the right side of the window; the 'View as' option will be your most essential tool for getting your profile into shape. It lets you view your profile from the perspective of family members, friends, coworkers, or anyone else on Facebook, letting you fine tune what other users can see.
Tweaking the visual display of your profile is surprisingly intuitive. Tap the star button on a photo or video to "feature" it on the Timeline, causing it to spread to the full width of the window. To minimize, click the star button again, and completely pull it from the Timeline by clicking "edit," and "Hide from Timeline." Note that this doesn't totally remove it from Facebook or from your friends' feeds. For that, you'll need to permanently delete a post or untag yourself from a photo or video to remove yourself.
Things get messy here. If you hide a post, it will disappear from your Timeline, but it's still discoverable through traditional, pre-Timeline means. That is, depending on your privacy settings for that post. Other posts on your Timeline will be visible to others based on your sharing settings for that specific status update.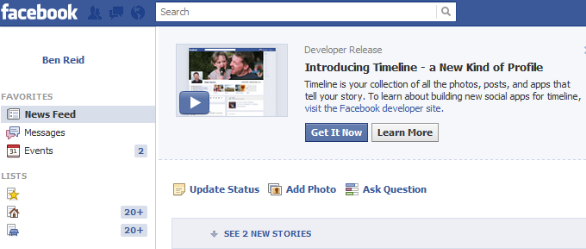 So, while your mom may not see your dinner party photos in your Timeline, your Close Friends will. Got it? More on this later.
Privacy and old posts
If you're content with everything out there, you can probably skip the next section. Live in public! If you want to lock it all down, or have some subtlety to your digital life, though, this could take a while. You've got a few options, and unfortunately, there's no magic button that lets you hide or share everything in bulk. Just hope you've been happy with how you've dealt with your sharing privacy settings in the past, or you've got a lot of clicking in your future.
It's a great time to get intimately familiar with your Privacy SettingsOf course, you can go through and manually hide, delete, or adjust the sharing settings on every piece of shared information in your Timeline, but that could take weeks.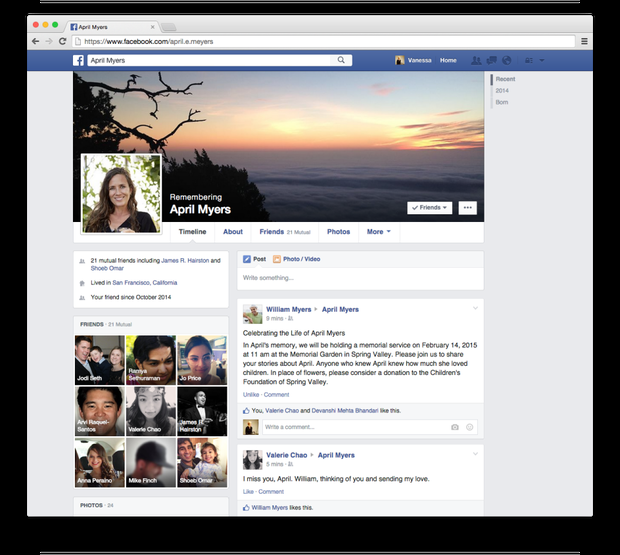 More immediately, you can considerably limit visibility by heading to your Privacy Settings. The Limit Audience for Past Posts option quickly changes everything you've posted publicly or to 'Friends of Friends' to only visible by Friends. Unfortunately, there's no way to start fresh and set everything in your past as visible only to you. Still, it's a great time to get intimately familiar with your Privacy Settings, and reintroduce yourself to how tags work and filter through Facebook.
Double check your default sharing settings: Everything you post on your Timeline going forward will be posted under those same permission levels. And, we recommend turning on Timeline Review, a feature that prompts you before posting pictures your friends have tagged you in on your Timeline.
Lists
Let's just agree that Facebook hasn't solved the friend issue. Should you give your ex, grandmother, and boss the same level of access to your profile? Or would you open up to a close old buddy as much as you would to a new friend? Unfortunately, you've got to make that call here, and the easiest way to define what information gets shared with which people is through Lists. Granted, it's kind of gross explicitly sorting your contacts into different piles by how much information you want to share with them — something we unconsciously do in real life interactions — and Lists simply can't reproduce the subtlety with which we structure face to face discussions, but it's the best you're going to get for now.
The point here is to set up groups like "Family," "Close Friends," "People who would like to see my music rants," or "Coworkers." Facebook also has smart lists — think iTunes's smart playlists — that update automatically based on your friends' profiles. For example, all your friends who you went to college with are automatically sorted into that Smart List. The same thing happens with people who identify themselves as family members. Facebook lets you use Lists to target who can see your updates, photos, app activity, and other data. You can also manage who sees new status updates using these same lists; if you share with a specific group, it appears in your Timeline sorted accordingly.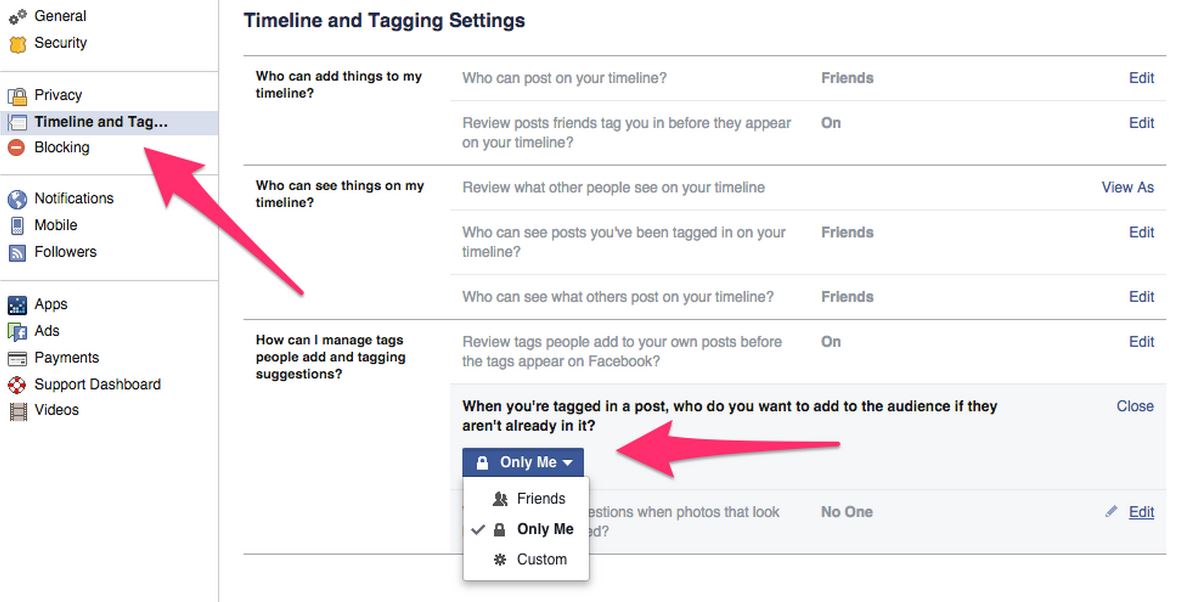
The Activity Log
The Activity Log, accessible only to you, shows everything about you that's been logged on Facebook, from the first wall posts new college friends added to beach photos from last summer to apologetic comments you left for someone's event that you couldn't attend. Fortunately, this level of detail is visible only to you, and you can browse your firehose of personal data by year, month, day, and minute. For example, I've already got months of listening data from Rdio pulled into my account, so I can jump back to October to see the songs I was listening to at 3:56pm on the 31st. Low's "Try to Sleep," if you were wondering.
The Activity Log also lets you tweak your Timeline: clicking the circle to the right of each status update gives you the option to feature, allow, or hide it on your profile, or to delete it entirely from your account.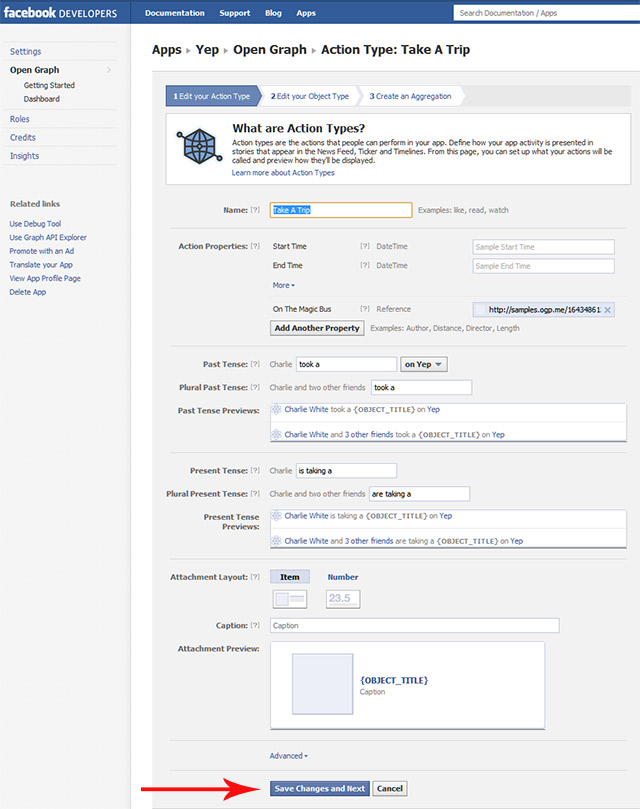
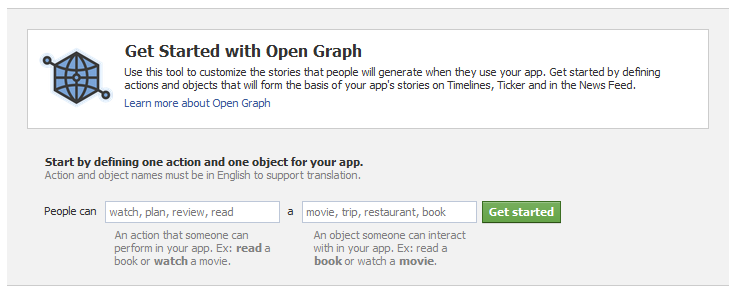
Apps and the Open Graph
Finally, your apps also feed their data directly into your Timeline, so if you've given Facebook access to Rdio, Netflix, Spotify, Nike+, and many other apps, their data will be tied to your profile. With Facebook's Open Graph initiative launching in "the coming weeks," bringing with it a flood of new apps — or as Zuckerberg explained, verbs — that log data to your profile, take a moment to consider just what this means. You probably see a regular stream of Likes each day already, and it will soon evolve into everything people watch, run, cook, photograph, and more — Zuckerberg is after every verb you can think of.
Fortunately, dealing with who can see this data is mostly clear cut, and to Facebook's credit, is a process that's far easier to understand than it used to be. Head to your Apps settings (Account Settings > Apps), and you'll find a list of all the apps you've authorized to work with Facebook.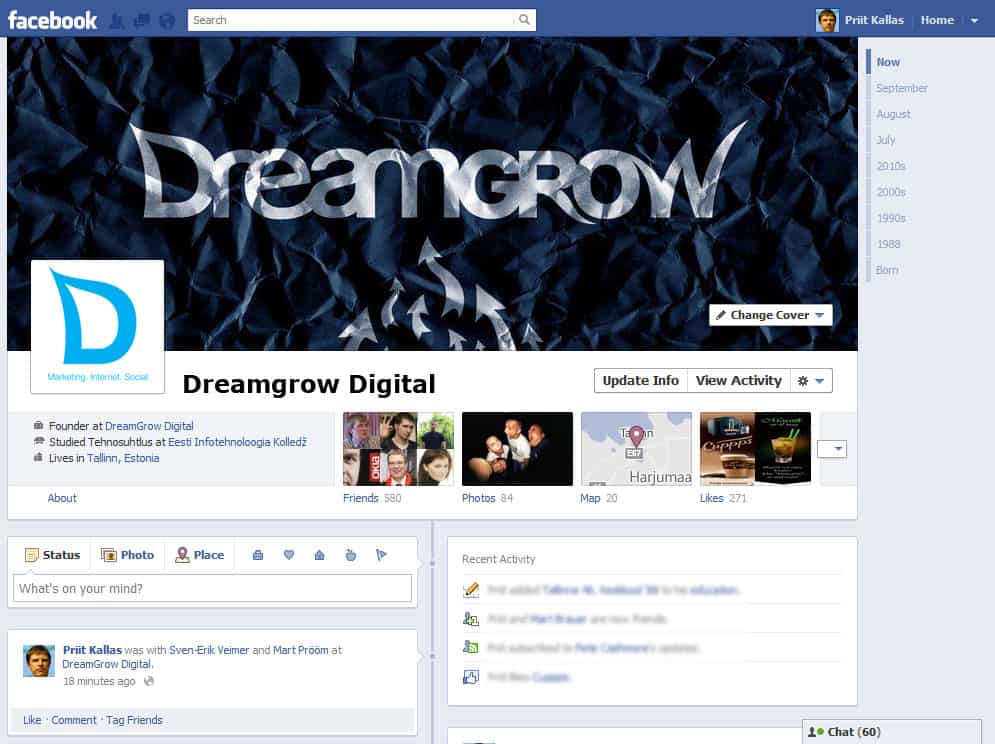 If you've set up Lists, you can go through each app and set your sharing limitations, ranging from "Only Me" or specific lists to "Public." This lets you share your flood of Rdio and Spotify listens only with trusted friends that you can safely burden with your taste for slow jams.
Wrap Up
Remember, once you start the process, there's no going back. With years of status updates, photos, likes, videos, not to mention Events, Notes, location check-ins, and Wall comments, there's a lot here to deal with. Timeline is Zuckerberg's vision for the future of Facebook, and there's nothing else like it on the web in terms of scope or reach. Aside from bailing on Facebook altogether, your best course of action is probably carving out an hour (or three) of your own time to make sure the your new Timeline-enabled personality is secure and beautiful.
[% } else { %]
[%= data.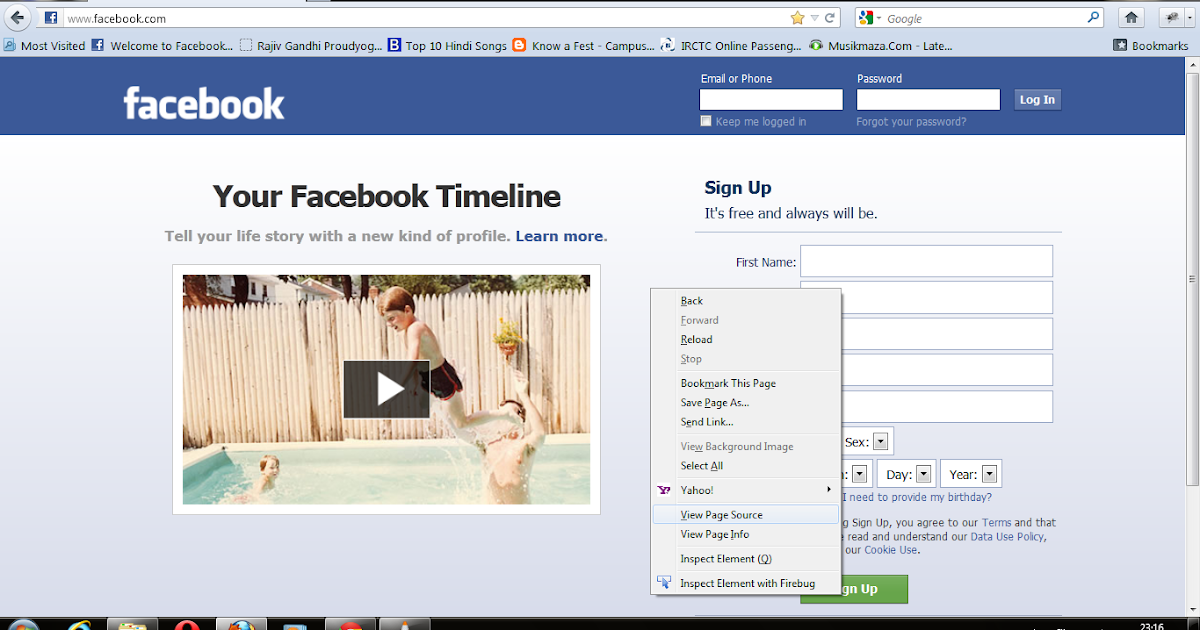 comment.user.display_name %]
[% } %] [% if (data.comment.user.membership && data.comment.user.membership.short_bio) { %]
[%= data.comment.user.membership.short_bio %]
Do you find yourself asking, “what is a timeline on Facebook?” You’re not alone.
The Facebook timeline is often confusing for some because it’s also called the Facebook feed, wall, and even just your Facebook profile. They’re all actually the same thing.
Here, I’ll clarify some of the confusion about accessing your Facebook timeline and what it displays. I’ll answer:
Please note: Some of the links in my posts are affiliate links. I get commissions for purchases made through those links. As an Amazon Associate I earn from qualifying purchases when you buy something from those links.
NOTE: If you are wondering how to search for previous posts on your Facebook timeline, here is the post with instructions.

Table Of Contents - Click To Expand Or Hide -->
Your Facebook timeline allows you to see your posts on your profile, posts from friends shared with you, and stories where you’re tagged. Posts are displayed in chronological order. When you sign up to Facebook, you’ll get a timeline where you can add life events and posts.
For those wondering, “where is the timeline on Facebook?” it’s not difficult to find. To see your timeline, click on your name at the top of any Facebook page.
Your timeline is the main middle column. It sits directly under the “Update Status” area.
Here’s a step-by-step guide on how to get to your timeline.
If you’re trying to search your Facebook Timeline for old posts, it can be tricky. Here’s a rundown on finding what was posted in the past.
Your syntax plays a big role when you search the Facebook timeline by keyword. There are three things you can do that will make searching more successful:
While you can’t hide the entire timeline, you can keep certain posts, photos, videos, etc., from being seen by specific people. When you change your profile privacy to friends only, it will make it so that only your Facebook friends can view your timeline.
To limit who can view your past posts:
Choosing this setting automatically hides your public posts and changes their privacy to “Friends only.”
To set the privacy for future posts, go to “Your activity.” Under “Who can see your future posts,” choose “Only Friends” or “Only me. ” If you select “only me,” no one will be able to see the posts you make except yourself.
You can also set the privacy setting for individual posts and create groups that won’t be able to see your posts. Those groups will only see posts on your timeline that don’t exclude them.
 ”
”You can use the Facebook “View As” tool to see what your Facebook timeline looks like to your friends and the public.
If you’re wondering how to check the timeline on Facebook to see why a Facebook post is not appearing on the timeline, these steps could help.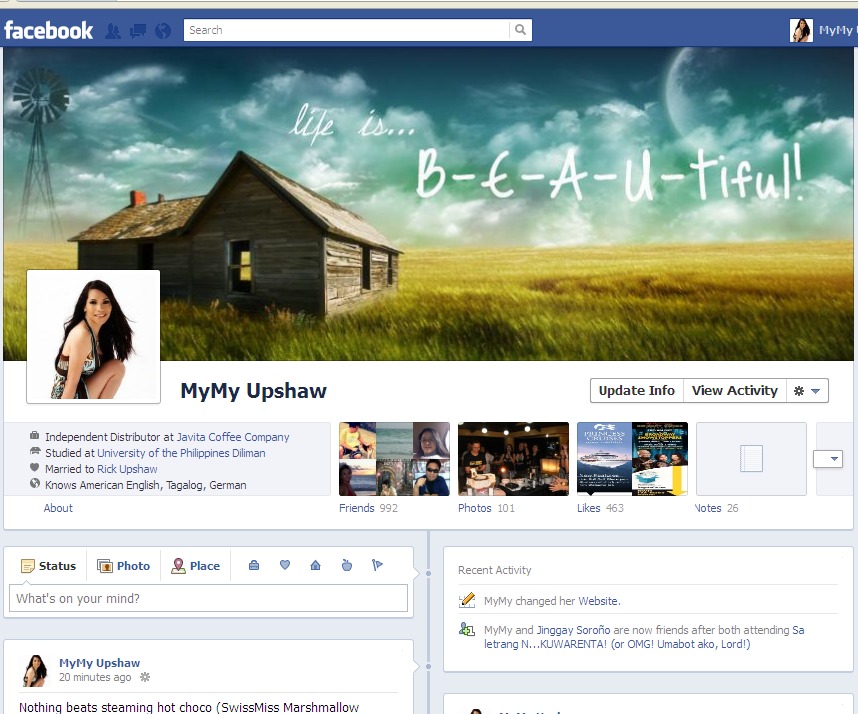 Your post might be set to friends only, only a specific group, or even to just yourself.
Often, if you’re thinking, “my Facebook post disappeared from my timeline,” it’s because the privacy setting kept it from being viewed publicly.
Facebook doesn’t allow you to see who views your timeline, and no apps can let you see that either. Unfortunately, that feature goes against the Facebook community standards.
The upside is that no one can tell if you’ve looked at their profile either. So, if you accidentally look at the timeline of a stranger instead of a friend, it won’t notify them.
I hope this information on how to view your timeline on Facebook was helpful. I encourage you to share your additional tips related to the Facebook timeline in the comments.
— Sean
When Facebook introduced the Timeline last year, initial reactions were mixed.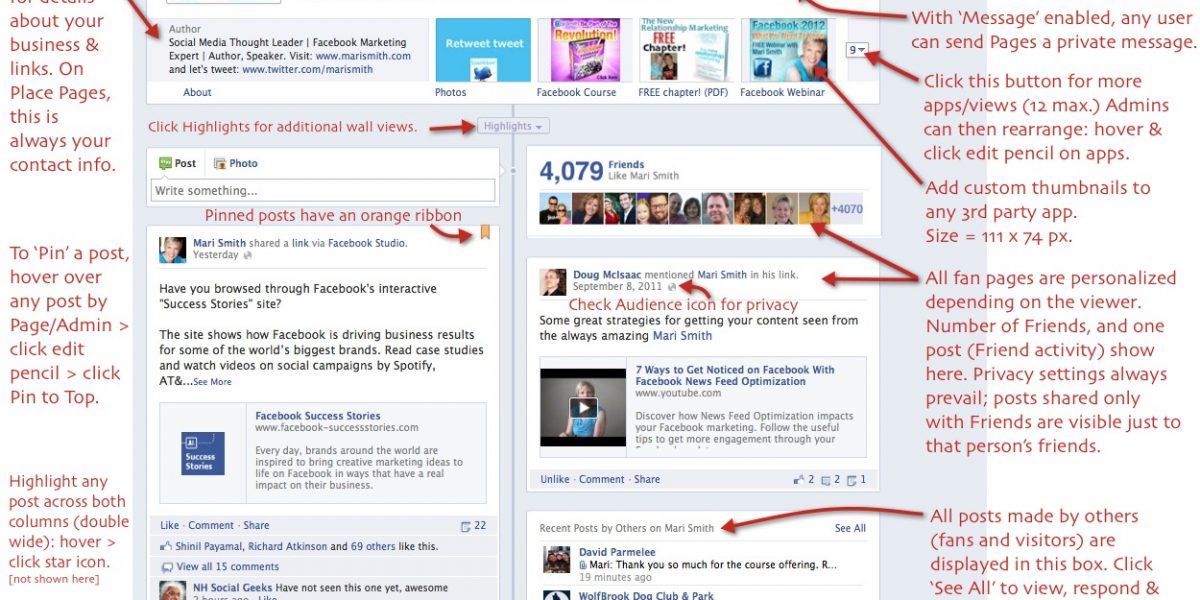 Many people who tried it quickly wanted to get rid of it again. The trouble is, once you've turned, there's no going back. So far, some smart programmers haven't come up with tools that would let you browse Facebook without a timeline. Now the situation is changing, and many people are turning to us for advice on how to get their timeline back.
Unlock your free "Facebook Security Checklist" now!
This will sign you up for our newsletter
Read our privacy policy
If you are one of those who is currently looking to switch to the Timeline view, this troubleshooting guide is for you. Together we'll find out if you enabled the timeline in the first place, or what exactly you did to get rid of it, and how you can undo it. And if none of the tips work, you can always ask for help in the comments.
By the way, if you're looking for a way to do the opposite, i.e. remove the timeline, just use your smartest brain cells and reverse engineer this tutorial to disable the Facebook timeline.
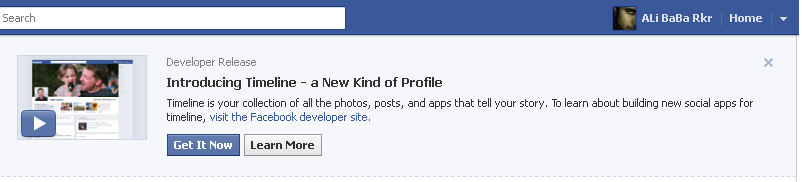
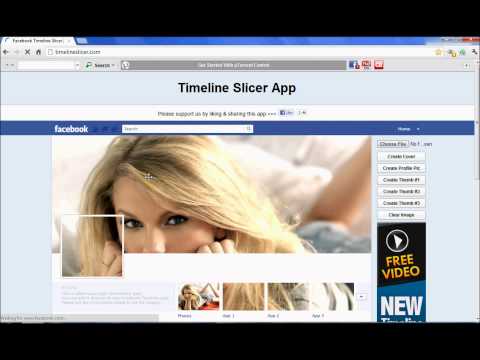
First, let's see if you have a Timeline. Sign in to your Facebook account and then visit the Presented Timeline website. At the bottom of the site, you should see a navigation bar. In the very right corner of this panel there is a button labeled Get Timeline . Click it, then click your own name anywhere on Facebook, or go to facebook.com/your-user-name (your Facebook wall) to see if you can now see your profile in the timeline view.
Or log in to Facebook, click on the small button at the bottom in the upper right corner next to house and select Enable Timeline .
Notice that your Facebook wall (where you see the timeline) is different from your Facebook News Feed, which is what you see when you go to Facebook.com while you're logged in! To see your wall and hopefully a graph, click on your name in the top left corner of your Facebook News Feed.
If you can't click the Get Timeline button, you already have a timeline. This is the case for me as shown in the screenshot below.
If you can't see your timeline even though Facebook says you've already updated your profile to the timeline, try to find out how you turned it off.
So Facebook says you already have a timeline, but you can't see it. Unless something is horribly broken, there is essentially only one way to disable the timeline, which is using a browser add-on. So let's see if this is the case for you.
To check if this is a browser add-on, sign in to Facebook using a browser you don't normally use. For example, if you usually access Facebook using Firefox, use Internet Explorer, Chrome, or Safari instead. If you see the timeline in another browser, you most likely used the Facebook Standard Browser add-on to disable the timeline. Go to Solutions.
If you can't see the Timeline in any of your installed browsers, something else is most likely going on. Try logging into Facebook from a friend's computer who can see the timeline on their Facebook wall.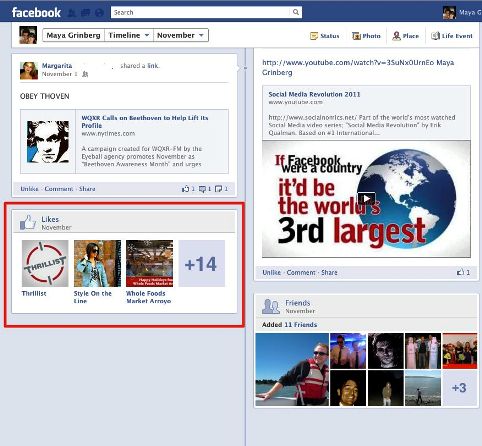 If you still can't see your timeline, you probably installed the Facebook timeline removal app.
If you can see your timeline on another computer but not on your own, no matter what browser you use, I'm stumped. To my knowledge, there is no application that removes the timeline for your entire computer. However, you can try to check all browsers, maybe you have installed Timeline Remove add-ons for all of them.
If you figured out in the previous step that you most likely disabled your Timeline using a browser add-on, re-enabling your Timeline is as easy as disabling or uninstalling the related add-on. Below are instructions for different browsers and add-ons.
This is the most popular browser add-on used to disable the Facebook timeline. You don't actually need to remove it to re-enable your timeline. Instead, you can toggle between enabling and disabling the timeline. When this add-on is installed in Chrome and possibly other browsers, you should see a "white on blue" button in the list of enabled extensions to the right of the Omni/Search bar.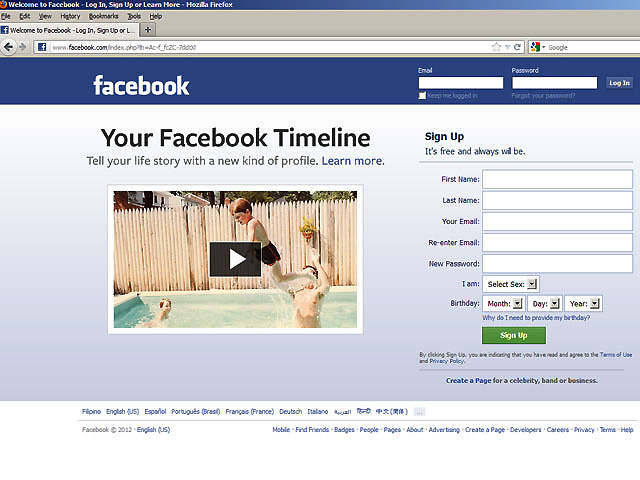 Just click this button and select a status to enable or disable timeline removal.
Although TimeLine Remove does not work with the latest version of Firefox, it does work with Chrome and is also available for Internet Explorer (not tested) and Safari (not tested).
FB Purity
This browser plugin is available for Firefox, Chrome, Safari and Opera. It allows you to customize Facebook in a number of ways, and one feature includes removing the timeline. If it is installed, you can enable or disable the timeline by clicking the TL (green letters with or without a red X) next to the Facebook search bar. Alternatively, you can also completely disable or remove the browser add-on.
Greasemonkey is a browser add-on that allows you to customize the look of websites, including Facebook. If you have installed a Greasemonkey script to customize the look and feel of Facebook, you can undo these changes by deleting the corresponding script.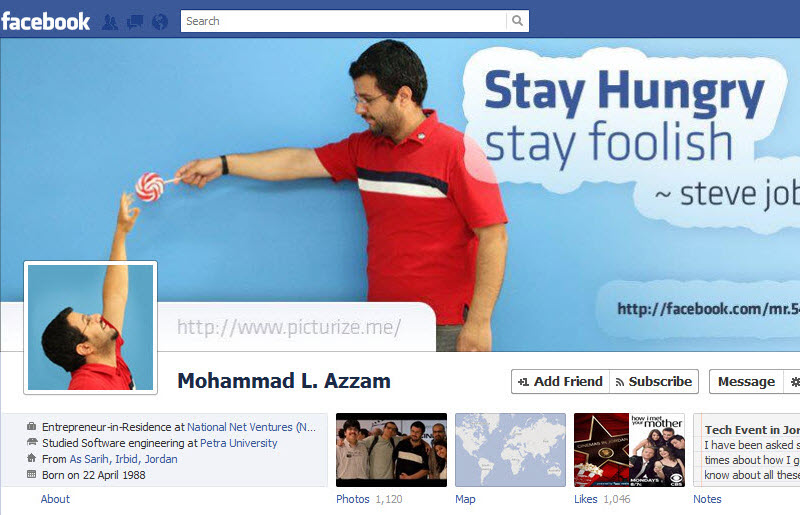 Please see instructions for managing your custom Greasemonkey scripts here.
You may have used a more or less manual trick to disable the Facebook timeline, which is not available in Internet Explorer 7. This trick is detailed in Techie Buzz. Simply undo your browser actions to undo the changes.
If you are using a different browser such as Safari or Opera, contact Google for instructions on how to disable or remove add-ons.
If none of the above solutions worked for you, your last resort is to check if you used the Facebook app to remove your timeline.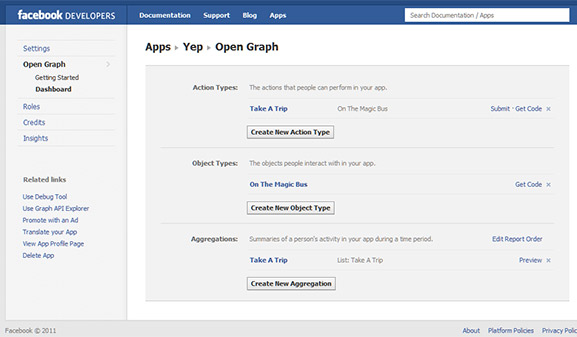
Do you know of any other ways to restore the Facebook timeline, or have you been unable to turn it on despite following all the tips above? Please share your experience in the comments for others to learn and help. Thank you!
If you'd like to maintain tighter control over what appears on your Facebook timeline (and therefore everyone you're friends with on Facebook), there's a simple but little-used mechanism built right into Facebook to give you the right to approve. everything that people say. you're in business.
Let's face it, we've all achieved least one of the following people in our Facebook friends stable: a person who tags everyone in their posts [political/event/multi-level-marketing], a person who likes to post random (and often inappropriate) content and tags everyone who, by their may find it funny, a person who takes millions of photos at each event and tags every person present at each of them, or any number of people who abuse Facebook's friend tagging feature.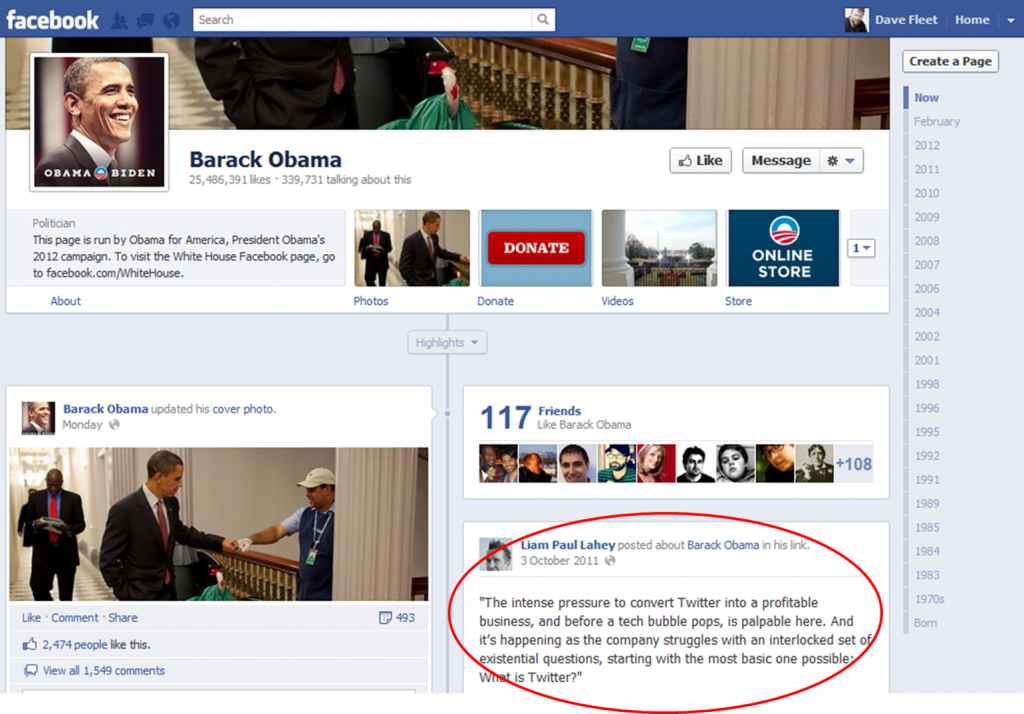
If you're tired of friends tagging you in ads for "Super Awesome Rap Slam Battle!!!" they show up next weekend, or you really don't want your last weekend's party photos to automatically flood into your Facebook feed without your permission, then you absolutely you need to use the "Graph View" function. In short, the timeline overview puts every single thing you're tagged in - posts, comments, and photos - for review before it's published to your Facebook timeline (and visible to your friends/family/colleagues).
RELATED: How to stop people from posting on your Facebook timeline without unfriending them
Before we move on to enabling this feature, it's worth pointing out a few things about the timeline view feature so there's no confusion. First off, the timeline view feature doesn't let you actually censor content you don't like outside of Facebook, it just lets you remove things you don't like from your personal timeline so they don't show up there ( and your Facebook friends).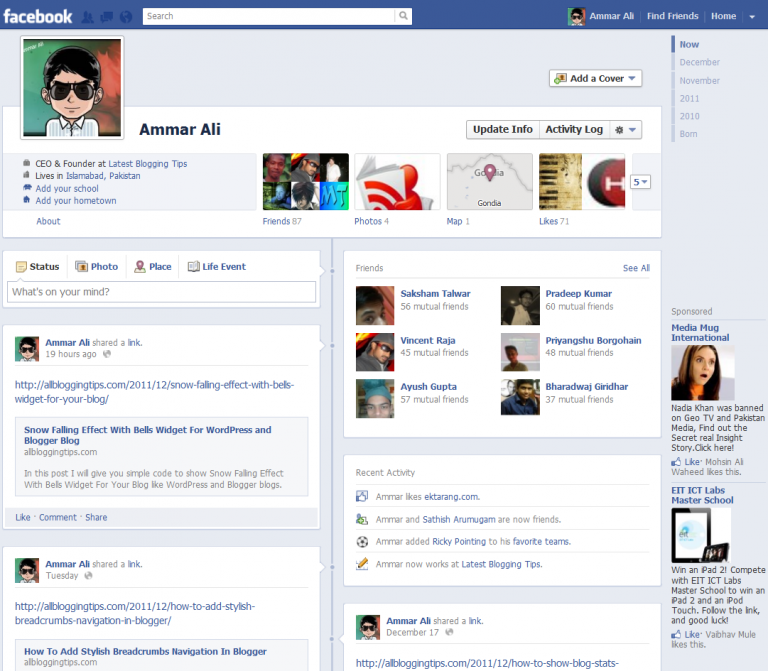 Rejecting a post with timeline review does not erase it, it just removes it from your timeline.
It also doesn't stop the tager's friends from seeing the posts - so if you have friends in common, they'll all see those posts no matter what. This can only prevent messages from appearing on your profile page and in the feeds of friends you are not associated with the tagger.
Likewise, it doesn't stop people from posting on your Facebook wall according to the settings you've configured for your wall. The timeline view feature is designed to filter posts you're tagged in, not to filter posts your friends leave right on your timeline. If you want to control who can post on your Facebook wall, see our tutorial is here .
Finally, all or nothing. At the moment, there is no function in the timeline overview to set any trusted friends, etc. This means that if your spouse tags you in a lot of family photos, you won't be able to say, "I approve everything from user XYZ, I trust them," and you'll have to manually approve all those posts before they appear on your timeline.
These caveats aside, it's an extremely handy way to prevent your friends from seeing your uncle's crazy political tirades (which he insists on tagging you) or your entire family from seeing the multi-level marketing garbage your colleague always tags everyone in. .
Turning on and using the timeline view is pretty straightforward. While you can toggle settings from both the website and the Facebook mobile app (we'll show you how), it's a bit faster if you do it on the website.
To enable timeline viewing through the Facebook website, log into your account and click on the small menu triangle at the top right of the blue navigation bar, then select "Settings" as shown below.
On the left navigation panel, select Timeline and Tags.
In the "Timeline and Tags" menu, find the entry "Check messages in which friends tag you before they appear on your timeline?"; by default, this option is disabled.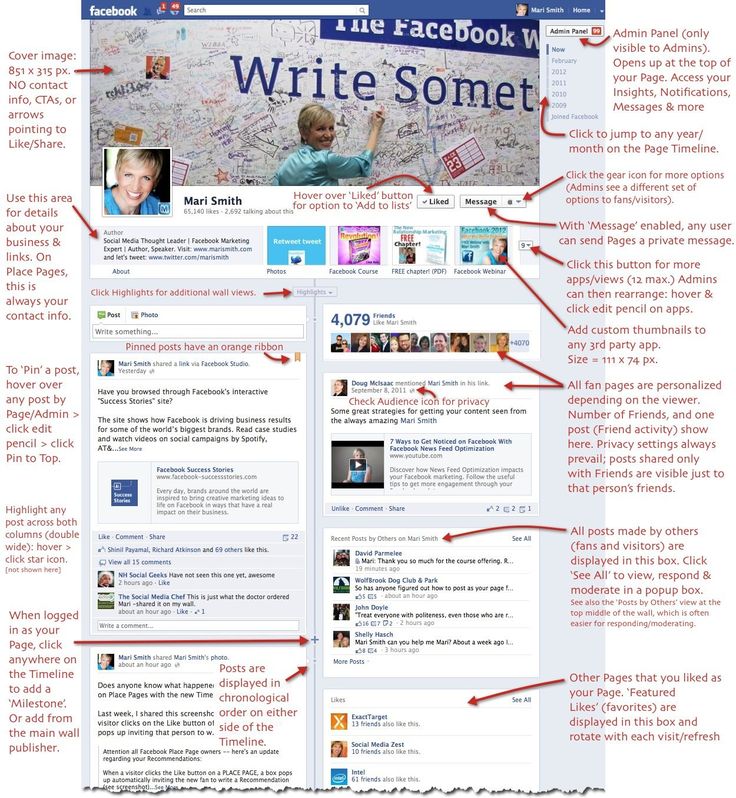 Click "Edit" to change it.
In the menu that opens, click the drop-down menu and switch "Disabled" to "Enabled".
Changes take effect immediately, no confirmation or save buttons are pressed.
If you're reading this guide on your phone and want to jump right into changing settings, here's how to do it on the Facebook mobile app. While there are slight differences between app layouts across mobile platforms, you should be able to easily keep an eye on them using these iOS screenshots.
Click the "More" menu button on the navigation bar and select "Settings" from the menu that appears as shown below.
Select "Account Settings" from the pop-up menu.
Select Timeline & Tags from the Settings menu.
Just like on the website, select "Check messages that friends tag you in before they appear in your feed?"
Turn on "View Timeline".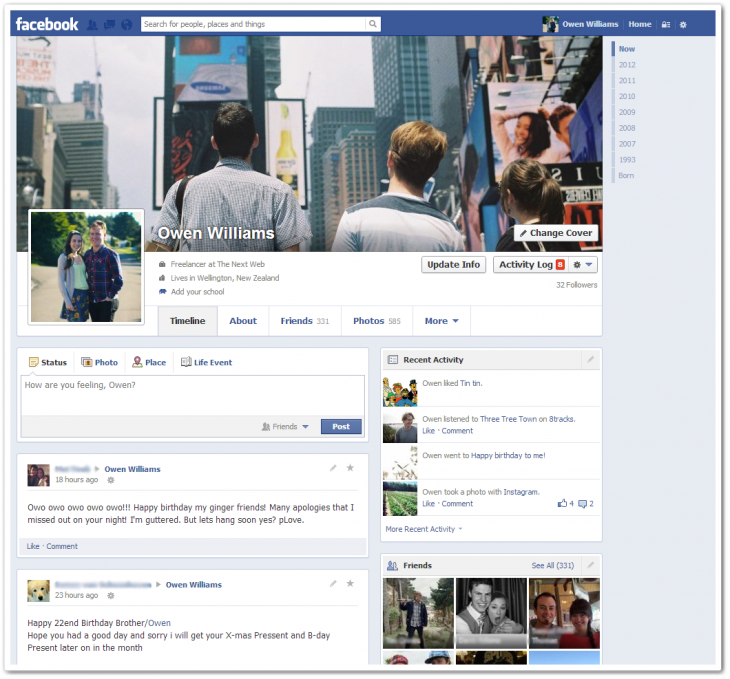
Again, as with a website switch, there is no confirmation and the change takes effect immediately.
Now that you've enabled the Timeline View feature, let's see how it looks in action. To demonstrate, we invited a friend to post a minion meme and tag us. On a sliding scale of things we don't want to be tagged in, we will place minion memes uniquely between invitations to parties selling overpriced candles and posts in which tagged users are involved in interstate drug smuggling operations.
When someone tags you, you get a similar notification.
The notification always looks something like this: “[user] tagged you in a post. To add this to your timeline, go to "Timeline Overview" with the post thumbnail. Click the bold "Timeline View" or thumbnail to navigate to the publication.
There you can choose to "Add to Timeline" or "Hide".