Instagram Stories have become a staple on the social media app since the feature's launch in 2016. Instead of posting carefully curated photos that will stay on your feed indefinitely (unless you delete them), Stories lets you post several images that play like a slideshow and disappear at the end of the day.
You can upload photos, videos, text or posts from other accounts to your Story. Since Stories don't show up on your main grid of photos, they're perfect for an image or message you want to share with your followers without having to commit to making a full, captioned post.
Stories function as an alternative way to see the most current activity from the people you follow (though you can now bring back chronological feeds). Stories are placed in a horizontal line directly above your feed: If someone you follow has posted a Story in the past 24 hours, their profile image will appear with a colored circle around it. Tap the image, and you'll see that account's Story. Keep tapping, and you'll see all of the day's Stories posted by accounts you follow.
Navigating through Stories is simple. While browsing the Stories of your friends, swipe right to go to the previous one, left to go to the next one and tap to skip the current photo or video. If you want to linger on one photo, you can pause a story by tapping and pressing the screen. To start the story again, just lift your finger. This also works for video. You can swipe up on a Story to react to it, or you can simply press the heart on the bottom right corner to Like it.
Here's everything you need to know about Instagram Stories.
Stories are temporary videos, photos or text that are strung together to form a slideshow gallery that, well, tells a story.
You can save your photo, send it to friends or add it to your Story.
Screenshot by Mary King/CNETThere are a few ways you can start an Instagram Story: You can swipe right or hit the blue plus sign on your profile picture, or go to the top right side of the screen and hit the plus sign there. Once you've done one of these, follow the steps below.
1. Tap the circle button at the bottom of the screen to take photos or tap and hold to record a video. To add photos or videos from your gallery, swipe up on the screen or tap the photo icon in the lower-left side of the screen.
2. Edit the photos or videos with text (the Aa button) or add a drawing (the button with three dots).
3. Tap Done to save your Story.
4. Tap the Your Story button to share it to your Story, or the Close Friends button to share with a customized list of accounts.
I used the color picker (a little eyedropper that shows up next to the color options) to make the text and star match other colors found in the photo.
Screenshot/Mary KingIf you click the Arrow icon, you can shoot your image or video to one of your friends at the same time as it posts to your Story.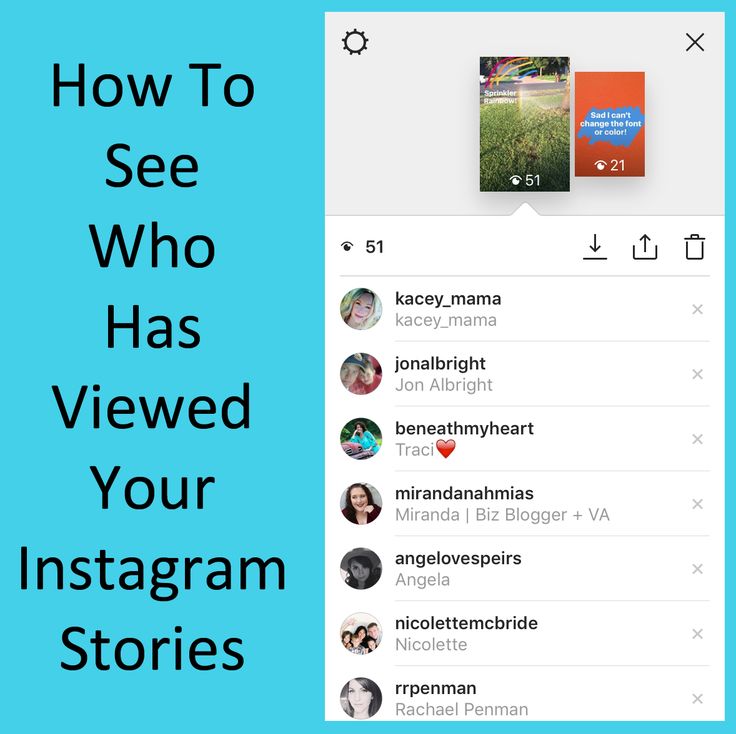 Just tick the bubble by Your Story, then Message and the person you want to share with. The image will disappear after your friend sees it.
Repeat these steps if you want to add more than one photo or video to your Story. Each photo you add within a 24-hour period will be placed in your Story.
You can select up to 10 photos at a time from your gallery or use the multi-capture feature (Go to the camera screen, hit the downward carrot on the left).
After you share your new Story, a colorful circle will appear around your profile photo to let your followers know you've posted new content. Your profile picture will also pop up at the top of your followers' Feeds. All they need to do is tap your face to see your Story.
If you have a habit of adding things to your social media accounts that you later regret, good news! Stories can be removed. Tap on the three dots at the bottom right of the photo or video you'd like to delete and hit Delete.
Aside from regular photography and videography, Instagram provides several options to mix things up on your Story.
Boomerangs are fun, short videos that play forward and backward.
1. To start a Boomerang, swipe right from your feed. This will take you to the Stories camera.
2. Select Boomerang on the left.
3. Tap record to shoot a short burst of photos.
No need to press and hold to make a video anymore. The Hands-Free option in the left menu lets you record a video without, well, hands.
1. Swipe right from your feed to open the Stories camera.
2. Hit the downward carrot on the left.
3. Tap the Hands-Free button.
You can make live videos in your Stories, too. It works a lot like Facebook's live video feature.
1. Swipe right from your feed to open the Stories camera.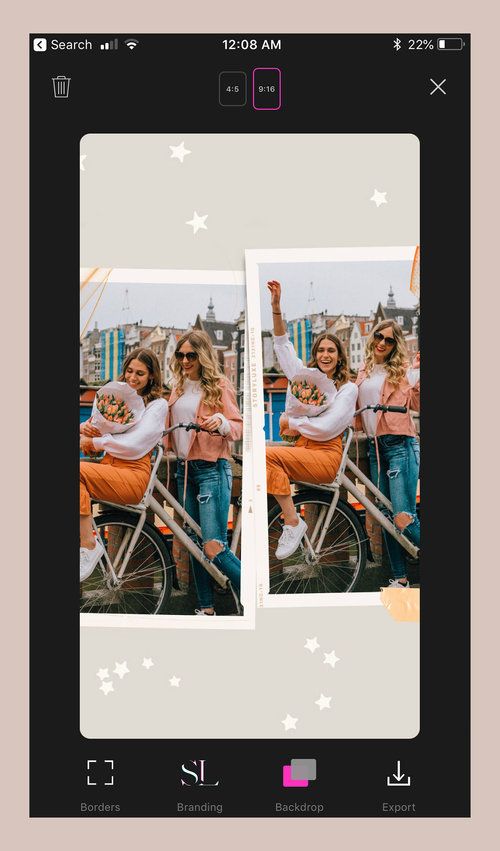
2. Scroll among the options on the bottom and select the Live option.
3. Options on the left let you title your Live video, schedule it and set it to public or private.
When you go live, a Live tag will pop up on your Instagram Stories bubble to alert followers.
One of the best things about Snapchat is the ability to add fun and flair to your photos. Instagram Stories have a bevy of customization features, too. After shooting a photo or video, swipe across it to add a filter. You can choose from options like Lagos, Los Angeles and Abu Dhabi.
If you see someone else using a filter on their Story and you want to give it a try, tap the name of the filter (below their username). A menu will pop up allowing you to try it instantly or save it for later.
Stories also let you add augmented reality filters to your pictures, just like Snapchat. Here's how to try them out.
1. Go to the Stories camera.
2. On the bottom, scroll across the different filter options. (Scroll to the end and tap the magnifying glass to browse even more effects.)
3. Tap the filters to try them on.
4. When you find a filter you like, snap a photo or take a video. These filters also work on Instagram Live.
Add entertaining filters to your photos and videos.
Screenshot/Mary KingOnce you've picked your filter, add some stickers. You'll find a stickers button with a smiley face on it in the top right corner next to the text tool. Tap the button, and you'll be able to jazz up your Story with customizable stickers. Some options include the weather, the day of the week, holidays, quizzes and polls. Once you add a sticker, you can add another, move it around and resize it.
You can also make your own stickers from images in your gallery.![]() Here's how:
Here's how:
1. Take a photo or video, then tap the stickers button.
2. Scroll until you find a circular icon showing your most recent camera roll photo.
3. Tap that icon, and select one of your images to use as a custom sticker.
4. Once the custom sticker is on your story, tap the sticker and it will transform into shapes like hearts and stars.
Hashtag stickers are another customization option. Just tap on the sticker that says Hashtag and customize it with your own hashtag. Other people will be able to tap on the sticker and find other photos with the same hashtag. You can also add a hashtag to regular text on your Story and it will be clickable, too.
If you want a sticker for something specific -- like, say, cats -- search "cat" and you'll be presented with both emoji options and gifs. To add a GIF sticker to your post, go to the sticker option and tap on the GIF icon. A library of the moving photos will open, provided by Giphy. When you find one that you like, just add it like you would any other sticker. Searching the word "Effects" will get you sparkles, hearts and other fun additions for your subject's environment.
Once you have your stickers added, go crazy with some snappy text. To add text simply tap on the text icon in the upper right side of the screen and tap on your color of choice. If the colors just aren't right, don't despair. Swipe left on the color palette to reveal more options, or tap the eyedropper icon to pick a color from the image.
Don't want to share a photo at all and just need a blank canvas for text? Go to the Story camera and hit the Aa button on the left. Tap the colorful button on the bottom right to change the color of the canvas.
Swipe through the icons on the bottom to see options for gifs, countdown widgets, quizzes, question prompts your followers can answer, and more.
The results may be frightening.
InstagramWhen adding text to a Story, all you have to do is include the @ symbol followed by the username to tag someone. The tag is a live link to the person's profile and you can tag up to 10 people.
You can share other people's Stories by tapping the Direct icon (it looks like a flying paper airplane) on the bottom right of the Stories' screen, choose the friend you want to share with, write a message and tap Send.
When you get a Story sent to you, it will come to your Direct inbox. Be quick, though. When the story disappears after 24 hours, you won't be able to look at it.
If you don't want people to share your Stories, just turn off the sharing ability. Go to your Story camera > Settings icon > Story and toggle Allow Sharing to Messages off.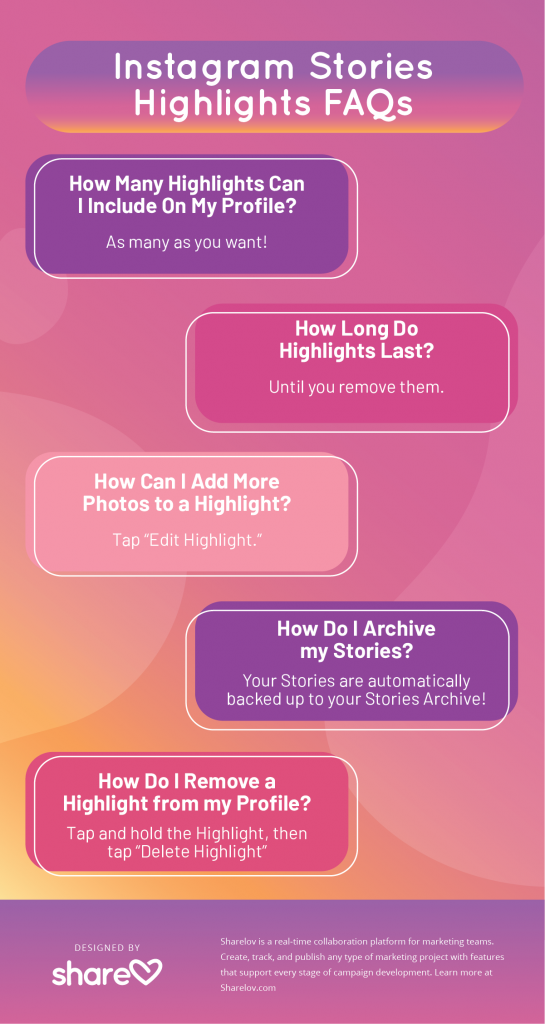
Navigating through Stories is super simple. While browsing the Stories of your friends, swipe right to go to the previous one, left to go to the next one and tap to skip a photo or video.
If you want to linger on one photo, you can pause a story by tapping and holding your finger on the photo. To start the story again, just lift your finger. This also works for video.
If you cringe every time you see a certain someone's Story in the lineup, you can mute it. Simply tap and hold on that person's Story icon when it appears in your Story lineup. A window will pop up that will give you the option to mute this person's stories.
Muting doesn't hide the Story totally. It just moves it to the last of the lineup and it won't automatically open while you're playing Stories. You'll need to manually unmute people to get their stories back in the normal mix. Just tap and hold on that person's Story icon and tap the unmute option.
You can also choose who gets to see your Stories and who doesn't. Want to prevent your parents from seeing that epic Friday night out, for example?
1. Go to your Story camera.
2. Tap the Settings icon.
3. Choose Story.
4. Tap Hide My Story From. Select your parents (or whoever else you want) from the list and tap Done. They will still be able to see your posts and profile, but they won't see your Story.
You can prevent certain people from sending you messages from your Story, too. In your Story settings, select an option from the Allow message replies list. You can choose Your followers, Followers you follow back or just Off to prevent anyone from commenting.
Curious to see who's looking at your story? Open your story and swipe up on the screen. At the bottom of the screen will be a view counter and the names of the people who viewed it, plus a heart next to the people who Liked it. Only you can see this information.
If you've become attached to your Story and don't want it to lose it forever, you can download it to your phone. Open your Story and tap the More icon bottom right of the photo or video. Then tap Save.
You can easily save your Stories to your camera roll, automatically, too. Go to your Story camera, find your Story settings and slide the Save story to Camera Roll option on. Every time you create a Story, the videos and images will be automatically saved to your camera roll on your phone.
If you decide you want everyone to see your photos or videos more permanently, you can add them to your profile grid. Simply open your Story, tap the three dots at the bottom right of the photo or video and tap Share as Post.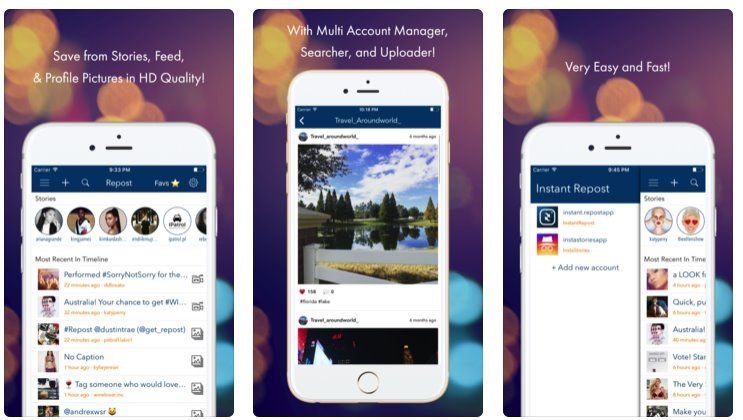 The photo or video will appear in your profile grid. Just beware, whoever can see your profile grid will be able to see the photo or video. It will no longer have special protections that you can add to Stories.
Looking for more Instagram tips? Check out these six hidden features on Instagram's in-app photo editor.
Instagram Stories let users post temporary updates to their profile that disappear after a day.
Snap a pic at a cool restaurant? Add it to your Story. Hanging inside watching movies on a rainy day? Add it to your Story. Take a really shaky video at a concert with incomprehensible audio? Add it to your Story *forces a smile.* That's the kind of content we love to see *forced smile intensifies.*
Many people use Stories to post minor updates to their day or life that they don't necessarily feel the need to commemorate with a permanent post. Followers can view the Story to check in, see what's up, and then be on their way.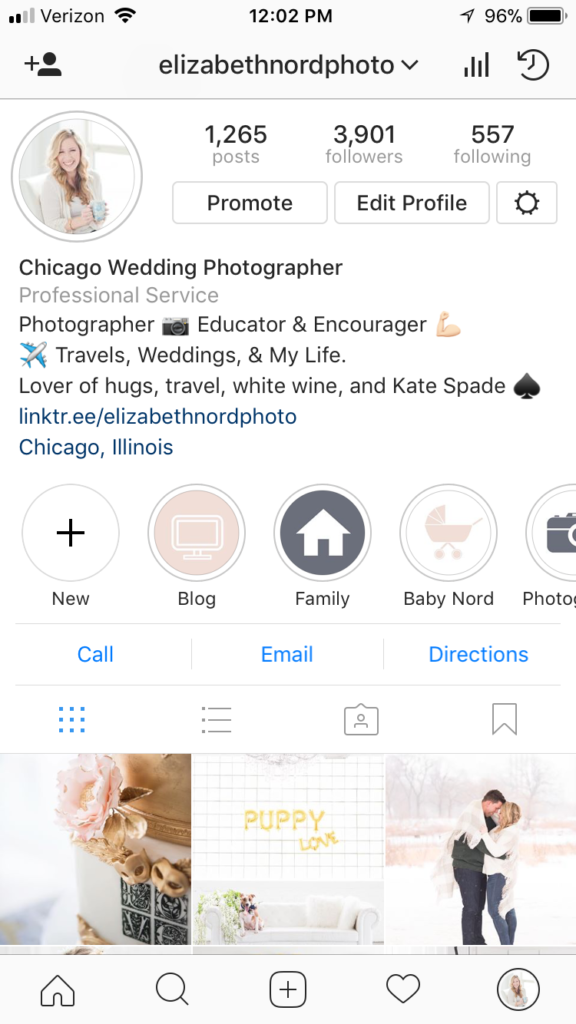
There's probably a million other reasons people use Insta Stories. We could try to list them all, but you probably just want to know how to make one, right? So without further ado...
There are a bunch of different ways you can start. All will get you to the same place.
1. From the home page (where your feed is), tap your profile picture in the top left where it says "Your Story" with a little plus sign next to it.
Tap "Your Story" to create a Story. Also, enjoy the Cats of Instagram post Credit: screenshot: instagram
OR
2. From the home page, tap the "+" icon at the top (to the left of the heart icon).
OR
3. From your profile page, tap the "+" icon in the top right corner, then select "Story" in the menu that pops up.
You can also get to your Story from your profile page. Credit: screenshot: instagram
OR
4. From the home page, simply swipe across your screen from left to right.
Any of those options should get you to your camera feed. Just make sure "Story" is selected at the bottom.
This is where you ultimately want to be to create your Story. Credit: screenshot: instagram
Now that you're here, this where the fun begins. You have access to a multitude of tools and features you can play around with to create your story. We'll give you the most important three steps and some basic info about the features in between. You'll have to play around with everything to create the specific Story you want.
1. Generally, you'd start by snapping a pic or a video.But you don't have to. You can scroll across the bottom to pick out a fun filter. You could also tap any of the features on the left to start. Here's a quick guide on what they can do.
Tools will help you create the kind of Story you want. Credit: screenshot: instagram
CreateAdd text with a background
Create a special occasion/shoutout post for someone (birthday, anniversary, etc.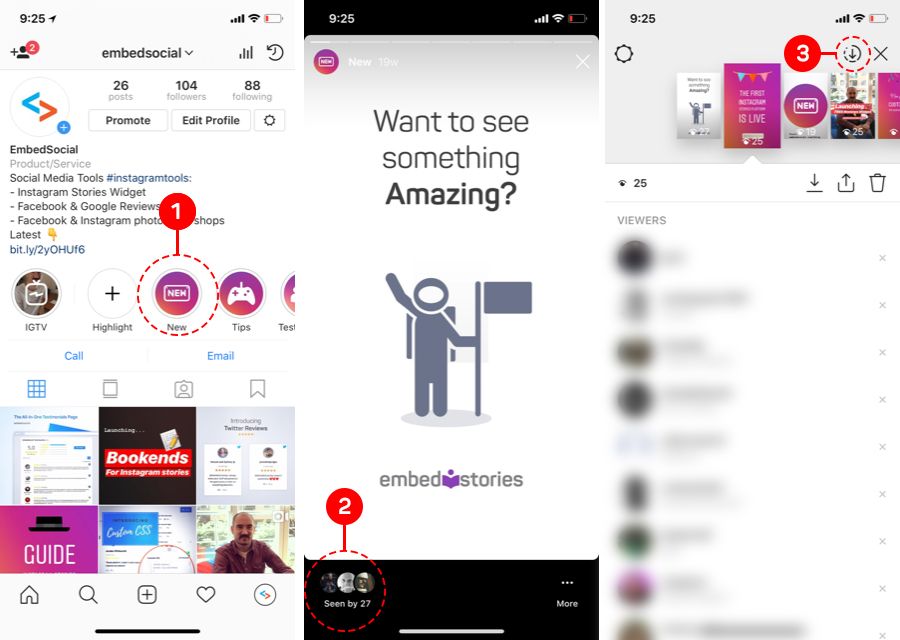 )
)
Add a GIF
Example of a "shoutout" post Credit: screenshot: instagram
BoomerangLayoutExample of the Layout feature Credit: screenshot: instagram
Hands-FreeMulti-CaptureLevel2. Once you have your picture or video, use the features at the top to edit it.Use these tools to edit/customize your Story pics and vids. Credit: screenshot: instagram
Symbols from left to right:
Save
Add music
Search for a song you want on your Story
Choose which 15-second segment of the song you want
Include lyrics in different fonts/colors or display the album artwork
Add music and show everybody what you're listening to.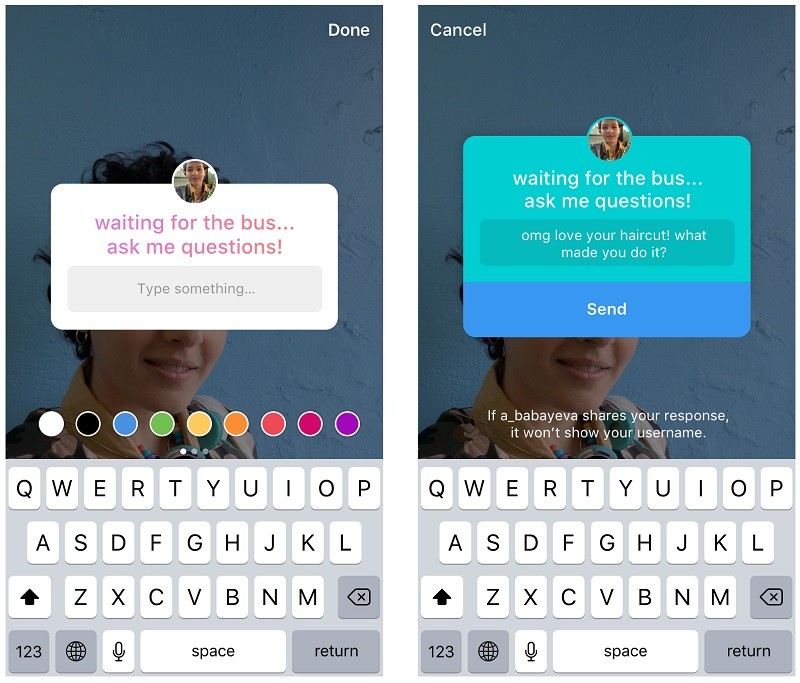 Credit: screenshot: instagram
Add stickers
Draw/paint:
We may have messed around a bit with the free-draw feature. Credit: screenshot: instagram
Add text
Type custom text to overlay on your Story
Apply background
Use different colors
Center or align however you want
You can also choose to send it directly to somebody you follow. But otherwise, it's up on your Story for your followers to view for the next 24 hours.
The story is live! At least until I delete it in about five minutes. Credit: screenshot: instagram
Instagram Stories, aka “stories”, “moments”, “stories” or “stories” appeared in 2016, and since then have gained such popularity that Instagram is constantly updating and improving this format.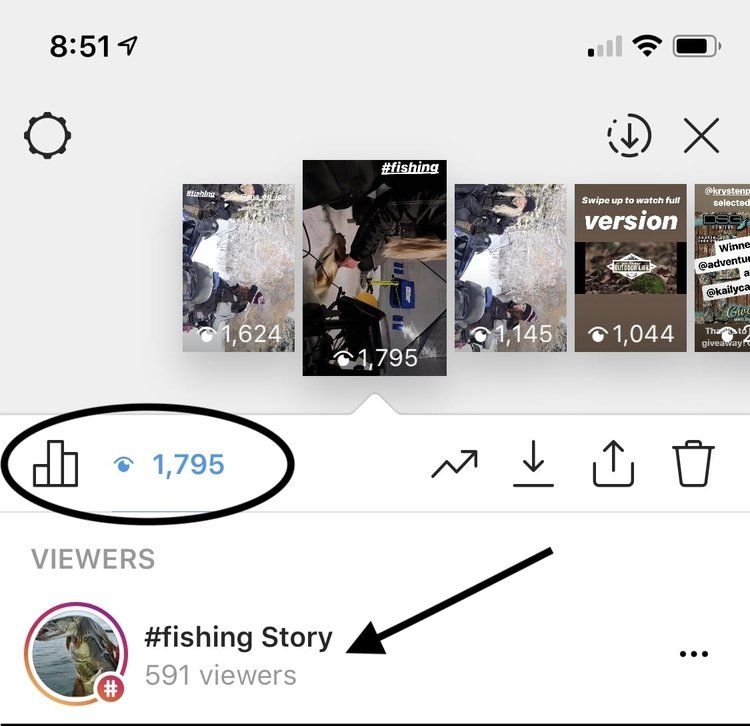 Instagram Stories appeared thanks to the growing popularity of Snapchat, in which users could send short videos and photos.
Now more than 400 million Instagram users view Stories per day, and this figure continues to grow.
Any content on Instagram can be seen by all users - profile posts and “stories” - this is a very promising media format, moreover, stories are integrated with Facebook, and users can view them from the feed of this social network.
Stories can only be viewed for 24 hours, after which they disappear from the feed and are stored in an archive accessible only to the user. The time of one video clip is no more than 15 seconds.
“Stories” are actively used for advertising, personal brand and business promotion. They help the brand to remind about itself, attract a new audience, talk about promotions and new products. Stories is like your own TV channel.
Instagram Stories appear at the top of the app, to view stories, just click on the profile photo. Stories are rewound with a single tap on the phone screen: on the right - fast forward, on the left - back. Stories are paused by long pressing the screen - this is usually used to read long texts.
To switch stories, swipe from right to left or vice versa.
You can create stories through Instagram or third-party applications, upload photos and videos from your computer after editing them. We will tell you about all the ways to create and upload stories.
To add previously captured videos and photos to stories, you need to switch to the Stories shooting mode, click on the leftmost button to go to the gallery, and select the necessary files. Thus, you can shoot stories not only with the camera from the application, but also with any available phone camera that you use.
Instagram allows you to capture and edit your Stories directly from the app. To create a Story, click the camera icon in the top left corner of the app, or open the camera by swiping right.
Instagram camera has several modes and features. Let's get to know each of them.
As soon as you switch to creating stories, the normal camera mode turns on. One short press on the central round button creates a photo, a long press - a video that lasts 15 seconds. If you hold the button and move it up, the camera will move closer to the object.
Below the photo and video button is a menu with other camera modes.
Boomerang
Boomerang is an analogue of live photos, that is, short looped videos made up of a series of photos. Frames taken one after another are played from beginning to end and in reverse order. Boomerangs are not as popular now as they were when they appeared, but users still love to make short videos and come up with new ideas.
View this post on Instagram
Posted by Starbucks Coffee ☕ (@starbucks)
Superzoom
Superzoom allows you to shoot dramatic 3-second video music using a special camera close to the subject. Instagram gives you the opportunity to choose several shooting options, from romantic to tragic. It remains only to choose the right one.
Reverse Capture
Reverse Capture creates videos with reverse playback, so you can diversify your content with an interesting idea.
View this post on Instagram
Posted by ReverX (@reverx.app)
Shooting one video will last 15 seconds.
Text
Text - a mode that allows you to insert text information into stories. There are several font options: modern, neon, typewriter, bold. Fonts are switched by touching the font name at the top of the screen. You can change the background color by touching the button with the current color on the bottom left.
Live
Live allows you to broadcast stories in real time, communicate with subscribers and get instant feedback.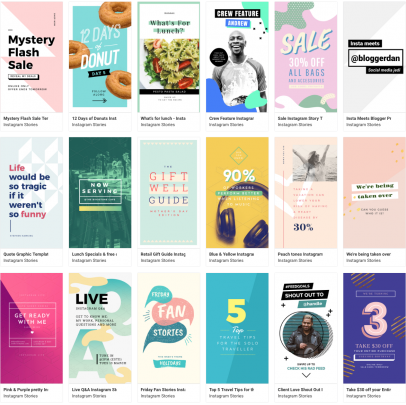 The live broadcast cannot last more than one hour, and users see the comments and likes coming at this time on the screen with the broadcast. Starting a live broadcast is very easy. It is enough to select the desired mode, and the “On Air” button will appear. Subscribers who are currently online (they can be seen live) will receive a notification when the broadcast begins.
During the live broadcast, you can write a comment and pin it on the screen. You can turn off the ability to comment for everyone by clicking on the menu item and selecting “Turn off comments”. Live broadcast allows you to broadcast together with another user.
To end the broadcast, you must click “End” and confirm the action. By clicking the "Save" button, you will download the live broadcast without likes and comments. This function is made so that the video material is not lost. The live broadcast can be seen on Instagram in the recording for another 24 hours, like regular stories.
Remember: if you don't save the live broadcast, it will be deleted after 24 hours and you won't be able to restore it.
Instagram masks
Another feature of stories is adding masks. Masks are virtual face filters that make Stories even more colorful and funny.
Masks are available in almost all shooting modes. Just click on the smiley to the right of the record button and select the appropriate one. Masks can change along with the rotation of the camera, the surrounding space or the user's facial expressions.
You can publish your posts from your Instagram profile to Stories to attract more attention to them. To do this, you need to click on the airplane icon under the post and select “Add to story”.
You can repost the story itself from another person's profile if your account is tagged in it. When this happens, you will receive a notification in private messages about the mention in the story, there is also an active link “Add this to the story”.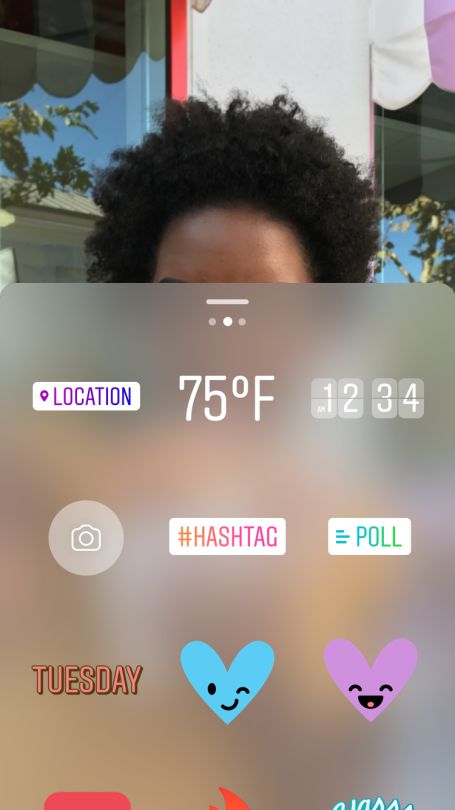 After clicking on the link, a window with editing stories will open.
Once you've shot your story, it's time to edit it. Editing is available for both photos and videos.
How to add filters to Instagram?
To view and apply filters, swipe left and select your favorite.
How to add hashtags to Instagram Stories?
A hashtag is a special label that combines user content into one group. On Instagram, hashtags are used not only as a means of navigation and search, but also for promotion. We can say that hashtags are the keywords of your post, story and Instagram profile.
There are several ways to add hashtags to stories.
The first way: click on the sticker icon at the top of the screen and select “#Hashtag”. In this case, you need to enter the hashtag without the pound sign #, Instagram will offer several popular or frequently used hashtags.
Second way: enter the hashtag using the Text tool. In this case, you must enter along with the hashtag #, and Instagram will also offer to select popular or frequently used hashtags.
Some users use tricks to insert more hashtags into stories. They use two methods at once, write more hashtags in text, hide hashtags in a poorly viewed area of the screen (at the very bottom or top of the story), fill the text with a hashtag with a background color so that they are not visible to users and do not annoy when viewing.
These hashtags are also included in Instagram searches.
On Onlypult.com, when publishing stories, you can insert up to 9hashtags, while they are not visible in the story itself, but participate in the Instagram search.
How to geotag Instagram?
Instagram geotags are also used to promote and search for publications. Geotags or geotags are data about a specific position that are affixed to a frame as metadata.
Inserting a geotag into an Instagram story is very easy. Just click on the sticker icon and select . Choose from the proposed list or start typing the name of the location.
How to tag a person in an Instagram story?
To mark another Instagram profile in your story, you need to select the “Text” tool and enter the user's nickname, starting with the @ symbol. In this way, you can enter up to 10 profiles in one History. If you click on the sticker and select “Mention” from the menu that appears, you can add one profile without using the @ symbol.
In both cases, Instagram will prompt you to select a profile corresponding to the characters you enter, it remains to choose the one you need.
The user will be notified that they have been mentioned. He will not be able to remove the mark, but it will be possible to share this Story in his account.
After affixing such a mark, subscribers will be able to go to the specified profile by clicking on it in the story.
How to insert a link in an Instagram story?
This feature is only available to business accounts with more than 10,000 subscribers. A few days after reaching the required threshold, a link button appears at the top of the screen in the interface for adding stories.
With this tool, discounts and promotions are announced, Instagram users are directed to the site or a separate page of the site, links are added to blog articles, online and offline events, and so on. By clicking on the button, enter the desired link and create a story. When viewing your Story, users only need to swipe up to follow the link.
If after reaching 10,000 followers the link button still does not appear, try restarting your phone or updating the app, you can also contact Instagram support.
How to draw on Instagram stories?
Instagram Stories has a drawing tool. To use it, you need to click on the pencil icon at the top of the screen.
Several modes or brushes are available for drawing. They differ in overlay style and line thickness.
Use the drawing tool to fill a photo with a solid color. Just select the desired color at the bottom of the screen and pinch the photo anywhere.
To fill with a translucent solid tone, choose a brush with a thick nib or a “marker”.
There is another secret to this tool. You can choose not only the standard colors indicated in the palette. If you press and hold the colors of the palette, a panel with a choice of an arbitrary color will appear. Without lifting your finger from the screen, move to the desired color to select.
How to add a selfie to Instagram stories?
You can add a selfie to the finished photo or video. To do this, click on the camera sticker. If you click on the finished selfie, the design will change: blurry edges or a white frame.
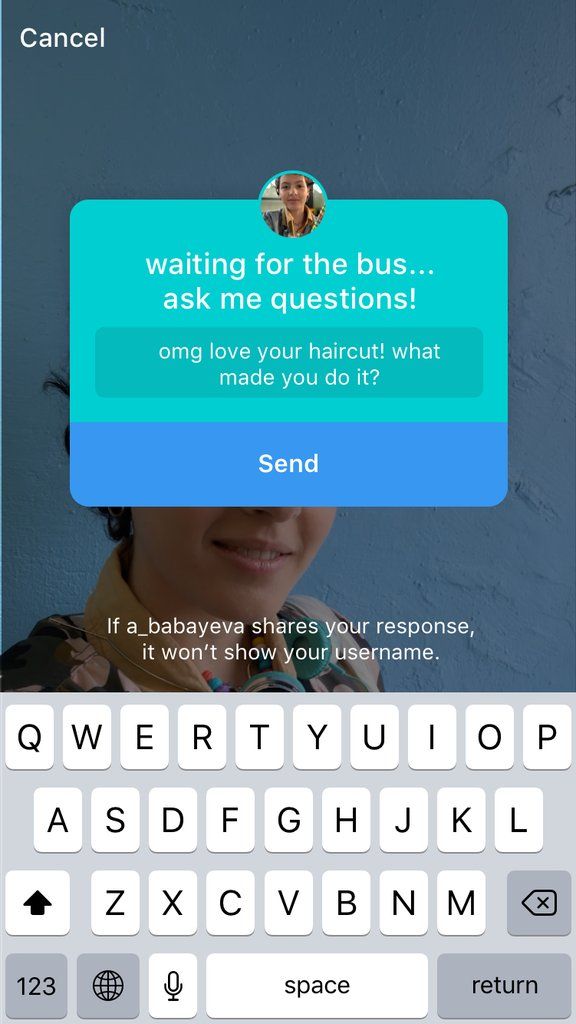
Questions.
A form is attached to the story in which you can enter your question. Subscribers will be able to ask you any questions.
To insert a form, select the “Questions” widget while editing stories. You can choose the color and size of the published form.
Enter your appeal in the form. For example, “I will answer your questions. Ask!”.
Responses can be viewed by clicking in the lower left corner in the story. You can share responses with subscribers, to do this, open the desired response and click "Share response". You can choose the color of the form, add a comment and publish to stories.
Polls
The "Polls" widget allows you to conduct a small survey among subscribers, where only two answers are available. The standard form is “Yes” and “No”, but you can enter your own question and short answers. After the survey is published, you will see the responses as a percentage.
In the story statistics, you can see which user clicked on which answer, and the total number of viewed stories.
Voting
Voting in stories is done using a scale. By selecting the appropriate widget, you can assign the color of the scale and emoji for the answer. Ask a question, and to answer it, subscribers will move the slider, expressing the degree of their reaction to the question.
Statistics will show exactly how users voted, as well as the average answer on the scale.
Quiz
This widget is also called “Test” because you enter the correct answer, and users, having chosen an option, immediately see whether it is correct or not. To insert a widget, click on the sticker icons and select "Quiz" in the story. In the form that appears, you can enter your question and several answers.
There can only be four answers. Enter the answers in order and press “Next” on the phone keypad for new options to appear next.
The color is changed using the setting at the top of the screen.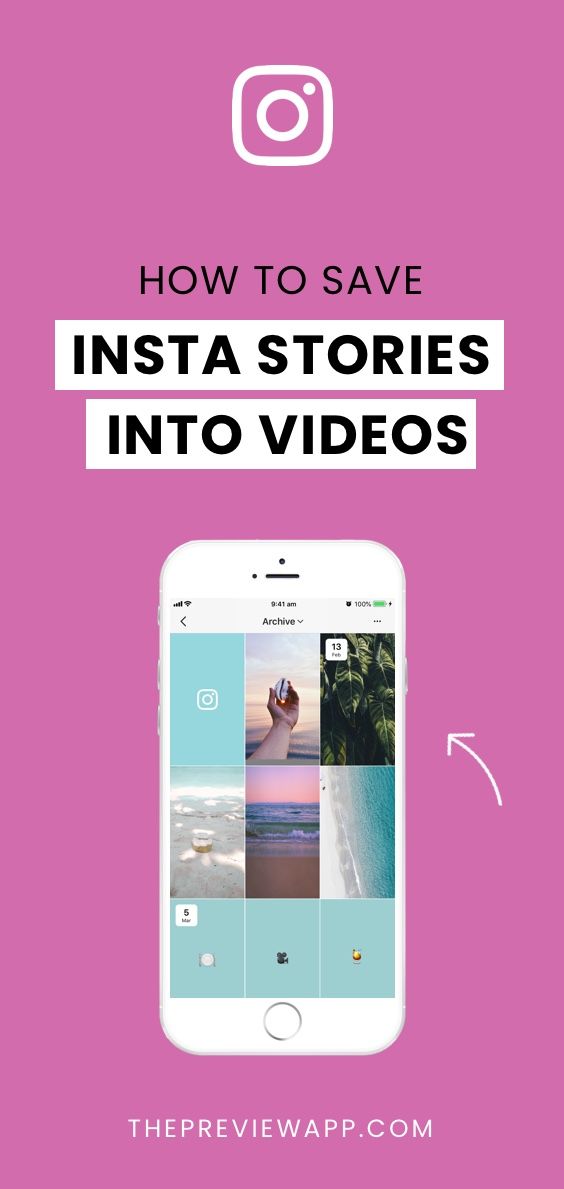
Do not forget to indicate the correct answer. To do this, click on the letter of one of the options, it will be highlighted in green.
To see user responses, go to your story statistics or swipe up. You will see the number of correct and incorrect answers, as well as the total number of viewed stories.
Adding music to Stories has been available since 2018, but not in all countries. Therefore, if it is not possible to add music directly through Instagram, you need to use third-party applications. But we will tell you about all the ways.
How to add music through the Instagram app?
If you can add music through the Instagram app, click on the sticker icon and select “Music” from the menu. The application has a search by mood, genre and popularity. After selecting a song, you can rewind to the desired moment, and the track will be played from a given point while the story continues.
You can add a track before selecting a video. Open the camera, swipe the menu under the record button to the right and select "Music". Find the song and the right moment, and record a video while the song is playing.
How to add music to Instagram?
If there is no choice of music in the Instagram application, it is possible to add it to the story through third-party video editors.
You can download the video editor from the App Store or Google Play, here are some of them:
Storybeat - allows you to add not only music, but also small effects on photos and videos, you can record your voice or slow down the video.
InShot - can remove unwanted frames, suppress noise, add text and stickers. Music is added only from the device library.
PicMusic - photo and video editor, you can add music, voice, text.
When a story is ready and edited, it can be published.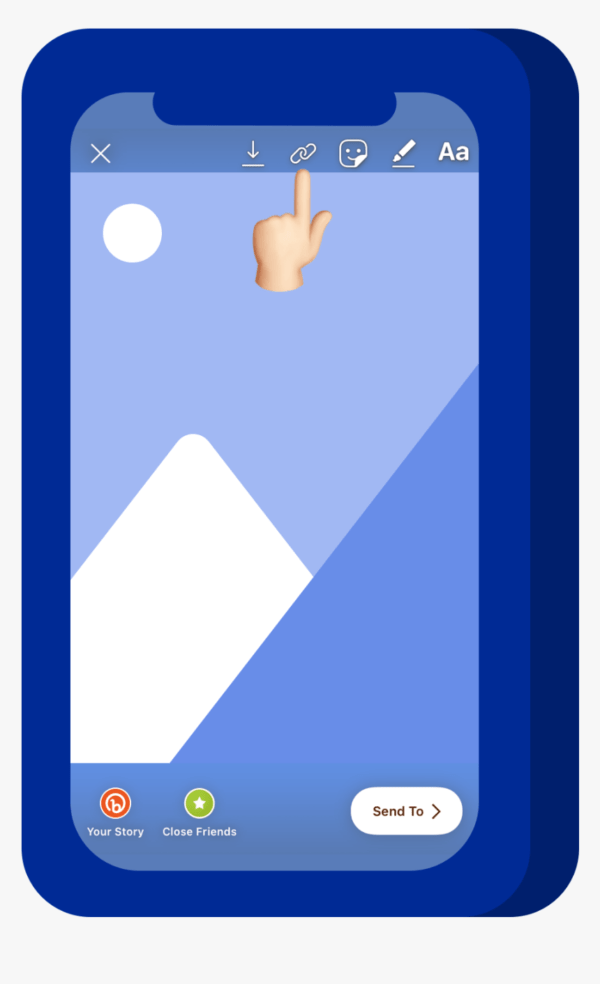 To do this, just click the “Your story” button in the lower left corner, and the story will be published on your profile and will be available to everyone. You can limit your viewers by clicking the "Best Friends" button when posting. Then only those whom you add to your friends list will see the Story.
Stories can be sent to selected contacts if you click on the "Publish" button and select the desired profiles.
Within 24 hours, while the published History is available, it can be deleted, edited and adjusted. To do this, click on the three dots in the lower right corner and select the desired menu item.
To customize your story, select "Story Settings". By moving the sliders and checking the checkboxes, you can customize the display of stories for yourself. Here you can hide Stories from certain accounts, allow or block comments on stories, and create a list of best friends.
You can post multiple stories at the same time. To do this, select the story camera and click on the gallery icon.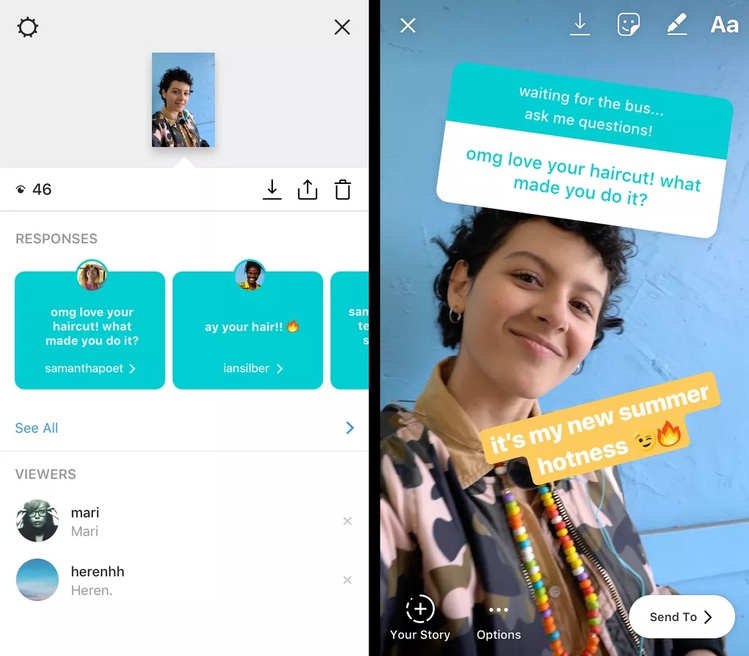 The latest photos and videos taken by the device will be shown. Click the pages icon at the top right and select all the photos and videos you want in the order in which they should be posted. Each story can be edited before publication.
To publish stories from a computer, you need to use third-party services. For example, the Onlypult.com deferred posting service, with which you can select the date and time of publication.
Go to the service website, click "Stories", edit the publication card and set the time. Ready!
Already published stories can be deleted. To do this, you need to open the Stories and at the moment the unnecessary file is displayed, click “More” in the lower right corner. When the additional menu of stories comes out, click “Delete” and confirm the deletion.
To delete the entire history, you must delete each file in it.
Stories Highlights or Actual Stories - albums or sections with archived Stories that users can save in their profile. Thus, all saved stories can be sorted or the main ones can be selected - as it is more convenient for anyone.
Actual stories you create yourself. They will appear on your profile above your photos. You can add to Topical those stories that have already been published. To do this, in the profile, click on the plus sign “+”, select the desired stories and click “Next”. Give a name to the new collection of "Actual", select the cover (initially it will be one of the stories) and click "Done".
Here you can save promotions, portfolios, products, case studies, workshops and much more. This will make it easier to navigate through your account and allow you to highlight the information you need.
When creating Actual Stories, it is important to remember:

For the latest, you can create and upload your own icons. This will emphasize individuality.
There are several ways to create a story icon.
The easiest option is to use a pre-made Story and select it as the cover.
Click on the “+” in the Instagram profile, select the necessary stories and click “Next”. After that, give a name to the new album and click "Edit Cover". In this step, you can choose any story for the cover, zoom in or out, or select a specific part of the photo.
Click "Done" and your new album will appear on your profile.
Another way to create an icon is to make it in third-party applications and services. For example, in Canva or Photoshop. It is better to create regular square images, where the icon will be located in the center. The optimal image resolution is 1080x1080 pixels.
The finished picture can be uploaded as a story and selected as a cover according to an already known option. Or, when editing a cover in Actual, click on the gallery icon and select from phone files.
To insert a cover into an already created album, you need to open it through your Instagram profile. In the lower right corner, click on the three dots with the words “More”, and then “Edit current”.
Click “Edit Cover” and select the desired icon.
Stories statistics can be viewed by connecting a business account.
To view statistics, go to your Instagram profile, click on the menu icon in the upper right corner and select "Statistics". You will have access to account statistics and publications.
The “Stories” section displays statistics of stories posted in the last 24 hours. But you can find out the statistics of publications made in the last 14 days. To do this, click "All" in the "Stories" section.
In the filter above statistics, you can switch data and view statistics on impressions, reach, clicks, scrolls, responses, and so on.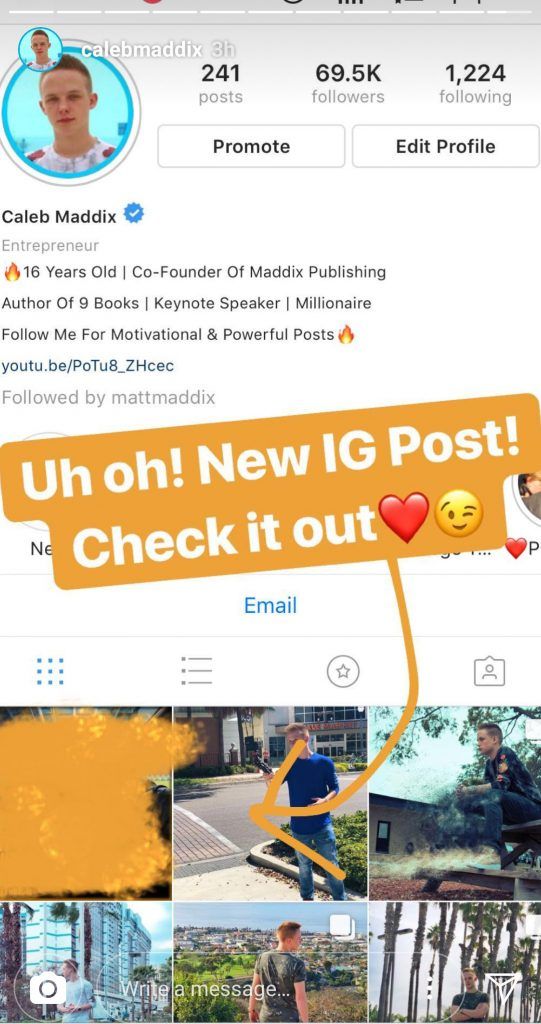
Impressions - the total number of views of stories.
Reach is the number of people who viewed your stories. Impressions for the same account do not count here.
Scroll forward and backward - how many times users have moved to your next post or returned to the previous one. So you can understand whether the audience was interested or not, they were intrigued by the continuation of the viewing, they understood what you wanted to tell in the story.
Next story - transitions to the stories of other accounts. The data shows how many people moved from your story to the next without being interested in the content.
Exits - shows how many times users clicked the cross to exit your Story.
Replies - how many people have responded to your stories.
Reposts - how many other accounts reposted your story.
Clicks on the link - how many people followed the link published in the story.
Stories statistics provide detailed metrics and help you determine how engaged your viewers are when viewing Stories.
Instagram stories can be created on third-party resources and use not only the standard tools that Instagram offers.
Here are a few services where you can create stories from ready-made templates, upload your photos or use ready-made backgrounds and fonts:
Easil is a platform with a number of ready-made templates that you can change. Templates already have the correct dimensions for stories, but in the paid version it is possible to change them.
Another popular platform for creating marketing materials, including Instagram Stories, is Canva. All templates you create will be stored on the platform and you can download them at any time.
Is the list of viewed Stories displayed in order?
Instagram uses different ranking methods, and users sort differently. Moreover, it can change every few months. Therefore, for some users, lists can be shown by viewing time, for others by the frequency of interaction with the profile, and so on.
How is the list of unviewed Stories formed?
Usually shows actual stories made in the last 4 hours. Then they are mixed with the earlier ones. But Instagram pays more attention to real people, so the stories of ordinary accounts are shown first, and then commercial or impersonal ones.
Viewing History will count as a profile visit?
No. According to Instagram, visits are the number of clicks on a username to go to a profile.
To learn more about Instagram and other social networks, subscribe to our newsletter.
Stories are publications that have a limited broadcast period of only 24 hours in the feed, after which they are not deleted, but sent to the Instagram stories archive.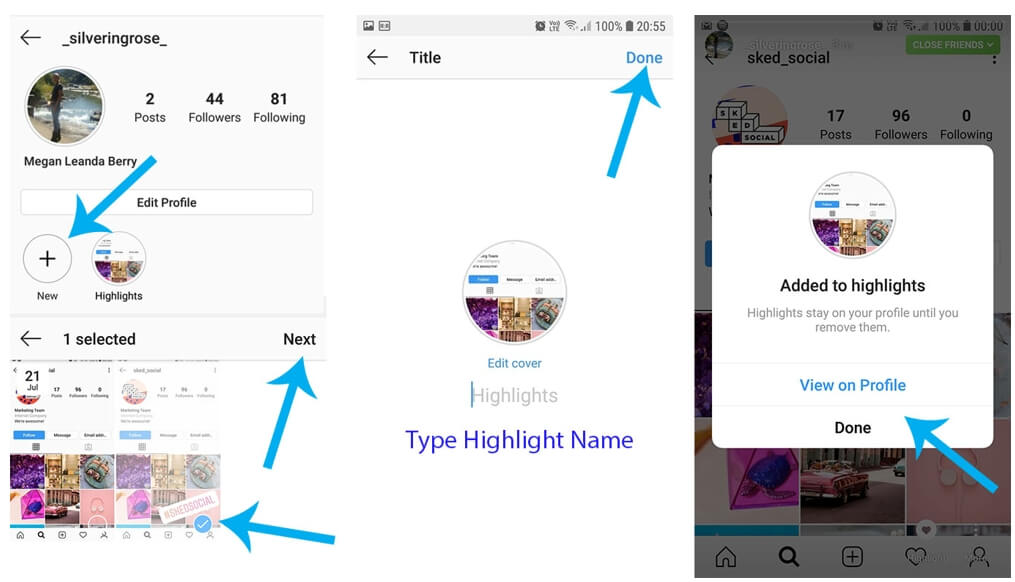 In the article we will tell you how the service works, where to find and how to view the archive.
The archive stores all the stories you published from the moment you registered on the social network. This important feature will prevent you from losing colorful content that is very dear to you. It will be very unpleasant if a high-quality and beautiful photo or video is deleted forever.
It should be remembered that only those publications that have been in the main feed for more than 24 hours will be stored in the repository. If you erased the content before the end of this period, then the history will not be saved.
Where is the archive list? Backup files can be found at any time, they are in the public domain, but only for the owner of the page in the service. Unauthorized persons will not be able to view stories. To go to the archive you will need:
Please note that on different operating systems and smartphones, the location of the main elements may differ.
Each story after the end of 24 hours and the end of the broadcast in the feed will be automatically saved to the storage.
As for all other publications, photos and videos that are not posted in the story feed, you will have to add them to storage yourself. After all, the automatic archiving function only applies to short recordings. Let's take a quick look at how to add a story to the archive list:
A similar algorithm must be performed with each publication that you want to save.
If you want to archive material on Instagram through a computer, you will have to face a number of difficulties. In the web version of the social network, there is no such function and it is impossible to access the vault. The official application for Windows solves the problem, starting from version 8 of the operating system, but in this case, only publications are displayed in the archive, but no stories. To add stories to the archive from a PC, you need:
Note. To have access to all the functionality on a PC, you can use the mobile version of Instagram by downloading an Android emulator or installing additional browser extensions.
In the archive, you can set up the desired publication at any time, edit it and re-place it in the news feed. In this case, the entry will be displayed with a memory mark, which can be erased using standard social network tools. If you decide to delete Instagram stories from storage, then follow these steps:
The procedure is the same for the PC application. Thus, you can erase from the archive not only stories from the tape, but also all saved photos and videos. It should be remembered that after this it will no longer be possible to restore the content, so think carefully before proceeding with actions.
It's important to remember that your mobile device and app may have the automatic storage feature disabled. In this case, you need to activate it: