(Update on November 14, 2021 at 9:00AM PT: This blog post was published in 2019. For up-to-date information about using video on Instagram, please visit our video solutions page.)
Read this guide for creative tips to enhance your photos and videos, as well as creative tools you can use to create content on Instagram.
Step 1: Get creative with these 8 post ideas
Instagram is where you can showcase your business' personality. By sharing photos and videos, you can invite your audience to learn more about your business. Let’s look at the 8 ideas below to create different types of photos and videos.
Learn more about how to take photos and videos with your Camera here.
Show the behind-the-scenes of your business.
Provide a tour of your workplace, spotlight a team member, or show the process of creating your product or service.
Announce new products or services.
Share a new product or product feature to create a buzz, or record yourself unboxing your own product. In the example above, @JARSbydani created buzz by sharing the new flavors she was working on prior to launching. (Update on October 29, 2021 at 11:00AM PT: "@jars_by_dani" is now "@JARSbydani" throughout this post.)
Make tutorials.
Show people the different ways they can use your products and services, whether through your captions or in a video.
Celebrate holidays.
You can post about mainstream holidays or think about smaller holidays.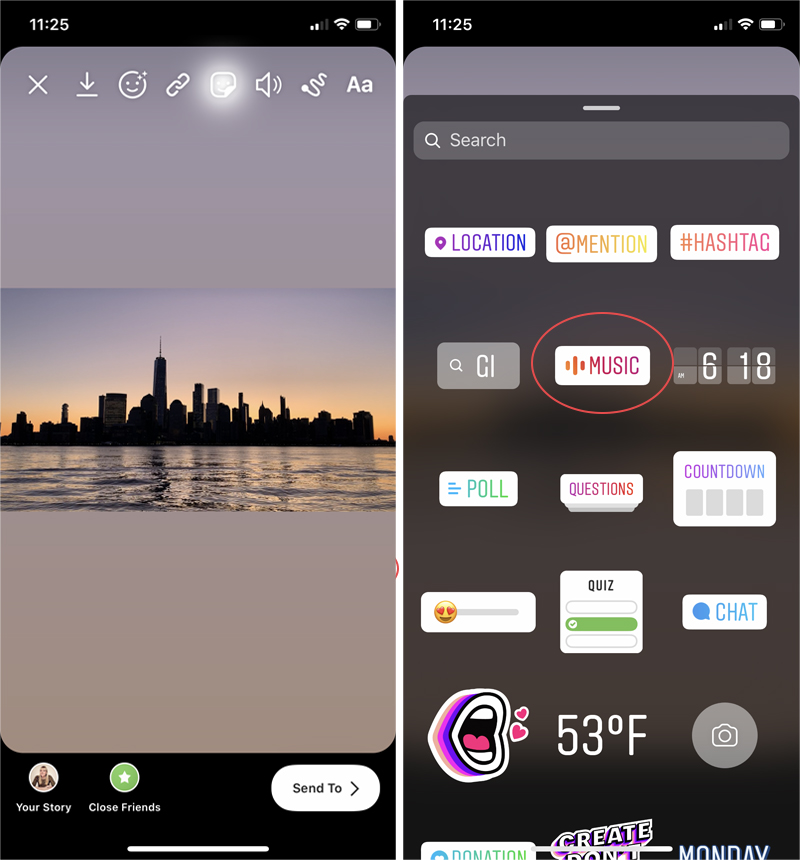 For example, if you run a donut shop, mark your calendar to create a special post for National Donut Day. Look at this photo @JARSbydani created for Valentine’s Day.
Share events.
If your business hosts events, invite your audience to post photos and videos before, during and after your event. Create a collection of your favorite moments by posting multiple photos or videos to tell the story of the night. Learn more about posting multiple photos or videos.
Get customer testimonials.
Ask customers for photos and videos with your products or services that you can share. You can even interview your trusted customers as they use them. Imagine a baker taking a video of a customer taking their first bite or a hair stylist filming a client during a cut.
Post other marketing materials.
Think about other photos and videos you’ve created for your marketing, like posters or creative for your website, that you can share.
Whatever posts you decide to create, don’t be afraid to experiment with different types of posts and ask for your followers’ feedback on what they enjoy the most.
Step 2: Add polish using these 4 photography techniques
Make your shots more balanced with the rule of thirds.
Look at the elements that are the most important in your shot. Then place the subject of the photo at the intersection points of the grid lines, which divides the photo into thirds.
Use space to spotlight your subject.
If you want to highlight the subject of your shot, add space around the subject to make it stand out. For instance, take a look at how @JARSbydani highlights their products against the table.
Use leading lines in photos.
People’s eyes follow lines in your photos. Create photos where the lines draw the eye to the subject you want to highlight, like this photo where @JARSbydani used the spoons to lead your eyes to her jars.
Experiment with light at different times of day.
Capture the soft light at sunset or create stark shadows at midday with harsh light. Take a look at how @JARSbydani captured her shot. You can also take night-time photos with neon lights or a colorful filter help set a mood and contrast your photos.
Step 3: Get the look you want with these 5 editing techniques
Taking the perfect photo or video when you’re crunched for time running your business can be hard. Use the 5 editing techniques below to enhance your photos after you’ve shot them.
Learn about specific creative effects you can use for your photos and videos here.
Crop to get your ideal image.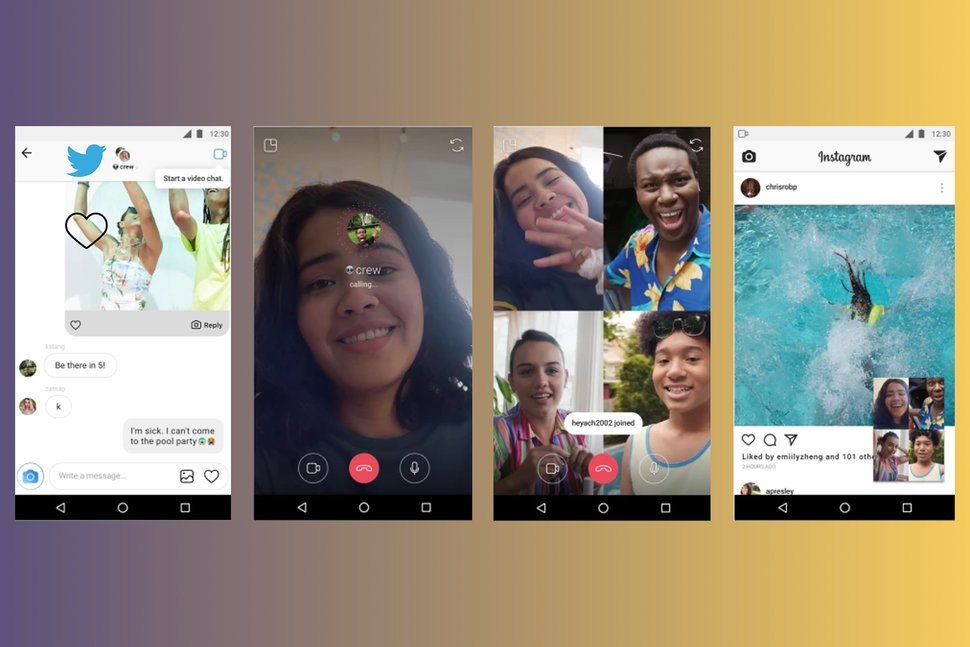
Play around with different zoom levels and angles for your shots. You can also share the same shot multiple times by cropping it differently each time. For instance, see how @JARSbydani has cropped her photo to zoom in just on her spoon.
Use Lux and enhance.
When you’re editing your photos, try tapping Lux, the magic wand on the top of your screen that appears when you take a photo using your in-app camera. Using Lux, you can immediately enhance your photos and videos by lightening shadows, darkening highlights and increasing contrast.
Use different filters for different moods.
Overlay the filters on your photos and think about the mood they convey—like Amaro if you want a vintage feel or Moon if you want classic black and white look.
Make your colors pop.
Experiment with tools like contrast and saturation to increase the intensity of your colors. Show off bold colors in your photos if that’s the look you’re going for, or tone it down if you’re going for a more muted look. For instance, see how @JARSbydani’s post with her rainbow cake really pops here.
Make your subject the center of attention.
If the subject of your photo is set in the center, add a vignette to darken your photo’s edges to direct people’s attention to it. Or, if you want to blur your background to focus on the subject in your foreground, try blurring it using Tilt Shift.
Step 4: 6 tips to make your videos look more professional
Create high-quality videos with these 6 tips.
Learn more about how to post videos on your feed here.
Make the right first impression.
Select a video cover that captures the essence of your video. Look at the bottom of the app after you shoot your video using the in-app camera. You’ll have the option to choose your cover, trim the video and add a filter.
Grab people’s attention in the first 5 seconds.
Show interesting visuals or share the most important points in your video upfront.
Keep your shots in focus.
Tap on your screen on the object you want to focus on when you’re recording. Keeping your shots in focus when filming a subject can make them look more professional.
Use Instagram’s creative tools to make engaging videos.
Hyperlapse helps you create time-lapse videos. Boomerang helps you create a mini video that loops back and forth.
Stabilize the shot for a polished look.
You can lean your phone against a wall or even get a tripod specifically for your phone.
Prep your people.
Make a list of talking points or a pre-written set of questions to get employees or partners ready to answer official questions about your business.
Instagram video content is currently available in four formats: Reels, Live, Stories, and Instagram Video.
Video content has exploded on the platform in recent years, with 91% of Instagram users reporting they watch videos on a weekly basis.
The varying formats of video across the platform may feel like a lot to juggle. But it’s also created new ways for marketers to tell stories and reach their audience.
Which Instagram video format is right for your brand? There may be a place in your social media strategy for all of them. Or maybe you’ll decide just to focus on a couple.
In this guide, we’ll teach you all about the features, specifications, and best practices for every type. Plus, we’ve rounded up tools that make using Instagram video that much easier.
Types of Instagram video
Instagram video size
Tips to make your Instagram videos go viral
Helpful Instagram video apps
Bonus: Download the free 10-Day Reels Challenge, a daily workbook of creative prompts that will help you get started with Instagram Reels, track your growth, and see results across your entire Instagram profile.
Types of Instagram videoReels, Stories, Live, oh my! If you’re looking to get started with Instagram video, we put together a simple breakdown of current formats to help.
Instagram StoriesInspired by Snapchat, Instagram Stories are 15-second videos that disappear after 24 hours.
Stories can be recorded by swiping right from the home screen, or by tapping the plus icon and selecting Stories. They can also be uploaded from your Photo Library.
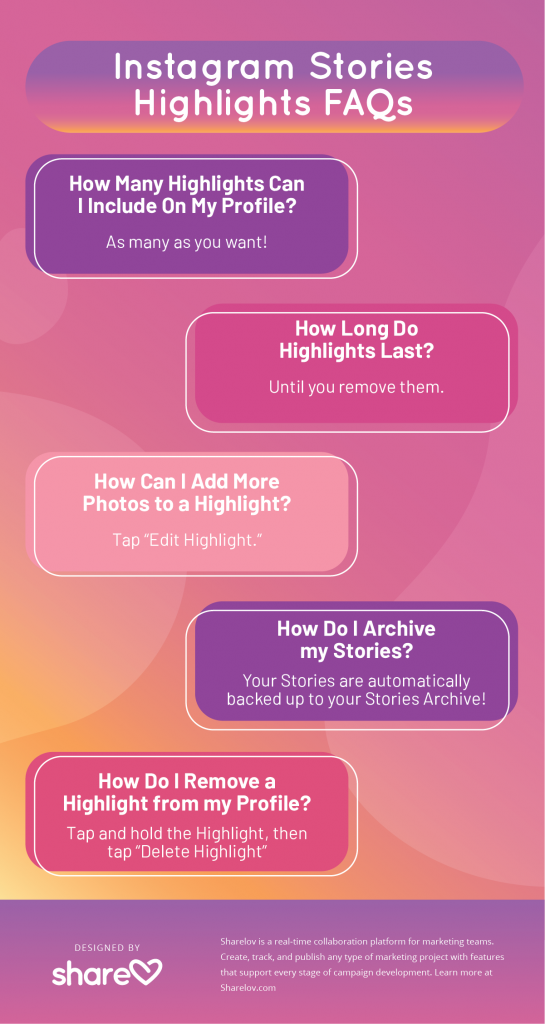
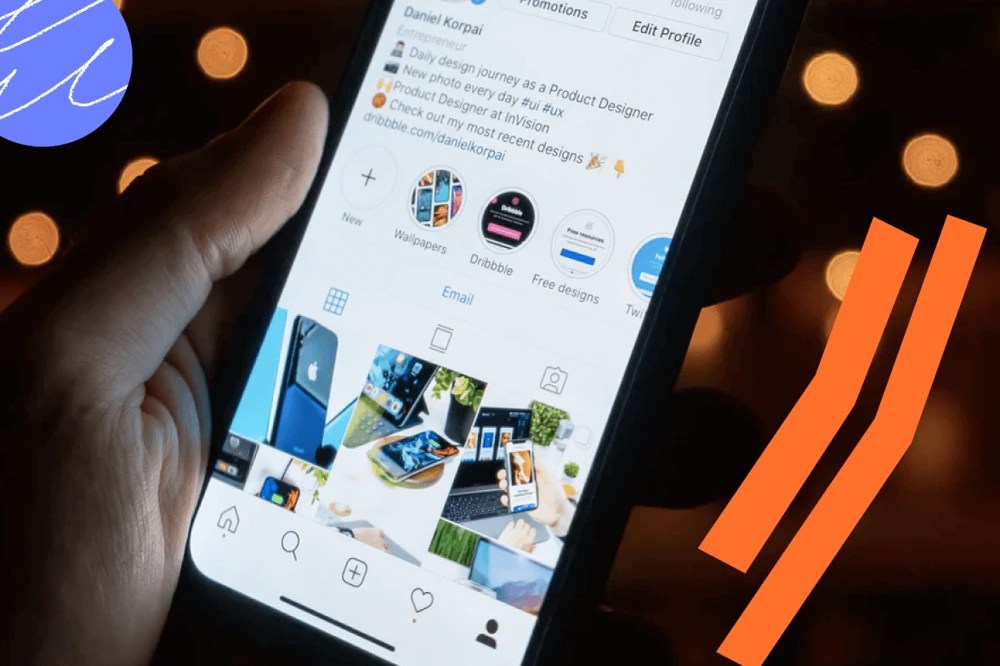
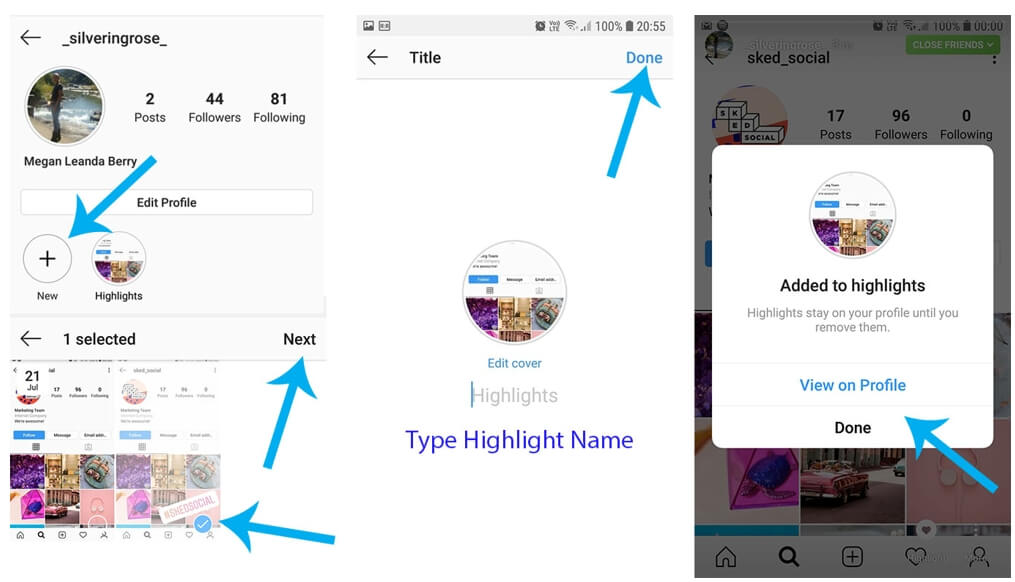
Expired Stories can be saved to the Highlights section of your Instagram profile, positioned just above the grid.
You can also add interactive elements such as filters, emojis, tags, and stickers to each Story. Several brands—some four million every month by Instagram’s count—have found novel ways to use these features, from “this or that” polls to Q&As and product tags.
Source: Instagram
Instagram Story tipsResource: Learn how to use Instagram Stories to build your audience.
Instagram Video is a format introduced in 2021. It replaced IGTV and combined it with in-feed video posts.
Instagram Video posts are added the same way images are posted: by using Instagram’s built-in camera or by uploading from your Photo Library.
Instagram videos can be up to 60 minutes in length, giving you creative freedom that doesn’t yet exist on most competing platforms.
Instagram Video tipsView this post on Instagram
A post shared by Jesse Cook (@musicianjessecook)
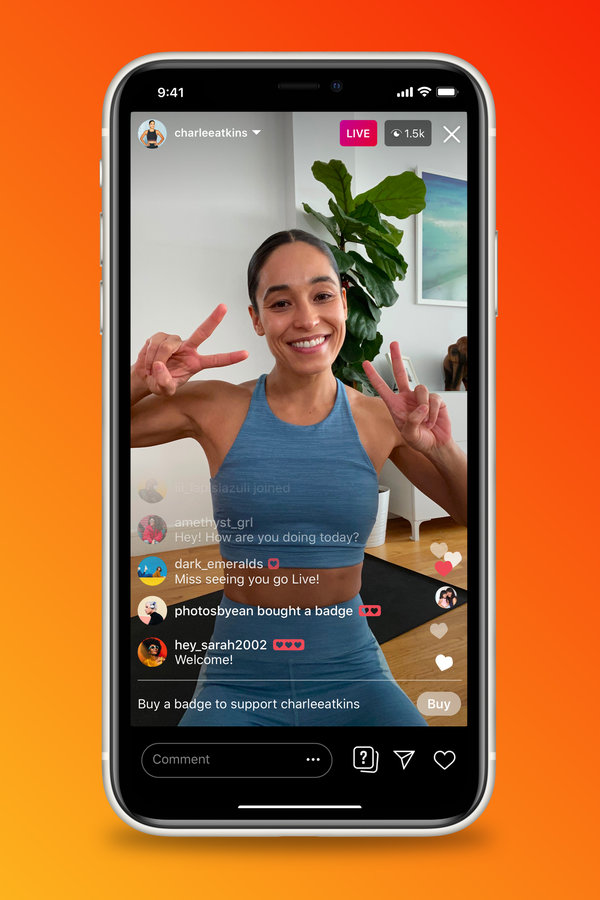
Instagram Live lets users video stream directly to their audience’s feeds. Brands and creators alike have used Instagram Live to host workshops, interviews, and more.
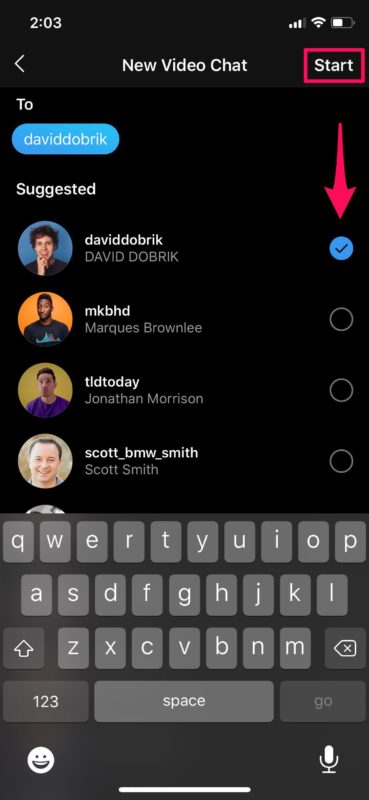
Start a Live broadcast by swiping right or tapping the plus icon and toggling to Live. Live streams can last up to four hours and can be hosted by one or two accounts.
When an account goes Live, they appear at the front of the Stories bar with a Live icon. Once finished, Instagram Live videos can be shared for 30 days before they are deleted.
Instagram Live tipsView this post on Instagram
A post shared by Cara Mia (@oh.uke.mia)

Resource: How to use Instagram Live to grow and engage your followers.
Instagram ReelsReels is Instagram’s latest video format. Inspired by TikTok, these 15-30 second clips can be created with Instagram’s camera or uploaded from the Photo Library.
Recording effects include timed text, AR filters, green screen mode, timer and speed controls, and access to an audio library.
Source: Instagram
Instagram Reels tipsResource: Everything you need to know about Instagram Reels
Instagram video sizeIf you’re ready to get started with Instagram video formats, the first thing to do is learn about Instagram video specs and sizes.
Here are the size and format specifications for each type of Instagram video.
Instagram Stories sizeStories take up the entire mobile screen and are tailored to the device. For that reason, exact specifications vary.
These are the recommended specs:
 MP4 or .MOV
Tip: Keep about 14% (~250 pixels) of the top and bottom of the video free from essential content. In this area, it could be obstructed by the profile photo or call to action.
Instagram feed video sizeInstagram feed videos are displayed in user feeds as well as on your Profile page. Use feed videos to promote a product, service, or collaboration with your audience.
Here are the recommended Instagram feed video specs:
Tip: Do not include edit lists or special boxes in file containers.
Instagram Live sizeInstagram Live broadcasts can only be recorded from the camera app. Specifications are similar to Instagram Stories. Before going live, be sure that you have a reliable and fast Internet connection.
Instagram Reels are fullscreen vertical videos dusplated in Stories, Feeds, Explore, and the Reels tab.
Here are the recommended Instagram Reels specs:
Tip: Include on-screen text, music, and closed captions to make your Reels engaging and accessible.
Tips to make your Instagram videos go viralEvery Instagram video format is different, but these best practices apply to all of them.
As a general rule, you have three seconds to stop thumbs from scrolling past your Instagram video. Or leaving your Instagram Story altogether.
Be sure to give people a reason to keep watching. Whether it’s arresting visuals or a teaser of what’s to come, find a way to offer instant appeal.
Don’t underestimate the importance of a caption either. If the video doesn’t grab someone’s attention, the caption is your second chance.
Create for mobileView this post on Instagram
A post shared by Nike (@nike)
While, most people intuitively use portrait or selfie mode when they record with their phones, that’s not the best practice for Instagram video. Most people view Instagram video on mobile, which means it’s best to shoot in vertical orientation.
Source: Instagram
Of course, there are some exceptions. For longer video content, horizontal video may be a better fit. Viewers can tilt their phone sideways for a full-screen viewing experience. Landscape video can also be uploaded to Stories and in-feed, but without the tilt effect.
Source: Instagram
Provide valueTo keep a viewer’s attention you need to make it worth their while. Try entertaining your audience through comic relief, captivating conversation, or your magnetic personality. Or, you could impart tips and tricks, how-to’s and workshops, or thought-provoking information.
In each Instagram video, your value proposition should be clear and simple. Before setting out to create a video, fill in the blank: When someone watches this video, they will _______. The answer may range from “laugh out loud” to “want to make breakfast cereal ice cream sandwiches” Whatever you land on, it should be clear to viewers upfront.
If you deliver on your promise, you’ll likely see more views, engagement, and shares.
Bonus: Download the free 10-Day Reels Challenge, a daily workbook of creative prompts that will help you get started with Instagram Reels, track your growth, and see results across your entire Instagram profile.
Get the creative prompts now!
Schedule your videos in advanceView this post on Instagram
A post shared by Ben & Jerry's (@benandjerrys)
You can use Hootsuite to schedule in-feed videos, Reels, and Stories.
Scheduling content in advance can help you post content when your audience is most active. It can also help improve the quality of your content by giving you more time to plan.
To schedule an Instagram video with Hootsuite, simply upload your video to the Hootsuite Dashboard, customize using the Hootsuite Image Editor, and then click Schedule for later.
When your Instagram video is ready to go live, you’ll get a push notification from the Hootsuite app. From there, open your content in Instagram and share it with the world.
Resource: How to Schedule Instagram Stories: A Step-by-Step Guide.
Use sound and captionsAccording to Instagram, 60% of people watch Stories with sound on. But it’s well known that there are many reasons people may watch video with sound off, including context and hearing impairments.
Use sound to enhance your video, and include captions to make your video accessible. Timed-text can be manually added to Instagram Stories and Reels. To save time, tools like Clipomatic automatically add captions to your video.
Post regularly
View this post on Instagram
A post shared by Aerie (@aerie)
The best way to build an audience is to post regularly. This is especially true when it comes to long-formats like Instagram Video and Live.
Create and share a schedule with your audience so they know when to expect your next Instagram Live. Or develop a video series that your followers can regularly look forward to and tune in to. Take advantage of scheduling tools like Hootsuite to make sure your posts are published on time.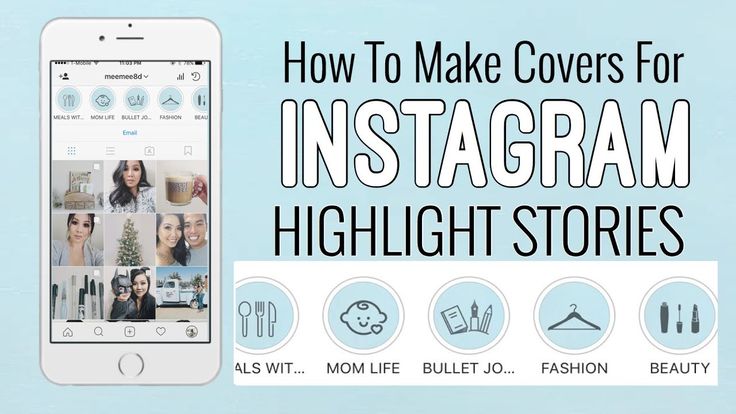
As well, try to post when your followers are most active online. Check your analytics and consult our research to find the best times to post Instagram videos.
Tip: Create a countdown sticker in an Instagram Story to build anticipation for an Instagram Live or an upcoming video premiere.
Helpful Instagram video appsGot your tripod and your ring light ready to go? Try these Instagram video apps to perfect your content.
Adobe Creative Cloud ExpressUse Adobe Spark to automatically size Instagram videos for you, add interactive elements, and take advantage of the app’s photo and audio library.
HootsuiteHootsuite’s collaborative platform is ideal for content that requires teamwork and approvals. You can also manage all your video material with Hootsuite’s content library.
Use the Hootsuite Planner to pinpoint publication, plan production, and spot holes in your content calendar. And avoid lags while posting a story with multiple parts with the scheduling tools.
Pictory is an AI tool that will help you turn text into professional-quality videos with just a few clicks.
How does it work? You copy and paste text into Pictory, and AI automatically creates custom video based on your input. The program pulls from a vast library of over 3 million royalty-free video and music clips.
Pictory integrates with Hootsuite, so you can easily schedule your videos for publication without ever leaving their dashboard.
ClipomaticClipomatic is an Instagram video app that lets you add live captions to social video. It’s been used by a number of high profile users, including U.S. Representative Alexandria Ocasio-Cortez and Queer Eye’s Karamo Brown.
Caption as you speak, or add captions to pre-recorded video. The captioning tool is available in more than 30 languages, and text can be edited and customized before posting.
Apple Clips
View this post on Instagram
A post shared by Alexandria Ocasio-Cortez (@aoc)
Apple’s video editor lets you slice and dice videos as you see fit before sharing it to Instagram.
The app also includes a range of filters, special effects, and graphics. Like Clipomatic, it also lets you add live subtitles and text to your videos.
Lumen5Lumen5 is an Instagram video app that helps businesses turn their blog posts into engaging social video. The AI-powered video app pulls images and words into a storyboard brands can edit and tailor to each platform.
HeadlinerView this post on Instagram
A post shared by Lumen5 (@lumenfive)
If you want in on the Instagram video action, but only have audio and text to work with, Headliner is for you.
Originally made to help promote podcasts, the app is used by Wondery, BBC, CNN and other platforms use Headliner to transcribe audio clips into shareable, animated videos.
Grow your Instagram presence using Hootsuite. From a single dashboard you can schedule and publish posts and Stories directly to Instagram, engage your audience, measure performance, and run all your other social media profiles. Try it free today.
Get Started
Easily create, analyze, and schedule Instagram posts, Stories, and Reels with Hootsuite. Save time and get results.
Free 30-Day Trial
March 12, 2019
It's no longer a secret that Instagram video is a new trend. The video attracts more attention, allows you to tell a story, create an atmosphere and convey a mood. Global brands have been using this for some time now, and advertising has migrated from TV to where the new generation of consumers lives - to social networks. But it is absolutely not necessary to be a brand in order to create and publish sketches from life. First things first - how to shoot and "upload" video content on Instagram so that it's right - quickly, beautifully and without loss of quality.

I have tried a million and one video editing software in my own skin and I can tell you about my favorites that I would not trade for anything now:
Sony Vegas Pro is a sophisticated professional desktop program for post-production. It will be easy for beginners to get lost in it, but if you don’t get scared right away, it will give you a lot of opportunities for editing and video processing.
InShot is an application for video editing and photo editing. If you want a process without recamera, and the result of the work - watermarks "made in InShot", you will have to buy a paid subscription. The interface is simple and clear, it gives you everything you need - transitions, cropping, cropping (among the options you will find both the story format, and the format for the Instagram feed and many others), photo filters and various effects with the ability to adjust the intensity, overlay graphics, text and music. The application has a small library of music for which Instagram will not block your video, it is also possible to attach music from the library on your device. You can mix several audio and video tracks, which can also be useful (when, for example, you want the main character's voice to sound in the frame along with the musical accompaniment). Most importantly, InShot will not "eat" the quality of your video and will suggest what resolution to save the output video in (choose the maximum, and you won't go wrong).
Splice is another very handy editing application: editing, editing, adding music, effects and text.
IMOVIE - this video editor is suitable for those who need a simple as an ax interface, in addition, as a bonus, there is also a desktop version of IMOVIE.
VSCO - the same application with an endless set of filters and tools for color correction of photos, as it turned out, it is also suitable for video: the only thing you need to access this feature is to purchase a ready-made subscription for $ 20, but it's worth it if you are going to edit regularly.
8mm is an application for creating an old film effect on video. As a result, your 4K video can turn into a video from a worn cassette from the eighties - with noise, dates, scuffs. If you do not overdo it with such effects, it is quite an interesting application.
Glitche is the latest in the digital world, used even by pop stars and famous directors of pop star music videos. The application is paid, by subscription, and contains a huge number of digital errors and effects, some of which are present in InShot - film effects, various distortions, lighting effects, textures, digital defects.
Unfold is probably the most promoted collage service in Stories, which allows you to create collages, including from videos. Templates are updated periodically, but all collections are usually paid.
KIRAKIRA+ - Downloads of this app seems to be increasing closer to the New Year holidays - it adds a glamorous glow effect to everything that glows in the frame - from the lights of the garlands to the sparkles on your lips or dress. You can shoot directly in the application, or you can add an after-the-fact effect to photos and videos from the library on your device. Several of my girlfriends were extremely surprised that Kim Kardashian's butt in a sparkling dress sparkled so much at one time only thanks to this application.
Almost the entire collection, as you can see, is a smartphone application. Just editing on a computer makes sense if you are a professional and deal with large amounts of data. In the case of personal videos and small creative sketches for social networks, using a smartphone is much more convenient. A few minutes, and the result can be "filled" to the audience. And besides, you can already fully appreciate how your video looks on a mobile device already during editing.
 Do not think that the higher the quality, the better. If the video is larger than Instagram accepts, it will be crookedly compressed automatically, and the result that your subscribers will see will be deplorable.
 Video | ZARA, MANGO
Are you thrilled when your favorite blogger posts action-packed videos of their workouts, shares mini-movies of their fast-paced workflow, or funny pet vines? If you're wondering if you can do the same on your Stories, here's how to speed up Instagram videos using third-party apps.
If you speed up your video in the standard way, your gestures will look slightly strange and comical, and your voice will change to a funny squeak or babble. If this effect (which may well work in your favor) is not what you are looking for, you can try creating a time-lapse video.
Time-lapse is a beautiful fast-paced video recording using a tripod.
The InShot service will do an excellent job of recording original videos, and Framelapse has no equal in terms of time-lapse. Let's take a closer look at these applications.
If you just need a video in accelerated mode, you can shoot a regular video on your smartphone, and then accelerate the file in InShot. The demo version of the service can increase the playback speed by 2 times. Go to the app, upload the video and click on the Speed tool. Select the acceleration you need and click on the checkbox to apply the set values.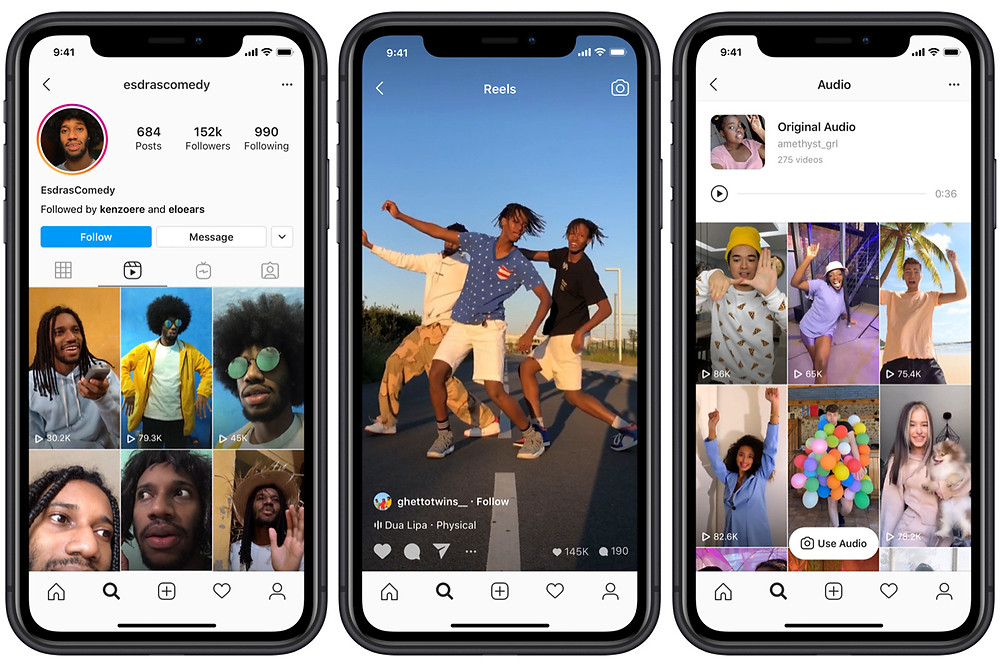
This program is specialized in shooting aesthetic time lapses. It is suitable for making films from a camera on a fixed surface - from a monopod or a tripod. A time-lapse video is assembled from many captured still frames, which are eventually glued together with smooth transitions. Each frame is obtained with a high resolution, so the output video will be of high quality.
Enter Framelapse. At the top right you will see a block with information. Click on the label that starts with "Frame Interval...". Two windows will open in front of you: Recording Duration and Video Duration. In the first one, you can adjust the duration of the shooting, and in the second one, you can set the time of the final video.
You can record 10 minutes of action and end up with a 60 second video. The speed and frame rate are automatically determined by the service. Conveniently, the program itself turns off the shooting mode when the interval you set expires.
In the Framelapse parameters, you can adjust the storyboard frequency and specify the desired duration of the final mini-movie, and the service will calculate how long the shooting should continue for this. Just click on the timer icon on the left of the screen and adjust the frame rate.
Your subject will help you determine the optimal frequency. If the video characters move quickly, set the frame rate as low as possible, and if the objects in the frame move smoothly (for example, these are clouds or shadows), then you can select a larger frame interval (Frame Interval (Speed).
When shooting finishes, the application will save the finished short film to the gallery on your smartphone
There are other amateur and professional video editing applications, paid and free: Hyperlapse, iMovie, Pinnacle Studio Pro and others.0027
These dynamic clips are convenient because they allow users to quickly get acquainted with the material of the post, without succumbing to the temptation to scroll through an overlong, static video.