If you know anything about Instagram, you know that it lets you put all sorts of filters on your photos. But filters aren't the only photo-editing tools that Instagram offers.
Here's a quick guide on how to add both filters and effects to your Instagram posts.
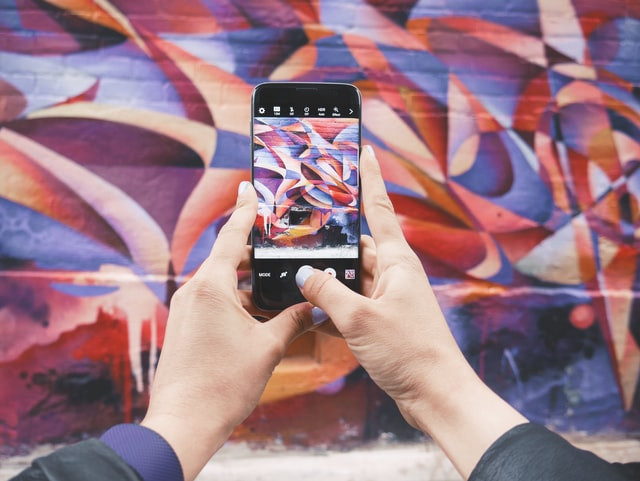
How to use filters on InstagramFilters are basic overlays that change the colors and shading of your photos. Some might make the picture brighter, while others might strengthen the shadows. Some remove all the color completely, giving your photo a grayscale makeover.
You can use filters when you're posting a photo or video to your feed, or when you're adding to your Instagram Story.
To use filters on a post, tap the plus sign icon at the top of your homepage or profile, then tap Post. Select the photo or video you want to upload and tap Next in the top-right.
You'll be brought to a page where you can add all sorts of preset filters to your photo. Tap any of the filters to overlay them on the post, and then tap the filter again to manage how strong it is. And if you don't like any of the available filters, you can tap Edit in the bottom-right to make your own.
When you're done, tap Next in the top-right to save your filtered post.
The same photo, with (right) and without (left) a filter. Instagram; William Antonelli/Insider
 Adding filters to your Story is simpler, but doesn't give you as much control. First, make a Story, either by taking a new picture/video or by uploading something from your phone's camera roll. When you're on the preview page that lets you add stickers and text, swipe left or right to switch between about a dozen different filters.
How to use effects on InstagramEffects are very different from filters. While filters just change the colors, effects add entirely new aspects, from stickers to animations. If you've ever used effects on TikTok, these are the same thing.
Also unlike filters, you can only use effects when you're making a Story, a Reels video, or when you're using Instagram Live.
To do it, open Instagram and swipe right to turn on the camera. At the bottom of the screen, next to the record button, you should see some circular icons with designs inside. These are all effects, and you can tap any of them to put them on your post.
Two recommended effects on Instagram. Instagram; William Antonelli/InsiderIf you don't like the effects you're offered, scroll to the far-right of the list and tap the Browse effects bubble. You'll get a full library of all the effects on Instagram, which you can scroll through or search from.
Quick tip: Some augmented reality (AR) effects that scan your surroundings aren't available if you're living in Illinois or Texas, due to local laws about AR on social media.
You can only use one effect at a time, and you can't combine them with filters.
William Antonelli
Tech Reporter for Insider Reviews
William Antonelli (he/she/they) is a writer, editor, and organizer based in New York City.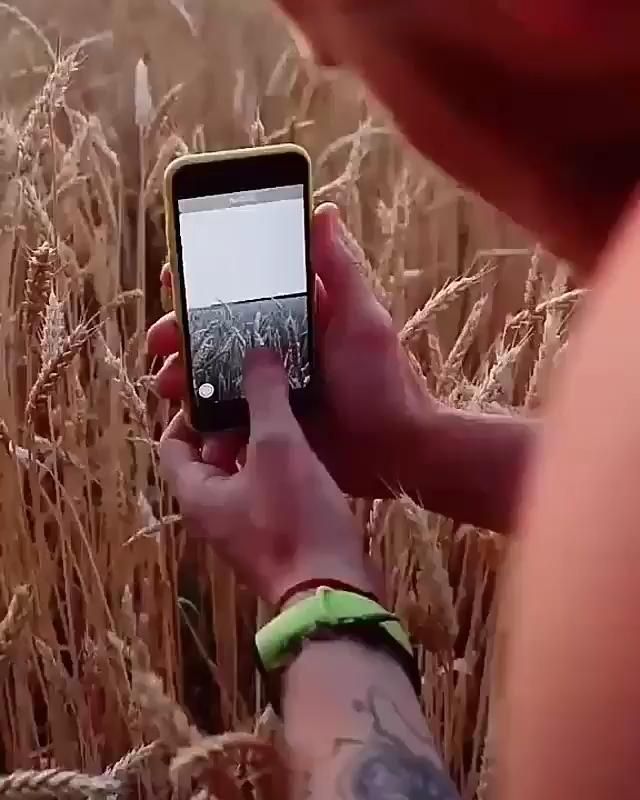 As a founding member of the Reference team, he helped grow Tech Reference (now part of Insider Reviews) from humble beginnings into a juggernaut that attracts over 20 million visits a month. Outside of Insider, his writing has appeared in publications like Polygon, The Outline, Kotaku, and more. He's also a go-to source for tech analysis on channels like Newsy, Cheddar, and NewsNation. You can find him on Twitter @DubsRewatcher, or reach him by email at [email protected].
Read moreRead less
If your brand uses Instagram for business, you’re probably already aware that Instagram Stories is an effective way to engage with young users. In 2019, 500 million accounts used Instagram Stories every day and 67% of all Instagram users are ages 18 to 29. Stories’s interactive features—like polling, questions, and Instagram AR filters—are fun ways for brands to engage those users. (Not sure how Instagram Stories can build your brand? We’ve got tips to help you use it like a pro.)
Augmented reality (AR) sounds futuristic, but Instagram Stories has used augmented reality filters since 2017 when it launched its face filters. And recently, Instagram Stories took augmented reality to a new level. The Facebook-owned platform Spark AR Studio lets users create their own interactive AR filters. In August 2019, that platform was opened to the public.
Now, anyone can create custom AR filters for Instagram Stories.
Here, learn what Instagram AR filters are, why creating unique filters might be right for your brand, and how to get started with Spark AR Studios.
Download your free pack of 72 customizable Instagram Stories templates now. Save time and look professional while promoting your brand in style.
Augmented reality (AR) filters are computer-generated effects layered over the real-life image your camera displays. In Instagram Stories, an AR filter alters the image your front or back camera displays.
Think of Instagram’s face filters. For example, the puppy filter superimposes a dog’s ears and nose over top of your image. Those digital effects move with you as you move.
Or its “Hello 2020” filter: 2020 glasses are superimposed onto your face and digital balloons fall down the screen.
Keep in mind that Instagram AR filters are different from its preset filters. Instagram’s preset filters elevate the quality of photos in one click, so you don’t need to spend lots of time editing photos for Instagram. In contrast, Instagram AR filters are an interactive element only for Instagram Stories.
At its F8 Conference in May 2019, Facebook announced that anyone can build custom AR filters using its Spark AR Studio platform. This new platform allows users to create original augmented reality effects for Instagram Stories, Facebook Stories, Messenger and Portal.
Before this platform became public in August 2019, Instagram users had to be invited to use Spark AR. That meant only select Instagram users could design and publish custom AR filters. Now, anyone who downloads Spark AR Studio can get creative with filters.
It’s easy for Instagram users to find these filters. Anyone visiting your brand’s Instagram profile can click the new face icon. All the AR filters you create are compiled here.
Click on the new face icon (third icon from left) while visiting a user’s profile to see all the filters they’ve made.
Plus, Instagram users can discover original filters in the new Effect Gallery. However, branded or promotional posts will not show here.
Original AR filters are categorized in the Effect Gallery. There are categories like “selfies” and “color and light.”
While this tool might not be right for all businesses, it’s a great option for brands trying to reach younger individuals on Instagram. Remember: 67% of all Instagram users are ages 18 to 29. Additionally, one-third of the most viewed Instagram Stories are from businesses.
Here are a few examples of how custom AR filters could leverage your brand:
Show off your brand’s personality
Connect with your audience
Be ahead of the curve
Increase brand awareness
When viewing an AR filter for Instagram Stories, there’s a “try it” button on the bottom left-hand side of the screen. Users can save the filter to use later by pressing the “upload” button. That’s the first button on the bottom right-hand side of the screen.
Here are five examples that show how different brands are getting creative with AR filters.
AritziaAritzia created the SuperGlow filter. This custom filter increases brand awareness and recognition.
Coca-Cola Poland uses an AR filter to digitally superimpose the brand’s polar bear on top of the real world.
This Paris-based artist publishes artistic AR filters and shows just how creative brands can get with custom filters. She also uses this tool to show her support for social causes.
Ray-Ban’s custom Reindeerized filter is a playful way to interact with the brand. It’s also a way to virtually try on a Ray Bans product, which is super helpful for customers looking to purchase Ray Bans online.
Tiffany and Co.’s custom filters incorporate the business’s branding.
HootsuiteThat’s right! We made our own AR filter for Instagram. It’s called Emoji Roulette and you can try it for yourself by going to our Instagram profile and tapping the smiley face icon.
This step-by-step guide shows you how to start creating custom filters for Instagram Stories.
Step 1: Download Spark AR StudioSpark AR Studio is the easy-to-use platform you need to create custom filters and effects. Currently, it’s available for Mac and Windows.
Step 2: Decide on your effectNext, walk through the tutorials in the Learning Center to get a feel for the program’s interface. Once you’re ready to get started, decide whether you’ll create a filter from scratch or choose from one of the eight templates.
We’re going to walk through the World Object template. This involves putting a 3D object into the real world, just like Coca-Cola Poland did with its polar bear.
Download your free pack of 72 customizable Instagram Stories templates now. Save time and look professional while promoting your brand in style.
Download the templates now!
Step 3: Getting startedYou’ll see a placeholder object in the central panel when you open the template. That central panel is called the Viewport. This is where you’ll build your filter.
The iPhone 8 in the corner is the Simulator. This is where you’ll preview your work. Using the dropdown, you can change the Simulator from an iPhone 8 to another device.
To the left is the Scene panel. You’ll use the options here to edit your Instagram Stories AR filters.
Step 4: Upload a 3D assetChoose a 3D asset for your filter from the AR Library or import your own. For this guide, we are importing a free asset from the AR Library.
The AR Library also allows you to choose from free audio files, animations and more.
Step 5: Edit the behavior of the uploaded graphicNow, you’ll see your uploaded asset—in our case, a rotating pizza—in the Viewport. Using the Scene panel, edit how it looks, moves and interacts with the real-world. The edits will result in your custom AR filter.
For example, you can change the colour and intensity of ambient light.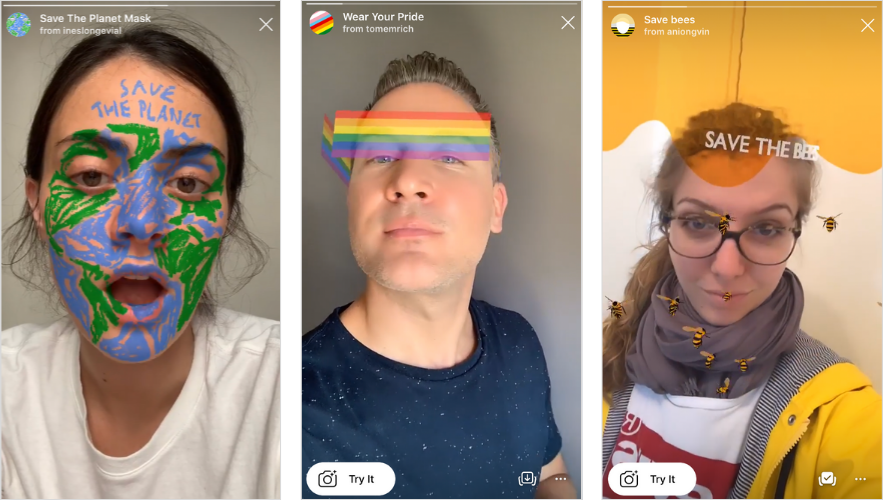 The below images show the 3D asset without ambient lighting (top) and with ambient lighting (below).
As you explore the Scene panel on the left, you’ll see that you can also:
You can send your test file to Instagram or Facebook to see how it works in Instagram Stories or Facebook Stories. Or you can download the Spark AR Player app.
Step 7: Publish your effectNow, press the “upload” button in the bottom left-hand corner. You’ll find it right below the “test on device” button.
Keep in mind that your new effect won’t be published immediately. First, your creation will be reviewed to make sure it meets Spark AR’s policies and guidelines.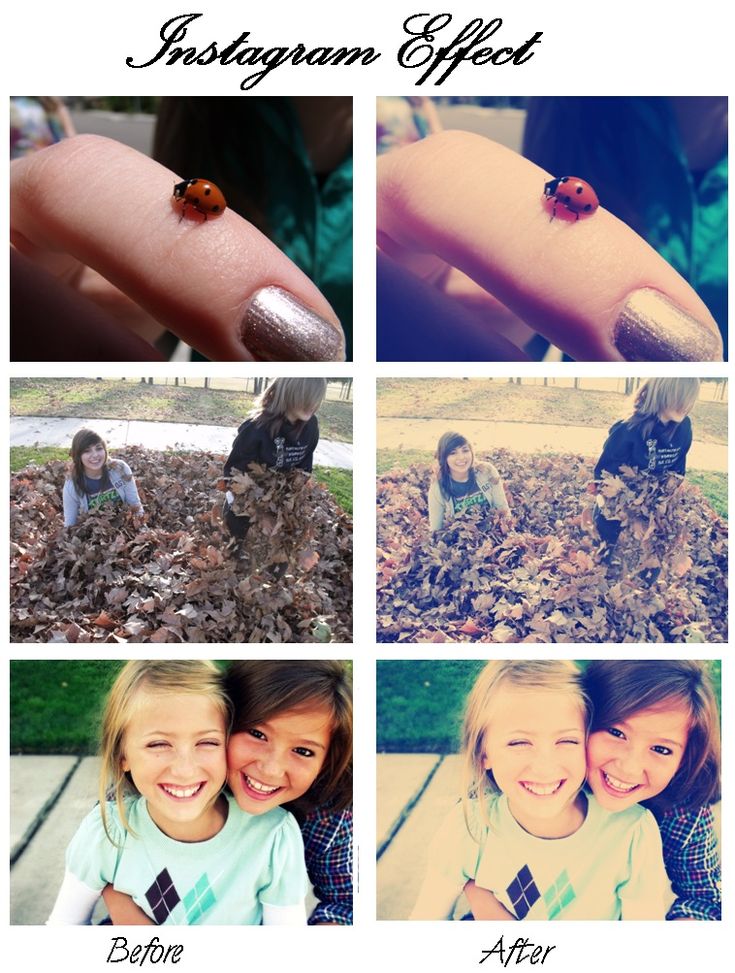 This review process might only take a few days, or it could take up to one week.
Spark AR also has more details in its Learning Center on submitting newly created effects for approval.
Step 8: Keep learningAs you familiarize yourself with this platform, you’ll quickly learn how to work with its other templates—or how to create an AR filter on a blank canvas.
Need more guidance? Curious about face filters, lighting filters or other AR effects? Spark AR has tons of useful guides in its Learning Center:
Now, it’s your turn. If you think creating your own AR filter for Instagram Stories is right for your brand, it’s time to get creative. Good luck!
Save time managing your Instagram presence—and all your other social media accounts—by using Hootsuite.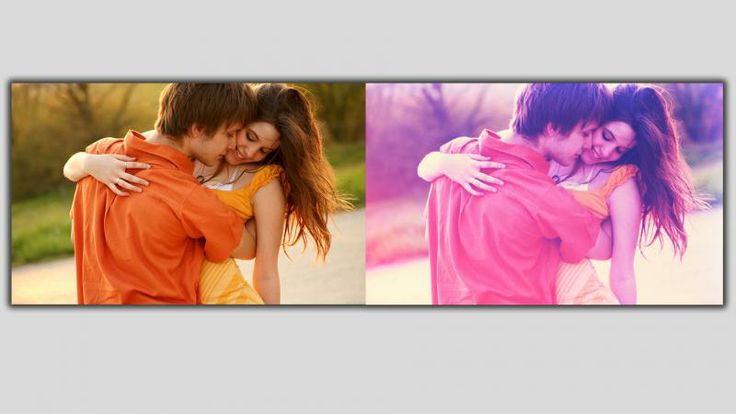 Create and schedule posts, respond to comments, track competitors, and measure performance. Try it free today.
Get Started
Easily create, analyze, and schedule Instagram posts, Stories, and Reels with Hootsuite. Save time and get results.
Free 30-Day Trial
Today Instagram occupies a worthy place among the most popular social networks. This service is used by hundreds of millions of people around the world. Instagram is loved for visual profiles, which contain many photos and videos, for a convenient system of user interactions with the help of likes and subscriptions. Of particular interest and some innovativeness are masks based on augmented reality technologies. Many have heard of their existence, but they do not know where to get them.
| Apple in Telegram and YouTube. Subscribe! |
To make your Instagram Stories even more colorful, use virtual filters (masks) to process faces. You can only post edited photos to your Instagram Story, or you can also save them and then post them to Instagram, Vkontakte, or Facebook.
Instagram animated masks work on both iPhone and Android.
BY TOPIC: Instagram secrets: 20 tricks that every user of the service should know.
Chances are you already know how to work with selfie filters. The MSQRD app (and many others) offer a similar feature that many users love. Instagram Face Filters work in a very similar way, but are activated a little differently. So, how to use filters.
1. Open Instagram on your mobile device.
2. Open the Instagram camera (tap the camera icon in the top left corner or swipe the screen from left to right).
3. Click on the smiley icon in the lower right corner.
4. Touch one of the patterns at the bottom of the screen.
5. Swipe left and right on the screen to view all faces.
6. Raise your eyebrows or open your mouth to activate some masks.
7. Press the shutter button to take a photo, or long press to take a video.
8. You can use the buttons in the upper right corner to add stickers, pictures or text.
9. Click the " Save " button or the plus sign to add the photo to your story.
The filters work with both the front and back cameras of your mobile device. You do not need to touch the display to brighten a face or activate a function. After saving the photo in the gallery, you can add it to Instagram like any other photo.
In addition to the templates suggested by the Instagram developers, there are many great masks and filters created by users.
To go to the gallery of custom effects, scroll all available masks to the right to the button More effects .
The same can be done by clicking on any mask and in the menu that appears, select the option View effects .
The effects gallery is divided into many thematic categories that will help you easily find the desired option.
Here you can also view the effect of each effect and, if you wish, try it out by pressing the corresponding button. To save the effect in the camera (in the menu where the default masks are located), press the button with the down arrow in the square.
The masks we are talking about are also offered by users completely free of charge on their pages. If a user's profile page has an emoji section, they are an Instagram effects designer.
Go to the effects section on the user page and select the suggested mask.
If you liked someone's work, we recommend that you subscribe to the account you like, so you will receive new masks immediately after they are published.
Popular filter developers for Instagram
In the assortment of each of them you can find more than a dozen rather interesting AR masks.
In addition, you can try to find masks manually by searching for some specific hashtags. You may find the following useful:
See also:
Please rate the article
Average rating / 5. Number of ratings:
No ratings yet. Rate first.
In this step, we are aiming to expand both rectangles to cover the entire filter.
4. Set the size of the rectangles. Select the background rectangle (previously known as "Rectangle0") and you'll see its properties in the panel on the right. Click on the boxes next to "Size" to change the width ("Fill width") and height ("Fill height") of the fill and stretch the rectangles to fill the screen of the device. Do the same for the second rectangle. Your viewport will be completely covered by rectangles, which will be displayed as a checkered pattern called "Alpha". This means they are transparent, but they are still there.
5. Separate the layers. By default, any object you add is attached to the layer you last worked on. If you don't need it, move it to another layer. For the segmentation effect to work, you need rectangles on different layers. So the background is "drawn" after the foreground. That's what the background rectangle in the Scene panel is for. In the Inspector panel on the right, click the "Layer" field and select "Create New Layer". You can rename layers if you wish by selecting the Layers tab in the upper right corner of the Scene panel and double-clicking on each layer name in turn.
6. Create new materials. Time to give these transparent rectangles a solid, visible shape. This is what the "Materials" function is for. You can assign each rectangle its own material: select them one by one in the Scene panel, and then in the Inspector panel on the right, click the plus sign next to Materials and click Create New Material. As a result, two materials should appear in the Assets panel (under each rectangle)
Materials can also be renamed. Once you've selected your materials, you'll see a host of new options in the Inspector panel. You can change the color, texture, transparency, blending, and so on. If you want to experiment with your filters, change these settings and see what happens.
7. Create a segmentation texture. This will turn any video taken with your camera into a texture, which means it will separate you (or whoever you're pointing at) from the background. In the Scene panel, click Camera, and in the Inspector panel, click the plus sign next to Segmentation. A new resource will appear in the Assets panel, named personSegmentationMaskTexture0 by default.
8. Add texture extraction to the front of the material. First, click Camera in the Scene panel, and in the Inspector panel, click the plus sign next to Texture Extraction. Another resource named "cameraTexture0" will appear in the Assets panel.
To use it as a new texture, click on the foreground material in the Assets panel. In the Inspector panel, change the Shader Type to Flat, which will give this material the properties of a flat 2D element.
In "Diffuse" (the second item in the "Inspector" panel), find "Texture" and select cameraTexture0 from the drop-down menu. At the bottom, check the box next to "Alpha", in the "Texture" field, open the drop-down menu and select personSegmentationMaskTexture0.
9. Change the background. It may seem like nothing happened, but you're almost there, as you've set the base for your filter.