Sep 01, 2022• Proven solutions
Facebook live split-screen is no more new to many of you. In this large list of advanced features, Live Split Screen was one of the most interesting additions and has been gaining popularity. It allows users to share two or more than two videos at once on a single screen and the best part is that their audio can be customized in an entertaining way. If you are new to the split-screen concept then here are few interesting things to know, keep reading.
Facebook Live feature is activated now and probably you might have planned lots of stuff to stream here directly. That’s great! It will help you to call your friends live chat and you will also be able to organize business meetings over here. Wow! It is really going to revolutionize digital media. Now we can conduct employee meetings with Facebook live chat or even interviews can be scheduled over here. This tool has so many applications and the awesomeness of results depends upon your creativity.
15 Best Facebook Analyzers>>
Let us discuss the requirements of the split-screen feature. Till now users were able to simply upload videos online and the audience uses to comment over that as per their reactions for the content. But now it is possible to update your current live moments interactively on Facebook so that every viewer can stay engaged with your creative stream. Further, it assists users to share the live screen with someone else over the network. But note that, this feature is currently compatible with iPhone only, no other device can enjoy these live-streamed moments. Probably, android users need to wait for few months to avail of this opportunity. So, if you are ready with your device and know very well about data that you are going to update online then follow the guidelines below:
12 Facebook Marketing Tips>>
If you want to entertain your audience with quality live split content then follow these steps below:
Step 1: First of all you have to open the Facebook application on your iPad or iPhone.
Step 2: Go to the news feed page and that hit the live button over there. This live button is indicated as “What is in Your Mind”.
Step 3: Now update an eye-catching description for your video, it must be engaging enough for users so that they can spend time for your content.
Step 4: Hit the “Go Live” option and your stream will immediately begin online.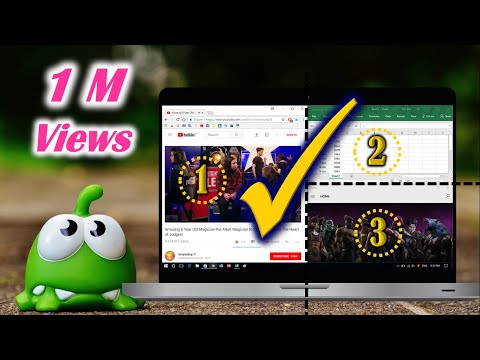
Step 5: As soon as your stream is live, you will be able to swipe over it to get different controls at ease. Simply swipe left and it will take you to the viewers count.
Step 6: If you want to add someone else to your split screen video then use the Invite to Go Live button on the screen.
Step 7: Once you are done with your valuable information or entertainment then you can remove the stream from the internet. You can simply use Cross sign to remove your viewers from a stream.
Technologies have revolutionized these days and now streaming is not bound to one person only rather you can invite your friend on the same stream and share screen with a split-screen option. This Live Split Screen Feature has been recently added to the Facebook platform and it enabled two-person broadcast features even from remote locations. After Live is ended, you can choose to post your video so more people can watch it. But how to create a split-screen video and upload it to Facebook without the Live Split-Screen feature? In the following section, we will show you everything you need to complete a split-screen video and upload it to Facebook directly.
Those who are interested to create a surprising stunning video clip for their Facebook friends are advised to use Wondershare Filmora. This application is compatible with Mac as well as Windows platform and follows a user-friendly interface. It offers a wide range of video editing features and results can be customized using transitions or by adding background music effects. The resulting video files can be directly uploaded to Facebook with the desired file format. You will be glad to know that Wondershare Filmora extends support to more than 150 media file formats along with high-resolution video content.
Here are simple steps for creating split-screen videos:
 Download Wondershare Filmora
First of all, you need to go online and download Wondershare Filmora from its official website. Get it installed and launch on your platform. As soon as the software gets started on your system, simply make selections for the desired aspect ratio for your project. Now from the welcome window, make a selection for full feature mode.
There are two options to import video files to Wondershare Timeline. You can either access them by pressing the Import button from the timeline that helps to bring files directly to the User’s Album. Or the second option is the user-friendly ‘drag and drop’ tools that make everything easier for a beginner.
You will find the Split Screen button on Wondershare Toolbar. Select this option and it will soon lead you to the library containing numbers of split-screen formats. Out of this big list, you can choose anyone and then drag it to a timeline.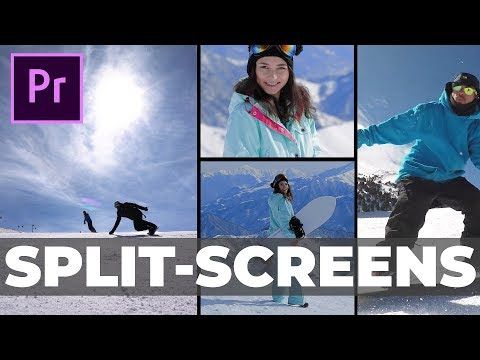 If you don’t want to use drag and drop tool then select your present, right-click over it, and then from the drop-down menu select the Apply option. One more option is to choose your present type and then hit the Plus icon available on the lower right portion of the thumbnail.
Go to the timeline and double click on your recently selected preset. You will find drop zones on your timeline to which videos can be added. Simply drag your video files and drop them in different drop zones as the available one box contains a slider for time adjustments of various videos, users can access it to apply desired timing constraints. One can also add borders to videos from the “Apply Border” option and the best part is that the colors of these borders can be also customized to create unique effects.
Now as you have added all videos to your split screen, they will naturally start playing at the same time and their audio information will appear like noise. Here you need to apply some trick for sound adjustment so that viewers do not find your content annoying. The best advice is to mute one video at a time and let another play normally. In order to mute a video file, you can simply hit the Mute Track option from Drop Zone. Users can also mute both these videos and add one separate informative file in form of a soundtrack to the split-screen video. You can find such soundtrack files in the built-in media library of Wondershare. Once all soundtrack adjustments are done then hit the OK button to save the changes.
As you are done with all the changes now so it is time to impress your audience. Hit the export button on the Wondershare platform and select the file format for your split-screen video. Use Facebook sign for selection of upload platform and sign in with your account. Add a description and title information and finally hit the Export button.
After the export process is finished, you can click the link or click the Find Target button to check your split-screen video on Facebook.
Or, you can save the video in .mp4 format first and then upload it to your Facebook later. To do so, click the first icon and then select the .mp4 format.
What’s more, you can export the split-screen video to your smartphone or burn it to a DVD collection, or upload it to YouTube and Vimeo.
You may also like: 8 Best Facebook Scheduler>>
How to Create Square Videos for Facebook >>
Facebook Insights: How to Use it for Beginners >>
Shanoon Cox
Shanoon Cox is a writer and a lover of all things video.
Follow @Shanoon Cox
The Facebook Live feature has been around for quite some time. However, it gets better all the time. For example, it now lets you add another person to your live stream as a broadcaster, while also letting you stream from both your private profile and a business Page.
Facebook Live now also supports third-party services, but since Facebook tends to strip your views off your stream in this case, we’ll stick to the native Facebook Live functions. Keep reading to see how you can master all of the most important ones.
Going live on Facebook with another person is the essence of split-screen on Facebook Live. Before you get to invite a person to join you live on air, you need to go live first. At the time of this writing, the only way you can go live from a private profile is from the Facebook app on your mobile device:
 If that’s the case, your smartphone’s OS will ask you to do so.
Starting a Facebook Live broadcast is easy. Setting it up may benefit from some additional tweaks, though:
 Here you can enable “Geo Controls” and use the “Locations” option to exclude or include certain audiences by their location.
Inviting a guest is easy and can be done in two ways: by adding a person from the Comments section, or by adding it from your Live viewers list:
 They are eligible to join if they are using a supported device. Such a person will have a green camera icon on their profile picture.
When going live from a Page, you’ll be able to see the “Event Log” button. This is a helpful function since it primarily shows errors regarding the stream, but you can modify what it shows. However, if you can’t connect at all, here’s what you should check:
Broadcasting from a Page also has additional requirements that your video needs to follow:
Facebook allows you to post live videos on your profile, page, event, or group. You will have to check your group’s privacy settings, though, to determine who will see your live video.
To go live on a Facebook group, follow these steps:
To go live on a Facebook group using your desktop computer, follow these steps:
Facebook Live is quite easy to set up, but it’s not immune to glitches and connectivity issues.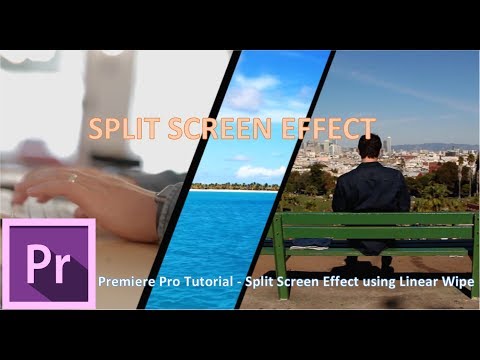 You’re now hopefully prepared for all that, though. Just follow the requirements and you’ll be golden.
If you could choose any person to be your live broadcast guest, who would you choose? What would be the broadcast about? Let your imagination roam and make the comments section more interesting.
Everyone was amazed when finally Facebook Live Split Screen was introduced. This feature on Facebook has created and improved identity when it comes to socialization. In addition, it was beneficial for streamers to collide on the same screen for their viewers to enjoy. However, Facebook decided to remove the feature from desktops and laptops, but kept it on mobile devices. And the answer to why Facebook did this is because of the unprioritized experience that this mega-platform has received from its users. In other words, the Live with Friends feature was used by very few users at the time. So Facebook dropped this feature for its software to make way for its other new innovative features.
So moving forward, this will only mean that you won't be able to split the live video screen on Facebook unless you do it on your mobile device. Luckily, we have the best tactic you can use when posting a split screen video on Facebook. You will learn this from the split screen instructions in the Facebook app from the content below.
As we mentioned above, Facebook software has discontinued the live split screen feature. Therefore, you can only complete this task using a mobile phone with the Facebook application. However, as the saying goes, it takes two to tango, which refers to the Facebook split screen.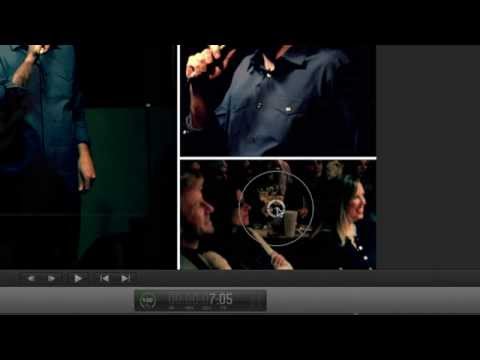 This means that your friend must join your live broadcast along with your approval so that you can join the screen. Hence, follow the instructions below for this.
Step 1
Launch the Facebook app on your iOS or Android phone. You then reach the Concerts option, located above Stories and Videos.
Step 2
Then, on the setup page, tap the Add Friend icon at the bottom left of the screen. Find a friend you'll collaborate with, check the box next to your friend's name, and tap Done.
Step 3
Now ask your guest to send you a request to join Facebook Live and accept it as soon as you receive it.
Now that you know how to live split screen on Facebook, you should also know how to stop it. We've been getting the same question lately about how to get rid of split screens on Facebook and now is the time to answer it as it requires a topic. Thus, you will be surprised at how easy it is to get rid of the split screen when you see the recommendations below.
Step 1
While Facebook Live is still running, you see two split screens on your phone. Now, to get rid of it, you can either tap the X icon on your guest's screen or the End tab at the bottom. Please note that by tapping the X icon, your live video will continue and end if you tap the End menu icon.
Step 2
Suppose you touched the X icon and a pop-up window will appear. From there, tap Remove Selection to begin getting rid of the split screen.
Just because you can't do a Facebook live interview on a split screen on a computer, that doesn't mean you can't make room for it. You can still create a split screen video interview using the phenomenal Video Converter Ultimate. You read it right; this ultimate converter can do all the work for you! It has this split screen maker that offers amazing templates and layouts to make your split screen videos more attractive. In addition, this software has a flexible structure as it can eventually run on Mac, Windows and Linux devices. In addition, it provides users with a wide range of editing tools, formats and presets that they can work with like a pro.
In terms of security, Video Converter Ultimate does not use hardware acceleration that works to protect and keep your device running smoothly. What's more, as part of its powerful toolbox, it comes with a video recorder that allows you to seamlessly record Facebook videos and push them across a split screen. Other things you can expect from this fantastic software are listed below.
Step 1
Start by installing the software on your computer device. Once you have it, launch it. In its user interface, go directly to its Collage Menu.
Step 2
Next, you need to select a template from several options below. Please note that the templates also contain the number of screens required to split the screen. Once selected, click the More icon to upload your recorded videos to any local videos you want to collide.
Step 3
Once your videos are in place, click the Filter menu button. Then choose the best split screen video filter. Otherwise, skip this step if you don't want to apply a filter to it.
Step 4
Finally, go to the Export menu and work with presets. Once the export process is complete, you can create a new file name and customize the format, resolution, frame rate, quality, and even command. Finish it by clicking the Start Export button and wait for the export process to complete.
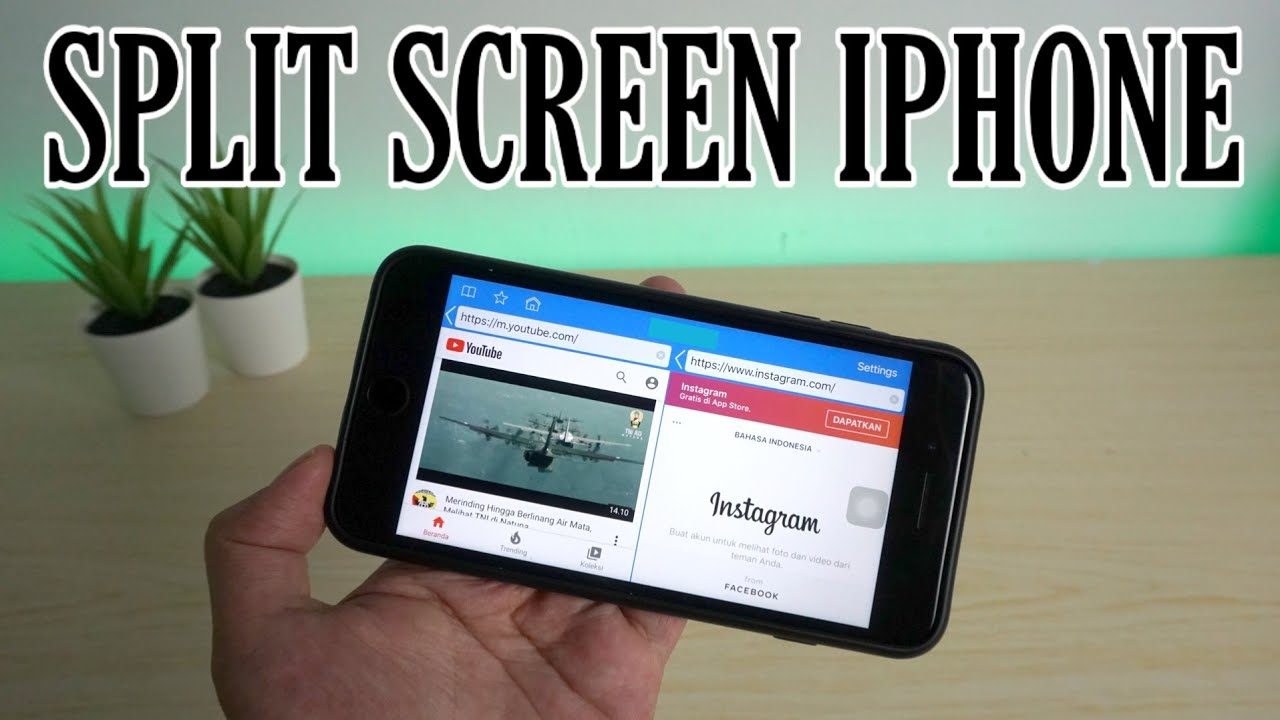
Unfortunately, Facebook Messenger's split screen doesn't work anymore. This is due to an update made a few years ago. This unfortunate event upset other users and was accepted by others at the time for security reasons. However, if you want to split screen between Facebook and Messenger, you can use Android's default split screen feature. When your Facebook is open, you can touch the screen with your three fingertips and drag them up. This way you will have a split screen and then open the Messenger app in a new screen. Then swipe up or down on the bar to exit the split screen.
Further reading:
How to use Skype split screen during a video call to open a message
Two easy ways to turn off split screen in Safari
Can I split screen for 3 videos?
This depends on the screen divider you are using. If you are going to use your mobile phone, unfortunately you can only split the screen into two parts.
Can I use another Facebook Live screen split app?
No. But third-party streamers offer split screens that you can integrate with Facebook.
Does Facebook offer split screen templates?
No. Unfortunately, Facebook does not offer split screen templates. Hence, with Video Converter Ultimate, you can choose from a wide range of templates.
Facebook Live Split Screen is limited. However, if you really need to create a split screen video on this mega platform, you can do so by following the given instructions. However, you won't be able to unleash your creativity in this task because Facebook lacks editing tools. Hence, with Video Converter Ultimate, you can now create many creative split screen videos as per your expectation.
What do you think of this post.
Great
Rating: 4.9 / 5 (279 votes)
More Read
100% working methods to compress video file to post to Facebook
Video too big to post to Facebook? Read our video file compression guide for Facebook and Messenger.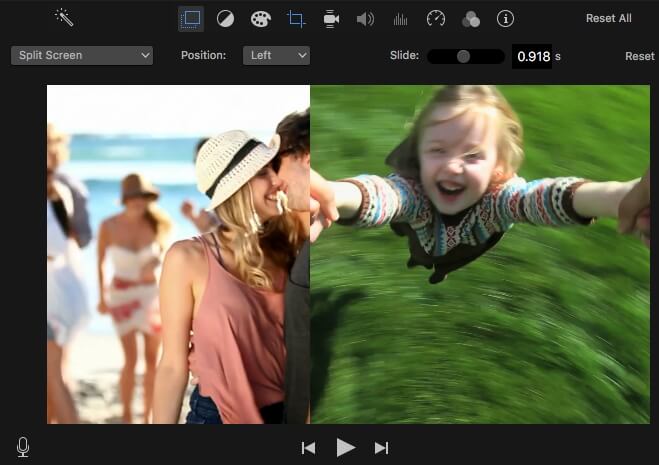
How to easily get rid of split screen on Android 9 phone0005
If you are planning to disable split screen on Android phones but don't know how to do it, please click on this post. This post contains a complete guide to this issue.
How to Make a Slideshow with Facebook [Best Quick Guide]
This article will show you how to make a slideshow with Facebook. There are steps you can follow to help you create slideshows that stand out.
3 Incredible Ways to Make Facebook Videos on PC and Phone
Learn how to create a Facebook video for free on your computer and mobile phone. Take full advantage of these programs to create amazing, publish-worthy videos.
When you have received several videos of birthday wishes from your relatives and friends, you can make a birthday collage on Facebook to share your happiness and save it as a keepsake .
As one of the popular social networking platforms, Facebook provides a slideshow feature that allows you to combine multiple photos to create a video collage. But how to make Facebook video collages with multiple videos on one screen? A professional video collage tool will help you with this. Read this article and you can explore these two methods in detail.
Make a video collage on Facebook
To make a video collage on Facebook, you need a dedicated video collage tool. AnyMP4 Video Converter Ultimate is your best choice because it can create Facebook video collages with a user-friendly interface and easy-to-use tools, including templates, editing tools, and audio tracks. So you can also add filters and music to video collages.
Step 1. Download AnyMP4 Video Converter Ultimate for Windows/Mac and run it on your computer. Click the Collage toolbar icon and select a tab template. First, you should select the Aspect Ratio. Because Facebook supports uploading videos in most aspect ratios like 16:9, 1:1, 4:5, 2:3 and 9:16, you can choose the one you need. You can then choose the templates you want.
Step 2. Click the Advanced icon to add video to each part respectively.
Then you can click the Edit button to rotate and crop the video, and click the Cut button to cut the video parts. Also, you can drag the border on the main page to adjust the size of each part.
Step 3. To make your videos uniform, click the Filter tab and select the appropriate filter that will also make your videos more attractive.
Step 4. By clicking the Audio tab and checking the Background Music box, you can also add background music to your videos. So you can make Facebook music video collage, which will enrich your videos. And you can choose different sound effects, including loop playback, fade in and fade out.
Step 5. Click the Export tab to configure the output options. To upload video collages to Facebook, it is better to choose MP4 or MOV format. And due to Facebook's limitation, you should choose a resolution below 1080P (included). Then click Export after selecting the storage path.
This method can help you combine multiple videos on one screen to make a Facebook video collage in simple steps. With templates, music and filters, you can make your videos more attractive. If you want to merge photos just to create a video collage, keep reading.
Facebook also has a default slideshow tool that allows you to combine multiple photos into a video. While you can't make a Facebook video collage of birthday wishes, reaction videos, or other interesting combo videos, it's a good way to create small ads for your products. Here are the steps:
Step 1: Open Facebook on your mobile phone and log in to your account. Then tap the Share photo/video button and select the slideshow button.
Step 2. Then click ADD PHOTOS click the button to enter the gallery, and select 3 to 10 photos you want to create a collage. After that, touch the Done button.
Step 3. You will see all selected photos and you should click on the Next button to continue. Then you can add music and title. Click the Music button to select music in a specific theme, and you can choose whether to add a title or not.
Step 4. After that, click Next and click the After button to share your photo collage on Facebook.
1. Can I add background music to video collage?
Of course you can. You can use AnyMP4 Video Converter Ultimate.