How to download Instagram images
01. Download Instagram photos
02. Download using source code
03. Save images on Instagram
04. Download using third-party apps
05. Download multiple images
06. Download Instagram Stories
Wondering how to download Instagram photos to your computer or phone? Understandably Instagram doesn't make downloading images quite as easy as right click and save, even if you're using the website in a browser. But there are ways that you can do it.
There are several reasons why you might legitimately want to download Instagram photos. Perhaps you posted a shot to the social media platform, and then deleted your original image by mistake, leaving the only copy on Instagram. Maybe you've even had enough of Instagram completely, but you have precious images that now only exist on the platform.
Finally, you might want to repost an image from a friend or colleague's feed. This is a more controversial case, but assuming you have their permission and give them credit when you use the image, they may be happy for you to use their image, but don't have a way to get it to you.
So how do you do it? Posting photos on Instagram is as easy as pie, but getting them off again is not as simple. Well, below we'll show how to download Instagram photos to your PC, Mac or phone through several different methods. You can download your entire Instagram history, you can use the source code for individual images (not quite as complex as it sounds, we promise) or you can use in-browser or downloadable third-party apps.
If you want to give your Instagram images a boost, see our pick of the best photo editing apps. For more Insta tips, see our guide to Instagram fonts and our guides on how to change the font in your Instagram bio and learn how to turn on Instagram's dark mode. We also have a beginner Instagram Reels tutorial, if you've yet to get your head around Instagram's newest media format.
If you do download Instagram photos, please do remember to respect image ownership. Some of the methods below will allow you to download Instagram photos that belong to other people but you should also seek permission and give credit where it's due. For more details on copyright issues, see our article on how to repost on Instagram.
There is no native method to download Instagram photos from your feed individually. The one concession Instagram has made is to allow you to download your account’s entire history on the platform in one hefty package. That includes all the photos and videos that you’ve uploaded as posts or stories as well as a lot of other things you might not want.
This one “official” way to download your stuff was introduced due to privacy concerns following controversies at parent company Facebook. To get started you'll need to request a download link either via the Instagram website or the app.
 Login to get started
(Image: © Joseph Foley on Instagram)
Go to the Instagram website, log in, then click the gear icon to the right of where it says Edit Profile. Choose Privacy and Security from the list of options.
This will lead you to the Account Privacy page. Scroll down to where it says 'Data Download' and click 'Request Download'.
(Image: © Joseph Foley on Instagram)
Enter your email and password again, confirming the email address where you'll receive the download link, then click 'next'. Instagram will start bundling your data into a downloadable package, and then send you the link by email. The platform says this can take up to 48 hours, but the email tends to come through within an hour or two. The link's only valid for four days, so keep an eye out for it or you’ll have to start all over again.
(Image: © Joseph Foley on Instagram)
Once you receive the email, click 'Download Data'. You’ll be taken to the Instagram site to sign in and start the download. The package comes in the form of a zip file that contains every post you've ever made as well as details of every message and everything you've searched for, liked or commented on. Depending on how long you've had an Instagram account and how much you use it, this could mean a ton of data, so extract the file to a new folder of its own to keep the many subfolders and files in one place.
You can also request this sizable download package through the app. Go to your profile, tap the menu icon in the upper right-hand corner and choose 'Settings'. Select 'Security', 'Download Data', type in your email and password, then tap 'Request Download'.
If you don’t want the hassle of wading through your entire Instagram history to find the one specific photo you wanted to download, or if you need an image from someone else’s feed after having received their permission to use it, you can download Instagram photos individually by turning to the source code.
(Image: © Joseph Foley on Instagram)
How you do this will depend on your browser. On Internet Explorer, you can click on the photo you want to download to view the full image, then right-click on the image and select 'View Source'.
(Image: © Jospeh Foley on Instagram)
Scroll through the code and find the meta property information (hit control+f or command+f and search for 'meta property'). You'll want to copy the URL that appears in double inverted commas in the line beginning: '<meta property="og:image" content='
Paste the link into your browser, hit 'Enter', and you’ll be taken the photo you want to download. Now, simply right-click or control-click on the image and choose 'Save Image As'. The default name will be a long stream of numbers so you’ll probably want to change it to something more recognisable. The process may also work for videos depending on your browser.
On Google Chrome, you can look for the source image by clicking 'Inspect', then looking for the 'V' folder under the sources tab.
If you simply want to be able to find an image on Instagram again rather than use it on another device, you might find it’s enough to save it within the platform. Instagram allows users to bookmark any post in order to be able to find it again later, whether it's from an account you follow or not. You can organise saved posts into folders to make them easier to find, for example by creating folders for design inspiration, wish lists, or dream holiday destinations – don’t worry, no one else can see your bookmarks!
(Image: © Joseph Foley on Instagram)
Tap the bookmark icon below any Instagram post and it will turn black to show the post has been saved. For the Marie Condo approach to bookmarks, tap the 'Save to Collection' message that pops up then click the + icon to choose an existing collection or create a collection with a new name.
(Image: © Joseph Foley on Instagram)
To view or edit your bookmarked images in the Instagram app, go to your profile, tap the menu icon at the top right, then 'Saved'. In a browser, you’ll find the 'Saved' tab above your own feed. From here, you can tap the plus icon to add new collections or to move a previously saved photo to a collection.
If you definitely need to download photos from Instagram rather than save them in the app but find the first two options above to be too fiddly or time-consuming, there are many third-party apps that offer workarounds. Bear in mind that some of these require access to your account data, while others rely on heavy advertising to make their money. Where possible we’d advise using the previous solutions, but if you want the convenience of a quick fix, then these are some of the most popular options.
DownloadGram is one of the most appealing third-party options to download Instagram photos since it doesn’t require the installation of any software. That may inspire more trust in terms of security. It can be used on both computers and mobiles. It can also be used to download videos, IGTV and Reels. The downside is that you can only download one piece of media at a time.
(Image: © Joseph Foley on Instagram)
On a desktop computer, go to the Instagram website, find the picture you want, click on the three dots at the top right above the image and choose 'Go to Post'.
(Image: © Joseph Foley on Instagram)
Copy the photo’s URL from your address bar then go to DownloadGram’s website and paste the URL into the box. Click the Download button, then the Download image button to save your image.
On a mobile device, open the Instagram app and find the photo you want, tap the three dots icon and choose 'copy link'. From there, follow the process as above.
Other options include FastSave for Instagram , which offers a faster app-based option for downloading individual images to an Android phone with no copying or pasting needed, but you need to grant the app access to your data, and the ads can be annoying.
If you want to download more than one image from Instagram at a time, you’re limited to using third-party software. Two of the most popular options are 4K Stogram and Save-o-gram.
4K Stogram allows you to subscribe to a username, hashtag or even a location to mass download every public image that it finds under that tag with no need to sign in to Instagram. However, while it’s free to subscribe to a couple of feeds, you’ll need to pay $10 for a licence for unlimited use. Chances are you’ll also find yourself downloading a ton of images that don’t interest you.
Download and install 4K Stogram on your computer, open the programme then type an Instagram username, hashtag, or location into the search bar. Click Subscribe, then the programme will search and automatically start downloading everything it finds. You’ll find the images piling up in the 4K Stogram folder on your computer in subfolders for each search you entered.
If you need to be more selective, Save-o-gram allows selected images to be downloaded all at once as a zip file or individually. It charges a one-off fee of $9 after a seven-day trial.
Instagram makes it much easier to download your own stories – the image or video including any stickers or text you’ve applied. Just click on the three vertical dots at the bottom right of the story and choose 'Save photo'. You can find old stories by going to your profile, clicking on the menu icon and selecting 'Archive'. (See our guide to Instagram Stories here.)
If you want a Story from someone else’s account – and some photographers specifically share pictures for use as wallpaper by this means – you can save it by simply taking a screenshot. The trick is to hold down one finger on the screen while you do so in order to remove the Instagram UI and get a clean shot.
Just tap and hold anywhere on the screen so that the UI overlay fades away. This also pauses the story, giving you time to take the screenshot. With a bit of finger contortion, keep your finger on the screen while you take the screenshot, whether that’s by pressing volume up and lock on an iPhone X, the power and home buttons on a Samsung Galaxy, or power and volume down on a Google Pixel.
Again, bear in mind potential copyright issues when taking screenshots of someone else’s work.
Read more:
Thank you for reading 5 articles this month* Join now for unlimited access
Enjoy your first month for just £1 / $1 / €1
Already have an account ? Sign in here
*Read 5 free articles per month without a subscription
Join now for unlimited access
Try first month for just £1 / $1 / €1
Already have an account ? Sign in here
Joe is a regular freelance journalist and editor at Creative Bloq. He writes news and features, updates buying guides and keeps track of the best equipment for creatives, from monitors to accessories and office supplies. A writer and translator, he also works as a project manager at London and Buenos Aires-based design and branding agency Hermana Creatives, where he manages a team of designers, photographers and video editors who specialise in producing photography, video content, graphic design and collaterals for the hospitality sector. He enjoys photography, particularly nature photography, wellness and he dances Argentine tango.
How to download Instagram images
01. Download Instagram photos
02. Download using source code
03. Save images on Instagram
04. Download using third-party apps
05. Download multiple images
06. Download Instagram Stories
Wondering how to download Instagram photos to your computer or phone? Understandably Instagram doesn't make downloading images quite as easy as right click and save, even if you're using the website in a browser. But there are ways that you can do it.
There are several reasons why you might legitimately want to download Instagram photos. Perhaps you posted a shot to the social media platform, and then deleted your original image by mistake, leaving the only copy on Instagram. Maybe you've even had enough of Instagram completely, but you have precious images that now only exist on the platform.
Finally, you might want to repost an image from a friend or colleague's feed. This is a more controversial case, but assuming you have their permission and give them credit when you use the image, they may be happy for you to use their image, but don't have a way to get it to you.
So how do you do it? Posting photos on Instagram is as easy as pie, but getting them off again is not as simple. Well, below we'll show how to download Instagram photos to your PC, Mac or phone through several different methods. You can download your entire Instagram history, you can use the source code for individual images (not quite as complex as it sounds, we promise) or you can use in-browser or downloadable third-party apps.
If you want to give your Instagram images a boost, see our pick of the best photo editing apps. For more Insta tips, see our guide to Instagram fonts and our guides on how to change the font in your Instagram bio and learn how to turn on Instagram's dark mode. We also have a beginner Instagram Reels tutorial, if you've yet to get your head around Instagram's newest media format.
If you do download Instagram photos, please do remember to respect image ownership. Some of the methods below will allow you to download Instagram photos that belong to other people but you should also seek permission and give credit where it's due. For more details on copyright issues, see our article on how to repost on Instagram.
There is no native method to download Instagram photos from your feed individually. The one concession Instagram has made is to allow you to download your account’s entire history on the platform in one hefty package. That includes all the photos and videos that you’ve uploaded as posts or stories as well as a lot of other things you might not want.
This one “official” way to download your stuff was introduced due to privacy concerns following controversies at parent company Facebook. To get started you'll need to request a download link either via the Instagram website or the app.
(Image: © Joseph Foley on Instagram)
Go to the Instagram website, log in, then click the gear icon to the right of where it says Edit Profile. Choose Privacy and Security from the list of options.
This will lead you to the Account Privacy page. Scroll down to where it says 'Data Download' and click 'Request Download'.
(Image: © Joseph Foley on Instagram)
Enter your email and password again, confirming the email address where you'll receive the download link, then click 'next'. Instagram will start bundling your data into a downloadable package, and then send you the link by email. The platform says this can take up to 48 hours, but the email tends to come through within an hour or two. The link's only valid for four days, so keep an eye out for it or you’ll have to start all over again.
(Image: © Joseph Foley on Instagram)
Once you receive the email, click 'Download Data'. You’ll be taken to the Instagram site to sign in and start the download. The package comes in the form of a zip file that contains every post you've ever made as well as details of every message and everything you've searched for, liked or commented on. Depending on how long you've had an Instagram account and how much you use it, this could mean a ton of data, so extract the file to a new folder of its own to keep the many subfolders and files in one place.
You can also request this sizable download package through the app. Go to your profile, tap the menu icon in the upper right-hand corner and choose 'Settings'. Select 'Security', 'Download Data', type in your email and password, then tap 'Request Download'.
If you don’t want the hassle of wading through your entire Instagram history to find the one specific photo you wanted to download, or if you need an image from someone else’s feed after having received their permission to use it, you can download Instagram photos individually by turning to the source code.
(Image: © Joseph Foley on Instagram)
How you do this will depend on your browser. On Internet Explorer, you can click on the photo you want to download to view the full image, then right-click on the image and select 'View Source'.
(Image: © Jospeh Foley on Instagram)
Scroll through the code and find the meta property information (hit control+f or command+f and search for 'meta property'). You'll want to copy the URL that appears in double inverted commas in the line beginning: '<meta property="og:image" content='
 Save the image
 Paste the link into your browser, hit 'Enter', and you’ll be taken the photo you want to download. Now, simply right-click or control-click on the image and choose 'Save Image As'. The default name will be a long stream of numbers so you’ll probably want to change it to something more recognisable. The process may also work for videos depending on your browser.
On Google Chrome, you can look for the source image by clicking 'Inspect', then looking for the 'V' folder under the sources tab.
If you simply want to be able to find an image on Instagram again rather than use it on another device, you might find it’s enough to save it within the platform. Instagram allows users to bookmark any post in order to be able to find it again later, whether it's from an account you follow or not. You can organise saved posts into folders to make them easier to find, for example by creating folders for design inspiration, wish lists, or dream holiday destinations – don’t worry, no one else can see your bookmarks!
 Save to collection
(Image: © Joseph Foley on Instagram)
Tap the bookmark icon below any Instagram post and it will turn black to show the post has been saved. For the Marie Condo approach to bookmarks, tap the 'Save to Collection' message that pops up then click the + icon to choose an existing collection or create a collection with a new name.
(Image: © Joseph Foley on Instagram)
To view or edit your bookmarked images in the Instagram app, go to your profile, tap the menu icon at the top right, then 'Saved'. In a browser, you’ll find the 'Saved' tab above your own feed. From here, you can tap the plus icon to add new collections or to move a previously saved photo to a collection.
If you definitely need to download photos from Instagram rather than save them in the app but find the first two options above to be too fiddly or time-consuming, there are many third-party apps that offer workarounds. Bear in mind that some of these require access to your account data, while others rely on heavy advertising to make their money. Where possible we’d advise using the previous solutions, but if you want the convenience of a quick fix, then these are some of the most popular options.
DownloadGram is one of the most appealing third-party options to download Instagram photos since it doesn’t require the installation of any software. That may inspire more trust in terms of security. It can be used on both computers and mobiles. It can also be used to download videos, IGTV and Reels. The downside is that you can only download one piece of media at a time.
(Image: © Joseph Foley on Instagram)
On a desktop computer, go to the Instagram website, find the picture you want, click on the three dots at the top right above the image and choose 'Go to Post'.
(Image: © Joseph Foley on Instagram)
Copy the photo’s URL from your address bar then go to DownloadGram’s website and paste the URL into the box. Click the Download button, then the Download image button to save your image.
On a mobile device, open the Instagram app and find the photo you want, tap the three dots icon and choose 'copy link'. From there, follow the process as above.
Other options include FastSave for Instagram , which offers a faster app-based option for downloading individual images to an Android phone with no copying or pasting needed, but you need to grant the app access to your data, and the ads can be annoying.
If you want to download more than one image from Instagram at a time, you’re limited to using third-party software. Two of the most popular options are 4K Stogram and Save-o-gram.
4K Stogram allows you to subscribe to a username, hashtag or even a location to mass download every public image that it finds under that tag with no need to sign in to Instagram. However, while it’s free to subscribe to a couple of feeds, you’ll need to pay $10 for a licence for unlimited use. Chances are you’ll also find yourself downloading a ton of images that don’t interest you.
Download and install 4K Stogram on your computer, open the programme then type an Instagram username, hashtag, or location into the search bar. Click Subscribe, then the programme will search and automatically start downloading everything it finds. You’ll find the images piling up in the 4K Stogram folder on your computer in subfolders for each search you entered.
If you need to be more selective, Save-o-gram allows selected images to be downloaded all at once as a zip file or individually. It charges a one-off fee of $9 after a seven-day trial.
Instagram makes it much easier to download your own stories – the image or video including any stickers or text you’ve applied. Just click on the three vertical dots at the bottom right of the story and choose 'Save photo'. You can find old stories by going to your profile, clicking on the menu icon and selecting 'Archive'. (See our guide to Instagram Stories here.)
If you want a Story from someone else’s account – and some photographers specifically share pictures for use as wallpaper by this means – you can save it by simply taking a screenshot. The trick is to hold down one finger on the screen while you do so in order to remove the Instagram UI and get a clean shot.
Just tap and hold anywhere on the screen so that the UI overlay fades away. This also pauses the story, giving you time to take the screenshot. With a bit of finger contortion, keep your finger on the screen while you take the screenshot, whether that’s by pressing volume up and lock on an iPhone X, the power and home buttons on a Samsung Galaxy, or power and volume down on a Google Pixel.
Again, bear in mind potential copyright issues when taking screenshots of someone else’s work.
Read more:
Thank you for reading 5 articles this month* Join now for unlimited access
Enjoy your first month for just £1 / $1 / €1
Already have an account ? Sign in here
*Read 5 free articles per month without a subscription
Join now for unlimited access
Try first month for just £1 / $1 / €1
Already have an account ? Sign in here
Joe is a regular freelance journalist and editor at Creative Bloq. He writes news and features, updates buying guides and keeps track of the best equipment for creatives, from monitors to accessories and office supplies. A writer and translator, he also works as a project manager at London and Buenos Aires-based design and branding agency Hermana Creatives, where he manages a team of designers, photographers and video editors who specialise in producing photography, video content, graphic design and collaterals for the hospitality sector. He enjoys photography, particularly nature photography, wellness and he dances Argentine tango.
There are 3 main ways to add a photo to Instagram* from your phone: upload via the Instagram* mobile app, from your phone gallery, or via third-party apps. We will analyze separately how to publish a photo in a post and a story.
Download the Instagram app* from the AppStore or Google Play. After registering or logging into your account, you will see the [+] icon in the upper right corner, click on it, and then in the menu that appears, click on the "Publish" button.
Interface for adding a new post to the feedNext, you will open the interface for adding a post, you need to go through several steps:
 ;
; Let's take a closer look at how to post photos on Instagram* from your phone.
Select media files. After pressing the "Publish" button, you will be taken to the gallery on your phone. Select the photos or videos you want to post. At this stage, you can also change the resolution or select multiple files for one post.
Basic buttons for setting up a future publicationEditing files. After selecting all the settings, click the "Next" button in the upper right corner and go to the editing interface - here you can apply filters, adjust contrast, add sharpness, level the horizon, and so on.
Photo and video editing tools Add text and labels. Once you've finished editing your media, click the Next button again and the last settings will open: select other social networks for publication, add text, geotag, user tags. Read more in our article “Instagram tags*: how and why to use”.
Big text cannot be posted on Instagram*, the limit is 2200 characters. But if you really need it, we have an article with recommendations for the design of such publications.
Publication . When you're done with the settings, click "Share" in the upper right corner and the post will appear in your account feed and in the news feed of your followers. Hooray!
The process of loading a post and its display in the news feedThis is a quick way when you just need to post one file with a caption, because this way you can not customize the display format, add multiple files to one post, edit media files, add geotags and tag other users.
How to post photos on Instagram* from your phone using the gallery:
That's it - the publication has been uploaded to your profile!
Step-by-step process of publishing a photo in the feed through the phone galleryIf you do not know what, why, why to publish and how to design, I recommend our free course "7 Steps of Content Marketing". In the course, we tell you what content marketing is, how to create, design and promote content on the Internet. All this will help you understand how content works, why publish posts and how to make them beautiful and interesting.
You can upload photos to Instagram* from photo and video editing apps, feed maker, and so on. Almost all of these applications have the ability to automatically add media files to Instagram*.
For example, the Canva photo and video editor app has a Share button in the top right corner. In the additional menu, the Instagram icon appears *, when clicked, it transfers to the social network application with the option to select a placement: Stories or feed. After clicking on the "Feed" button, the standard Instagram interface * opens to add a post to the feed.
You can upload a photo to Instagram stories* from your phone both directly from the Instagram application* and through third-party applications.
There are 3 ways to post a Story via the Instagram app*:
After clicking, the interface for creating Stories will open. By default, the camera opens, and you can immediately take a picture or video for stories. If you want to add files from your phone's gallery, tap the button in the bottom left corner of the screen or swipe up from the bottom of the screen.
The story editing interface also has many useful features:
 There are masks both from Instagram* itself and from users. To get as many creative masks as possible, subscribe to major bloggers who create such masks. For example, bloggers ya.molli or georska.
 Once you're done with your stories, select the publish option at the bottom of the screen:
Stories, like posts, can be posted from other applications, only when choosing a placement, you need to click "Stories".
Check out the Instagram Stories* section of our blog for inspiration on how to use Stories on both your personal blog and brand account.
If you feel uncomfortable publishing posts and stories from your phone, use services for publishing from your computer, such as SMMplanner. With it, you can design and post posts and stories from your computer and specify the time at which they will be automatically published.
Scheduling a new post on Instagram* from a computer via SMMplannerWhat is the convenience of delayed posting and how to post on Instagram* from SMMplanner, read in our article "Delayed posting services on Instagram*: why they are needed and how they work".
Universal algorithm of actions for posting photos on Instagram* from the phone:
Done! Your first story or post is already in the feed.
We continue the series of articles “Instagram for a teapot”. Simple instructions on how to properly use the functionality and much more. Next topic: “How to add a photo to Instagram”.
Content
Instagram itself is designed to share experiences. You can use the social network from a PC or smartphone. But adding a photo to Instagram through the latter is much easier - apart from the application itself, nothing else is needed for this.
The topic of publishing photos on Instagram from a computer has always been relevant. The Internet is full of different ways, most of which involve installing additional applications. But it is long, and sometimes even difficult. Therefore, we suggest using the following method:0003
2. In the upper left corner of this menu, there is an icon with a phone and a tablet. We press.
3. After clicking, the Instagram view will change. Now press F5 or round arrow in the upper left corner of the browser to refresh the page. On Instagram, the bottom menu will appear, as in the mobile version.
4. Now, if you need to publish a photo, close the menu by clicking on the gray cross in the upper right corner and use instagram like on your phone.
5. If you want to add a story, then leave the menu open and click on the camera icon to the left of the inscription “Instagram” . This function only works when the menu is open.
Posting and sharing your photo from your mobile device is very simple.
1. Enter the profile and look for "+" at the bottom of the screen.
2. Click on it and get access to the gallery and camera. In the first case, we select a ready-made picture from the library, in the second we make a new one online directly in the Instagram account. It looks like this:
If you want to take a photo or shoot a video, go to the corresponding inscription. After selecting or taking a picture, click "next" at the top right.
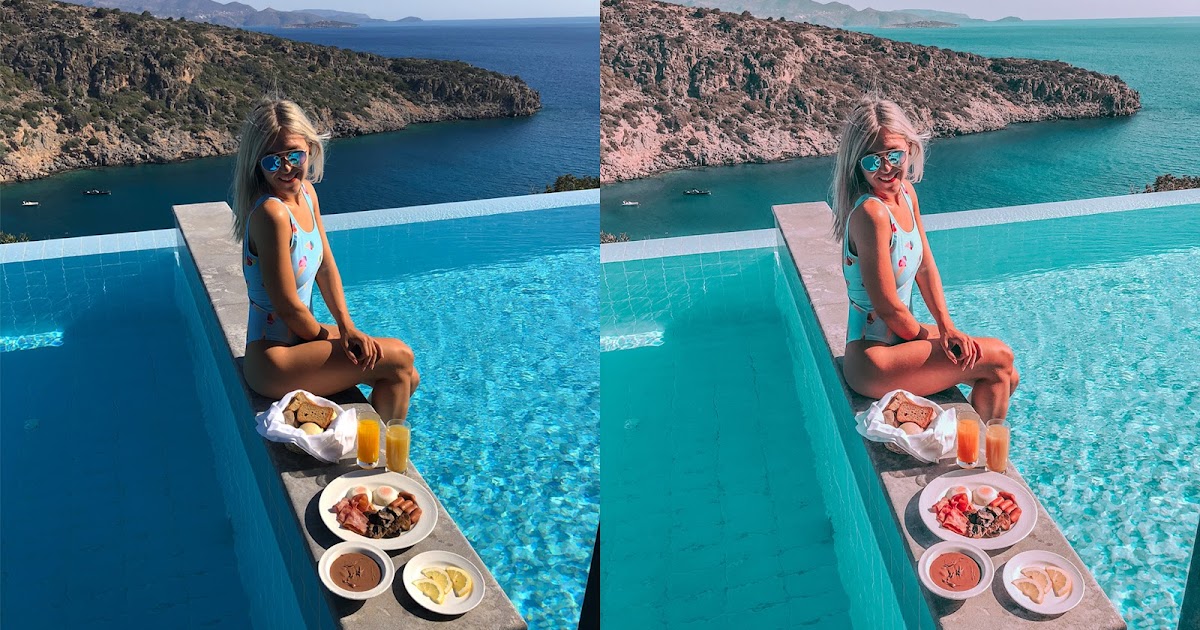
3. Get into the photo editor. Here you can adjust the brightness of the image. Scroll the ribbon with tools to the left - there are enough filters to get the desired quality. To align it, add or remove brightness, sharpness, contrast, etc. go to the "edit" tab (also at the bottom of the screen). At the end of the correction, we look up and send the “Next” frame.
4. Everything is ready! You can sign - your comment is added right next to in the same window. A little lower is the "tag people" option. Now you can share by clicking the blue button of the same name in the upper right.
Your Instagram photo! The same is done with video.
Posting multiple photos is possible in two ways:
Consider the second option in detail. To do this, in step No. 2 of the previous instruction, before clicking "Next", we activate the inscription "select several" at the bottom.
We get into the general gallery with the ability to select frames:
Mark the ones you need and only after that go up and click "Next". It turns out a carousel of several pictures.
On the web, such a collage looks like this:
Below, in the line with a heart, there is a quadruple. It says that there are several frames in the post. This is also evidenced by the counter in the upper right corner - 2/4. That is, we have the 2nd of 4. Flipping through them is simple - with a light touch on the screen with a shift to the left. In total, you can add up to 10 photos or videos to the carousel.
Until recently, all frames for an Instagram profile had to be cut. The network accepted only square images. Now the restrictions on the dimensions and orientation of the image have been removed. Vertical or horizontal, it doesn't matter.
So, choose a photo through the gallery or take a new camera. Before uploading to the profile, adjust the size. To prevent the picture from looking cropped, use the double brackets in the lower left
corner - . Full size without cropping guaranteed.