Would you like to save time creating and scheduling posts for your Instagram account?
In this post, we’ll show you how we use Canva for Instagram to create and schedule a month of posts. Creating a batch of content eases our overwhelm and frees up our time to work on other stuff in our business.
** Disclaimer: This post is NOT sponsored. Some product links are affiliate links which means if you buy something we’ll receive a small commission.
In the (7-minute, 49-second) video below, we show you our process of creating a month of Instagram posts.
The video was originally recorded May 25, 2020. There have been several updates to Canva since then. Subscribe to my YouTube page to be alerted of new videos.
We also include a step-by-step instruction below the video.
The 5-step Framework to Creating a Month of Posts Using Canva Quickly
Step 1: Choose 7 different Social Media Template for each day (alternate photo, text, graphic, etc.)
Step 2: Customize with templates brand colors and font
Step 3: For content, theme your days (such as Motivational Monday, Testimonial Tuesday, Wisdom Wednesday, etc.) or theme your weeks based on topics you mainly talk about.
Step 4: If you decide to theme your days, create all your Mondays at one time, then Tuesdays, etc.
BUT, if you theme your weeks, create a week of content at a time, then copy all 7 days and duplicate them for the 2nd week (Note, you can switch out photos or alternate colors with the same messaging. This not only saves time, but gives you a bit of consistency of content and branding.
Step 5: You can either download all content and schedule using your preferred scheduling app OR you can scheduling directly from within Canva.
Now the fun part of scheduling your posts.
How to Schedule Instagram Posts
Would you like to schedule Instagram posts on Canva?
Option 1: Use Canva’s Content Planner
And as a Canva Pro user, you can use the Content Planner to schedule posts to Instagram, Facebook Groups and Pages, Twitter, LinkedIn, Pinterest, Slack and Tumblr.
Option 2: Schedule thru the Facebook Creator Studio (now Business Suite) inside the Facebook Publishing Tool
Option 3: You can use a third-party platform like Buffer.com, Later.com or Hoosuite.com to schedule your Facebook and Instagram posts.
Why I like Canva
I like Canva because it is easy to use. I can start a project on my desktop computer, then finish it on my phone. I use Canva to create graphics for my website projects, social media, Youtube video thumbnails and more.
I started with the free plan, but upgraded to the Pro plan over a year ago so that I could access their brand kit feature.
Having a brand kit that includes my logos, fonts and brand colors saves me time when I’m creating graphics.
Why You Should Use CanvaCanva is for everyone who needs something designed for personal and business use. You don’t need to be techie or even a professional graphic designer to use it.
The FREE version of Canva is great! However, if you want to schedule your posts, access their brand kit or work with a team of people, you might want to try out the Canva Pro option.
Try Canva Pro for free.
In ConclusionWe hope this article helped you learn how to use Canva to create a month of posts for your Instagram account. You may also want to see our article on How to Set Up Your Canva (Pro) Brand Kit Set Up on Desktop and Creating Instagram Posts in Canva for Hair Stylists.
If you liked this article, then please subscribe to our YouTube Channel for Canva video tutorials.
One of the things I’ve wanted to do in 2021 for this blog is to grow my business Instagram account.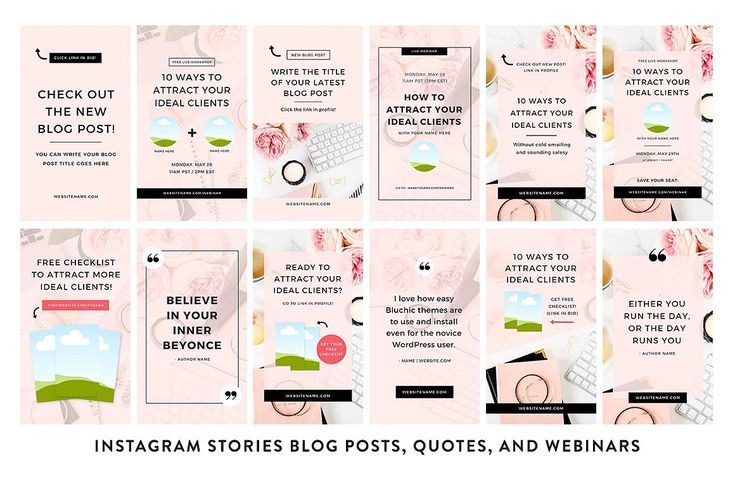
Considering how little effort I’ve put in (everyone who’s failed at their resolutions, say AYE!), I must say, it was exciting to see the account grow from hundred-something followers to over 500 followers in just a couple of months. My personal social media allergies and gimmicks aside, I’ve done my due research and have come up with some pretty fantastic, creative, and non-cringy ways to grow a following.
Today’s blog post is all about my findings, followed up with ways to implement the tips I’ve prepared for you. What’s more, most of what I’m about to show you, you can accomplish with just one tool — Canva. Starting with designing your Instagram posts to scheduling your posts weeks ahead of time, all can be done from within Canva, while never having to leave the platform. And well, not just Instagram, but you can automate most social media platforms with Canva these days, including Facebook, Twitter, LinkedIn, and more.
So, without further ado, allow me to share with you everything you’ll need to know about growing your Instagram account and then grow your business with it.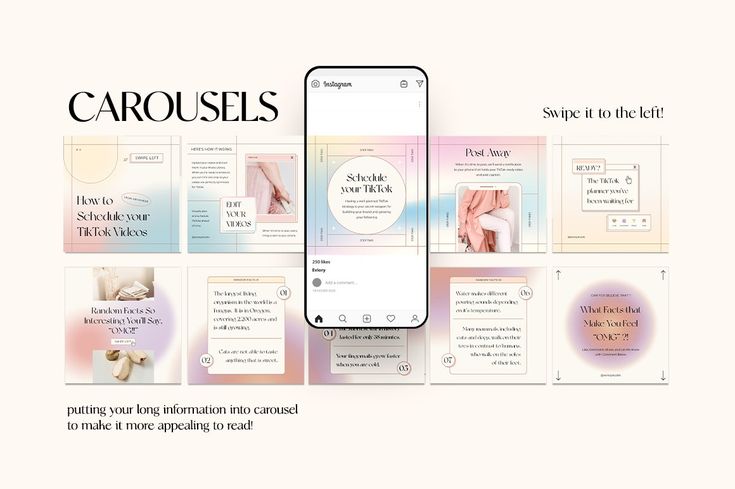 I’ll be covering the following topics in this post:
Part I.
Part II.
Also, since this post is so Canva-heavy, I recommend you sign up for Canva Pro. Not only will Canva Pro make your designs superior (by giving you access to premium photos, elements, and features to work with) but it’ll also help you schedule Instagram and other social media content weeks ahead of time.
Not sure if Canva Pro is right for you? Well, why not give it a try before you commit to it? You can sign up with my Canva Pro affiliate link for a 45-day free trial period.
Now then, let’s get started!
Part I.
If you’ve been around this space, you know that I focus primarily on Pinterest to drive my blog traffic, subscribers, and sales. This was intentional because from the beginning of this blog I knew I’d have to make the best out of my limited time. Pinterest is significantly easier to grow than mainstream social media platforms, but still, it was a new platform, so it took some time to master.
Things are different now. I know exactly what works, so Pinterest marketing takes no time at all. Things more or less run on auto-pilot. So, now that I suddenly have so much time, I decided to diversify. Instagram was a natural choice because this platform still makes more sense to me than, say, Twitter or Facebook. I’m a visual person and a lover of good design. Making graphics with Canva is pretty fun.
But this may not be the case for you.
Here’s what I’ll say. If you’re like me and your business is your side hustle, then, like me, you’re likely dealing with limited time in your hands. If that’s the case, and if you’re not social media savvy already, then do not try to grow all these different social media platforms at the same time. Choose one platform, master it, then move to the next platform. Choose a platform that excites you, a platform that makes sense for your business (more on this shortly.)
I prefer Pinterest because it is more a search engine than a social media platform. It also helps with driving traffic to my blog posts. Instagram, however, could work better for you if you’re a photographer, or a designer, or a creative freelancer, trying to increase brand recognition.
This post is for those of you who’ve decided to double down on Instagram. And if that’s you, well, welcome aboard!
A section of The Side Blogger Instagram feed @thesidebloggerIn the last couple of months, not only has my following grown by a few hundred, but I’m also starting to get more and more DMs on Instagram inquiring about my courses, my Canva templates, and just people wanting to say hello or show their appreciation. Considering how inconsistent I’ve been (I swear I intend to remedy that!) in this platform, this is already a good sign of the platform’s potential.
All this is an indication that Instagram is a great way to score customers and clients. By sharing the right types of content (more on this later), you can establish your authority in your field and create a sense of trust among your audience.
As I mentioned above, Instagram is all about brand recognition and authority. Also, trust-building. So, let’s figure out if Instagram is right for you or not.
If you’re a brand new blogger trying to drive traffic to your blog, Instagram isn’t for you.
Instagram can help drive some traffic to your blog, but don’t depend on it to be your main traffic source. Nobody has time to look at your feed, tap through to your profile, then tap again to your website, then tap again to find the right link… Ugh! Although Instagram stories can link directly to your blog, I’d still say you’re better off using some other strategy. Learn to use Pinterest instead. Not only is Pinterest good for driving traffic, but it is also easy to learn and implement in your overall business strategy.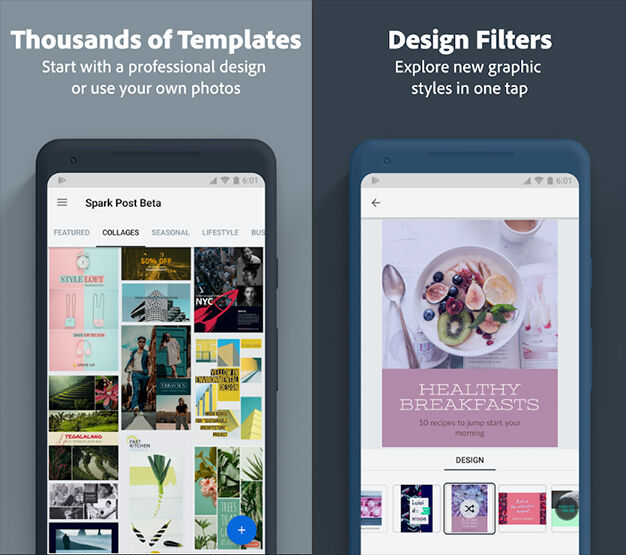 Basically, you’ll have an easier time running with Pinterest for your brand new blog than with Instagram.
Instagram could be good for you if you’re trying to establish yourself as a trusted figure in your field.
Think about what you see on Instagram and who has the most engagement and likes. Lifestyle bloggers who bare their life on Instagram (influencers??), cat lovers, home decor nerds, fashionistas, artists and graphic designers, etc. You won’t drive massive traffic, but if you keep putting your work out there over and over again, you’ll start to build trust with time.
Let’s consider a hypothetical scenario: let’s say person A follows branding expert and designer B on Instagram. Person A follows person B because they love their work. It’s good on the eyes. After all, that’s what Instagram is for; we follow people because we like to look at what they share. Then, one day, person A decides to rebrand their business, or maybe start a new business for which they require branding work.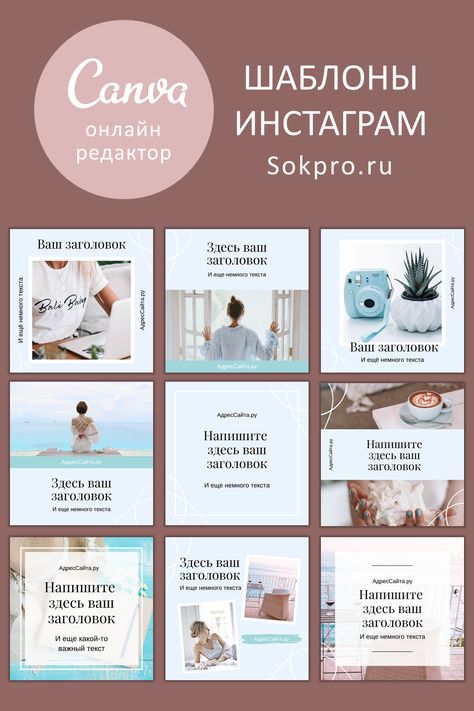 Who do you think they go to? Some random XYZ they don’t know or trust? Or the person they have been following on Instagram whose work they’re familiar with, and love?
You get the picture.
Instagram can be a good place to score customers and clients.
In the above example, the scenario I just painted, proves this point. If you’re a freelancer or a coach trying to score clients, Instagram can help. If you’re an artist or designer trying to sell your work or even score commissioned work, Instagram can help.
No, Instagram won’t drive traffic, but it can help you reach the right people. And sometimes, for certain types of business owners, influencing one right person can be better than driving a thousand wrong people to your website. One right person may buy a $1,000 product or service from you, whereas a thousand wrong people going to your website may not be of any help to you.
And that’s why bloggers need to be careful. Bloggers can often benefit from traffic, even if that traffic isn’t comprised of potential customers or clients.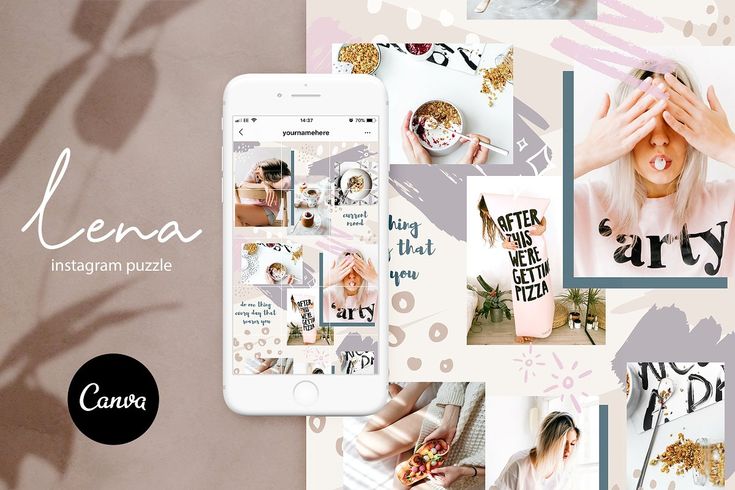 Traffic can mean eventual ranking on Google, for example. Instagram won’t help you with that. But it can help you sign a high-ticket client.
If you want to partner with brands and companies for sponsored content, a large following on Instagram may help.
I told you already, Instagram is all about building trust and authority. Brands and companies understand that aspect well. And that’s why a lot of companies partner with influencers on Instagram for sponsored posts.
Alright… still here and wish to learn more about Instagram? Keep on reading!
Follow this blueprint regardless of what kind of business you’ve got; whether it’s a blog, a creative business, a design studio, or anything in-between.
Convert to a business account: An Instagram profile for your business should be a business profile. Setting it up takes a couple of clicks. Go to your Instagram Settings > Account, then scroll down to the very bottom until you see “Switch Account Settings”.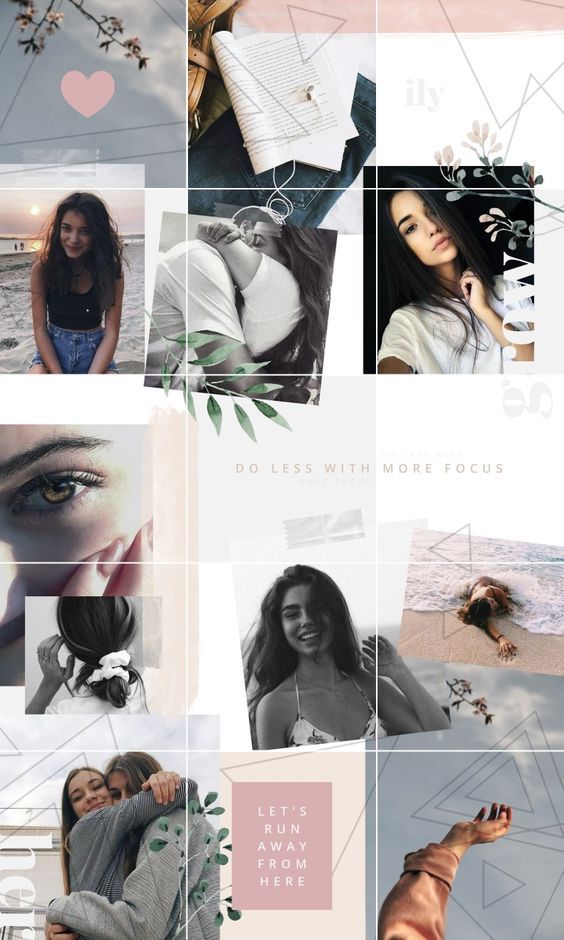 Tap it. This should give you the option to convert your account to a business or creator account. Choose “Switch to Business Account”.
Set a profile picture: It doesn’t have to be your photo. It can be, but it doesn’t have to be. It can be your logo too. Or a cartoon version of you. Or something else entirely. I’ve seen plenty of users with thousands of followers with a silly profile photo. What matters is that your profile photo reflects your brand.
Write a bio that makes people curious about you: Don’t be afraid to experiment here. Michael Thompson, who I think gives proper business advice, once shared this, “Want to stand out on LinkedIn? Don’t talk about work.” For example, Michael’s LinkedIn bio doesn’t say that he’s a writer, a content creator, or a blogger. Instead, it says, “Co-creator of two cool little boys with an equally cool woman.” Isn’t that freakin’ genius? I think the same advice can apply to Instagram too. However, I’ve also seen the opposite, as in, people who do really well on Instagram but also share detailed and accurate info about what they do.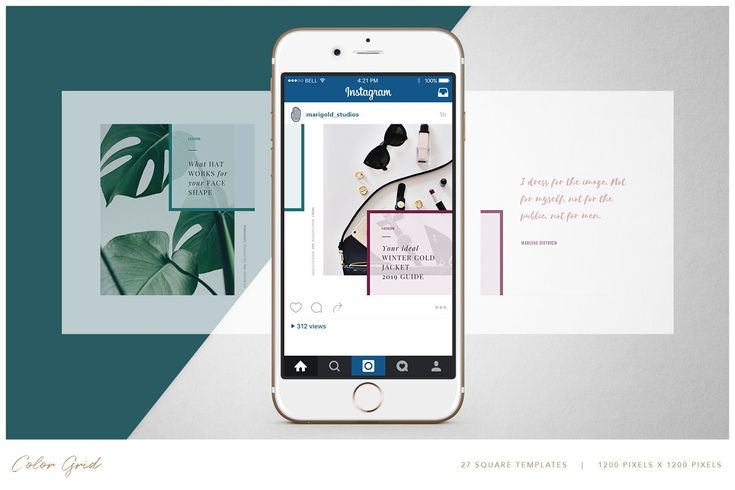 So, don’t be afraid to try different strategies.
Share your website/URL: You should try to drive traffic to your website with your Instagram, so, to that end, you should always add your website link on your Instagram bio. A few things to note: try and avoid third-party linking sites like Linktree on Instagram . Your goal should be to minimize the steps required to land on your site. If you use a third-party service, you’re adding an extra, unnecessary step, and likely losing potential readers, customers, or clients. My advice is that you should always link your own website. If you like the idea of sharing some quick links with your Insta audience, then the best thing to do would be to create a page on your site with these quick links. This way, you still get the same benefits of something like Linktree, but without redundancy. To give you an example, look at my Instagram default link: https://www.thesideblogger.com/instagram/
Instagram landing page for The Side BloggerCreate a branded experience: Create a feed that speaks to your audience without telling them what your brand is about.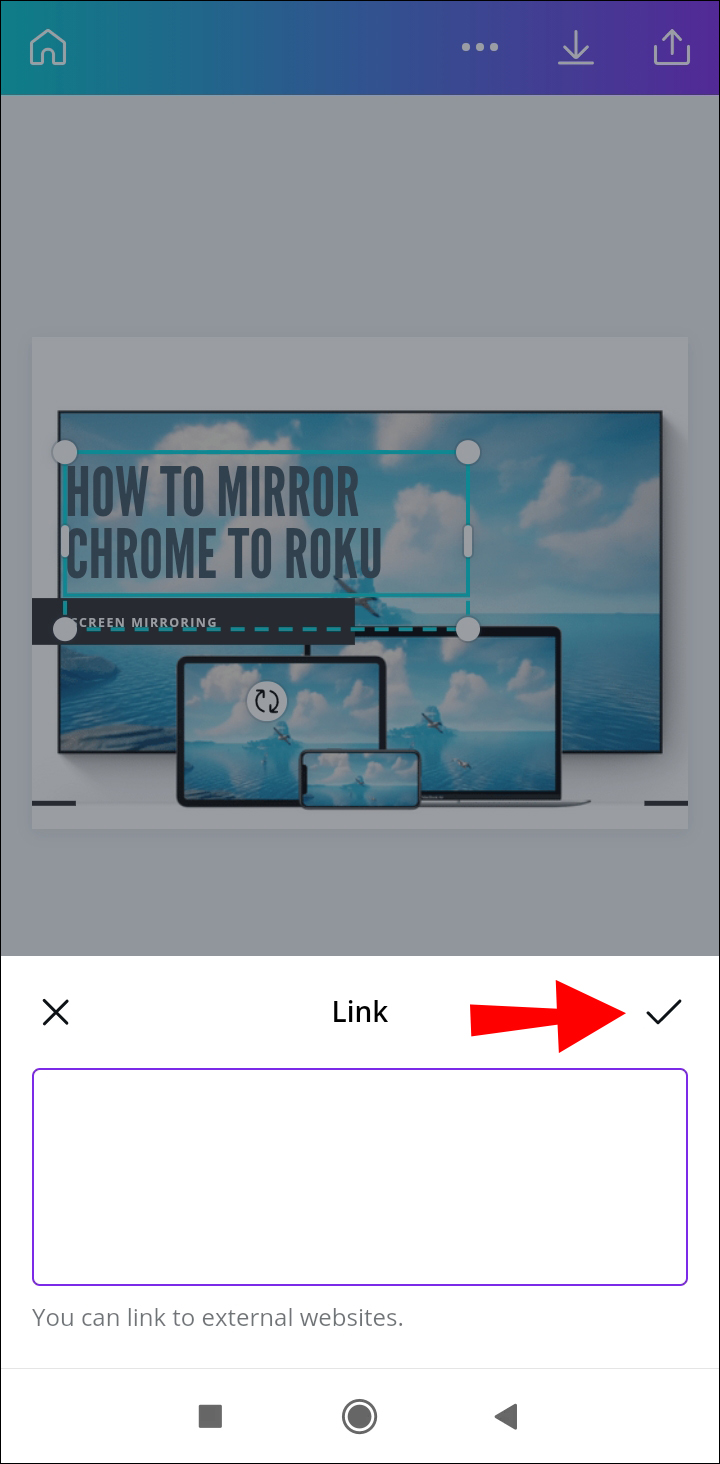 Be that the colors your use, the photos you choose to share, the graphic elements in each image, or the message in them; try and create consistent branding across your feed. You may not get there from day-1, and that’s OK. Running a business is all about experimenting, trying things, and learning from the errors and failures.
Mind the feed: Your Instagram feed is what most people see. Stories are cool, but remember that stories are temporary. While stories can be a cool way to showcase your behind the scene process and such, the feed is your unique chance to provide real and lasting value to your potential customers and clients.
Mind the size: These are the current sizes for Instagram.
Be mindful of the captions: Unless you’re a great writer well versed in copywriting and telling stories, you should keep your captions short and to the point. No need to add redundancy in the caption. Keep them only as long as they need to be to convey your message. If your caption tends to run on the longer side, then use linebreaks to create a better reading experience, instead of using super-long blocks of text.
Use the right hashtags: As you may already know, hashtags are great for attracting an audience who’s looking for content specific to what you’re creating. Use them wisely. Using a lot of generic hashtags won’t be of any help to you; instead, research hashtags that are specific to your industry. Look at what more successful people in your niche are using, and then compile a list of hashtags that you can use. Do not use the same hashtags for every single post; instead, rotate them. Here’s a great blog post on Instagram hashtags that you should check out.
Be consistent: When running a business, consistency is key. Now, you do not need to post every single day, but do make an effort to post at least a couple of times a week, every week.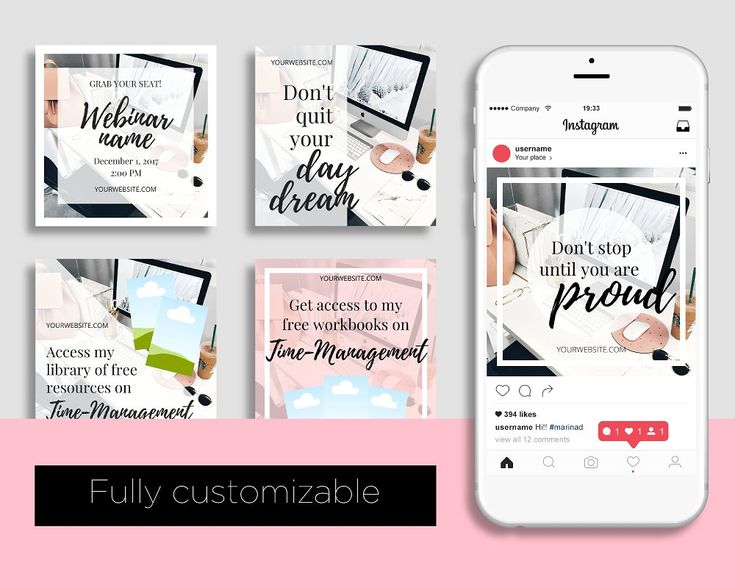 Use third-party software such as Canva Pro to schedule content ahead of time if it’ll help you stay consistent.
Alright, now that the essentials are out of the way, let’s look at the kind of content you can create to grow your followers and potential clients and customers, as well as drive traffic to your website.
In this section, I will talk about content for the Instagram feed specifically. As for stories, they’re best for the following types of content:
Now, let’s get to the feed area.
Your feed is your opportunity to score potential customers and clients as they’re more permanent than stories. I’ve already mentioned earlier that you should create a branded experience in this section. By that, I mean your visuals, your message, your copy, your content, they all need to play nicely into your overall branding strategy.
Check out these feeds for example and inspiration.
Let’s look at the three examples above (from left to right):
Cup of Jo: Joanna Goddard’s blog Cup of Jo remains one of my all-time favorite lifestyle blogs, like, ever! She doesn’t have courses, nor does she sell any other type of digital products. She’s, what you’d call, a traditional blogger. As a lifestyle blogger, her feed is full of things that she personally finds intriguing, including, but not limited to, photos of herself and her family. She shares vacation photos, photos of daily life, quotes from inspirational people as well as strangers, etc. Just one look at her feed and you can feel the personality of the blogger behind the brand.
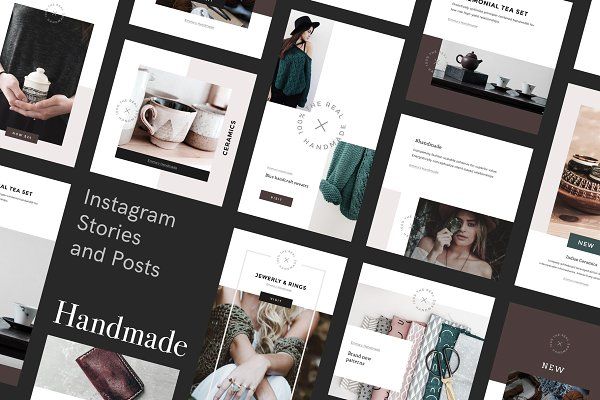
Moyo Studio: Moyo is my go-to when I need cool, earth-toned premium stock photos and digital templates.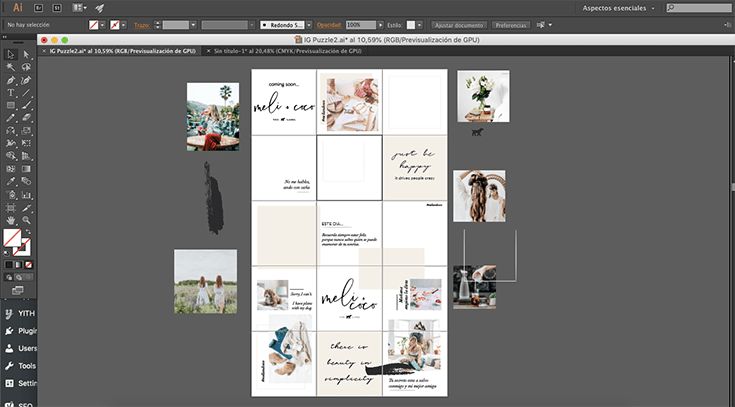 I recommend Moyo Studio to all my students in my course — Side Income with Canva Templates, and use their products myself all the time! Most of the Canva product photos you see on my Canva shop are made with Moyo’s templates. Moyo has a very unique style — it’s light and airy, and you see this style in their products, their website, as well as their Instagram feed. As for the content itself, since they’re a design studio, you’ll find tips and advice related to good design practices, as well as images of their products — stock photos and templates. Moyo’s Instagram feed pretty much works like a portfolio for the business.
Canva: The popular online graphic design app Canva is colorful and it’s evident in their visual branding. Unlike Cup of Jo or Moyo Studio, both of which happen to be small businesses, Canva is a multi-billion dollar unicorn. Their content ranges from graphic design tips to Canva-specific tutorials to messages regarding social awareness.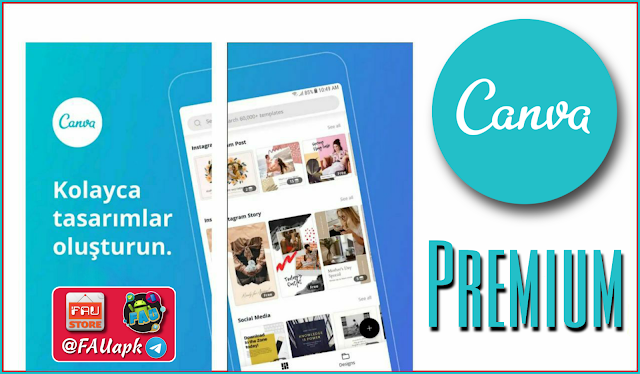 They tie all these different types of content together with a cohesive visual branding across platforms.
Now, let’s look at some specific types of content you may share as a business owner. Since this space is for bloggers and creators, I’ll focus on content ideas for those niches. Also, please note that the ideas below are just a few from plenty. For example, I won’t talk about sharing photos. If you’re a lifestyle blogger like Joanna Goddard of Cup of Jo, you may share your personal photos on your business account, and that’s totally fine. But I won’t be talking about that here, because sharing images on social is self-explanatory.
But then there are some other types of content that people like us share—people who run niche blogs, sell products or services, and generally do not like splashing their lives in public. If that’s you, keep reading because that’s the type of content I’ll be focusing on in this post.
A great way to promote your latest blog post is to highlight a few main points on the post.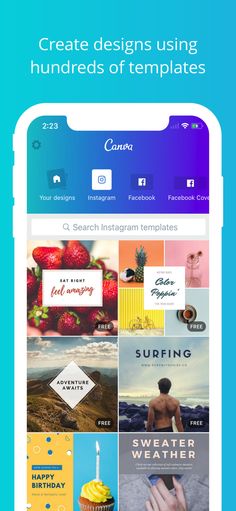 For example, let’s say that you just published a new blog post — 7 Types of Content That Create Engagement on Instagram (heh!). How would you promote this on Instagram? You can do this in a few ways:
In the section above, I showed you a way to promote your blog posts. You can use similar ways to share advice and tips related to your niche. For example, if your business is about teaching graphic design, then you could pick a specific graphic design topic and then share a few tips in your post. You can create a single post with multiple tips (similar to the first option in the section above), or you can create a multi-page (carousel) post with one tip per image (much like the second option in the previous section).
But in this case, instead of asking people to go to your blog, you could ask people to purchase a service from you. As an educator, maybe you offer consultation or coaching or sell a course. You could prompt people to make a purchase here. Or, keep things simple and ask them to save the post for later (engagement!)
However, do keep in mind that people do not like overly salesy people. So my advice would be to keep your CTAs (Call to Action) versatile. I’ve shared more about CTAs below; keep reading!
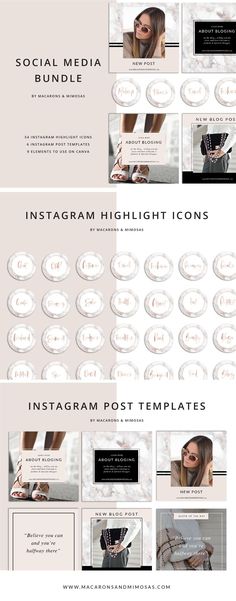
In the image of some of my favorite feeds that I shared above, you’ll notice that Moyo Studio — a photography and design studio — often shares images of their work. They share images of their templates in use or the photos they sell on their shop. My own Instagram feed often showcases the Canva templates I create. It’s a great way to show people what your products look like.
If you’re a freelancer, you may even consider sharing a case study as a series of carousel images. This may help a potential client understand your process better, and compel them to sign with you.
When showcasing your work, try to think of creative ways to present what you create. Follow other creators on Instagram for inspiration and ideas (do not steal their work, but use them to motivate yourself.)
I sell Canva templates, so I often share my products on my Instagram.Testimonials are a great way to share social proof for the quality of your work or products. Ask your buyers and clients to share their honest feedback with you, and then use them across your website, emails, and yes, on social media too!
These are a couple of Canva templates for testimonial posts. Feel free to use them for yourself: Left template | Right template
Think about the first example I gave you regarding sharing your latest blog post. There I asked you to share a few of the highlights of your post to entice your audience to click through to your website. But this doesn’t mean you cannot repurpose your content. You can always wait for a few weeks and then repost the same highlights again. Here are a few examples of content repurposing within Instagram:
 )
)Oh, and make sure to create different visuals for repurposed content.
You can use videos not only on your Insta stories but also in your feed. You can record yourself giving advice, make a video of behind the scene work or process, etc.
No matter what your niche, you can always use a good quote.
Canva templates perfect for sharing short quotes. Left template | Right templateLike I’ve said plenty of times already, the goal of an Instagram account should never be to drive traffic to your blog or website. That will happen automatically, but the way you go about it has to different than, say, how you do it on some other platforms. On Instagram, you’ll need to focus on being helpful and providing value. Either that or share cute photos. Many of us business owners and bloggers aren’t on Instagram to share photos of our cute living room, or the new rug we purchased, or our puppies. So, how do you make sure you’re sharing content that will make people want to follow you? Be helpful and give value with each and every post you share.
Or at least try to.
Let’s talk about CTA’s now. When it comes to CTA’s, remember that you don’t want to be in your potential clients’ or customers’ faces all the time. Nobody likes it when someone is desperate to make a sale. Keep things subtle instead, even if you’re not selling a product or service, necessarily. Be subtle and remember, if you give value to your audience, they’ll buy from you eventually. That said, here are some ways you can ask your audience to take action, as well as some best practices.

It’s easy to share photos on Instagram — you don’t have to think about it.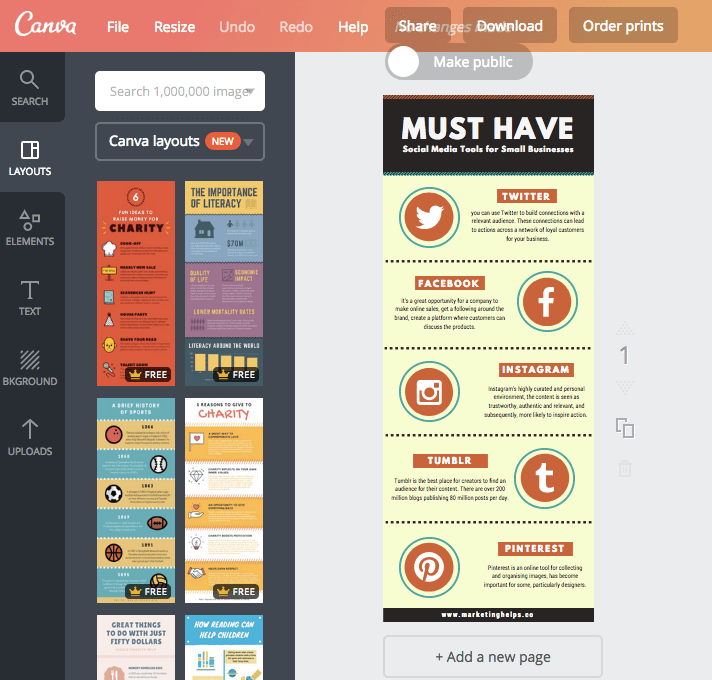 But creating graphics, where you share tips, add lists, blend images or shapes with text, can get complicated easily. And that’s why the best strategy for designing Instagram posts is to keep things simple. Here are some tips:

And that concludes the first part of this post. Hopefully, you have a good enough idea now as to how to get started with using Instagram as a way to grow your business, drive traffic, attract potential customers or clients. The next part is about automating your Instagram game by way of scheduling weeks’ worth of posts in advance.
Looking for pre-made Canva templates to speed up your design process? Check out my Canva template shop as well as my free [with Canva Pro membership] Canva templates available on Canva’s template marketplace.
Want to try Canva Pro free for 45 days? Sign up with my affiliate link!
Part II.
This part is about scheduling your Instagram posts. As you know, scheduling social media content can free up your day and save time. To that end, allow me to share with you the tools I use to schedule my Instagram posts and short tutorials on how I use these tools.
You may already be familiar with various third-party programs that do the work such as TailWind, Later, Planoly, CoSchedule, Buffer, and who knows how many others are out there. Personally, I prefer two:
I use Canva almost exclusively these days to design my social media posts. This is why, when Canva announced the Instagram post scheduling feature in April (2021), I was ecstatic! I mean, this new feature has cut down the time it takes to schedule posts by half.
Let’s see… before Canva added this feature, I’d have to design the posts in Canva, download them into my computer, then upload them to another platform to schedule.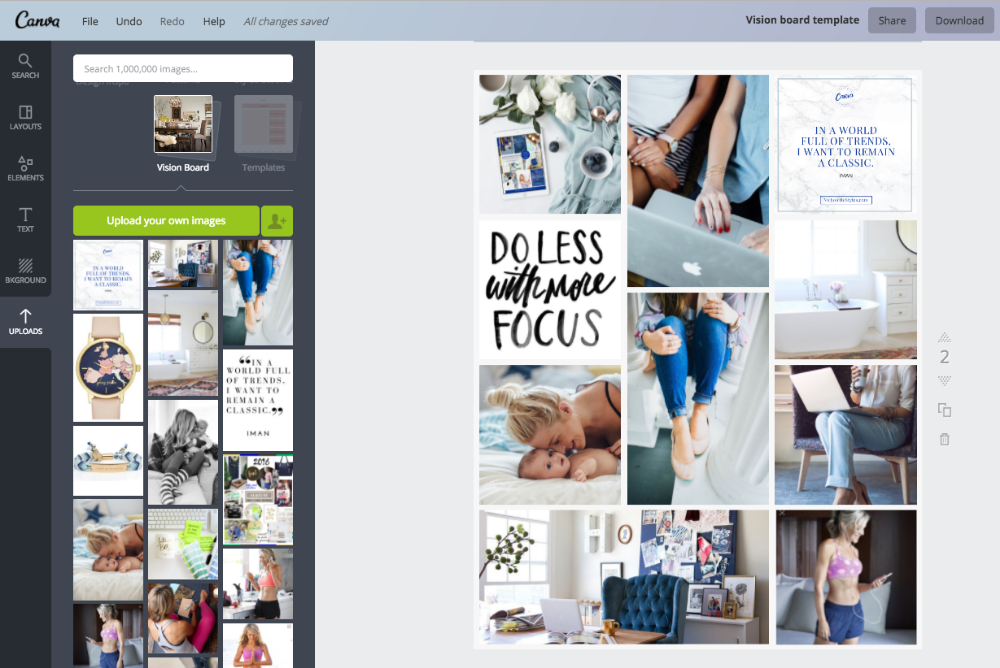
SMH
And now? Now I just open up Canva, design the posts, and right from within the design editor, I schedule it to go up on Instagram. No more downloading and uploading. How sweet is that?
No, seriously, I implore you… OK, not quite “implore” maybe, but I seriously recommend you to at least give it a try and see how you like it. If you’re already a Canva Pro member, then all you have to do is connect your business Instagram account to Canva and start scheduling your Canva made Instagram posts. And if you’re not a Canva Pro member? Don’t worry! Sign up today for a 45-day free trial of Canva Pro using my unique affiliate link. If you don’t like it, you can cancel it before the trial ends and nothing will be lost. Also, as a business owner, you should be able to write off your Canva Pro subscription as a business expense. So yeah, give it a try.
Let me show you exactly how it works (if you prefer a video tutorial, you can skip this and go straight to the video tutorial section at the end of the post).
1. Make sure you have a business Instagram account. If you do, skip this and go to #2. But if not, it is easy to convert your personal or creator account into a business account, for free, with just a few clicks.
And done! Then,
2. Log on to Canva. (I personally prefer designing on a computer — a desktop or a laptop.) You’ll need to be a Canva Pro member in order to schedule. If you’re a free Canva member, you can still post on Instagram, however, you won’t be able to schedule them ahead of time.
3. Create a new Instagram post. You can design something from scratch, or customize a pre-made template to reflect your branding and content. Note that at this time, you can only schedule single-image posts with Canva Pro. If you have a multi-page post, you’ll need to use a different platform (more on that later.)
4. Once you’re done with the design, click the three dots on the top-right corner, then search for “Instagram business” using the search function, then click it.
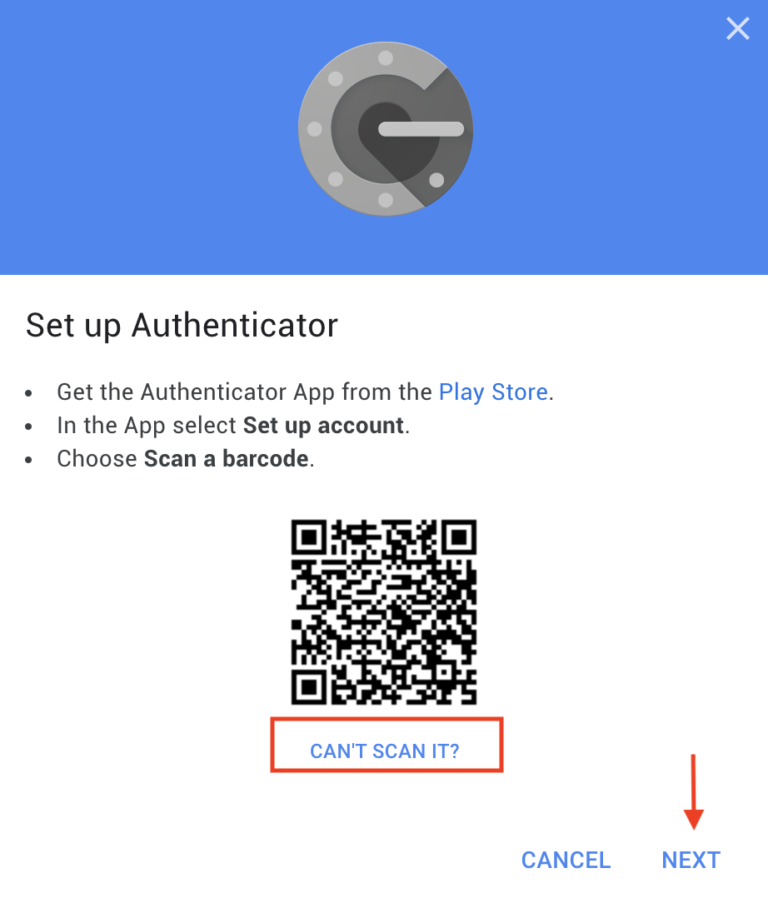
5. Now, click the button that says “Connect via Facebook”.
6. Follow the prompts to connect your Instagram account and Facebook page. Since Facebook owns Instagram, these two are connected and Canva requires you to connect your Instagram account via Facebook.
First, you’ll need to log into your Facebook account.
Then, it’ll ask you to choose the Instagram account, followed by asking you to choose the Facebook business page, and finally, it’ll ask you to select the permissions. Make sure you have all of them turned on.
7. Once your Instagram business account is connected to Canva, refresh the design page. Then repeat process #4 — go to the three dots and click “Instagram business”. When you click it this time, you should see your Instagram handle. Click it.
8. Next, you’ll be asked to add a caption for your post. Type the caption and then you can either publish your design to your Instagram feed right away or schedule it for a future day and time. To schedule, click the calendar icon.
9. Next, set a desired day and time, then click “Done”, then click “Schedule Post”.
10. To see your scheduled posts, go back to the Canva homepage, and then click “Content Planner” from the left menu.
11. If you need to make edits to the design or caption, or change the scheduled date and time, click the scheduled post from the calendar. This will pop up the design and you’ll be shown more options. To see more options, click the three dots as shown in the image below. From there, you can change things as needed.
And that’s it!
This is by far my favorite way to schedule Instagram posts. Again, remember, you’ll need to have Canva Pro to be able to schedule your posts on Instagram.
Looking for pre-made Canva templates to speed up your design process? Check out my Canva template shop as well as my free [with Canva Pro membership] Canva templates available on Canva’s template marketplace.
Want to try Canva Pro free for 45 days? Sign up with my affiliate link!
I love Canva and man, does using Canva’s native scheduling platform save me time?!
But there’s just one caveat.
You see, you can only schedule single-image posts with Canva. if you have a carousel post with multiple images, then well, you have to resort to a different method for scheduling.
And that’s where Facebook Creator Studio comes in. You can schedule multi-page posts with this tool in just a few clicks. I still prefer Canva as it saves time, but every now and then I’ll want to share a carousel post, and that’s when the Facebook creator studio comes in handy. It’s a robust, easy-to-use, FREE tool. You can use the creator studio if you have a Facebook page for your business (or any Facebook page, really. )
)
In order to use Facebook creator studio to schedule Instagram posts, you’ll need to connect your Instagram business account to your Facebook page. If you’re not sure how to do that, here’s a guide.
Once your accounts are connected, go to Facebook creator studio and you should be able to start scheduling your multi-image posts in no time. Just use the following steps:
1. Click the Instagram icon at the top of the page, then click the “Create Post” button. Then, from the options shown for Instagram Feed and IGTV, click “Instagram Feed”.
2. Next, you’ll be prompted to create your post. Add your image(s), and write a caption. Hit “Publish” to share the post right away. If you wish to schedule on a future day and time, then click the arrow next to the “Publish” button to open the option to schedule. Pick a date and time, then click “Schedule”. And you’re done!
Alright, so, I made a video showing you the exact steps for scheduling your Instagram posts using Canva as well as Facebook creator studio.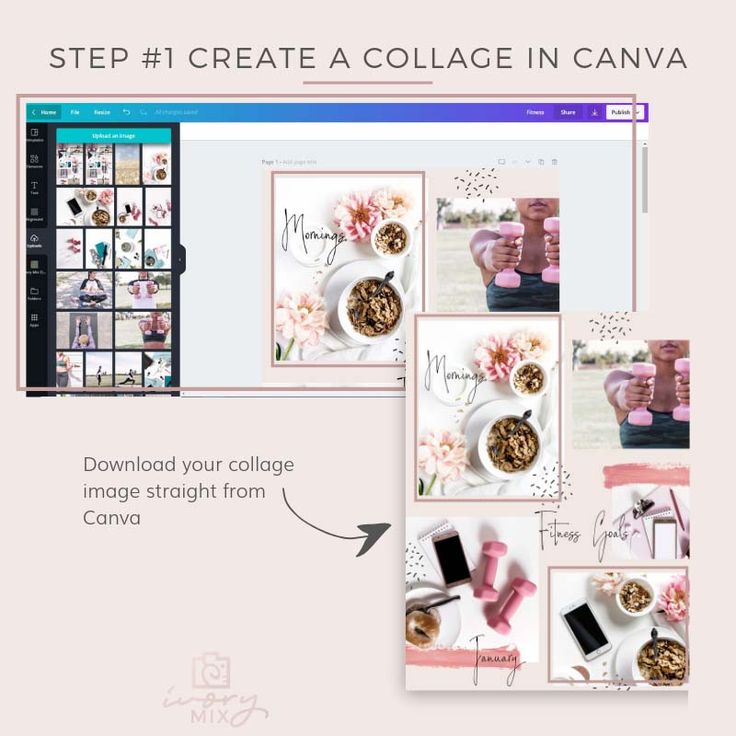 If you’re more of a visual person, this should help!
That’s it, guys! As you can see, Canva is pretty much taking over the business world. With this latest addition of Instagram scheduling, I feel even more efficient in performing my day-to-day business tasks. Canva can somehow transform the mundane into something exciting. Not something I can say about most tools out there. Especially with Canva Pro, my blogging life is now a breeze… more or less. And remember, even if you do not have a Canva Pro account, you can always sign up for a 45-day Canva Pro trial period for free with my unique link.
Alright, now I believe I’ve shared everything I’ve learned about Instagram over the past few months. This post should help you get started if you’re a complete beginner in using Instagram for your blog and/or creative business. Also, if you know of an interesting Instagram tip that’d be helpful to bloggers and creators, feel free to share them in the comments!
Try the targeted advertising module: automatic creation of creatives, bid management, selection of targeting; payment without commissions
In Canva, you can make graphics for a variety of purposes, we have chosen the most popular direction - Instagram *. And we will tell you step by step how to create an attractive picture using a browser or an application on a smartphone. Work in any of the service formats is performed in several steps:
Work in the browser
Post from a ready-made template
Design from scratch
Work in the application
Design in the application
Your layouts are synchronized so that a post prepared in the browser can be opened on a smartphone and vice versa.
Canva in the browser is a powerful editor in which you can assemble an Instagram post* from ready-made blocks and your own images.
The service offers a large number of templates that are adapted to different topics.
Each template has its own design, and if you want to save time by creating your publication based on a ready-made layout, you should focus on the overall appearance of the template and the arrangement of elements on it.
Do not forget that any component can be changed or removed, so do not waste time looking for the perfect template, in which only the inscription remains to be changed.
On the main page, after authorization, select the design direction. Enter the name in the search bar and select the suggested option from the ribbon.
Please note that the designs are already sized for social media requirements, no further trimming is required.
After selecting the appropriate option, the work page will open in a new window. To the left of the layout, collections of templates for different topics are immediately available, which, according to the creators of the service, are the most popular among users on Instagram*:

Thematic template sets are followed by layouts that are added randomly. But even among them, you can select the desired topic by keyword in the search bar. Filtering is possible by Russian and English words, but the localization of the service is ongoing, so the results may vary.
Remember: you can choose a template completely arbitrarily if you like the design. No one will forbid you to use a Halloween picture to please your subscribers with a sale — any text and any block on the template can be replaced or edited.
Please note that some illustrations, frames and photos are watermarked. This is authoring content created by designers for Canva for a fee, available either through a 12.9 subscription9$/month, or with a separate purchase - at a price of 1$ per item.
However, don't be in a rush to buy a subscription or stop using the service, Canva has a free 30-day premium period to help you figure out if you need Canva's advanced functionality or if basic access is enough for you.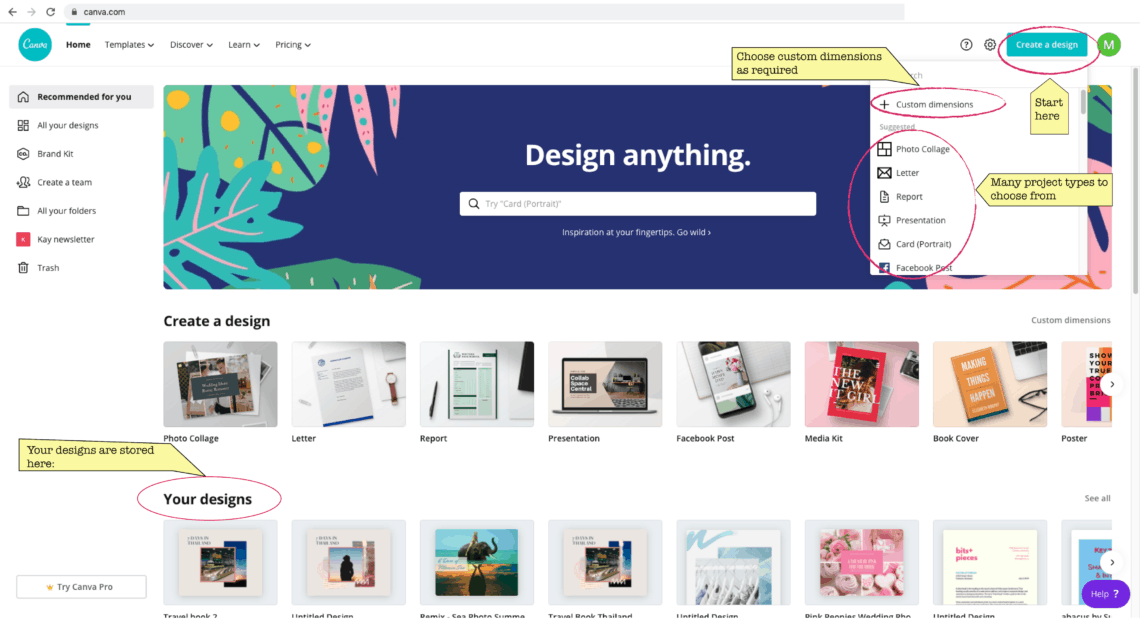
If you're active on social media, creating content for your audience on a daily basis, accessibility features like a massive photo bank library, social media post scheduler, or animations will really come in handy.
But if you just sometimes want to create an original design for your vacation photo or a new post, then you can get by with simple functionality, and download pictures from the Internet, use your own images, or find a free alternative among the huge collection of the service.
Besides, you can always buy the block or photo you like for $1.
PromoPult module for targeted advertising in social networks: all channels in one account, minimum budgets, automated creation of creatives, automatic bid management, convenient selection of targeting.
For an example of quick work based on the selected template, we will customize a thematic post about a bake sale from the "Sales" category.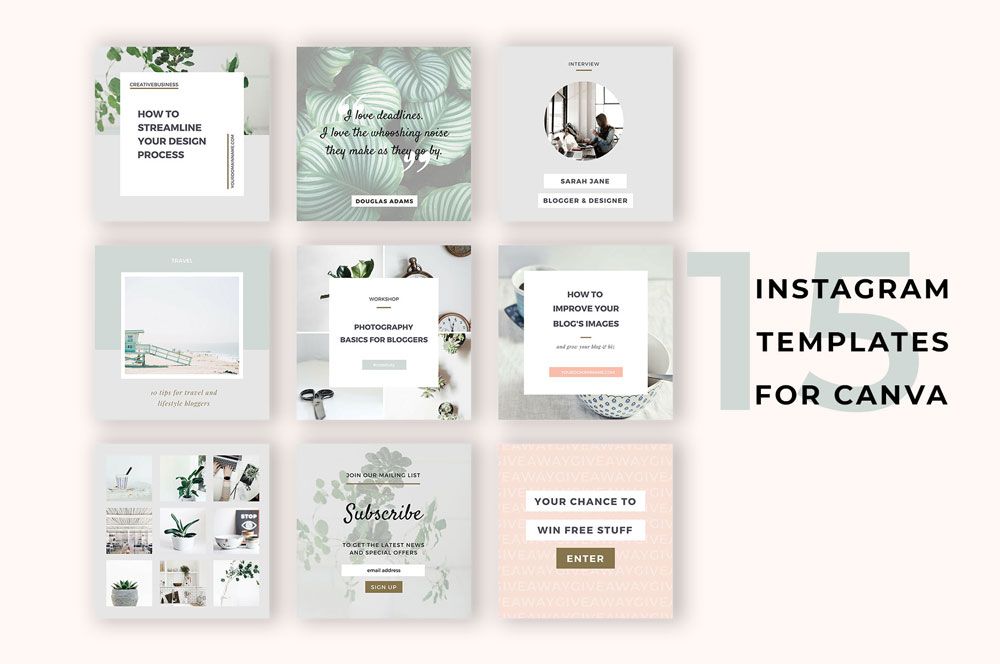
1. Change the background from pink to gray-blue by selecting it and clicking on the color in the upper right corner of the working area. By the way, if you know the code of your favorite or corporate color, you can specify it in the field marked in the figure.
2. Let's write the information on the post by simply selecting the desired part of the inscription and changing it. Many text blocks on the template are grouped to make it easier to change their position in the bundle. If you want to leave only one text field, you must first ungroup the elements and then delete the unnecessary block.
3. Replace the photo with your own pastry (we'll talk about working with photos later).
Ready post can be edited by adding other design elements and texts.
Let's move on to some more elaborate and detailed editing and create a post about the summer florist workshop.
As you saw earlier, a finished publication design can be whipped up in a few clicks. However, sometimes - if no template seems to suit you - you want to create an original design from scratch.
You can be inspired by the ready-made works of designers from the collections and come to a similar result. Or implement your own vision in design, based on the style of your channel.
Step 1: Graphics and Elements
Most complex designs consist of graphic components such as grids, frames, or shapes to separate areas. Behind them, we move on to the Elements section, which is also divided into collections by component types - grids, frames, shapes, charts, gradients, lines, and a vast illustration area, which is separately structured by image theme. For convenience, a keyword search bar is available everywhere.
As a background, we will choose a simple triple grid from the corresponding section. As well as a rounded square that will serve as a selection for the text block.
Step 2. Background and photo
Go to the "Photo" section.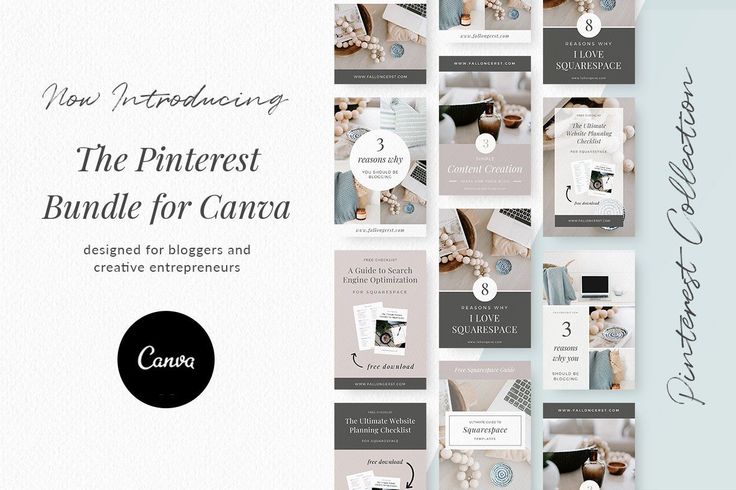 Here is a collection of Canva stock photos. The search will help you find thematic photos.
In our case, the search word will be exactly “floristry”, and not “flowers”, since the search results for the first word will be more adequate. In addition, you can search by a bunch of words, for example, for the query “floristry summer”, the service will return bright and sunny photos that will contain mainly summer flower arrangements.
In this collage, we tried to choose images that are similar to each other in style and color. This gives completeness to the overall composition, in addition, pastel, soft colors are more pleasant for the perception of the female audience that the publication is aimed at.
A calm color was also chosen for the background, harmoniously combined with the selected images, but not distracting. The background for the text, as an important element, will be filled with white, matching the intervals between the blocks, and expanded in size.
Any photo can be processed, Canva has a set of fairly simple filters and advanced image options: contrast, brightness, cross-processing, vignetting, blur.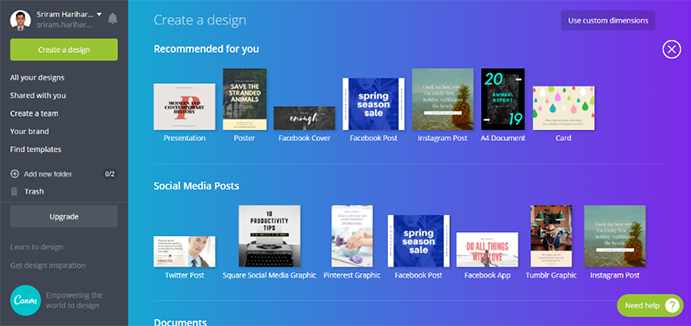 It's worth experimenting with them yourself.
Upload your own images
If you are faced with the fact that there are no images of a certain subject, did not find the perfect picture, or just want to use a personal photo in your design, the service allows you to add any image from your computer. There are no restrictions on weight and quality. But photos that are too large will take longer to load and may freeze when editing.
Your own photos are imported and stored in the Downloads section. If you use an image all the time, such as a logo or signature, you can upload it once and use it in your posts.
Step 3. Text
The text block when creating a post on Instagram* should not make the overall structure of the post heavier, because all the information will be available in the description. However, if we are talking about workshops, events or sales dates, it is better to put all the important information in the picture. It will be convenient for users to take a screenshot of the mobile phone screen so that the address, time or dates are always at hand.
This is easy to do with the Add Text Field button in the Text section. One text field is designed in the same style, if you want to add several labels in different fonts or colors, create several text fields.
Please note: Cyrillic fonts are grouped together — you can distinguish them by Russian letters in the example.
The "Text" section also offers ready-made sets of several fonts by subject. For example, a set for designing a publication with an invitation to a birthday, training, seminar, and others. You can choose the template you like (just click on it and the block will appear in the center of your post) and edit the text.
When working on text, use the panel above the layout. When you select a text block, editing buttons will appear here: font sets for Latin and Cyrillic, size, color, highlight, spacing settings, and others.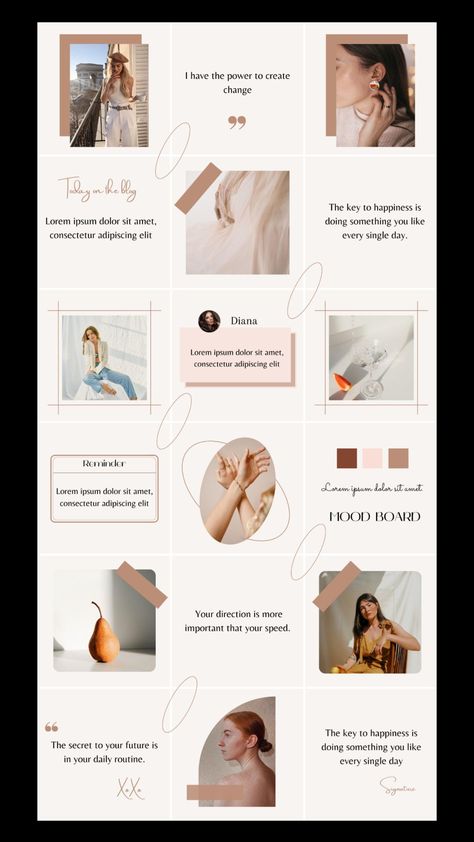 The setting applies to the entire text element.
For convenience, you can group text boxes that are already correctly positioned relative to each other to avoid inadvertent shifting. Select them together with the background to create a single element and group them.
We have highlighted the basic functionality of the service, sufficient to create an original publication. However, in the paid access under the "More" button, there are several useful features that you can add to your dashboard:
Separately, you can use teamwork access, which allows multiple users to edit the same layout together.
And for a paid account, you will find an additionally useful social media planner and animation, which are available via the "Download" button.
To download the finished work, click on the download button on the top blue bar and select the format. The recommended format for saving high quality publications is PNG.
Tools are also available here that allow you to immediately share a publication on Facebook, Twitter and other social networks.
PromoPult module for targeted advertising in social networks: all channels in one account, minimum budgets, automated creation of creatives, automatic bid management, convenient selection of targeting.
It is more convenient to work with the editor from a smartphone, as you can immediately publish an image to your Instagram account* without first saving the image. But the application has some limitations in functionality.
To work, you need to download the Canva app for Android or IOS and go through a simple authorization.
The text describes an application for a smartphone on Android; in an application for iOS, the arrangement of elements may differ, but the logic of operation is the same.
The Canva mobile app does not have such an extensive “Elements” section as on the desktop, only a limited part of the illustrations and shapes are available from it, so creating a complex grid, as in the browser version, will not work. But the functionality is enough to make attractive posts.
The main page displays collections of templates - by type. The main function buttons are located at the bottom of the screen. These are "Templates", where ready-made layouts are collected, and "Designs", where you will find the work you have already completed.
For example, in our “Designs” section, we store a template for the summer florist workshop created in the browser version, which can be easily saved to the smartphone gallery and published on Instagram*.
Here, in the upper right corner, there is a profile management button.
Let's use the templates and create a publication based on a ready-made solution.
On the main page of the application, select a theme: enter the name of the design direction in the search bar. The service immediately offers thematic options for stories, publications and covers. Select the desired option and proceed to the choice of template.
After selecting a template, the work page will open and the collections are presented right at the bottom.
If you want to start from scratch, choose an empty template.
Managing elements
You can rotate or move an object on the layout using gestures and buttons that appear next to the selected elements.
To delete, select an item and click on the bucket icon at the top.
To add any item, click on the plus sign at the bottom right of the screen. A menu will appear similar to the sidebar in the browser version - you can select blocks of any type.
You can ungroup a block by clicking on the three dots on the top panel and on the button depicting layering.
Inserting and processing images
The service will ask you for permission to access the phone's photo gallery. After approval, you can choose personal photos to insert into layouts in the "Gallery" section.
In the "Pro Images" section you will find thematic photos from the service's collections.
Selected images can be edited in the Color and Filter sections. To open advanced options, go to the "Filters" section and then click on "Advanced Filters" to access saturation, brightness, contrast, hue settings.
Texts
Click on a text field in the layout or add a new one.
Edit the text using the additional menu that opens below the layout. Any fonts, settings for the position and size of text, its color and selection are also available here.
To send a finished post to Instagram*, click on the blue arrow at the top right above the layout. The image will be uploaded to the gallery of your smartphone or sent to the publication of your choice.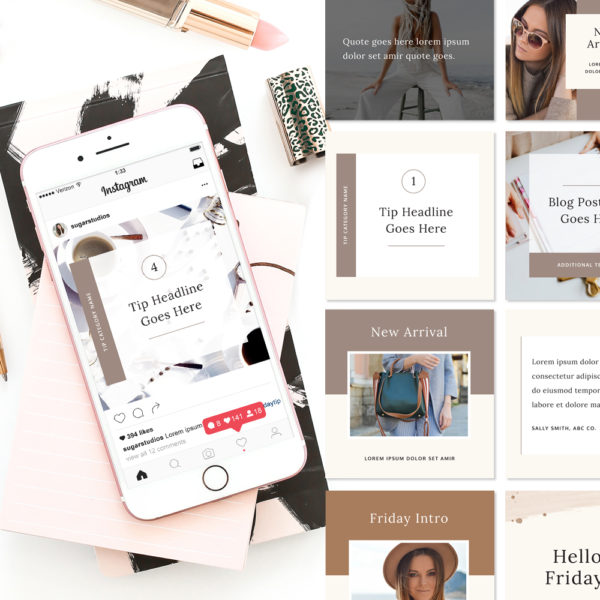
In the service, you can create not only publications, but also covers for Instagram highlights*, unusual thematic stories for personal or commercial accounts. Working on the basis of ready-made templates is intuitive and does not require special skills or experience in design.
*Instagram and Facebook are banned in Russia. On March 21, 2022, Meta was recognized as an extremist organization in Russia.
Menu
Content
Canva is the editor that visual artists, designers and social media users use in their work who want to diversify their feed.
On the service, users create presets for the tape, correct videos, pictures, make presentations and design stories.
Canva is a free app that works on both Android and iOS. We will analyze the full functionality of the utility in the article.
To get started with the service, download and install it →→→ Canva for Smartphone
Then open the utility and start registration:
When you're done, you can get to work.
The phone version differs from the computer one in that the control panel is located at the bottom of the screen.
If you click on the "Home" button, you will be taken to the main page. There is a search bar through which you can search for ready-made designs or the work of individual users.
The feed contains materials in thematic sections: "Instagram Stories", "Instagram Posts", "Your Stories" and so on.
Next to the main page is the item "Design". In this section, all the works that you created in the application appear.
On the right side is the section "Menu". Here you can edit your account, join shared designs or design group by invitation.
Also in the menu there is a picture in which deleted files are stored, and all folders. You can upgrade to the Canva Pro plan through another section. It costs 13.9$5 per month and $131.81 per year.
After payment, you will be able to access more than 75 million files, work on corporate symbols, fonts and their size not only in Canva, but also on other platforms.
The developers have created a version for a computer or laptop. To download it, follow the link →→→ Canvas for smartphone
After downloading and installing, log in to your account or register in the same way as above.
The application does not differ in functionality, because it is official. The only difference is the adaptation to the desktop. The control panel is located on the left side, and the main menu is in the middle.
An endless feed is a design in which each post is connected to the others. There is no distance between the images, and everything looks like a single canvas.
To design a seamless ribbon in Canva, use the instructions:
Canva doesn't have any grid templates suitable for Instagram. Many designers customize it themselves, but this is not required. You can find a file on the Internet called "3x4 Grid" for Canvas.
Download the material and add it to the new design. After that, fix the grid - click on the key. Then design. To do this:
After you've finished working on the endless ribbon in Canva, you can remove the grid so it doesn't get in the way later.
Canva story templates can be found on the main page of Canva. The feed with templates is constantly updated - they add interesting design ideas or prepare decorations for holiday stories. For example, now among the actual ones there are templates with congratulations for the New Year.
You can use any design if you click on it. When the editor opens, change the labels or some of the details to make the design your own.
Another way you can find a template is to create a new work in the Instagram Stories format. Then an empty sheet will open in front of you, followed by a panel with templates. You can scroll through the list or use the search. There are filters to choose the right tone or language.
But it's better to be inspired by design and take an example. Using someone else's work is wrong because it looks unoriginal and ridiculous. It is better to develop your design according to the example, if there are no ideas.
Posts can also be designed in Canva. If you want to see ready-made templates, find the Instagram Posts section, or create a blank sheet in post format and find the templates in the panel.
An easy way to create an image for a post without repeating someone else's design is to use a template. On it, replace the main photo with your own, then add details - these can be flowers, leaves, stars, or full-fledged individual pictures.
For example, you want to talk about how you prepare breakfast. Choose a template, add a photo by topic, and then an image of a dish, write an inscription next to it, and you can publish your work. You can also change the background to a close shade that echoes the pictures.
To make a presentation, use this information:
You can add a company logo to the application in advance, choose a font to make your presentation look professional.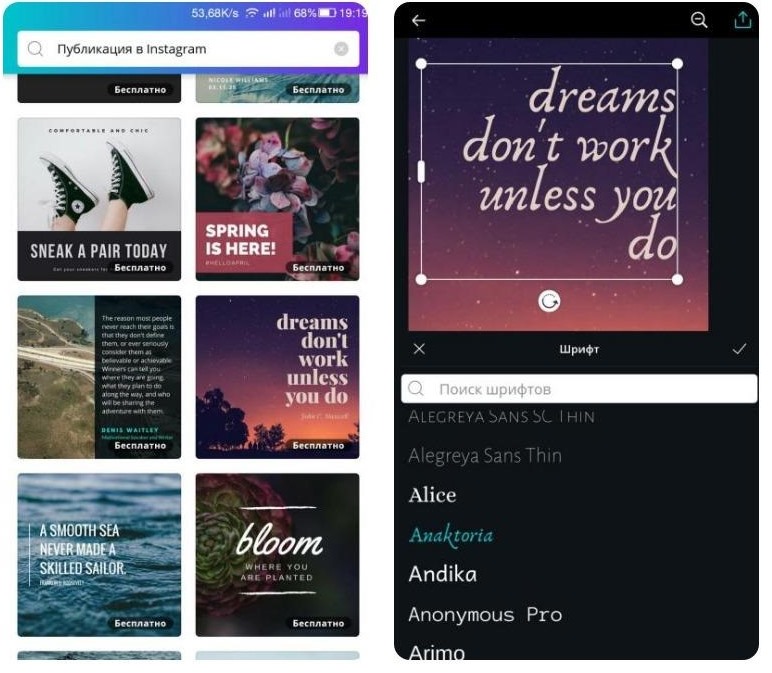
You can also do team work by inviting other users to the group. Then they will be able to edit the work with you, that is, it is not necessary to constantly send links and make adjustments themselves.
On average, a checklist is made in Canva in a few minutes using templates. In five steps you can get the finished work:
The checklist doesn't have to be designed differently all the time. You can develop a design that you like once, and then use this template for the next work.
You can change parts so that the material does not look identical.