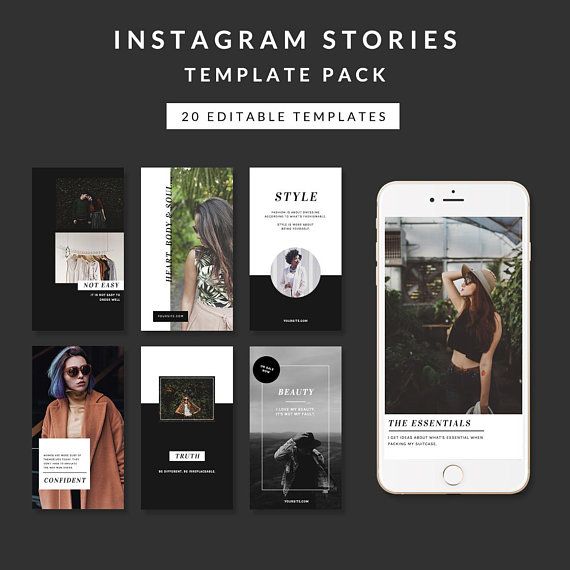
Instagram is one of the most popular social media platforms that allow users to share photos and videos with their friends and followers. To enhance user satisfaction, Instagram constantly adds new and cool features that make the app even more fun and interesting. In 2016, Instagram launched its own version of Stories, modeled from a similar element in Snapchat.
Instagram Stories allows you to share multiple photos and videos to document your day, whether you’re on an adventure or just chilling out. These stories can be viewed by your followers within 24 hours, after which, they are saved in your archive. The photos and videos in your Stories are uploaded separately from your Instagram posts.
Instagram Stories last for 24 hours (although you can Highlight them to keep them longer) and can be viewed by the world or just by your followers, depending on your privacy settings. For private accounts, only your followers can view your story; however, everyone can see your stories on public accounts.
Instagram Stories appear on your followers’ Instagram feed (at the top). Unlike standard Instagram Posts, users can add images and videos to their Stories.
Creating an Instagram Story is relatively simple. Here’s what you need to do:
Now, your Story will appear for all of your chosen friends to see it. But, what happens when you realize you forgot to add a few images? What if your Story is an actual story and you need to add more context throughout the day?
Fortunately, the next section explains how you can easily add to your existing Instagram Story.
Adding photos and videos to your Instagram story is easy. The steps are nearly identical to those creating a Story. But, there are a few things you should know to make sure the updated videos and images are added correctly.
To add content, follow these steps to add images to a Story you’ve already published:
 Then, tap Next.
You can add any filters or text before selecting the arrow icon to personalize your Story. After uploading your updates to your Story, users can tap your Story icon at the top of their feed and the Story will roll from the original images and videos to the newer ones.
You can repeat the same steps if you want to add more photos and videos to your Instagram Story.
Once you’ve uploaded your stories to Instagram, they will appear in these places:

Just in case you have added the wrong photo to your Instagram story, or you just changed your mind about it, you can always delete it from your Story. Here’s how:
Aside from simply adding more to your Story, Instagram limits your ability to make edits once you’ve sent it to all of your friends or posted it. If you want to make edits to filters or add the text you will run into some difficulty. Unfortunately, you’ll need to re-upload your Story.
But, if you want your story to live on forever, you can add it to your Highlights. A Highlight in Instagram will live on forever in your profile (or at least until you delete it).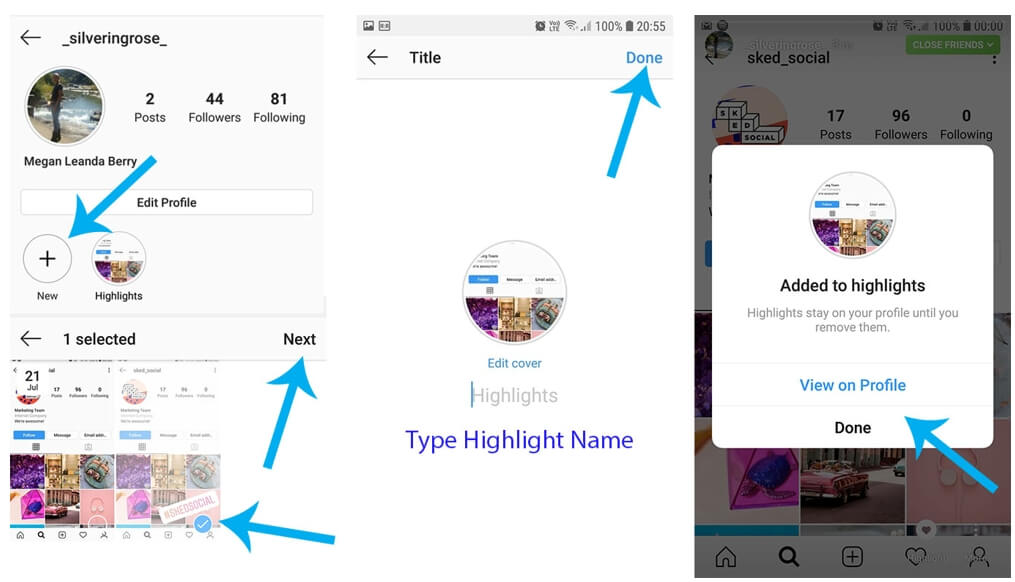
Whether you’re an Instagram expert or a novice, we’ve heard your questions! Here are some more answers to the questions our readers have asked about Instagram!
Unfortunately, no. An Instagram post is different from an Instagram Story. The former is a permanent fixture on your Instagram account until you delete it, but it doesn’t have the same options as a Story for editing and updating. Once you publish a regular Instagram post, there aren’t a lot of options to edit or add content. You will have to delete the entire post and upload it all over again.
Yes, you can edit and add content to your Highlights. Highlights are a more permanent option to display your Story on your profile. If you’d like to add more content, you can visit your profile page and click on the highlight under the ‘Edit Profile’ button.
The Stories are usually short snips with a video or only one image.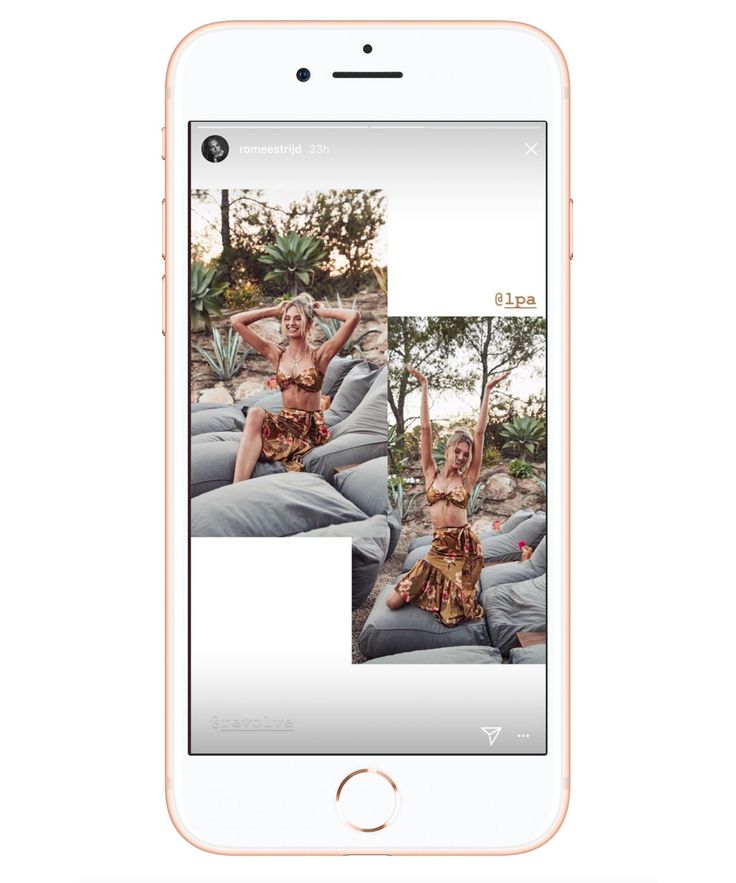 One option is to use your phone’s screen record feature to scroll through multiple images and upload the video. For this to look good, you may need to create an album on your phone just for those photos you want to upload to your story, but also be mindful of the video’s length. The other option is to set a photo as the background and use one of Snapchat’s stickers that allow you to upload more photos. When posting, take, or select your photo and swipe up from the bottom to access the stickers.
Instagram Stories are a neat feature of the app that makes it just that little bit more interesting. The time-limited nature of them is both a benefit and a bane of the system but forces you to be creative quickly. It also means you don’t have to scroll through weeks’ worth of other stories to get to the most recent.
Posting engaging photo and video collages on Instagram has become increasingly popular. It is a great way to show your audience your latest work from different angles, share photos from an event, or even give a sneak peek at what’s coming up.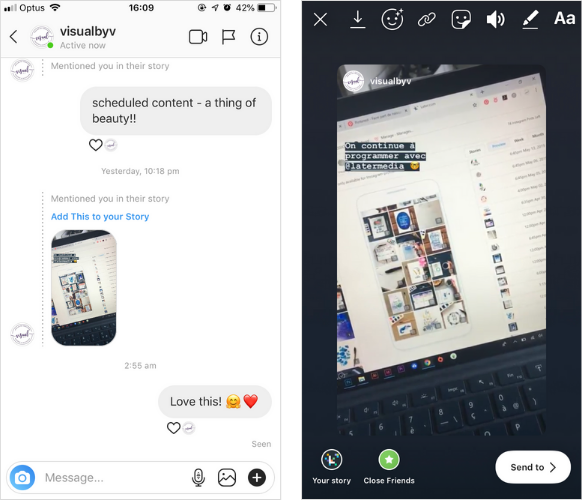
That’s why we’ve put together this post where we cover everything you need to know about picture and video collages for Instagram.
Not just that, but if you stick around till the end, we also show you how you can create engaging video collages for Instagram in minutes using InVideo’s online editor. Do make sure to also check out the InVideo Instagram channel where we share useful tips & tricks to simplify video creation.
Here’s what you’ll learn:
1. How the Instagram collage trend blew up?
2. How to make a video collage on Instagram?
3. How to create engaging video collages for Instagram using InVideo?
Let’s jump right in!
Realizing that Instagram collages have become a huge phenomenon, plenty of developers started creating apps to help users come up with creative solutions with little effort. With the right tool, you can make stunning Instagram collages in the form of images and videos and upload your creations to Instagram as posts and stories.
As a response to the trend, Instagram came up with their solutions. Not only can you create collages using the Story feature, but the platform also created a standalone app called Layout. One of the most notable downsides of both options is that you can only create collages using images. If you want to get more creative and craft a multimedia collage, you’re going to have to look for a different solution, such as a handy video editing app.
If you’ve got the basic knowledge on how to edit videos, you can come up with amazing Instagram collages using all kinds of features and media file types. And in case you’re someone who’s always on the lookout for inspiration & ideas, do follow InVideo’s Instagram channel. Before we get down to how you can craft attention-grabbing collage videos, let’s take a look at how you can create a collage using Instagram’s solutions.
Source: Pexels
Realizing how big of a trend collages have become, Instagram came up with two solutions:
With the Layout feature for Instagram Stories, you can choose from one of the available grids and upload images for each portion. To create a collage using this solution, you need to:
- Open Instagram on your mobile device
- Go to Your Story in the top-left corner
- Pick the Layout option from the menu on the left
- Tap the Grid icon and pick the kind of grid you want to use
- Take pictures for each portion or upload them from your gallery
The same as when creating a regular story, you can pick an appropriate Instagram filter for each picture that you add to the collage. You can also add text and Instagram stickers.
Create Instagram stories in minutes
With 1000+ ready-to-use templates
Try InVideo today
You can download the Layout app from the Google Play store. When you open the app, you’ll see all the images in your gallery. To create a layout out of them, you need to:
- Select all the images that you want to include by tapping them
- Choose one of the suggested layouts from the top of the screen
- Customize the size and positioning for every image
- Tap the Save button
The app enables you to flip and mirror the images. You can also take photos using the Photo Booth option. Press the capture button that looks like a clock, and Layout will take four photos in an interval of one second between the shots. You can customize the layout the same as with the photos from your gallery.
While both options provided by Instagram may be fast and easy solutions for making collages and uploading them to your profile, they are made for quick and simple creations. You can’t set up your photos to be outside the grid or add an enticing background.
The most notable disadvantage of the Layout app and feature is that you can’t add videos to your Instagram collages. If you want to come up with fascinating mixed-media creations, you’re going to have to turn to a more feature-rich solution.
The good news is that InVideo has got you covered. You can use our browser-based video editing platform to create an attention-grabbing Instagram collage video in no time.
InVideo is a powerful video editing platform that provides plenty of features for creating professional-looking videos. It’s one of the best video editing software solutions that you can find because it enables you to come up with fantastic creations with little effort.
You can create a video from photos, add music to an Instagram video, and much more. If you want to craft stunning multimedia Instagram collages for your followers, you can do so using InVideo in under ten minutes.
There are three ways that you can make videos using our platform. Each method was made to provide you with a distinct approach and a specific set of options.
The Text-to-Video option provides you with a template that has some premade elements you can use as the basis for your video. It focuses on creating a series of scenes from a script, website link, or media files that you upload.
Once InVideo generates your scenes, you can customize them any way you like using two modes—Storyboard and Advanced Editor. You can pay special attention to each scene using the Storyboard and work with all the features that InVideo has to offer in the Advanced Editor.
Want to repurpose your text?
Create a video in minutes
Get started for free
If you want to start making your video using professionally designed elements, you can choose from our library of over 5000 premade templates made for all kinds of purposes. Aside from top-notch Instagram collages, we’ve got templates that can help you make high-quality YouTube videos and Facebook stories.
Even though this method focuses on working with premade assets, you can customize each element to the fullest extent. It’s a fantastic option for combining professional-looking templates with your creative efforts.
The Blank Templates option is the closest to more traditional video editing software solutions. You can choose this option if you want to start creating your project from square one. You start off with a bare template that you can add any elements and features that you like to.
This method is perfect if you want to have complete freedom over your creative process. While it may not provide premade assets as a starting point, it’s as easy to use as the other options that InVideo offers.
If you want to have complete creative freedom with your Instagram collage, you can create a video using the Blank Templates option. This way, you can add a background, different media files, and a variety of amazing elements.
To start using this option, you need to:
1. Log in to your InVideo account
2. Click on Create in the top-right corner
3. Open the Blank Templates tab
4. Choose the aspect ratio for your collage video
5. Click on Start Editing
When you open up the project in the InVideo editor, you need to start by uploading your media files. Go to the Uploads tab in the panel on the left and click on the Upload button at the bottom of the menu. It’s important to note that InVideo doesn’t allow uploading files bigger than 200MB to ensure that you can work on your project without experiencing any performance issues.
InVideo supports a variety of media formats, including:
| InVideo Supported Formats | ||
| Video | Image | Audio |
| MP4 AVI MKV WMV MOV | JPG BMP PNG RAW GIF | MP3 WAV OGG M4A FLAC |
All the files you import will appear in the menu on the left. You can click on any of them to preview them in a pop-up window. To add them to your video, all you need to do is drag and drop them onto a scene.
Start by setting up a background image. It can also be a video that doesn’t draw attention away from the main elements of your collage.
When you drop the file onto your scene, you need to resize it. Click on the media element and grab any of the dots along the grid. Drag them around to make the media fit the dimensions of your collage video. Now that you’ve got a background, you can start adding other media files.
Add your images and videos to the scene the same way you did with your background. Each time, InVideo will ask whether you want to add the file as a layer or replace the existing background. Pick the former option.
Resize your media elements and move them around until they fit your concept for the collage. You can rotate any element by clicking and holding the Rotate button above the element. Move your mouse around and let go when the media file is in the desired position.
You should decide if you want your collage video to have sound. You can focus on the audio from your video files or use a song for the entire collage.
Go to the Music tab, where you can choose from our collection of royalty-free songs or upload music from your device. Click on the + symbol next to any audio file to add it to your video.
While you can add videos and animated GIFs to your project, it’s important to note that the collage shouldn’t have a lot happening at the same time.
If you’re creating a video for an Instagram story, you should keep in mind that it’s fairly short. This is why you should ensure that there aren’t too many elements that demand attention. Not everyone is going to pause your story or watch it multiple times.
An Instagram post isn’t limited by time, but you still shouldn’t overcrowd it with animated elements. If you want to use multiple videos for the collage, you can animate them so that they appear in succession.
To animate any video element in your collage, click on it and go to the Edit menu on the right. When you go to the Video Animation tab, you can set up the in and out animations for the element. Pick an animation from the menu and set up the duration using the slider below.
You can check out the other tabs for various video editing options, including:
- Video Edit: Crop and trim the video element, change the volume, and set up a blur effect
- Playback Speed: Use the slider to change the speed of the video element
- Volume: Change the volume for the video element and the background music
- Fade: Set up a fade in and fade out effect for the video element
You can also set up a variety of options for any image element. Click on the image and go to the Edit menu. When you open the Filters tab, you can find an extensive selection of filter options, such as Aden, Mayfair, Brooklyn, Amaro, Valencia, etc.
If you want to animate your image element, go to the Image Animation tab. Aside from adding the in and out animations, you can also pick one for when the image is in place. The picture can roll in from the left, zoom in while it’s in place, and then roll out to the right.
You can crop the image and add a blur effect by going to the Image Edit tab.
You can set up the duration of your collage video using the timeline. Grab the edge and drag it until the video is as long as you need it to be. The length of the collage depends on whether you want to upload it to Instagram as a post or story. Here’s how long both of the options are:
Click on the Advanced Timeline button in the top-right corner of the timeline to get a more traditional overview of your project. Here, you can see all the elements as layers. You can change their duration by dragging the edges and move them around to alter how they appear in contrast with one another.
The blue button with a triangle activates our Intelligent Video Assistant (IVA). You can use it to ensure that your video is flawless. IVA scans your scenes for mistakes and provides suggestions for fixing them. It pays special attention to project colors, text alignment, and animation speeds.
Create stunning videos in minutes
With the world’s easiest video editor
Get started with InVideo
InVideo is the perfect solution for your video editing needs because it’s a feature-rich and easy-to-use platform. Instead of spending hours making a video in a complex video editing program, you can come up with professional-looking results with InVideo in a matter of minutes. The navigation is as user-friendly as they come, so you will get acquainted with all of the platform’s features in no time.
If you have any questions, you can rely on our 24/7 customer support. Open up the chat by clicking the button in the bottom-right corner of the screen, and one of our agents will be with you as soon as possible. You can also check out our extensive collection of video tutorials.
Another huge benefit of using InVideo is how affordable the platform is. You can choose one of two paid plans:
(1) Business Plan
If you opt for the Business plan, you can use InVideo with only two monthly limitations. The export limit is up to 60 videos. If you want to use the premium files from our media library in your video, the number is restricted to 300.
The Business plan costs $20 per month, but you can get it for $10 if you sign up for the annual arrangement.
(2) Unlimited Plan
Unlike the Business plan, the Unlimited plan—as the name implies—has no restrictions.
You can use all the features that InVideo has to offer for $60 per month. If you choose the annual option, the price is $30.
If you want to try out our platform for free, we’ve got good news. We provide a free version of our platform that you can use for as long as InVideo exists. This version comes with the same limitations as the Business plan, with the inclusion of a watermark on all your exported videos.
Sign up for InVideo as soon as today, and start creating top-notch videos that will amaze your audience!
Help Center
Instagram Features
Stories
You can only post someone else's post to your story if the author of the post has made their account public and allowed their posts to be reposted. Not everyone can share a post from the feed in their story.
To share someone's feed post to your story:
Instagram app for Android and iPhone
Click the icon below a photo or video in the feed.
Select Add Post to Your Story, Add Video to Your Story, or Add Reels Video to Story.
Press in the lower right corner of the screen.
Click Share.
Instagram Lite app for Android
If you share someone's post in your story, every person who has viewed it will be able to see the name of the author and go to his account. Learn more about how to share a store in an Instagram story.
If you have a public account, you can prevent other people from sharing your stories.
To prevent people from sharing your posts in Stories:
Instagram app for Android and iPhone
Tap the or icon on your profile photo in the bottom right corner of the screen to go to your profile.
Click the icon in the upper right corner of the screen and select Settings.
Click Privacy and select History.
Click next to Allow reposts in stories.
Instagram Lite app for Android
Was this article helpful?
Similar articles
How to share a photo or video in an Instagram story?
How to share a store in an Instagram story?
How to share posts from Instagram to other social networks?
How do I mention someone in an Instagram story?
How do I share an archived story on Instagram?
Jobs
Terms of Service
Privacy
Help Center
Instagram Features
Stories
You can only post someone else's post to your story if the author of the post has made their account public and allowed their posts to be reposted. Not everyone can share a post from the feed in their story.
To share someone's feed post to your story:
Instagram app for Android and iPhone
Click the icon below a photo or video in the feed.
Select Add Post to Your Story, Add Video to Your Story, or Add Reels Video to Story.
Press in the lower right corner of the screen.
Click Share.
Instagram Lite app for Android
If you share someone's post in your story, every person who has viewed it will be able to see the name of the author and go to his account. Learn more about how to share a store in an Instagram story.
If you have a public account, you can prevent other people from sharing your stories.
To prevent people from sharing your posts in Stories:
Instagram app for Android and iPhone
Tap the or icon on your profile photo in the bottom right corner of the screen to go to your profile.
Click the icon in the upper right corner of the screen and select Settings.
Click Privacy and select History.
Click next to Allow reposts in stories.