Is your Facebook account a photographic trip down memory lane? Did you frequently end a night out in the late aughts by uploading hundreds of photos to the social network?
Perhaps you'd like to wipe these questionable snaps from your Facebook account while preserving them in a more private location. Lucky for you, a built-in Facebook tool helps you easily transfer photos and videos to any of five external services: Google Photos, Dropbox, Koofr, Photobucket, and Backblaze B2.
By housing your files in one of these services, you can view them on any device and download them to your computer or mobile phone. And if you ever delete your Facebook account, those photos and videos are still available on the service of your choice. Let’s look at your options.
To use Google Photos (iOS(Opens in a new window) and Android(Opens in a new window)), you’ll need a Google Account. Most Android devices should already have the app downloaded. Whether you’re in the app or on the web, Google Photos allows you to view images by photos and albums, or by ones suggested for you. Open Google Photos(Opens in a new window) to see what photos and videos are already stored there.
Transferring your photos and videos works the same from the Facebook website and app, though the initial steps to access the feature differ. On the web, click the down arrow in the upper right and select Settings & Privacy and then Settings. From the app, click the hamburger icon and go to Settings & Privacy > Settings.
At the Settings screen, go to Your Facebook Information (Your Information in the mobile app) and select Transfer a Copy of Your Information. Enter your Facebook password at the next screen and click Continue.
Under Common Destinations, choose Google Photos as the destination. Open Choose what to transfer and choose what media should be included in the transfer. You can select only photos, only videos, only specific date ranges, or only specific albums or videos. After making your selections, click Next.
Click Connect to pick the Google Account you wish to use, then sign in if prompted. The first time you do this, you’ll have to grant Facebook access to your Google Photos library. Click Continue. You’re then taken back to Facebook and asked to confirm the transfer.
Click Confirm Transfer to initiate the transfer. You may be prompted to retype your Facebook password. The transfer of your photos or videos kicks off. At the same time, you’ll receive an email confirming the transfer. If you wish to stop the transfer for any reason, click the Stop button. Otherwise, just hang tight and let it continue.
After the process finishes, a notification appears in Facebook, and you’ll receive an email confirming the transfer. Open your Google Photos page and go to the Albums section. You should now see several new albums for the imported Facebook photos, including Timeline photos, mobile uploads, and profile pictures.
Open a specific album to see its photos and videos. After these initial files have been transferred, you can repeat the process to move the other set of files. So if you transferred your photos, you can then transfer your videos, or vice versa.
If you wish to use Dropbox for the transfer, sign into your account to view any existing photos and videos already stored there. Open Settings & Privacy > Settings in Facebook and select Your Facebook Information (Your Information in the mobile app) and choose Transfer a Copy of Your Information.
Pick Dropbox from the list of options then open Choose what to transfer to pick what media should be included in the transfer. You can select only photos, only videos, only specific date ranges, or only specific albums or videos.
Sign into your Dropbox account if prompted and select Allow to give Facebook the necessary permissions for Dropbox. Click Start transfer.
Go back to Dropbox, open a folder called Apps, and then choose a subfolder called Facebook Data Transfer. That will contain two additional subfolders, one called Photo Transfer and the other Video Transfer. Browse each of those folders for your transferred photos and videos.
Though not as well known as services like Google Photos and Dropbox, Koofr(Opens in a new window) is a file storage service based in Europe but available around the world. You get 2GB of storage for free with the ability to get more by referring friends to the service and by upgrading to any of the many paid tiers. As a bonus to users, Koofr allows you to store up to 15GB of Facebook photos and videos beyond your account quota.
After you’ve set up an account on the Koofr website, return to Facebook and open Settings & Privacy > Settings. Go to Your Facebook Information (Your Information in the mobile app) and choose Transfer a Copy of Your Information. Select Koofr as the destination, then open Choose what to transfer to pick what media should be included in the transfer.
Sign into your Koofr account if prompted and allow the necessary permissions. Click the Confirm Transfer button and wait for the transfer to complete. Go to Koofr and open a folder called Data Transfer. Check for the transferred photos or videos across that folder and its subfolders.
Photobucket(Opens in a new window) is a photo storage site that requires a paid subscription. After a free 21-day trial subscription, your choices include a 25GB plan at $6 a month or $65 a year, a 250GB plan at $8 a month or $87 a year, and an unlimited plan at $13 a month or $141 a year.
After you’ve set up an account, return to Facebook and open Settings & Privacy > Settings. Go to Your Facebook Information (Your Information in the mobile app) and choose Transfer a Copy of Your Information. Click Next, then click the button for Choose destination and select Photobucket from the list.
You can then choose what media will be transferred over. You can select only photos, only videos, only specific date ranges, or only specific albums or videos. Sign into your Photobucket account if prompted and allow the necessary permissions. Click the Confirm Transfer button and wait for the transfer to complete.
After the transfer is done, sign into Photobucket. Depending on what you opted to transfer, you’ll see a folder for Facebook photos and a folder for Facebook videos. Look through the folders to see the transferred files.
Backblaze B2(Opens in a new window) is an enterprise-grade file storage and backup service designed for businesses but also available to consumers. The first 10GB of storage are free. If you need more, you pay as you go depending on the amount of data you upload, both initially and on a monthly basis.
After creating an account, you’ll need to set up a bucket to serve as a container for your online files. Return to Facebook and open Settings & Privacy > Settings. Go to Your Facebook Information (Your Information in the mobile app) and choose Transfer a Copy of Your Information. Click Next, then click Choose destination and choose Backblaze B2 from the list.
You must then enter the Key ID and Application Key created from your Backblaze B2 account. You’ll find those at the App Key section at your Backblaze account page(Opens in a new window). Click Next and then confirm the transfer.
After the transfer is finished, return to your Backblaze B2 account page. Click Browse files, select your bucket, and then look for a folder named facebook-data-transfer-[random sequence of numbers]. Open that folder to a subfolder called Photo Transfer or Video Transfer to see the transferred files.
Beyond transferring your photos and videos to a new service, you can download your Facebook data directly. You can then store and upload it anywhere you wish. To do this, open Settings & Privacy > Settings and go to Your Facebook Information (Your Information in the mobile app). Click Download Your Information.
Review the criteria at the top to choose the format (HTML is the default), pick the quality (High, Medium, or Low), and select a specific date range. Leave all the content types selected. Scroll to the bottom of the page and click the Request a download button.
You’ll receive an email notifying you when the files have been generated. Return to the Your Facebook Information page, select the heading for Available Files, and click the Download button. Retype your Facebook password if requested and then confirm the download.
Save the generated ZIP file to your computer, then unzip the file. Open the extracted index.html file to see thumbnails of the downloaded photos and videos. You can then drill through all the extracted folders to find and view the specific files.
You can view your saved photos and videos under the Posts category. Click the Your photos or Your videos to see your saved media and find the files you wish to view.
Sign up for Tips & Tricks newsletter for expert advice to get the most out of your technology.
This newsletter may contain advertising, deals, or affiliate links. Subscribing to a newsletter indicates your consent to our Terms of Use and Privacy Policy. You may unsubscribe from the newsletters at any time.
Thanks for signing up!
Your subscription has been confirmed. Keep an eye on your inbox!
Sign up for other newsletters
Device Links
Did you know that Facebook users upload millions of photos every day? If you’re one of those users and have posted many pictures over the years, it might be time to clean up your albums.
But before you delete all the photos from Facebook and lose them forever, downloading them first might be a great idea. That way, they will all be in the same folder.
Fortunately, you don’t have to download each photo separately. You can download all images simultaneously, and this article explains how.
One of the reasons some Facebook users decide to download all their photos in bulk is that they want to delete their accounts, but there are other reasons as well.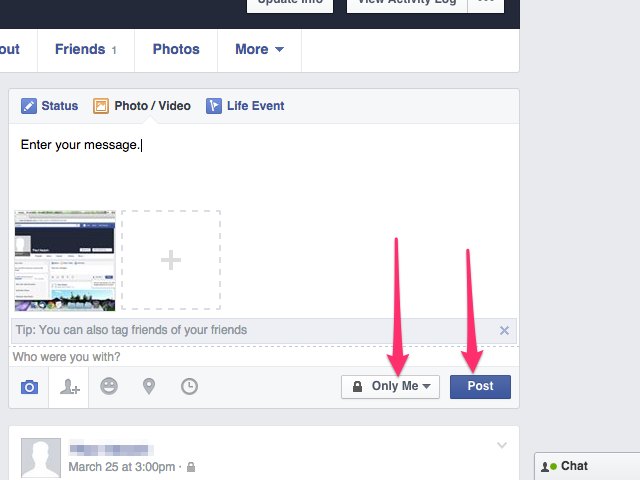
 ” Choose “HTML” to navigate and view files in a browser environment or “JSON” to get a zipped folder to browse files on your device. Click on “Save” when finished.
 HTML pages and view images in a browser.
Note: When choosing to download all Facebook images in bulk, the created folder also downloads any other data residing in the specified folders. You’ll have to browse through some of them (mostly for HTML format) to find the images and videos. such as “your_posts.html.” Others (mostly with the “JSON” option) like “stories” and “posts > media > [folder name]” only show the images and videos. Keep in mind that the number of videos and pictures you have on Facebook determines how long it takes for the file to download. Once the process is complete, you’ll receive a notification and an email from Facebook.
You can only download all photos from the Facebook page for which you are the administrator. However, you will also have to download all other data to download all images and videos.
Essentially, you’re making a full copy of your page. That’s the only way it works on Facebook pages for now. Here’s what you do:
It might take a few minutes for Facebook to create a downloadable file. Once complete, you can save it to your device.
Unlike Pages, Facebook doesn’t allow data from groups to get extracted. There are several reasons why this could potentially be the case. Some groups have tens of thousands of members who want to protect their information.
On the technical side, extracting files from groups would create large files. Some browser extensions and add-ons can download separate albums from Facebook, but they don’t always work very well.
iPhone users also can download all photos from their Facebook profiles to their devices. Before you start, ensure that you have enough storage on your phone when it’s time to download the compressed file.
 ”
”You can choose to save your compressed file to your iPhone camera roll or iCloud.
Android users can also download all their Facebook photos in one compressed file. If you have an Android phone or tablet, here’s what you need to do.

If you’ve already exchanged plenty of photos with your friends, you can’t retroactively download them all at once. You download them individually by tapping on the image and saving it to your device.
However, if you want Facebook image downloading to be an automated action in the future and avoid having to save the files manually, here’s what you can do.
 ”
”Once you have completed the above steps, your Messenger photos and images will automatically get saved to your device.
You can download all photos at once from Facebook only within your profile account or page, regardless of whether you’re using a browser or the mobile app version of Facebook.
The created file can sometimes become several GBs, so ensure you have a stable internet connection and enough storage to save the file.
Sometimes, you don’t need every photo or video from your Facebook account, just a particular album. There’s a simple way to download the album you want. Here’s how to do it.

If you have a business page on Facebook, you can download all the data, including your photos and videos. Unfortunately, you can’t just save pictures alone. Regardless, here’s how to download your images from your Facebook business page.
In closing, whether you want to purge your Facebook profile or just clean it up, there’s no need to lose all the photos forever when you don’t want them on Facebook anymore. There are several ways to download your precious images and videos and preserve them forever. How you go about it is up to you!
Yes, you can save your Facebook images to your devices and the cloud, such as iCloud or Google Photos. Navigate to “Settings>Your Facebook information,” then select “Transfer a copy of your photos or videos.”
Facebook asks you to choose a file location, and you can select “Google Photos” or any other destination you have in mind. Finally, just confirm the transfer. Facebook will send you an email when the import is complete.
Yes, you have the option to download all your photos at the same time. You can do it on mobile devices and your computer (Mac, Linux, Windows, etc. ) The easiest way to get all images is to access the “Your Facebook information” section from the “Settings” menu.
Copying facebook images is just another term for downloading them. There are three ways you can copy all pictures from Facebook.
The first option is to copy one picture at a time, but that might take a while.
The next option is to download one album at a time. If you don’t have too many albums, the process won’t take that long to complete.
The third option is to export all your photos and videos at once. Keep in mind that when exporting all the images in bulk, videos are attached too. You can’t just download all the photos.
By Milena Anderson Reading 5 min. Views 4 Posted by
Short answer
Frequently Asked Questions about Yoast
How do I create a photo collage?
There are several ways to create a photo collage. One way is to use a photo editing program like Photoshop or Picasa. Another way is to use a website that specializes in making collages, such as Collage.com.
How do I make a collage on my Samsung?
There are several ways to make a collage on a Samsung phone. One way is to use the Gallery app to create a new collage album. To do this, open the "Gallery" application and click the "+" button in the upper left corner of the screen. Then select "Collage Album" and click "Create".
You can also create a collage in the Photos app.
How do I put photos in an album?
To put photos in an album, open the Photos app and select the album you want to add photos to. Click the "Add Photos" button and select the photos you want to add.
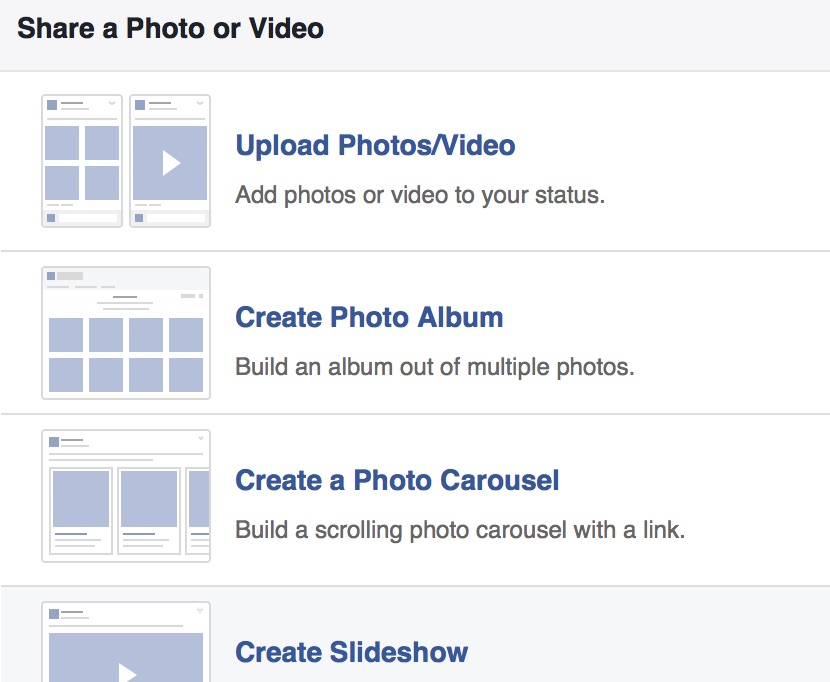
How do I upload an album to Facebook?
To upload an album to Facebook, first create an album on your computer. Then open Facebook and click "Photos" in the left column. Click "Add Photo/Video" and then select the album you just created. Select the photos you want to add and click "Open".
What is the difference between uploading photos and creating an album on Facebook?
Uploading photos is the process of adding photos to your Facebook profile. When you upload a photo, it appears on your timeline and in the albums of friends who can see it.
Creating an album is the process of grouping photos in a specific album. You can create an album on any topic, such as vacation photos or photos of your pets. Albums are a great way to organize your photos and make them easier to find.
Why are my photos not uploading?
There are several reasons why your images may not load. One possibility is that the image file size is too large. If the file size exceeds the Quora limit, it will not be uploaded. You can check the file size of your images by right clicking on the image and selecting “properties. The image size is indicated in the “Size” section. Another possibility is that the image format is not supported by Quora.
Why can't I add photos to my Facebook page album?
There are several reasons why you won't be able to add photos to your Facebook page album. One possibility is that you don't have permission to post to the album. Another possibility is that the album is set to private and you don't have permission to view it. Finally, you may have reached the limit on the number of photos you can add to an album.
Why won't my phone upload photos to Facebook?
There may be several reasons why your phone is not uploading images to Facebook. One possibility is that you have a data limit and have reached your monthly limit. Another reason could be a software issue with your phone. Finally, it is also possible that there is a problem with the Facebook website. If you're having trouble loading images, try restarting your phone or check the Facebook website for updates.
Why can't I access my Google Photos on Facebook?
There are several reasons why you can't access your Google Photos on Facebook. One possibility is that you haven't linked your Google and Facebook accounts. To do this, open the "Settings" menu in Google Photos and click "Connected Accounts". Then select Facebook and follow the instructions.
Another possibility is that you have connected your accounts but have not given Facebook permission to access your photos.
Why can't I access my photos on Facebook?
There may be several reasons why you're having trouble accessing your Facebook photos. One possibility is that you are not logged in. Make sure you're signed in and then try again. If you are still experiencing problems, it may be because your account has been temporarily suspended. If so, try contacting Facebook support for help.
Why can't I upload photos to Facebook from my Samsung Galaxy?
There are several reasons why you won't be able to upload photos from your Samsung Galaxy to Facebook. One possibility is that you are not logged into Facebook. Please make sure you are logged in and try again. If you're signed in, another possibility is that your phone's settings are preventing Facebook from accessing your camera. To fix this, go to your phone's settings and make sure Facebook is allowed to use your camera. If so, try uploading the photos again.
How can I combine 2 photos?
There are several ways to do this. One way is to use a photo editing program like Photoshop or GIMP. Another way is to use an online photo editor like PicMonkey..
How to make a collage on Android?
There are several ways to make a collage on Android. One way is to use applications such as PicCollage or Adobe Photoshop Express. Another way is to use Google Photos. Google Photos allows you to create a collage by selecting multiple photos and clicking the "Create" button.
I have a habit of updating all the apps on my Android before I hit the bag. When it's a popular app like Facebook, Foursquare, Instagram that gets an update, I make sure to read the What's New section. Yesterday I received an update notification for the Facebook Android app, and when I read what's new for users, I saw an item that says "Select an album when uploading photos."
It was very interesting to see the update as I have been looking forward to this feature for quite some time. But when I updated the app and tried to upload some images to an existing album, I didn't have a direct option to do so. I explored the app, looked at the existing album pages, played around with the settings, etc. And finally, after 15-20 minutes, I got the option to select the existing albums.
So let's see how you can upload your photos to an existing album without wasting time switching from one option to another.
Step 1 . Open the Android app for Facebook and tap the photo upload option in the top bar between status and registration. Just make sure you are using the latest version before running the app.
Step 2: When you click on the Photos option, the app will open your android photo gallery and ask you to select the photos you want to upload and press the select button on the bottom right corner of the screen.