Have you ever wondered how people share their Instagram posts to Facebook?
The secret is cross-linking your accounts — that way, when you create posts (or edit them), you can direct Instagram to share your photo or video to that other platform.
Plus, linking your accounts may send a notification to your Facebook friends to the effect that you're now on Instagram. That makes it easier to gain followers from that network without having to send out a "follow-me" message.
Here's how to link Facebook and Instagram accounts on your iPhone or Android.
Check out the products mentioned in this article:This is a quick and easy process, just make sure you have your Facebook login information on hand.
1. Open Instagram and toggle over to your account profile (located in the bottom toolbar).
2. Tap the three bars and select "Settings."
Tap settings to link your accounts. Devon Delfino/Business Insider3. Tap "Account" and then select "Linked Accounts."
4. Tap "Facebook" and log into your Facebook account to confirm that you want to link your Facebook account to Instagram.
Log in to your Facebook account to link it to Instagram. Devon Delfino/Business InsiderBefore sharing any posts, be aware that if you have a private Instagram, anything you share to other social networks, like Facebook, will become public.
If you want to unlink your Facebook account from your Instagram, you'd go through the same general process. The only difference would come at the final step — instead of logging into Facebook, you'd tap "Unlink Account" (for iPhone) or "Unlink" (for Android.)
Devon Delfino
Devon Delfino is a Brooklyn-based freelance journalist specializing in personal finance, culture, politics, and identity. Her work has been featured in publications such as The Los Angeles Times, Teen Vogue, Business Insider, and CNBC. Follow her on Twitter at @devondelfino.
Read moreRead less
Edgar Cervantes / Android Authority
If you created your Instagram account using an email address, you might not have linked it to your Facebook account. Facebook isn’t a service that everyone uses, but it is very easy to link with Instagram for those who do. They’re both subsidiaries of parent company Meta, so they’re deeply integrated and share many of the same features. For everyone who hasn’t done so already, this is how to connect Instagram to Facebook.
READ MORE: How to change your Instagram profile picture
THE SHORT ANSWER
To link Instagram to Facebook, open Instagram and go to your profile page. Tap Menu (≡) > Settings > Accounts Center > Set up Accounts Center > Add Facebook account. Log in with your Facebook account and choose what you want to sync between both accounts.
KEY SECTIONS
Things have changed since Facebook became Meta. If you want to connect your Instagram and Facebook accounts, you will need to go through the Accounts Center.
From your Instagram profile, tap the Menu (≡) button in the top right corner. After that, go to Settings.
Curtis Joe / Android Authority
Within Settings, locate the Accounts Center button under Meta. Press Set up Accounts Center within the Accounts Center and then Add Facebook account. You will be redirected to a Facebook login page where you must log in to the Facebook account you wish to link to.
When prompted, press Continue as [your Facebook name].
Curtis Joe / Android Authority
Finish setting up your Accounts Center. You can choose to sync your name and profile. When you press Continue, it will link your Instagram and Facebook accounts together.
Curtis Joe / Android Authority
If you wish to unlink your Facebook account from Instagram, return to the Accounts Center by opening the Menu by tapping the ≡ button in the top right corner of your Instagram profile. From there, tap Settings > Accounts Center.
Curtis Joe / Android Authority
From Accounts & profiles, press the button that shows your name and the accounts linked. On the following page, tap your Facebook account.
Curtis Joe / Android Authority
Select Remove from Accounts Center. The following confirmation pages say pretty much the same thing, ensuring that you do indeed want to remove your Facebook account from the Meta Accounts Center. Press Continue > Remove [insert your Facebook name here].
READ MORE: How to delete and manage comments on Instagram
If you’ve linked your Instagram account on Facebook, you can cross-post between Facebook and Instagram.
Yes, you can easily launch Instagram from within Facebook.
Not automatically. You can, however, choose the Share to Facebook option from the New Post screen whenever you create a new Instagram post.
“Hello. I can't link my Instagram account to Facebook. Help!"
This is how more than half of the letters coming to our Service and addressed to SMM specialists begin. The combination of Instagram and Facebook is the No. 1 problem among those who promote on Instagram, because without this connection it is impossible to launch targeted advertising, and therefore, a full-fledged business promotion on the social network.
At first glance, everything is simple: to link accounts, you need to spend literally 5 minutes of time. But when it comes to practice, a whole bunch of difficulties come up, and sometimes they simply cannot be solved by an outside specialist. Most often, these difficulties arise due to the fact that initially the algorithm of actions was performed incorrectly.
So, do you want to learn how to correctly link Instagram and Facebook on your own? So that there are no problems with accessing and launching ads? Then this article is for you. It contains all the pain and all the experience of our SMMs. Believe me, they cry every time they get requests for help with linking accounts...
Since Instagram must be linked to Facebook, you must first register on Facebook.
And don't laugh at this part of the article! The more we work, the more we understand that many users register accounts on social networks at random, and as a result, they cannot regain access to them later. And then because of this, the difficulties grow like a snowball.
So what needs to be done:
Go to Facebook using the link https://ru-ru.facebook.com/ and click on the "Create an account" button.
Enter your first name, last name, date of birth, gender.
Important! We indicate the real data, which, in which case, you can confirm with a document: a passport, driving license or anything. The fact is that a huge number of new accounts are created on Facebook every day, some of them are spam. In order to monitor and remove these spam accounts, the FB system checks all newcomers very carefully. If she has even the slightest suspicion that your new account was created for the purpose of spam, that it does NOT belong to a real person, they will immediately block it.
We link our page to a phone number.
Important! The system, as it were, offers a choice: link an account to a phone or email. We always choose a phone, it is more reliable and safe. In addition, this is another signal for the system that you are a real person, and not a spam page. Only indicate the number to which you have access and to which you can get a security code to enter. Later, you can also tie up the mail, you even need it. So you will have double page protection.
Create a password.
Important! The password must be made up of numbers and letters, but such that you remember it. If you are not sure of your memory, it is better to write it down. Do you laugh and consider this an extra precaution? Do you know how many clients we had who linked their Instagram to Facebook, and then could not get into FB to set up ads because they forgot their account password? More than I would like... :((
Fill in personal data on the created page.
Important! We do it to the maximum: real photo on the avatar, school and university where you studied, city of residence, marital status, place of work.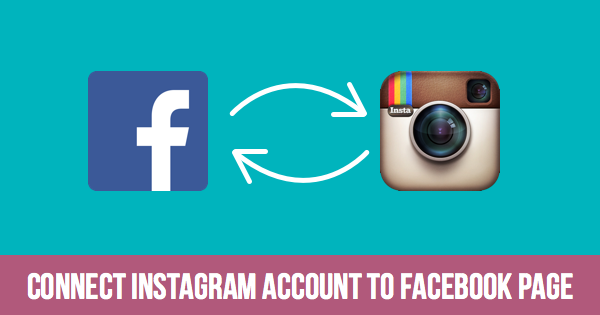 It would not be superfluous to add a dozen (real) friends, publish a couple of posts in your feed, subscribe to some pages, even if you do not plan to constantly use Facebook. We do this for the same purpose that real FI was indicated during registration: so that your new account is not blocked for suspicions of spam. Our task is to show the Facebook system by all available means that this is the page of a real, living person.
In general, everything. Once again, we draw your attention: do not neglect the security rules (linking to a phone number, a good password written on a piece of paper), as well as indicating real data. This will save you from blocking and the problems associated with recovering your account if it is still blocked. If you already have a Facebook account, check that it fulfills all the above points.
By the way, similar security rules apply to an Instagram account, whether it is personal or transferred to a business. It must be associated with a real phone number to which you have access, ideally with the same one that your FB account is linked to. And don't forget to come up with (and write down) a strong password, but it's better not to duplicate it from Facebook, but to make it unique.
At this stage, you need to understand the terms to avoid confusion. Facebook has:
Personal account: page of a real person linked to his phone number and email. To enter a personal account, a person uses this same number or mail, as well as a password that he came up with. Here, for example, is the personal account on FB of our executive director:
Business page: official representation of your company or project on Facebook. An analogue of the VKontakte community. This is how the 1PS.RU business page looks like, by the way, it is available at https://www.facebook.com/1psru/:
Absolutely any Facebook user can create a business page, and this is what you will need to do in order to set up a connection with Instagram, since an Instagram account must be associated with a FB business page, and not with a personal account.
Important! This must be done personally, from your personal account, which you have already created. In this case, you will have maximum access to the business page and be listed as its owner. If the SMM manager you are working with offers to create a business page from his personal account or from some other account in general, DO NOT AGREE IN ANY WAY! You must have access, and then the SMM manager can be given administrator rights for work, but more on that later.
The specialist may also offer to log into your personal account and create a business page from it. Not a very good idea for two reasons. Firstly, if you have personal correspondence, personal data and other information not for public access in your account, the SMM will have access to it when he logs in. Secondly, and this is much more important, when users from different IP addresses enter one personal Facebook account, this is a signal for the social network system that the page is either trying to be hacked or has already been hacked, and it is used for fraudulent activities. And this means what? That's right, blocking! Therefore, we are not lazy, we create a business page ourselves, with our own hands, since it is quite simple.
So what to do:
On the main FB page, click on the plus sign, select the "Create page" option.
Fill in the page name.
Important! The name can then be difficult to change, so it's better to immediately set an adequate variant. The ideal formula for the name of a business page: brand + thematic key indicating the nature of the activity + geography of work. For example, "Papa Johns - pizza delivery in Moscow", "Pretty Woman - an online store for women's clothing", "Golden Key Family Restaurant, Yekaterinburg". If you are not sure whether you have come up with a good name, consult a specialist.
Specify the category.
The category describes the general direction of your company, here Facebook will offer options - you just need to choose the most suitable one.
This is the most necessary minimum for creation. As soon as you fill in the specified items, the system will allow you to click on the "Create Page" button:
But the work does not end there. New business pages are scrutinized just as thoroughly as new personal accounts. If you do not want your business page to be blocked, it must be filled with information. You can do it yourself, or finally appoint your SMM manager as an administrator and assign a task to him.
How to share admin rights to a business page:
 They have different access to page tools, the system will tell you what the differences are.
 Click on the "Add" button.
After that, the person you want to appoint as an administrator will be sent an invitation. He must confirm it, then the user will have access to the page and be able to complete its design.
By the way, about the design. What needs to be done so that the newly created business page is not blocked:
And here we link the company's business page on Facebook with the company's Instagram account. Let's see in detail how this is done.
We will again need the "Page Management" → "Settings" section, only now the Instagram tab. Here we click on the "Connect account" button, and then enter the login and password from your Instagram account. Everything. :) From the Facebook side, the process is completed.
It is better for you, the owner of the business page, to do this manipulation, because sometimes third-party users, even if they are administrators of the business page, get errors. If everything was done correctly, there should be this picture:
Next, you need to confirm the link from Instagram. To do this, we enter the social network application on a mobile device, open the account that we linked. Click on the "Edit Profile" button.
Important! All further instructions are relevant only if your Instagram account has been converted to business. How this is done is described here. If everything is OK with this, we move on.
In the field "Public information about the company" there is an item "Page". In theory, the name of your business page should be indicated there. Like this:
If you see this picture, congratulations! You are lucky. :) For setting up, you had enough actions from FB. Now your social networks are correctly connected to each other.
If the title is listed but there is also an orange "Verify" button, just click on it and follow all the steps that Instagram asks. This will complete the setup and correctly link FB and Instagram.
If the name is not specified, and instead the text is "Connect or create", you have to tinker a little more:
Click on the text "Connect or create".
Select the "Link an existing page" option in the window that opens.
We select from the list of business pages to which you have administrator or owner access, the one that you created for your company. If you have only one page managed on Facebook, you will only see it in the list. I note that sometimes at this stage there are glitches and the list of pages is not displayed. Do not despair and update the section until it appears.
We confirm the connection of accounts and rejoice.
Done! You are wonderful! The connection is now set up at both ends. You can safely launch targeted advertising. By the way, catch the instructions for setting it up.
If it still didn't work out, you can feel a little sad, cry and... try all over again. :)
Seriously, no kidding. If at any of the steps described there are difficulties, the best solution is to roll everything back to the beginning and do it all over again. Again, if you have no problems accessing your personal FB account, if you correctly created the company's business page there, and if you did everything in the order described in this article - 90% that you will successfully set up a connection between Instagram and Facebook. We leave 10% for social media glitches, which, alas, happen quite often. If you encounter glitches, you should wait a day or two, and then try again.
That, perhaps, is all. At this stage, we should have offered to use the services of our SMM specialists who will set up the connection for you, but this will not happen. At the beginning of the article, I already mentioned the dangers of logging into personal accounts from another IP, and without logging into accounts it is impossible to set up a connection.
But there is a way out: a video consultation with a 1PS SMM specialist. If you can’t figure it out yourself, we are ready to call you via Zoom or Skype and do everything together according to the instructions. You will click with the mouse, but our employee will tell you where to click so that everything works out. You can apply for a video consultation here.
However, we do not give guarantees that everything will work out successfully, especially if you do not remember the password to your personal FB account or do not know who is the owner of the business page that is now linked to your Instagram. I'm afraid that in this case nothing will help you, only creating new profiles, pages and accounts and linking them correctly from scratch. Now you understand why it is so important to write down passwords? :))
Content
Benefits of linking Instagram to Facebook
How to connect Instagram to Facebook
Of course, you can also maintain branded pages on Facebook separately. But if you want your brand to be known, it's better to link your accounts. What will it give?
1. Access to Instagram statistics
You will be able to view weekly data on:
In addition, publication statistics will become available: coverage, likes, comments, saves, profile clicks, subscriptions, etc.
Promotion statistics (promoted posts) will show impressions, engagement, website clicks, and impression audience.
2. Opportunity to promote Instagram account
Through Facebook, you can advertise on Instagram without linking accounts. But in this case, you are advertising on behalf of a Facebook page. And when the user sees the ad, wants to go to your company profile, he will go to Facebook. Agree, if a user is on Instagram, he is unlikely to want to switch to another social network. In addition, if he is not registered with Facebook, he will not be able to read information about your company.
After linking accounts, ads created through Facebook will be shown on behalf of the instagram profile.
Once linked, you will also be able to advertise directly through the Instagram app. In this option, two promotion goals are available: clicks to a profile or website and reach near a specific address.
3. Ability to edit profile information and reply to Instagram comments directly in Facebook
After linking, the "Instagram" tab appears in the messages section of Facebook, where you can reply to comments:
And in the page settings in the "Instagram" tab, you can quickly edit information such as name, website, biography (description), mail, phone number and address.