You’d need to resize a video for Instagram if you want it to appear properly on the platform.
If you don’t, Instagram will automatically crop a part of your video which might make it look awkward. This will negatively impact your brand and the engagement of your video.
There are various size requirements depending on the kind of Instagram video post. Read on to learn the different Instagram video size requirements and how to perfectly resize a video for Instagram Story, Feed, and TV.
Posting a video on Instagram’s feed requires your video to be either square (1:1) or vertical (4:5) in size while posting it as a Story or on TV requires it to be portrait (9:16) in size. Below, we’ve listed 3 simple tools that would let you quickly resize videos for Instagram.
Animaker is a free online tool that lets you quickly edit videos for social media. On top of allowing you to easily resize videos for various social platforms, the tool allows you to quickly trim, rotate, flip, merge, filter, adjust, mute, and change the speed of your videos.
Here’s how to resize Instagram video using Animaker in 3 easy steps:
1. First, open Animaker’s video resizer. Once you’re on the page, pick the dimensions you’d want to resize your video to; in our case, square (1:1) or vertical (4:5) or portrait (9:16).
2. Now upload the video you want to resize.
Optionally, you could scale and reposition the video to fit the dimensions perfectly. Simply click on the “Resize” icon in the top right corner of the video. Now hold and drag the edges of the video to scale it and reposition it by simply holding and dragging it. Once done, click on the green button that says “Apply” to save the changes made.
3. Click on the orange button in the top right corner that says “Download” to download the video.
Kapwing is an online video editor that lets you easily resize videos.
1. Visit the site and navigate to its “Video Resizer” page. Once you’re on the page, you can upload your video from your local computer or from a URL.
2. Pick the dimensions you want to resize based on the type of Instagram video post.
Optionally, you can scale your video and adjust its position.
3. Click on the big red button that says “CREATE!” to download the video.
EZGIF lets you resize a video to the custom dimensions of your choice.
1. Visit the site and navigate to the “Resize” page. Once you’re on the page, click on the “Choose File” button to select the video from your computer. Once you’ve selected the video, click on the “Upload!” button to upload the video.
2. Now, enter the width and height you want to resize your video to, and click on the “Resize video!” button.
3. Finally, click on the “save” button to download the resized video to your computer.
Learn More
About
Image
Video
Carousel
Collection
AboutImageCarouselCollection
Instagram Feed is the constantly updating list of photos and videos that appears when you open the Instagram app. The Instagram Feed displays photos and videos from accounts that people follow and from advertisers.
You can use the video format in Instagram Feed to show off your product, service or brand in new ways. Include movement and sound to capture attention quickly and show unique features of a product or tell your brand story.
Videos should not contain edit lists or special boxes in file containers.
All ads must comply with our Advertising Policies.
Select a placement option to discover which objectives are available.
Instagram Feed
Facebook FeedFacebook Instant ArticlesFacebook In-Stream VideoFacebook Video FeedsFacebook StoriesFacebook Search ResultsFacebook Business ExploreFacebook ReelsInstagram FeedInstagram StoriesInstagram ExploreInstagram ReelsAudience Network Native, Banner and InterstitialAudience Network Rewarded VideoMessenger StoriesFacebook Right ColumnFacebook Groups FeedInstagram Shop
Something Went Wrong
We're having trouble playing this video.To watch the video, please upgrade your web browser.
Learn more
Select an objective to see which calls to action are available.
Engagement
AwarenessTrafficEngagementLeadsApp promotionSales
The conversion location is the place where you want people to take action. For some objectives, the conversion location is automatically selected for you.
Messaging Apps - Messenger
Messaging Apps - MessengerMessaging Apps - InstagramMessaging Apps - WhatsAppOn your ad – Video viewsOn your ad – Post engagementWebsiteApp
Not all calls to action may be available to you, depending on your industry.
Learn more
Learn moreShop nowDownloadSubscribeApply nowOrder nowPlay gameCheck AvailabilityTry in CameraSign upBook nowSee menuWatch moreListen nowGet quoteGet showtimesSend messageContact usGet directionsGet offerSend WhatsApp messageRequest timeDonate nowView event
Was this page helpful?
Meta technologies
Messenger
Audience Network
Oculus
Workplace
Tools
Free tools
Facebook Pages
Instagram profiles
Stories
Shops
Meta Business Suite
Facebook ads
Messenger ads
Instagram ads
Video ads
Ads Manager
Goals
Set up a Facebook Page
Getting started with Messenger
Build brand awareness
Promote your local business
Grow online sales
Promote your app
Generate leads
Measure and optimise ads
Retarget existing customers
View all goals
Business types
Small business
Large businesses
Agency
Media and publisher
Creator
Developer
Start-up
Business partner
Industries
Automotive
B2B
Consumer packaged goods
E-commerce
Education
Entertainment and media
Financial services
Gaming
Property
Restaurants
Retail
Technology and telecom
Travel
Inspiration
Meta Foresight
Creative guidance
Business news
Case studies
Video
Events
Creative Hub
Skills and training
Online learning
Certification programmes
Webinars
Guides and resources
Ads guide
COVID-19 resources
Safety and integrity
Business equality
Find a business partner
Site map
Business Help Centre
Create and manage accounts
Publish and distribute content
Advertise
Sell on Facebook and Instagram
Monetise your content or app
View All Articles
User Manual Cancel
Search
 io, group 9 products and projects0006
 After editing a video project, automatically center the video according to different aspect ratios.
The auto-center feature intelligently detects video actions and centers clips for different aspect ratios. This feature is very handy for posting videos on various social media channels such as Instagram, YouTube or Facebook.
The days of manually centering videos for various social platforms are over!Auto centering can be used to center scenes for square, vertical, and 16:9 cinematic aspect ratios, or when cropping high resolution content such as 4K and above.
You can automatically center individual clips or the entire sequence.
Select Video Effects > Convert.
Drag the Auto Center effect to the clip you want to center.
Dragging the Auto Center effect onto a clip To fine-tune the Auto Center effect, select the appropriate Motion Tracking option for it in the Effect Controls panel. When you apply this effect, Premiere Pro creates motion keyframes that follow the action in your content. You can choose from the following options: Slow down, Default, or Speed up.
Slow motion
Suitable when there is little or no camera movement (for example, when a close-up of a face is shown during an interview). When using this control, the results are almost static, and there are very few keyframes in the clip.
Default
Suitable for most contents. Here, the Auto Center effect follows the action, however if the action is very fast, the results may not be very good.
fast motion
Suitable for footage that has a lot of movement and you want the Auto Center effect to follow the action (such as action sports or skateboarding videos). In this case, thanks to automatic centering, the moving object is always in the frame. This adds a lot of keyframes to the clip.
(Optional) The generated path can be overwritten
(Optional) You can also change the following settings: Position Correction, Centering Offset, Centering Scale, and Centering Rotation.
(Optional) After applying the effect, play the clip. If necessary, copy and edit keyframes in the Effect Controls panel to fine-tune the results.
Copying and editing keyframes
If the sequence contains many clips, it is more efficient to automatically center the entire sequence.
Select Automatically center sequence. Select a sequence in the Project panel.
In the dialog box that opens, select the Target aspect ratio from the available presets, or specify your own aspect ratio.
For the new aspect ratio, Premiere Pro duplicates the sequence with the correct dimensions. The Auto Center effect is applied to each clip in the new sequence. This duplicate sequence is stored in the auto-centered sequences folder at the root of the Project panel.
To fine-tune the Auto Center effect, select the appropriate motion preset in the Motion Tracking panel. You can choose from the following options: Slow motion, Default, or Fast motion.
Slow motion
Suitable when there is little or no camera movement (for example, when a close-up of a face is shown during an interview). When using this control, the results are almost static, and there are very few keyframes in the clip.
Default
Suitable for most contents. Here, the Auto Center effect follows the action, however if the action is very fast, the results may not be very good.
fast motion
Suitable for footage that has a lot of movement and you want the Auto Center effect to follow the action (such as action sports or skateboarding videos). In this case, thanks to automatic centering, the moving object is always in the frame. This adds a lot of keyframes to the clip.
(Optional) To keep the original adjustments in a centered sequence, apply clip nesting.
When nesting clips, Premiere Pro nests all your video clips, uses original split points, and tracks layers, leaving graphics and audio intact.
Select an attachment when working with the following components:
Because there are no marker media in subclips, transitions are not supported properly.
When working with a complex sequence with multiple viewpoints or fast movement after centering, you may need to fine-tune the keyframes in the sequence.
Here are some tips for getting the best results from auto centering.
Shooting: When sizing video frames, leave a little more space around the subjects so that the footage can later be reassigned to any environment.
Using Text Titles: Automatic centering works best when titles are created using Premiere Pro.
Using still images: auto centering does not work with still images. Center still images individually.
Apply the Auto Center effect only once : Applying Auto Center multiple times (especially with nested clips) can cause unexpected results such as black bars on the sides of the video. If you want to reapply the Auto Center effect, it must be applied to the original clip.
Watch our expert video demonstrating how Auto Center Sequence works.
Video length: 2 minutes 11 seconds
Using automatic centering in Premiere Pro
If you have a question or an idea, join our Premiere Pro community. We would love to hear from you and watch your videos on auto-centering.
Account login
To come in
Account management
Want to add multiple videos to Instagram* at once, but don't know how yet? We will tell you how to do it from your phone and computer.
Not so long ago, posting to Instagram* could only be done from a phone or through a mobile app emulator. But then Instagram* finally allowed posting from the web version, now you can post videos not only from a smartphone, but also from a computer. In the article we will consider each method.
Videos on Instagram* are interesting for users, they are willingly watched. You can show, for example, videos about the creation of your products. This is discussed in our idea for the post “Process Video”. This will help to attract the audience and show them your expertise.
At the end of 2021, Instagram* decided to please users with another update and allow posting from a computer. To post several videos on a social network from a PC, we will follow a simple algorithm.
Open the main page of Instagram*. Go to your page or immediately look for the “+” icon in the upper right corner. You will be prompted to create a new post.
There are two ways to add a video to a future post:
When the files are uploaded, they will appear on the screen.
Each video can be trimmed or the order of the clips can be changed if it was disturbed during loading, and the video that should have been the first turned out to be the second or third.
You can change the order of videos or add more videosTo change the order, click on the white square in the lower right corner. You can also add a few more videos - for this, just click on the plus in the circle.
If everything is fine at this stage, click on "Next" and proceed to the next stage before publishing the video.
The editing window opens. Here you can:
The settings apply to all downloaded clips. To switch between videos and adjust the next one, click on the arrow in the center of the right edge of the video.
You can see how each video will look after publication If you like everything done, click on "Next" and find yourself in the next window. This is the post creation window. Here you can add finishing touches before posting.
What can be edited here:
By the way, comments can be turned off later, if necessary.
Done. You are great, the post is published, you can collect reactions and customers who want to order goods with a video :–)
Via the SMMplanner delayed posting service, it has long been possible to publish videos on Instagram*. Using the link, you will get free access to all functions and after registration you will be able to publish posts and stories to all social networks for 2 whole weeks. Discover huge functionality, schedule posts for several days or weeks at once, get on with more important things.
Let's go back to how to post two or more videos on Instagram*.
First, log in to the service or simply go to your page in SMMplanner. Click on Schedule Post.
The post is published through the Posts tabA window for creating a post opens, where you can:
Be sure to select the page on which the post will be published.
This is what the SMMplanner page looks like in the process of preparing a post for publicationThanks to SMMplanner, you can:
The most important plus is that all posts can be postponed: prepare them for publication, plan the dates and times of publication in advance. And do other things. Is it healthy?
Deciding on an account or several pages at once, where the post will be published. Select the videos that you want to attach to the publication.
Each video can be edited, the cover can be changed or deleted.
Video can be published:
The settings for each option are equally simple, regardless of whether you choose Stories or Reels. Enjoy :–) If you haven't figured out what Reels are and why you need them at all, read our article "Instagram Reels: Everything you need to know about short video reels on Instagram*". In it, we talk about all the possibilities of this format.
Selecting the date and time for publicationSo, the videos have been added and edited, the account has also been selected. It remains to decide where and when the post will be published.
You can select one date and time to post to all social networks at the same time. You can assign different times and even dates for the same post in different social networks. Everything is customizable according to your wishes.
If everything is ready - just click on the "OK" button, the post will be scheduled. All posts are ready - great, you can exhale.
If you need to prepare a video for targeting, read the article "How to make a video for targeting in social networks: formats, services, editors". There is a maximum of information on how to make the coolest video and get all the customers.
To post multiple videos to Instagram* in the mobile version, you will need a phone or tablet and an installed Instagram* application, preferably the latest version.
Open the application and click on the plus sign in the upper right corner. Then select "Publish".
Publishing from a phone is not much different from publishing from a computer, only there are more possibilities You will open a gallery with files on your device. Next, select the video files that you would like to publish. If you need to publish several files, select the file that will be the first.
Hold it and a circle will appear on the other files in the upper right corner. You will now be able to select a few more videos or photos. The number in a circle indicates the order of the files, pay attention to it when choosing clips.
The order in which the videos will be played is optional. Videos must not be longer than 60 seconds. Otherwise, the system will reduce them to one minute. To make your post look interesting and unusual, you can use various filters.
You can crop clips by yourself, choosing important moments from long videosVideo can be edited, you can:
In addition to the text, hashtags can be added to the description line to reflect the content of the video. Learn more about hashtags and how to use them on different social networks in our article “How to use hashtags on social networks: a guide”.
You can also add a location. This can be important for companies that need to gain a new audience and remind old customers about themselves.
Write a city or street and see what Instagram offers*Look carefully at the geolocation, otherwise instead of Lenin Street in Rostov-on-Don, you will indicate Lenin in Moscow and be surprised how many people looked at the publication, but no one came.
This is what the post we just created looks like And turn on the Instagram app* again. If you still don’t quite understand what to publish in stories, we suggest reading the article “The basics of working with Instagram Stories *: posting rules and useful features”. There we talk in detail about the features of the format and shooting modes.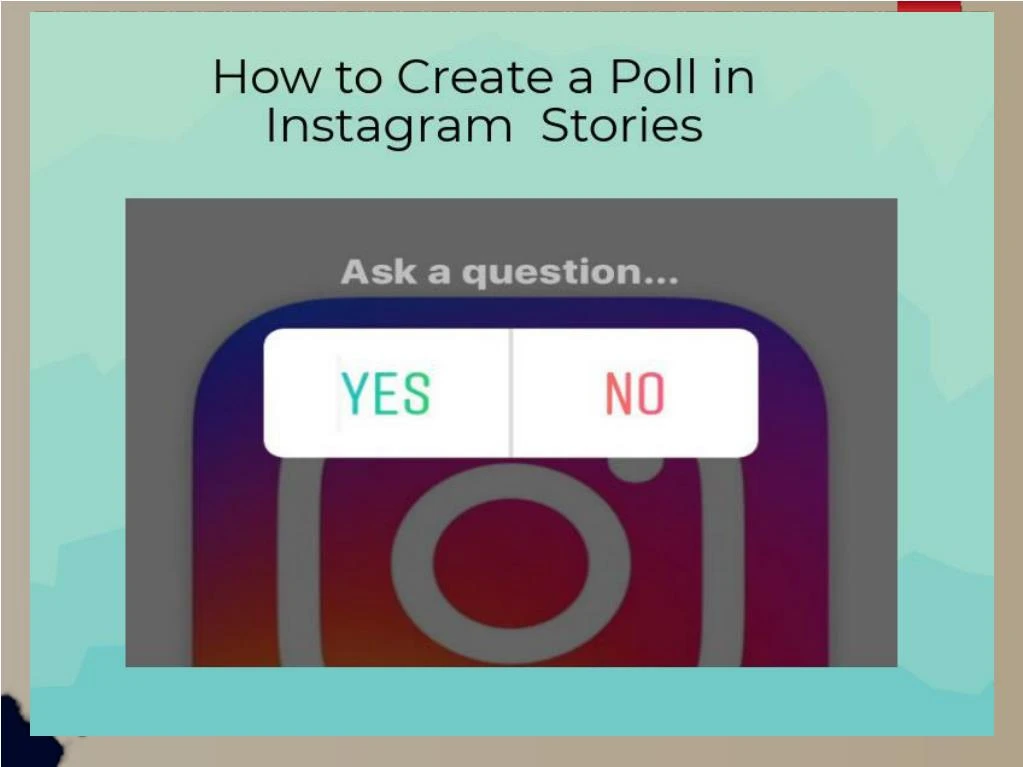
The top left corner is occupied by your account icon with a blue plus sign. Click on it, select two or more videos and click "Next".
Sometimes you also want to add a lot of videos to storiesYou can select a folder on your mobile from which you will add videos for publication.
How many folders there are on your phone or tablet - all will appear for selectionSelect the videos that we want to add to a future post. Check the order again. Is the number 1 in blue on the video that should be the first? So everything is correct.
Have you chosen everything and decided on the order? Click on "Next"Optionally, you can:
Any processing, editing and effects - all at your discretion. You can publish as is.
You can draw something on the video and apply filters We use the text if we plan, for example, to advertise a tour, service or product. We select the font size, its color, slope and everything else.
You can also add a picture to the video. To do this, click on 3 dots and select "Picture" in the drop-down menu. Done, you can draw.
Click on 3 dots and start drawingClick "Next" and choose who will see this Story:
Everything is fine, the story is ready. It will be seen by those for whom you posted it. And maybe comment. By the way, you can add not only pictures, but also polls to stories. How - they told in the idea for the post "Polls", but you can apply it to stories.
If you need to see statistics on published stories, read our article “Instagram Stories Statistics* 2021 – Guide”. In it, we tell you what indicators to look at and how to work with them. Analyze your performance and develop to become the coolest company in your niche.
The video has been posted and is now in your stories. But this is not for long. After 24 hours, the video will disappear, no one will see it. But you can pin the video in Actual, then it will delight your subscribers indefinitely.
To add videos from a fresh story to a Featured Story, click on your Story.
We are looking for the “Add to Hot” button in the lower right cornerClick, a menu appears in which Instagram * will offer to select a Hot folder or create a new one. If you haven't already, you will need to name the new folder. We advise you to choose a name that will reflect the content of the stories.
The name was chosen, click on "Add", a new folder appears, and the story is fixed in itNow all the videos added to the Actual will be there until they are deleted. Users can view them at any time.
Video posted in Featured We figured out how to add multiple videos to a post or Instagram Story*, pin new stories to Featured.