Device Links
The “About” section of a Facebook group is a very important feature to attract new members and maintain the old ones. The purpose and aims of the group are explained in this section. For instance, a group for a project’s team might outline the project’s goals. And if no one has given a description for the group, any member could do so. But only group admins can change the description if it already exists.
So, how can you edit the About section? In this article, we will show you how to edit the About section of your Facebook group and let you know why this section is important.
Using your phone to access Facebook is pretty convenient. You still have all the options you would have using a PC, including editing and managing groups. The steps to edit the About section of a Facebook group from your iPhone are the following:
The Facebook app for Android also offers you the option to edit your groups. The steps to edit the About sections are the following:
Editing the About section of a Facebook group on an iPad is similar to editing it on an iPhone. It might be slightly more convenient because of the bigger screen and keyboard which can be connected to the iPad.
To do so, follow these steps:
You can edit the About section of your Facebook group from your Windows or Mac computer. It is a simple process, and it can be done in two ways. To begin, you need to be signed in to Facebook first.
From here follow these steps:
Another way to edit the About section is to access your group from the “Groups” menu. This can be done following these steps:
To see a list of your groups, the steps are:
1.![]() Click “Groups” in the left menu of your News Feed. Click “See More” if you don’t see Groups.
Click “Groups” in the left menu of your News Feed. Click “See More” if you don’t see Groups.
2. You will see “Groups You Manage” and “Groups You’ve Joined” in the left menu.
3. Click “View More” to see a list of all the groups you manage or are a member of.
1. Select the + button in the top right corner of Facebook.
2. Click on “Group.”
3. Enter the name of your group.
4. Choose the privacy setting. If you choose private, you may choose whether to make your group public or hidden.
5. Invite users to join your group.
6. Click the “Create” button.
After you’ve created your group, you can customize it by adding a cover photo and a description.
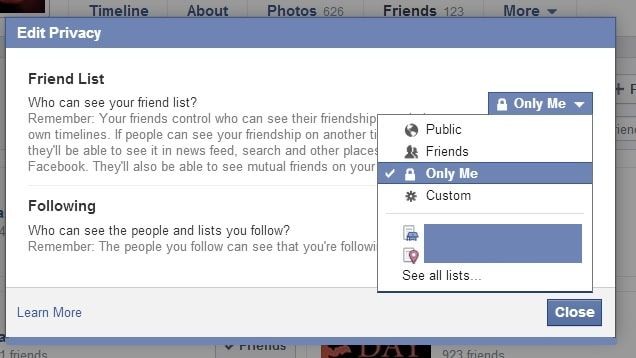
You can check if a group is public or hidden in the About section of the group. If your group is visible, anyone can find the group in Facebook’s search and other locations. If your group is hidden, only members can locate the group through a Facebook search or other search locations.
To check if a group is visible or hidden, do the following:
1. Click “Groups” in the left menu of your News Feed and pick your group. Click “See More” if you don’t see Groups.
2. If you’re a member of the group, go to the left menu and choose “About.” Scroll down to the group description if you are not a member of the group.
3. “Visible” or “Hidden” will appear underneath the group description as well as the privacy level.
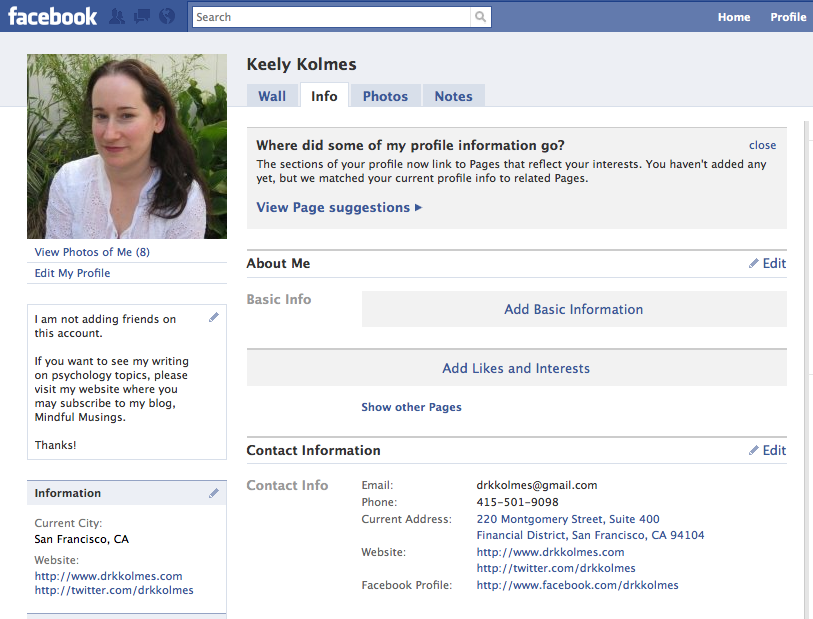
The first thing Facebook users see is the About section of the group. It provides them with information about the group and its members. Based on the description, they can decide if the group is something they are interested in and if they should join it. Regularly updating the About section also helps the members know that the group is active. This attracts new members and keeps already existing members interested to stay in the group.
Are you part of a Facebook group? Are you an admin of one? Let us know in the comment section below!
Did you know that more than 1 billion people are using Facebook groups around the globe? Over 100 million of them see Facebook groups as an important part of their experience on the platform. Since groups have such an astounding ability to create engagement and traction, you should know all about them. You can learn how to change group name on Facebook with this blog.
You can form groups on Facebook to stay in touch with your community and use a social media scheduler to manage your posts on the group. Facebook groups give you a chance to connect with like-minded people and allow you to create a sense of community.
This blog is going to focus on one aspect of Facebook groups which would be the group’s name. We will talk about how to change group names on Facebook in different settings. But before that, you must know how to schedule facebook post.
As an administrator, you will have the liberty to alter the group’s name as you like as long as the name complies with Facebook standards. Whoever creates the group or the page will automatically become the administrator and can appoint others as administrators too. Now we will see how to change group name on Facebook from different devices. But before that let’s see why you might need to change it.
Like we discussed above, as an administrator, you will have the liberty to change Facebook Group name as you like. But if you are wondering why you might need to change the name, here are the reasons:
The most common reason for changing a group name would be to get rid of its original URL. If you are a new group, you would want people to be able to find your group by simple search terms instead of long URLs.
A few years down the lane your group will no longer be the new one. The discussions will grow and so will your audience’s purview. At times topics can become repetitive and deviate from your purpose. And sometimes the discussions can take an interesting turn and might be worth the new name. You can schedule Facebook group posts in advance to keep up with all the group conversations and be abreast with the changing trends.
For you to be able to rename a Facebook group, you will have to be the administrator of the group. This means that you should have either created the group or someone should have made you the group admin. Here are the steps to follow to rename a Facebook group on a computer:
After getting done with the above-mentioned steps, your Facebook group name should have changed. The notification for change will automatically be sent to all the group members.
The requirement for being able to edit the group name on Facebook remains the same for mobiles, that is, you will have to be the admin. Here are the steps to follow if you want to edit the group name on Facebook:

We learned all about how to change group name on Facebook, now let’s see another way to simplify the management of your Facebook groups.
You can use automatic Facebook posting for scheduling all your posts for Facebook groups in advance and forget worrying about how you will keep up with the conversations on your groups.
RecurPost is an excellent Facebook post scheduler that will let you manage your Facebook posts with minimal effort. You can post to multiple social media at once with this tool because it supports all major platforms.
Here are the steps you will have to follow to schedule posts on Facebook groups with RecurPost:
The very first step to begin with scheduling would be to sign in to your RecurPost account. If you don’t already have one, go to RecurPost and create one with the 14-day free trial.
After your account is open, go to the dashboard where you will see an option saying “add social accounts. ”
”
When you click on it, a pop-up will appear on your screen. Under the Facebook section, you will see three options: pages, profile, and group.
Select “Add group” and you will be directed to the login screen of Facebook. Once you enter the credentials, you will be taken to a screen where you will have to grant certain permissions to RecurPost.
Click on “Continue” and you will be taken back to the RecurPost interface where you will see a list of groups that you administer or are a member of.
All you have to do is click on the “Add” button and your group will be connected to RecurPost.
To create a one-off update, you need to select “share a post” from your dashboard.
A pop-up will appear on your screen wherein you will have to add all the details about your post. Once you add in your content and media, you will have the option of publishing it then or schedule it for later.
If you want to schedule it for posting later, select the “schedule for later” button and choose the date and time for scheduling. You can also choose the option of “auto-schedule for best time” and RecurPost will suggest the best time to post on Facebook to you.
When you sign-up for RecurPost’s services, you will get 3 libraries by default. You have the option of using them or creating new ones. If you want to create a new library, go to the “libraries” section and click on “Add new library”.
When you create a new library, you will have to add three details: name of the library, color code, and whether it will be a one-time post or recurring library.
Once you have created your libraries, click on the library that you want to add content to. Inside the library, you will get multiple options to add recurring updates.
Once you have added the content to libraries, you need to put them on a recurring schedule. For this, you will have to go to your library and navigate to the “your schedule” tab, then click on the “add recurring schedule” option.
Here you can add the frequency of posting on your Facebook groups to make your post shareable on Facebook. Choose amongst weekly or monthly cycles, add the time, and select the “add schedule button”.
So, this was everything you needed to know about how to change group names on Facebook or how to schedule facebook post or how to increase Facebook followers. We saw how you can do it via your computer or your mobile device. Facebook groups are a great way to build communities and keep a base of loyal fans for your brand. You will have the chance to engage with thousands of people in one go.
A social media scheduling tool like RecurPost can lift some pressure off your shoulders regarding content management and posting or launching a brand on social media. You can post in advance with social media bulk scheduling for Facebook groups with the Facebook publishing tool. It is also a great Hootsuite alternative and Agorapulse Alternatives if you are looking for more reasonable options.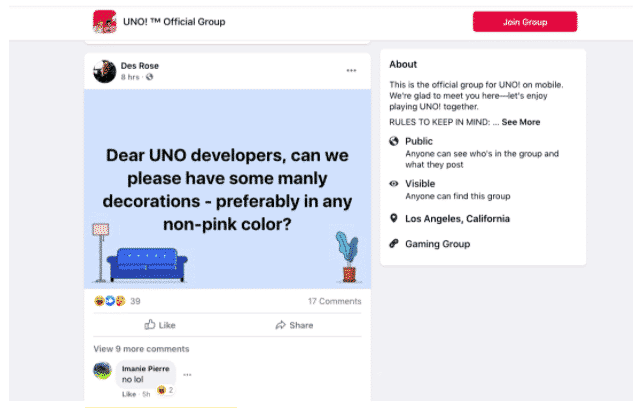
Want to know more about how RecurPost’s plans work? Go ahead and learn more about its services.
1.Why can’t I change my Facebook group name?
Facebook does not allow admins to edit group name on Facebook once the group reaches 5000 members in order to avoid abuse. This is done because closed and public group names, members, and Facebook group descriptions are visible to everyone, they could be seen as part of their identity.
2.How many people can join a group in Facebook?
There is no such limit to the number of people that can join a Facebook group. However, as the administrator, you can set certain restrictions on the type of people that can join. Once your group reaches 5000 members, certain functionality restrictions will be imposed.
3.How can I change my Facebook group name after 5000 members?
It is not allowed to change Facebook group name after there are 5000 members in the group in order to prevent abuse. This is done by Facebook because details of the group along with the members are visible to everyone and may be seen as a part of their identity on Facebook.
4.Can I rename a Facebook group?
Yes, it is quite possible to rename your Facebook group. For this, tap on the top right corner of Facebook and scroll down to groups, then choose your group. Below the cover photo, select more and choose view group info. Now choose edit group settings. Under the group name, tap to change the group name and save.
5.Can you change the URL of a Facebook group?
Yes, you can change the URL of a Facebook group. You will have the allowance to change it every 28 days but will not be able to do anything after your group makes it to 5000 members.
Debbie Moran
Debbie Moran is a Digital marketing strategist with 5+ years of experience producing advertising for brands and helping leaders showcase their brand to the correct audience. She has been a part of RecurPost since 2019 and handles all the activities required to grow our brand’s online presence.
Do you miss the simple Facebook interface of the last decade? Over time, the design became complex, with many versatile features. Even simple things like finding the settings screen require you to put on your detective hat. The same is true for Facebook groups and pages. If you're wondering, Where do I change my Facebook group settings? We'll help you find it in a sea of settings.
Facebook groups are a new world in itself. They can be thought of as small social networks within Facebook. And for any social network settings play an important role. But finding these settings is not an easy task for a beginner.
We have included steps for editing Facebook groups in this guide. The post also tells you how to change the profile picture of your Facebook (FB) group.
The following steps and screenshots are for the new Facebook layout. Also, group settings can only be changed by the group administrator. Moderators are not allowed to change group settings.
In this article
Below are detailed instructions.
Step 1: Enable facebook.com in your browser and log in to The account used for the group administrator.
Step 2: Open group that you want to change its settings . You can either search for a group or click on groups in the Show more section on the left sidebar. Facebook homepage.
Then click on the name group that you want to edit.
Step 3: Inside the group you will find Admin Tools on the left sidebar. Scroll down this section and tap Settings .
Here you will find most of the settings related to your group. This includes basic group settings such as name, description, group privacy (private, private, and private), group link, group color, and group types (parenting, gaming, buying, selling, etc.). You can also configure membership settings like who can join the group, who can post, approve membership, post claims, etc.0005
You will find other features such as pending membership requests, pending posts, activity history, membership questions, etc. in the admin tools section on the left sidebar.
Other settings such as bulk archiving or pinning can be found under the three-dot icon next to your group's search icon. You will also be able to manage notifications for your group.
Finding Facebook group settings is confusing, especially on mobile devices. But don't worry. Here are the steps. Next time, it won't be hard to find the group settings on your Android device, iPhone, or iPad.
Step 1: Enable Facebook mobile app and open the group whose settings you want to change. Make sure you are viewing the group from an administrator account. Group admins won't see the "Settings" option.
Step 2: Click the icon The icon in the upper right corner.
Step 3: Administrator Tools screen will open. Here you will see a lot of Features and settings. Click on Group settings Displays and configures most group settings. This includes the group type, name, membership settings, related groups, and additional features like Messaging Rooms Watch Party, etc.
Other settings such as rules and membership questions can be seen right below the admin tools screen. Tap "Settings" on the admin panel screen to set a group or change group notifications. On Android, you can add a group icon as a shortcut to your phone screen.
Step 1: Open m.facebook.com on your mobile phone from any mobile browser. get up Switch to the group administrator account.
Step 2: go to Mandatory group . Click on Arrow small next to Group name.
Step 3: You will see all features and options related to the group. Click "Edit". Group settings . You can set the Group Name and Privacy Type, Description, and Membership Approval on the settings screen. There are no other settings as they can only be changed from the Facebook mobile apps or desktop.
To change the profile picture of a Facebook group, you need to change the group cover image. Facebook groups do not have a separate option for a profile picture. The cover photo was taken as a demo photo of the band.
To edit the group cover on your computer, click the edit icon on the group cover and upload a new photo.
Similarly, on the Facebook mobile app, tap the Edit icon on the group cover. Select your photo and the same photo will be used as the group photo.
To change the group's cover image from the Facebook mobile website, click the small arrow next to the group's name. On the next screen, click Add Cover.
Hint: learn how to add custom backgrounds to your Facebook post.
As mentioned earlier, you must be a group administrator to configure group settings. Although the administrator can manage the group, he cannot change the group's settings.
Don't you miss the simple Facebook interface of the past decade? Over time, the design has become more complex, offering too many features scattered all over the place. Even simple things like finding the settings screen require you to put on your detective hat. The same goes for Facebook groups and pages. If you're wondering "Where to edit group settings on Facebook?", we'll help you find it in a sea of settings.
Table of contents
How to change Facebook group settings on computer
How to change group settings on Android, iOS and iPadOS
How to change group settings on Facebook mobile site
How to change Facebook group profile picture
Group admin power
Facebook groups are a whole new world in their own right. They can be thought of as mini-social networks within Facebook. And for any social network, settings play an important role. But finding these settings is not an easy task for a beginner.
In this guide, we have listed the steps to edit Facebook groups. The post also explains how to change the profile picture of a Facebook group (FB).
Note: The following steps and screenshots are for the new Facebook layout. In addition, group settings can only be edited by the group administrator. Moderators are not allowed to change group settings.
Here are the steps in detail.
Step 1: Launch facebook.com in your browser and log in with the account used for the group administrator.
Step 2: Open the group whose settings you want to change. You can search for a group, or click on "Groups" under the "Details" section on the left sidebar of the Facebook home page.
Then click on the group name you want to change.
Step 3: Inside the group, you will find the admin tools on the left sidebar. Scroll down in this section and click Settings.
Here you will find most of the settings related to your group. These include basic group settings such as name, description, group privacy (private, secret, private), group link, group color, and group types (parent, games, buy/sell, etc.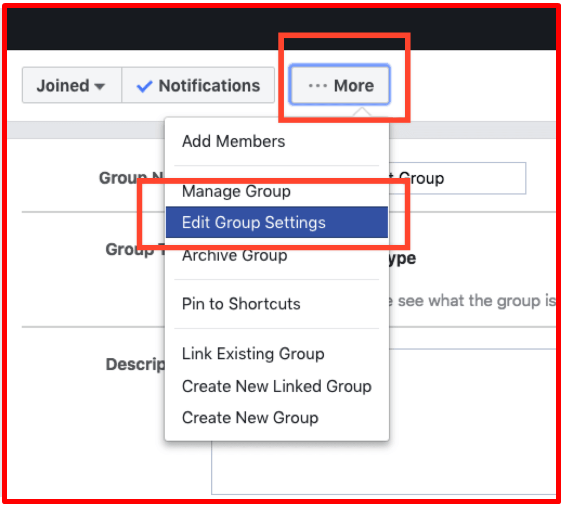 ). You can even set up membership options like who can join the group, who can post, membership approval, post approval, etc.0005
You will find other features such as pending member requests, pending posts, activity log, membership inquiries, etc. in the admin tools section on the left sidebar.
Other settings, such as archiving or pinning a group, can be found under the three-dot icon next to the search icon within your group. You will also be able to manage notifications for your group.
Finding Facebook group settings is confusing, especially on mobile devices. But don't worry. Here are the steps. The next time group settings are easy to find on your Android, iPhone or iPad.
Step 1: Launch the Facebook mobile app and open the group whose settings you want to change. Make sure you are viewing the group from an administrator account. Group moderators will not see the settings option.
Step 2: Click on the icon icon in the upper right corner.
Step 3: The Administrator Tools screen will open. Here you will see various functions and settings. Click on the Group Settings option to view and configure most group settings. These include group type, name, membership settings, related groups, and additional features like messaging rooms, viewing party, etc.
Other settings such as rules and membership questions can be seen directly from the admin tools screen. Click "Your Settings" on the admin tool screen to pin a group or change group notifications. On Android, you can add a group icon as a shortcut to your phone screen.
Step 1: Open m.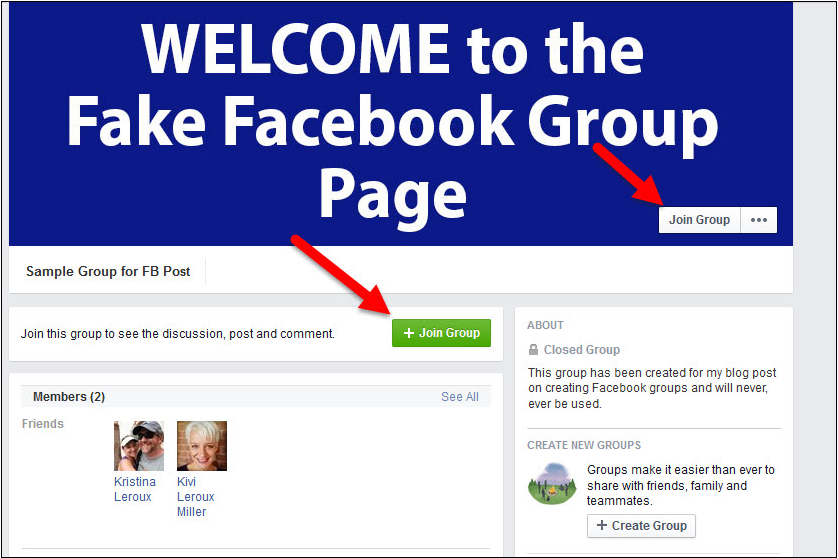 facebook.com on your mobile phone from any mobile browser. Switch to the group administrator account.
Step 2: Go to the desired group. Click on the small arrow next to the group name.
Step 3: You will see all the functions and parameters associated with the group. Click Change Group Settings. You can customize the group name, privacy, membership type, description, and approval on the settings screen. There are no other settings as they can only be changed in the Facebook mobile apps or desktop.
To change the profile picture of a Facebook group, you will need to change the cover photo of the group. Facebook groups do not have a separate profile picture option. The cover image is used as the display image for the group.
To edit your group cover photo on your computer, click the Edit icon on your group cover photo and upload a new image.