Home > Mirror Tips > 5 Easiest Ways to Use Instagram on PC in 2022
Spencer Hill
September 22, 2021 (Updated: January 6, 2022)
6 min read
0 Count
Instagram is the most popular photo-sharing app among Generation Z for all kinds of use, whether business or personal. But when the professionals and brands want to manage their accounts on a large screen, or maybe you lost your phone and do not want to compromise on your social presence, Instagram limits some significant features.
Fortunately, there are some interesting ways to enjoy all the features of Instagram on computer using third-party apps. So instead of sharing and uploading pictures through frustrating methods, you can now speed up your work.
Today's article will walk you through a comprehensive guide to using Instagram PC without any glitch.
Here are 5 Ways to check and reply to Instagram on your computer, including Windows and Mac.
The easiest way to access your Instagram desktop is to access it through their official website. It is an excellent way when you just want to roam around the news feed and explore some pages. The Instagram PC version allows you to like and comment on the posts, view stories, reply to DMs, view live videos, and much more.
It is almost similar to the mobile version, just a little broader. The toolbar can be found on the top of the screen and the Stories section, on the right.
This version does not allow posting multiple photos and videos to the feed or the stories.
The method is simple:
Back in April, an official Instagram App was launched for Windows 10 PC and tablets. The Instagram for pc windows 10 allows users to access the Live Tiles and keep an update on what’s going on around the app.
Some of the features it allows are:
The app still has some glitches that need fixing.
How to Use It?
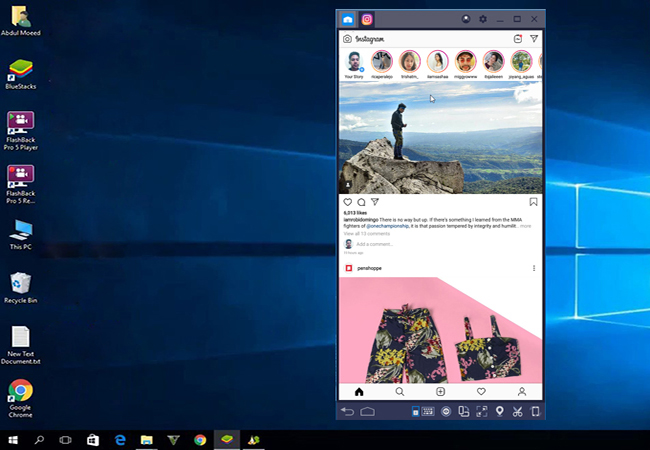
When you wish to go through the awesome pictures and videos available on Instagram on your PC for a better experience and adventure, using a third-party app such iMyFone MirrorTo is the best app to screen mirror your phone screen to PC. iMyFone MirrorTo is a trending app with millions of users. The features that make this app distinguished are:
Try It Free Try It Free
Where screen mirroring is the ideal way to explore your Instagram content over a bigger screen, the advanced technology of iMyFone MirrorTo makes the experience even better.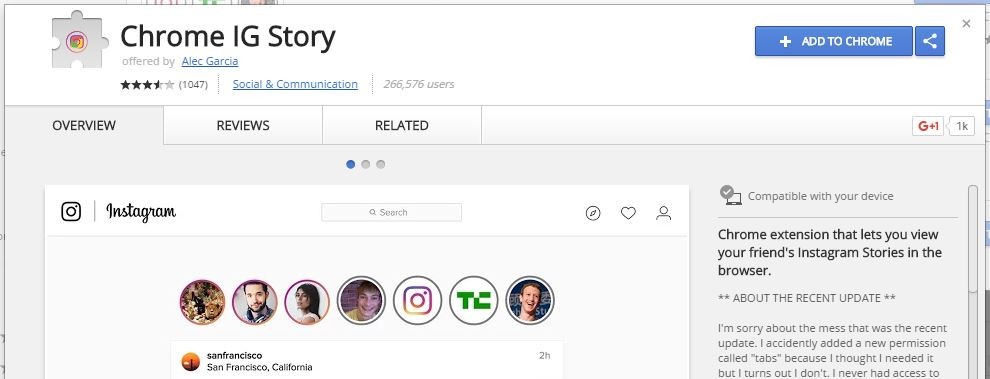
How to Use It?
iMyFone MirrorTo is a 100% secure app that offers a money-back guarantee if you are not satisfied with their service, which is hardly ever a case. Screen mirroring desktop for Instagram puts an end to any restrictions that you can face with the above methods.
Try It Free Try It Free
Gamers usually use Emulators to make their gameplay easier, but why not utilize their incredible technology to use Instagram on PC.
It’s a third-party app that lets Android users run their applications on their PC as well. BlueStacks is the best android emulator on the list to use mobile Instagram on PC. It is highly compatible and a simple tool that can get your job done efficiently.
This allows you to post your photos and videos on the News Feed and stories as well. It is a lightweight and fast application to connect with your loved ones without any restrictions.
How to Use It?
It is another famous yet powerful emulator on the list allowing users to enjoy fantastic features and characteristics. NoxPlayer works best on PC and Mac as well. Most gamers prefer it for games, but you can run social media sites through it. The app is free and convenient to use.
How to Use It?
When we talk about Android Emulators, how can we not talk about the fantastic KoPlayer?
It's free, it's awesome, and it’s user-friendly. The emulator lets you enjoy all your android features and functions on your PC. Its gameplay lets you find any app of your choice. Other key features include screen capturing, volume adjustment, desired resolution, and much more.
How to Use It?
LDPlayer is another renowned emulator for windows. You can download it for free and start using it without any delay. It supports a wide range of compatibility, gives an excellent performance, and allows a high graphic experience.
With improved compatibility, it allows 6× faster gameplays and much smoother controls. The customized user interface adds to the overall experience.
How to Use It?
MEmu is relatively new in the market but packs some incredible features to offer to its users. Its performance is flawless, and it offers unique compatibility. Its main features revolve around providing an android experience with an even better desktop. Its premium version is ads-free and offers customization of setting resolution, device models, memory size, and much more.
It allows file sharing between PC and android devices; you can watch live shows and chat unlimitedly using various social media platforms.
How to Use It?
The process of using Instagram is simple. Just download and install the emulator, then install Instagram from their platform, and you are ready to use it.
Andy for PC and Mac is among the best emulators available in the market. It creates a perfect virtual environment and is a lightweight tool, offering unlimited storage capacity. It offers seamless sync between your mobile and PC and makes sure that the device is always up to date. It is the easiest way to bring your most favorite apps to PC, including Instagram.
How to Use It?
Desktop for Instagram is the most famous desktop version of Instagram, which aids in accessing restricted features of Instagram for Windows 10. When you want to save time and run your business tasks more efficiently, Desktop for Instagram on a bigger screen.
The special features it brings to the table include:
It restricts the use of sending direct messages, adding photos to stories, and tagging people.
How to Use It?

Getting Instagram on PC is possible. You can get the Instagram desktop version from their official website or download it through the Microsoft play store or utilize the excellent android emulators on the web to access the restricted features of the app.
Yes, Instagram for Instagram for windows 7, 8, and 10, android and iOS devices are all available free of cost to let the users enjoy the unlimited experience of this excellent photo-sharing app.
Where there are ways to enjoy the Instagram PC version with all the app features, most users prefer the mobile version over the PC one. But businesses and brands consider the Instagram computer version as it makes their tasks easier.
You can download Instagram for windows desktop from Microsoft Store. Visit their website or store to get the app directly on your laptop. Once the data of about 80 megabytes has been downloaded and installed, you will be granted unlimited access to the app.
Instagram is not banned in India or any other region from the developer. But some governments like the Indian government issued a notice in Feb 2021 to ban the app.
Mobile Instagram on PC offers another level of ease and convenience when handling hectic tasks daily on this popular platform. Though Instagram PC allows access to the app, the restriction on certain features spoils the experience.
So, you can decide to use the screen mirroring app like iMyFone MirrorTo or the famous android emulators to access the app without any hurdles.
Try It Free Try It Free
(Click to rate this post)
Generally rated 5 (256 participated)
Rated successfully!
You have already rated this article, please do not repeat scoring!
Love posting your photos on Instagram and also want to do so using your computer? Since the service focuses on mobile, uploading to Instagram from your computer isn't the primary use case. But it's certainly possible to post to Instagram from a Mac, Chromebook, or any other desktop device.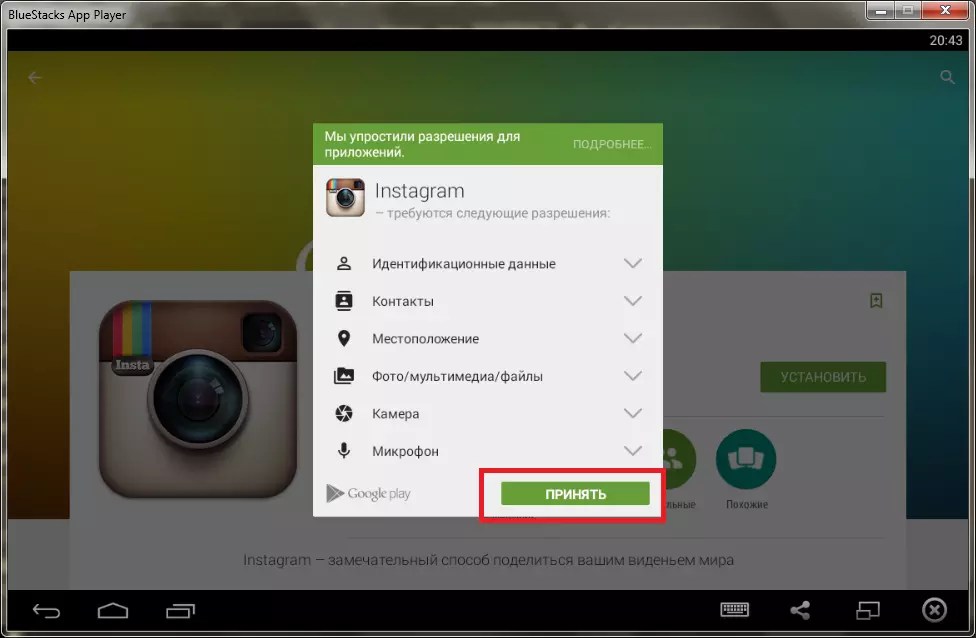
Below, we show you several ways to post to Instagram from your PC or Mac.
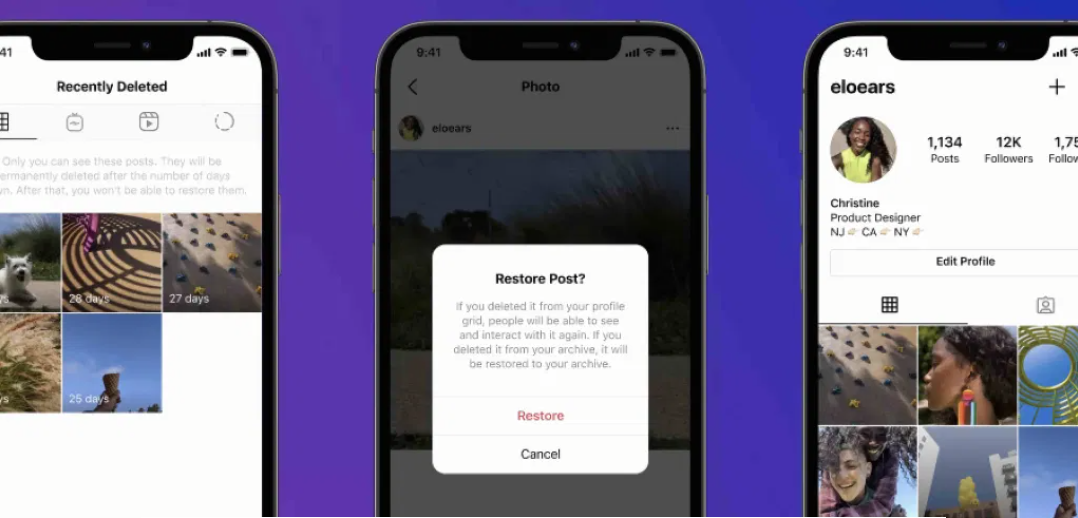
In late 2021, Instagram finally added an official solution for uploading images from a laptop or desktop. You can now visit Instagram.com in any browser, sign into your account, and post images as you do on your phone.
Click the Plus button at the top-right to start this process, then see our full guide to Instagram's desktop upload feature for more help if you need it. This is the best and fastest way to post to Instagram from any computer, but we also include other methods below so you're aware of other ways.
Aside from the primary option above, Windows users can also use the following methods to post to Instagram. They will work whether you're posting from a Windows laptop or desktop.
Instagram doesn't offer a traditional Windows desktop program, but Windows 10 and 11 users can use the Instagram Microsoft Store app.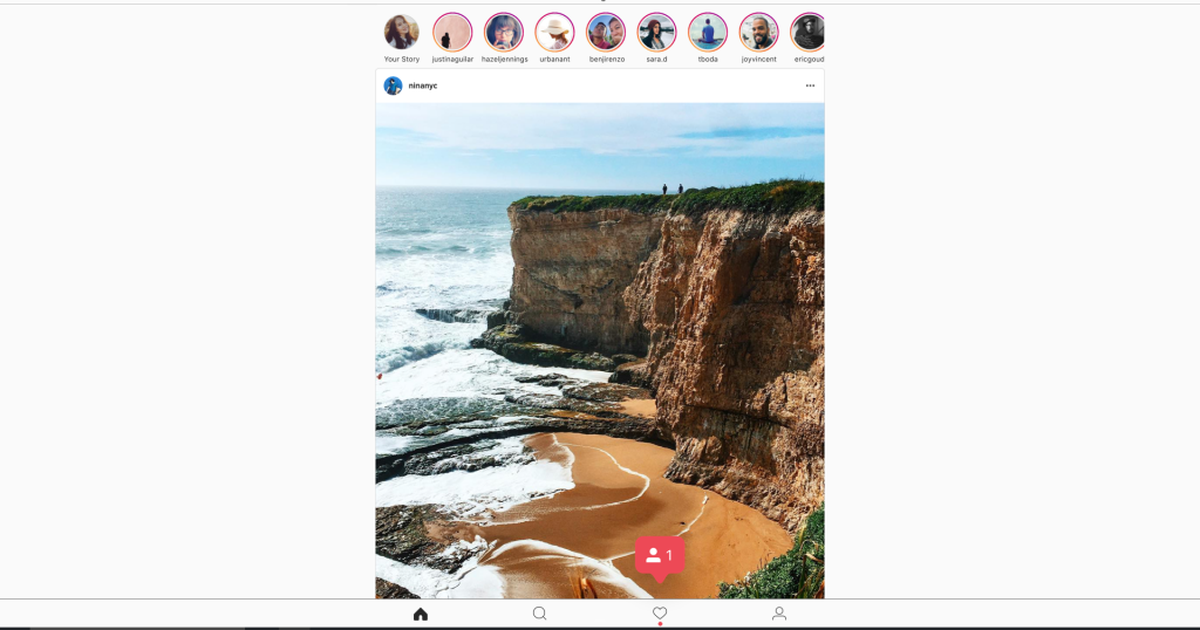 It's essentially just a port of the mobile apps, so while it's nothing special, it gets the job done.
After installing the app, sign in and you'll see your feed like normal. To post on Instagram, click the Plus icon in the upper-right corner, just like on the website. From there, drag and drop images onto the box, or click the Select from computer button to choose some.
From here, you can use the familiar Instagram interface to edit the image, apply a filter, and add a caption. If you prefer an app instead of visiting a website to post every time, this method is great.
Before native support for posting to Instagram using the website, the best method was using a trick where you post to Instagram from Chrome. This involves swapping your browser's user agent to fool the Instagram website into thinking you're using a mobile device.
For the uninitiated, the user agent is a small piece of information your browser sends to websites so they know a few details about your computer. You can override the automatic user agent and tell the website you're using something else without much trouble.
This method is more tedious than either of the above, so we don't recommend it now. We include this here to preserve the steps, but it's thankfully no longer necessary.
To try the user agent workaround in Chrome, open Instagram's website and log in. Then press F12 (or right-click and choose Inspect) to open the Developer Console. Press the shortcut Ctrl + Shift + M or click the Toggle device toolbar button (highlighted below) to swap to the mobile website for Instagram.
You'll see an interface just like the mobile app, complete with click-and-drag functionality. Click the Plus icon at the bottom-center and you can add a photo from your PC. If you don't see this icon, refresh the page with F5 or navigate to a different page, and it should show up.
On the resulting screen, use Edit to tweak the photo and Filter to change its look.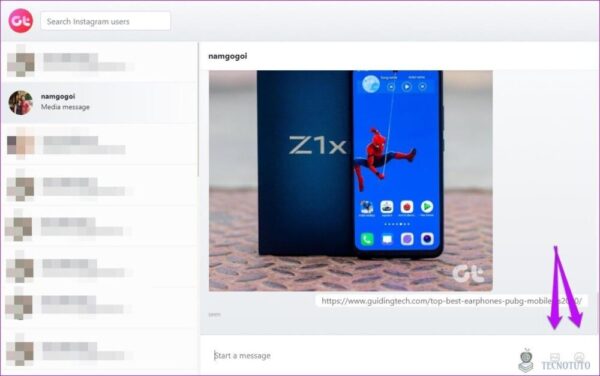 Click Next for the final steps of adding a location, tagging others, including hashtags, and posting a caption. Once you click Share, you're good to go.
If you enjoy methods that aren't convenient, you can go further and emulate Android on your computer for free. This allows you to access the true Instagram app and do everything with it as you would on your phone.
The easiest way to do this is using BlueStacks, though you have plenty of other ways to emulate Android on Windows. All you need to do is download BlueStacks, sign in with a Google account, download the Instagram app, and log into your Instagram account. Watch the video below for more details.
The methods for posting to Instagram from your Mac are similar to the Windows steps, but we'll share Mac-specific tips here. Remember that by using the main Instagram site, you don't have to worry about any of these workarounds.
We detailed how to change your user agent in Chrome above, which will also work on a Mac. If you'd prefer to use Safari, follow these instructions.
Open Safari's Preferences window using Safari > Preferences or the shortcut Cmd + Comma. Switch to the Advanced tab and check the box at the bottom to Show Develop menu in menu bar.
Next, open the Instagram website and sign in. Open the new Develop tab on the menu bar and choose User Agent > Safari — iOS xx — iPhone.
The page will refresh, and you'll see the bar of icons along the bottom just like on the mobile app. Click the Plus icon in the center, and you'll get a prompt to upload an image from your computer.
From there, just follow the steps to edit, add a filter if you wish, and post.
You can emulate Android apps on macOS as easily as you can on Windows. It's far easier to emulate Android than iOS, so you should give it a try even if you're a newcomer to the platform.
Just like Windows, BlueStacks is the easiest way to emulate Android on your Mac. It's as simple as downloading and installing BlueStacks, then searching for the Instagram app. If you don't want to use BlueStacks, check out some other ways to run Android apps on macOS.
If you use Chrome OS, the instructions are exactly the same as above with the Instagram desktop site. If you need an alternate method for whatever reason, you can follow the instructions in the "Use the Mobile Instagram Website in Chrome" section above. It works exactly the same way, allowing you to post a picture from your Chromebook's storage.
Most modern Chromebooks have the ability to download and use Android apps as well. If you prefer, you can download the Android Instagram app and use that to post, similar to the Microsoft Store app on Windows.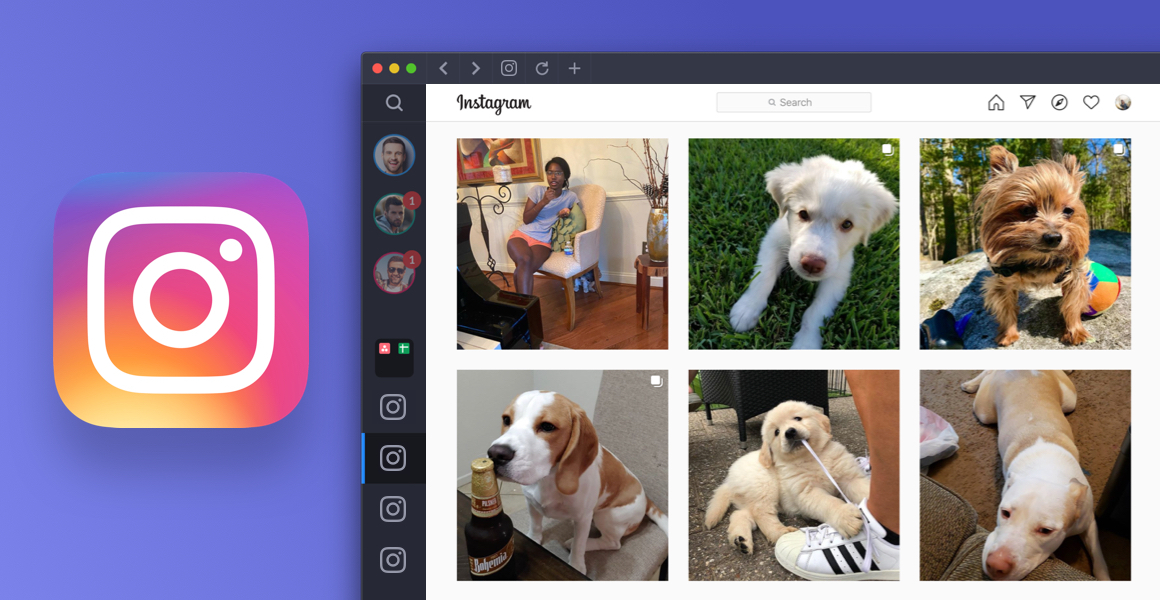
Just open the Play Store and search for it like you would on your phone. From there, you can log into the mobile app and share your photos.
On both Windows and Mac, you'll find several third-party apps that offer the ability to upload images to Instagram, among other features. Flume is one example of many. We recommend you avoid using these apps for two reasons.
First, if they don't redirect you to the official Instagram login page, then you have no guarantee that they're keeping your password secure. Entering your credentials into third-party apps could lead to your account being compromised. Apple has kicked several third-party Instagram apps off the App Store for violating this policy.
Second, most of these apps require you to pay for the premium version to upload pictures (or more than a few in the free trial). This is a waste of money for something you can do for free.
Additionally, some apps include questionable features like "free likes," which are spammy and against Instagram's Community Guidelines. Even if you don't abuse these features, Instagram could disable your account for using unauthorized apps like this.
Stick to one of the genuine methods above, and you shouldn't experience any of these issues.
Now, you should know how to post on Instagram from a Windows computer or a Mac. This is much easier than it once was, so sharing on Instagram is now just as easy no matter what device you use. Whether you want to share art you've created or selfies you took with your webcam, you're all set.
Before you post, you should know the top tips that will help get you noticed on Instagram.
3 ways to use Instagram effectively on a computer. It is free and does not require special skills and knowledge. Quickly post publications with a large number of hashtags, use Photoshop to create posts and at the same time save a lot of time, using Android emulators will allow you.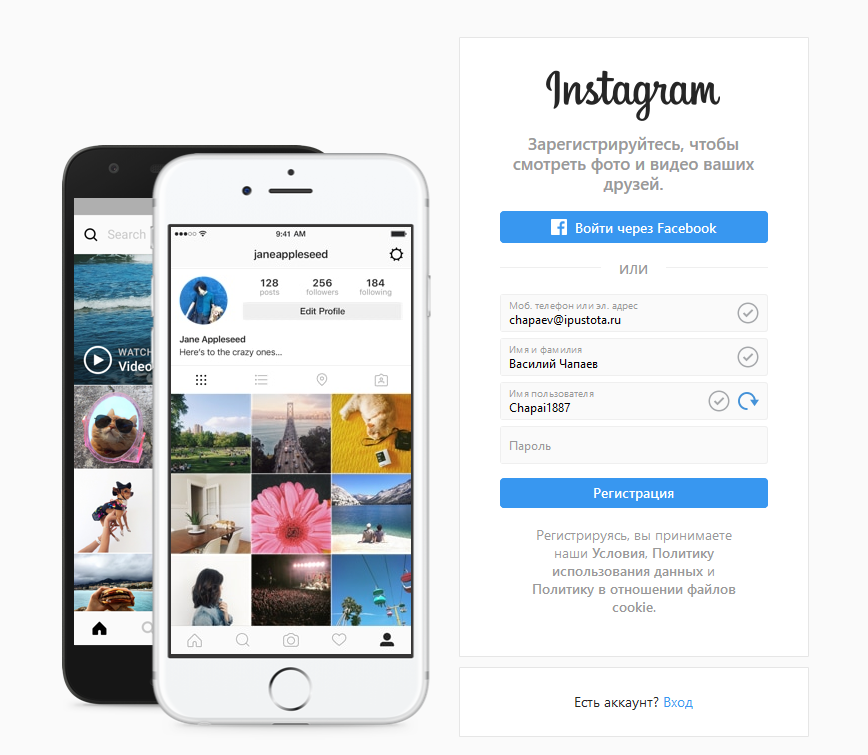
Contents
For professional management of Instagram accounts, I have been for several years I use Android emulators. It is simply a full-fledged smartphone, only right on your computer. This will save you 4 times more time compared to working on the phone.
Here I will look at 3 virtual machines that will allow you to professionally use instagram through a computer to get clients:
I give a detailed comparison of these Android devices at the end of the article. However, some conclusions can be drawn from this list.
And yes, I think you all already know about bluestacks (for those who do not know, I describe the installation and disadvantages of this device in the article too). I decided to compare it with other, more convenient and faster ways to work on Instagram from a computer.
In this publication, I will show you where to get it, how to install it correctly and use one or another virtual machine without any problems.
With the help of emulators, you can make your work on Instagram easier if you need to:
If you are an administrator of several accounts, Android emulators are indispensable.
In addition, virtual devices will solve the problem of using Instagram online from a computer if you have a smartphone running Windows Mobile, Symbian or another closed operating system.
Websites-services are not without drawbacks - you won't be able to fully "use Insta" like on your smartphone.
One of the disadvantages is security: you essentially transfer all access from your account to someone unknown.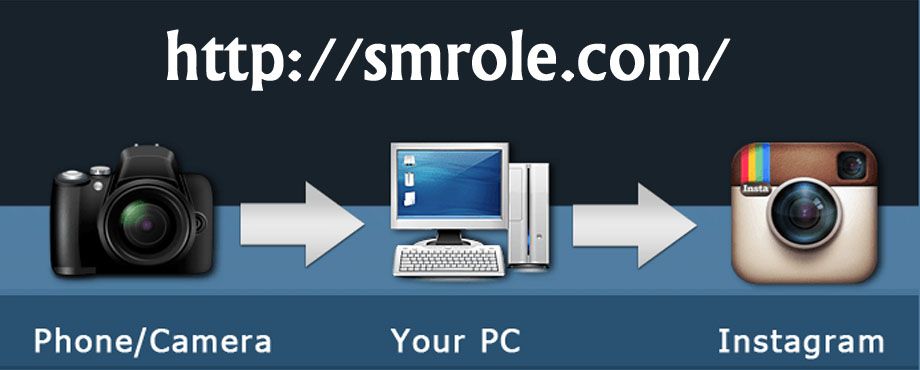 If you have 200 subscribers, there is no problem. But what to do if there are, for example, 100,000 fans in the account, in which several thousand dollars are invested? What if your account has 500,000 fans?
In particular, you can find such alarming comments on the net:
The second disadvantage is that you will not be able to view the publication as users see it from smartphones and, in which case, make changes.
Thirdly, on almost all such services you will have to pay a subscription.
All these problems are perfectly solved by Android emulators. On all virtual devices under consideration, virtual “geo-location” settings are available, as well as any functions that regular smartphones have.
This Android player is very convenient and fast. Much faster than bluestacks, it doesn't slow down or crash. Therefore, it can be used not only to use Instagram from a computer, other social networks, but also for Android games.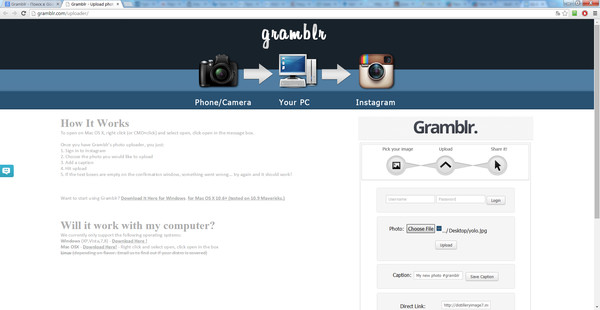 In addition, following the example of the described installation method, you can install both WhatsApp and Viber. And also in general everything that Android offers.
Download the emulator from this link: Download Knox
Important: using this link you will have access to a program without viruses and any "appendages" in the form of Mail.Ru and other spam programs of "useful things".
The file weighs 274 megabytes, so if the Internet speed is low, you will have to wait a bit. We find the installation file, it is located in the "Downloads" folder (if you did not change the default file download location):
Click on it 2 times and in the window that appears confirm the installation by clicking on "Yes":
In the process, select the folder where to install (by default, this folder is: C:\Program Files (x86)). Once the installation is complete, restart your computer and launch Nox.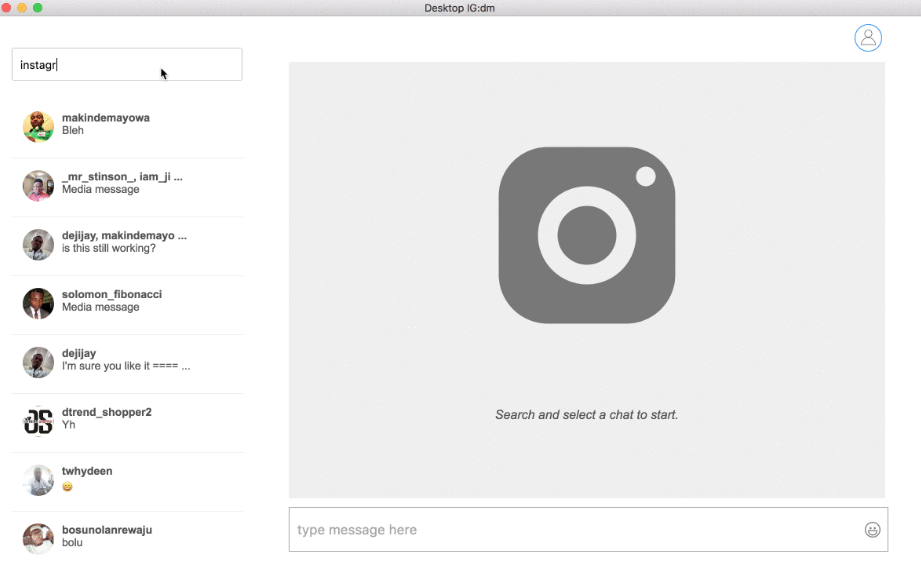 The following window should appear:
After Nox has fully launched and you see what is shown in the photo below, you are already on the verge of using instagram from your computer.
Next, click on the Play Store icon:
When the program asks about adding a new Google account, select "Existing":
After that, enter your data for authorization (you do not need to type it manually - the standard insert Ctrl + C works). Then accept the agreement by clicking on the "OK" button. Next, in the window that appears, in the search bar "Play Market" type "Instagram". After all the manipulations, you will have:
Here, click "Install", accept all permissions and wait for the installation to complete. Then click on "Open" - Nox will turn to 90° and you will see:
At the very bottom, click on "Login" and enter your login details. That's it, you can work with Instagram online, as if from your smartphone, but using all the convenient methods of a desktop computer.
Based on the use of processor and RAM resources, we can draw conclusions from this screen:
The tests were carried out on a computer with a 2.4GHz processor and 3 GB of operating system. In general, Nox APP Player works very quickly and no "glitches" have been noticed for all the time.
Genymotion is perhaps the most powerful of all Android emulators in terms of functionality. This virtual device will allow you to work on a computer LITERALLY on your particular model and version of your smartphone. Available for use on Linux, Mac and Windows. Genymotion also has built-in functions to emulate GPS, Wi-Fi network and all device cameras.
Go to the official page of the emulator: Official page. Click on the "Sign In" button:
Next, click "Create an account" (that is, create a new account):
Enter all the necessary data. After that, a registration confirmation letter will be sent to the specified mailbox. By clicking on the link in the letter, you confirm the registration on the genymotion website. Then click on the "Buy Now" button - do not be embarrassed, you do not need to buy anything:
Then click on the "Dowload" button:
Then download by selecting "Download from VirtualBox" (size 152 MB):
After downloading, go to the download folder and run the setup file. Complete the installation by selecting English during the process.
Restart your computer. You should have two shortcuts on your desktop. Run the application by double-clicking on the icon on the left:
You will see a window where you need to add a device from which you will work on Instagram. Click on the button with the plus sign "Add":
Next is the most interesting, in the window that opens:
you can choose almost any gadget that exists today with the latest version of Android.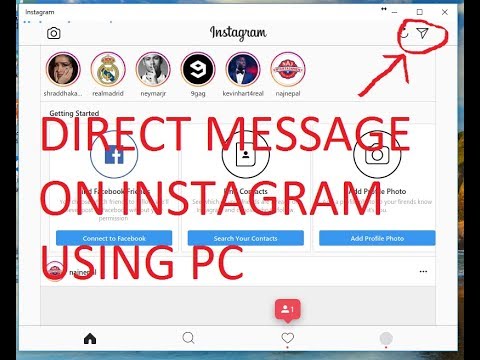 That is, on your PC you can work on Instagram, like on the latest smartphone from Sony, Samsung, choose the most advanced Google Nexus, or use any tablet with a large screen for convenience. Enter in the "search" field the gadget from which you want to use Insta (I already entered sony and clicked on the line Sony Xperia Tablet S):
Then click on "Next":
Genymotion will load the parameters of the selected device (in my case it is Sony Xperia Tablet S). At the end of the installation, click on the "Finish" button. In the main window, you will see the loaded device (Sony Xperia Tablet S). You need to select this “device” by simply clicking on it once:
By the way, you can download several devices at once, that is, several types of tablets and smartphones from different manufacturers. The point is to try what will be more convenient to work with.
Next, let's launch our Sony by clicking on the "Start" button:
The emulator launched the Sony Xperia and this is what I got:
the case described with Nox.
How many resources Genymotion uses
From the screen, you can draw preliminary conclusions about how much Genymotion "loads" the processor and memory:
In general, in terms of functionality and ease of use, of the devices listed in this article, Genimoushen took first place.
Owners of powerful PCs will most likely like this virtual "device". However, if your computer has a below average processor and less than 2 GB of RAM, then it is better to opt for other emulators from this article.
Go to the official website of the developers: Bluestacks site and download the installation file:
Click "Download Bluestacks", in the window that appears, select "Save file":
Install and run the emulator:
In general, the whole installation is similar to the one described with Nox. Installing Instagram for a computer is also absolutely identical with Knox. After installing the social network on the emulator, you should see the following:
From here you can launch the app and access Instagram from your computer.
Bluestacks performance rating will not be very high. In terms of PC memory load:
On a ten-point scale in general - three, no more. In the process of work, there are frequent and unexpected "self-completion" of the program. In addition, bluestacks often freezes and is rather slow. And that's just using Instagram online. You can imagine what will happen if you run any game on this emulator.
This method is given here only because of the great popularity of the player and to compare it with other, more efficient ways to use Instagram from a computer.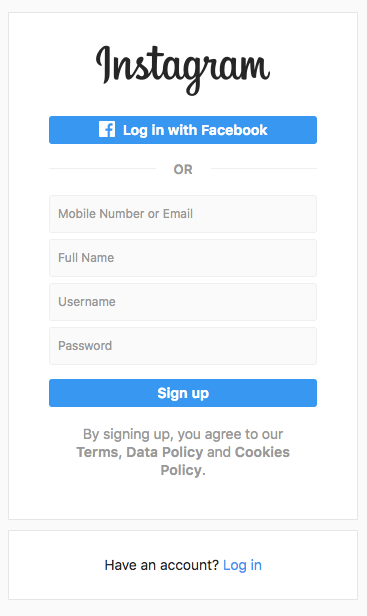
I give a visual comparison in the table:
From this article, you can see that android emulators provide more functionality and convenience than posting sites. In addition, unlike online services, virtual devices are free.
Knox emulator is suitable for those who value simplicity and speed. The Bluestex device is suitable for owners of powerful computers. Jeni Motion will be of interest to those who like to experiment and constantly try various Android devices.
Get sales and promote your business on Instagram with all the convenience and benefits of a desktop computer, all for free.
All the best!
P.S To find out how much Facebook and Instagram advertising clients can cost, please go to the section by clicking the button below:
Go to the “cases” section
If you have an Instagram account, you must have wondered at least once whether it is possible to use it not from a smartphone, but from a computer. Can! And how to do this, we will tell in this article. And let's start with the most popular question.
View likes on Instagram through a computer is not only possible, but quite easy.
 So you can see the number of likes for both your own and other people's photos.
That's all the possible actions with likes that you can and would like to carry out using a computer, not a phone. Read the article further and find out what else you can use to fully work Instagram from a PC.
To view the feeds of other users, including your friends and even celebrities, you need to be able to follow their pages. By the way, sometimes there is a need for a reverse action when we want to unfollow someone. A subscription allows you not only to view other people's news, but also leave your comments there. Let's see step by step how to do it:

As you can see, even a novice user can do this without any problems.
Important: automatic access to the profile does not appear in all cases. If the account is of a closed type, then you first need to wait for the appropriate confirmation from its owner.
Similarly, the reverse process occurs when we want to unsubscribe from someone's page. Just on the page with the profile of this person you need to find the "Unsubscribe" button, after which the subscription will be terminated. This means that access to news, photos and messages with this person will be limited.
In order to be really interesting on Instagram, you need to be able to follow the news of other users, that is, simply follow the feed.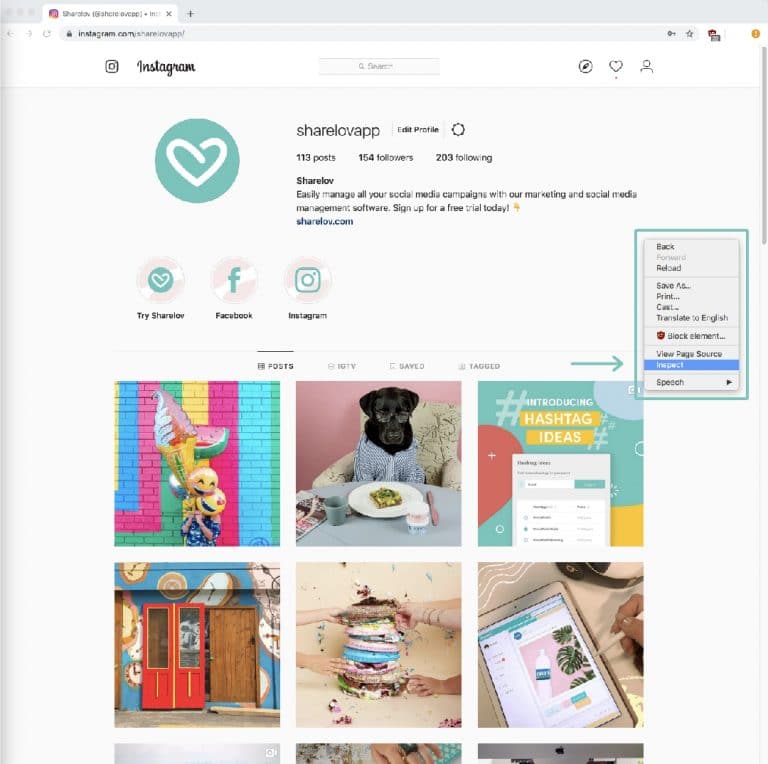 First, of course, you need to get into your own account in order to then perform any actions. If authorization is required with a username and password, then you will have to go through this necessary step.
The news section will open automatically as soon as Instagram verifies the user who goes to their profile. From now on, in the search feed, it will be possible to find sections with relevant news in order to spend time to your advantage. In addition, all the news shared by other users to whose pages we are subscribed will be published in the feed. As you can see, Instagram has made it as easy as possible to subscribe to a news feed, which you can even customize to your liking so as not to experience difficulties later. The only thing you can’t get rid of is annoying contextual and other advertising, which is necessary for the existence of this social network.
From time to time, a number of users have a desire to change their Instagram profile - it turns out that there are different options for implementing this plan.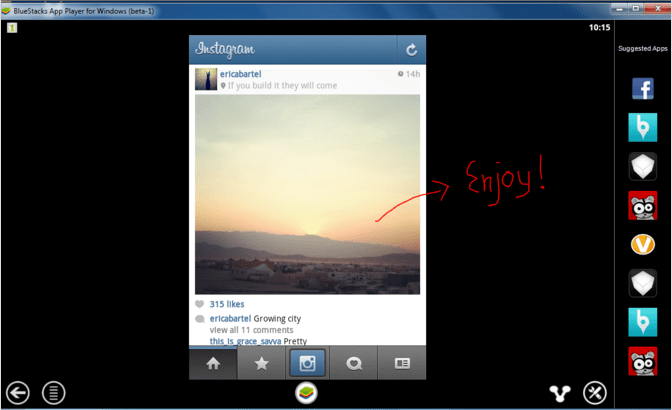 To complete this procedure, we need the following steps:
In addition to the appearance of your page, here you can edit contact information, settings, and even publications that pop up in the news feed. Some create multiple profiles to be able to keep a personal diary and a business account to earn money. The main thing is not to forget to save all the changes you have made in order for them to take effect.
We have already figured out how to view subscribers using this service. Let's find out how you can make new friends. Pay attention to the small window in the top panel of the site. It is for searching. We drive into it the login of the person we want to add as a friend, and we see a list of similar logins in front of us. We find the person we need.
If it is convenient for you to use Instagram from a computer, then you will probably want to send private messages through this network, that is, use the so-called Direct (Instagram Direct). You can do this in two ways.
The official app for PC allows you to easily write to Direct from your computer.
It is very easy to handle.
By the way, you can attach a photo uploaded from a PC or taken with a camera to a text message. True, in the second case, the picture will be without processing. If you want to apply Instagram branded filters, you need to select a post in "photo" format.
BlueStacks is a PC emulator that recreates the Android OS on your PC. Download it and start using it.
Since we are talking about this wonderful program, let's find out what else you can do with it from a computer.
Of course, you can upload an avatar and any photos using branded filters and settings. You can accept applications, find friends - absolutely everything that you did before from your smartphone. Moreover, you don't even have to do any unfamiliar and incomprehensible actions, because your Instagram will look exactly the same from a computer as from a mobile one.
How we update Instagram on PC depends on how we use this social network. All Instagram subscribers coming from a computer can be divided into two categories: those who use the official website and those who use additional services or programs. The official website of Instagram is good first of all because it is official and that actions with it do not require any additional gestures. And there will be no problems with the update here either: the site will update its functionality and inform you about it. It's the same with online services like Iconosquare - they update without you noticing. If you use any additional paid or free programs, then you will have to update them yourself. However, BlueStacks and other possible options are easy to update, they themselves request updates and remind you of them.