When uploading photos or videos to Instagram, you might have noticed that some content changes when you see it displayed on your profile. In fact, Instagram will resize, convert and/or compresses your digital files by default.
Although Instagram will upload your content with decent quality, there’s actually a way to improve them by restricting any sort of changes from ever occurring.
Note: At no extra cost to you, we may earn a commission for purchases using our links. Learn more.
While Instagram seems to try-hard to hide this feature by default, there’s a simple way to enable high quality uploads. Deep within the settings menu in your Instagram app is a simple way to change your upload preferences.
By enabling this setting, your photos and videos won’t experience any change in quality when you upload them. It’s possible to change this setting on Android or iOS; the instructions for each are similar but slightly different. See below.
iPhone or iPad users will need to follow these instructions to enable high quality uploads:
1. Tap the Instagram icon on your Home Screen to launch the app.
2. Tap your profile icon in the bottom right corner so you’re viewing your own profile.
3. Tap on the three dashes in the upper right corner. This will pop-up a list of more options.
4. Tap “Settings” at the very top of the list.
5. Tap “Account” and then “Data Usage”. Alternatively, you can simply search for “Data Usage”.
6. Now, you will see two options. Click the toggle button next to “High Quality Uploads” so the button turns blue upon activation. That’s it. Now your uploads will be higher quality regardless if you’re using cellular or WiFi connectivity.
The process is quite similar but not exactly the same for Android users. Follow these instructions to enable this setting on the Instagram app for Android:
1. Tap the Instagram icon on your Home Screen to launch the app.
2. Tap your profile icon in the bottom right corner so you’re viewing your own profile.
3. Tap on the three dashes in the upper right corner. This will pop-up a list of more options.
4. Tap “Settings” at the very top of the list.
5. Tap “Account” and then “Cellular Data Use” towards the bottom of the list. Alternatively, you can simply search for “Cellular Data Use” back in the Settings menu.
6. Now, you will need to activate the toggle button next to “Data Saver” to unblur the “High Resolution Media” setting directly below. Once you do that, it will let you choose from three options: never, WiFi only or Cellular + WiFi.
Choose “Cellular + WiFi” and now, regardless if you’re connected through your cell service or WiFi, the Instagram app won’t change your uploads or even attempt to compress or distort any of the content you view.
As you can see, regardless of the type of device you’re using, enabling high quality uploads without any restrictions is actually quite easy. Keep in mind, however, that regularly uploading high resolution photos or videos can quickly use a lot of data. In fact, it can easily diminish any data usage you may have through your cell phone or Internet provider. Even browsing around with these settings activated can make a huge difference in your data usage. By enabling, you’re basically telling Instagram to give you the highest quality content without any regard for the amount of bandwidth you’re using.
To be honest, most users won’t find a huge difference by activating high quality uploads on Instagram. Given how advanced Instagram’s default compression algorithm works, the changes they make to your photos and videos are hardly noticeable. But if you have a large following or you’ve got a knack for providing the highest possible quality, it’s a setting that you’ll probably want to keep activated. Either way, trying it out for yourself is the best option.
If you try these settings activated for a few days and you don’t notice a big difference, we recommend leaving the default settings activated. Ultimately, you’ll end up saving a lot of data usage and it may be for the best. After all, load times will likely increase with high quality uploads enabled, which could ultimately put a damper on your overall Instagram experience.
Regardless, learning new things with Instagram is fun and can be quite useful. Whether you’re a personal account user or a manager of a big brand, learning the ins-and-outs of Instagram is a great skill to achieve. Interested in learning more? Be sure to check out our other tutorials such as how to see a list of people you’ve requested to follow on Instagram or how to remove other users likes on your Instagram photos and videos. Enjoy!
Please consider sharing:
Note: At no extra cost to you, we may earn a commission for purchases using our links. Learn more.
This post is also available in: Deutsch Español
It happens to the best of us. You put all that effort into editing a stunning video, but when you upload it on social media, the results are disappointing. The video has lost quality, the image is cropped in unexpected places, and the end of the story is no longer there. A total fail.
It’s super stressful, for sure. But don’t worry — you’re not alone. In this post, I’ll show you how to upload videos on Instagram in the highest quality by following these simple steps.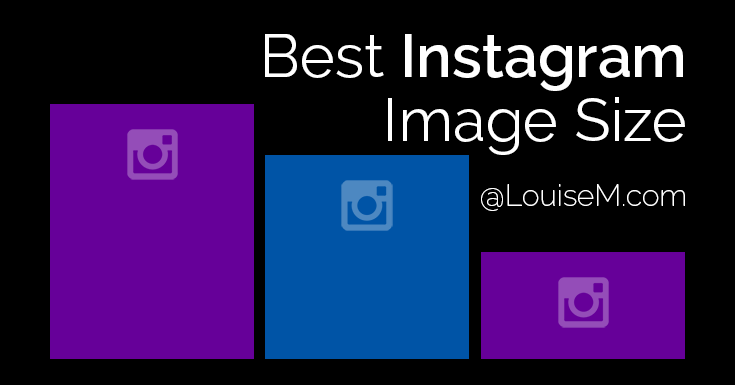 Different formats, stories, posts, IGTV, or reels, no matter — we’ve got it covered. Ready? Let’s go!
First and foremost, keep these two questions in mind when you’re out recording: What story do I want to tell? Where am I going to show it? If you follow these two maxims before starting a shoot, you’ll already have a good idea of the right framing and duration, among many other things.
https://www.youtube.com/watch?v=T71UL4zdjf4Video can’t be loaded because JavaScript is disabled: Así subes videos a INSTAGRAM sin perder CALIDAD en 2022 | HISTORIAS – REELS – FEED (https://www.youtube.com/watch?v=T71UL4zdjf4)
On Instagram, there are several ways to publish your content: Stories, Posts, Instagram videos, and Reels. In each instance, you can upload your video in high quality. To achieve this, you must create a project for editing — in Final Cut, Premiere, or any video editing program that you regularly use — with the correct size for each case. These are the main Instagram formats:
For Instagram Stories best video size is 1080x1920px.
Instagram stories have a duration of 15 seconds, and everything you’re going to do must be in 1080 x 1920 format. Many purists insist on putting 1920×1080 content in stories, but that’s very pretentious. As creators, we must adapt to the formats to create a pleasant viewing experience.
If you’re forcing viewers to turn their smartphones to the side, you better have a good reason. If you don’t, then NEXT! Get with the program.
For normal posts, there are two versions, and the maximum duration in both cases is one minute. The best sizes for Instagram post videos are:
Within this format, you can either put your video in 1920×1080 and simply click on the button that allows you to keep the proportions or edit directly in square format. If you do the above, choose the frame for your thumbnail wisely because the image will have a square crop. If you make a bad choice, it’ll end up looking ugly.
In addition to the traditional square format, we have the portrait option, which I like a lot because the information in your photo fills the entire screen, and you don’t have to compete for people’s attention in the feed (#win).
Instagram Video (IGTV)The best sizes of Instagram videos are:
IGTVs are ideal when you want to share content that is longer than one minute. If you want to make a short documentary, upload your band’s music video, or post a makeup tutorial, this is the format for you. This is usually content that is produced with some kind of educational value.
Here it’s really important always to try to adapt to the format. Elongated is the way to go, I insist. If you don’t want to shoot vertically because it doesn’t work for your story, you can use slugs or black bars at the top.
The best size for Reels videos is 1080x1920px.
You might have heard that Instagram created this format to reconquer the market niche that TikTok had taken from it. It’s short content, 3 to 30 seconds long, with a general focus on humor and repetition.
The tool was mainly developed to create content within the application, but you can also make the videos, edit them on your computer, and upload them from the reel.
Here are all video sizes and ratios you can upload to Instagram:
Video Orientation | Ratio | Resolution | Products |
|---|---|---|---|
| Vertical | 9:16 | 1080×1920 | Instagram Video, Story, and Reel |
| Square | 1:1 | 1080×1080 | Post (Feed) |
| Post-Vertical | 4:5 | 1080×1350 | Post (Feed) |
| Horizontal | 16:9 | 1920×1080 | Instagram Video |
Video Guidelines

Character Limits
Once you know the formats, the rest should be child’s play. You simply have to create a project in your editing program with the correct dimensions, adjust the video’s framing to keep the most attractive or interesting content in the shot, and export in high quality, usually with the H.264 video codec.
In my video How to Upload Videos on Instagram in the Highest Quality (Stories, Posts, and IGTV), you can follow the step-by-step guide for making the sequence and adjusting the sizes in Final Cut.
Premiere Pro and Final Cut have incorporated a new feature in their latest updates that automate this procedure, saving you many work hours.
In the latest version of Final Cut, it’s as simple as right-clicking on the sequence, selecting “Duplicate Project As,” renaming the project, selecting either vertical or square, and choosing the correct resolution. For example, the vertical needs to be 1080×1920, as we mentioned earlier. Voilà, the program has taken care of everything in just a few seconds, so all you have to do is a quick check to ensure it’s correct.
The same goes for Premiere. Instead of creating a new sequence and adjusting it manually, you just have to right-click, click on “Auto Frame,” choose the aspect ratio (1:1, 4:5, 9:16, 16:9), and the program will adapt your video just as you want it.
Once exported, you have to send your video to your phone. If you have a Mac and iPhone, I recommend using AirDrop because it won’t compress the files. If you have other devices, you can use Gmail, Dropbox, Google Drive, and even WeTransfer, which allows you to send up to 2GB of content for free.
Once exported, you have to send your video to your phone. If you have a Mac and iPhone, I recommend using AirDrop because it won’t compress the files. If you have other devices, you can use Gmail, Dropbox, Google Drive, and even WeTransfer, which allows you to send up to 2GB of content for free.
What I do NOT recommend is using WhatsApp or Facebook because they compress the file, and you’ll be back to square one: a horrible-looking video! Don’t be that person.
If you follow these recommendations, the resolution of the video will be maintained. You can then admire how great it looks on your Instagram. Remember to choose a thumbnail you like for the post, and that’s it!
The Instagram app on your iPhone or Android smartphone device is set to save data when uploading videos; for that reason, Instagram lowers the quality. The way to avoid this is by activating the high-quality upload option.
To do this, go to the settings menu, then to account, data usage, and activate the option of High-quality uploads. It may take a little longer to upload your videos, but it will be worth it.
It’s pretty simple, right? The trick is to use the correct sizes, quality, and duration to get the right results. So now you know how to post awesome videos on Instagram.
Anna Frantsuzova
Telegram bot that tracks your parcels? We did it! It's 100% free and 1000% convenient! Add while it's free - @otslediposylkubot (https://t. me/otslediposylkubot)
When uploading a video to Instagram, it does not look as perfect as popular bloggers, what's the problem? This question worries many users. Note that there is no 100% information that would help make your videos excellent, but we will try to suggest you some effective methods to improve the quality. After all, one can hardly argue with the fact that videos uploaded to the feed in poor quality are unlikely to get a lot of likes, and it will not be very pleasant to watch them.
We will not talk about how to make a beautiful video, because this is a separate and rather extensive topic. Your video is already there, and you just need to upload it in good quality.
Contents
 Instagram secrets (1 video)
 Today, Instagram can handle the vast number of different video formats uploaded by users of this social network. Are there any tangible differences in what format the video will be uploaded to? Many believe that this is precisely the reason for poor quality. Since your video will be recoded in this social network. Let's discuss several known formats.
Let's take a look at the various formats that are most commonly used in shooting and processing. We will not discuss the formats that are used in professional photography.
The video file format is the structure of information storage in the file itself.
If we consider all the formats and final results in this social network, then there are no tangible differences in the quality of the formats. They do not affect the video quality in any way.
So, what affects the quality? Bitrate refers to the amount of data that has been transmitted per unit of time. The quality of the video depends on the bitrate. But the user in this social network cannot change the bitrate at will.
Note that at a bitrate of 1000 kbt/s, the decrease in quality is most noticeable. Before posting the video, make sure that it is always with a bitrate of more than 3000 kbt / s.
Also, shooting at the highest resolution will help to improve the quality of the video. After all, Instagram uses square video formatting, which is relevant when the composition of the frame when shooting was conceived as square or vertical, which rarely happens in reality. Let's try something in between a 1:1 and 16:9 picture. Cropping in this situation takes up a large screen area of the smartphone, and most importantly, does not lose detail, which ultimately helps to visually improve the clarity and image quality.
Recommended format 2048x1556. It does not eat up 50% of the frame, as it happens with 1:1.
This method is not always relevant, but it may suit many users.
Note that contrast also helps visually improve image clarity. This happens due to color and light differences between areas of the picture.
Also, in order to improve the quality of a video on Instagram, there is one simple method: increase the sharpness. Such a tool is available in any video editor.
So let's summarize. To make the video quality better, you need to:

We hope that now, knowing how to improve the video, you will no longer upload bad quality videos to Instagram.
a present for you! Free telegram bot for tracking packages - @otslediposylkubot (https://t.me/otslediposylkubot)
Hypnotist Theme by Sandip Sekhon
Author Aleksey Krokhin Reading 3 min
There are three ways to add a video to Instagram: through the "Create publication" button, by sharing through the Gallery or by publishing from other applications.
Contents
To upload a video to Instagram, you need to make sure that the clip meets the technical requirements of the social network. So, some formats will not be added due to different encoding.
How to publish through the official application:
Also, videos can be added to Stories, uploaded to IGTV and shared using the carousel.
The second way to post a clip on Instagram is to share it from the Gallery.

Next, Instagram will open, where you can upload the video or share it in Stories. Also, the section will be opened: "Description" and functions necessary for the design of the clip. Please note that you can only post videos that are less than one minute long.
Uploading video to Instagram without quality loss is possible through third-party applications that change the clip encoding. Or, improve the quality with the tool: Sharpen.
Which apps are suitable for adding videos to Instagram:
But the user should not forget that it is impossible to improve a obviously low-quality clip. Only improve the quality if the video was compressed when posted on Instagram.
How to use 4K Video to improve quality:

The application offers a level from 720 to 1080 FullHD, as well as other settings that the mobile device supports. Editing is available using filters and visual objects.
When adding video to Instagram, the application compresses any files. That is, if the user has a maximum video size of 400 MB, 200 MB will be uploaded to the social network. This compression affects the quality and saturation of the shades.
Ways to fix the problem:
For example, if a user adds various color-changing effects to a clip, this will affect the size and upload on Instagram.