January 21, 2019 August 24, 2022 / By Harsh Agrawal / 6 minutes readDisclosure
Disclosure: This post may contain affiliate links, which means we may receive a commission if you click a link and purchase something that we recommended. Read more about Affiliate disclosure here.
622Shares
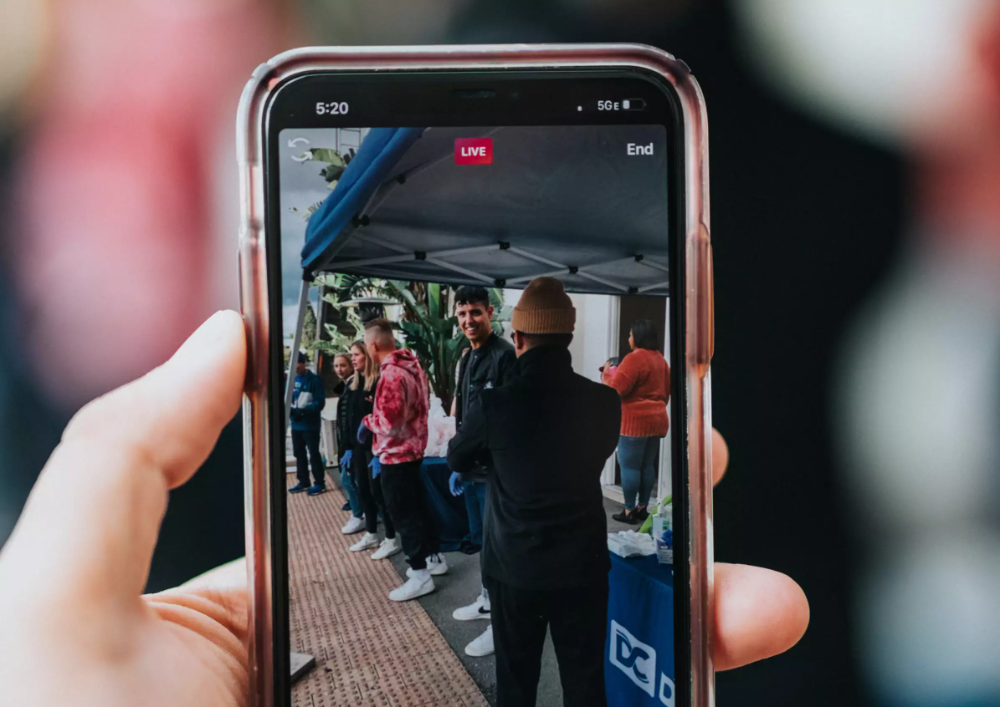
There is no denying the fact that videos have taken the digital world by storm!
And as a digital entrepreneur, your job is to ensure your social media subscribers receive a decent number of engaging content on a regular basis. And surveys suggest that the most engaging content is video.
Creating new video content is not usually as simple as text content. Videos typically take more time and resources.
But, I have a solution for you. A trick of sorts.
Curious?
Well, in this article, you will learn how you can LIVE stream existing videos to a Facebook page.
2020 Update: I have found Onestream to be a better alternative than OBS. The free plan let you schedule videos up to 5 GB, and 5 minutes. The paid plan starts from $10/month and offers a lot more features to amp up your live video marketing.
Page Contents
Recently a lot of new software has come out that let you stream existing videos on Facebook, and other channels as well. Here are some of the best pre-recorded live stream Software that are available.
Onestream is the most budget-friendly cloud-based tool that let you stream pre-recorded videos. They also offer a free trial, which is good enough for you to try out before you actually spend significant money.
Take free trial of Onestream
LiveReacting allows uploading pre-recorded videos and schedule streams to Facebook live.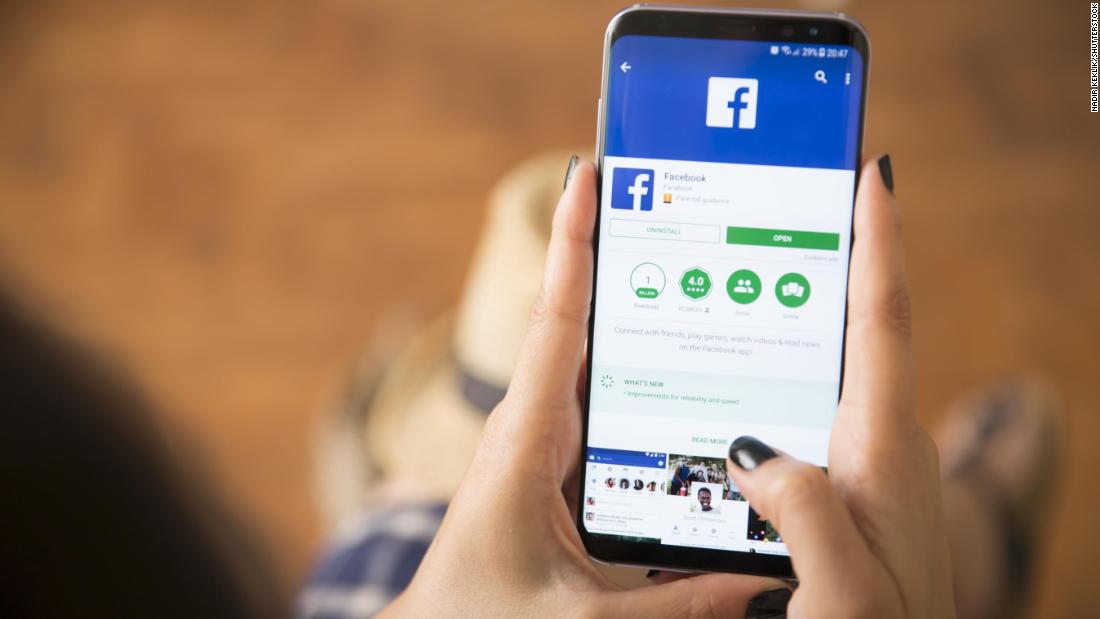 It’s fully cloud-based, so no third-party software is needed.
Besides simplicity and the ability to schedule your pre-recorded videos to go out automatically, LiveReacting provides additional unique features like adding your logo, lower third, and scrolling text right inside of your stream. You can also supplement your pre-recorded streams with countdowns, quizzes, and other fun, interactive elements to increase engagement even more.
Try Livereacting for free
Restream was started as a multi-stream tool (One video to multiple platforms), and now they do support option to live broadcast or reschedule existing videos for live streaming. The platform is easy to use, and they are offering $10 as a joining bonus.
Get $10 as joining bonus
This is idle for solopreneurs, influencers, or anyone who is looking to live stream from the desktop. Ecamm is a desktop-based software that let you live stream existing movies/videos from your desktop to Facebook pages, profile, and a few other platforms. There are various plans that you can pick from. For an individual, Ecamm live is perhaps the best solution. I’m currently using Ecamm live.
Try Ecamm Free
OBS is the only free solution that let you stream pre-recorded videos on Facebook. The configuration part is not as simple as the above three, but at the price of zero, we have nothing to complain. My tutorial below will help you learn everything about OBS, and how to set up for Facebook live streaming.
Download OBS Free
Because live videos get more visibility than regular videos, you will make your existing content reach more people.
Just follow the steps below to live stream any of your existing videos from your desktop to your Facebook page.
The first thing you need is the “Stream Key” from your Facebook page. This is a unique key that every page has. It enables us to use the streaming software we need.
Here is how you can get it:
You will see a pop-up. Copy the “Stream Key”.
As per Facebook: Keep the Stream Key a secret. Anyone can use them to stream videos to your post. This stream key is valid for seven days. Once you preview the video, you have up to 5 hours to go live. If you need more time, create a new stream key.
Do not close this window. After we configure the streaming software, we will use the screen above to go LIVE.
Now, click on the + icon in the Sources field and select VLC Video Source.
Now, we need to create a playlist. This playlist could consist of one video or more. It depends entirely on your goal. For this tutorial, I’m streaming only one video.
On the next screen, you should configure how you want the stream to happen. For example, live streaming should work only when the software is running in the foreground, or you can set it to stream even when the software is minimized.
In my case, I’m letting it stream even after the video is minimized by using the option “Always play even when not visible”.
You can add as many videos as you like by clicking the “+” icon.
If you have followed all the steps mentioned above, you will see a screen like this:
You should test this first as a trial video to get the hang of how OBS and this whole “pre-recorded live streaming” thing works.
However, there are a couple of issues that you may face:
OBS is indeed one of the best free solutions for live streaming pre-recorded videos. There are also many other solutions that offer advanced features which could be better for any digital marketing companies acting on behalf of a client.
Here are some popular (paid) solutions:
 live
liveFor a blogger or startup who is looking for a free solution, OBS is the best bet.
Go ahead and stream some of your existing videos on your Facebook page. It may take 2-3 times before you get the whole process right, but if you follow these instructions, you should have no problem.
After you try, come back and let me know how it goes. I look forward to hearing about your experience!
Also, read:
Subscribe on YouTube
622Shares
Authored By Harsh Agrawal
A Blogger, Author and a speaker! Harsh Agrawal is recognized as a leader in digital marketing and FinTech space. Fountainhead of ShoutMeLoud, and a Speaker at ASW, Hero Mindmine, Inorbit, IBM, India blockchain summit. Also, an award-winning blogger.
STREAM NOW
Multicast to 40+ streaming networks including Facebook Live, YouTube, Instagram, Twitter, Wowza Media Systems, Twitch &
Schedule your pre-recorded videos for live streaming to social media up to 60 days in advance
Read more
Use any streaming tool like OBS, Zoom, Ecamm, Webex, Wirecast, XSplit, etc and start multistreaming across social media
Read more
Live stream on your personalized web page with Live Spaces, whether or not you have a personal website.
Read more
Queue recorded videos in any order of your choice and schedule them to go live on multiple social media streaming platforms
Read more
Configure & stream to your own Custom RTMP streaming destination using Server URL & Stream Key
Read more
Import videos directly from any S3 or cloud storage from across the world and save your internet bandwidth - Google Drive, Dropbox, OneDrive, pCloud, Zoom & Webex recordings, Box, Frame.io, S3 Amazon, etc.
Read more
Upload videos stored in your computer, use camera to record yourself or capture your screen to live stream later
Read more
Manage your team members to collaborate and live stream more efficiently
Read more
Efficiently manage incoming messages, comments & replies from multiple streaming platforms on a single screen.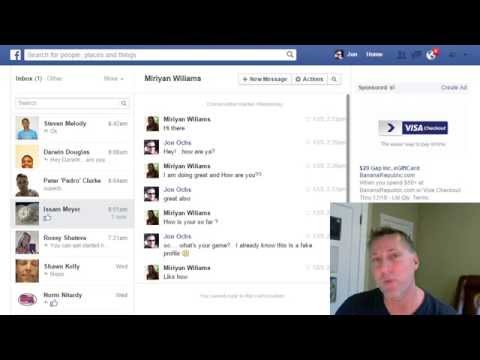
Read more
GET STARTED for FREE
Pre-recorded Streaming Recorded Streaming
1
Copy your Server URL and Stream Key from OneStream dashboard.
2
Setup external streaming software like OBS, Zoom, Webex, Ecamm, Wirecast, XSplit, etc. and start sending stream to OneStream servers.
3
Select streaming destinations. Choose multiple destination streaming platforms where you wish to multistream your incoming stream.
OneStream is a cloud based service to schedule & live stream pre-recorded videos as well as real-time streaming to 40+ social media platforms including Facebook Live, YouTube, Instagram, Twitch or any Custom RTMP Streaming Destination.
With powerful scheduling & multistreaming features, it is designed to cater businesses involved in marketing & live streaming. Though anyone can use it.
OneStream allows all the major video formats and qualities. Don't worry, our server will transcode your video to the required specs for live streaming to the destination platform.
Have a look at OneStream Resource Hub for frequently asked questions. Email or chat with us live to know anything!
Ask our Support team
Resource HubEMAIL US
Gain detailed insights about your live streams performance and user engagement.
Save your videos and use them to reschedule your streams. Save your time and bandwidth.
Go live even with recorded 180° or 360° videos. Engage your viewers like never before.
Go Live Now
Facebook already has over 2.3 billion users, and 80 million of them are SMBs. Facebook for them, if not the only one, then one of the key points of contact with consumers in the social media universe. For some brands, the Facebook page even becomes the main platform: here they talk about themselves, immediately communicate with the client, announce events and sell goods. If most often the first meeting of a consumer with a brand on Facebook takes place in the feed - through an advertisement or a post shared by friends - then a detailed acquaintance begins with the profile page.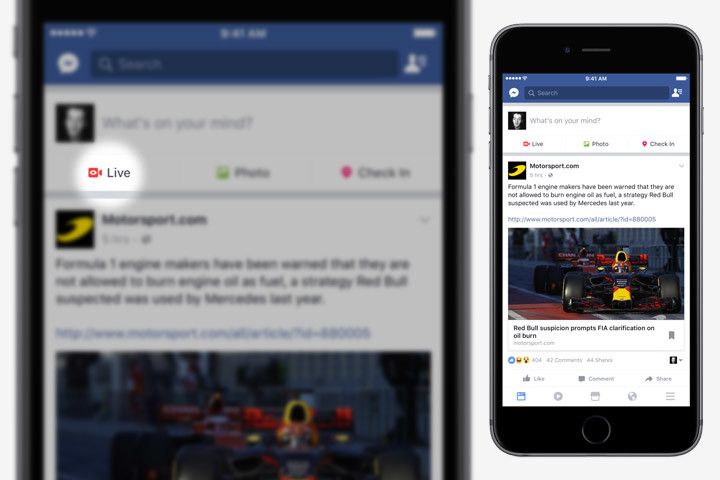 And the page, in turn, begins with the cover. Let's figure out how to make a Facebook cover video that will help create a good first impression, be informative and truly exciting.
In order for the dynamic cover video to load and display properly, the recommended cover video size is by 820 x 312 pixels . This is the minimum allowed size. But it's still better to use a video size of 820 x 462 or 851 x 315 pixels . If the dimensions and proportions are larger than recommended, don't worry - during the addition, you can select the desired part of the video to display, and the excess will be "hidden". Facebook cover video format is not limited to pixels – length and weight are also important. Roller must be from 20 to 90 seconds - files longer or shorter than Facebook will simply not be allowed on the cover. In addition, the video must be of high quality - 1080p . If you don't want to overwhelm users with information, you can simply duplicate a short video element (for example, make a 10-second video with two repetitions). That's what WeWork did
: Source: WeWork page
Having dealt with the technical part of the process, we move on to the creative one. With this, everything is much more interesting - there are no rigid frameworks and limits. You can create an extremely ascetic cover or organize an explosion of colors and emotions - everything is appropriate. Most importantly, start from the style of your brand and the tasks that the cover should solve. With the help of a motion cover, you can, for example:
Tip #2. If you don't have a separate Facebook cover video, use a pre-made dynamic brand video that conveys the brand vibe in a concentrated manner. This is what Red Bull did:
Source: RedBull page
Video covers grab attention by default - even today this is unusual because many brands (including the biggest ones) still use static. In order to use the attention of subscribers to the maximum benefit, when creating a cover, rely on the following basic principles:
 A high-quality and creative, but completely disconnected from the main story video will confuse subscribers.
 Tip #3. Don't overload your cover video with details and use simple animation if you can't make a cool studio clip.
Source: M&M's page
To put a video on the cover, you can either select the desired file from those already uploaded or add a new one. These options open when you click on the "Change cover" button in the upper right corner of the cover. If you don't have the budget or time to create a clip, use Facebook cover video templates. There are more than 1000 of them in VistaCreate (and the collection is constantly updated), for any task and purpose.
Here is a step-by-step guide on how to make a professional cover based on a template in VistaCreate:
Step 1. Select a template
Select a template with a design of your choice from the gallery on the left.
Step 2: Customize the design
Once you've chosen the template that best suits your theme or style, move on to editing. You can change everything from colors to objects and photos. Usually they start with text, VistaCreate has several hundreds of Latin and Cyrillic fonts and it is possible to upload your own. You can add not only static objects, but also videos. Select a video from the VistaCreate media collection or upload your clip to your My Files folder and replace the video from the template with one click. If you're adding your own video to VistaCreate, make sure it's in MP4 or MOV format and doesn't exceed 200MB. The size is not so important - you can move the video and choose which part of it will be displayed in the template. The minimum video length is 3 seconds, and the maximum length is 60 seconds, but it can be trimmed directly in the editor.
Step 3. Download the design
After changing the design, you can download it in MP4 format by clicking the corresponding button at the top of the editor interface. If you want to show the design to the team, click "Share" and select the "Send Link" option. Editing even the most complex video template usually takes no longer than 10-20 minutes - depending on how many changes you plan to make. It's much easier than putting together the right file in a video editing program and definitely cheaper than hiring a professional designer for this task. To make it easier for you to get started, we have compiled a selection of 20 of the most interesting templates. You can start creating your cover video or animation right now.
[button text="Use Template" url="https://create.vista.com/artboard?template=5c6c268085ea3c16f9ead02e/" background="red"/]
[button text="Use Template " url="https://create.vista.com/artboard?template=5bcdc54778e1194aa6524caa/" background="red"/]
[button text="Use Template" url="https://create.vista .com/artboard?template=5bfd30d68caf671e1cd7294d/" background="red"/]
[button text="Use Template" url="https://create. vista.com/artboard?template=5c13adec133a785392e84104/" background="red"/]
[button text="Use Template" url="https://create.vista.com/artboard?template=5bd8502378e1194aa6e58179/" background="red"/]
[button text="Use Template" url="https://create.vista.com/artboard?template=5bfc23e08caf671e1c267605/" background="red"/]
[button text="Use Template" url="https://create.vista.com/artboard?template=5bcdc21078e1194aa64829e5/" background="red"/]
[button text="Use Template" url="https://create.vista.com/artboard?template=5b7c25f11cc8aa5429258dc0/" background="red"/]
[button text="Use Template" url="https://create.vista.com/artboard?template=5b91004818654940f72e13c3/" background="red"/]
[button text="Use Template" url="https://create.vista. com/artboard?template=5b7d84f81cc8aa5429cab4c3/" background="red"/]
[button text="Use Template" url="https://create.vista.com/artboard?template=5b869eb21cc8aa5429b7b2cb/" background="red"/]
[button text="Use Template" url="https://create. vista.com/artboard?template=5b7c21721cc8aa54290601dd/" background="red"/]
Read our article on how to design social media for business without a designer, and go to a collection of 25 free Facebook cover templates. They let you combine video and GIF images to create something more immersive than a still image.This latest breakthrough in photography does more than freeze a moment in time.It breathes energy into your photos.The fun part is that you can post them on your social media accounts like FB and Instagram.Let's see how to post Live Photo on Instagram and Facebook from iPhone.0003
Yes, you can upload Live Photos taken from your iPhone to Instagram. But to do this, you will need to convert the Live Photo you have taken into a video and then share it on your Instagram feed.
Note. Live photography is only available on iPhone 6S and later.
Here is our blog post to help you convert Live Photo to Video.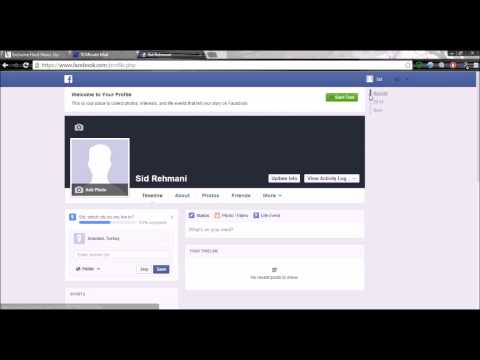
Programs for Windows, mobile applications, games - EVERYTHING is FREE, in our closed telegram channel - Subscribe :)
Now the captured live photo can also be converted to loop, bounce or long exposure according to your requirements.
 Now click on the share icon and select save as video.
 Your clicked image will be saved as a video.
Now to upload the converted video to Instagram. Follow the steps below:
Now, if you have already synced both apps, when posting a video of the post to Instagram, you will see the option to directly share the post to the Facebook app. You can turn on the toggle to pass the same to FB.
Follow the steps above to take a Live Photo.
You are now ready to place this in your story. And if you have directly synced your Facebook with the Instagram app. Directly click on "Your Stories" in the bottom left corner, there you will see the Facebook icon and profile photo. When you click on it, your boomerang will be available on both social media apps.