Instagram is one of the relatively new ‘visual’ platforms that, for those focusing on the written word, is a bit challenging to make headway on. We don’t have gorgeous products or interesting scenery… we have blog posts, right?
But Instagram, like every other social network, does have potential for certain bloggers who want to make a little effort to leverage it. And I’m going to tell you exactly how.
And the good news is, while we’ll be reviewing quite a number of techniques and processes, the amount of time required to promote an individual post to Instagram is relatively minor… likely a few extra minutes. Is that worth it? Let’s discuss that.
Now, bear in mind that how each individual uses and experiences Instagram depends in large part on who they’ve chosen to follow. That said, most of us probably have Instagram feeds filled with selfies and family photos and food porn. With its tight integration with Facebook and fun filters, it’s incredibly easy to snap a fun, candid photo, edit it a bit, and then share it with your friends.
But suppose for a moment that, instead of connecting with friends and family, you instead used Instagram to connect with peers and colleagues, influencers and readers.
And suppose that you regularly posted an image associated with your latest blog post, inviting your followers to read it?
Oh but wait, you can’t include working links within image descriptions. So this must all be a waste of time.
Here’s where Instagram gets really interesting.
Yes, you cannot include links within individual image descriptions. That means that, in order for someone to get to your site or blog or post, they’re going to need to use the link within your Bio.
That’s right. Someone that sees an image you’ve shared and is interested in reading the corresponding blog post is going to have to read the description, tap on your Name to get to your Bio, tap on the link in your Bio, and then find your blog post and tap the title to open it up on their mobile device.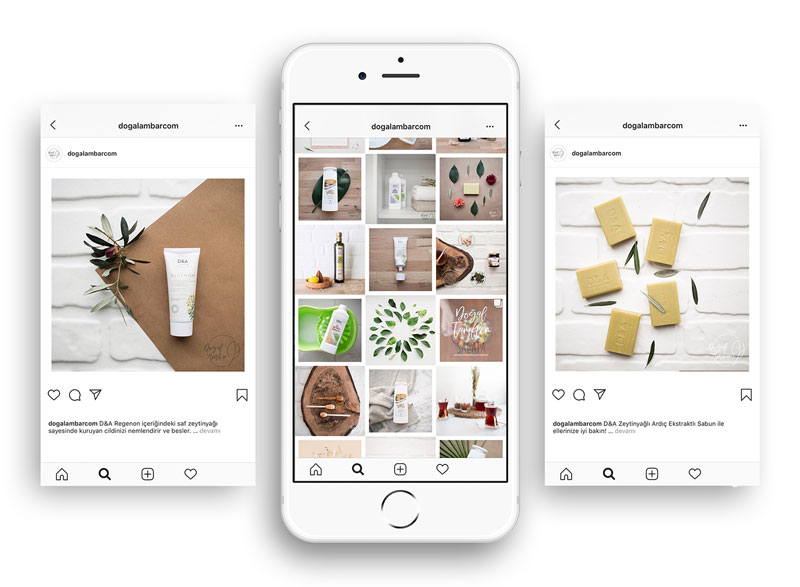
Who’s crazy or bored enough to do all that!
Quite a few people, it turns out.
While actual numbers will vary of course with the blogger and blog post, bloggers who have tried to leverage Instagram have been pleasantly surprised. While the referral traffic won’t rival other social networks, what’s interesting is how interested those readers really are.
I mean, think about it. If they were willing to jump through three hoops just to get to your content, they must really want to read it, right?
And the metrics back this up.
When one compares the traffic from Instagram to the traffic from other sources and campaigns, it’s clear that the Instagram users tend to read the entire article, spending more time on site than others. And they’re interested in clicking around to other content as well.
During a one-week test, I observed on my own blog that readers from Instagram spent twice as much time on site and were 40% less likely to bounce off the page.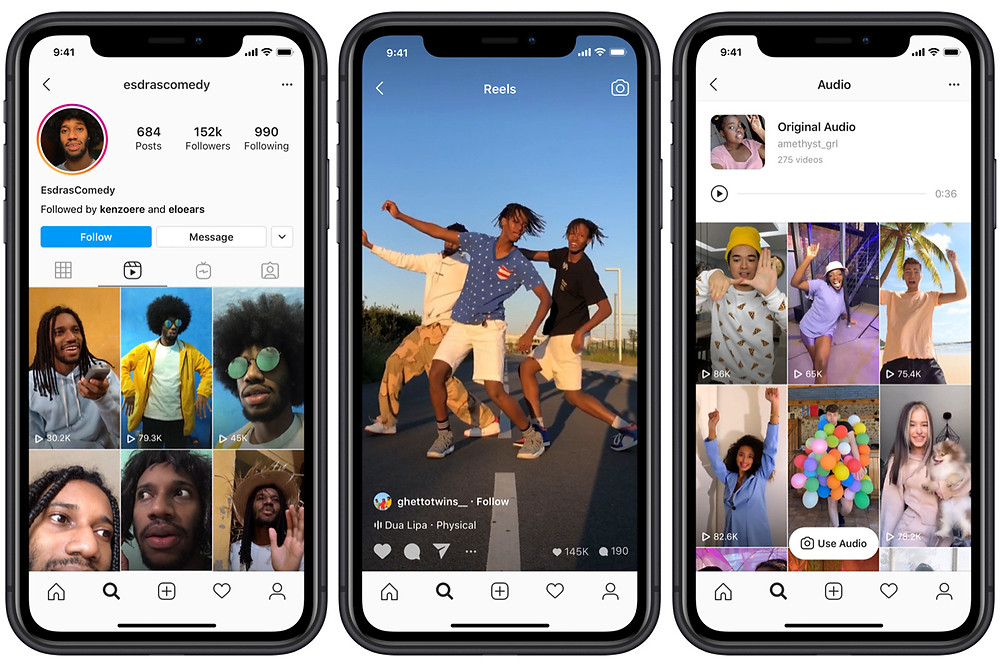 (Though to be fair, this low bounce rate is largely due to the fact that we’re sending followers to the Home page, and they need to tap another link to get the content they’re interested in.)
Editor’s Note: Google Analytics now tracks Instagram referral traffic correctly. Using the advanced UTM parameters below will simply help you qualify that traffic.
But there’s another problem. It’s not inherently obvious how to measure this traffic, since you won’t see it within Google Analytics alongside your other social networks.
You see, on desktops, when someone clicks a link within, say, Facebook, to go to your site, it opens your article in a new window and Facebook is attributed as the source of that traffic.
And on mobile, if someone clicks on that same link within Facebook, Facebook actually displays the linked content within the Facebook environment, so that while the traffic is credited differently, it’s still attributed to Facebook.
Instagram, on the other hand, is primarily a mobile app experience, and instead of opening content within the app, it uses your default mobile browser.
That means that most Instagram traffic today is being recorded as direct via Safari or Chrome. Anything but Instagram.
In order to accurately gauge Instagram traffic, you have to put a tracking link within your Bio, rather than just a straight URL for your blog.
For instance, I used to use http://www.TheSocialMediaHat.com and just told people to tap on my Bio and tap the link to get to my blog. While that worked for readers, it gave me zero data on actual traffic and readership from the platform.
Now, instead, I’m using a shortened tracking link that I built within Bit.ly. By using a Bit.ly shortened link, I can run a report within Bit.ly that shows me exactly how many times that link was clicked.
Within your Bit.ly dashboard, click on Analytics in the left sidebar. Next, click on the report for URL Click Stats where you’ll be able to paste in the Bit. ly link you created and have a report running that emails you every day, week or month how often that link was clicked.
But I took it a step further.
While you can certainly use whatever link shortener you prefer to shorten your blog URL and use that in your Bio, I wanted to tie the results into Google Analytics where I can not only view the results, but also compare them to other sources and campaigns. That means tracking tags needed to be added to the URL.
Within Agorapulse, go to the Compose field where you’d post a new status update, and put your URL in the URL field to shorten it. But before proceeding, click on Advanced.
Here I can add standard UTM (Urchin Tracking Module) tags that will provide Google Analytics with additional information about where the traffic comes from.
You see, if you don’t do this, while the Bit.ly link report will tell you clicks, your Google Analytics data will still be inaccurate.
With Agorapulse’s help, I can make that shortened link include Campaign, Source and Medium values.
The resulting shortened link can be inserted into your Instagram Bio (since you’re building the link on desktop, presumably, note that you can go to http://www.instagram.com and log in and edit your profile there) and the next time you share a blog post, you’ll begin to see results in your analytics.
If you don’t blog often, and really want to make it easy on followers, you can certainly replace this URL with that of a specific blog post or article. I’ll do that from time to time and use a branded shortlink.
UPDATE: Third Party tools like Agorapulse can now publish, schedule and queue posts directly to Instagram.
I think the number one reason most bloggers don’t think to share posts to Instagram is the simple lack of a share button, right there on the blog, staring us in the face and asking, “Why, Mike? Why haven’t you shared to me lately?”
Ok, maybe that’s just me.
But really, just as followers on Instagram have to jump through a few hoops to get to your post, likewise you need to jump through a few hoops to get that post on Instagram.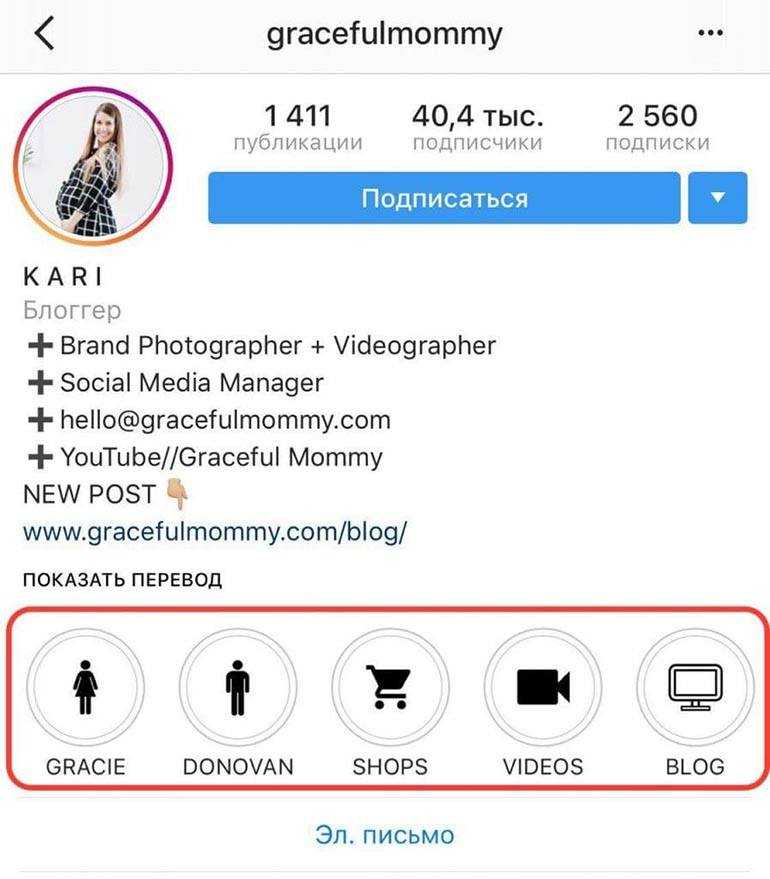
This in and of itself is probably not too challenging… just not easy to remember. You need to make this part of your Blog Promotion Checklist.
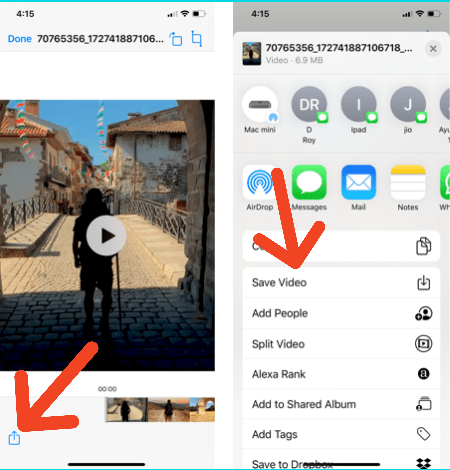
If your blog post already has a great image that’s suitable for sharing to Instagram, you can likely visit your blog on your phone once it’s published, tap and hold the image, and select Save Image to save it to your camera roll. (Specific steps may vary depending on your phone’s OS.)
Now, simply open the Instagram app on your phone, tap the center button in the bottom row, and then tap the thumbnail image in the lower left. This will open up your camera roll and allow you to choose an image from your phone.
Tap Next and you’ll have an opportunity to apply filters and other image edits.
Tap Next and you can add a description, tag people, and even share to other social networks.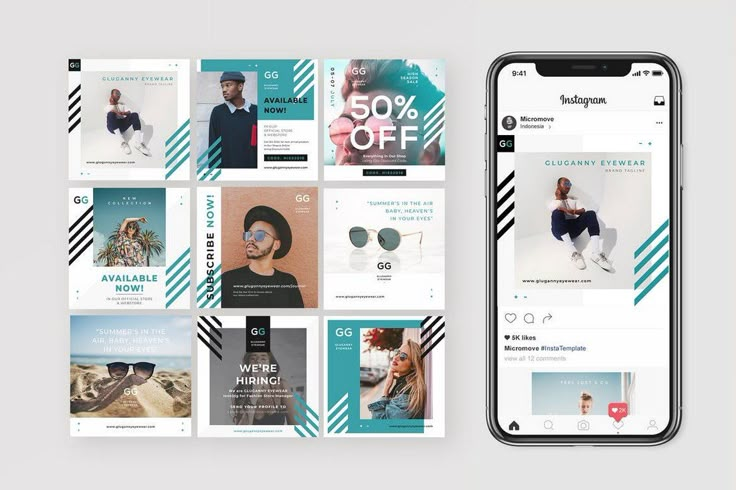 The caption is where you must explain that this is a new blog post, and that followers can get to it through the link in your Bio. I also avoid sharing these posts to Facebook or Twitter, since I’ve already shared the blog post there in a more optimal way. However, I do share these images to Flickr.
Click Share->
Now that we’ve covered the basics, let’s cover some additional tips and techniques, as well as some questions other readers have mentioned.
Q: What’s the Ideal Size to Share To Instagram?
A: 612 x 612 square is the ideal size. That means that, if you upload a portrait or landscape image, it will need to be cropped and resized in order to fit. Instagram will automatically do that for you as soon as you select it, but depending on the image, that might night result in an ideal image.
Q: Should I Create Instagram-specific Images?
A: That certainly depends on you and your normal blog post images. Personally, I use a Landscape format for my blog post images that I know looks great on Google+, Twitter and Facebook. And then within the graphic, I always limit the text to the center 50%, which means shares to Instagram cut off the right and left, yet leave the center. So my images generally look just as good on Instagram. If that’s not the case for you, I’d recommend building images using PhotoShop or Canva where you can resize blog post images easily and create alternate images for Instagram or even Pinterest (where large portraits are preferred).
Q: How Can I Get Other Images On My Phone For Instagram?
A: Ok, suppose you did create an alternate version of your blog post image just for Instagram. How do you get it on your phone now? My suggestion would be to use a Google Drive or Dropbox. You can drag the image from your desktop into your cloud folder, and then open the appropriate app on your phone. Depending on the app, there’s likely a Share button you can tap and then tap Save Image to put it on your phone.
Q: Should I Filter Blog Post Images?
A: Too much editing and filters and you risk taking away from your image and point, particularly if you’ve already adequately branded your blog post image.
Q: How Should I Describe My Blog Post and Image?
A: Definitely don’t describe the image itself, like you normally would on an Instagram post. Instead, focus on the blog post and content. What topic are you covering and what questions are you answering? While you can certainly include the title, if it’s on your blog post image it may be redundant to state it in the caption. I do like to start mine with “NEW BLOG” just to clue followers in that this isn’t just any other image.
Q: How Many Hashtags Can I Include?
A: As Many As You Want. Seriously. Ok, technically, there’s a limit of 30 total hashtags at any given time, including both the caption and any comments. But that’s a lot! Instagrammers do not care how many tags you use on a post. Use any related hashtag you can think of. But note “related” – it is still important that you don’t stuff the post with hashtags that have little or nothing to do with your image and content. That’s a great way to tick off potential followers. But if you do use a number of great, appropriate hashtags, you’ll see quite a few likes and new followers from people who didn’t you know you previously as a result.
One tip I picked up from Social Media Marketing World 2016 was to use an app called Grama for iOS, that pulls in a lateral search for hashtags based on a given suggestion. Put in #entrepreneur and you’ll get a hundred results ranging from #business to #hustle and #mompreneur.
So, let’s review.
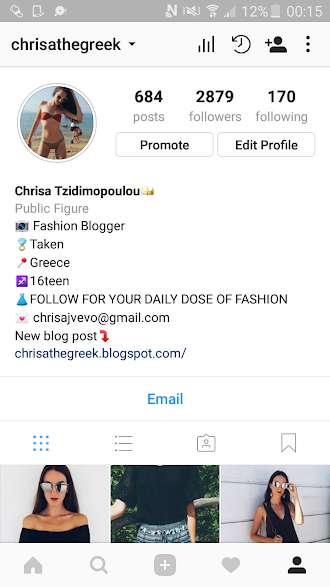
Before you start sharing posts to Instagram, make sure that you’ve put a shortened tracking link in your Bio so that you can measure performance. You might also take that opportunity to make sure you’ve got a great profile image and excellent description, since you’re going to be asking people to check out your profile with each new blog post. Then,
Then,
NEW BLOG! You may have seen the latest round of obits for Google+ this week. If you’re concerned about the future of the network, and would like a review of the facts and events, tap the link in my bio read more! #googleplus #socialmedia #news #business #smb #socialnetworking
A photo posted by Mike Allton (@mallton) on
Of course, sharing great content to Instagram, or really any platform, where you haven’t taken the time to develop a strong following and great relationships will be fruitless. Sure, if you’re just getting started, you can’t expect too much in terms of interest and referral traffic. But over time, if you’re working at it, I think you’ll appreciate the results.
If, like me, Instagram isn’t a platform on which you want to focus a lot of your effort, that’s OK. You can and should share your latest posts, just as we’ve described above. But you’re also going to want to monitor your activity like you would any other network.
Log into Instagram at least once a day to review the performance of your latest posts, and look for opportunities to thank or respond to other readers and users who tool the time to share or comment.
For more training on Instagram, including access to a private group and library of resources, you need to join Jenn Herman’s course at Jenn’s Friends.
If you’d like to do even more with Instagram. If you see that network as having a very strong relationships between its demographic and your target audience, here are some excellent articles for you to read from people I unequivocally trust when it comes to Instagram:
With time and a little work and creativity, your Instagram feed can look like this:
For updates and more articles like this, be sure to subscribe to my newsletter. I send an email about once a week with unique, “only for my community” information, plus links to the blogs and articles I’ve written here and elsewhere since the last email.
RELATED: How To Start A Blog: The Ultimate Guide
Want to save time with your social media activity and yet get even more results? Use the #1 rated social media management tool, Agorapulse, and as a friend of Mike Allton, you’re eligible to receive your first two months free after trial! Go to https://www.Agorapulse.com/Allton to learn more and get started.
Bloggers, take note: Instagram is an amazing tool to grow your blog! You can artfully use the visual platform to drive targeted traffic to your blog with skillful use of posts, videos, and Instagram Stories.
However, finding the perfect mix of methods and tools to grow your blog and get those traffic numbers can get tricky if you’re just starting out! 🤔
That’s why we’ve put together a few easy tricks showing you exactly how to use Instagram to promote your blog. By putting these simple practices in place, you’ll be driving targeted traffic from your Instagram content to your website in no time at all! ⏱
Ready to clear the roadblocks from your Instagram-to-website traffic? Let’s get your blog growing! 🚗💨
Struggling with getting your Instagram followers to visit your website? Why not try a FREE link in bio tool they can’t resist?
Introducing Smart.bio by Tailwind, the most advanced linking tool now available on the market!
Skyrocket your web traffic today with your own FREE branded Smart.bio link!
One of the best ways to get your latest blog post in front of your Instagram followers is by using Instagram Stories!
Why? According to Vidmob’s 2018 State of Social Report, it’s where your followers are! Over 70% of Instagram users watch Instagram Stories every day, and the popularity of Stories isn’t shrinking anytime soon. Using Instagram Stories to promote your blog content is a great way to hook your existing followers. Plus, you can potentially reach all-new fan bases who will help your blog grow! Here’s how to do it:
If you caught our FB Live with style blogger Chloe Alysse, then you heard her spill an amazing tip about using multiple frames to catch your viewer’s attention when promoting a new blog post in Instagram Stories.
(If you didn’t, we strongly suggest you take some time to watch the episode below or listen to the podcast; it’s filled with amazing tips about creating engaging Instagram Stories!)
Chloe explained that she often spreads out important information over multiple Stories rather than piling all the details in one. The reason? Instagram users are usually tapping quickly through dozens and dozens of Stories, looking for something interesting.
If you put all the relevant information about your new blog post in just one Story frame, there’s a good chance that most of your viewers will see it for just a second or two as they get in the rhythm of tapping through.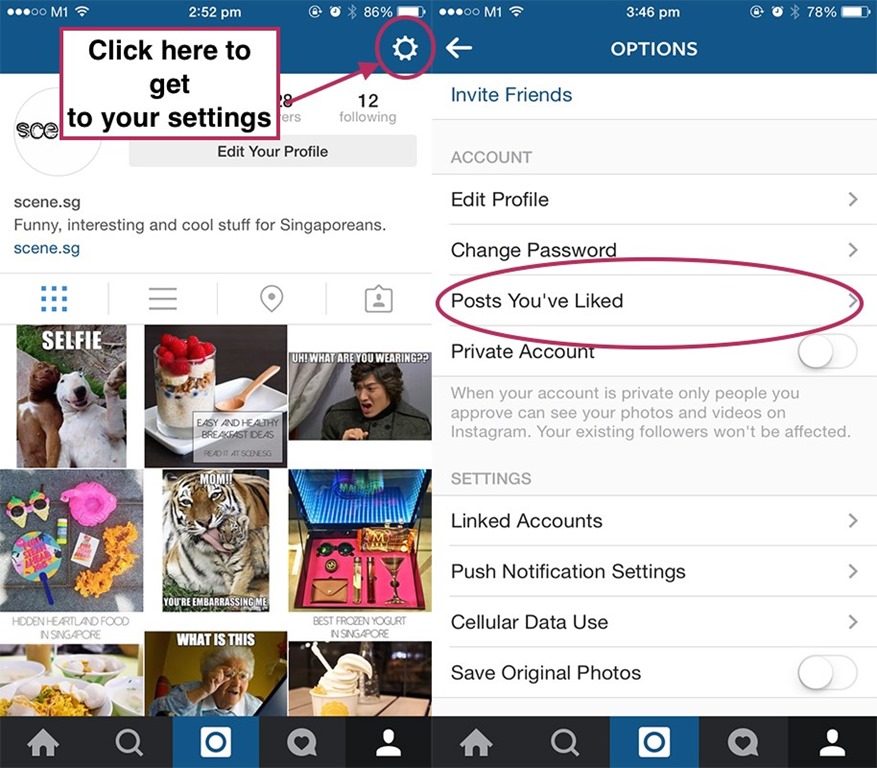
However, if you create 3-4 slides full of engaging visuals and a story building through each Frame, you have more of an opportunity to disrupt that automatic tapping and capture their attention.
If you do snag your viewers’ attention like this, they can then tap back to take your Story in from the top! Then, if you have over 10,000 followers you can use the Link in Stories feature to promote your blog post and take your followers right to it while it’s still top of mind!
If you don’t have Link in Stories quite yet, growing your blog from Instagram is not a lost cause. There are some handy workarounds to drive your followers to your link in bio, a handy tool that also makes a huge impact on the growth of your blog!
We have a pretty handy hack for driving traffic from your Stories when you don’t have access to Link in Stories just yet, if we do say so ourselves (and we do.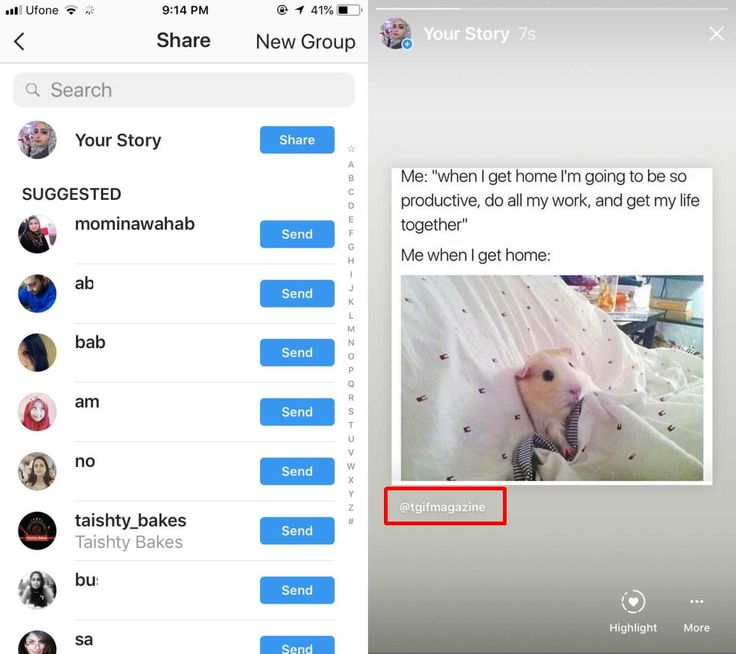 ) Simply direct your followers to your
Bio instead, where the latest blog post you’re promoting is eagerly waiting!
You might have to spell this one out for your viewers, since they may not understand exactly why you’re tagging yourself in your Story or what they’re meant to do next!
Don’t worry though, teaching them what to do is a snap!
Here’s how to promote your blog content with Instagram Stories when you don’t have the swipe-up feature yet:

Your followers are now clued in that they can find your blog post in your link in bio. Plus, it saves the time-suck (and a chance to lose interest) when your followers have to navigate out of your Stories, search your username, and go through to your profile to find that link in bio!
Presto, two steps eliminated. You’re well on your way to growing your blog with Instagram!
Don’t miss the best times to post! Schedule your Instagram Stories with Tailwind! Try a free trial of Tailwind for Instagram now – no credit card required! 🤩
But Story teasers aren’t the ONLY way to get your followers excited to learn more about your blog using all of your Instagram content!
We’ll break down an easy-to-use strategy using your Instagram feed posts and your Stories to promote your blog and get your followers invested in your latest and greatest content.
Here’s how it works:
 The first will be to go check out your Instagram Stories to learn more about one specific topic covered in your blog post. (This could be a tutorial, a demo, or more detailed information!) The second will be a call to action to go read your blog post by tapping your link in bio (in case your caption already sold them!)
Using more than one stream of content on Instagram means that you offer your followers another chance to learn something new, and be intrigued by all the amazing information your blog post contains! Cool, right
When you’re figuring out how to use Instagram to promote your blog, it’s easy to focus only on the things you can do, and not what others can do for you! In reality, building a strong community with others in your niche can expose your content to new audiences who might really benefit from your latest blog post!
Make networking a part of your larger blog promotion plan with these easy tips:
Curious where to find other bloggers in your niche? Start researching relevant industry hashtags! You can see how popular hashtags are – and how many posts they have attached to them – using Tailwind’s Hashtag Finder tool!
Skeptical about networking? It really works! Chloe Alysse of Chlo & Clothes gave another powerful tip in the FB Live we mentioned above. She credits the strong community of loyal followers and fellow bloggers as part of her quick rise to Instagram success (over 25,000 in one year!).
A regular part of her Instagram plan is to share the love – and reshare! – cool posts from bloggers, Instagrammers, and brands that resonate with her and she believes her followers would also appreciate it.
Those accounts are more than happy to share the love, too, giving Chloe exposure to their audiences who could then become fans!
Of course, getting attention from new Instagram users depends on their first impression of your posts. Since Instagram is a visual platform, the photo or video you use has a direct effect on whether you’ll grow followers, engagement, OR your blog traffic!
Think of it this way: Unless you just so happen to be at the tip-top of your followers’ Instagram feeds every time, chances are they may have to scroll through their feeds for a moment before encountering your post.
The longer your followers scroll, the less likely they are to stop and read each caption or examine each image they see. If they did, that would be information overload, right?
That means that the image or video you choose should disrupt that mindless perusing and make them stop their thumbs mid-scroll (just like that Stories tip in #1!).
Here are some good ways to do that:
In order to grab attention quickly and wow your followers, you’ll need high-quality images that stand out from the sea of content vying for attention. Source and create images, videos, and graphics that wow, especially where they relate to the content of your blog post.
This doesn’t necessarily mean you need to run out and buy the latest camera or phone, but make sure you’re taking your photos in clear lighting, with a decent-quality camera and paying special attention to your backdrop, colors and photo composition.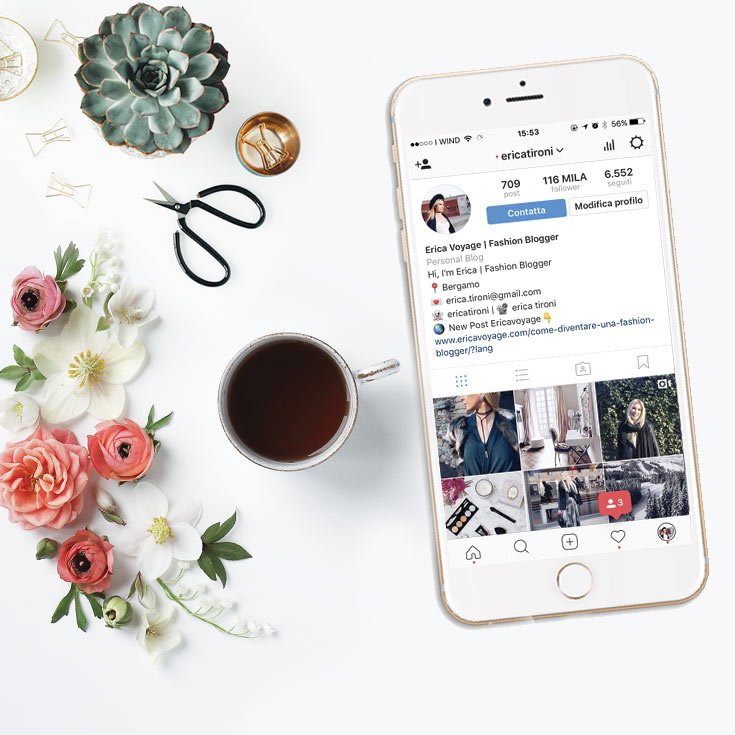
Our new tool, Tailwind Create, was created with this in mind! All you have to do is upload the images you want to feature and Tailwind will build multiple layouts to choose from. You can rely on Tailwind Create to do the legwork, and let you focus on creating perfect content with engaging captions.
Try it for free! See some examples of Tailwind-created Instagram story and post templates here.
For more, read our how-to post on taking gorgeous lifestyle photography!
Your image also plays a huge supporting role in the story you’re telling… or should be telling!
Curious what we mean? Keep reading! 👀
Chances are, your blog post tells a story. Whether you’ve written about a recipe, fashion, or wellness, there’s an underlying story that your reader will connect with. At heart, your life was different before and after you encountered this topic, and your blog post can help inform a reader, sway them, or in some way change their lives, too!
To achieve that buy-in from your followers and get them to click from your Instagram to your website, you want to give them a taste of the journey, as well as a happy ending.
While your image or video should be eye-catching since it’s the first thing people notice, our image should tie into the overall story and support it. In fact, it’s the hook to your story that draws attention. It’s like the cover of a fairytale! However, the real story is told just below your post image… in your caption.
Why is it that the caption is crucial to connecting with your audience and driving traffic to your website, but we often leave it to the last minute? #GuiltyAsCharged When posting to Instagram, it’s all too easy to focus all your attention on the image in your post, and write your caption as an afterthought. 😅
However, flipping the order that you approach your Instagram content may just be a gamechanger for you – and spell successful promotion of your blog!
That’s because the place you should really be spending most of your time when planning Instagram content is your caption. While your image or video snags attention, it’s often the caption that your followers relate to, emotionally invest in and is ultimately what drives them to your website.
Therefore, the story you tell in your caption is the most important part of the post, and what you should focus on first.
Here’s how to write amazing captions yourself:
Most people have a fear of sounding too sales-y or pushing too hard when it comes to the last part of your CTA in particular, but keep this in mind: if you believe in your content, and that it will help someone or answer a need, then you aren’t just being a salesperson. You’re sharing experience and providing tools to help improve someone’s life in some way. Shout it from the rooftops!
Plus you can really bring your story home with caption font formatting – now available with Tailwind for Instagram! Highlight words, phrases or your entire caption with bold font, italics, cursive or serif fonts to bring your storytelling to life. ✍️ Try it with a free trial of Tailwind for Instagram.
Okay, now you’ve promoted your latest blog on Instagram every which way and your followers are well on their way to clicking through to blog bliss. That’s great!
However, there are a few important things to keep in mind about your link in bio, and what kind of tool will help you successfully promote your blog post on Instagram.
Ready to find out how to put your personal blog in your Instagram bio, and drive traffic to it with ease?
Let’s go!
You may be a little skeptical of this one, but hear us out. While you absolutely want to drive traffic to your website, you may be making this a little harder than necessary on your curious followers by just linking your homepage in your link in bio.
Why?
Unless your site is very well organized, with your new blog post immediately visible on the home page, you run the risk of your followers getting lost and losing interest navigating through your website for that specific post.
Lost, bored or frustrated readers won’t help you grow your blog!
And here’s the thing: even if your site is the most organized website that ever was, followers who see a website homepage in your bio may give up before ever clicking, because they’ve experienced that frustration on another site before. AND, you won’t be able to track your link visits without a trackable custom link anyway!
To avoid this, and signal to your followers that you have a unique Instagram landing page with all of your relevant links available just one click away, it’s safest to opt into a link in bio tool – like Smart.bio by Tailwind!
One of the unique things our users love the most about smart.bio is that you can choose two types of links for your content. They are:
These two types of links allow you to strategize with your blog content. Static links are often best for evergreen pages that you’ll always want your followers to click on – things like newsletter links, featured collections, or links to other content platforms (link to Facebook, YouTube, or LinkedIn, for example!).
On the other hand, post links tend to catch the eye immediately, and your followers will recognize your post image and know that it corresponds to the blog post they’re looking for.
Wait… how will they know, exactly? 🧐
That’s where the customizable CTAs come in! You can enter a catchy, clickable prompt like “Check It Out!” or “Grab It Here!” in your landing page customization settings, and that text will appear under your link posts.
Smart.bio is the perfect tool for Instagram bloggers and allows you to promote your blog post on Instagram and snag traffic to your website.
Are you as excited about this tool as we are? Opt in to be a beta tester and grab your FREE customizable smart.bio URL today!
Are you confused or even frustrated wondering how to effectively promote your blog posts on Instagram? Banish your worries! There are just five important strategies to remember when growing your blog with Instagram:

Smart.bio helped Instagram influencer Chloe Alysse grow her web traffic and newsletter signups without even trying! Read all about how she grew her personal brand with Tailwind tools in our latest interview, “Confessions of An Instagram Influencer: How to Grow Your Personal Brand!“
Repost on the social network Instagram - the ability to share a story, photo and other publications with your friends and followers. Such a function is useful when you want to discuss a particular topic of a post or simply demonstrate someone else's information on your page.
MUSTHAVE services for your Instagram!
TapLike - Instagram promotion. Buying followers, likes, story views, comments. Quality Audience! 100% service safety guarantee!
Instahero - instant cleaning of Instagram account from bots! Do a profile analysis for free!
Cleaning Instagram from spam, bots, shops, dead accounts. Connect the SpamGuard service and improve subscriber engagement. Try it for free!
This feature has appeared quite recently, but has already gained great popularity. This was possible due to the high demand for the repost of extraneous stories. Someone else's story will appear in a blurred frame in the feed of the person who reposted. But many Instagram users who are new to the social network may not know what Stories are.
Stories is a special feature on the Instagram social network that allows you to record and then post a short video to your page in a special field (more on that below). The main feature of this feature is that stories are not stored on the page all the time until they are deleted by the owner. On the contrary, stories are automatically deleted exactly one day after publication.
Finding and viewing them is easy enough. You need to go to the very top of the tape. At the top of the screen, there will be stories. The entry itself is made in the form of a circle, which depicts the person who posted this story. You just need to click on the person's avatar and Stories will open on the screen.
If you've been tagged in a story, it's easiest to repost it. But many may have a question: how to find out that I was noted in stories. Usually, if this happens, then the person who was marked receives a notification that informs him about this.
Right next to the notification, you can find the inscription "Add this to the story." Just click on this button and the selected story will appear in the feed. If you want to share the story with a specific person, then you need to click on the icon that resembles a paper airplane, and then select the person to whom you want to send the story.
The phrase "someone else's story" means that story in which the person who wants to repost is not tagged. In this case, you also need to click on the button that looks like a paper airplane, and then select the person with whom you want to share the story. If you need to add it to your page, then after clicking on the airplane, you should click on "Add".
A post is any photo, video, any text and everything else. The main task of the post is to attract as much attention as possible. Reposts, like likes with comments, allow you to evaluate how interesting this or that post is. You can repost a post to your feed, history, or simply download it for some personal purposes.
When adding someone else's post to your story, you can edit it a bit. For example, write an inscription, add stickers, and so on. But keep in mind that the link to the original post will be in the published story. Therefore, a person who watches a story with a reposted post can go to the original at any time. To repost someone else's post to your story, you need to:
Do not forget that you can repost a post to your story only from an open profile. If a person for some reason decided to close his account, then reposting his post or stories will not work in this way.
It is impossible to repost someone else's post to your feed. What can be done instead:
The first method is the only one of the above, which was approved by the administration of Insta. In order to repost any entry by pasting the code, you only need:
After all the actions done, the page will display exactly the same publication with an attached link to the profile of the author of this post.
Screenshot - the easiest, but not quite allowed way. Since a ban can fly in for stealing someone else's content and appropriating it to yourself if the administration of the social network notices this. However, many often use this method. To repost the post you like on your page using a screenshot, you should:
To avoid a ban, you can simply mark the author of this post. To do this, while editing a future post, you should click on "Mark a person" and select the author or indicate his name after the special character: "@". Then usually the administration does not ban such reposts.
The last method involves installing third-party applications on your smartphone. If a person is ready to sacrifice his internal memory in order to be able to repost other people's posts, then you can use the following programs:
 google.com/store/apps/details?id=com.redcactus.repost&hl=en).
In all of the above programs, the interface is simple, so problems should not arise. Usually it all comes down to the fact that through the downloaded program you should log in, find the post, click on the three dots in the upper right corner and click on "Share" or something similar (it may differ in different programs, but the meaning is the same).
Video repost, as well as post repost, is currently impossible to do. There are two ways: download the video or use the app. The first option can be problematic, as downloading videos is not always possible. Therefore, it is better to have a downloaded application in order to be able to repost whatever your heart desires:
As you can see, these are the same applications as for reposting posts. It’s just that they are universal, and with the help of them you can repost anything on Instagram. Links to download them can be found in the "Repost someone else's post to yourself" block. There, at the very end, you can find a brief general instruction that tells how these applications work.
As mentioned above, you can simply download a post or video to do something with it later. For example, put it on your page. The easiest way: go to Insta through a PC and paste the character set at the very end into the address bar of the browser: media/?size=l.
You can find out other ways to download posts at the link: https://gruzdevv.ru/stati/kak-skachat-foto-video-storis-iz-instagram/.
Sometimes there are times when you need to place your favorite post from Instagram on your website.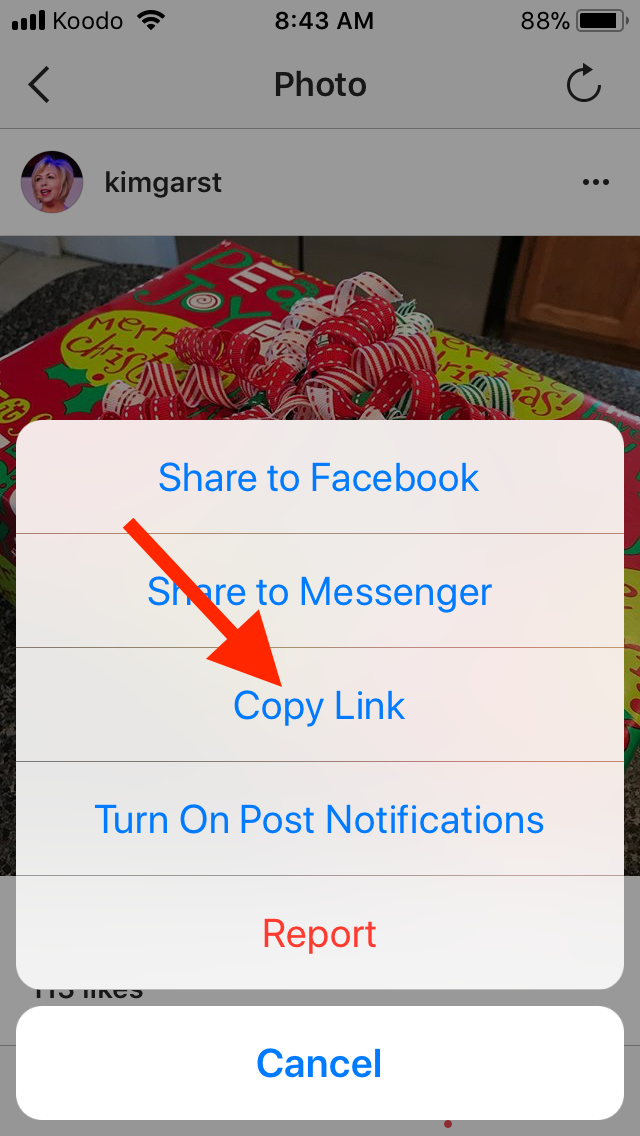 This can be done in the way allowed by the Instagram administration - using the embed code. This method was discussed a little higher, but here it will be described again, since the last steps are different:
After that, a reposted post with a link to its author will appear on the site. The last condition is necessary, because otherwise it will be considered content theft. The site owner can be forced to remove this post, but this happens quite rarely.
Now it is difficult to meet a person who is not registered on Instagram. But sometimes you want to share a post or story with a friend that is not registered on this social network. You can do this without downloading any software. But there is one condition - WhatsApp or another program must be installed on the phone through which the post or story should be reposted.
Increase activity on your blog or online store on Instagram. A new and 100% legal way to promote is GetFans.
Instagram reposts are the right tool. But it is important to remember that when reposting, you should always indicate the author of the post, story or video. Otherwise, it can be mistaken for theft and plagiarism. And for this, according to the rules of this social network, the user is banned. It is best to download special applications for reposts, they will make life much easier for people who like to share the posts they like. 9How to repost on Instagram: posts, stories or videos It doesn't exist and most likely never will. The developers explain this fact by the struggle for the rights of the author: no matter how much they want to make the social network as convenient as possible, copyright is still a priority for them. That is, today's article is unlikely to ever lose relevance.
Want to learn how to repost quickly and easily? In this case, just use our step-by-step instructions!
Program for promotion on Instagram - SocialKit:
Registration >>>
See also: Delayed posting on Instagram
Before proceeding directly to the methods of duplicating content, let's briefly go over the theoretical part.
So, a repost is a 100% copy of someone else's publication. It is needed if you want to share your favorite post with your subscribers. Or you plan to participate in a contest, where one of the requirements is to post a post in your account.
Please note! When duplicating content, a prerequisite is adding a link to the original source. Also, according to the rules of good manners, it is desirable to make sure that the author of the publication does not mind posting it on other pages.
Consider all three methods.
Step #1. Open Instagram, go to the post you like and take a screenshot.
To take a screenshot on Android and Apple iOS, simultaneously press the power key and the Home button (in some cases, volume down is used instead). If you have a Windows Phone, press the lock button and Home.
Step #2. After saving the photo to the device's memory, you need to upload it to the social network. To do this, launch the application and click on the "+". Next, select the screenshot you just made.
Step #3. If necessary, crop the extra details of the image, apply a filter and copy the caption from the original source.
Step #4. Click "Post", remembering to mention the author using the "Tag person" function or by entering their name after the @ symbol.
First, select a utility to create a repost in the "App Store". In our instructions, for example, the Regrann program is taken, which has more than a million downloads. It is not only popular, but also very easy to use. However, you can install Insta Repost for Instagram, Repost for Instagram, or another application based on your preferences and mobile device. The principle of their work is practically the same.
Step #1. Install and then open the selected software.
Step #2. Enter the data for identification in Instagram.
Step #3. Find content using the running program and click on the three dots.
Step #4 . Choose the Share or Copy Link action.
After that, the desired entry with a watermark or author's mark, as well as the program logo will be displayed on your page.
Article in the topic: The best applications for editing photos on Instagram
This is the only method recommended by the developers of the social network.
Step #1. Select the post to repost.
Step #2. Click on the three dots next to the post, then on "Copy Link" or "Share".
Step #3. Paste this code into the post editor and save the changes - the page will display the source content with a link to the author's name.
Attention! If the account is closed, the repost will not work.
The algorithm of actions for duplicating content in this case is straightforward, because the developers have taken care of the corresponding functionality.
Step #1. Open the desired entry and click on the flying airplane ("Share" icon).
Step #2. In addition to the list of friends, the button "Add post to your story" will appear. Click on it and the system will automatically redirect you to Stories.
Step #3. If necessary, edit the post by adding hashtags and stickers.
Read also: How to add a link to Instagram Stories
It's simple: when you are mentioned in Stories, you get a notification. Above it there is a button that allows you to add this Story to yours. After you click it, your friend's Stories will appear on the Add Story screen - here you can edit it and then host it.
Step #1. After receiving the notification, click "Add this to story".
Step #2. Click on the "+" for "Your Story".
Step #3. If your friend has an open profile, then there should be no difficulties. His Story will appear in yours, with the author's name displayed on a small icon. According to it, your followers, if they wish, will be able to go to the source page.
Tip! If you cannot find this option, try updating Instagram to a new version - it should appear after a while. In extreme cases, you can use third-party utilities.
Now you know how to repost a regular post to your Feed and Stories, as well as how to share other people's content in your Stories. Choose the method that is convenient for you, while not forgetting to indicate the source.
If you do not want anyone to repost your posts, you can disable this option in the settings.