"Hi, guys I badly want to recover my messages, by mistake, I deleted Viber from my phone, can you recover Viber messages from iCloud? Please help!" – From a Viber user
A convenient tool for texting and calling, Viber allows you to send text messages effortlessly. The number of Viber users is on the rise. You may have many important pieces of information stored in Viber on your iPhone if you use it a lot. If those vital Viber messages and attachments go missing, it could be a serious problem. Fortunately, you still have a chance to retrieve this data from iCloud as long as you have enabled "iCloud Backup" on iPhone before.
Now you can catch your breath; we'll show you two of the most popular ways to restore Viber messages from iCloud specifically.
Joyoshare iPhone Data Recovery is a typical iCloud backup extractor that is able to restore over 20 types of iOS data from iCloud effectively and completely supports Apple two-factor authentication.
It can find data in a variety of data loss scenarios, including factory reset, update failure, water damage, passcode locked, jailbreak, mistaken deletion, device disabled, etc. What matters is that all data recovery process guarantees 100% safe and can scan data at super-fast speed.
As one of the most reliable iPhone data recovery tools, Joyoshare won't damage, lose and overwrite any current data kept on your iOS devices. Aside from Viber messages, it supports more data types, such as videos, iMessage, photos, call history, notes, reminders, voicemails, voice memos, etc.
Restore from iCloud backup without reset
Be compatible with iOS 15 and iPhone XR/XS/Max
Retrieve common & encrypted data from iTunes/iCloud backups
Preview Viber messages in real-time and select data selectively
Try It FreeTry It Free
So, the below-mentioned steps show you how to restore Viber messages from iCloud to Mac or Windows:
After downloading and installing Joyoshare iPhone Data Recovery, you can straightly get it started on the computer and set recovery mode as "Recover from iCloud" on the top navigation bar. As instructed, you log in to your iCloud account with your Apple ID and password. Besides, if you have enabled two-factor authentication on iPhone, you will need to extra type in the random code.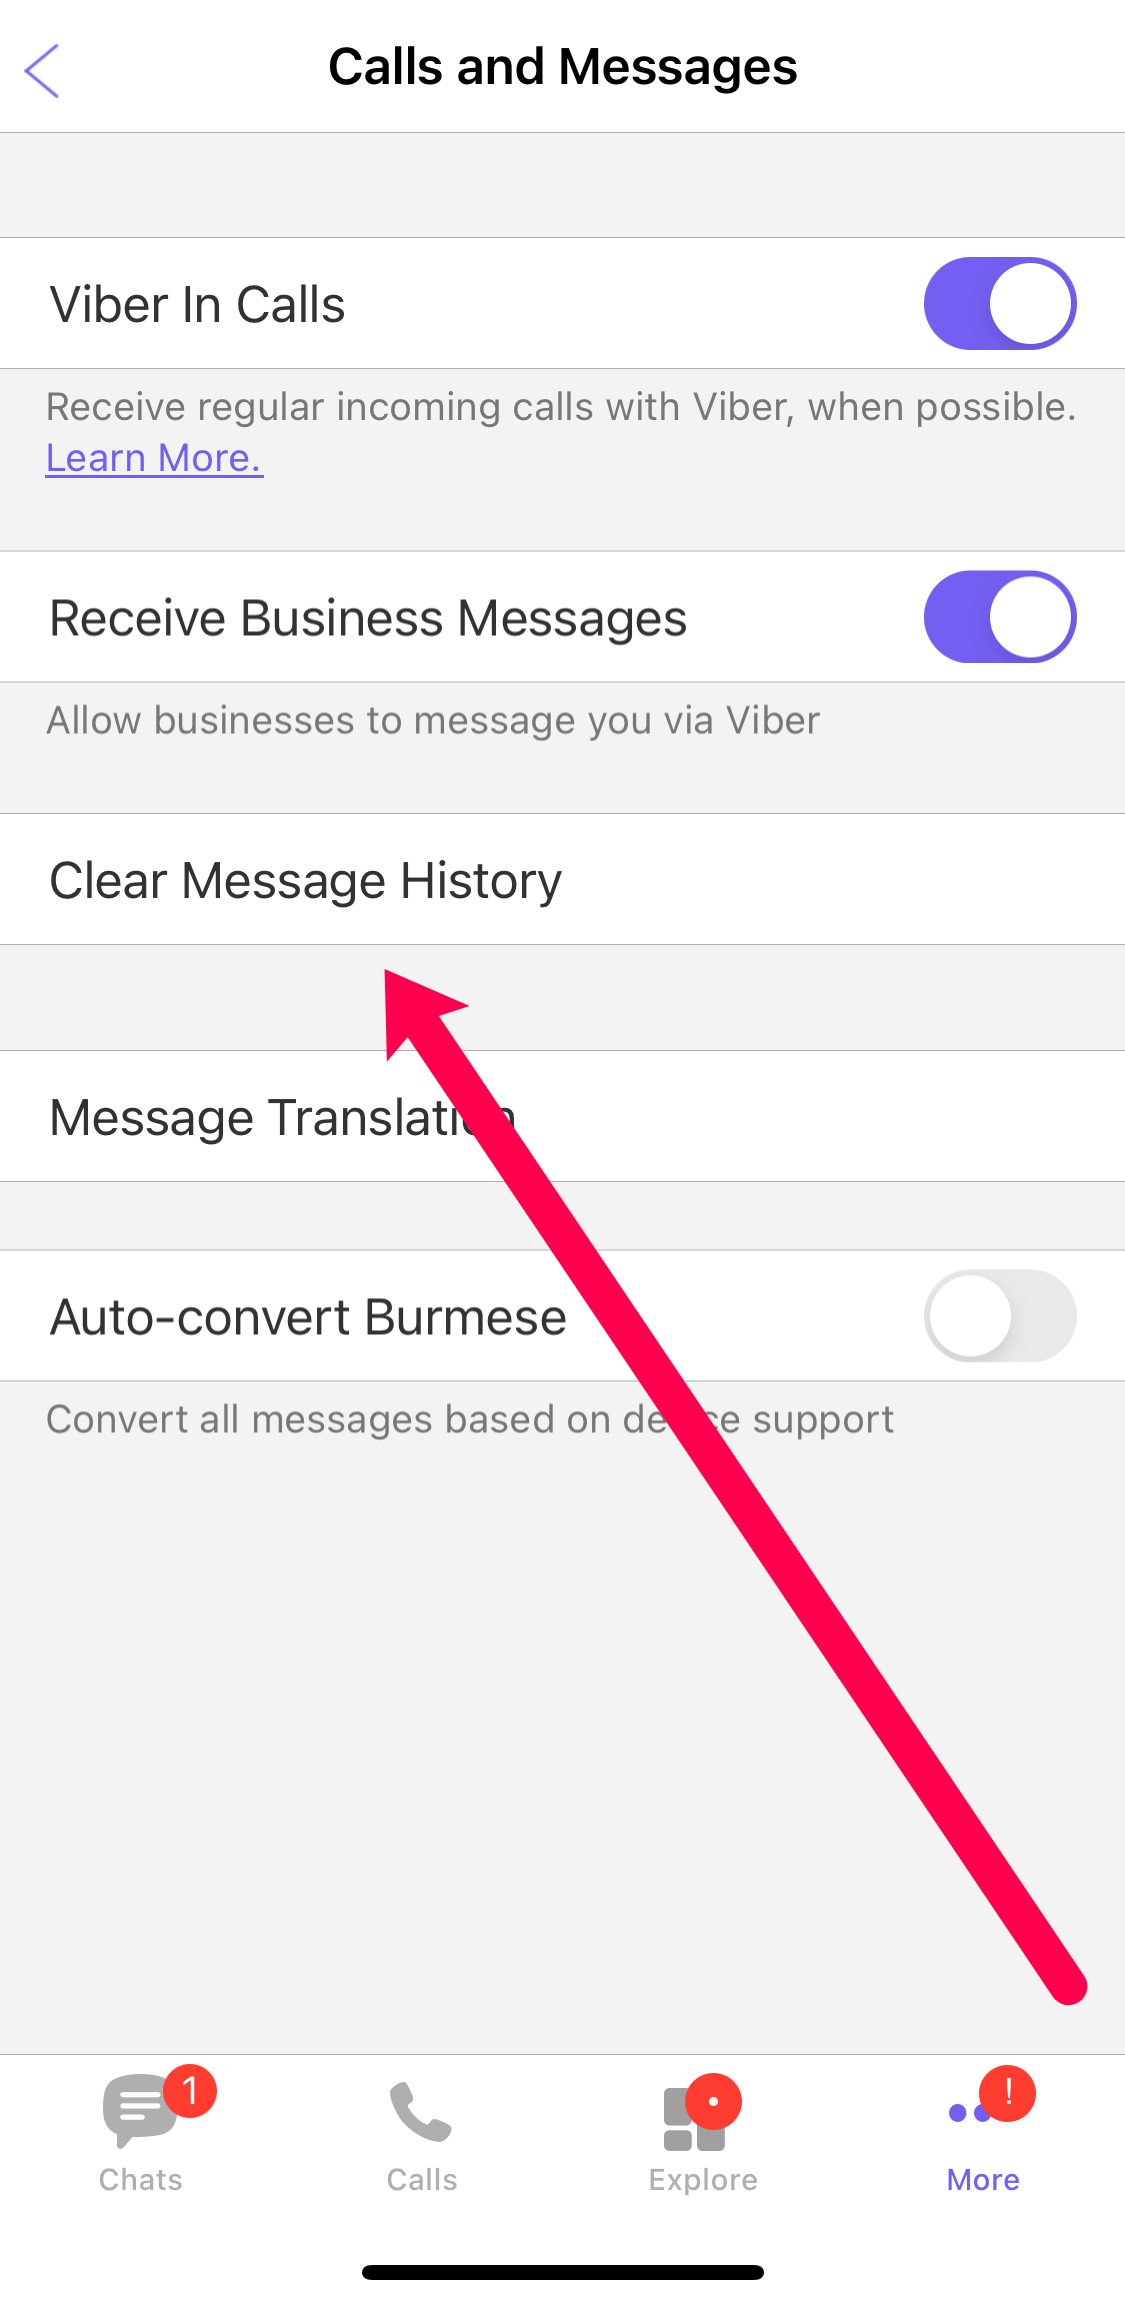
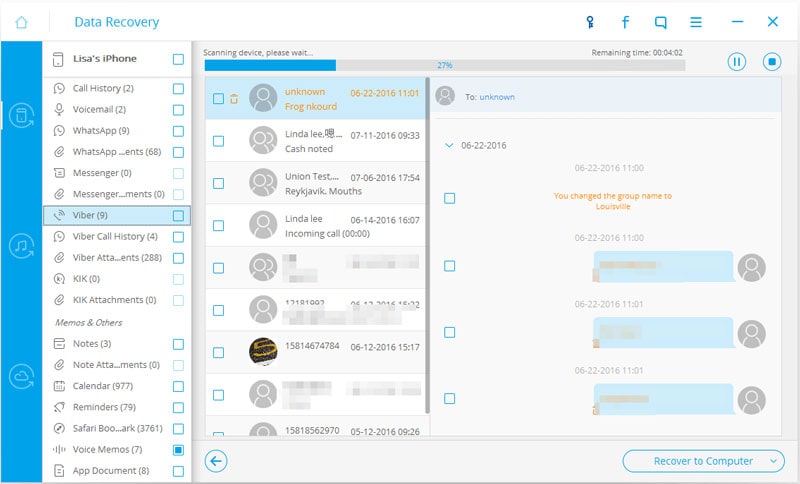
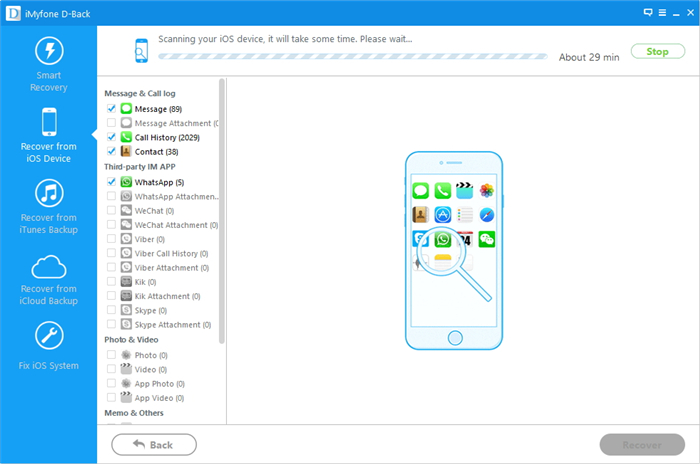
After accessing iCloud account successfully, you can see a list that displays all created iCloud backups. Press the "Download" button to download the recent one that may save Viber messages. Then go forward to hit its "gear icon" to confirm data types and tap on the "Scan" button to start to extract data from iCloud backup.
Once Joyoshare iPhone Data Recovery completes scanning iCloud backup, all recoverable contents will be classified and shown in an orderly. Head to "SNS Data" to find "Viber", from where the deleted Viber messages can be previewed. Mark the one you want and click on "Recover" at the right bottom to begin retrieval.
Try It FreeTry It Free
This way allows you to recover deleted or lost Viber messages from iPhone iCloud without relying on any 3rd-party software.
Step 1. Simply go for "Settings" → "General" → "Reset" → "Erase All Contents and Settings" on iPhone to restore to factory settings;
Step 2. Follow onscreen prompts to set iPhone; stop at "Apps & Data" interface and click on "Restore from iCloud Backup";
Step 3. Sign in with your iCloud Apple ID and continue to choose an iCloud backup to restore; wait until it ends.
Note: What you should bear in mind before an operation is some disadvantages that cannot be ignored when using this method. In detail, all contents and settings on your iPhone will be erased and no real-time preview option is offered. It's also unavailable to only restore Viber messages from iCloud; you have to recover the whole iCloud backup.
We recommend that you enable automatic backup of your chat history in your settings. By the way, please make sure you are using the latest Viber version before backing up your chat history. Having a regular backup keeps your Viber history safe in case something happens to your phone.
Manually backing up your chat history may also be necessary for the following situations:
· Before you uninstall Viber from your phone.
· Getting a new phone and transferring data from one to another.
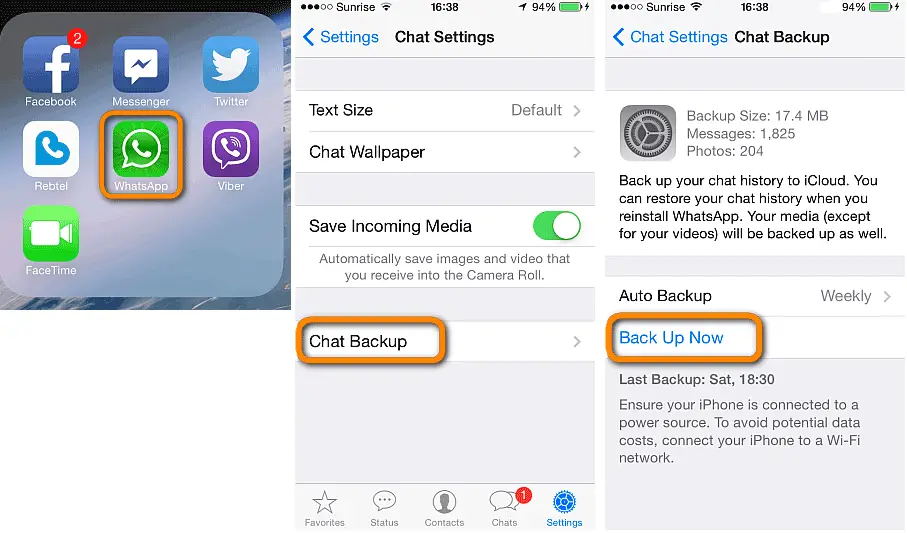
Before you begin the backup process, please ensure Viber is connected to Apple iCloud. Here's what you should do then:
Step 1. On your iPhone Home screen, open Settings.
Step 2. Tap on the Apple ID that is right at the top of the screen.
Step 3. Tap on iCloud.
Step 4. Ensure Viber is switched ON.
Manually Backup Your Chat History
It takes time and data to back up your chat history manually, so be sure you're connected to a stable Wi-Fi network:
Step 1. Run Viber on your iPhone.
Step 2. Tap on More(···) → Settings → Account → Viber Backup.
Step 3. Pick if you want your messages or photos to be backed up.
Step 4. Lastly, tap on backup.
Automatically Backup Your Chat History
Our recommendation is to back up your data daily to keep your chat history up to date. To turn on auto backup:
Step 1. Open Viber on your iPhone and tap on More (···).
Step 2. Open Settings → Account → Viber Backup → hit on Auto Backup.
Step 3. Select how often you want an auto backup to be performed: Daily/ Weekly/ Monthly.
Note: On iPhones, auto backup is only performed when you are connected to Wi-Fi.
Tip 3. What Will Be Backed up?* Profile information
* Chat history from text messages, photos to videos
* Purchased stickers
* Groups and Communities memberships
* Viber Out subscriptions and plans
 Final Verdict
That's it! Now you have all the Viber messages extracted from iCloud backup. But if you face any tech problems while recovering Viber messages from iCloud backup. Don't feel blue! Here's another option, which is directly recover deleted Viber messages from iPhone with help of Joyoshare iPhone Data Recovery. What's more, the 24/7 online Email Support is here to assist you. You only have to leave a comment so that you will contact the talented and qualified techies.
Try It FreeTry It Free
(Click to rate this post)
Updated on Feb 17, 2022 11:23 AM
"I bought a iPhone 13 Pro and had to switch data to new phone. I have no idea about how to transfer my Viber messages. Can someone tell me an easy way to transfer Viber messages?"
Compelled by the fascinating and exceptional features of the latest iPhone 13 series and couldn't restrain from purchasing it? Well, Congratulations on getting your hands on it. You must be enticed to try out all of its amazing features, but initially, you would be required to restore all your data to this new device, especially Viber data, so that you don't lose out your important messages, pictures, assignments, presentations, etc. Well, if you don't have any clue regarding how to backup Viber messages, just follow any one of the methods below and get all your Viber messages restored on your new iPhone within a few minutes.
MobileTrans - WhatsApp Transfer is a superior software that is introduced by the Wondershare company. This outstanding software transfers data from one device to another in just one click!
download download
Not only does it transfer data from one phone to another, but it also backup and restore mobile, as well as, social applications data. With around 50 million+ downloads and 700K+ users, the software is gaining trust and attention from all over the world. It functions efficiently with around 6000 devices and can be effortlessly downloaded to Windows and Mac OS.
Using this ultimate software, you can easily restore the Viber messages on your latest iPhone 13 series by following the detailed guidelines below.
Step 1: Launch MobileTrans software
First, install the MobileTrans software on your computer. Connect the old iPhone with your computer to proceed to the next step.
Step 2: Backup Viber messages
On your computer screen, you will perceive several options to choose from. Click on the "Whatsapp Transfer" button. After that, in the left-hand column, the software will exhibit social apps that are compatible with the MobileTrans software. Find and tap on "Viber", which will then provide you with two choices on the right-hand side; "Restore" and "Backup".
Step 3: Backup completed
Click on the "Backup" button to start the backup procedure.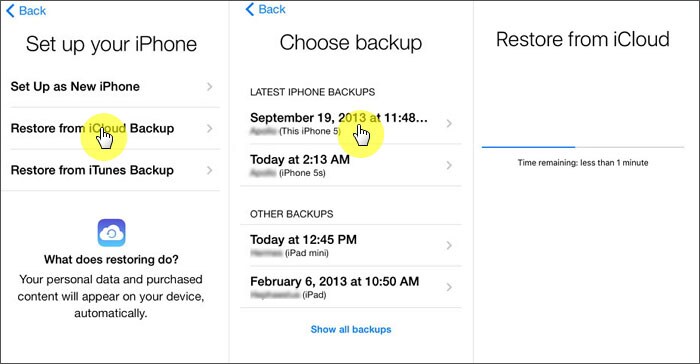 The process may take some time, thus wait patiently. You will be notified once the backup process finishes.
Step 4: Connect iPhone 13 to the computer.
After linking the new iPhone 13 to the computer, do the same as step 2. Once you are given two choices, instead of clicking on "Backup", tap on the "Restore" option. Or hit the "View Backup History" button. Select the most recent Viber Backup and click on the "Start" button.
Step 5: Restore Kik messages successfully
The procedure may take some time to restore Viber messages to your iPhone 13 series. Most importantly, refrain from disconnecting devices throughout the process to avoid any inconvenience or delays.
If you linked your Viber account with your iCloud account in your old iDevice, then it must consist of a Viber Backup folder which can be easily restored.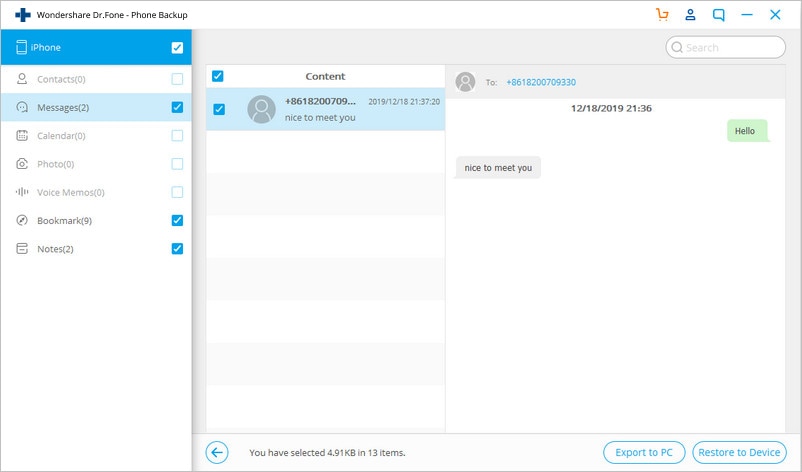 Detailed step by step instructions are given below.
Step 1: Restore to Factory settings
On your iPhone 13/13 pro/13 pro max enter the "Settings" tab. Find and click on the "General" option, which would then show you several options. Select the "Reset" option and subsequently click on the "Erase all content and settings" button. This would cause your iPhone to recoup all the factory settings
Step 2: Restore all the backup data available on iCloud account
From the settings tab, click on the "Apps and Data" button. Scroll through several options shown on the screen, search and tap on the "Restore from iCloud backup"
Step 3: Log in to your iCloud Account:
Sign in to your iCloud account and select the most recent backup file to restore.
Keep in mind, that by using this method the entire data, including Viber messages, will be retrieved. You can't back up a particular application data individually.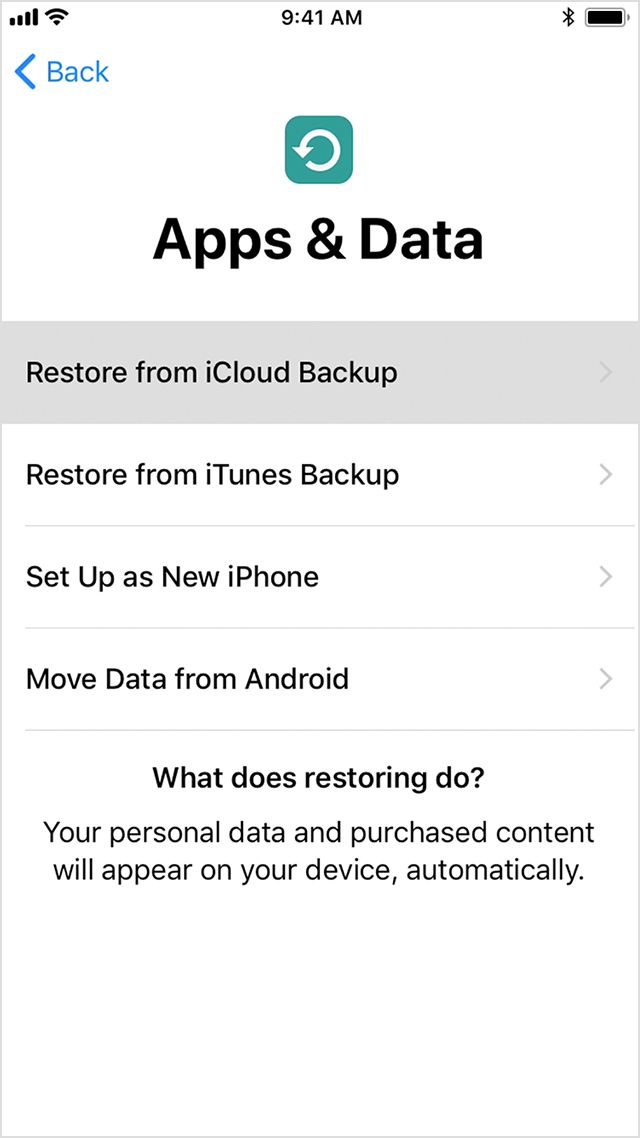
Get all your Viber messages back in your iPhone, without any trouble, via iTunes. However, this is only applicable if you uploaded and synced your data with iTunes. Follow the guidelines below.
Step 1: Connect your iPhone to computer
Link your iPhone with your PC or Mac where you have backed up your iPhone data. Launch the iTunes application on your PC or Mac. Choose the "iPhone" as your device when asked.
Step 2: Restore Data:
You will be able to see the option of "Summary" on the left column. The complete summary of your device would be shown on the right-hand side. Under the heading of manually backup and restore, click on the "Restore Backup" button. You will be asked to select a specific backup file. Make sure to select the most recent backup file which consists of your Viber messages. Click restore and wait patiently for the procedure to complete.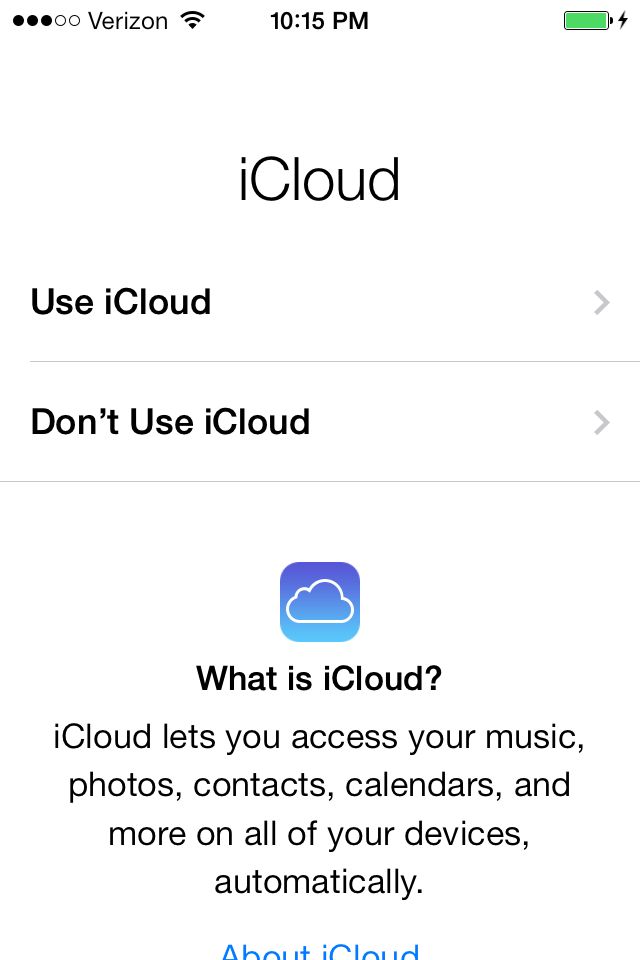
Just like iCloud, in iTunes, you cannot preview data nor can you choose a specific file to restore.
If you have a habit of regularly mailing yourself a Viber backup file, then by following the steps below you can restore your Viber messages on your latest iPhone 13 series device.
Step 1: Download the previous backup file:
Log in to your email account where you receive your backup file. Open the mail which consists of the Viber backup file in it. Download the "Viber Messages.zip" attachment.
Step 2: Recover the Viber Messages:
Open the downloaded file in CSV format and perceive it in an organized manner in Excel. All your messages would be categorized in a standardized way according to the time they were sent and received. The names of both the sender and receiver are exhibited.
The drawback of this method is that you cannot view what picture, video or attachment you sent or received.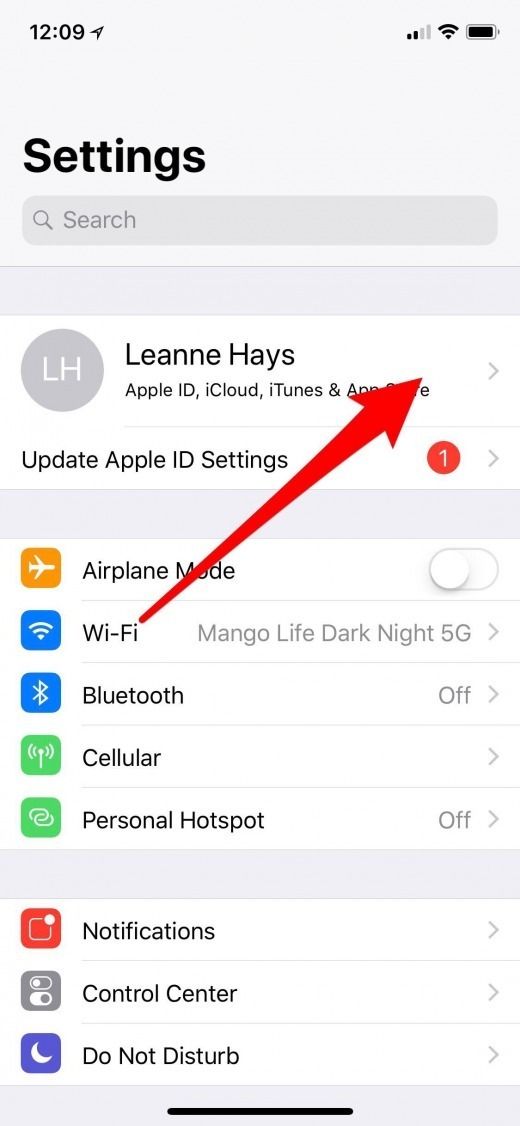 Only you can view messages through this method.
After going through this article you can easily decide which method to choose in order to restore Viber messages to your latest iPhone 13/ iPhone 13 Pro/iPhone 13 Pro Max. There is no doubt, MobileTrans is exceptional software that can restore messages as well as media files and is compatible with both iPhone and Android devices.
download download
New Trendings
If your iPhone is stolen or broken, or if you have lost your data, there is a convenient way to retrieve and restore your Viber messages.
Many users consider Viber to be one of the best apps for messaging, video calling or group chats. Viber has over 600 million users, if you are one of them and accidentally deleted or lost your Viber messages, read and follow these simple steps to extract Viber messages from backup files.
Here is a guide to extract Viber messages from your iPhone backup using iPhone Backup Extractor:
You will need:
Make sure you have an iCloud backup before you start or iTunes saved before you lost or deleted your Viber messages.
You can download iPhone Backup Extractor here and it works on both MacOS and Windows. The app always supports the latest version of iOS.
You can choose iCloud or iTunes backup:
For iCloud: , click + or Click here to add iCloud backup. You will need to enter your iCloud login details.
For iTunes: iPhone Backup Extractor will automatically read all backups located in the default folder. If your backups are stored elsewhere, you need to add a folder by pressing button + or "Click here to add an iTunes backup." You will need to provide your backup password to read encrypted backups.
Adding iTunes and iCloud backups
Depending on what you want to extract from the backup, you have 3 options:
If you want to view the Viber conversation list from the backup copies, in the right window select "Preview". If you only want to recover a few messages, you can check them and click "Extract".
You will need to choose between CSV and HTML file types (CSV will store them all in one text file, while HTML will store them in separate files where you can see images). Choose a location to save the files, click "OK" when the message "Extraction Successful" appears - and that's it!
iCloud Viber messages preview
If you want to extract full Viber files, in the right window go to App View → Viber → All messages . Select the location where you want to save the data, and after the message "Extraction Successful" appears, click "OK".
Restore all Viber messages from a backup
If you already have an extracted Viber chat archive and you want to convert it to an HTML or CSV file, go to "File" and you will have two options: "Convert Viber DB to HTML" or to CSV. Select the Viber database you want to convert and click "Open", select the location where you want to save the new file and click "OK".
Viber SQLite database conversion
If you have any questions or need help, we are happy to help you, just contact our support team using the live chat on this site or email. How did this tutorial work for you? We'd love to hear your story!
Are you looking for a way to extract your Viber contacts from iPhone? We have good news for you: you are in the right place! In just a few minutes, you will learn how to restore Viber contacts from an iPhone backup.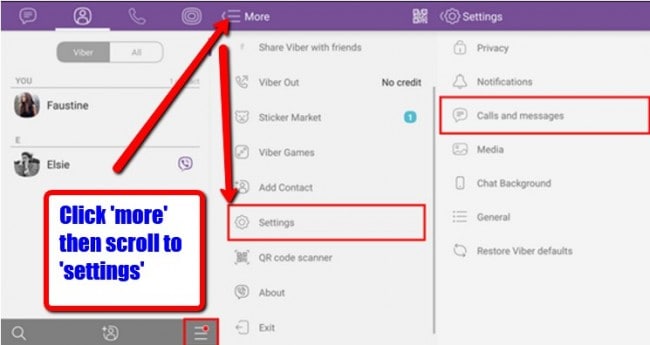
There are two steps for this:
To start recovery Viber contacts from your Apple device, follow these steps:
If you have an iTunes or iCloud backup in iPhone Backup Extractor before clicking Expert Mode. Go to Application Domain → com.viber → Documents → Contacts.data , click "Extract" and select the folder where you want to extract the database.
Extract Viber contacts and call history
Viber contacts are stored in the file Contacts.data .
This is it! You now have the Viber contacts database extracted on your computer. Let's move on to the next step.
To get data from the database Contacts.data you need a tool that can read the contents of this SQLite file. We have a document on how to choose the right SQLite tool. The instructions below assume that you are using "SQLite Manager".
To extract Viber contacts, do this:
Open the SQLite manager, click Database → Connect database in the top menu and navigate to the folder where the Contacts.data file is stored.
Open the Viber contact database
Change the file extension from .sqlite to All Files in SQLite Manager, then select the file Contacts.data .
Select "All files" in the open dialog box.
After opening the database, press ZABCONTACT then select the "Browse and search" tab. You will see Viber contacts in the database. Contacts are available in two separate columns:
 ZMAINNAME and ZSUFFIXNAME (first and last name).
View Viber contacts database
You have two options now:
Select all rows, then right-click and select "Copy rows as CSV (MSExcel compatible)". Create a separate Excel file, open it and paste the copied data into a spreadsheet.
Copy Viber contacts
Another option is to export the table to a file .CSV . To do this, click Table → Export tables from the main menu of SQLite Manager. Then select the file format and confirm the action. You will be asked where you want to save the data. Once you confirm the destination folder, the .CSV file will be created and saved on your computer. Copying Viber contacts before pasting in Excel
This is it! Now you have all Viber contacts extracted from your iPhone.
The number of Viber users has grown significantly, with over 754 million registered users worldwide. If you are one of them, we hope this guide helped you recover Viber contacts from your device.
If you need more information on this topic, do not hesitate to contact our support team.
Viber is a messenger application where you can chat with your friends, relatives, colleagues for free. This is a simple and intuitive application for smartphones, which can be downloaded and installed by any user. Correspondence in Viber is not only the process of exchanging information and files, but also your feelings, emotions, using colorful emoji, stickers and emoticons. For iPhone owners, here are a number of other important features that are indispensable. And if you lose some important information in the messenger, you can restore it.
Content
iPhones are very demanding phones and the general rules of popular apps don't always apply to them. However, in the event of a deliberate or accidental deletion of information in the application, you will be able to restore the correspondence. But only on one condition that you previously set up Viber correctly or regularly create a backup copy using your smartphone - via iTunes or iCloud. If none of the requirements are met, then there is no way to restore the messages that you deleted.
If you deleted a chat or individual messages and now want to restore them, then there are three main ways for iPhones: through the Viber application itself, through the iTunes program or through iCloud storage. Carefully read each of the methods and strictly follow the instructions.
It will not be possible to restore deleted correspondence from the server of the messenger itself by contacting the support service. After all, as according to the rules of the privacy policy, the company does not have the rights and access to personal correspondence.
The easiest, fastest and most convenient way is to restore messages and call history from your phone through the Viber application itself. However, this option will only work if you previously activated the backup function in the settings. How to check it:
If this option is enabled in your Viber, then you just need to click on the "Restore" button below. After that, all your correspondence will be updated, up to deleted messages. A similar method also works when deleting Viber and re-downloading the application to the same or another smartphone. If you notice that the history of calls and chats has been updated only up to a certain date, then pay attention to the frequency of archiving a copy of the correspondence. In the settings of the "Backup" item, it is possible to choose the regularity of resaving information from Viber - year, month, week, day.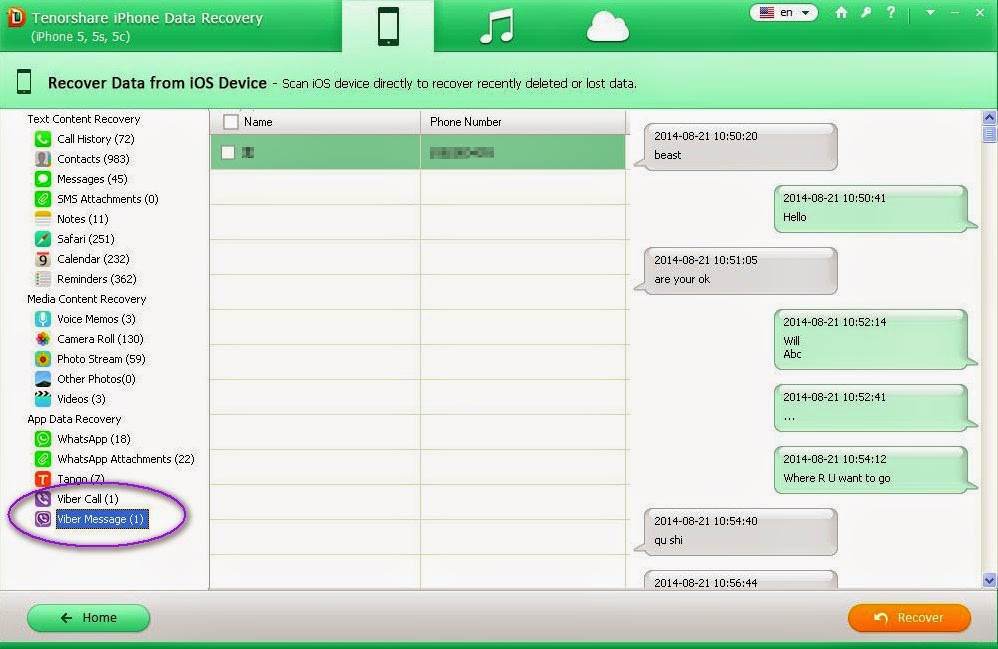
Restore correspondence in ViberOnly messages can be restored through the backup function. Media files, emoticons and other inserts will not be available.
The next way to recover lost or deleted messenger correspondence is to seek help from a specialized program for iPhone and computers. It's called iTunes. This is an auxiliary utility that is downloaded to a laptop or computer and is a link for two devices (PC and smartphone). With it, you can fully synchronize your smartphone and iTunes data. But in order to restore the necessary information from an iPhone, you need not only to connect the phone to the computer through a cord, but also to first activate the "Backup copy" function. If you do not remember whether a copy is saved or not, then check it as follows:
iTunes is very useful for iPhone owners. Through it you can download free music, video and save photos.
The iCloud server is the required account and primary storage for Apple devices. An iCloud mail account is linked to your smartphone and registers its data in the system after purchase. In order for your correspondence to be saved in the cloud storage on your phone, in the "Accounts and passwords" settings, click "iCloud", and under the "Storage" item in iCloud Drive, Viber must be active. If this rule is followed, then you can access deleted messages:
You must understand that if before you deleted the message, you did not take any action to create a backup copy of Viber - neither through the application, nor through iCloud, nor through iTunes, you will not be able to restore the correspondence. Therefore, if you continue to use Viber, then do not be lazy and set up your device for comfortable use.
If none of the above methods works, you have not set up a backup for your phone, then the only way out is to install a special additional application. These are backup programs. If you have deleted important information in Viber and want to restore it, then use one of the applications: