How can you connect your Facebook page to the WhatsApp business app? What are the advantages? Here you’ll get step-by-step instructions on how to set it up and valuable tips for the right interaction between Facebook and WhatsApp Business.
Having a dialogue with your followers, customers, or fans has several advantages. Your content may be brilliant – but the consumer often finds himself acting as a silent observer. And in most cases, he remains that way. If you get into a conversation with them, you tie them much more strongly to your brand and content.
To drive traffic from your Facebook page to your WhatsApp Business account, you should not miss out on linking your apps.
💡 Companies that already use a WhatsApp Business API – or would like to use one in the future – can of course also connect their Facebook page to WhatsApp Business.
Get to know more about it in a Live Demo with one of our Messenger experts and feel free to ask us all your questions.
Here’s what you’ll find out in this post:
WhatsApp Business gives you advanced features compared to the regular WhatsApp version, which is primarily intended for personal use. This includes a product catalog, a company page and the labeling of conversations for a better overview.
The free app is especially useful for small businesses with fewer than 5 employees and self-employed people. In these cases, less traffic can be expected and the handling and GDPR hurdle is therefore easier to overcome.
For larger companies and enterprises, however, a WhatsApp Business API in conjunction with an official business solution provider such as MessengerPeople by Sinch is recommended.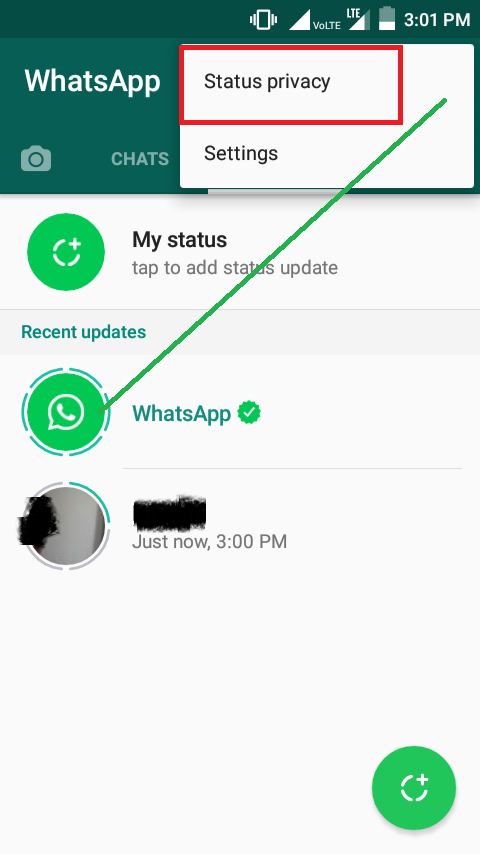
In contrast to the free WhatsApp Business app, you can handle data with the API in a GDPR-compliant manner. It’s also possible to connect WhatsApp to your in-house CRM platform and make life easier for your customer support team. Also for companies that plan for a lot of requests or manage multiple departments or locations, a WhatsApp Business API in conjunction with an official business solution provider is an enormous help. Greater efficiency is the keyword here.
You can find a comprehensive insight into the topic in our article “WhatsApp Business for Companies – Everything you need to know!“.
Now you have linked your Facebook page with WhatsApp.
After connecting your Facebook page to the WhatsApp Business app, you can, for example, add a “Send a message” button to your organic posts or run Facebook Ads that start a conversation on WhatsApp with a swipe or click – so-called Click-to-WhatsApp Ads.
Example of a Click-to-WhatsApp ad to start a dialogue with your customers.
In addition to the Click-to-WhatsApp Ads that you can easily run on Facebook, you also have the option to make your WhatsApp account visible to your customers on Facebook.
You can either display your phone number in the header of your Facebook page or show a “WhatsApp button”. Through this button, the users can start a WhatsApp Chat with your company with one click.
This is how you can embed the button into your Facebook page.
The WhatsApp button and the phone number are displayed.
This is how the WhatsApp button will appear on the Facebook page:
What’s useful about the WhatsApp button is that it remains clearly visible even while scrolling through posts:
The Age of Conversational has already begun in many countries around the world. In many places, people have been surfing, shopping, and getting information using Messenger for a long time.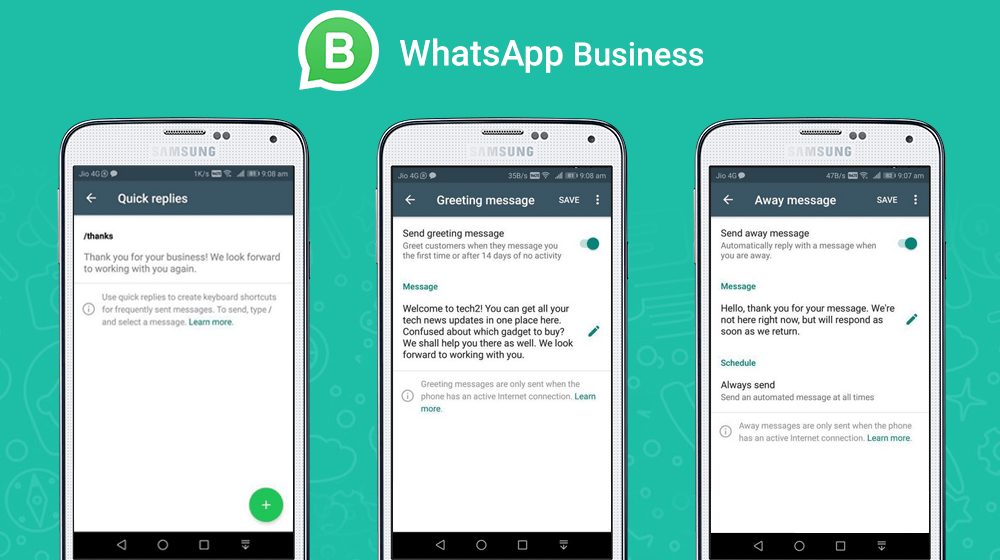 Not only in China (WeChat) have messengers long been used along the entire customer journey to serve everyday customer needs.
WhatsApp is the messenger with by far the largest user base worldwide (over 2 billion users) and is already successfully used by numerous companies along the entire customer journey.
Combining Facebook and WhatsApp Business, you can use your social media communication to break the contact barrier with your customers. Let them participate in your company and use your WhatsApp Business app to engage in conversations with them.
Remember, if you have more than 100 requests on your WhatsApp channel every day, this amount won’t be manageable with a WhatsApp Business account.
The topic of GDPR also plays a major role here. WhatsApp Business does not offer support for data privacy compliant handling of your chats. Using a WhatsApp Business API is essential for exactly such cases.
Here you can read about the differences between the individual variants of WhatsApp accounts and in this article you’ll learn about the advantages and disadvantages of the WhatsApp Business app.
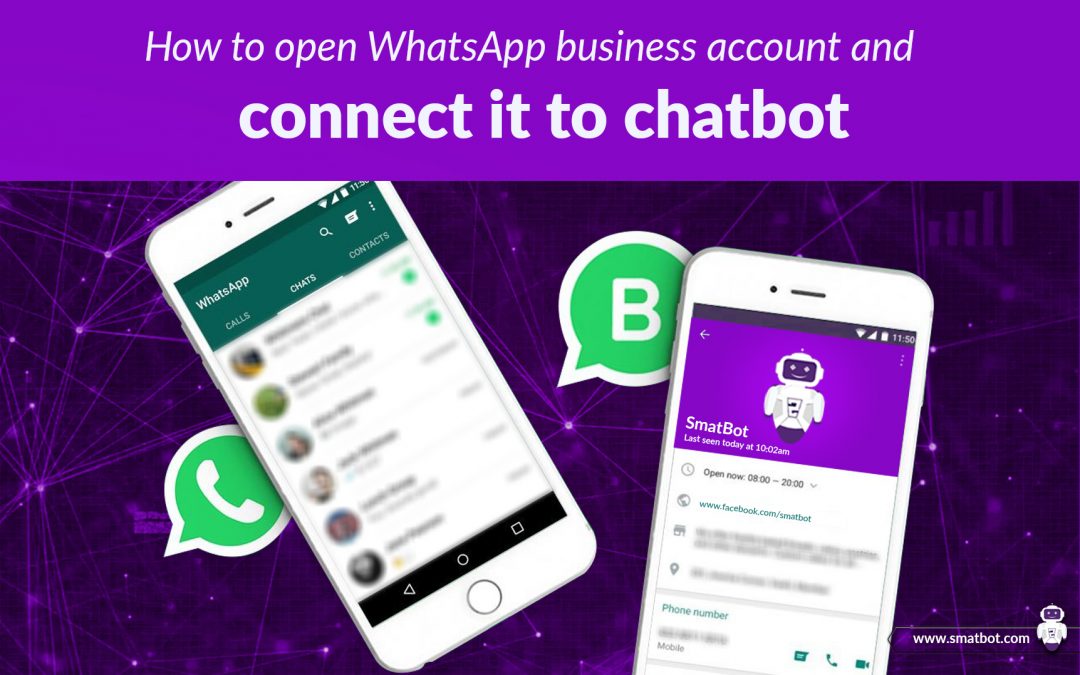
Our “Messenger Communication Platform” is your starting point for customer communication via WhatsApp and other relevant messaging apps. Deep integration with Chatlayer by Sinch allows you to create AI-driven virtual assistants that don’t feel like chatbots, and use them for any channel you want.
With the combined powers of Chatlayer and MessengerPeople, you can…
👨⚖️ … use WhatsApp and other messaging apps in a fully GDPR-compliant way for your customer service.
🚀… start immediately and without any IT effort – even from your home office!
💻… Manage and reply all messages centrally – no matter from which messaging app they were sent.
↔ … assign tickets to responsible colleagues manually or automatically via auto-routing
🤖 … start with simple automation and take it to the next level with Conversational AI
💕 … use integrations to your existing customer management software / CRM to drive personalized customer experience
💰 … use the No. 1 communication channel effectively and at fair prices and without a set-up fee for maximum personal digital consulting!
You can get a first impression of our product here:
👉Tip: Schedule a live demo for the Messenger Communication Platform now. We will guide you through the product via web demo and give you expert tips as well as answers to all your questions.
Anil Soeyuenmez
Hi, I'm Anil. I am a Junior Content Marketing Manager, interested in Tech and an enthusiast when it comes to words and writing. I love to play and study Chess (but I'm not too good at it), I am crazy about Martial Arts and addicted to Food and Travelling.
Carlos Bravo
12 May, 2022
If you have an online business, it’s best to have all your digital media connected, don’t you think? That includes linking WhatsApp to Facebook.
It’s only logical, Facebook is one of the most important social networks where you share content about your business… and WhatsApp is the most widely used instant messaging app.
💡 First conclusion: linking the two platforms will help you grow your business.
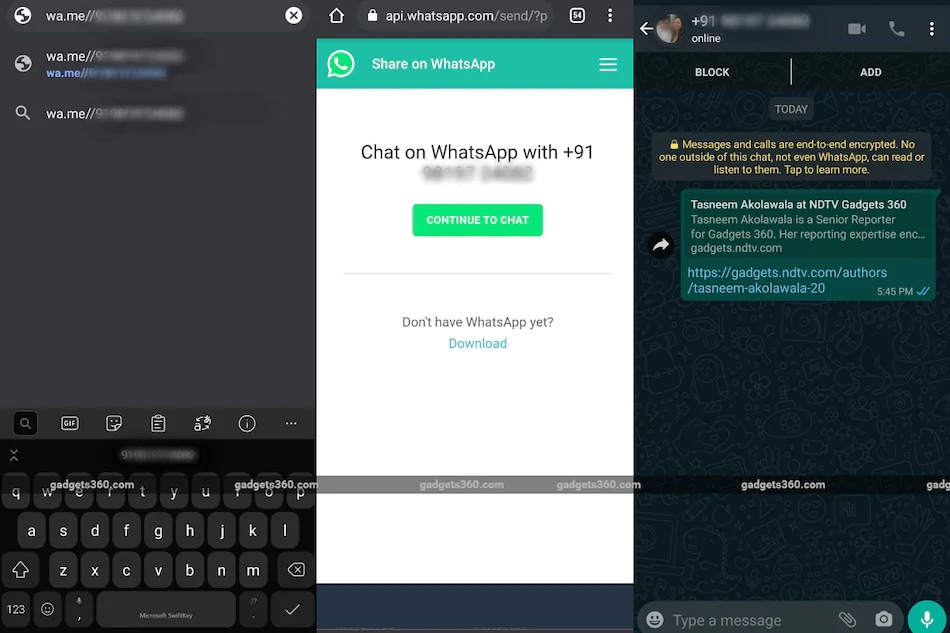
Why? Among other advantages, you can create ads on Facebook to click through to WhatsApp so users will send you a message on WhatsApp Business from Facebook. Another advantage you’ll find interesting is that users who visit your Facebook fan page can contact you and send you a WhatsApp message in just one click.
That way, you make it easier for Facebook users to contact you and that can be key in closing a sale and having a satisfied customer.
That said, how can you link WhatsApp to Facebook? Here we go!
To synch and connect the two platforms properly, you need:
▶️ A WhatsApp Business account: you can download it here for Android or iOS.
▶️ A Facebook fan page: learn how to create a page here and optimize your business page here.
▶️ Updated apps so you can sync them.
You have two options to link the platforms, from WhatsApp Business or from Facebook. We’ll explain both.
If you’re ready, let’s get started!
Let’s start with the instant messaging app. Remember to make sure you’ve downloaded the latest version of the app.
❇️ If you don’t have a page already when you go to link WhatsApp and Facebook, you’ll see the option to create one on the same screen.
Now we’ll add another player, your Facebook fan page. Remember to create your business page so you can link it to WhatsApp Business.
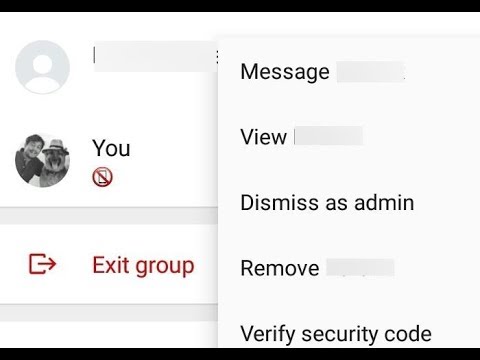
Follow the steps above on WhatsApp Business, in Settings or More options, depending on your operating system, tap on the linked Facebook account > Remove WhatsApp > Remove. Done!
Now you know how to link WhatsApp to Facebook. Now all you have to do is connect them and reap the rewards.
If you need a guide to get started, here’s the Metricool Facebook Marketing guide. Your perfect companion to set off on your Facebook adventure.
Carlos Bravo
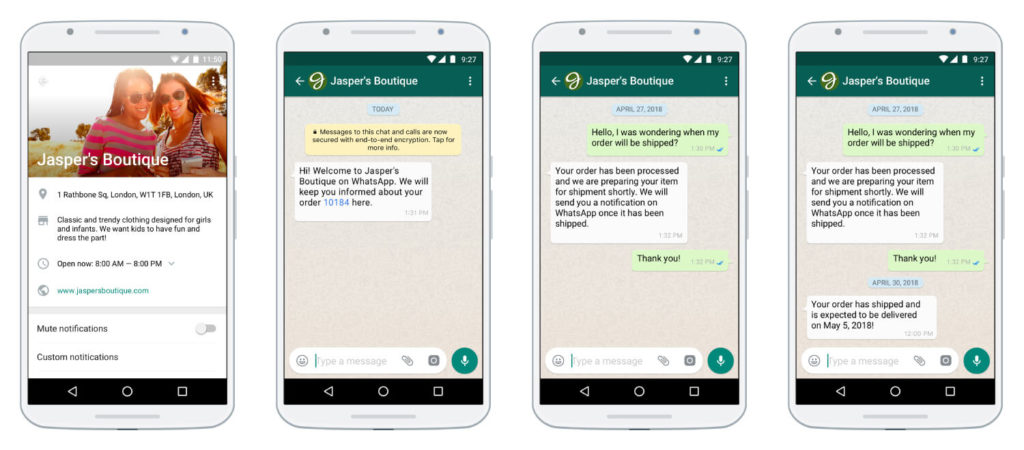
Recently, a function has appeared that allows you to link WhatsApp to a Facebook page. This add-on is designed to improve the productivity of the company, and facilitate the interaction between the organization and customers. By connecting the application to the page, the user will be able to advertise and sell services in the application and the social network.
Contents
The WhatsApp business was created to help businesses and entrepreneurs. It creates a profile of a firm or company, and this allows you to establish communication with the client base.
Facebook is a popular social network, used daily by hundreds of thousands of users from all over the globe. Therefore, the combination of two popular sites allows the company to effectively advertise its services, keep in touch with customers and attract new consumers.
Contact, through a message or a call, with a brand or company will turn out in one click.
To synchronize information about the organization (working hours, website address, office location), you need to connect WhatsApp to Facebook. After connecting, the user will also be able to set up an ad unit to go to the WhatsApp business program.
Before connecting, you need to install the WhatsApp business application on your mobile device. The app supports Android and iPhone.
If the user has a personal account, then during the synchronization process, he will be asked to switch to a business account. Whatsapp business needs to be updated to the latest version. For owners of android devices, the application version is 2.19.132. For iOS devices - 2.20. 20.
20.
Account linking is possible provided that the user is the owner or administrator of the Facebook page. Once linked, the administrator and editor will be given access to edit and change the organization details. The edited data will appear on the whatsapp business screen.
To connect whatsapp business to facebook page:
After the steps have been completed, the Facebook page and WhatsApp business account will become linked. When you click the information synchronization item, all information about the organization available on the page will be displayed in the WhatsApp business.
Synchronization is carried out in one direction, from the Facebook page to the WhatsApp business program. The edited data on the page in the social network is displayed in the application. And the changes made in the business application are displayed only in the application itself, but not on Facebook.
Enabled synchronization is active both in the mobile app and in the web version.
Before using this link, you need to fill out the organization profile in the WhatsApp business application. For the application to work correctly, it is necessary to allow access to the requested information during installation.
All fields are filled in the profile window: name, description, address, type of activity, e-mail address. The profile is configured through the settings menu, where the 'profile' item is selected.
Setting up auto-replies in the 'message management' section. The next item is the ordering of correspondence.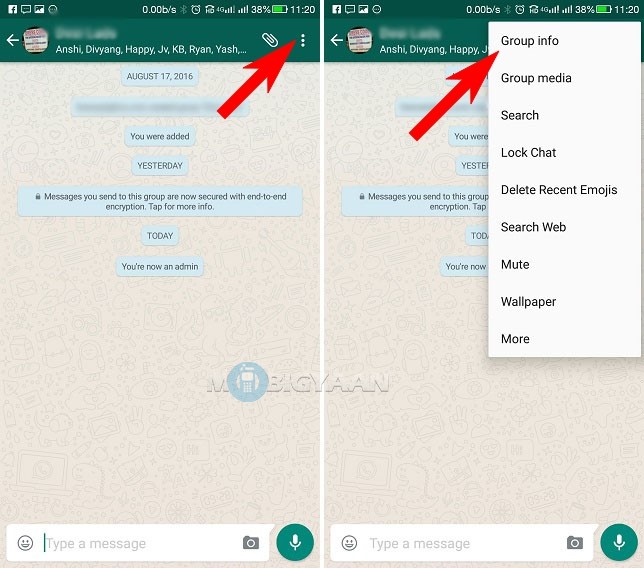 In the main menu (entry through three dots at the top of the screen), you enter the 'shortcuts' section. The function is necessary for large volumes of messages.
Publishing a post on Facebook and promoting on WhatsApp:
Viewing statistics to determine the efficiency of work is done in the settings menu. The item with business account settings is selected, then the item with statistics.
Setting up auto-replies is done in the business account settings in the message management section. The administrator independently enters a test message, and chooses to whom and when to send them.
Welcome messages are needed to create a positive impression when visiting a page. The administrator configures the categories to which the message will be sent.
Out of office notification, tells customers that the page owner is temporarily away. It is possible to configure the sending of messages: the time of sending (always, according to the established schedule, on non-working days or time) and the text of the message.
Customizable abbreviations, allow you to send links to Internet pages (websites) and directories.
Thanks to auto-messages, your workflow will increase, as there is no need to constantly write new messages or look for the necessary link.
To connect whatsapp to facebook, just follow the steps above. By linking a WhatsApp business to a social network page, communication with customers will take place in a convenient and efficient manner.
WhatsApp Business API is designed to ensure that businesses always stay in touch with customers and be the first to write without fear of restrictions. However, it is not always possible to immediately connect and configure it. Read this guide and you will be able to pass verification the first time.
 Create FaceBook Bus Bus bring (FBM)
 In order to create a Facebook Business Manager, you must have a personal Facebook page. So if you don't have one, create it. After that, you can start creating FBM:
Business Manager profile ready.
|
Only a business account can be verified, not a public community. Therefore, a business page is needed.
| To speed up verification in the future, the page must be active.
|
Facebook does not limit the number of pages. For verification, you need to link at least one page to FBM. The data about the page will be checked by the technical support of the social network.
Open Facebook Business Manager and go to Company information

| Fill in all the fields in your account accurately. Keep in mind that all data on the page must exactly match the documents. This will help registration in the future. |
Go to Brand Security > Domains and follow the instructions. If you do everything right, you will see Confirmed .
Add the following information to the main page of the site (usually placed in the footer):
 For example: if the site is www.chat2desk.com, then the address should be [email protected]
 | This data must completely match the ones you specified earlier. Most often, companies “roll in” at the address verification stage, so be careful. Do not change this data during verification. |
Write to us to receive an application form for registering a WhatsApp Business API account.

You have done all the preparatory work, now you can send the company for confirmation.
 Follow the Facebook instructions, check the data is correct and click Next . In a new window, upload documents to confirm the name of the organization.
 Please use a valid phone number and email as this is where the confirmation request will be sent.
The application is fully formed and sent to Facebook for verification. This process takes about one week. If before that you did everything correctly, then verification will be quick and without problems.
Then you will have a personal account on the provider's website. In your personal account, you need to verify the display name and phone number.
This is the name that is displayed in Facebook messenger in the company profile. It is necessary so that the client can immediately see which organization is writing to him.
In most cases, this is the organization name that is chosen and approved by Facebook technical support.
The recommendations for choosing a name are quite strict, so a negative answer can be obtained due to very small details. In order not to delay, try Facebook's tips on choosing a name from the link. It can be changed in your account.
 This is only possible after FBM verification.
 Do two things before confirming:
After agreeing on the name in the personal account, the button Trigger registration or Re-register number is activated. Click on it. After that, a verification code will be sent to the specified mobile phone number in your personal account. Confirm it and click Complete registration . Fill in the PIN code in the field that appears.
WhatsApp Business API number is now verified.
When you register, you need to connect a phone number in your 360dialog account. To do this, you need to get an API key. Click Generate API Key .
| Be careful: you can copy the key only once, it will not appear again. Therefore, save it just in case in a separate file. |
The received key must be inserted in your account in Chat2Desk. After that, the number will be activated. Open Accounts and channels , select the number associated with WhatsApp Business API, click on the pencil icon and enter the API key.
Then click the button Show details , go to your 360dialog account and fill in the company profile.
Done. You have been verified, you can now use the WhatsApp Business API.
The next step is to create HSM templates in your 360dialog account and send them from Chat2Desk.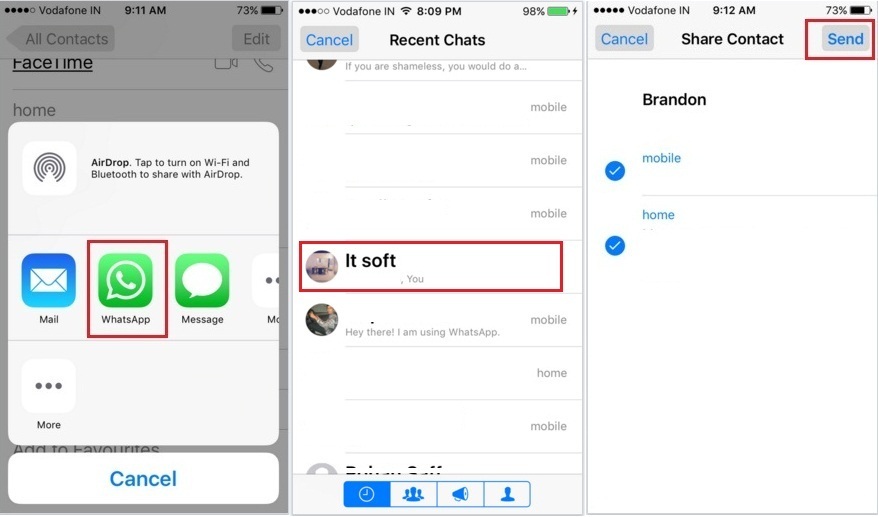
 Develop the page right away: