Instagram overlay stickers are the new creative trend making waves (quite literally) on Instagram!
Businesses, influencers, and Instagrammers alike are jumping on the trend to create eye-catching content that stops scrollers in their tracks.
From hand-drawn doodles to colorful rainbows, Instagram overlay stickers can be used to add a bright pop of color, set a fun and playful tone, and bring extra personality to your posts.
In this post, you’ll learn how to create your own Instagram overlay stickers, discover creative examples from influencers and brands, and find out how to successfully incorporate stickers into your feed:
What Are Instagram Overlay Stickers?Stickers have seen a huge surge in usage in Instagram Stories, and now the trend is making its way into Instagram feeds too.
Instagram overlay stickers are graphic designs that are added to an image or video. Bright flowing lines, lightning bolts, and flowers are already proving to be popular choices:
Thanks to easy-to-use design apps, you can now quickly create custom overlay stickers for your pictures too!
Some influencers have even started selling their own custom packs, removing the challenge of creating designs altogether:
View this post on Instagram
A post shared by Later: Visual Social Marketing (@latermedia)
Brands are capitalizing on this trend too, creating memorable multimedia experiences with pops of personality:
Take for example Create & Cultivate, who add pastel brush strokes and dainty illustrations to really dial up the celebratory mood of their posts.
Cult beauty brand Glossier showcase product swatches in their overlay stickers, creating a fresh new way for followers to interact with their products:
View this post on Instagram
A post shared by Later: Visual Social Marketing (@latermedia)
While adding different stickers to your posts and stories can be a lot of fun, you’ll want to make sure you use them sparingly. Only add stickers to your posts where they make sense and are a good fit for the content you’re sharing.
The good news is, it’s never been easier to get creative with overlay stickers on your posts!
From creating your own custom overlay stickers to finding your favorite pre-made “pack”, we’re sharing a few different ways you can stay on top of the trend this year.
Plus, we created our own FREE Instagram Overlay Sticker Pack that you can use with your favorite editing app! Just sign up below and we’ll send the pack straight to your inbox:
Ready to learn how to add Instagram overlays to your photos? Let’s dive in:
#1: Use an App to Create Custom DesignsUsing an app to create your overlay stickers is a foolproof way to create unique designs on-the-go.
Luckily, tons of new apps are popping up to help you create on-brand designs and take on this trend in a way that fits with your business.
Here are a few options for using apps to create customized overlay stickers:
Developed by the creators of A Beautiful Mess and A Color Story, A Design Kit is a fun way to add life to your images. The app is packed with stickers, backgrounds, and realistic brushes that let you draw textures or colors directly on to your photos:
Plus, A Design Kit has a wide-range of playful stickers that you can add to your images:
You can also use the in-app brush tools to add strokes of color to your image:
Tip: Use the eraser tool to remove parts of the stroke (such as sections that overlap the focal point of the image) to fully integrate the sticker into your post.
For inspiration, you can also follow #ADesignKit to check out designs from other users in the community.
View this post on Instagram
A post shared by Later: Visual Social Marketing (@latermedia)
If you’re looking to create more customized Instagram overlay stickers, Over might be the best option for you!
Over is packed with graphic stickers that you can add to your photos, from basic doodles to graphic designs, to help you create high-quality, on-brand content.
Once you choose your design, you can easily resize, change the color, alter the opacity, and mask parts of your chosen sticker.
See how we’ve added in these circles to the blue wall, and then used the Mask tool (more on this handy tool later in this blog post!) to give our image bit more “pop”:
The best news is that you don’t need any prior design knowledge to get started.
Thanks to Over’s completely customizable designs — you can create Instagram overlay stickers that match your Instagram aesthetic seamlessly and showcase your business in just minutes, using only your phone!
View this post on Instagram
A post shared by Later: Visual Social Marketing (@latermedia)
Check out our post How to Design Instagram Stories That Captivate Your Audience to learn more about designing stunning Instagram Stories with Over.
Alternatively, if you’re more familiar with the Adobe Creative Cloud, Adobe Photoshop Sketch app is a great way to get more freedom with your sticker designs.
Mirroring the functionality of Photoshop, the app has a range of brush tools that you can use to create textured, paint-like strokes on your posts.
You can also edit the opacity of each layer, creating a handy way to see exactly which part of the layer should be erased to create a perfectly aligned overlay sticker:
As you can see, there are a ton of great apps that allow you to get creative with overlay stickers for your posts!
If you’re looking for some more creative ways to level-up your Instagram content, you can check out our 14 Apps For Creating Gorgeous Instagram Stories blog post!
#2: Use a Pre-Designed Instagram Sticker PackInstagram overlay stickers have become so popular that some influencers have started releasing their own custom sticker packs!
Influencers Mallory Joy (@malloryonthemoon) and Jasmine Lorimer (@jasmine. lorimer) have created their own downloadable sets – so you can now recreate their trademark edits in your posts.
View this post on Instagram
A post shared by Later: Visual Social Marketing (@latermedia)
Once you purchase their sticker pack, you can easily add them to your pics with an editing app, such as Canva, Over, or PicsArt.
Each artist will have different ways of editing and adding the overlay stickers to your images, so it’s worth checking in with them that they’re compatible with a program or app that you’re comfortable using.
View this post on Instagram
A post shared by Later: Visual Social Marketing (@latermedia)
Buying a pre-designed pack of stickers is a great way to take on the trend while maintaining a cohesive aesthetic.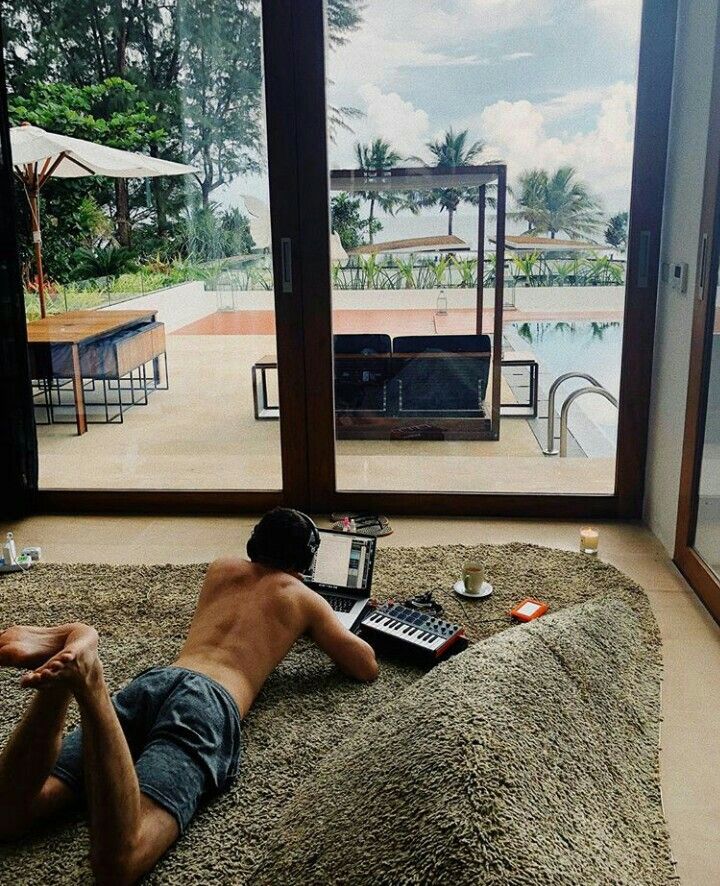 Using Instagram overlay stickers in a consistent style can add a ton of personality to your posts and stories, and will help you build a loyal following!
To make life even easier, we’ve created a free Instagram overlay sticker pack that you can download right now.
The pack includes 10 overlay stickers themes (with 52 style variations!) designed to make your posts pop with color, including doodles, stars, constellations, and flower designs.
Fill out the form below and hit download to find your dream sticker overlay:
Here’s how to use them and design Instagram posts that stand out from the crowd:
When you fill out the form above, your stickers will be emailed to your inbox, or you’ll be given the option to download the pack straight away too.
Once you’ve downloaded the sticker pack on desktop, you need to unzip the file by opening it to reveal your shiny new folder of stickers!
If you plan to edit your images on your desktop, you can add the sticker images to Adobe Photoshop or Canva by uploading or adding the image files.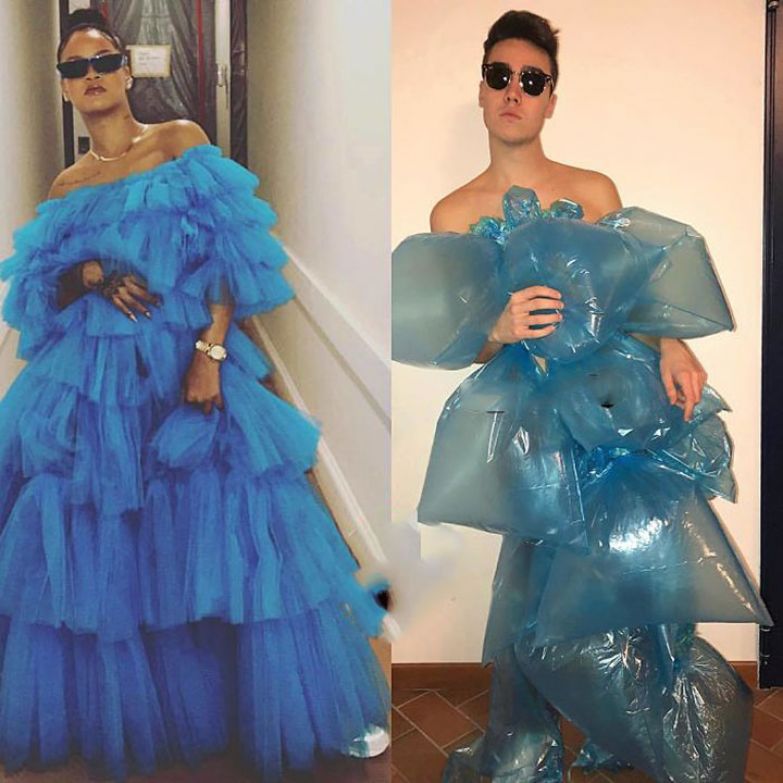
If you want to edit your images using a mobile app, carry on to step #2!
To edit the stickers on mobile, you’ll need to transfer each sticker image from your desktop to your mobile and save them to your camera roll.
You can do this by either attaching them to an email, saving them to a Dropbox folder that you’ll have access to on your mobile from the Dropbox app, or (for Apple users) Airdrop them to yourself.
Once saved to your mobile’s camera roll, you can select these stickers from within an editing app, such as Canva, Over, or PicsArt, and start editing!
There are tons of great mobile photo editing apps that will allow you to overlay stickers from your camera roll on top of your images, and it’s worth experimenting with a few to find an app that suits your needs!
For this example, we’re going to use Over app as it’s super simple to navigate, plus there’s a handy masking tool which can help make the overlay sticker “peek out” from behind your image! Cool right?
Here’s how to do it:
#1: Choose and Edit Your Image for Instagram
Once you open Over app, you’ll need to start by select the image you’ll want to edit from your camera roll:
From here, you can make any necessary changes like cropping it to fit the right dimensions for Instagram.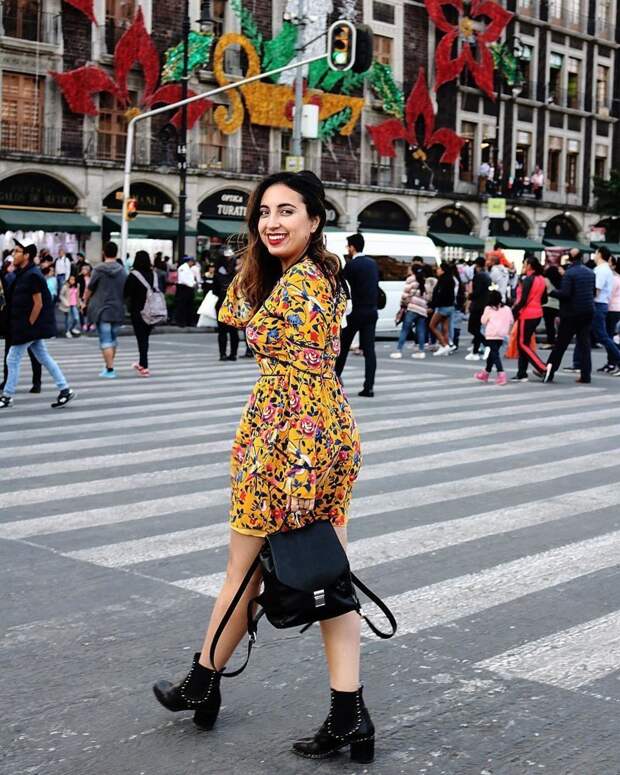 Or add filters, edit the colors or text to the image using Over’s tools.
Once you’re happy with your image, it’s time to add in the overlay stickers!
#2: Add Your Overlay Sticker to Your Image
Adding your overlay stickers is a similar process! Now that you have sent the overlay sticker image files to your mobile’s camera roll, you just have to repeat step #1 above, but choose the overlay sticker you want to add instead!
Just tap the “Image” button at the bottom of your screen to choose your sticker from your camera roll:
You can then resize and reposition the sticker to place it where you’d like on the image.
And if you’d like to customize your sticker a little bit more, you can use Over’s image editing features like filters, color adjust, and saturation to change the sticker’s look. We turned down the opacity in this example to make it a little more translucent:
#3: Use the Mask Tool to Edit the Overlay Sticker
While sometimes you may want to literally overlay the sticker on top of your image, the Mask tool is really useful if you want to make it look like the sticker is coming out from “behind” elements in your image.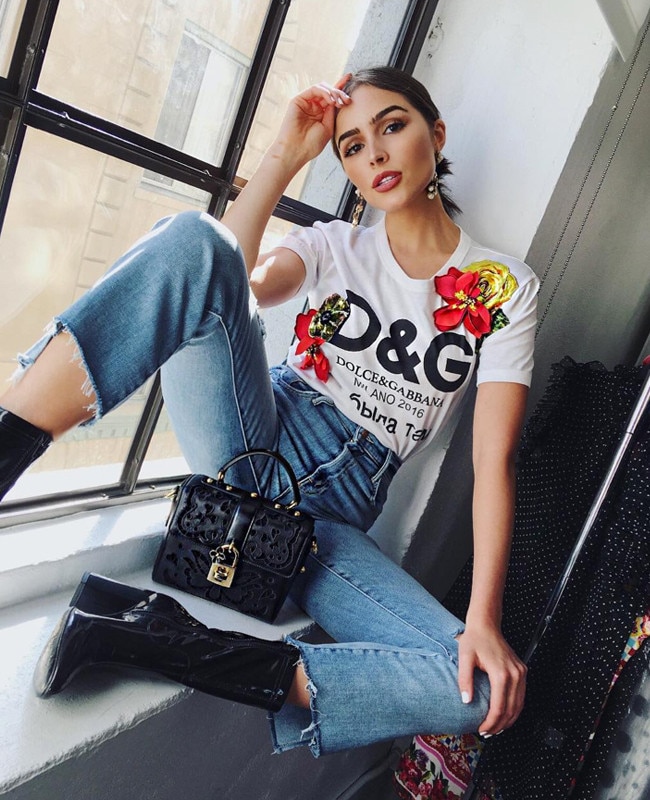
To get this effect, you need to select Mask from the editing tools at the bottom of our screen.
This will give you an “eraser” that will let you remove parts of the sticker that you don’t want to overlay on part of your image:
By erasing out some of the sticker, it gives the illusion that the sticker is peeking out from behind elements of your image, or helps make the sticker a more subtle addition to your image.
Over is full of great tools and features to help you make the most of your photos and images for Instagram. We reveal some of our favorite Over tips (including the Mask tool!) in this video guide:
#4: Download & Save Your Edited Image to Your Camera Roll
Once you’re happy with your edits and final image, all you have to do is save your image from Over to your camera roll.
Just tap the yellow export button on the top right-hand corner of your screen:
Then it’s ready to post on Instagram, or you can add it to your Media Library if you use Later to schedule your posts and Instagram Stories.
Downloading Later’s free overlay sticker pack is the easiest and most cost-effective way to start experimenting with this new trend in your Instagram feed – no budget required!
How to Incorporate Instagram Overlay Stickers Into Your FeedWhatever type of Instagram overlay stickers you choose to use, an important thing to consider is how they look alongside your other posts.
Your designs should fit cohesively with your brand aesthetic, as a consistent Instagram feed will attract more followers and engagement.
@jasmine.lorimer
Using a visual Instagram planner like Later can help you plan out the look of your Instagram feed after you’ve edited your photos.
Just drag and drop your photos onto the visual planner, rearrange them to see how they’ll look in your Instagram feed, and then save to schedule them!
There are so many different ways you incorporate Instagram overlay stickers into your strategy, so you can really let your creativity flow! Remember, you can download our free stickers here to get started.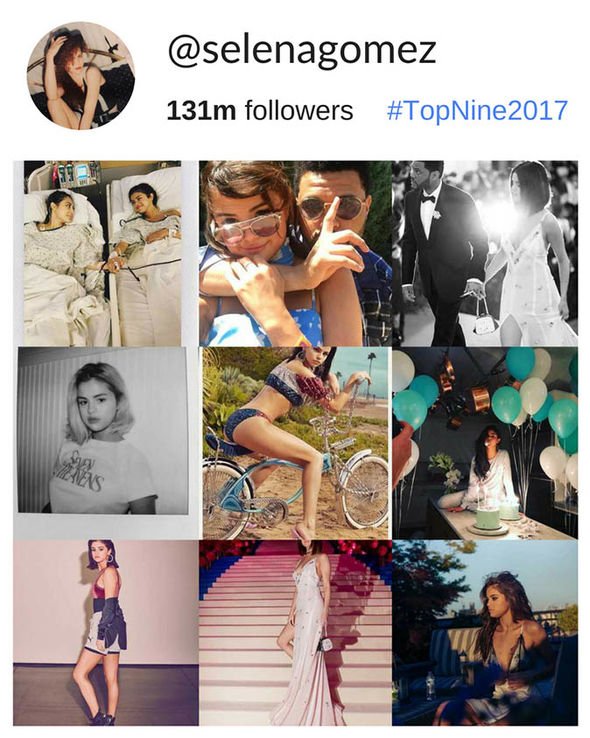
Plan your feed and schedule Instagram posts for free with Later! Sign up now to save time and create a gorgeous Instagram feed that attracts new followers:
Table of Contents
If you have been following me on Instagram, you know I love adding in stars on my dusk and night photos. I think it just adds something special to your image. Even though you can’t see the stars in real life sometimes, we know they are there ?. In this easy Photoshop tutorial, I will show you how to add Stars in Photoshop in under 5 simple steps! In the end, you’ll be able to add in stars to all your photos perfect for Instagram.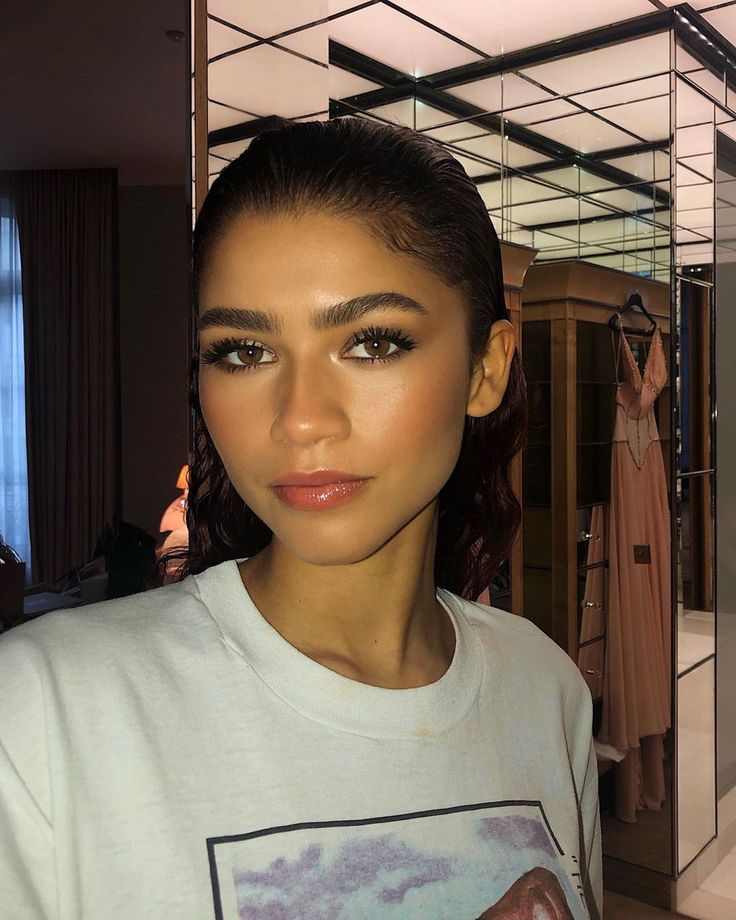
If you have your own photo of a starry night use it. But if you don’t it’s okay! I found a high-resolution star image through Google Image Search.
Find a photo of stars that you would like to use.
To find a high-resolution photo in Google Images click Tools -> Size -> Large.
You might have to scroll a while to find one that you like. Ideally, the best image will have a darker background with more realistic stars.
Download your image of choice and save the file with an easy name like “Stars”. You can refer back to this image to add stars even faster.
Open up the image you would like to add to your stars. Next, find the star image that you just downloaded and insert it on top of your image.
With a Mac, you can search in your Finder the file name of your star image and drag it into photoshop.
Next, you will have to move the star image over the area where you would like stars.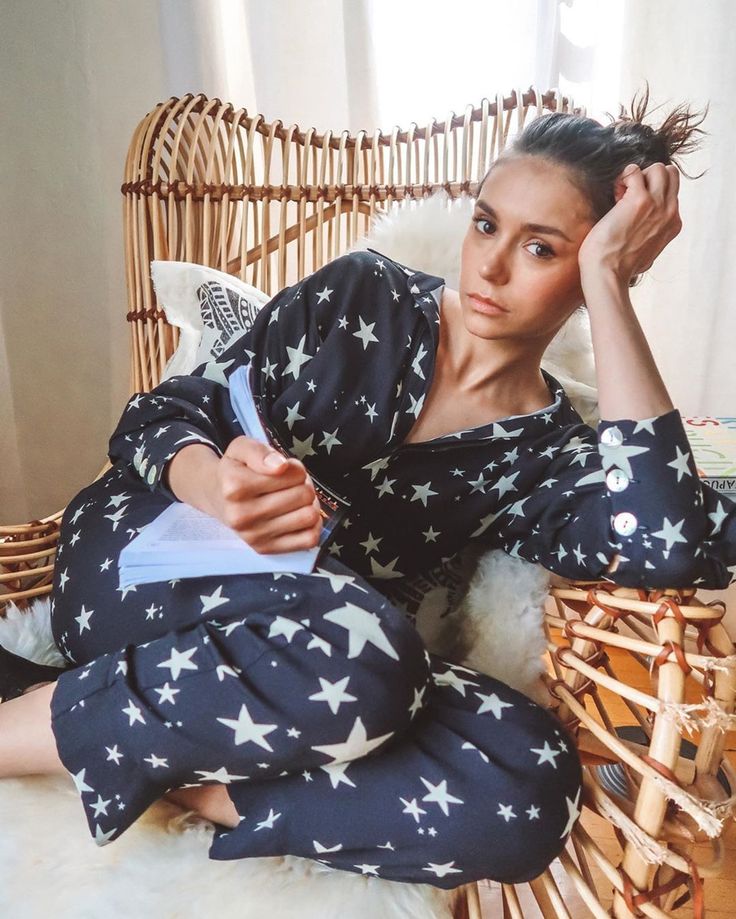 To do this you have to press ⌘ (command or Control on PC) and T to Transform/ move the image.
In this step, you can also resize your star image. If you’d like the stars bigger, expand your image.
This is where the magic happens. By default, your layers will be in Normal mode, but to show the stars in a more natural way, put your Star Layer in Screen Mode.
Once your stars are in Screen mode, there will be some stars you don’t want showing.
All you have to do is click the Eraser tool and erase over the stars you no longer want in the image.
TIP: A quick shortcut to change your brush size on the keyboard is pressing [ and ] keys.
NOTE: I always get this pop-up once I do this if you get the same message just press Okay.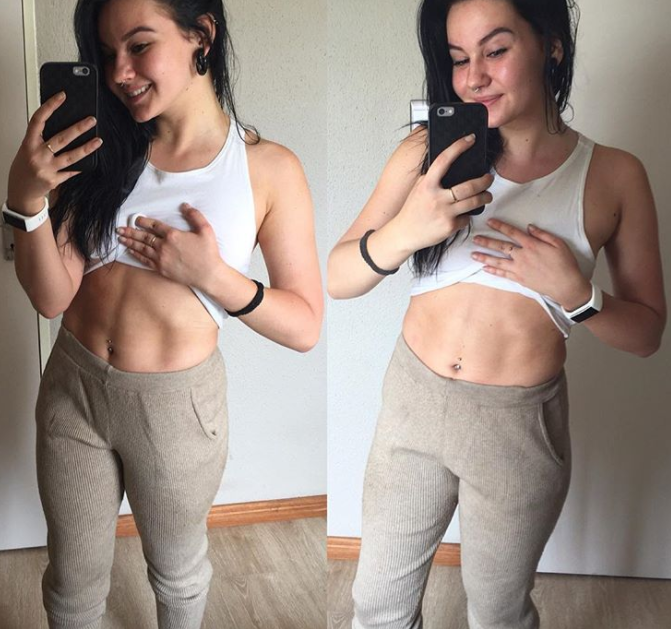 Now erase away.
Because some stars were covering the Brooklyn Bridge and skyline, I brushed over those areas with the eraser tool.
The image below shows the final erased effect.
If your stars are looking too bright for your image, play around with the opacity. I usually leave mine around 80%-100%.
Now that you have learned how to add stars in your photos, you can use this same method for objects like moons and suns.
Hope you enjoyed this Tutorial. Here are some of my favorite star photo transformations!
If you enjoyed this How to Add Stars in Photoshop, Pin it to your photography boards. Happy editing!
* The social network is recognized as extremist and banned on the territory Russian Federation.
Get hooked on filters on Instagram (the social network is recognized as extremist and banned on the territory of the Russian Federation), but you still can't get the same amazing shot as a star? Don't be discouraged, we'll tell you what a photo has to go through before being in a celebrity account
Grazia
Tags:
the beauty
makeup
clothing
Bloggers
Cafe
The first rule of a beautiful woman is to surround yourself with beauty.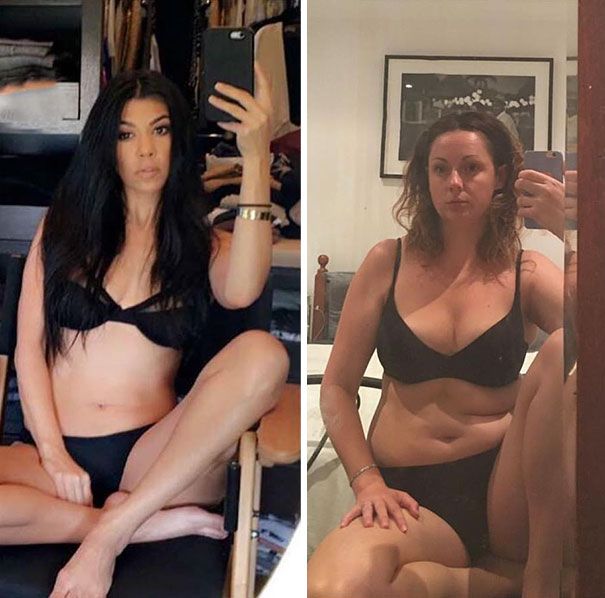 That's what Instagrammers are trying to do! True, not everyone has the opportunity to constantly fly to resorts, so you have to get out. So, for the sake of staged photos in beautiful hotels with panoramic views (certainly in a snow-white bathrobe), many girls unite to pay for a room, after which they take turns organizing photo shoots. To take a photo in an expensive car, or at least against the background, Instagrammers go to car dealerships, car rental centers, or even call a business class taxi. Plus, many elite establishments have recently been ready to cooperate “by barter” in the form of geotaging by a blogger, so there should be pictures from premium salons and expensive cafes! Well, you probably already knew about the rental of bouquets and luxury clothes. It remains only to polish the image of an abundant woman with a separately purchased brand package (such services are also provided - the need, as they say, is cunning).
1 of 3
1 /3
Recently a number of bloggers “leave the profession” and talk about what remains behind the scenes. So, for the sake of one successful picture, about 1-2 hundred photos are taken! Models are photographed, as a rule, by the most patient friends or relatives - far from every Instagrammer has a court photographer. By the way, a hundred photos fall on just one pose. And you need to “master the location” to the maximum, so count the energy costs and draw conclusions!
ITEM 1 of 3
1 /3
with a couple of filters, as you probably, you can’t do in this difficult matter. As a rule, a photo obtained with sweat and blood goes through 2 stages of processing - basic correction and special effects. The “basic” package includes retouching, thanks to which pimples and bumps disappear from the faces of beauties; smoothing, giving the skin a velvety feel, and working with light for a “rested” look effect.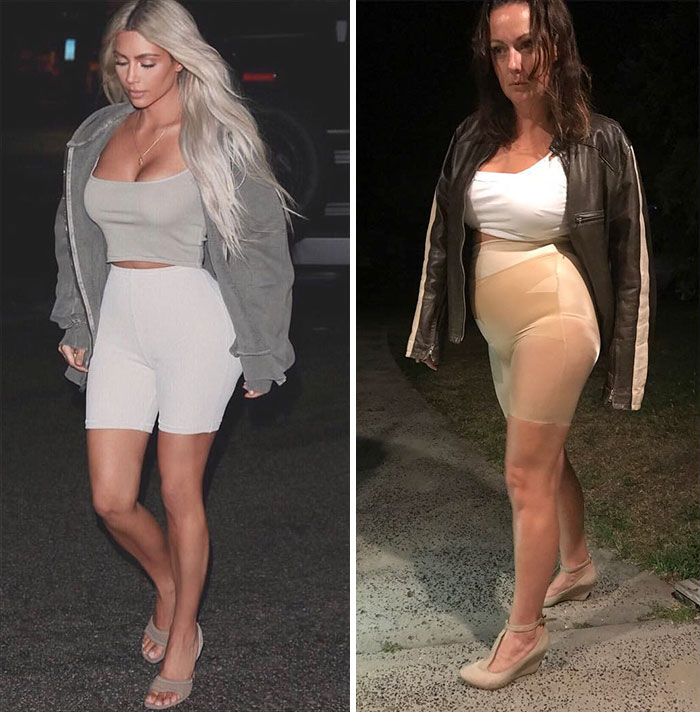 Special effects include, for example, color correction: by fitting all photos to one color template, bloggers get a harmonious profile with photos designed in the same style. But in addition to “coloring” the picture itself, the girls also embellish themselves - they do online makeup and brighten the whites of the eyes and teeth, add blush, draw arrows ... And if programs for working with the face come first, then they are clearly followed by correctors figures with which you can "inflate" the chest or narrow the waist. All these applications can be easily found on your own, choosing to your taste. Among them, professional photographers note Snapseed, Union, Perfect365, BodyEditor, as well as VSCO, Camera+ and TouchRetouch.
Item 1 of 3
1 / 3
Source: Cosmo.ru
Creating content for social networks is, if not an art, then at least a skill that requires imagination, time, diligence and creativity.
There are fewer and fewer people who think that being a blogger is easy.
What is worth only painstaking approach to filming! The right light, angle, winning pose, as a rule, decide everything, so if you dream of becoming an influencer, then a few life hacks on how to look 100% in the frame will definitely not hurt you.
Especially from social media guru Yulia Gavrilina.
We think her 4.4 million Instagram followers would hardly subscribe to anything uninteresting. 9Correct posture Without it, you won't get a beautiful shot. I use the rule of three zones (composition recommendation, according to which the object is placed in the left or right third of the image, and the remaining two thirds remain free - Approx. ed. ). And the butt and chest become visually a little larger when I bend in the lower back.
Honestly, this really adds femininity and elegance to the figure.
This is also very important. There is an elementary technique - take a deep breath, take your shoulders back and exhale. So the shoulders instantly straighten out, the neck visually lengthens and the chest is emphasized.
 gavrilina
 mysterious and sexy. You just need to stand half-turned to the camera and look over your shoulder directly into the lens.
It looks cool if you touch the hair in the frame: you can, for example, play with ponytails or pigtails with a mischievous smile, tilting your head to the side.
Sit on the floor, leaning slightly to one side. Bend one leg at the knee, placing it on the floor, bend the other in an upright position. Place one hand on the floor and lean to the side. Photo for a million likes is ready!
face and so on.