In the name of convenience, Facebook remembers your email address to seamlessly log in the next time you try to browse social media. That can be troublesome when using your Facebook account from a café or your friends’ phone. Here’s how you can remove remembered email addresses in Facebook login on the web and mobile and leave no trace behind.
In this post, we will show you how to remove remembered Facebook accounts and the remembered email address from Facebook login on the web and mobile. Without further ado, let’s get started.
The practice makes sense on your personal computer, but you should click on the Not Now button if you are using Facebook on some other computer or laptop.
From now on, when you log out from your Facebook account, the app won’t remember your password, and you will be required to type the password again to access your account manually.
Here’s what the Facebook home looks like when you log out from social media.
You can also click on forget password from the login window, and Facebook will reveal your email address and masked mobile number to reset your password.
If you are done using Facebook on the computer, you can hover the cursor over the saved account and click on the x mark to remove the account.
Even after removing the Facebook account, Facebook will automatically fill in the saved email and password when you try to click on the Email Address box. Let’s remove it as well.
For example, Google will ask you to save the login information to the Chrome Password Manager. That way, Google can easily fill up the login information for you in the future.
Once again, this feature makes sense for your personal computer only. You shouldn’t be saving your Facebook login information to someone else’s Google account.
Here’s how you can remove saved Facebook information from the Google Chrome browser.
Step 1: Open the Chrome browser and click on the three-dot menu at the top.
Step 2: Go to Settings.
Step 3: Select Autofill and click on Passwords.
Step 4: From the Saved Passwords menu, find Facebook.com.
Step 5: Click on the three-dot menu beside it and select Remove.
Alternatively, you can visit Facebook. com and click on the little key icon in the address bar. Click on the Delete icon and remove the saved email address in the Facebook login.
Click on the email address box and Chrome will no longer offer your email address to autofill.
Step 1: Open Facebook on iPhone and go to the Menu tab.
Step 2: Scroll down and select Log Out.
You aren’t completely logged out there. Anyone can tap on your profile picture and log back in. Let’s remove your Facebook account completely.
Step 3: Tap on the Settings gear as shown in the screenshot.
Step 4: Select an account you want to remove.
Remove saved login info – The option will remove your email address or mobile number and it will ask you to use a password the next time you want to browse Facebook.
Remove account – It will completely remove your account and you must use a combination of your Facebook email address and password to log in again.
Tap on the three-dot menu and select the Remove account from the device option.
Facebook offers an option to remove saved login information from any previous device. Here’s what you need to do.
Step 1: Visit Facebook on the web and sign in to your account.
Step 2: Click on the down arrow and open Settings.
Step 3: Go to Settings and select Security and login.
Step 4: From the right-side menu, go to log in and click on Edit beside the Save your login information menu.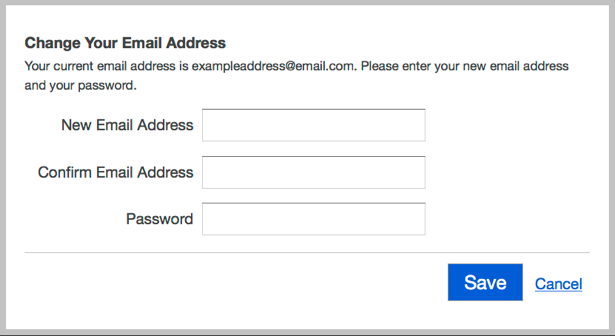
Step 5: From the Other devices and browsers option, select Remove saved login information, and you are good to go.
By default, every Facebook user has a facebook.com email address, whether he likes using it or not. Any email sent to the facebook.com email address of a user lands up in the messages folder and can be found from the search box by typing “is:email”.
The problem with a Facebook.com email address is that the address is not private, as anyone can guess the address through the vanity URL of your Facebook account. For example, if your Facebook account URL is facebook.com/abc, your facebook.com email address would be [email protected].
Until today, Facebook users had the ability to show their primary or secondary email addresses on their profile information section, instead of showing their facebook. com email address, which I don’t consider as a real email address anyway. Shy users often tweaked the visibility of their profile information section to “Private” or “Friends only” so that their real email address is hidden from spammers and random strangers, who might try to extract contact information from their Facebook profile.
Yesterday, Facebook has changed how email addresses are displayed on your Facebook profile. The change does two things :
This is in some ways useful for users who get tons of spam at their Gmail, Yahoo or Hotmail accounts and have always wondered the real source of email spam.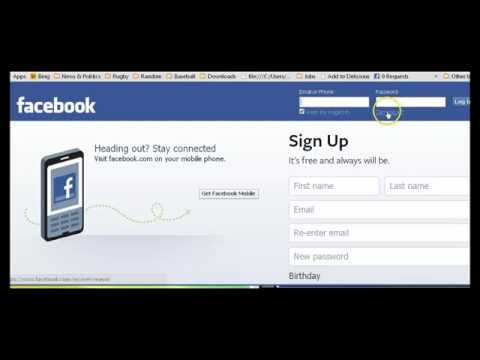 However, if you are anything like me and want to show at least one Gmail.com address publicly on your Facebook profile, here are a few things you should do.
First things first, there is no way you can permanently delete your Facebook.com email address or completely disable it. This is a core feature and it is not possible to turn your Facebook.com email off. You have to live with it.
However it is certainly possible to remove email address from Facebook profile by tweaking the email visibility settings. We will soon learn the steps to do it.
1. To replace the Facebook.com email address with a custom email address of your choice, go to your Facebook timeline and click on the “About” section. Next click the “Edit” button on the top right corner of “Contact Info” section, an example is shown below:
2. Click the “circle” button placed next to your Facebook.com email address and from the drop-down menu that appears, choose “Hidden from Timeline”.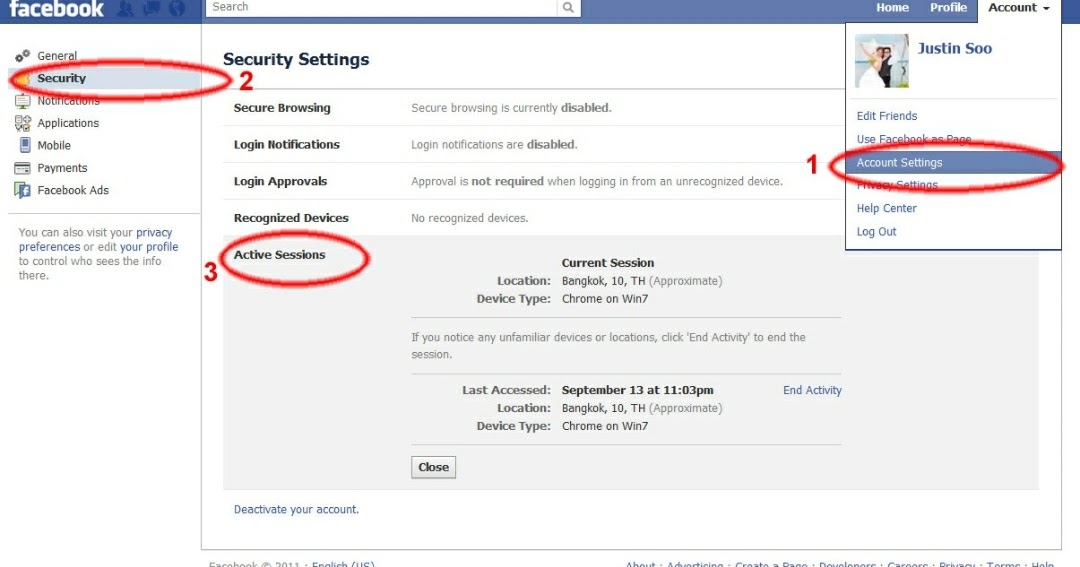 The default option from yesterday is “Shown on Timeline” so if you want to hide your Facebook.com email address, you have to choose the other option.
4. Right above your Facebook.com email address, you will see your primary and secondary email addresses listed one after another (this also includes the email address you have used to sign up for Facebook). Click the circle icon and you can choose to show your primary email address on your Facebook profile or you may also choose to keep email address hidden on Facebook.
If you ask me, I prefer showing at least one Gmail.com address on my Facebook timeline so that anyone can get in touch or send me a message. It is also worth noting that you should choose the email visibility as “Public” and not “Only me”.
At first, you need to go to the Settings and visit the General tab. Here you can find a section called Contact. Expand this section and find out the email ID that you want to remove.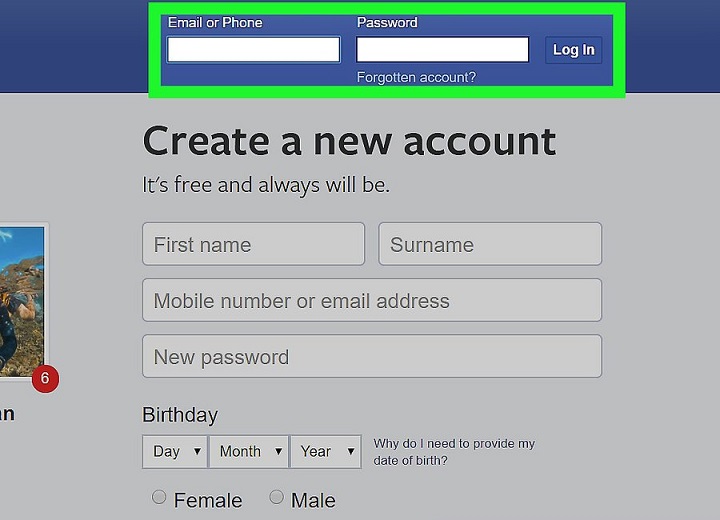 Following that, click the respective Remove button and verify your entry by entering your account password.
Related tip: Keep your real email address hidden from Facebook applications and Games.
For convenience, Facebook remembers your email address so that you can log in smoothly the next time you try to browse social networks. This can be problematic when using your Facebook account from a coffee shop or your friends phone. Here's how you can delete remembered email addresses when logging into Facebook on the web and mobile devices and leave no trace.
Table of contents
Delete remembered Facebook email address Sign in to Google Chrome
Delete remembered Facebook account
Delete remembered email address when logging in with Facebook
Delete remembered email address from Facebook app on iPhone
3. Android
 Delete saved login information from other devices
Manage your Facebook account efficiently
In this post, we will show you how to remove remembered Facebook accounts and remembered email address from Facebook login on web and mobile devices. Without further ado, let's get started.
The practice makes sense on your personal computer, but you should click the "Not now" button if you are using Facebook on another computer or laptop.
From now on, when you log out of your Facebook account, the application does not remember your password and you will need to enter your password again to access your account manually.
This is what the Facebook home page looks like when you log out of social networks.
You can also click "Forget password" in the login window and Facebook will show your email address and masked mobile phone number to reset your password.
When you're done using Facebook on your computer, you can hover over your saved account and click the x icon to delete the account.
Even after you delete your Facebook account, Facebook will automatically fill in your saved email address and password when you try to click the Email address field. Let's delete it too.
For example, Google will ask you to save your Chrome Password Manager login information. This way, Google will be able to easily fill in the login information in the future.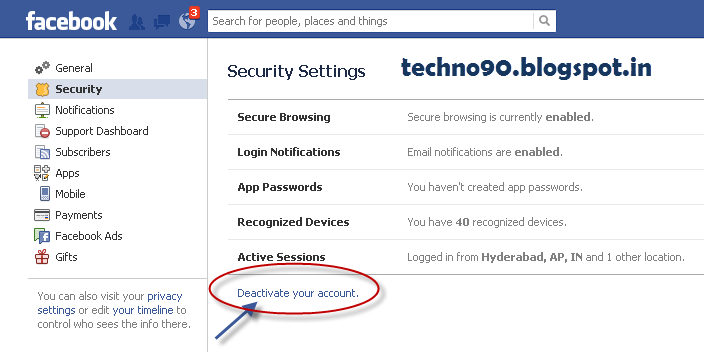
Again, this function only makes sense for your personal computer. You must not save your Facebook login information to someone else's Google account.
Here's how you can delete saved Facebook information from the Google Chrome browser.
Step 1: Open the Chrome browser and click on the three-dot menu at the top.
Step 2: Go to settings.
Step 3: Select AutoFill and click Passwords.
Step 4: In the Saved Passwords menu, find Facebook.com.
Step 5: Click on the three-dot menu next to it and select Delete.
Alternatively, you can visit Facebook.com and click the small key icon in the address bar. Click on the Delete icon and delete the saved email address in the Facebook login.
Click on the email address field and Chrome will no longer suggest your email address for autofill.
Step 1: Open Facebook on iPhone and go to Menu tab.
Step 2: Scroll down and select Sign Out.
You are not fully authorized there. Anyone can click on your profile picture and log in again. Let's delete your Facebook account completely.
Step 3: Click on the settings gear as shown in the screenshot.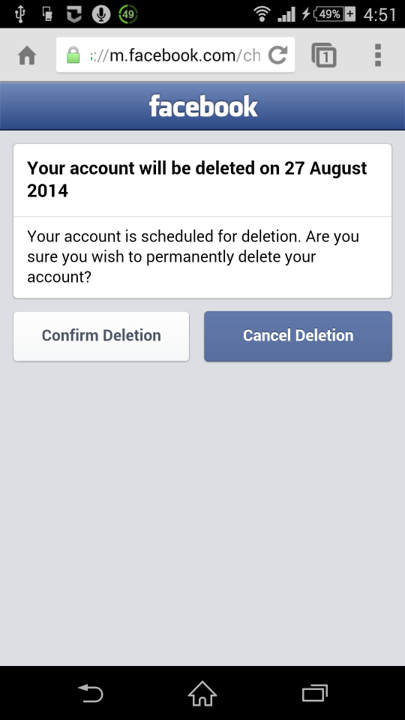
Step 4: Select the account you want to delete.
Delete Saved Login Information - This option will delete your email address or mobile phone number and ask you to use your password the next time you browse Facebook.
Delete Account - This will permanently delete your account and you will need to use your Facebook email and password combination to log in again.
Click on the three-dot menu and select the "Delete account from device" option.
Facebook offers the option to delete saved login information from any previous device. Here's what you need to do.
Step 1: Visit Facebook on the web and sign in to your account.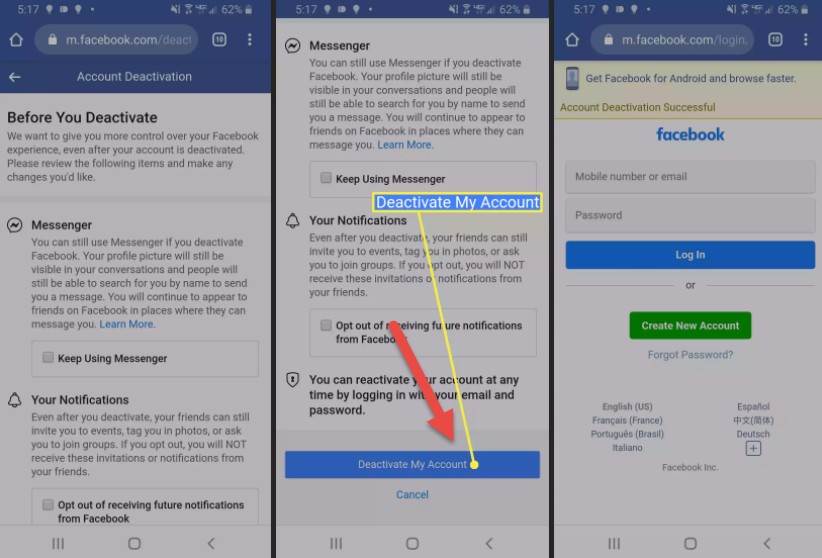
Step 2: Click the down arrow and open Settings.
Step 3: Go to Settings and select Security & Login.
Step 4: In the right menu, log in and click Edit next to the Save Login Details menu.
Step 5: Under Other Devices and Browsers, select Delete Saved Login Information and you're done.
Facebook has over two billion active users and is still the most popular social network in the world, although the gap to Instagram is shrinking every year. One of the reasons for the slowdown in Facebook's growth is the exodus of old users who migrate to other online platforms. Often these same people want to delete their accounts but don't know how to do it. Well, now we will teach them.
The process of deleting a Facebook account is in many ways similar to the same procedure performed with VKontakte and Instagram accounts. The steps for deleting the accounts of the last two social networks are discussed in detail in separate instructions published on the site: one, two.
For some unknown reason, the developers of Instagram and VKontakte have deprived users of the opportunity to delete their accounts using mobile social network clients. None of the above programs has a corresponding item or section of settings.
But this is available in the official Facebook application, thanks to which you can delete your account in two ways at once: by resorting to using a browser or a mobile client. The editors of 4iDroid have studied both options - neither of them should cause difficulties for the average user, so let's start in order. Since the procedure will be carried out on a smartphone or tablet, we will consider the required steps using the mobile version of the website as an example.
As you can see from the previous paragraph, you can easily do without the Facebook app. Any mobile browser will do for this purpose: Google Chrome, Mozilla Firefox, Safari, Opera or another. As a rule, the Chrome browser is preinstalled on Android devices, and Safari is preinstalled on iPhone and iPad. Firefox and Opera are available for free on Google Play and the App Store.
Navigation through the article:
First of all, follow the link https://m. facebook.com/ and log in to your account if you have not been authorized before. To do this, enter your email address and password in the appropriate fields, and then click on the “Login” button.
If you don't remember your login details, click the "Forgot Password" button, which will open a page with an empty form that you need to fill out with the phone number linked to your account. If you used an email address instead of a number when signing up for Facebook, select the "Search by email address or name" option. Then follow further instructions.
After logging into your account, tap on the button located in the upper right corner of the screen. Then scroll through the menu that opens to the end and click on the "Settings" item to go to the section of the same name.
Then go to the "Account Management" subsection and select the "Deactivate and delete" item.
On the next page, you will be prompted to select one of two available options. The first is account deactivation, which means a temporary account freeze, which can be canceled at any time. The profile will be disabled, but you will be able to continue using Facebook Messenger.
The second option is the complete deletion of the account, to restore access to which will never be possible again. Not only the profile will be deleted, but also all posted materials, as well as sent and received messages. Think twice before starting the account deletion process. If the decision has already been made, you should be aware of the possibility of data backup, which is performed by standard Facebook tools. But more on that later.
Check the required option and click the "Continue from ... account" button. If the choice fell on deactivating the profile, it remains to re-enter the password, thereby confirming the deactivation of the account.
If a permanent deletion procedure has been initiated, you will be prompted to export all the data you have uploaded and published while using Facebook.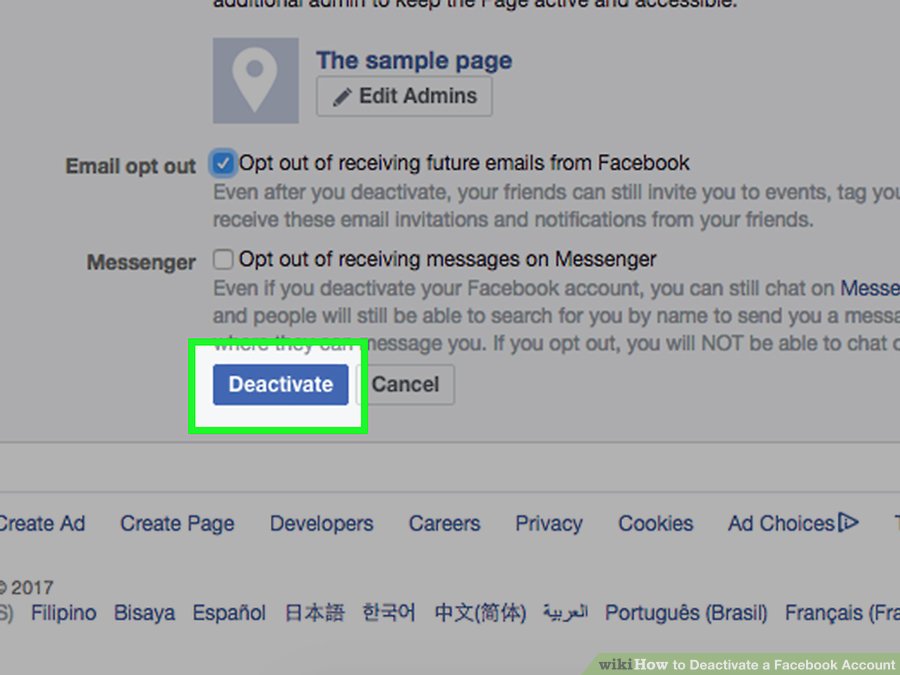 This includes posts, messages, photos and videos, search history, places visited and events created, saved items and collections, comments posted, profile information, and more.
Tap on the "Download information" button, then select specific data types (all items are checked by default) so as not to download a large archive full of unnecessary information. Also specify the date range (all time or a specific period), select the file format and the quality of the media files. At the end, click "Create File".
Depending on the amount of downloaded information, creating a backup will take some time: from several minutes to an hour. Then the archive with the files will be available for download. To download it, go to the "Available Copies" tab and click on the "Download" button. If prompted, enter a password.
Let's continue deleting the account. Use gestures or the Back button to return to the Permanently Delete Account page. Scroll down and click "Delete Account".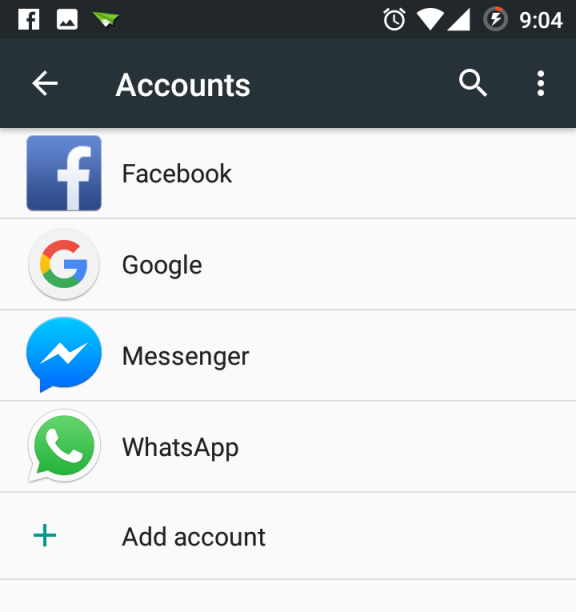 On the next page, enter your password, thereby confirming that the account belongs to you, and then click on the "Continue" button. After completing the above steps, it will be impossible to restore the profile.
The Facebook application performs the same functions as the mobile version of the site, which means that you can use it to delete your profile. If you haven't used the Facebook mobile client before, you can download it from Google Play (on Android) or the App Store (on iPhone, iPad, and iPod touch).
After installing the program, run it and log in: enter your phone number or e-mail in the first field and password in the second.
If you do not remember your login information, click on the "Forgot your password?" "Find an account" and follow the instructions.
Depending on the selected option, a six-digit password reset code will be sent via SMS or email.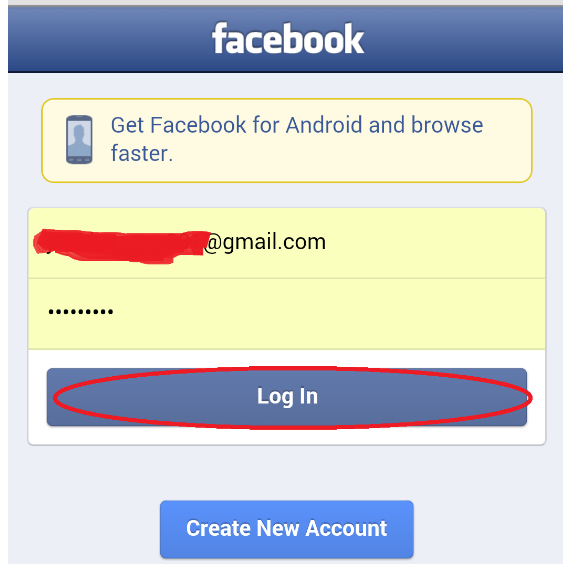 It remains to enter it in the application to reset the old and set a new account password.
If you are already logged in or remember your login details, you can skip the previous two steps. Click on the "Menu" button, which is located in the upper right corner of the screen, then scroll down the page, select "Settings and Privacy", and then "Settings".
To start deleting or blocking your Facebook account, go to the Account Management section and open the Deactivation and Deletion subsection. Since the application duplicates the functions of the mobile version of the website, all interface elements located in this subsection are identical to the corresponding controls on the Facebook website.
You will have two options: deactivate your account and completely delete it. By choosing the first option, it remains to re-enter the password, thus confirming the deactivation of the account.
The second option involves deleting the profile, which means that it will not be possible to restore it. Therefore, before deleting an account, it is recommended to export user data from it. You can create a backup that includes all the data you've uploaded and shared since you started using Facebook, or you can download specific information by setting the time period you want. The following types of data are available for download: published photos and videos, posted posts, correspondence, a list of groups in which you belonged and managed, your posts and comments in these groups, saved objects and collections, payment history, profile information and much more .
To create a backup, click on the "Download information" button, check the required categories or leave all selected. Then select the date range, file format, image and video quality, and click the "Create File" button.
After some time, a link to the generated backup will appear in the "Available copies" tab. To download the archive, click on the "Download" button. If required, additionally enter a password.
After downloading the backup, go back to the "Permanently deleting your account" page, scroll down and tap on the "Delete account" button. On the next page, enter the password, thus confirming the seriousness of your intentions. At the end, click Continue. Done - account deleted.
Once the page is deleted, the Facebook application is no longer needed, which means that it can also be deleted.
Go to the home screen or open the application menu, if available in the launcher. While holding your finger on the Facebook icon, drag it to the trash and confirm the removal of the program by selecting "OK" in the pop-up window.
Place your finger on the Facebook app icon for a few seconds until the context menu opens. Among the available options, select "Delete" and then confirm the action by clicking "OK".
The One UI firmware that many Samsung Galaxy smartphones run on has the Facebook application pre-installed, which makes it impossible to remove it using standard tools.