With millions of Facebook users, finding someone using their full name can be challenging. In most cases, people have associated their accounts with their nicknames; unless you know them, you may find it challenging to find them.
If you have a nickname that no longer pleases you, Facebook allows you to change or remove it and stick with your full name.
Facebook allows using nicknames, and this guide will cover everything you should know regarding adding names on Facebook. We will discuss how you can add and remove a nickname on Facebook. Also, we will see how to edit your other names on Facebook. Check it out!
Table of Contents
Yes, it does.
Facebook allows you to add other names that best represent and help find your account.
You can add your nickname, birth name, maiden name, etc. Besides, people prefer adding their other names to make their accounts unique. You could have a similar first and last name, but your maiden, nickname, or other name is unique.
The problem comes in when your friends don’t know the nickname you’ve added to your account. In that case, they may find it hard to locate your account unless you share your nickname with them.
So, how can you add an alias on Facebook?
A nickname is the other name people use to refer to you or a name you chose to represent what you love. Most people go by their nickname instead of their full names, and Facebook understands this and allows users to add their other titles to their profiles.
To add your nickname on Facebook, use the steps below:
You’ve now added your nickname to your Facebook account, and anybody can search you using it. If you ever change your mind about the nickname or want to remove it from your account, use the steps in the section below.
Are you tired of your Facebook nickname? Feel free to remove it.
Whether on iOS or Android, use the steps below to remove your nickname:

That’s how you remove a nickname on your Facebook account. Alternatively, you can use the same steps to edit and use a different nickname instead of removing the current one.
So far, we’ve seen how you can add and remove your nickname on Facebook. What about your official full names on Facebook? Do you know how you can change them?
The good news is that Facebook allows changing your full name, but you can only change your name once in 60 days. That’s the rule.
Nonetheless, you can change your Facebook name on your phone using the steps below:
Facebook will review the changes you’ve made to your name. They will approve your name change and update your details to match your new name if everything checks out.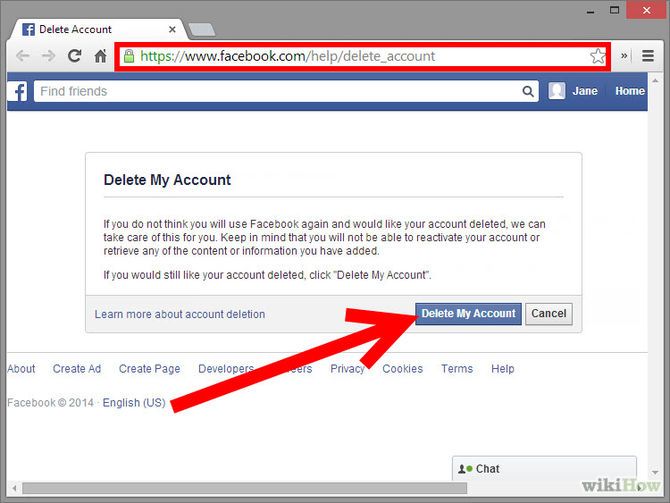 However, if you already changed your name recently and 60 days have not elapsed since then, your name change won’t get approved.
Associating your Facebook account with your nickname is not a bad idea.
Some people are more popular using their nicknames than their official names. In that case, adding a nickname will help people easily reach you on Facebook.
Today’s guide covered adding and removing your nickname and official names on Facebook. With this guide, you should easily remove your Facebook nickname.
By Kunal Rana / November 23, 2022 November 23, 2022
Facebook is the biggest social media platform in the world. It has more than a billion active users worldwide.
Many people prefer to add a nickname instead of their real names. And if you search for a friend on Facebook it can be a bit difficult to do so.
But you can remove or change your nickname on Facebook, which will help your friends and family find you.
In this article, we will show you How to Remove Nickname on Facebook.
Table of Contents
Facebook allows you to edit or remove nicknames on Facebook. Just perform the step mentioned above and you can remove the nickname on Facebook.
If you want to remove your last name on certain devices like iPhone or Android then follow the steps mentioned below.
To Remove a nickname on Facebook on iPhone follows the below step:

If you are an android user then you can follow these steps to remove nicknames on android.
Facebook nicknames are derivative of your real name. A nickname can be added to your Facebook profile. In fact, many people use nicknames rather than real names on Facebook. For example, if your real name is Christina, you can have “Christine” or “Chris” as a nickname.
Yes, you can use a nickname on Facebook.
Many prefer to use nicknames like john instead of johnny or raj instead of Rajesh (Yeah reference to TBBT) on Facebook. Nicknames are cool on Facebook many like to put nicknames instead of just real names.
To get recognized on Facebook you must enter your real name or the name everyone is familiar with on Facebook. Generally, people search for your real name and Facebook tries to deliver the best match for your search, but if you play with your name Facebook wound,t recognize giving anything to the user.
Help Center
Account Management
Facebook Names
We're updating the mobile version of Facebook. com. More
You can enter a name in your account that is different from the name on your ID (for example, maiden name, nickname or professional title).
Classic version for mobile browser
Add another name
Click the icon in the top right corner of the Facebook window, and then select your name.
Select the View Info section.
Scroll down and under Other names, click Enter your nickname or birth name.
Next to Name type, select the one you want.
In the Name section, enter your other name.
Select the Show at top of profile check box to display a different name at the top of the profile.
Click Save.
Change or remove a different name
Click the icon in the upper right corner of the Facebook window, and then select your name.
Select the View Info section.
Scroll down to OTHER NAMES.
Click to the right of the name you want to edit or delete.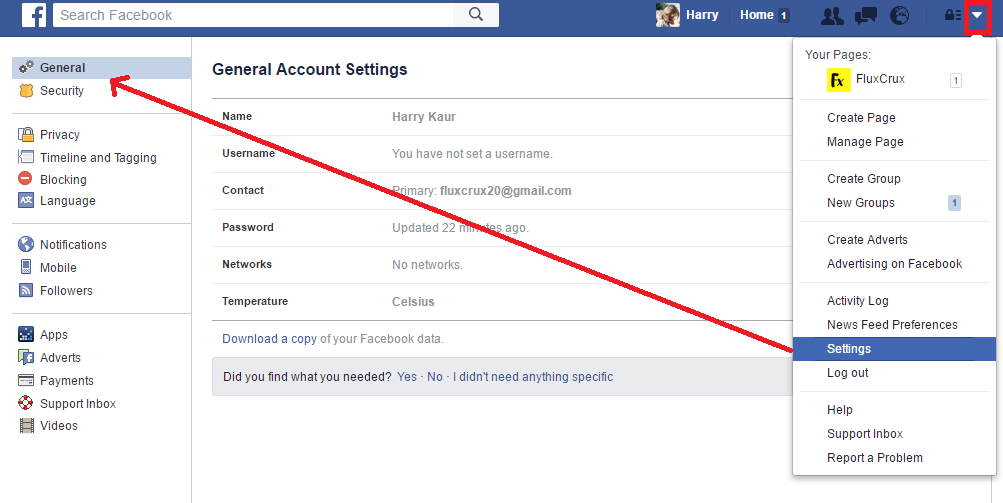
New version for mobile browser
Add another name
Click the icon in the upper right corner of the Facebook window.
Select Settings.
Select Personal Information under Account Settings.
Click on your name.
In the Other names section, click Enter a nickname or birth name.
Next to Name type, select the one you want.
In the Name section, enter your other name.
Select the Show at top of profile check box to display a different name at the top of the profile.
Click Save.
Changing or deleting another name
Click the icon in the top right corner of the Facebook window, and then select your name.
Select More information about me.
Scroll down to the Other Names section.
Click to the right of the name you want to edit or delete.
Learn more about the rules for other names.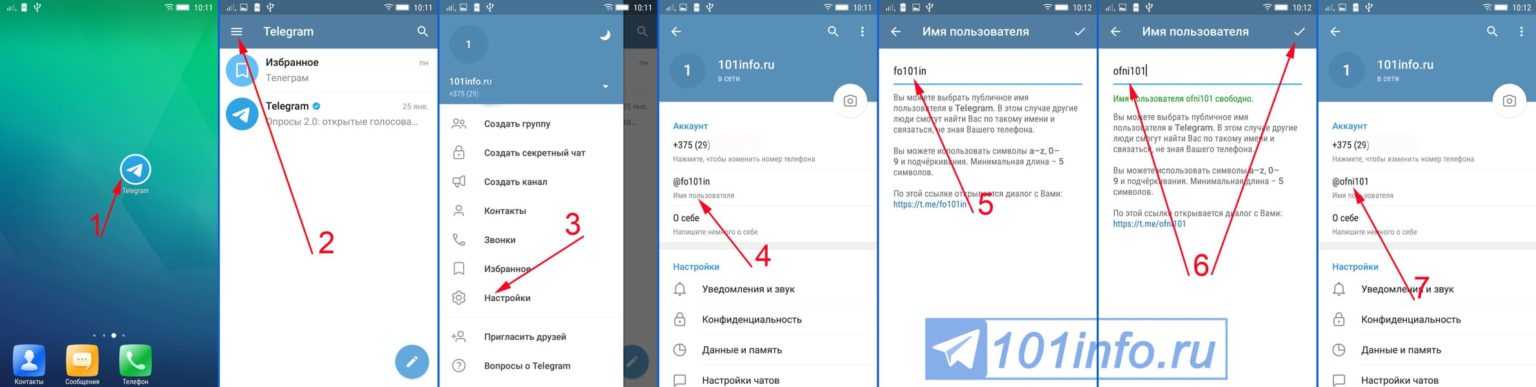
Note. If you don't check the "Show at the top of your profile" checkbox, your other name will still appear in your Profile Information section and will also appear in search results.
Information
Privacy
Terms and Conditions
Advertising Preferences
Jobs
Cookies
Create an Ad
Create a Facebook Page
permanentlyIf you delete or deactivate your account, all of its profiles will be deleted or deactivated along with it. Learn more about how to delete or deactivate an individual profile.
What happens if you delete your Facebook account permanently?
You will not be able to reactivate your account.
Your profile, photos, posts, videos and other content will be permanently deleted.
You will no longer be able to use Facebook Messenger.
You won't be able to use Facebook Login with other apps and websites, such as Spotify and Pinterest. To recover your accounts, you may need to contact support for those apps and websites.
Some information, such as messages you send to your friends, may still be available even after you delete your account. Copies of the messages you send are stored in your friends' inbox.
If you use a Facebook account to sign in to your Oculus device, deleting it will also delete information related to the Oculus platform, including your in-app purchases and achievements. In addition, you will no longer be able to return apps and will lose all Oculus store coupons.
What if I want to stop using Facebook for a while without deleting all my content?
If you want to take a break from Facebook, you can temporarily deactivate your account. At the same time:
People will not be able to see or access your Facebook profile.
Your photos, posts and videos will not be deleted.
You will not lose your ability to use Facebook Messenger. In conversations, your profile photo will be visible, and people who want to start a conversation with you will be able to find you by name.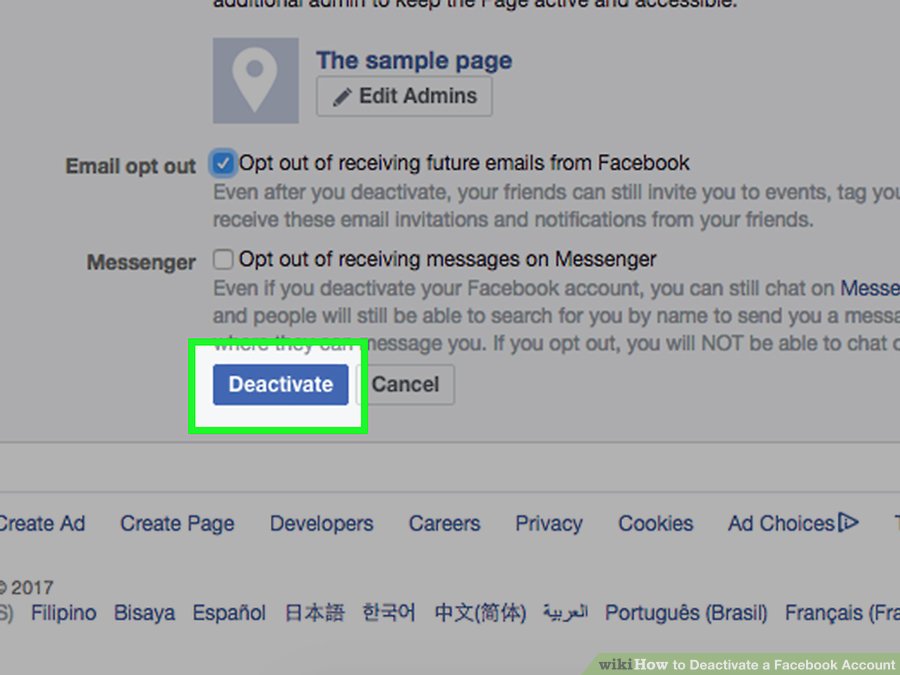 Your Facebook friends will still be able to send you messages.
You can use the Facebook Login feature in other apps such as Spotify, Pinterest and Facebook Games.
You will not be able to use your Facebook account to access Oculus Products and view information related to the Oculus platform.
You can return to Facebook at any time.
Learn more about how to temporarily deactivate an account.
To permanently delete an account:
Log in to Facebook from a computer.
Click on your profile picture in the top right corner of the Facebook window.
Select Settings & Privacy and then Settings.
Click Your information on Facebook.
Click Deactivate and delete.
Select Delete Account and click Continue with Delete Account.
Click Remove account, enter your password, and select Continue.
Can I cancel the account deletion?
You can restore your account within 30 days after deletion. After that, it and all information associated with it will be deleted without the possibility of recovery.