by Christine Smith • 2022-11-08 15:25:31 • Proven solutions
Instagram is one of the most popular social media platforms on the Internet nowadays. You can hold live sessions, upload photos, and even chat with your friends. People often look for things like how to record someone else's Instagram live on the Internet because many live videos are informative and have a lot of cool stuff. If you are one such person and wish to record someone's Instagram live sessions, there are a wide variety of ways that can help do so. Most of the devices on which people use Instagram have inbuilt recorders, but with third-party tools, you can get better results.
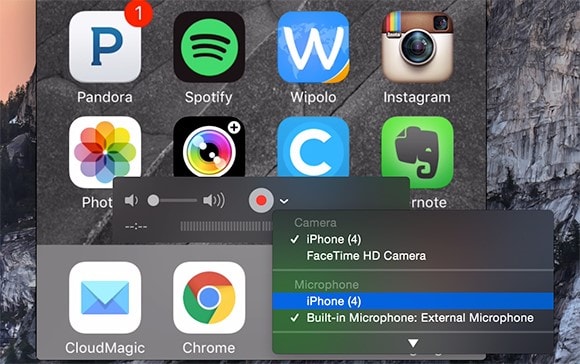
Did you know you can use Instagram directly on your computer browser? Well, now you know! Even better, you can use Wondershare UniConverter to record Instagram live videos on your computer. With this software, you can grab any computer screen activity by selecting a specific capture area or the entire screen. As expected, you can add voice narrations, Picture in Picture effects (PIP), and annotations like shapes, lines, arrows, and texts. Most importantly, users can convert and edit their recorded Instagram videos professionally.
Wondershare UniConverter – Best Computer Screen Recorder
Launch Wondershare UniConverter on your Mac or Windows computer, then hit the Screen Recorder button. After that, press the Camcorder icon, and the screen capture tool will launch automatically.
Now open the Instagram live video, then press the recording mode drop-down list. Here, you can choose to record the video in either Full Screen or Custom mode. Choose Custom if you want to enter specific frame dimensions, then tap Lock Aspect Ratio. A more straightforward way is to drag the recording cropper inwards or outwards to set a capture area.
Open the System Audio menu, then choose a device for recording the Instagram Live video sounds. You can also select a microphone for adding voice narrations and a webcam for recording a Picture in Picture effect.
Now navigate to the Advanced Settings icon and click it. Here, you can customize the keyboard shortcuts, folder path, and set the recording timer. And of course, you can select the output frame rate, quality, and format.
Preview the capture area, then tap REC to start recording the video. Now launch the screen recording taskbar, then click the Annotation icon to add highlights using shapes, texts, arrows, etc. If you've recorded enough content, click Stop. That's it!
iPhones are powered by the iOS operating system, which is extremely efficient and capable. They have a pre-installed screen recording software that can record your screen processes in high quality. Also, it allows users to record the system sounds due to which you will get crystal clear sound as well. If you are an iPhone user and wish to record your favorite influencer's live session, it can quickly be done through the inbuilt recording tool. The tool can easily be accessed through the control panel of your iPhones. The following is a step-by-step guide to record live sessions of Instagram on your phones.
Step 1 Open Instagram and go to the live session of the user that you wish to record.
Step 2 Pull up your iPhone's control center from the bottom and look for the Screen Recorder icon. Click on it, and your video will start to get recorded.
Step 3 After recording the complete live session, click on the red button in the floating recording control option, and your recording will be stopped.
Android is one popular operating system for mobile devices in the market. Due to this, most of the Instagram users are using the application on their Android devices. People often wish to record live sessions of their friends and their favorite social media influencer and have no idea about how to record Instagram live. Like iOS, most Android phones also come with an inbuilt screen recording tool, which is quite great. You can also go for third-party tools available on the Play Store.
The following steps will help you to understand how to record Instagram live on Android.
Step 1 Drag the notification panel down and search for the screen recording option from the various alternative and click on it. If it is not there, search for it in the application list or the tool folder.
Step 2 A floating control panel will appear on the screen that will allow you to control the recording. Open the Instagram live video, start recording, and click on that widget's red button.
Step 3 After recording the live session properly, stop the recording by click on the square-shaped button of the floating control bar present on the screen.
If you want to record someone else's live sessions, there are a few things that you should remember to get the best quality out of the final results. If you know the various aspects of screen recording like the resolution and the frame rates, it becomes a bit easier to set everything up correctly. There are several tips and tricks available on the Internet, and the following are a few of them.
1. One of the first and most important things is respecting the person's privacy, whose live sessions you are recording.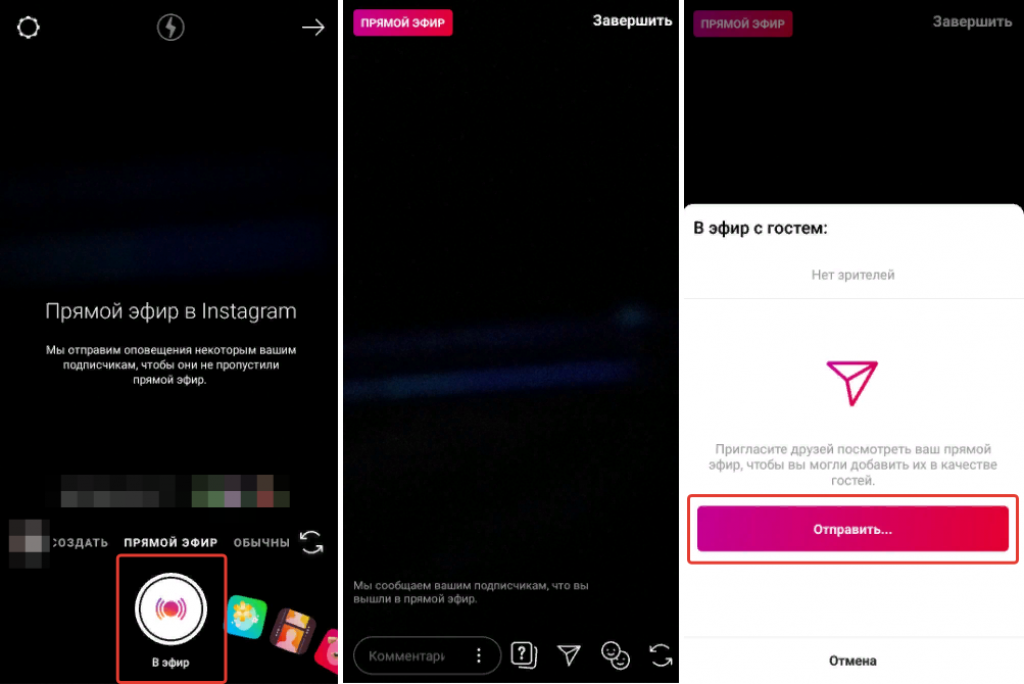 It is better to take permission from them if you intend to use the clip to make some content.
2. Make sure that you set the audio source to system sounds before starting the recording, and if that doesn't happen, the sound in your videos will not be clear at all and will be disgusting. If your recorder doesn't allow you to do so, make sure that you keep the background noises minimum.
3. Try to get a useful third-party tool for recording because they provide more settings, features, and options that can significantly enhance the recording's overall quality. Also, advanced recording tools like Wondershare UniConverter have many other features like video editing to make your work a lot easier.
4. Keep the resolution as high as possible to get better quality. Also, make sure that you properly set the bit rate and frame rates depending on your demands. Understand your device's processing capability and set the settings accordingly to avoid putting pressure on your device's processor.
5. If you are recording with a computer, make sure that your mouse's cursor is kept aside from the main recording area as it can cause distraction and can be annoying at times. Also, most of the Android screen recorders show the touch areas while recording, make sure that that is turned off to get the best possible outcome.
Conclusion
A lot of people hold educational, and motivational live streams on their Instagram accounts for their audiences. A lot of people join such streams regularly. If you wish to record these streams to watch them later, there are many ways to do so. Android and iOS devices have an inbuilt screen recorder as well as third-party tools. If you are looking to record those streams on your laptop or computer, make sure that you try out Wondershare UniConverter, which is a free-to-use toolkit that can record screen, convert files, burn CDs, and a lot more
FREE DOWNLOAD FREE DOWNLOAD
Being upset about missing Instagram lives? We bring 3 practical screen recorders to help on how to record Instagram live on iPhone, Android, and PC.
Has this ever happened to you that you are struggling with the thesis when your favorite Instagrammer is live streaming? What a tough decision you have to make to give the Instagram live up! Even if you have a chance to enjoy the Instagram live you are fond of, watching it once may not enough for a loyal fan like you. Your wish is to watch it anytime, anywhere in a comfortable position. Furthermore, a better option is to save it as editing footage so as to make a video collection some time.
Unluckily, Instagram live videos disappear automatically when the live streams are finished. So, if you want to save it for later viewing, the best solution is to record the Instagram live on your device, no matter the iPhone, Android, or PC. But how to record Instagram live on these devices?
In the following part of this article, we'll show you the detailed steps of recording Instagram on an iPhone/Android/PC one by one.
The problem that how to record Instagram live on iPhone can be easier than you think after the iOS 11 release. iOS comes with a handy built-in screen recorder, you are allowed to record everything that is going on your screen.
The built-in screen recorder has three basic functions, which are video recording, audio recording, and disturbance-free button.
Time to come straight to the point, we divide the whole recording process into 4 simple steps: add the record button, record the screen, end the screen recording and find the recordings.
Step 1. Add the record button.
Go to the “Settings” to find the “Control Center” and then scroll down to tap the green “+” button next to “Screen Recording”.
Step 2. Record the Instagram live on the iPhone screen.
Go back to the “Control Center” and enable the screen recording button. Wait for a three-second countdown and it will start recording automatically.
Step 3. End screen recording.
Go back to the Control Center to toggle the screen recording icon button or tap the red bar at the top of your iPhone screen to end the recording.
You can find and view the videos you just saved in “Photos”.
Note: Keep in mind that if you'd like to record your voice at the same time, you need to press and hold on the screen recording button, and tap the microphone, then tap “Start Recording”. Your screen recording will begin in 3 seconds.
Even iPhone has billions of fans, Android also has crowds of loyal users. So, for some Android customers, how to screen record Instagram live on Android is also a puzzle.
You have a question and we have the answer. Here we recommend a popular tool -XRecorder, to help solve how to record the Instagram live video on Android, due to it gets a high rating of 4.7(5 is a total score) in Google Play and it has more than 100,000 downloads.
Attractive advantages of XRecorder:
Next, we'll show you how to record an Instagram live video in 3 steps. After you installing the XRecorder, you'll find it has a translucent quick menu icon at the right-hand side of the screen or options hidden in the top pull-down menu.
Step 1. Modify recording settings.
Tap the “Settings” icon to set your preferences for video, audio, and other control settings like disenabling the automatic countdown.
Step 2. Record the screen.
Tap the red dot to record the screen. During the recording process, you can click the “Tools” icon to enable screenshot, brush, and facecam.
Step 3. Edit the recordings.
Tap the “Pen” button to edit the video and screenshots. It allows you to trim videos, change the speed of it, and add text messages and music to it.
For users who prefer a bigger screen to enjoy Instagram live, a PC is a good choice. Therefore, how to record Instagram live on PC is an urgent problem for them.
Speaking of how to record Instagram live from PC, unlike on mobile phones, people usually can't recall some excellent Apps. But things will change now. iTop Screen Recorder – developed by iTop, is always the last product you want to miss.
Why Should You Choose iTop Screen Recorder?
Free to get, free to use.
iTop Screen Recorder can be easily downloaded from the official website for free and users needn't pay for using it.
100% safe and private.
Users can be 100% assured that only you have the right to share and use your recorded videos. iTop Screen Recorder will not disclose your personal privacy.
Flexible Screen Capture.
Users can control the recording zone of their screen because iTop Screen Recorder has a flexible screen capture feature.
Easy to use.
No more than 4 steps to record a complete live video and the full workflow is really simple for everyone to master in three minutes.
No time limit.
There is no limitation on the length of recordings when using iTop Screen Recorder, so it's a perfect selection to record a long-time live stream.
Multiple output formats.
In order to offer better service, iTop Screen Recorder supports more than 12 output formats. And you can play the recordings on any mainstream digital device.
HD recording.
The iTop Screen Recorder, as a 1080p screen recorder, meets your needs of recording screen in high definition, so the recorded videos can be viewed smoothly without loss of quality.
How to Record Instagram Live with iTop Screen Recorder in 4 Steps
Since it is mentioned that iTop Screen Recorder is easy to use in the former part, this is the moment that we can prove how to screen record Instagram live on PC simply with iTop Screen Recorder.
Step 1. Set up preference.
Select any zone of the PC screen, usually, the full screen of the object you'll record.
Light up the icons of Speaker, Mic, Mouse, and Webcam if you need them in the recording process.
Step 2. Record the screen.
Tap the big red icon “REC” before the Instagram live starts because you have to wait for a 3-seconds automatic countdown.
At the right bottom of the recording screen, you can tap the play icon(“F10”) to pause the recording and tap the red square icon(“F9”) to end the recording. Then the recordings will be saved on iTop Screen Recorder.
Step 3. Edit the recordings.
Find the recordings and screenshots under “My Creations”. Click the preview button to check if it needs to be edited. Click the edit button to trim the recordings by dragging the red sidebar.
Note: If you want to share your creations, you can click the file button beside the screenshots to open the file location or set the location of the outputs in “Recording Settings” ahead of recording.
Now you have your videos, but is that enough? If you want to make your videos better, you need to pay attention to the following points.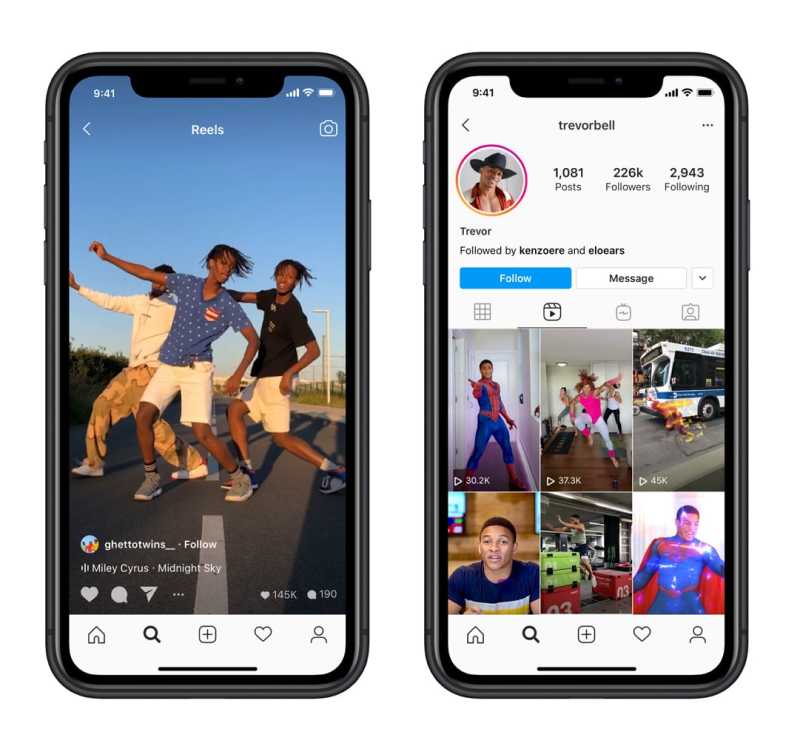
Watch the copyright.
Always remember that you are recording videos that belong to others. So, you have no right to use them for commercial purposes. And if you want to do so, you should contact the video owner to access authorization.
Notice the resolution ratio.
It will be the most disappointing thing when you find the recordings of low quality after finishing recording the full live video. Terrible may be the first word that occurs in your mind. So, for a good watching experience, you'd better choose a 1080p screen recorder like iTop Screen Recorder.
Keep stable network speed.
What will happen when you are recording a live video, the network goes down unexpectedly or the live video load slowly? The live streaming doesn't wait for you to connect to the Internet again. And you're bound to miss some of the content. Therefore, it's mattered to make sure you are in a stable network environment.
Keep your screen simple.
Keep a mouse cursor and other irrelevant stuff out of the captured zone. Otherwise, they may affect the viewing experience. Just as you are focus on watching the recorded video, then a mouse cursor moving on the screen or a message notification popped out subsequently. How do you feel about this?
Conclusion
In the article, we deliberately picked up 3 screen recorders for users whether using iPhone, Android, or PC to figure out the common issue that how to record Instagram live. iPhone has a built-in screen recorder, and XRecorder is better suited to Android. While how to record Instagram live on PC, iTop Screen Recorder has an easy and free method. No hesitation anymore. Action brings changes!
Powered by Froala Editor
Help Center
Instagram features
Sharing photos and videos
From July 2022, most videos will only be able to be shared using the Reels feature. These changes will not affect videos previously posted to the feed and posted to Instagram on the web.
The Reels feature is not yet available to everyone. Some account holders will be able to view Reels videos, but will not be able to shoot them.
Reels function allows you to shoot and edit 90 second Instagram videos. Reels videos can be overlaid with various effects and music, as well as use original audio tracks in them.
Video Recording Reels
Instagram app for Android
Tap the icon at the top of the screen or swipe right anywhere on the feed.
Scroll to the Reels option at the bottom of the screen.
Tap and hold to record a clip, or tap this icon to start recording and again to end. You can also click on the camera roll at the bottom left of the screen to add a video from it.
Press Preview.
Select Edit Clips to view, trim or delete your previous clip and click Done.
Tap the appropriate icon at the top of the screen to add stickers, pictures, and text to your Reels video. Click to download the video to your device. Use the slider at the bottom of the screen to choose when you want the text to appear on the video and click Next.
Click Edit Cover to edit the cover photo and add a caption.
Select Share or Share to Reels.
Instagram app for iPhone
Touch the icon at the top of the screen or swipe right anywhere on the feed.
Scroll to the Reels option at the bottom of the screen.
Tap and hold to record a clip, or tap this icon to start recording and again to end. You can also click on the camera roll at the bottom left of the screen to add a video from it.
Click Next in the lower right corner of the screen.
Select Edit Clips to view, trim or delete your previous clip.
Tap the appropriate icon at the top of the screen to add stickers, pictures, and text to your Reels video. Click to download the video to your device. Use the slider at the bottom of the screen to choose when you want the text to appear on the video and click Next.
Click Edit Cover to edit the cover photo and add a caption.
Select Share or Share to Reels.
Note. You can record one or more clips up to 60 seconds in total. The progress bar at the top of the screen will show the remaining recording time. If you post a Reels video in Explore, it will also be available in the Reels tab on your profile.
Interactive stickers such as "Poll", "Challenge", question sticker and others cannot be used in Reels videos. Learn more about saving and editing a Reels video draft.
Vacancies
Terms of use
Privacy
How to choose a video format for Instagram, as well as how to shoot videos with music for stories and just in the feed - in this article You will find a lot of useful tips and tricks.
Followers - live and active
Likes - on photos and posts
Views - on video and IGTV
Comments - real with guarantee
Recently, Instagram has been redistributing content. Previously, millions of pictures were posted daily on the favorite social network for photographers. Now more and more users prefer to publish not static pictures, but videos. So far, film mania has not completely captured everyone, but many have already taken up the issue seriously. For example, they are concerned about the video format for Instagram and the duration of the videos.
There is good news on both. As for the video format for Instagram, not so long ago, users were offered a limited set: only mp4 or mov, only a square shape, 640:640 pixels in size. As a rule, there were no problems when downloading or shooting videos on the phone. But when the video was shot on a digital camera, before publishing it, you had to tinker: change the encoding and size.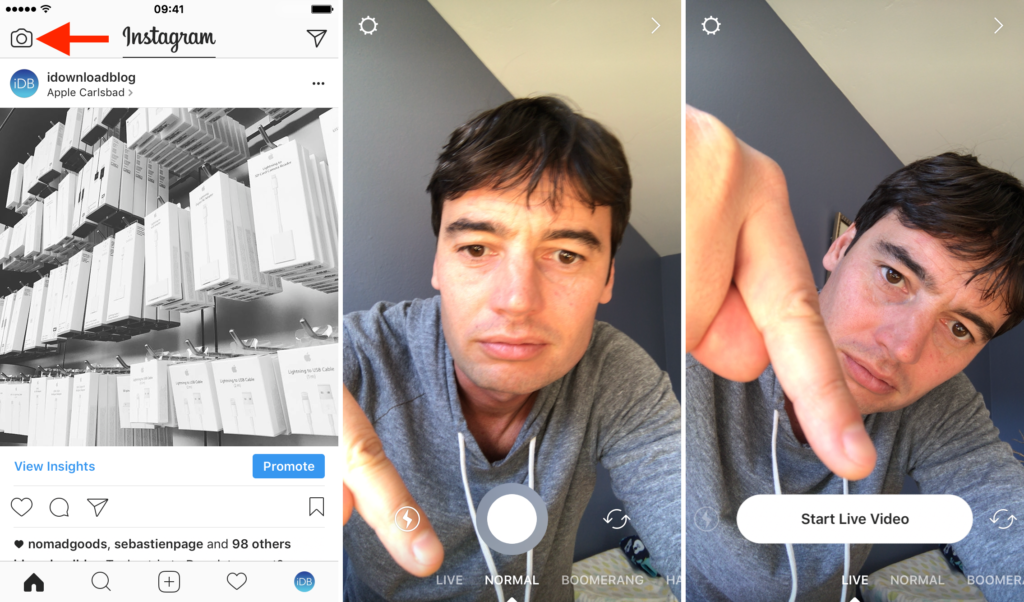
Now Instagram gives its users the opportunity to choose. The site allows you to upload videos in a variety of formats. Only two dozen items and more and more are being added to them. We list the most popular ones: avi, mkv, mp4, mod, mov, mpeg4, 3g2, 3gp, 3gpp, asf, dat, m4v. See the full list in the Instagram Help Center.
The minimum resolution for square video files is 600:600 pixels, for horizontal video files it is 600:336. Video with vertical orientation (600:750) can also be uploaded to the network. But this form is considered unpromising. Since the picture will take up the entire screen. This is inconvenient for grading and commenting. By the way, the maximum resolution allowed in this social network is 1080:1080 pixels.
Look for bots or high-quality and live followers on Instagram - we have them! Get a new audience for your profile at incredibly competitive and cheap prices. Choose the most suitable service option and achieve an effective result.
Now about the video time on Instagram. The further the network develops, the longer the videos last. Recently, the longest video could not exceed half a minute (30 seconds). Now you can add clips to the tape from 3 to 60 seconds. And in history - up to 15 seconds. Although maybe at this very time the Instagram developers give the go-ahead to double the duration. By the way, one of the novelties of the social network is the IGTV channel. There, some users were given the right to upload videos lasting an entire hour. We will tell you more about IGTV later.
In the meantime, a little more about the format. It happens, however, quite rarely that the material you shoot does not fit into the framework offered by Instagram. In this case, you should use programs for converting. According to users, such resources as Online Video Converter, Online MP4 Converter and Clipchamp have proven themselves well. And it is more convenient to use them on a computer, and not on a phone. If you don't know how to add video from computer to Instagram, read our article. By the way, the administration of the social network assures that it is impossible to upload photos and videos from stationary devices (PC) to the site. But we refute this rule in the material “Add photos to Instagram from a computer - the simplest ways”.
In the meantime, let's recall the instructions for the procedure, which has already become familiar to the old-timers of the site, but is new for beginner instagrammers. We will tell you how to shoot video on your phone for publication in the feed:
Open the Instagram app, go to your profile;
Click on the "+" icon located at the bottom of the screen;
To record, touch the word "Video" at the bottom of the screen;
Next, click on the white circle with a stroke and keep your finger on it while you are shooting, if you need to pause, release the “button”;
So you can record a number of clips in sequence, if necessary, switch the camera to the front mode, this is done by the button with circular arrows;
When the video is recorded, prepare it for publication, apply a filter, write a description, set a geotag;
Finish sharing the video you just shot by touching the word "Share".
Now details about the innovation, which has pleased all lovers of amateur cinema. The authors of short films will find their audience if they create an IGTV channel on Instagram. There, ordinary users can upload videos lasting from 15 seconds to 10 minutes. And established Instagrammers (if you're not in their ranks yet, read about the best free and paid promotion methods) with over 10,000 followers are allowed to upload up to 60 minutes of video. However, this operation is only possible on a computer. By the way, the IGTV channel works for downloading and displaying both on stationary devices (PCs, laptops) and mobile devices (phones, tablets).
And all users will be able to see your films. Of course, if your profile is not closed. In a hidden account, only approved subscribers will be able to view the channel. How to make a closed Instagram and what it gives, we told separately. And for the most inquisitive, we will show you ways to look into the contents of a secret profile.
Since the IGTV channel is a novelty of the site, the video format is still subject to strict limits. Only MP4 format is accepted. Size from 650 MB to 5.4 GB (maximum for videos up to 60 minutes). Orientation must be vertical, 4:5 or 9:16.
But creating your own channel is not difficult at all. Instagram developers have made the procedure very simple and convenient. You can connect IGTV on your phone and on your computer. Pay attention to these letters and the symbol "TV" on the screen. Click on it and follow the prompts.
If you are just starting to master this social network, you will definitely need our materials “Registration on Instagram from a computer and phone, a profile without it”, “Instagram search for people - effective ways to find a person” and “Nicky on Instagram for girls and guys , with a name, in English and Russian.
For those who are bored with the site for photo and video amateurs, we will show you how to quickly and permanently delete your account. And to evaluate and choose another social network, visit avi1.ru. On this resource you will find information about 9 communities from the Internet.
Instagram Stories (stories) appeared on the social network just two years ago, in August 2016. still has a negative attitude towards this function. On the one hand, it is interesting to take photos and shoot short videos, then put text, stickers and other decorations directly on them to express your emotions. On the other hand, you create, invent, and your creation lives only a day, exactly 24 hours. After this time, the story disappears if it is not sent to the "Actual" section.
But you have to admit that telling your story through video is easy. And the built-in tools allow you to show maximum imagination and imagination. Let's take a look at how to shoot videos on Instagram in Stories. Pay attention to the same instructions, you can take photos, as well as add files from the phone's memory. If you want to record your video story in the Instagram app, follow our instructions:
You can add quality-guaranteed likes to your Instagram posts at great discounts. You also have access to a wide range of services and additional criteria for making the most profitable and reliable purchase.
Click on the "camera" symbol, which is located on the screen at the top and left, or slide your finger along the tape to the right;
At the bottom of the screen, click on the circle with a stroke to start recording the video, keep your finger on it so that the shooting does not stop;
Click on the “pencil” symbol if you need to make a drawing, on the “letters” to add text, on the emoticon when you need a sticker;
When the video is decorated as intended, click on the words "Your story", which are located in the lower left corner of the screen.
Now you know how to shoot videos on Instagram in a story in the usual way. But the “camera” button has another, yet rarely used function. With its help, you can conduct a video broadcast for your subscribers. The recording of the live broadcast will not be included in the feed, but it can be posted in stories, saved, and then repeated again. Let's learn how to shoot a video on Instagram live, and then put a replay in the story. Do this:
Press the “camera” symbol in the upper left corner of the screen, or drag your finger over any place on the tape to the right;
We touch the words "Live" located at the bottom of the screen, then - on the line "Start live broadcast" to start the broadcast;
You can see the number of viewers at the top of the screen, comments should be displayed at the bottom;
To stop the live broadcast, click on the word "End", which is located in the upper right corner, and confirm your decision by clicking again;
To make the ended live broadcast appear in the history or it could be added to the tape, touch the "Save" command, it is on the right and at the top of the screen;
We will repeat the recording in the story by clicking on the "Share" button at the bottom of the screen.
And you can add the saved live broadcast to the feed in the usual way. But remember that the video must be no longer than 60 seconds, otherwise it simply will not load on the site. But on IGTV, you can post a clip up to 10 minutes. For information on how to make your own Instagram channel, as well as different options for uploading videos to this network, read our article "How to add Instagram videos to your story, from a computer and phone." We will also share information on how to repost and how to remove photos and videos from your account.
Instagram was originally conceived as a visual network. Therefore, the site developers paid the most attention to photo and video files. And everything that concerned the sound, for the time being, remained forgotten. Fortunately, this one-sided situation is gradually beginning to improve. Just the other day, Instagram introduced a new feature for video voice acting. For now, it's only available to iPhone owners. But soon, the administration of the network promises, there will be an option for android. We'll talk about the novelty a little later.
Now let's find out how to make an Instagram video with music. Since the network developers did not offer tools for this procedure, third-party applications took care of it. The AppStore and Google Play stores offer many applications for phones with different operating systems and web versions. Among the most popular programs: Replay, Lumify, GoPro Quik, VivaVideo, Pic Music, SoundTracking, KineMaster, Flipagram. They help you add music to a photo slideshow or video. One of the proven programs for Android devices is VideoShow.
And let's look at how to make a video on Instagram with music without connecting third-party applications. For example, a completely simple option: shoot a video with your phone, and turn on the music louder on some other device before recording. Place the sound source nearby so that the quality is acceptable.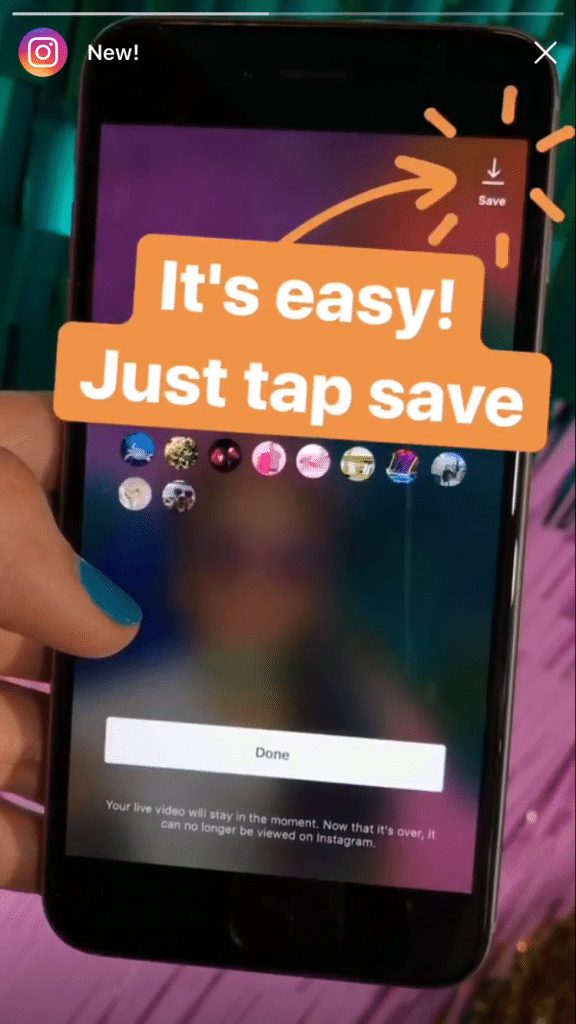 Then add the music video to your story or Instagram feed. But keep in mind: the voice acting will still not be very good, because the microphone will pick up all the accompanying internoise.
There is another option for connecting music and video on Instagram. But for this you need to have a player installed on your phone (no matter what it is: an iPhone or an Android device), and the music you need has already been saved. The instruction is simple, especially for those who have mastered the swipe movements well:
Open the audio player on your phone;
Let's find a song that we will attach to the video;
Turn on playback;
Stop playback by pressing pause;
Open the Instagram application, enter your profile;
Click on the “camera” symbol (top left corner) to record a new video story;
Before shooting, move your finger across the screen up (swipe) to open the player, start the music again and start recording video;
As a result, the recorded clip must be synchronized with the sounding melody.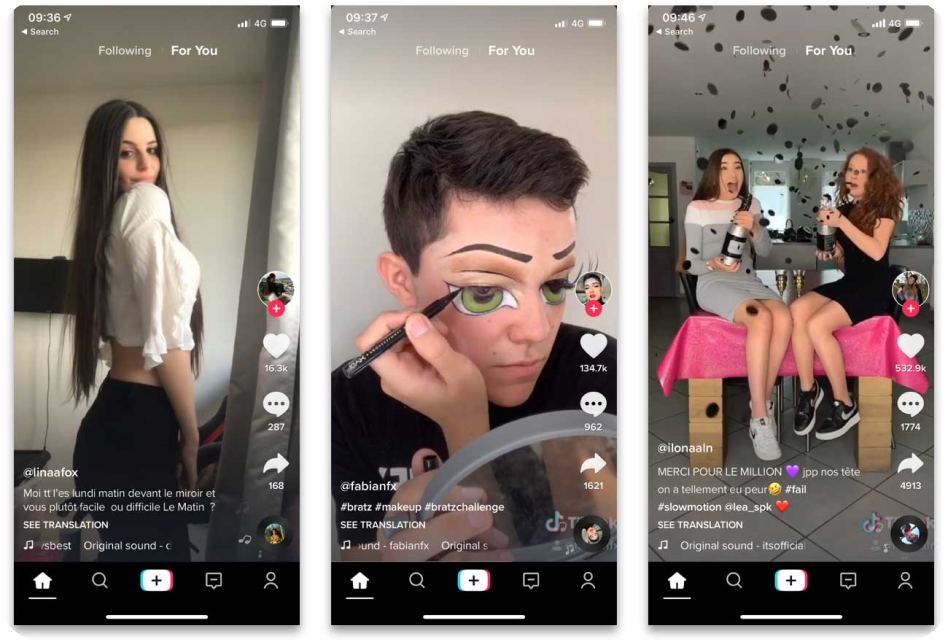
And it remains to tell about the innovation that allows you to record a video in a story with music, using only Instagram tools. This summer, the network carried out a functional update. Among other things, the Music in Stories option appeared. At first, iPhone owners from 51 countries will be able to test its work. And the updated application for android is still in the works.
The latest option attaches music tracks to photos or videos as effortlessly as stickers. The instructions for it are simple and understandable even for beginners. How to add music to stories:
Open the Instagram app, tap the camera icon on the left and top of the screen;
Start capturing a video by clicking on the white circle with a stroke;
When finished recording, touch the sticker icon;
In the window with stickers, check the "sticker" called "Music", in some versions of the application you can select a melody before starting recording;
From the list that opens, select the music file that will accompany your publication.
Pioneers who have tested this feature say that the Instagram audio library is not yet pleased with the variety. But as the administration of the social network assures, new tracks will be added frequently. So after a while, any user will be able to find a melody or song to his taste. In addition, the music library will not only be actively expanded, but also systematized. It has been designed for easy navigation. You can search for songs by genre, as well as by mood. Before publishing the audio file, you should edit it, then listen to what happened, and only then combine it with the video.
According to many Instagram users, the musical direction on the site should be further developed. High-quality and appropriate voice acting for videos will make the feed and Instagram stories even brighter. The novelty will help to share visual impressions and favorite music with subscribers.
Very cheap to buy advertising on Instagram with a visible effect Our website will help you.